
:max_bytes(150000):strip_icc():format(webp)/macOS-Sonoma-Banner-fe4ffda2caaf4040b81ae0b66f2d6dc0.jpg)
Updated TuneTrimmer Pro The Essential Tool for Distraction-Free Listening for 2024
TuneTrimmer Pro: The Essential Tool for Distraction-Free Listening
Are you a creative creator? Do you long productivity at the workplace? Or are you either Windows or Mac user?
With the media and creative industry progressing exponentially, advanced features have become necessary. The background music has to be eliminated in multiple instances. It is important to add one’s music, voice, or audio. Most creators prefer visuals instead of audio. Hence, a background music remover is needed.
The article previews a background music remover online, Windows, and Mac. The step-by-step guide to using the apps would also be the crux of the article. So, are you with us? Let us do this together!
In this article
02 How to Remove Background Music on Windows?
03 How to Remove Background Music on Mac?
Part 2: How to Remove Background Music on Windows?
Are you into Windows? Do you find Windows more workable than any other operating system? It is good to know! The section provides an overview of Wondershare Filmora . Wondershare Filmora is a perfect background music remover, and there is no denying the fact.
Wondershare Filmora is known for audio and video editing . It is why removing audio from a video is one of the strongest suits of this software. The “Audio Detach” functionality continues to create real chaos in the world. Besides this, creative professionals can rely on Filmora to customize timeline-track controls, fade audio in and out, and perform audio ducking like a pro.
With that said, Filmora splits and adjusts audio with a simple process. Moving on, Wondershare Filmora has a particular specialty in video editing. There are more than 300 effects that make any regular video extraordinary and magical. The motion graphics and animations bring revolution to the workplace and enhance viewer engagement.
Wondershare Filmora is used in the creative industry for changing backgrounds. The motion tracking feature enables you to keep the subject in the frame. Furthermore, do not hesitate to resize videos, and add watermarks, logos, and whatnot. Isn’t that tempting for you?
There is an extensive set of video formats supported by Filmora. For instance, MP4, FLV, AVI, MOV, VOB, 3GP, 3G2, MPG, MPEG, TS, TRP, TP, F4V, M4V, M2TS, MTS, DAT, WMV, MKV, etc.
For Win 7 or later (64-bit)
For macOS 10.12 or later
If you want to know how to remove background music from a video, continue exploring the section. Let us begin!
Step 1: Opening Filmora
Launch Wondershare Filmora from your Windows operating system. The interface appears in a couple of seconds. Click on “New Project” after selecting the aspect ratio for the video. Now, navigate to the “File” located in the top panel. Select “Import Media” and then “Import Media Files.”

Step 2: Importing Process
Use the system to import the file after it is displayed in the Media Library, drag and drop it to the timeline. Change the resolution or frame rate as you deem necessary. After that, the user is directed to right-click on the media in the timeline. Hit “Audio” from the menu.

Step 3: Detaching Process
Select “Detach Audio” from the “Audio” sub-menu. The audio will be detached and shown on the timeline separately from the primary video. Now, please right-click on the audio to delete it. You can also click on it and press “Delete” from the keyboard.

Step 4: Exporting Process
You can preview the video as well to check if the audio is removed permanently or not. The user can export the video now by clicking on the “Export” button. Select the output format and hit “Export” to save the video without background music on your computer.

Part 3: How to Remove Background Music on Mac?
Allow us to introduce you to another background music remover. iMovie is a free tool that comes pre-built in Mac. It has an extremely interactive interface that makes workability flawless. If you are a beginner, you shouldn’t worry for a second.
With an extensive range of audio tools and classy themes on the go, iMovie has got it all. Essentially, the great chrome keying ensures productivity in personal and professional life. There are excellent movie templates that bring variety to the lot. As far as the resolution is considered, iMovie comes up with 4K. Isn’t that great?
iMovie is also responsible for your security. Hence, there is no need to worry if your data is on the line. The “Audio Detach” functionality helps remove background music from video. The quick edits and workable interface make iMovie the best for Mac lovers.
Follow our lead to know how to remove background music from video via iMovie.
Step 1: Preliminary Process
To begin, launch iMovie from your Mac computer. Hit “Import Media” to browse the targeted video file. After the video is imported, drag and drop it to the timeline.

Step 2: Removing the Audio
Moving on, use the “Control” button from your keyboard and bring the mouse to the video and click it. Tap on “Detach Audio.” The audio will be separated and shown on the timeline.

Step 3: Sharing the Output
Click on the audio to delete it. After that, click on “Share,” located in the top right corner of the interface. Hit “Export File” from the displayed options. You can change the resolution, quality, description, tag, and compress type from the window that pops up.

Step 4: Final Process
Now, click on “Next,” input the output location and rename the file. Press “Save,” and you are done.

Final Thoughts
We are moving in circles. Sometimes we wish to insert music into the video while struggling to remove it some days. Isn’t that life? Therefore, the article featured three background music removers for online, Windows, and Mac. We expect that the procedure will be of great help to you as you mute your video once and for all.
Versatile Video Editor - Wondershare Filmora
An easy and powerful editor.
Numerous effects and resources.
03 How to Remove Background Music on Mac?
Part 2: How to Remove Background Music on Windows?
Are you into Windows? Do you find Windows more workable than any other operating system? It is good to know! The section provides an overview of Wondershare Filmora . Wondershare Filmora is a perfect background music remover, and there is no denying the fact.
Wondershare Filmora is known for audio and video editing . It is why removing audio from a video is one of the strongest suits of this software. The “Audio Detach” functionality continues to create real chaos in the world. Besides this, creative professionals can rely on Filmora to customize timeline-track controls, fade audio in and out, and perform audio ducking like a pro.
With that said, Filmora splits and adjusts audio with a simple process. Moving on, Wondershare Filmora has a particular specialty in video editing. There are more than 300 effects that make any regular video extraordinary and magical. The motion graphics and animations bring revolution to the workplace and enhance viewer engagement.
Wondershare Filmora is used in the creative industry for changing backgrounds. The motion tracking feature enables you to keep the subject in the frame. Furthermore, do not hesitate to resize videos, and add watermarks, logos, and whatnot. Isn’t that tempting for you?
There is an extensive set of video formats supported by Filmora. For instance, MP4, FLV, AVI, MOV, VOB, 3GP, 3G2, MPG, MPEG, TS, TRP, TP, F4V, M4V, M2TS, MTS, DAT, WMV, MKV, etc.
For Win 7 or later (64-bit)
For macOS 10.12 or later
If you want to know how to remove background music from a video, continue exploring the section. Let us begin!
Step 1: Opening Filmora
Launch Wondershare Filmora from your Windows operating system. The interface appears in a couple of seconds. Click on “New Project” after selecting the aspect ratio for the video. Now, navigate to the “File” located in the top panel. Select “Import Media” and then “Import Media Files.”
Step 2: Importing Process
Use the system to import the file after it is displayed in the Media Library, drag and drop it to the timeline. Change the resolution or frame rate as you deem necessary. After that, the user is directed to right-click on the media in the timeline. Hit “Audio” from the menu.
Step 3: Detaching Process
Select “Detach Audio” from the “Audio” sub-menu. The audio will be detached and shown on the timeline separately from the primary video. Now, please right-click on the audio to delete it. You can also click on it and press “Delete” from the keyboard.
Step 4: Exporting Process
You can preview the video as well to check if the audio is removed permanently or not. The user can export the video now by clicking on the “Export” button. Select the output format and hit “Export” to save the video without background music on your computer.
Part 3: How to Remove Background Music on Mac?
Allow us to introduce you to another background music remover. iMovie is a free tool that comes pre-built in Mac. It has an extremely interactive interface that makes workability flawless. If you are a beginner, you shouldn’t worry for a second.
With an extensive range of audio tools and classy themes on the go, iMovie has got it all. Essentially, the great chrome keying ensures productivity in personal and professional life. There are excellent movie templates that bring variety to the lot. As far as the resolution is considered, iMovie comes up with 4K. Isn’t that great?
iMovie is also responsible for your security. Hence, there is no need to worry if your data is on the line. The “Audio Detach” functionality helps remove background music from video. The quick edits and workable interface make iMovie the best for Mac lovers.
Follow our lead to know how to remove background music from video via iMovie.
Step 1: Preliminary Process
To begin, launch iMovie from your Mac computer. Hit “Import Media” to browse the targeted video file. After the video is imported, drag and drop it to the timeline.
Step 2: Removing the Audio
Moving on, use the “Control” button from your keyboard and bring the mouse to the video and click it. Tap on “Detach Audio.” The audio will be separated and shown on the timeline.
Step 3: Sharing the Output
Click on the audio to delete it. After that, click on “Share,” located in the top right corner of the interface. Hit “Export File” from the displayed options. You can change the resolution, quality, description, tag, and compress type from the window that pops up.
Step 4: Final Process
Now, click on “Next,” input the output location and rename the file. Press “Save,” and you are done.
Final Thoughts
We are moving in circles. Sometimes we wish to insert music into the video while struggling to remove it some days. Isn’t that life? Therefore, the article featured three background music removers for online, Windows, and Mac. We expect that the procedure will be of great help to you as you mute your video once and for all.
Versatile Video Editor - Wondershare Filmora
An easy and powerful editor.
Numerous effects and resources.
“Sonic Treasure Trove: The Ultimate Collection of Websites for Free Audio Files “
FREE Top 10 Best Websites to Download Sound Clips for Videos

Liza Brown
Mar 27, 2024• Proven solutions


Are you working on animation , video, game, music, or maybe some other media file? Sound is a vital factor for all. It is the effect of the sound that can make or break a project.
But it can be difficult to find perfect and quality free sound clips. There are thousands of software for creating excellent videos, adding sounds , titles, overlays, tracks, and more. But what if you don’t wish to create a piece for just jazzing up your already existing video?
Free sound clips are great resources to download for videos if you don’t want to create sound effects.
Many people want to know the source of high-quality free audio for videos. These free sound samples are easy to find on the Internet.
In this article, you will get to know the 10 best websites to download free sound clips.
10 Best Free Sound Samples to Use
1. Freesound
Licensed under the Creative Commons License , the Freesound comprises of a large sound database. You can choose from the huge collection of sounds and decide which one is free and which sound needs attribution.
You can ensure if the sound can be used in commercial products or not. If you are not a professional and just need free sound samples for personal use, you may use free sound download from any site. The features of Freesound include-
- You can search for sounds or browse by tags or geotags
- The pack feature helps you to find a bunch of similar sounds very easily
- Preview the sound without logging in
- For downloading the sound, you need to log in
- Add your audio samples to contribute to the database
- You get 5 free sound clips download
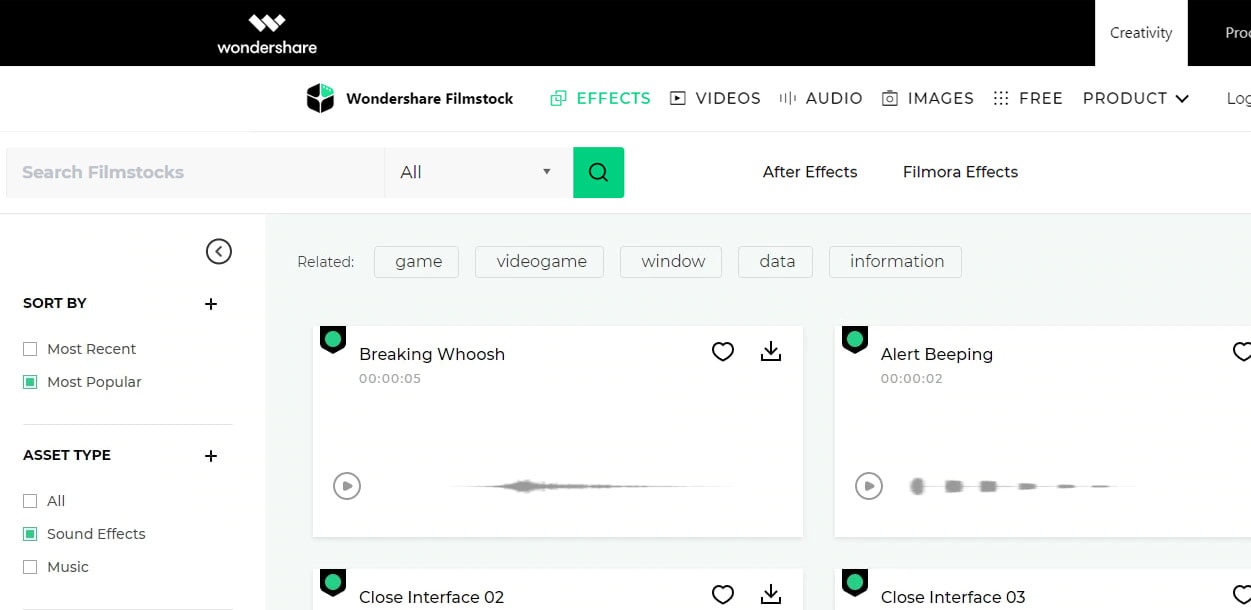
2. Filmstock
Filmstock from the house of Wondershare is one of the greatest libraries for free sound clips.
Any budget filmmaker would love to have this invaluable resource not just for free audio clips for videos but also for royalty-free sound clips.
You can bring your cinematic video to life from the Filmstock free-stuff one-stop-shop. The features of Filmstock include-
- Royalty-free video effects, audio, and stock media
- There are genres like science fiction, sci-fi, ufo, technology games
- Huge selection of curated quality stock images
- Filmstock library is continuously updated
- No attribution required for any project on Filmstock
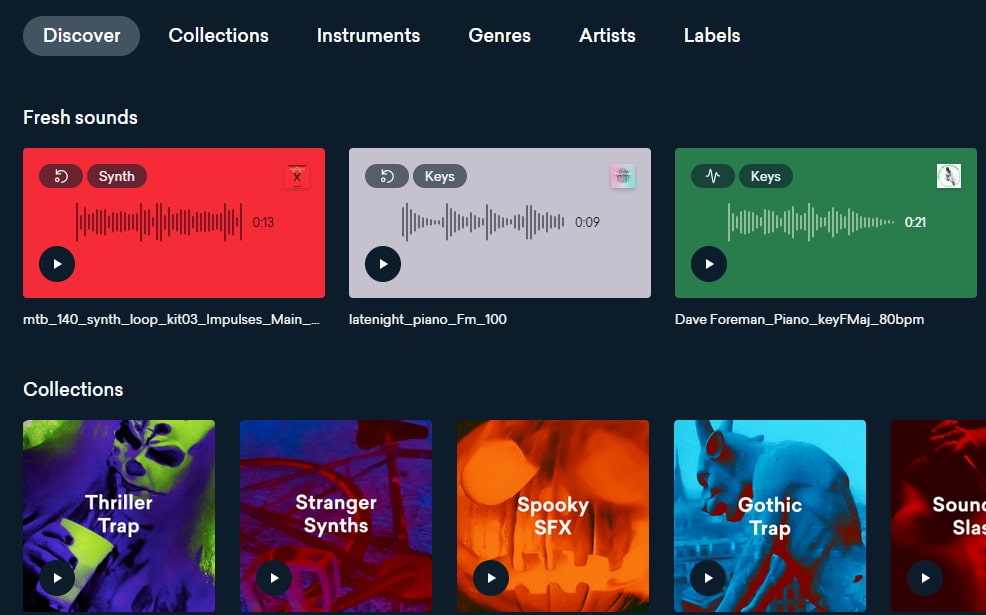
3. Landr
With a simple interface, Landr offers the best loops, packs, and samples to you. Make use of powerful Artificial Intelligence (AI) and you can spend lesser time searching and browsing. The features of Landr includes-
- You can browse free sound clips from the various collection of instruments
- Quickly find the right sound from the millions of free sound samples
- Get access to Selector tool powered by AI to make your browsing session faster
- Nourish your ideas with the curated collection and smart browsing
- The filter sounds by instrument, mood, BPM or key
- Go pro with your sampling
- Royalty-free sounds from today’s best artists, producers, and labels
4. Audio Micro
Audio Micro is one of the best tools for downloading horror-based free sound clips. Once you register with Audio Micro, you can easily download free audio clips for videos.
For downloading sound for commercial uses like TV or mass reproduction, you must be a paid subscriber. The features of Audio Micro are-
- Get access to the collection of royalty-free music and 2000 free good quality sound effects
- High-quality audio content for commercial use, available at competitive prices without any hidden cost
- Research, locate, purchase, and download stock audio
- Easy and fast search option with free sound collection visible from the navigation bar on the homepage
5. Audio Blocks
It is an intuitive platform to download loops, sound effects, and music. It has a low-cost subscription model and the content is constantly updated based on the search results. The features of Audio Blocks are-
- Unlimited royalty-free audio
- Loop, sound effects, and music download
- Low-cost subscription offers more content at a nominal price
- There are flexible plans for every budget
- Use content multiple times for commercial and personal projects
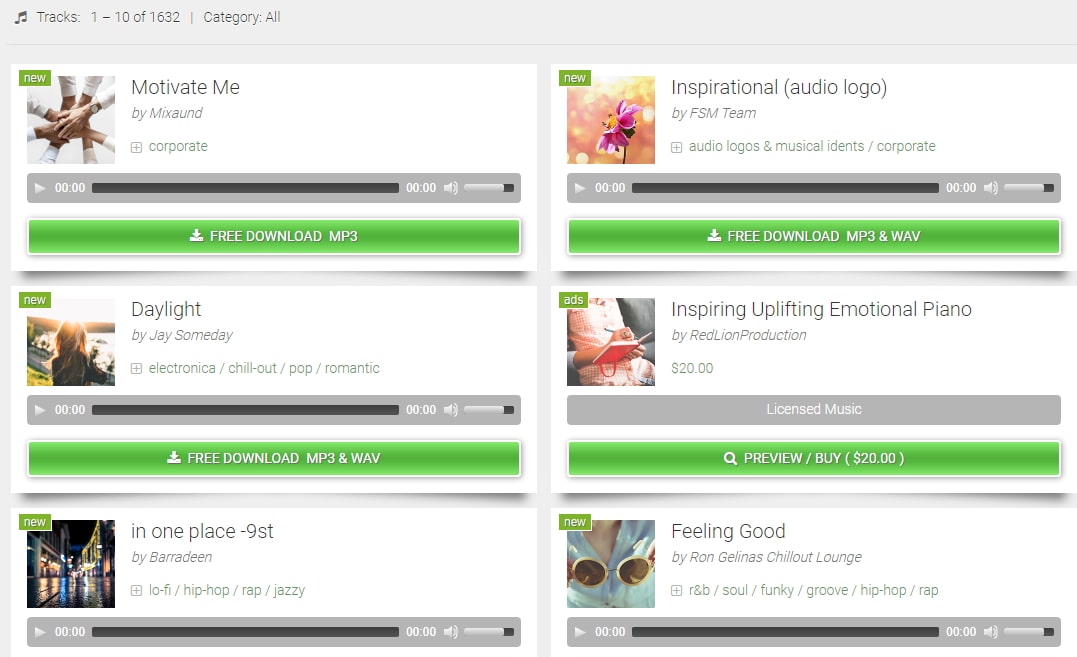
6. Free Stock Music
Whether YouTube project or your personal Vlog, Free Stock Music offers royalty-free music for a range of media platforms.
For any non-copyrighted sound clips free download, always feel free to reach Free Stock Music. The features are-
- Free access to non-copyrighted music
- Just put the attribution in credits to use the sound clips
- Unlimited royalty-free music in all moods, lengths, tempos, and categories
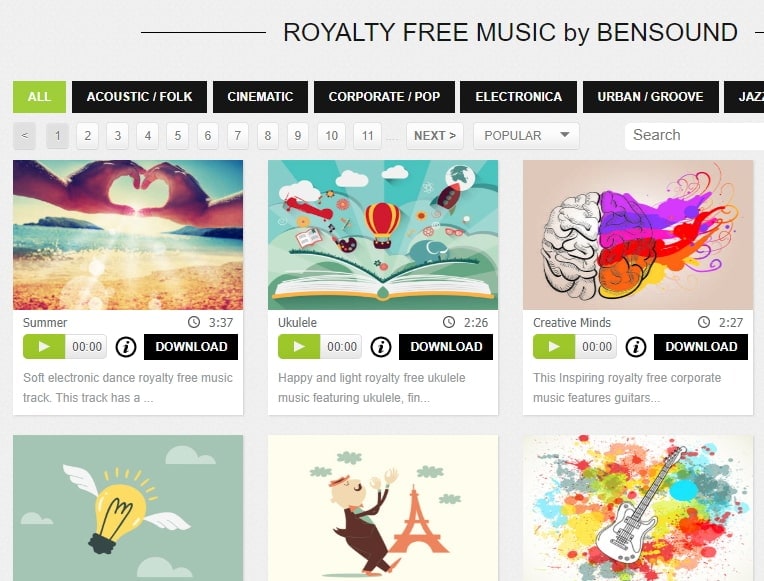
7. Bensound
Available under the Creative Common License, Bensound is used for multimedia projects like web applications or videos.
You can use the free tracks available with Bensound stock music in the various website background score, animations, web adverts, slideshows, etc. The features of Bensound include-
- Royalty-free stock music in various genres like electronica, urban, cinematic, jazz, rock, etc.
- Download free sound clips from the huge collection and add attributions in credits
- If you don’t wish to give credits and use the high-quality premium tracks, get the Bensound Pro License
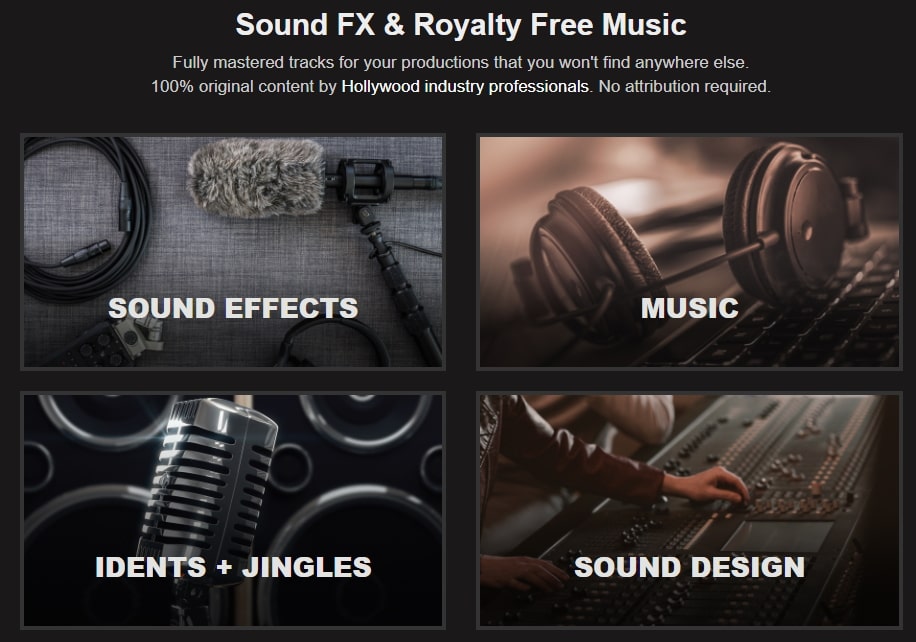
8. Sounds Crate
Are you looking for the best soundtrack for your video? Sounds Crate offers some of the best royalty-free music and sound FX.
With the tracks completely mastered for your production, Sound Crate offers 100% quality content created by industry professionals from Hollywood. The Sound Crate features include-
- Sound FX for electricity, gun, explosion, weapons, sci-fi, vehicles, movements, etc.
- Royalty-free music in diverse genres
- You can also use idents for corporate, news jingles, holiday idents, etc.
- Download and use the royalty-free sound clips easily
- Over 10000 plus HD assets
- No attribution required
- Browse from unlimited music, sound effects, etc.
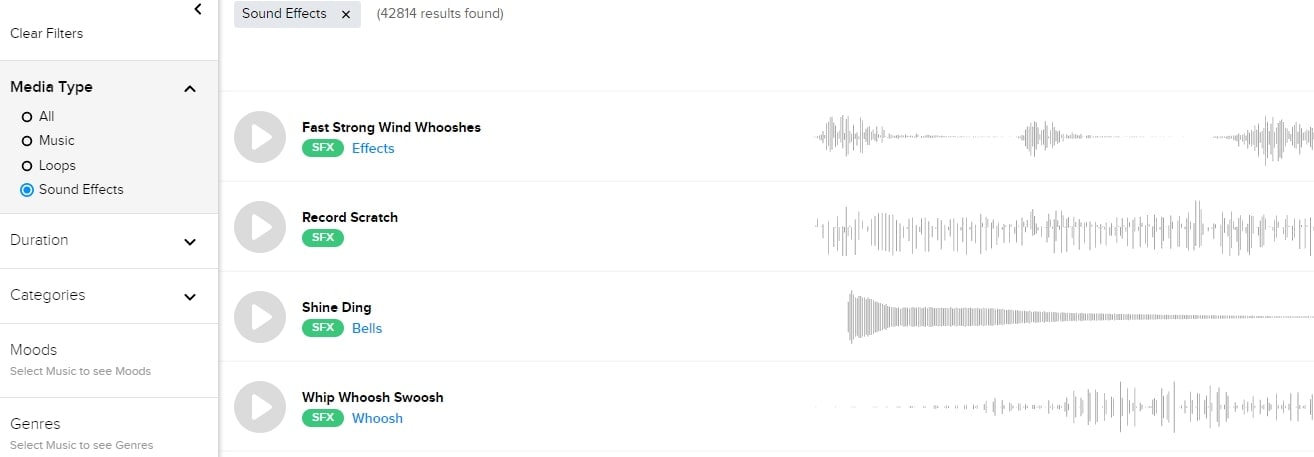
9. ZapSlat
Do your audio and video editing projects need some cool soundtracks to jazz it up? Look no further. ZapSlat is one of the best free sound download sites to make your project successful. The features of ZapSlat are-
- Comprises over 54,000 professional free sound effects and royalty-free music files
- Variety of free sound effect packs
- Download royalty-free music from a variety of genres
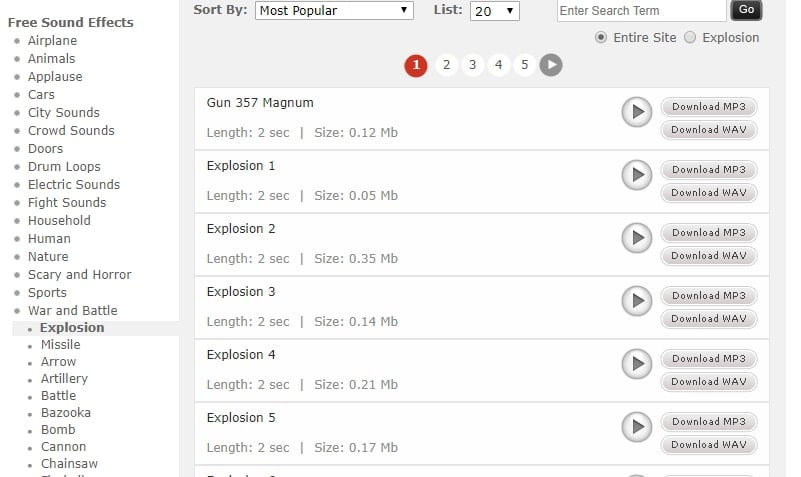
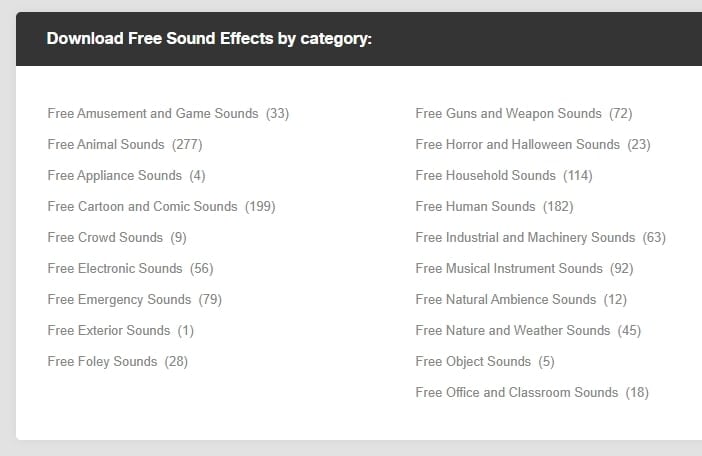
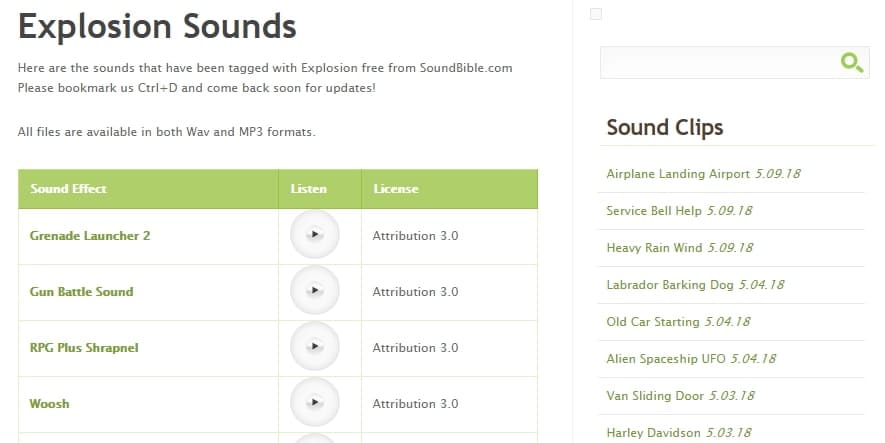
10. Sound Bible
Choose the best from 2000 free sound clips licensed under Creative Commons. To use the sound effect for commercial video, you can select from the royalty-free sounds. The features of SoundBible are-
- Download free sound clips without logging in or creating an account
- 2000 free sounds
- Copyright-free sound resources are weekly updated
Conclusion
Now that you know the best 10 free sound clip download sites, make use of it in your videos. Without worrying about the expense, you can use these sites to download free sound clips.
Liza Brown
Liza Brown is a writer and a lover of all things video.
Follow @Liza Brown
Liza Brown
Mar 27, 2024• Proven solutions
Are you working on animation , video, game, music, or maybe some other media file? Sound is a vital factor for all. It is the effect of the sound that can make or break a project.
But it can be difficult to find perfect and quality free sound clips. There are thousands of software for creating excellent videos, adding sounds , titles, overlays, tracks, and more. But what if you don’t wish to create a piece for just jazzing up your already existing video?
Free sound clips are great resources to download for videos if you don’t want to create sound effects.
Many people want to know the source of high-quality free audio for videos. These free sound samples are easy to find on the Internet.
In this article, you will get to know the 10 best websites to download free sound clips.
10 Best Free Sound Samples to Use
1. Freesound
Licensed under the Creative Commons License , the Freesound comprises of a large sound database. You can choose from the huge collection of sounds and decide which one is free and which sound needs attribution.
You can ensure if the sound can be used in commercial products or not. If you are not a professional and just need free sound samples for personal use, you may use free sound download from any site. The features of Freesound include-
- You can search for sounds or browse by tags or geotags
- The pack feature helps you to find a bunch of similar sounds very easily
- Preview the sound without logging in
- For downloading the sound, you need to log in
- Add your audio samples to contribute to the database
- You get 5 free sound clips download
2. Filmstock
Filmstock from the house of Wondershare is one of the greatest libraries for free sound clips.
Any budget filmmaker would love to have this invaluable resource not just for free audio clips for videos but also for royalty-free sound clips.
You can bring your cinematic video to life from the Filmstock free-stuff one-stop-shop. The features of Filmstock include-
- Royalty-free video effects, audio, and stock media
- There are genres like science fiction, sci-fi, ufo, technology games
- Huge selection of curated quality stock images
- Filmstock library is continuously updated
- No attribution required for any project on Filmstock
3. Landr
With a simple interface, Landr offers the best loops, packs, and samples to you. Make use of powerful Artificial Intelligence (AI) and you can spend lesser time searching and browsing. The features of Landr includes-
- You can browse free sound clips from the various collection of instruments
- Quickly find the right sound from the millions of free sound samples
- Get access to Selector tool powered by AI to make your browsing session faster
- Nourish your ideas with the curated collection and smart browsing
- The filter sounds by instrument, mood, BPM or key
- Go pro with your sampling
- Royalty-free sounds from today’s best artists, producers, and labels
4. Audio Micro
Audio Micro is one of the best tools for downloading horror-based free sound clips. Once you register with Audio Micro, you can easily download free audio clips for videos.
For downloading sound for commercial uses like TV or mass reproduction, you must be a paid subscriber. The features of Audio Micro are-
- Get access to the collection of royalty-free music and 2000 free good quality sound effects
- High-quality audio content for commercial use, available at competitive prices without any hidden cost
- Research, locate, purchase, and download stock audio
- Easy and fast search option with free sound collection visible from the navigation bar on the homepage
5. Audio Blocks
It is an intuitive platform to download loops, sound effects, and music. It has a low-cost subscription model and the content is constantly updated based on the search results. The features of Audio Blocks are-
- Unlimited royalty-free audio
- Loop, sound effects, and music download
- Low-cost subscription offers more content at a nominal price
- There are flexible plans for every budget
- Use content multiple times for commercial and personal projects
6. Free Stock Music
Whether YouTube project or your personal Vlog, Free Stock Music offers royalty-free music for a range of media platforms.
For any non-copyrighted sound clips free download, always feel free to reach Free Stock Music. The features are-
- Free access to non-copyrighted music
- Just put the attribution in credits to use the sound clips
- Unlimited royalty-free music in all moods, lengths, tempos, and categories
7. Bensound
Available under the Creative Common License, Bensound is used for multimedia projects like web applications or videos.
You can use the free tracks available with Bensound stock music in the various website background score, animations, web adverts, slideshows, etc. The features of Bensound include-
- Royalty-free stock music in various genres like electronica, urban, cinematic, jazz, rock, etc.
- Download free sound clips from the huge collection and add attributions in credits
- If you don’t wish to give credits and use the high-quality premium tracks, get the Bensound Pro License
8. Sounds Crate
Are you looking for the best soundtrack for your video? Sounds Crate offers some of the best royalty-free music and sound FX.
With the tracks completely mastered for your production, Sound Crate offers 100% quality content created by industry professionals from Hollywood. The Sound Crate features include-
- Sound FX for electricity, gun, explosion, weapons, sci-fi, vehicles, movements, etc.
- Royalty-free music in diverse genres
- You can also use idents for corporate, news jingles, holiday idents, etc.
- Download and use the royalty-free sound clips easily
- Over 10000 plus HD assets
- No attribution required
- Browse from unlimited music, sound effects, etc.
9. ZapSlat
Do your audio and video editing projects need some cool soundtracks to jazz it up? Look no further. ZapSlat is one of the best free sound download sites to make your project successful. The features of ZapSlat are-
- Comprises over 54,000 professional free sound effects and royalty-free music files
- Variety of free sound effect packs
- Download royalty-free music from a variety of genres
10. Sound Bible
Choose the best from 2000 free sound clips licensed under Creative Commons. To use the sound effect for commercial video, you can select from the royalty-free sounds. The features of SoundBible are-
- Download free sound clips without logging in or creating an account
- 2000 free sounds
- Copyright-free sound resources are weekly updated
Conclusion
Now that you know the best 10 free sound clip download sites, make use of it in your videos. Without worrying about the expense, you can use these sites to download free sound clips.
Liza Brown
Liza Brown is a writer and a lover of all things video.
Follow @Liza Brown
“Unlocking Speech From Melody: Top 3 Online Methods for MP3-to-Text Conversion”
How to Convert MP3 to Text Online [4 Easy Ways]

Shanoon Cox
Mar 27, 2024• Proven solutions
People all over the world use audio and video records. Many people’s lives are made simpler by translating these recordings to text format, which is nothing more than transcription. Let’s start by looking at why people convert mp3 to text.
It is no more difficult to track exact details in an mp3 file collected during a conference, telephone conversation, meeting, or broadcasting. You will have quick access to the files if you use a transcribed text. When you transcribe a recording, you will translate, arrange, and store the data for later reference.
Further, this article will address 4 easy ways that can transcribe mp3 to text, keep reading!
- Method 1: Convert MP3 to Text Online by Media.io
- Method 2: Convert MP3 to Text Online by Veed.io
- Method 3: Convert MP3 to text online by Amberscript
- Method 4: Convert MP3 to text online by Sonix
- Bonus tip: Add text to your video with Wondershare Filmora
Method 2: Convert MP3 to Text Online by Veed.io

Would you like to ease your continuous struggle of concentrating on recordings? Well, then convert your MP3 to a text file and transcribe the speech as your way out. A big thanks to VEED! The online auto transcription tool from VEED is quick, accessible, and clear to use. Veed.io is compatible with Video files, WAVs, OGGs, M4As, which you can transcribe to text with a couple of clicks.
Here are three simple steps to converting an MP3 to text using the handy online mp3 to text converter Veed.io.
Step 1: Launch Veed.io
Start by launching the online converter Veed.io on your browser.

Step 2: Upload your MP3 file
To get started, click on Upload a file to import your MP3 file from your device to the online converter or simply drag and drop the file. You can also choose from the other upload options available such as Dropbox, YouTube link, or record.

Step 3: Convert to text
From the edit menu on the left, go to Subtitles, tap on the Auto Transcribe option, pick your language, and hit Start. You can also choose to add manual subtitles or upload a subtitle file.

Step 4: Download the transcribed file
Once your file is transcribed to text, hit Export and select your required preset from the Preset dropdown. Finally, tap on Export video to save the file to your device.

What are the benefits of using this mp3 to text converter?
At the touch of a button, you can convert audio to text.
- Fast
You can transcribe your audio in a couple of seconds with VEED, avoiding your hours of endless writing.
- Simple
You can change every line and word to ensure that the transcription is just everything you want.
- Adaptable
This audio transcription platform is used to make clear transcripts, descriptions, or individual transcript files.
Method 3: Convert MP3 to text online by Amberscript
Ambertrasncipt is an excellent mp3 to text converter with speech recognition technology. The software allows you to transcribe audio to text automatically in just a few steps. Here’s a quick tutorial on how you can transcribe mp3 to text using Amberscript.
Step 1: Upload a file
Open Amberscript on your browser to get started. Next, click on Choose File to upload your audio file or drag and drop the file on the main interface.

Step 2: Transcribe mp3 to text
For automatic transcription, select Transcription and further choose Automatic under the select service menu. You can also choose to add manual subtitles. Finally, hit Order to start the transcription process.

Step 3: Transfer
After the transcription process is completed, preview and save your transcript. To save the file to your device, hit Export and choose from the available export options such as Text, Subtitles, or audio.

What are the benefits of using this mp3 to text converter?
- Simple
Find essential sections of your text quickly by searching through them.
- SEO-friendly
Use your text to boost your content’s search engine ranking.
- Edit
You can’t change what was said once the audio has been captured. That isn’t a problem with text analysis.
To conduct qualitative research, you’ll need a transcript.
- Research
To conduct qualitative research, you’ll need a transcript.
- Translate
With text, translating your document becomes much more straightforward.
- Quickly
Text is much faster and simpler to operate.
Method 4: Convert MP3 to text online by Sonix
With Sonix you can transcribe, edit, highlight, timestamp, and even translate your transcript in 3 to 4 minutes. Just follow these simple steps and you can convert mp3 to text easily.
Step 1: Sign up for free
First, launch the online tool and sign up for a free account on Sonix or sign in if you have an existing account.

Step 2: Upload your audio file
Drag and drop your MP3 Audio File file (*.MP3) from your PC or import from Google Drive, Dropbox, or YouTube.

Step 3: Convert mp3 to text
Now, select your desired language from the Language dropdown and tap on Transcribe to start the transcription.

Step 4: Edit the transcript
After the transcription process is completed, use the Sonix AudioText Editor to polish your transcript. Simply type in your browser to correct any words.

Step 5: Export
Once all the edits are made, select Export. To save a text version of your MP3 file, choose ‘Text file (.txt)’ from the options list and hit Download.

Bonus tip: Add text to your video with Wondershare Filmora
Adding text to your video is the perfect way to connect with your audience on another level. Whether you want to add an exciting intro, ending credits, or captions to tell your story, Wondershare Filmora lets you do just anything. Filmora is a handy and professional video editor that comes loaded with creative editing tools. It offers a variety of text templates with fancy fonts and stunning transitions you can choose from.
What’s more? Using Filmora is very easy, thanks to its intuitive interface. To inspire you, here is a quick guide on how you can add fancy texts to enhance your video.
Step 1: Import a video to the Filmora timeline
Open the Wondershare Filmora tool and hit New Project. On the main screen, open the Import dropdown and select Import media files to import your video. Now drag the video onto the timeline to start editing.

Step 2: Choose a text template
On the Edit menu at the top, go to Titles. From the available presets, you can choose from the cover opener, ending credits, subtitles and lower thirds. Double click a template to preview it, and select the one you like. Then drag the selected template to the timeline.

Step 3: Edit your text
To edit your custom text, double-click the Text thumbnail on the timeline. Now on the text editor panel, customize your font, color, alignment, and size of your text. Or you can choose a built in text style from the text style library. Further, go to the Animation tab, to add special animations to your text.
Now you can either click ok to save the edits or choose the Advanced option to enter the advanced editing panel. Here you can customize the text with elements, shapes, text boxes, and shadows. You can also adjust the duration of your text as you like.

Step 4: Export your video with titles
Once all the edits are completed, tap the Export button on the top right corner. Then give your video a name, select where you want to save it, choose a resolution, and again hit Export.

CONCLUSION
Converting audio to text is not anymore a menial task and does not require human transcribers sitting all day long to listen to audio files. The automatic online transcription apps and platforms allow anyone to convert mp3 to text extremely fast and efficiently. You can transcribe any audio file just like a native speaker with 99 percent accuracy without knowing much about the process.
This strategy can benefit students, professionals, and others who want to consume information but find it hard to concentrate or remember things.
Shanoon Cox
Shanoon Cox is a writer and a lover of all things video.
Follow @Shanoon Cox
Shanoon Cox
Mar 27, 2024• Proven solutions
People all over the world use audio and video records. Many people’s lives are made simpler by translating these recordings to text format, which is nothing more than transcription. Let’s start by looking at why people convert mp3 to text.
It is no more difficult to track exact details in an mp3 file collected during a conference, telephone conversation, meeting, or broadcasting. You will have quick access to the files if you use a transcribed text. When you transcribe a recording, you will translate, arrange, and store the data for later reference.
Further, this article will address 4 easy ways that can transcribe mp3 to text, keep reading!
- Method 1: Convert MP3 to Text Online by Media.io
- Method 2: Convert MP3 to Text Online by Veed.io
- Method 3: Convert MP3 to text online by Amberscript
- Method 4: Convert MP3 to text online by Sonix
- Bonus tip: Add text to your video with Wondershare Filmora
Method 2: Convert MP3 to Text Online by Veed.io
Would you like to ease your continuous struggle of concentrating on recordings? Well, then convert your MP3 to a text file and transcribe the speech as your way out. A big thanks to VEED! The online auto transcription tool from VEED is quick, accessible, and clear to use. Veed.io is compatible with Video files, WAVs, OGGs, M4As, which you can transcribe to text with a couple of clicks.
Here are three simple steps to converting an MP3 to text using the handy online mp3 to text converter Veed.io.
Step 1: Launch Veed.io
Start by launching the online converter Veed.io on your browser.
Step 2: Upload your MP3 file
To get started, click on Upload a file to import your MP3 file from your device to the online converter or simply drag and drop the file. You can also choose from the other upload options available such as Dropbox, YouTube link, or record.
Step 3: Convert to text
From the edit menu on the left, go to Subtitles, tap on the Auto Transcribe option, pick your language, and hit Start. You can also choose to add manual subtitles or upload a subtitle file.
Step 4: Download the transcribed file
Once your file is transcribed to text, hit Export and select your required preset from the Preset dropdown. Finally, tap on Export video to save the file to your device.
What are the benefits of using this mp3 to text converter?
At the touch of a button, you can convert audio to text.
- Fast
You can transcribe your audio in a couple of seconds with VEED, avoiding your hours of endless writing.
- Simple
You can change every line and word to ensure that the transcription is just everything you want.
- Adaptable
This audio transcription platform is used to make clear transcripts, descriptions, or individual transcript files.
Method 3: Convert MP3 to text online by Amberscript
Ambertrasncipt is an excellent mp3 to text converter with speech recognition technology. The software allows you to transcribe audio to text automatically in just a few steps. Here’s a quick tutorial on how you can transcribe mp3 to text using Amberscript.
Step 1: Upload a file
Open Amberscript on your browser to get started. Next, click on Choose File to upload your audio file or drag and drop the file on the main interface.
Step 2: Transcribe mp3 to text
For automatic transcription, select Transcription and further choose Automatic under the select service menu. You can also choose to add manual subtitles. Finally, hit Order to start the transcription process.
Step 3: Transfer
After the transcription process is completed, preview and save your transcript. To save the file to your device, hit Export and choose from the available export options such as Text, Subtitles, or audio.
What are the benefits of using this mp3 to text converter?
- Simple
Find essential sections of your text quickly by searching through them.
- SEO-friendly
Use your text to boost your content’s search engine ranking.
- Edit
You can’t change what was said once the audio has been captured. That isn’t a problem with text analysis.
To conduct qualitative research, you’ll need a transcript.
- Research
To conduct qualitative research, you’ll need a transcript.
- Translate
With text, translating your document becomes much more straightforward.
- Quickly
Text is much faster and simpler to operate.
Method 4: Convert MP3 to text online by Sonix
With Sonix you can transcribe, edit, highlight, timestamp, and even translate your transcript in 3 to 4 minutes. Just follow these simple steps and you can convert mp3 to text easily.
Step 1: Sign up for free
First, launch the online tool and sign up for a free account on Sonix or sign in if you have an existing account.
Step 2: Upload your audio file
Drag and drop your MP3 Audio File file (*.MP3) from your PC or import from Google Drive, Dropbox, or YouTube.
Step 3: Convert mp3 to text
Now, select your desired language from the Language dropdown and tap on Transcribe to start the transcription.
Step 4: Edit the transcript
After the transcription process is completed, use the Sonix AudioText Editor to polish your transcript. Simply type in your browser to correct any words.
Step 5: Export
Once all the edits are made, select Export. To save a text version of your MP3 file, choose ‘Text file (.txt)’ from the options list and hit Download.
Bonus tip: Add text to your video with Wondershare Filmora
Adding text to your video is the perfect way to connect with your audience on another level. Whether you want to add an exciting intro, ending credits, or captions to tell your story, Wondershare Filmora lets you do just anything. Filmora is a handy and professional video editor that comes loaded with creative editing tools. It offers a variety of text templates with fancy fonts and stunning transitions you can choose from.
What’s more? Using Filmora is very easy, thanks to its intuitive interface. To inspire you, here is a quick guide on how you can add fancy texts to enhance your video.
Step 1: Import a video to the Filmora timeline
Open the Wondershare Filmora tool and hit New Project. On the main screen, open the Import dropdown and select Import media files to import your video. Now drag the video onto the timeline to start editing.
Step 2: Choose a text template
On the Edit menu at the top, go to Titles. From the available presets, you can choose from the cover opener, ending credits, subtitles and lower thirds. Double click a template to preview it, and select the one you like. Then drag the selected template to the timeline.
Step 3: Edit your text
To edit your custom text, double-click the Text thumbnail on the timeline. Now on the text editor panel, customize your font, color, alignment, and size of your text. Or you can choose a built in text style from the text style library. Further, go to the Animation tab, to add special animations to your text.
Now you can either click ok to save the edits or choose the Advanced option to enter the advanced editing panel. Here you can customize the text with elements, shapes, text boxes, and shadows. You can also adjust the duration of your text as you like.
Step 4: Export your video with titles
Once all the edits are completed, tap the Export button on the top right corner. Then give your video a name, select where you want to save it, choose a resolution, and again hit Export.
CONCLUSION
Converting audio to text is not anymore a menial task and does not require human transcribers sitting all day long to listen to audio files. The automatic online transcription apps and platforms allow anyone to convert mp3 to text extremely fast and efficiently. You can transcribe any audio file just like a native speaker with 99 percent accuracy without knowing much about the process.
This strategy can benefit students, professionals, and others who want to consume information but find it hard to concentrate or remember things.
Shanoon Cox
Shanoon Cox is a writer and a lover of all things video.
Follow @Shanoon Cox
Also read:
- Updated The Best-Sounding Symphonic Selections for Romantic Film Projects, Updated for 2024
- Updated Audiophiles Blueprint Top Tools and Practices to Minimize External Sound Interference (On & Off)
- Updated Echoes of Clarity A Comprehensive Tutorial on Eliminating Background Distractions in Web Tools
- Critical Lists of Soft Instrumental Sets for Ambient Acoustics for 2024
- In 2024, Excellent Real-Time Vocal Disguise Apps The Best Edition
- New In 2024, Auditory Craftsmanship Exploring the Best Tools for Editing Sounds with Benefits and Limitations
- In 2024, The Audio Editors Handbook 6 Methodical Steps for Clearing Vocals Using Adobe Audition
- 2024 Approved Tracking Down Immersive Echoes Resembling a Paintbrushs Path
- New How to Eliminate Background Music From Your MP4 Videos for 2024
- In 2024, Shifting Gears Methods for Redefining Your Vocal Range
- 2024 Approved Best Chat Apps for Video Conversations The Top Virtual Community Platforms
- New In 2024, Unleash Your Podcast Experience The Ultimate List of Free Mobile Players
- New 2024 Approved Seamless Transition Exploring the Best Free Online & Offline Audio Conversion Software
- New In 2024, Top 10 Windows & macOS Compatible DAWs The Ultimate Selection
- Best Places for Downloading Free Lofi Imagery and Tunes
- New Explore Silent Bubbles Auditory Display
- Updated Ancient Aria Top-Tier Music Picks for Wedding Video Production
- Updated Ultimate Anime Character Reimaginings Best Software for Desktop & Mobile Users for 2024
- Updated The Ultimate List of Windows-Compatible DAWs A Guide to the Best Free & Paid Options
- New Melody Meets Picture Infuse Photos with Free Audio Content
- Updated Unveiling the Most Effective 8 Software Solutions for Windows, Mac, and Cloud Platforms for 2024
- New Premier Voice Effect Simulation Software of the Year 2024
- Progressive Audio Fade-Out Effects in Adobe Rushs 2023 Update
- Normalizing Volume in VLC A Step-by-Step Guide
- New 2024 Approved 5 Popular Linux Audio Recorder and Linux Audio Recording Tips
- New Utilizing the Sound Recorder Feature in Samsungs Newest Models (S10/S9)
- Updated 2024 Approved Synergy of Audience Roars Effect
- Unlock Your MP4 Tracks 2024S Effortless Audio Extraction Processes
- Updated Achieving Perfect Intonation in Audacity Maintaining High-Quality Output
- Steps to Dissociate Audio Elements in Video Projects with Adobe Premiere Pro
- New Essential Features of a Mac-Compatible Sound Editing Software for 2024
- Updated In 2024, The Quintessential Free MP3 Amplitude Adjusters Guide
- New 2024 Approved Mastering Silence Techniques for Eliminating Sibilance in Recordings
- New Mastering Android An Assessment of Premium Voice Recorders (Including Free Variants) for the Year 2023 for 2024
- How to Transfer Music from OnePlus 12R to iPod | Dr.fone
- In 2024, How to Transfer Data from Vivo Y55s 5G (2023) to Samsung Phone | Dr.fone
- Easy Ways to Manage Your Infinix Smart 7 Location Settings | Dr.fone
- Calls on Vivo X100 Go Straight to Voicemail? 12 Fixes | Dr.fone
- 7 Solutions to Fix Chrome Crashes or Wont Open on Nubia Z50 Ultra | Dr.fone
- In 2024, Latest Guide How To Bypass Vivo Y02T FRP Without Computer
- In 2024, Unlock Your Device iCloud DNS Bypass Explained and Tested, Plus Easy Alternatives On iPhone 12 Pro
- How to Mirror Samsung Galaxy S24+ to Mac? | Dr.fone
- In 2024, Why is iPogo not working On Tecno Spark 10 4G? Fixed | Dr.fone
- Reset iTunes Backup Password Of iPhone XS Max Prevention & Solution
- How to Make Lip Sync Video Without Installing Any App
- New 2024 Approved How to Translate YouTube Videos to English Subtitles
- New 2024 Approved Unbiased Reviews of YouTube MP3 Converters for Beginners
- New 2024 Approved Video Editing Pro Tips Controlling Speed in Camtasia
- In 2024, Planning to Use a Pokemon Go Joystick on Vivo Y02T? | Dr.fone
- In 2024, The Updated Method to Bypass Honor 80 Pro Straight Screen Edition FRP
- Updated 2024 Approved Are You Searching for the Best Cinematic LUTs for Premiere Pro? You Are in the Right Place because This Article Is Dedicated to LUTs
- Wax 101 Learn How to Edit Videos with This Free Video Editor for 2024
- In 2024, How can I get more stardust in pokemon go On Apple iPhone 11? | Dr.fone
- In 2024, Full Tutorial to Bypass Your Xiaomi Mix Fold 3 Face Lock?
- How to Resolve Motorola Moto G14 Screen Not Working | Dr.fone
- Updated 2024 Approved Say Goodbye to Shaky Footage Adobe Premiere Pro Stabilization Tips and Tricks
- Dose Life360 Notify Me When Someone Checks My Location On Realme Narzo 60x 5G? | Dr.fone
- Updated 2024 Approved Unleash Your Creativity Final Cut Pro Tutorials
- Title: Updated TuneTrimmer Pro The Essential Tool for Distraction-Free Listening for 2024
- Author: Paul
- Created at : 2024-05-05 06:10:06
- Updated at : 2024-05-06 06:10:06
- Link: https://voice-adjusting.techidaily.com/updated-tunetrimmer-pro-the-essential-tool-for-distraction-free-listening-for-2024/
- License: This work is licensed under CC BY-NC-SA 4.0.
