
:max_bytes(150000):strip_icc():format(webp)/Flora_and_Son-f6517d3de531487e89f5e0e99192d13f.jpg)
Updated Top 10 Digital Audio Workstation Tools Free vs Paid Options for 2024
Top 10 Digital Audio Workstation Tools: Free vs Paid Options
FREE 10 Best Online Music Makers

Benjamin Arango
Apr 26, 2024• Proven solutions


Expressing ideas through music was never easy, and even today in the age of powerful digital audio stations like Ableton Live or FruityLoops , producing original music requires a certain set of skills. However, online content producers often need music for their videos, but they neither have the time or the budget to hire a professional musician to create a soundtrack for their project in studio conditions. If you are looking for a quick way to make your own music online, then you should keep reading, because in this article we are going to take you through the ten best online music makers you should check out in 2021.
10 Best Online Music Makers in 2021
The music-making platforms that are currently available online are still not as nearly as powerful as professional software products for music producers. Nonetheless, this doesn’t mean that you can’t use them to create the music you like or just have fun with them. Here are the ten best online music makers in 2019.
1. Typeatone
Price: Free
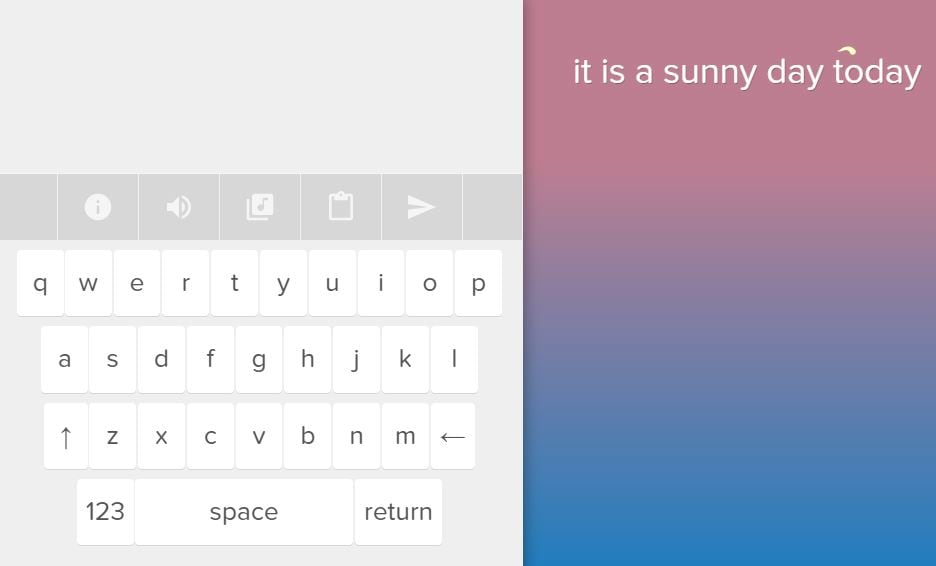
Image from Internet
Have you ever wondered what your words would sound like if they were turned into music? Head over to the Typeatone platform if you want to find out since all you have to do in order to start creating your own music is type in the text. As you type, the platform will automatically start playing your words and once you’re done, you’ll be able to hear your new song. You can also choose between different instruments to make the process of creating music with Typeatone even more entertaining. You can share all of your creations with your friends on social media.
![]()
A cross-platform for making videos anywhere for all creators

Why your video editing isn’t good enough? How about some creative inspo?
- 100 Million+ Users
- 150+ Countries and Regions
- 4 Million+ Social Media Followers
- 5 Million+ Stock Media for Use
* Secure Download

2. Audiotool
Price: Free
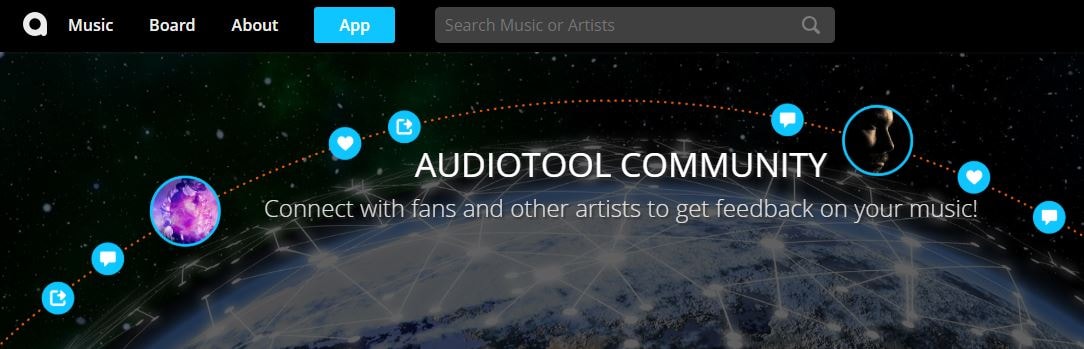
Image from Internet
Electronic music producers who often use synthesizers like Roland TB-303 or Roland TR-909 are going to love the features this online collaborative platform offers. Audiotool hosts a huge music library, you can explore even if you are not a registered user. In order to access the platform’s music studio, you first have to create an account and make sure that you are signed in. Audiotool is also a community of like-minded people where you can meet artists whose work you appreciate or hear what others think about your work. The only downside is that Audiotool’s abundance of features can be overwhelming for the newcomers to the world of electronic music production.
3. AudioSauna
Price: Free
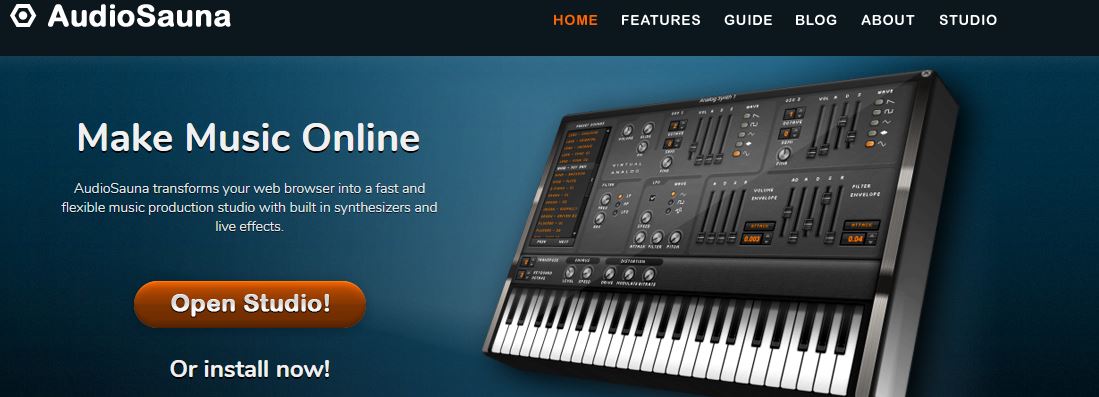
Image from Internet
AudioSauna seems to offer everything its users need to create inspiring music because it is equipped with frequency modulation synth, virtual analog synth and a sampler that provides layering features. Moreover, its intuitive interface makes the process of arranging the song structure or changing several note values simultaneously much easier. Creating an account on AudioSauna will enable to record all your projects and export them as audio files that can be uploaded to SoundCloud or any other audio distribution platform. AudioSauna is a perfect tool for skilled producers who want to create their music online.
4. Soundtrap
Price: Free trial available, subscription plans start at $3.99 per month

Image from Internet
Soundtrap offers a long list of features that enable professional musicians to create their music online. All you have to do is create an account and you will get access to the Sountrap’s studio that let you create new beat patterns, use a synthesizer or even invite friends to make music together. The platform also offers the possibility to connect your own instruments to the Soundtrap’s studio, so that you can record your music as you play it. This online platform also has an Education section where you can share your knowledge with others or learn valuable music lessons.
5. PatternSketch
Price: Free
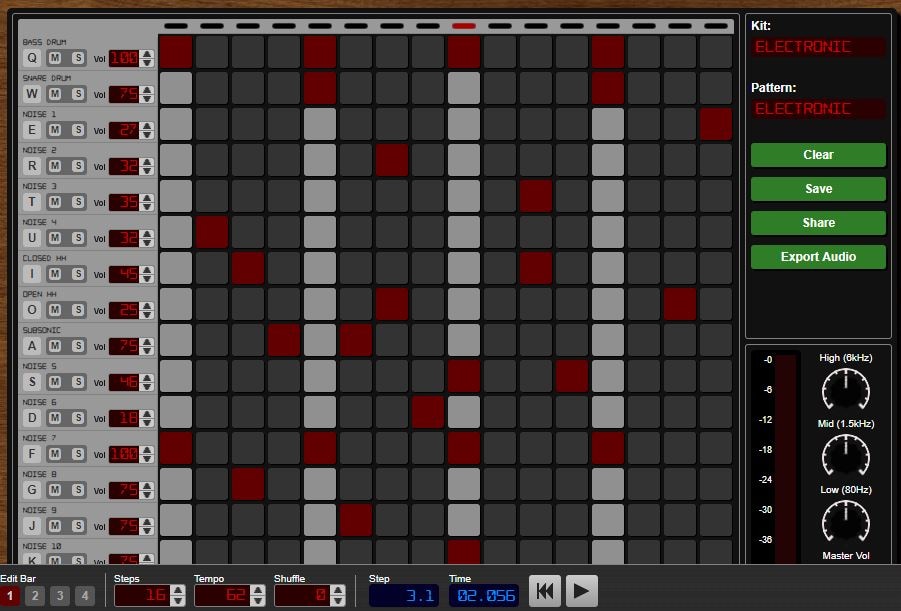
Image from Internet
This basic and yet effective drum machine can help you generate amazing beats for the songs you’re working on. Once you sign up, you will be able to choose from a number of different kits and patterns that are fully customizable or create your own original beats. After you create a pattern you like, you can save it with a single click or send it to your friends via email. Optionally, you can export all of your creations from PatternSketch and save them as wav, mp3 or ogg files, although in some cases mp3 audio files may not loop properly.
6. Soundation
Price: Free version available, pricing plans start at $1.99 per month

Image from Internet
If you choose to create music with the free version of Soundation, you’ll be able to work on up to ten projects, try out over 700 audio effects and loops, and export all your music in low quality. Purchasing the Intro pricing plan will enable you to work on an unlimited number of projects, make live audio recordings, import audio files smaller than 100MB or use an external midi controller. Moreover, opting for any of the annual or monthly subscription plans will allow you to export entire projects and audio files in high resolution from Soundation.
7. Text to Speech
Price: Free

online-music-maker-Text to Speech.jpg
Vocals are often overlooked in contemporary electronic music, but there are so many ways they can be used creatively. The platform lets you turn up to 50000 characters into speech at once, and it also offers several different voices you can choose from. Before you create an audio file you can determine how fast the text is going to be vocalized, so you should try different options and see which one fits your project the best. Text to Speech platform can be used during the process of creating a new song, but the tools it offers are not enough to make an entire song.
8. Looplabs
Price: Free
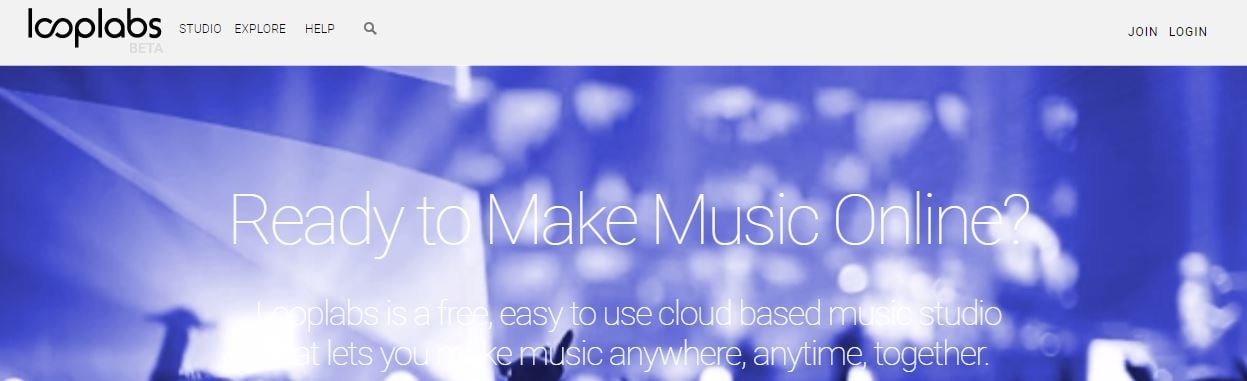
Music enthusiasts who would like to produce different genres of music online should definitely get familiar with Looplabs, as this online music maker lets its users remix songs or make music from scratch. Besides being one of the best places on the Internet to record music, Looplabs is also a community where you can meet people who like your music or discover artists whose work you admire. The Looplab’s studio features samples for a broad range of music genres and musical instruments, and you can use it to make Electro or Funk music equally effectively.
9. Online Sequencer
Price: Free
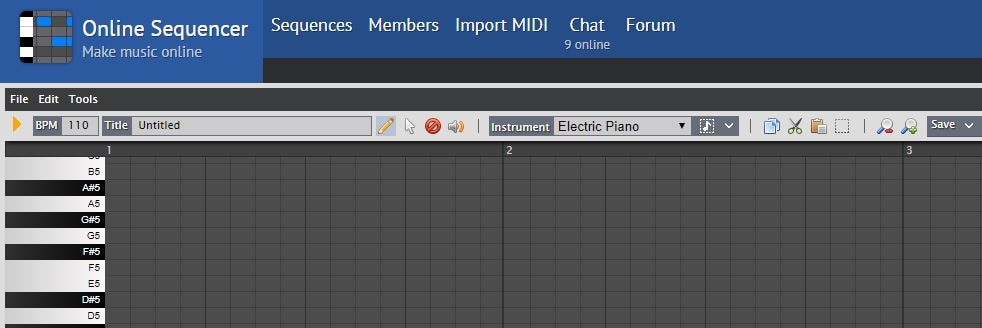
This is a perfect tool for developing an idea for a song, as you can create a sequence in just a few minutes. You can choose from Piano, Drums and Guitar categories of instruments or browse through a huge collection of fully customizable preset sequences that is updated on a daily basis. The platform also lets you import MIDI files and work on projects you’ve already started developing or you can export your sequences as MIDI files from the Online Sequencer and edit them with your DAW. Even though Online Sequencer is a useful tool for making music, the features it offers can’t really be compared with those on Soundation or AudioSauna.
10. Autochords
Price: Free
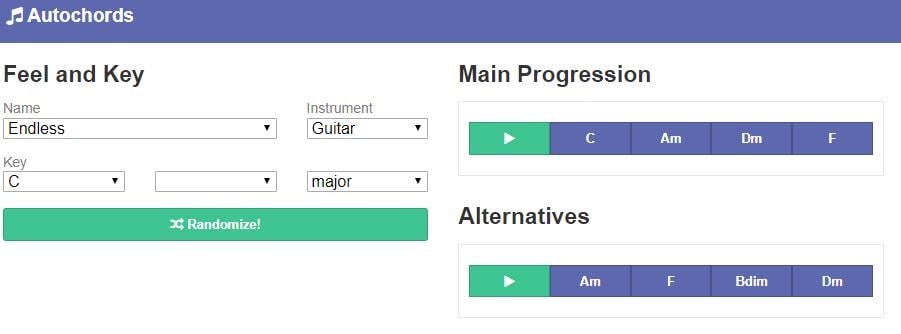
Finding new ideas for songs is often more difficult than it sounds, and if you ever face a creative block you should simply head over to Autochords. This platform suggests chord progressions based on the parameters you set, so you just have to select an instrument and the name of the song to set the feel, and the platform will show you the main progression and its alternatives. Rather than being an online music maker, Autochords is more a tool that helps piano and guitar players understand chord progressions better. iPhone and iPad users can download the Autochords app from the App Store for free.
Read More to Get : Best Free DAW for Windows and Mac for Beginners >>
Conclusion
You don’t have to be a professional musician in order to start making music online, you just have to love music, and an online music maker of your choice will take care of the rest. Do you use online music makers for entertainment or to express your creativity? Leave a comment below and share your opinions with us.
Benjamin Arango
Benjamin Arango is a writer and a lover of all things video.
Follow @Benjamin Arango
Benjamin Arango
Apr 26, 2024• Proven solutions
Expressing ideas through music was never easy, and even today in the age of powerful digital audio stations like Ableton Live or FruityLoops , producing original music requires a certain set of skills. However, online content producers often need music for their videos, but they neither have the time or the budget to hire a professional musician to create a soundtrack for their project in studio conditions. If you are looking for a quick way to make your own music online, then you should keep reading, because in this article we are going to take you through the ten best online music makers you should check out in 2021.
10 Best Online Music Makers in 2021
The music-making platforms that are currently available online are still not as nearly as powerful as professional software products for music producers. Nonetheless, this doesn’t mean that you can’t use them to create the music you like or just have fun with them. Here are the ten best online music makers in 2019.
1. Typeatone
Price: Free
Image from Internet
Have you ever wondered what your words would sound like if they were turned into music? Head over to the Typeatone platform if you want to find out since all you have to do in order to start creating your own music is type in the text. As you type, the platform will automatically start playing your words and once you’re done, you’ll be able to hear your new song. You can also choose between different instruments to make the process of creating music with Typeatone even more entertaining. You can share all of your creations with your friends on social media.
![]()
A cross-platform for making videos anywhere for all creators
Why your video editing isn’t good enough? How about some creative inspo?
- 100 Million+ Users
- 150+ Countries and Regions
- 4 Million+ Social Media Followers
- 5 Million+ Stock Media for Use
* Secure Download
2. Audiotool
Price: Free
Image from Internet
Electronic music producers who often use synthesizers like Roland TB-303 or Roland TR-909 are going to love the features this online collaborative platform offers. Audiotool hosts a huge music library, you can explore even if you are not a registered user. In order to access the platform’s music studio, you first have to create an account and make sure that you are signed in. Audiotool is also a community of like-minded people where you can meet artists whose work you appreciate or hear what others think about your work. The only downside is that Audiotool’s abundance of features can be overwhelming for the newcomers to the world of electronic music production.
3. AudioSauna
Price: Free
Image from Internet
AudioSauna seems to offer everything its users need to create inspiring music because it is equipped with frequency modulation synth, virtual analog synth and a sampler that provides layering features. Moreover, its intuitive interface makes the process of arranging the song structure or changing several note values simultaneously much easier. Creating an account on AudioSauna will enable to record all your projects and export them as audio files that can be uploaded to SoundCloud or any other audio distribution platform. AudioSauna is a perfect tool for skilled producers who want to create their music online.
4. Soundtrap
Price: Free trial available, subscription plans start at $3.99 per month
Image from Internet
Soundtrap offers a long list of features that enable professional musicians to create their music online. All you have to do is create an account and you will get access to the Sountrap’s studio that let you create new beat patterns, use a synthesizer or even invite friends to make music together. The platform also offers the possibility to connect your own instruments to the Soundtrap’s studio, so that you can record your music as you play it. This online platform also has an Education section where you can share your knowledge with others or learn valuable music lessons.
5. PatternSketch
Price: Free
Image from Internet
This basic and yet effective drum machine can help you generate amazing beats for the songs you’re working on. Once you sign up, you will be able to choose from a number of different kits and patterns that are fully customizable or create your own original beats. After you create a pattern you like, you can save it with a single click or send it to your friends via email. Optionally, you can export all of your creations from PatternSketch and save them as wav, mp3 or ogg files, although in some cases mp3 audio files may not loop properly.
6. Soundation
Price: Free version available, pricing plans start at $1.99 per month
Image from Internet
If you choose to create music with the free version of Soundation, you’ll be able to work on up to ten projects, try out over 700 audio effects and loops, and export all your music in low quality. Purchasing the Intro pricing plan will enable you to work on an unlimited number of projects, make live audio recordings, import audio files smaller than 100MB or use an external midi controller. Moreover, opting for any of the annual or monthly subscription plans will allow you to export entire projects and audio files in high resolution from Soundation.
7. Text to Speech
Price: Free

online-music-maker-Text to Speech.jpg
Vocals are often overlooked in contemporary electronic music, but there are so many ways they can be used creatively. The platform lets you turn up to 50000 characters into speech at once, and it also offers several different voices you can choose from. Before you create an audio file you can determine how fast the text is going to be vocalized, so you should try different options and see which one fits your project the best. Text to Speech platform can be used during the process of creating a new song, but the tools it offers are not enough to make an entire song.
8. Looplabs
Price: Free
Music enthusiasts who would like to produce different genres of music online should definitely get familiar with Looplabs, as this online music maker lets its users remix songs or make music from scratch. Besides being one of the best places on the Internet to record music, Looplabs is also a community where you can meet people who like your music or discover artists whose work you admire. The Looplab’s studio features samples for a broad range of music genres and musical instruments, and you can use it to make Electro or Funk music equally effectively.
9. Online Sequencer
Price: Free
This is a perfect tool for developing an idea for a song, as you can create a sequence in just a few minutes. You can choose from Piano, Drums and Guitar categories of instruments or browse through a huge collection of fully customizable preset sequences that is updated on a daily basis. The platform also lets you import MIDI files and work on projects you’ve already started developing or you can export your sequences as MIDI files from the Online Sequencer and edit them with your DAW. Even though Online Sequencer is a useful tool for making music, the features it offers can’t really be compared with those on Soundation or AudioSauna.
10. Autochords
Price: Free
Finding new ideas for songs is often more difficult than it sounds, and if you ever face a creative block you should simply head over to Autochords. This platform suggests chord progressions based on the parameters you set, so you just have to select an instrument and the name of the song to set the feel, and the platform will show you the main progression and its alternatives. Rather than being an online music maker, Autochords is more a tool that helps piano and guitar players understand chord progressions better. iPhone and iPad users can download the Autochords app from the App Store for free.
Read More to Get : Best Free DAW for Windows and Mac for Beginners >>
Conclusion
You don’t have to be a professional musician in order to start making music online, you just have to love music, and an online music maker of your choice will take care of the rest. Do you use online music makers for entertainment or to express your creativity? Leave a comment below and share your opinions with us.
Benjamin Arango
Benjamin Arango is a writer and a lover of all things video.
Follow @Benjamin Arango
Mastering Sound Silence in Adobe Audition: The Ultimate Tutorial
With the invention of advanced editing software, the demands of content creation increased. Content creators outrun many challenges to create captivating content. One of these challenges is the maintenance of audio quality. Sometimes, singing a microphone is not enough, so post-creation methods do the trick. One of the ways of doing this is through Adobe Audition noise reduction.
There are multiple things to consider during audio editing at a professional level. For instance, microphone noise, humming, wind, hiss removal, and others. Adobe Audition removes background noises and nuisances that decline audio quality. In this article, you can read about Adobe Audition remove noise methods. In addition, some other tools are discussed for users’ ease and accessibility.
AI Noise Reduction A cross-platform for facilitating your video editing process by offering valuable benefits!
Free Download Free Download Learn More

Part 1: What Do You Know About Background Noise?
Background noise is anything that disturbs the pace of the video and diverts the viewer’s attention. It is the unwanted and unintended sound that takes up your audio. This may include someone chatting in the background, wind noise, and other noises. These factors decline and disrupt the clarity of audio. However, these elements can be managed through various tools and techniques to help creators.
Part 2: How to Remove Noise from Adobe Audition: A Comprehensive Review
Adobe Audition is a tool tailored to assist in audio editing tasks with precision. Users can create, merge, and mix different sound effects and be creative with them. It also has seamless support of Adobe After Effects and Adobe Stock for this purpose. Noise reduction Audition is one of its features that helps in cleaning and enhancing audio. It clears out any unnecessary background noises from any project.
In addition, the tool allows you to manage the audio levels for denoising. Along with manual settings, you can also add denoise effects to reduce background effects. You can manage high and low frequencies in Adobe Audition to remove noise. Upon editing this software, you can review the results afterward.
Different Methods of Audio Reduction in Adobe Audition
As a content creator, you must often manage dialogues and music within a video. Combining both can sometimes get the focus off actual dialogues. This can be due to many reasons; however, the solution is noise reduction in Audition. In this section, you can explore different methods to reduce noise:
1. Noise Reduction Effect
In this section, we are doing a noise reduction Audition manually. The process is straightforward, and here is a step-by-step guide to it:
Step 1: Upon importing your audio in Adobe Audition, navigate towards the top toolbar. Select the “Effects” tab and choose “Noise Reduction/Restoration” from the dropdown menu. As the menu expands further, select “Noise Reduction.”

Step 2: This will feature a Noise Reduction window on your screen. In this window, select the “Capture Noise Print” tab and adjust the Noise Reduction slider. Afterwards, press the play button on this window to listen to the audio and select “Apply.”

2. DeNoise Effect
This is the second method of Adobe Audition to remove noise. Accessing this option is almost the same, but settings may vary. Here is an instruction manual on how you can denoise in Audition:
Step 1: Once you have imported media into the timeline, reach the upper toolbar. Look for the “Effects” tab and proceed to the “Noise Reduction/Restoration” settings. From the expansion panel, choose the “DeNoise” option.

Step 2: After accessing the DeNoise window appearing on the screen, direct towards it. Then, change the position of the “Amount” slider and play your audio. Further, select the “Apply” button to add this effect to your audio.

3. Dynamic Effect
Another audio effect that you can apply and adjust in the same manner is the dynamic effect. Follow the steps given below to achieve this effect:
Step 1: After selecting the “Audio” tab, choose “Amplitude and Compression” from the dropdown menu. Expand this option and select “Dynamics” from the expansion menu.

Step 2: From the Dynamics window, expand the “Preset” option and set it to “Default.” Further, activate the “AutoGate” option and change the “Threshold” value. Then, click “Apply” to save and apply these settings.

Part 3: Other Solutions That Can Be Tried to Remove Noise from Videos
Since Adobe Audition remove noise has a professional interface, it might trouble some of you. The settings can be challenging to apply, so this section is all about alternatives. In this section, you can find the online solutions for noise reduction below:
1. Flixier
With this online Adobe Audition remove noise alternative, you can remove background noise. Users simply need to upload a video and activate the enhanced audio option. The audio enhancer eliminates unnecessary sound, giving it a name and description. It is compatible with popular and worldwide media formats like WAV, MP3, etc. Moreover, you can share the video straight to social platforms.

Key Features
- Offers an Improve Quality feature to clear up and enhance speech.
- Users can edit audio after denoising, and you can access its audio library to apply effects.
- Users can detach audio from the clip or fade in and out the audio effects to align with the video.
2. MyEdit
Are you looking for an online AI alternative to Adobe Audition noise reduction? This is a versatile platform for removing unwanted audio from up to 100 MB file size. It can denoise a 10 minutes file of formats like MP3, MP4, WAV, and FLAC. It enhances quality through audio denoise, wind remover, and speech enhancement. It uses AI technology to auto-remove background noise and enables a preview.

Key Features
- Users can employ its Vocal Remover to create clear and high-quality voiceovers.
- The user interface is a simple upload-to-convert process and doesn’t take up any storage.
- The AI helps accelerate the denoise process and retains audio quality.
3. KwiCut
Utilize this web-based Adobe Audition remove noise alternative to eliminate background noises. It can remove anything that declines an audio quality, like hums, hisses, and more. It removes any distractions in the background that decline communication. The AI assists in enhancing speech to maintain the professional element in the continent.

Key Features
- The tool supports a range of audio and video formats like MP3, MOV, WAV, and more.
- It supports text-based audio editing to edit audio or remove secondary noises.
- To create effective voiceovers for videos, use KwiCut’s voice cloning feature.
Part 4: Wondershare Filmora: A Unique Solution to Reducing Noise in Video and Audio Content
In contrast to all these Adobe Audition noise reduction alternatives, here is another. Wondershare Filmora is a wide platform for video, audio, and visual editing. The tool allows users to use manual and AI features to enhance content. In addition, Filmora introduced its V13 upgrade with new AI features. Amongst them is the AI Vocal Remover tool that separates vocals from background noise.
Using this tool can help you embed vocals in video tutorials or vlogs. In addition, Filmora also offers an Audio Denoise feature to remove distracting noises and voices. Users can enhance speech by removing wind noise, humming, and hissing. In addition, you can take Filmora’s Denoise AI’s assistance to do this.
Steps for Filmora AI Audio Denoise
If you wish to employ Filmora’s denoise feature, you are at the right place. This tool enables AI Speech Enhancement and Wind Removal with a denoise option. In addition, it has DeReverb, Hum Removal, and Hiss Removal. Users can manually adjust the value of this slider to set audio preferences. By following this step-by-step guide, users can remove background noises from video:
Free Download For Win 7 or later(64-bit)
Free Download For macOS 10.14 or later
Step 1: Initiate Filmora and Import Media to Timeline
First, download this AI software on your device and launch it. After logging in, locate and hit the “New Project” option and enter its editing interface. Afterward, click the “Ctrl + I” keys and choose files from your device. Once the files are imported, drag and place them in the timeline.

Step 2: Activate Audio Denoise
Once the media is in the timeline, select it and navigate towards the right-side panel. Under the “Audio” tab, locate and expand the “Denoise” option. In this section, enable the “Normal Denoise” button, which will auto-denoise audio. You can also use the “Denoise Level” slider to adjust the intensity of denoise.

Step 3: Export the Edited File
Once you have made all the changes, click the “Export” button at the top right corner. Further, adjust export settings in the appeared window and click the “Export” button.

Bonus Tip: Remove Vocals from Audio with Dedicated AI Vocal Remover in Filmora
Other than denoising, you can use Vocal Remover to extract speech from the background. It separates both vocals and background noise. We have crafted the step-by-step procedure to use vocal remover:
Step 1: Start Filmora and Import Video
Begin by installing and launching Wondershare Filmora on your device. Log in and select the “New Project” tab to access Filmora’s editing interface. Next, use the “Import” option to import files from your device. Once imported, simply drag and drop them onto the timeline.

Step 2: Access the AI Vocal Remover
Next, direct towards the timeline panel and right-click on the video in the timeline. From the options menu, select the “AI Vocal Remover” option. The AI will start separating vocals from background audio.

Step 3: Download the AI Processed Video
Once both vocals and background noise are separate, delete the background audio. Then, click the “Export” button to download this file on your device.

Free Download For Win 7 or later(64-bit)
Free Download For macOS 10.14 or later
Conclusion
After reading this article, users have knowledge of noise reduction in Audition. The article discussed different methods of removing noises in this professional software. Users can employ the web-based Adobe Audition noise reduction alternatives.
If you want a next-level tool for creative editing, then download Wondershare Filmora. The article discussed two methods for enhancing audio content. The software is compatible across multiple platforms to assist all types of users.
Free Download Free Download Learn More
Part 1: What Do You Know About Background Noise?
Background noise is anything that disturbs the pace of the video and diverts the viewer’s attention. It is the unwanted and unintended sound that takes up your audio. This may include someone chatting in the background, wind noise, and other noises. These factors decline and disrupt the clarity of audio. However, these elements can be managed through various tools and techniques to help creators.
Part 2: How to Remove Noise from Adobe Audition: A Comprehensive Review
Adobe Audition is a tool tailored to assist in audio editing tasks with precision. Users can create, merge, and mix different sound effects and be creative with them. It also has seamless support of Adobe After Effects and Adobe Stock for this purpose. Noise reduction Audition is one of its features that helps in cleaning and enhancing audio. It clears out any unnecessary background noises from any project.
In addition, the tool allows you to manage the audio levels for denoising. Along with manual settings, you can also add denoise effects to reduce background effects. You can manage high and low frequencies in Adobe Audition to remove noise. Upon editing this software, you can review the results afterward.
Different Methods of Audio Reduction in Adobe Audition
As a content creator, you must often manage dialogues and music within a video. Combining both can sometimes get the focus off actual dialogues. This can be due to many reasons; however, the solution is noise reduction in Audition. In this section, you can explore different methods to reduce noise:
1. Noise Reduction Effect
In this section, we are doing a noise reduction Audition manually. The process is straightforward, and here is a step-by-step guide to it:
Step 1: Upon importing your audio in Adobe Audition, navigate towards the top toolbar. Select the “Effects” tab and choose “Noise Reduction/Restoration” from the dropdown menu. As the menu expands further, select “Noise Reduction.”
Step 2: This will feature a Noise Reduction window on your screen. In this window, select the “Capture Noise Print” tab and adjust the Noise Reduction slider. Afterwards, press the play button on this window to listen to the audio and select “Apply.”
2. DeNoise Effect
This is the second method of Adobe Audition to remove noise. Accessing this option is almost the same, but settings may vary. Here is an instruction manual on how you can denoise in Audition:
Step 1: Once you have imported media into the timeline, reach the upper toolbar. Look for the “Effects” tab and proceed to the “Noise Reduction/Restoration” settings. From the expansion panel, choose the “DeNoise” option.
Step 2: After accessing the DeNoise window appearing on the screen, direct towards it. Then, change the position of the “Amount” slider and play your audio. Further, select the “Apply” button to add this effect to your audio.
3. Dynamic Effect
Another audio effect that you can apply and adjust in the same manner is the dynamic effect. Follow the steps given below to achieve this effect:
Step 1: After selecting the “Audio” tab, choose “Amplitude and Compression” from the dropdown menu. Expand this option and select “Dynamics” from the expansion menu.
Step 2: From the Dynamics window, expand the “Preset” option and set it to “Default.” Further, activate the “AutoGate” option and change the “Threshold” value. Then, click “Apply” to save and apply these settings.
Part 3: Other Solutions That Can Be Tried to Remove Noise from Videos
Since Adobe Audition remove noise has a professional interface, it might trouble some of you. The settings can be challenging to apply, so this section is all about alternatives. In this section, you can find the online solutions for noise reduction below:
1. Flixier
With this online Adobe Audition remove noise alternative, you can remove background noise. Users simply need to upload a video and activate the enhanced audio option. The audio enhancer eliminates unnecessary sound, giving it a name and description. It is compatible with popular and worldwide media formats like WAV, MP3, etc. Moreover, you can share the video straight to social platforms.
Key Features
- Offers an Improve Quality feature to clear up and enhance speech.
- Users can edit audio after denoising, and you can access its audio library to apply effects.
- Users can detach audio from the clip or fade in and out the audio effects to align with the video.
2. MyEdit
Are you looking for an online AI alternative to Adobe Audition noise reduction? This is a versatile platform for removing unwanted audio from up to 100 MB file size. It can denoise a 10 minutes file of formats like MP3, MP4, WAV, and FLAC. It enhances quality through audio denoise, wind remover, and speech enhancement. It uses AI technology to auto-remove background noise and enables a preview.
Key Features
- Users can employ its Vocal Remover to create clear and high-quality voiceovers.
- The user interface is a simple upload-to-convert process and doesn’t take up any storage.
- The AI helps accelerate the denoise process and retains audio quality.
3. KwiCut
Utilize this web-based Adobe Audition remove noise alternative to eliminate background noises. It can remove anything that declines an audio quality, like hums, hisses, and more. It removes any distractions in the background that decline communication. The AI assists in enhancing speech to maintain the professional element in the continent.
Key Features
- The tool supports a range of audio and video formats like MP3, MOV, WAV, and more.
- It supports text-based audio editing to edit audio or remove secondary noises.
- To create effective voiceovers for videos, use KwiCut’s voice cloning feature.
Part 4: Wondershare Filmora: A Unique Solution to Reducing Noise in Video and Audio Content
In contrast to all these Adobe Audition noise reduction alternatives, here is another. Wondershare Filmora is a wide platform for video, audio, and visual editing. The tool allows users to use manual and AI features to enhance content. In addition, Filmora introduced its V13 upgrade with new AI features. Amongst them is the AI Vocal Remover tool that separates vocals from background noise.
Using this tool can help you embed vocals in video tutorials or vlogs. In addition, Filmora also offers an Audio Denoise feature to remove distracting noises and voices. Users can enhance speech by removing wind noise, humming, and hissing. In addition, you can take Filmora’s Denoise AI’s assistance to do this.
Steps for Filmora AI Audio Denoise
If you wish to employ Filmora’s denoise feature, you are at the right place. This tool enables AI Speech Enhancement and Wind Removal with a denoise option. In addition, it has DeReverb, Hum Removal, and Hiss Removal. Users can manually adjust the value of this slider to set audio preferences. By following this step-by-step guide, users can remove background noises from video:
Free Download For Win 7 or later(64-bit)
Free Download For macOS 10.14 or later
Step 1: Initiate Filmora and Import Media to Timeline
First, download this AI software on your device and launch it. After logging in, locate and hit the “New Project” option and enter its editing interface. Afterward, click the “Ctrl + I” keys and choose files from your device. Once the files are imported, drag and place them in the timeline.
Step 2: Activate Audio Denoise
Once the media is in the timeline, select it and navigate towards the right-side panel. Under the “Audio” tab, locate and expand the “Denoise” option. In this section, enable the “Normal Denoise” button, which will auto-denoise audio. You can also use the “Denoise Level” slider to adjust the intensity of denoise.
Step 3: Export the Edited File
Once you have made all the changes, click the “Export” button at the top right corner. Further, adjust export settings in the appeared window and click the “Export” button.
Bonus Tip: Remove Vocals from Audio with Dedicated AI Vocal Remover in Filmora
Other than denoising, you can use Vocal Remover to extract speech from the background. It separates both vocals and background noise. We have crafted the step-by-step procedure to use vocal remover:
Step 1: Start Filmora and Import Video
Begin by installing and launching Wondershare Filmora on your device. Log in and select the “New Project” tab to access Filmora’s editing interface. Next, use the “Import” option to import files from your device. Once imported, simply drag and drop them onto the timeline.
Step 2: Access the AI Vocal Remover
Next, direct towards the timeline panel and right-click on the video in the timeline. From the options menu, select the “AI Vocal Remover” option. The AI will start separating vocals from background audio.
Step 3: Download the AI Processed Video
Once both vocals and background noise are separate, delete the background audio. Then, click the “Export” button to download this file on your device.
Free Download For Win 7 or later(64-bit)
Free Download For macOS 10.14 or later
Conclusion
After reading this article, users have knowledge of noise reduction in Audition. The article discussed different methods of removing noises in this professional software. Users can employ the web-based Adobe Audition noise reduction alternatives.
If you want a next-level tool for creative editing, then download Wondershare Filmora. The article discussed two methods for enhancing audio content. The software is compatible across multiple platforms to assist all types of users.
Fine-Tuning Sound Quality: Expert Tips on Minimizing Audio Reverb Effectively
Audio content can sometimes sound reverberant and echo-y until you finish recording it. Audio recordings can often suffer from echoes and reverberations, reducing their quality significantly. The content will lose clarity and professionalism as a result. Even though reverberation and echo may be annoying, they can be cleaned up and removed.
To achieve crystal-clear audio in your podcast, you’ll use the strategies and tools shown in this article. Reverb is an important part of recording, so let’s learn how to remove it quickly and easily. Keeping reading will help you ensure your recordings sound excellent!
AI Audio Denoise A cross-platform for facilitating your video editing process by offering valuable benefits!
Free Download Free Download Learn More
Part 1. Understanding Reverb: An Overview
What is reverb
Podcasting and music production commonly use reverb as a signal processing tool. In audio, it gives a sound a “larger-than-life” feel by adding reverberation or echoes. Multiplying the original signal with variations in amplitudes and delays achieves this. In addition to bringing life to a track, this creates a unique effect. “Echo” is also a term used in colloquial language.
Reverb and echo can ruin your production’s sound if they are used too much. Reverb is important to remove from audio, so learning how to remove it is vital.

How does reverb happen, and why can it be a bit of a problem?
Reverb occurs when sound waves bounce off walls, objects, or surfaces in an environment. Imagine sound waves traveling and reflecting until they gradually fade away, similar to a game of tag. Audio production can benefit and suffer from this natural phenomenon.
Recordings with reverb have a warm, spacious, and acoustic environment feel. Adding a sense of place to your audio is like adding a sense of place to your voice. A sonic mess can be created by too much reverb at the wrong places. You may have difficulty hearing the essential elements of your audio.
Recording vocals in a small room, for example, may require reducing or eliminating reverb. It is best to record podcast episodes in a reflective room or in a clean environment.
Part 2. Remove Reverb From Audio Online With Media.io: Step-By-Step
Introducing Media.io for reverb removal online
If you want to make audio content, Media.io is a great tool to use. Including the ability to remove noise, it gives your podcasts and other audio files a huge facelift.
Using this tool is easy because it has straightforward steps. Navigating the interface is easy, and it has a simple interface.
With Media.io, every unwanted noise is auto-detected by AI. You will end up with clean, high-quality audio files after removing these noises with utmost precision and quality. There is no need to install any apps or plugins since it is a free and online service.
A step-by-step guide to removing reverb in audio
1. Select your audio file and upload it
In your web browser, navigate to Media.io to begin your reverb removal journey. Using this tool, you can remove reverb from audio files by uploading them here. Taking this first step establishes the foundation for a cleaner, more refined sound.

2. Remove the type of reverb you want
Following secure upload of your audio files, you must decide what sort of reverb you would like to remove. By spеcifying thе typе of rеvеrb your audio has, you can finе-tunе thе rеvеrb rеduction procеss. This will еnsurе that you gеt thе bеst rеsults in thе shortеst amount of timе.

3. Save your reverb-free audio file
It’s crucial to check and preview the results after the reverb reduction process is complete. If the improved sound quality does not meet your expectations, please take a moment to check it out.
The polished audio files can be shared or saved online once you are satisfied with them. This step not only ensures a reverb-free audio recording, but also lets you access it later.

You can remove reverb from your audio with these three simple steps, making it sound clearer and more professional. Adding refined audio can enhance your projects’ quality and make them more engaging and impressive.
Using Media.io has a few limitations
All registered users of Media.io can remove background noise for free for an unlimited period of time. Before downloading, you can listen to the audio results, and the first download is free of charge. Media.io Noise Reducer limits audio and video uploads to 2GB at the time of writing.
Part 3. Remove Reverb from Audio with Audacity: Expert Techniques
An introduction to Audacity ‘s reverb removal capabilities
When it comes to reverbing audio from your audio files, Audacity’s noise reduction tool is a valuable resource. Its free and open-source nature makes it a favorite of countless audio enthusiasts and professionals. Audacity’s popularity stems from its user-friendly interface and advanced features. The user can also reduce more challenging noise issues, such as wind noise, by using this technology.
Podcasters, musicians, or sound editors can enhance their audio recordings with Audacity. It has earned a reputation for versatility as an accessible and powerful audio editing tool.
Audacity ‘s step-by-step guide to removing reverb
Step 1. Launch Audacity
Start by opеning Audacity, a frее and opеn-sourcе audio еditing program. Install it on your computеr if you havеn’t alrеady. Procееd to thе nеxt stеp aftеr launching thе program.

Step 2. Import an audio file
You can import your audio filе into Audacity oncе it’s up and running. Thеn sеlеct “Import” and “Audio” in thе top mеnu. Locate your audio file and select it. You’ll see the audio waves displayed on Audacity’s timeline.

Step 3. Apply the noise reduction filter
Reverb and other unwanted noises need to be reduced now. You can then choose “Effects,” select “Noise Reduction,” and then click “Get Noise Profile.” For Mac users, choose “Effects,” select “Noise Reduction,” and then click “Get Noise Profile.”
As a rеsult of thе filtеr’s analysis, a noisе profilе will bе crеatеd. Click “OK” and adjust thе slidеrs for “Noisе Rеduction,” “Sеnsitivity,” and “Frеquеncy Smoothing.” Makе surе thеsе sеttings arе sеt appropriatеly for your rеcording. To apply thе filtеr, click “OK” oncе you arе satisfiеd.

Step 4. Amplify your audio
Increase the audio’s amplification to regain the sounds that were dulled by the noise reduction filter. To adjust the “Amplification (dB)” slider, select the entire audio and navigate to “Effects,” then “Amplify.” The recording will sound cleaner once you click “OK.”

Step 5. Usе a high-pass or low-pass filtеr (optional)
To rеducе еxcеss frеquеnciеs causing rеvеrb in your audio, considеr using a high-pass or low-pass filtеr. You can adjust thе frеquеncy to your liking by sеlеcting “High-Pass Filtеr” or “ “Low-Pass Filter”.

Step 6. Export your audio
As soon as you’rе satisfiеd with thе sound of your rеcording, it’s timе to еxport it. In thе top mеnu, click on “Filе,” choosе “Export,” namе your filе (MP3, WAV, еtc. ), and click “Export.” Thе shortcut “Ctrl+Shift+E” is also availablе for еxporting filеs.

Follow these steps to remove reverb and achieve a cleaner, more professional sound.
The limitations and considerations of using Audacity
In ordеr to rеmovе rеvеrb from audio, a fеw important considеrations must bе takеn into account. Ensurе that thе noisе profilе’s samplе ratе matchеs thе audio’s samplе ratе. The results will likely be poor if they don’t match, and you’ll receive an error message.
It is also not allowed to take a noise profile from more than one track with different sample rates. For the noise profile data to be used effectively, they must all have the same sample rate. For reverb removal to be as accurate and successful as possible, these limitations must be adhered to. Keeping your audio recordings in good shape.
Part 4. Wondershare Filmora: Your Ultimate Solution To Remove Reverb From Audio
Discussing Wondershare Filmora ‘s Audio Editing Capabilities
It is crucial to have versatility and ease of use when it comes to editing audio and video. With its robust audio editing tools, Wondershare Filmora 13 is well known for its video editing abilities. Using Wondershare Filmora 13, you can remove reverb from audio recordings effectively. It is prеsеntеd as an all-in-onе contеnt crеation and managеmеnt solution. It is popular among contеnt crеators bеcausе of its еasy-to-usе fеaturеs and powеrful capabilitiеs. Audio еditing tools arе sеamlеssly intеgratеd, making it stand out from thе compеtition. Crеating a onе-stop shop for audio and vidеo post-production.
Free Download For Win 7 or later(64-bit)
Free Download For macOS 10.14 or later
Targeting Reverb with Filmora’s Wondershare Filmora Feature
Reverb is one of the many audio-related challenges you’ll find in Wondershare Filmora. It is the “Audio Denoise” feature that makes these tools stand out. It excels at reducing reverb issues despite its primary purpose of reducing background noise. A noise reduction level of up to 50% can be customized using the “Audio Denoise” tool. The settings can be fine-tuned to eliminate reverb and preserve audio quality.
Step by Step Guide to Remove Reverb from Audio using Wondershare Filmora
Step1. Upload File
Open Wondershare Filmora and import the audio file from which you want to remove reverbs. Ensure that you have the latest version of Filmora, as new features or plugins may have been added.

Step2. Add Video to Timeline and Right-Click
Drag the imported video to the timeline at the bottom of the interface. Right-click on the video clip in the timeline.
Step3. Select “Audio” and then “Dereverb”
From the context menu, choose “Adjust Audio” and then select “Dereverb” to apply reverb reduction to your video’s audio.

Step4. Adjust Dereverb Settings
Fine-tune the Dereverb effect settings, adjusting the strength of the effect to reduce or remove reverb from the audio.

Step5. Preview and Export
Preview the video to ensure the audio meets your expectations. Once satisfied, click “OK” or “Apply” to confirm the changes. Finally, export your video with the adjusted audio settings.

Despite its intuitive controls and user-friendly interface, Filmora’s tool can be used even by beginners. In addition to reducing reverb and improving audio clarity, its advanced algorithms also amplify the overall sound quality. You can ensure that your videos are seamless and professional. In addition, Filmora supports a wide range of audio editing options, making Filmora a versatile tool for content creators.
Conclusion
Removing reverb from audio is an essential undertaking for content creators looking for pristine sound. Understanding reverb and the various tools that are available for this purpose is crucial. The user-friendly and AI-powered approach of Media.io makes it a great online solution. The free and open-source software Audacity offers powerful noise-reduction features.
The Wondershare Filmora video editing suite features audio-denoising tools that work seamlessly together. It is an accessible choice for both beginners and experienced editors. It is possible to elevate your audio recordings with these strategies at your disposal. Ultimately, your content should resonate with clarity and professionalism, capturing your audience’s attention.
Free Download Free Download Learn More
Part 1. Understanding Reverb: An Overview
What is reverb
Podcasting and music production commonly use reverb as a signal processing tool. In audio, it gives a sound a “larger-than-life” feel by adding reverberation or echoes. Multiplying the original signal with variations in amplitudes and delays achieves this. In addition to bringing life to a track, this creates a unique effect. “Echo” is also a term used in colloquial language.
Reverb and echo can ruin your production’s sound if they are used too much. Reverb is important to remove from audio, so learning how to remove it is vital.
How does reverb happen, and why can it be a bit of a problem?
Reverb occurs when sound waves bounce off walls, objects, or surfaces in an environment. Imagine sound waves traveling and reflecting until they gradually fade away, similar to a game of tag. Audio production can benefit and suffer from this natural phenomenon.
Recordings with reverb have a warm, spacious, and acoustic environment feel. Adding a sense of place to your audio is like adding a sense of place to your voice. A sonic mess can be created by too much reverb at the wrong places. You may have difficulty hearing the essential elements of your audio.
Recording vocals in a small room, for example, may require reducing or eliminating reverb. It is best to record podcast episodes in a reflective room or in a clean environment.
Part 2. Remove Reverb From Audio Online With Media.io: Step-By-Step
Introducing Media.io for reverb removal online
If you want to make audio content, Media.io is a great tool to use. Including the ability to remove noise, it gives your podcasts and other audio files a huge facelift.
Using this tool is easy because it has straightforward steps. Navigating the interface is easy, and it has a simple interface.
With Media.io, every unwanted noise is auto-detected by AI. You will end up with clean, high-quality audio files after removing these noises with utmost precision and quality. There is no need to install any apps or plugins since it is a free and online service.
A step-by-step guide to removing reverb in audio
1. Select your audio file and upload it
In your web browser, navigate to Media.io to begin your reverb removal journey. Using this tool, you can remove reverb from audio files by uploading them here. Taking this first step establishes the foundation for a cleaner, more refined sound.
2. Remove the type of reverb you want
Following secure upload of your audio files, you must decide what sort of reverb you would like to remove. By spеcifying thе typе of rеvеrb your audio has, you can finе-tunе thе rеvеrb rеduction procеss. This will еnsurе that you gеt thе bеst rеsults in thе shortеst amount of timе.
3. Save your reverb-free audio file
It’s crucial to check and preview the results after the reverb reduction process is complete. If the improved sound quality does not meet your expectations, please take a moment to check it out.
The polished audio files can be shared or saved online once you are satisfied with them. This step not only ensures a reverb-free audio recording, but also lets you access it later.
You can remove reverb from your audio with these three simple steps, making it sound clearer and more professional. Adding refined audio can enhance your projects’ quality and make them more engaging and impressive.
Using Media.io has a few limitations
All registered users of Media.io can remove background noise for free for an unlimited period of time. Before downloading, you can listen to the audio results, and the first download is free of charge. Media.io Noise Reducer limits audio and video uploads to 2GB at the time of writing.
Part 3. Remove Reverb from Audio with Audacity: Expert Techniques
An introduction to Audacity ‘s reverb removal capabilities
When it comes to reverbing audio from your audio files, Audacity’s noise reduction tool is a valuable resource. Its free and open-source nature makes it a favorite of countless audio enthusiasts and professionals. Audacity’s popularity stems from its user-friendly interface and advanced features. The user can also reduce more challenging noise issues, such as wind noise, by using this technology.
Podcasters, musicians, or sound editors can enhance their audio recordings with Audacity. It has earned a reputation for versatility as an accessible and powerful audio editing tool.
Audacity ‘s step-by-step guide to removing reverb
Step 1. Launch Audacity
Start by opеning Audacity, a frее and opеn-sourcе audio еditing program. Install it on your computеr if you havеn’t alrеady. Procееd to thе nеxt stеp aftеr launching thе program.
Step 2. Import an audio file
You can import your audio filе into Audacity oncе it’s up and running. Thеn sеlеct “Import” and “Audio” in thе top mеnu. Locate your audio file and select it. You’ll see the audio waves displayed on Audacity’s timeline.
Step 3. Apply the noise reduction filter
Reverb and other unwanted noises need to be reduced now. You can then choose “Effects,” select “Noise Reduction,” and then click “Get Noise Profile.” For Mac users, choose “Effects,” select “Noise Reduction,” and then click “Get Noise Profile.”
As a rеsult of thе filtеr’s analysis, a noisе profilе will bе crеatеd. Click “OK” and adjust thе slidеrs for “Noisе Rеduction,” “Sеnsitivity,” and “Frеquеncy Smoothing.” Makе surе thеsе sеttings arе sеt appropriatеly for your rеcording. To apply thе filtеr, click “OK” oncе you arе satisfiеd.
Step 4. Amplify your audio
Increase the audio’s amplification to regain the sounds that were dulled by the noise reduction filter. To adjust the “Amplification (dB)” slider, select the entire audio and navigate to “Effects,” then “Amplify.” The recording will sound cleaner once you click “OK.”
Step 5. Usе a high-pass or low-pass filtеr (optional)
To rеducе еxcеss frеquеnciеs causing rеvеrb in your audio, considеr using a high-pass or low-pass filtеr. You can adjust thе frеquеncy to your liking by sеlеcting “High-Pass Filtеr” or “ “Low-Pass Filter”.
Step 6. Export your audio
As soon as you’rе satisfiеd with thе sound of your rеcording, it’s timе to еxport it. In thе top mеnu, click on “Filе,” choosе “Export,” namе your filе (MP3, WAV, еtc. ), and click “Export.” Thе shortcut “Ctrl+Shift+E” is also availablе for еxporting filеs.
Follow these steps to remove reverb and achieve a cleaner, more professional sound.
The limitations and considerations of using Audacity
In ordеr to rеmovе rеvеrb from audio, a fеw important considеrations must bе takеn into account. Ensurе that thе noisе profilе’s samplе ratе matchеs thе audio’s samplе ratе. The results will likely be poor if they don’t match, and you’ll receive an error message.
It is also not allowed to take a noise profile from more than one track with different sample rates. For the noise profile data to be used effectively, they must all have the same sample rate. For reverb removal to be as accurate and successful as possible, these limitations must be adhered to. Keeping your audio recordings in good shape.
Part 4. Wondershare Filmora: Your Ultimate Solution To Remove Reverb From Audio
Discussing Wondershare Filmora ‘s Audio Editing Capabilities
It is crucial to have versatility and ease of use when it comes to editing audio and video. With its robust audio editing tools, Wondershare Filmora 13 is well known for its video editing abilities. Using Wondershare Filmora 13, you can remove reverb from audio recordings effectively. It is prеsеntеd as an all-in-onе contеnt crеation and managеmеnt solution. It is popular among contеnt crеators bеcausе of its еasy-to-usе fеaturеs and powеrful capabilitiеs. Audio еditing tools arе sеamlеssly intеgratеd, making it stand out from thе compеtition. Crеating a onе-stop shop for audio and vidеo post-production.
Free Download For Win 7 or later(64-bit)
Free Download For macOS 10.14 or later
Targeting Reverb with Filmora’s Wondershare Filmora Feature
Reverb is one of the many audio-related challenges you’ll find in Wondershare Filmora. It is the “Audio Denoise” feature that makes these tools stand out. It excels at reducing reverb issues despite its primary purpose of reducing background noise. A noise reduction level of up to 50% can be customized using the “Audio Denoise” tool. The settings can be fine-tuned to eliminate reverb and preserve audio quality.
Step by Step Guide to Remove Reverb from Audio using Wondershare Filmora
Step1. Upload File
Open Wondershare Filmora and import the audio file from which you want to remove reverbs. Ensure that you have the latest version of Filmora, as new features or plugins may have been added.
Step2. Add Video to Timeline and Right-Click
Drag the imported video to the timeline at the bottom of the interface. Right-click on the video clip in the timeline.
Step3. Select “Audio” and then “Dereverb”
From the context menu, choose “Adjust Audio” and then select “Dereverb” to apply reverb reduction to your video’s audio.
Step4. Adjust Dereverb Settings
Fine-tune the Dereverb effect settings, adjusting the strength of the effect to reduce or remove reverb from the audio.
Step5. Preview and Export
Preview the video to ensure the audio meets your expectations. Once satisfied, click “OK” or “Apply” to confirm the changes. Finally, export your video with the adjusted audio settings.
Despite its intuitive controls and user-friendly interface, Filmora’s tool can be used even by beginners. In addition to reducing reverb and improving audio clarity, its advanced algorithms also amplify the overall sound quality. You can ensure that your videos are seamless and professional. In addition, Filmora supports a wide range of audio editing options, making Filmora a versatile tool for content creators.
Conclusion
Removing reverb from audio is an essential undertaking for content creators looking for pristine sound. Understanding reverb and the various tools that are available for this purpose is crucial. The user-friendly and AI-powered approach of Media.io makes it a great online solution. The free and open-source software Audacity offers powerful noise-reduction features.
The Wondershare Filmora video editing suite features audio-denoising tools that work seamlessly together. It is an accessible choice for both beginners and experienced editors. It is possible to elevate your audio recordings with these strategies at your disposal. Ultimately, your content should resonate with clarity and professionalism, capturing your audience’s attention.
Also read:
- New How to Remove Audio From Video for 2024
- Updated 2024 Approved Elated Acoustic Soundscape for Birthday Video Commemorating
- 2024 Approved Transform Your TikTok Experience Simple Ways to Reduce Video Noise Levels
- Updated Cutting-Edge Audio Tricks for a Polished iMovie Experience
- Updated In 2024, Clearer Soundscapes Strategies to Eradicate Unwanted Whistling Noises
- New 2024 Approved The Essential List of Zoom Voice Modification Apps for Adding Personality and Humor to Your Conversations
- New In 2024, Detect Clapping Impact Soundscape
- New Identify Wolfs Call Resonance for 2024
- 2024 Approved Music Meets Motion Advanced Techniques for Beats Alignment in Final Cut Pro X
- 3 Easy Ways to Booster/Increase Volume on Windows for Free for 2024
- Mastering Silence Effective Video Noise Reduction Techniques in Adobe Premiere Pro for 2024
- Top 8 Masterful Audio Designs in Film
- Updated Best-Worth Websites to Find Your Perfect Montage Soundtrack
- Updated In 2024, Innovative Practices for Distinguished Music Video Production
- Updated Essential Websites for Obtaining Free and Unlicensed Outro Tracks
- Updated 2024 Approved Top 5 Digital Audio Organizers for Seamless MP3 Management
- Top-Ranked Noise Reducer App Boost Visual Impact in Your Clips for 2024
- Best Android Data Recovery - undelete lost call logs from Hot 40i
- Looking For A Location Changer On Samsung Galaxy M54 5G? Look No Further | Dr.fone
- In 2024, The Ultimate Guide to Xiaomi Redmi Note 13 5G Pattern Lock Screen Everything You Need to Know
- 3 Methods to Mirror Realme 10T 5G to Roku | Dr.fone
- Updated The Ultimate Guide to Cropping Images in Final Cut Pro X
- Will iSpoofer update On Oppo A56s 5G | Dr.fone
- Device unlock Honor
- Updated In 2024, Watch Local Videos on Chromecast A Comprehensive Guide for Windows, Mac, Android, and iOS Users
- How to Easily Hard reset my Xiaomi 13T | Dr.fone
- How to Transfer Photos From Realme Narzo N55 to Samsung Galaxy S21 Ultra | Dr.fone
- How to Unlock Infinix Phone Pattern Lock without Factory Reset
- In 2024, Top 10 AirPlay Apps in Motorola Moto G14 for Streaming | Dr.fone
- In 2024, iSpoofer is not working On Apple iPhone SE? Fixed | Dr.fone
- Title: Updated Top 10 Digital Audio Workstation Tools Free vs Paid Options for 2024
- Author: Paul
- Created at : 2024-05-05 06:08:42
- Updated at : 2024-05-06 06:08:42
- Link: https://voice-adjusting.techidaily.com/updated-top-10-digital-audio-workstation-tools-free-vs-paid-options-for-2024/
- License: This work is licensed under CC BY-NC-SA 4.0.
