
:max_bytes(150000):strip_icc():format(webp)/handstypingonkeyboardCROPPED-6b13200ac0d24ef58817343cc4975ebd.jpg)
Updated The Comprehensive Tutorial on Detaching Audible Elements From Video Clips
The Comprehensive Tutorial on Detaching Audible Elements From Video Clips (2023 Update)
Audio Extractor: How to Extract Audio from Video

Shanoon Cox
Mar 27, 2024• Proven solutions
You have a video that includes a great soundtrack that you’d like to extract it so that you can listen to it using the media player - a portable MP3 player, for instance. That can be a very easy job if you use the professional video editing software- Wondershare Filmora . Just follow this guide to extract audio from video with ease.
If you didn’t have Filmora yet, click the download button below to get started.
 Download Mac Version ](https://tools.techidaily.com/wondershare/filmora/download/ )
1. Import video files
Install and run this Wondershare Filmora. Then click the “Import” button to locate and add your target video. You can also directly drag and drop the video to the program. The loaded video will be listed in the media library as the following picture shows.

2. Start extracting audio from video

After importing video to Wondershare Filmora, drag the video from the media library to the video Timeline. You can then right-click the video clip and choose “Audio Detach” to extract audio from the video. After a while, video and audio will be displayed on different tracks. If you don’t want to keep the video file, right-click it and choose “Delete” to remove it from the video timeline.
3. Edit the extracted audio if you like
Double click the extracted file in the audio track and then you will see the audio editing panel.
You can add fade-in and fade-out effects, change the sound volume , adjust the pitch to change the voice , etc. as you like.

If you find some unnecessary sounds in the extracted audio file, and you want to delete them, just put the cursor to the place where you would like the deletion to start and press the “Split” button to split. The end of the deletion area can be marked similarly – play the audio and select the final point of the area to be excluded from the output audio, and then press the “Split” button again.

Click the split part in the audio track, press the Delete button on the keyboard, or click the Delete icon on the toolbar to remove the unwanted audio clip.
4. Save the edited audio file
After that, click the “Export” button to export the extracted audio track. Here different options are provided. For example, you can save the audio in regular formats such as MP3, MP4, WMV, AVI, and so on in the “Device” tab.

To customize the audio Encoder, Sample Rate, Bit Rate or Channel settings, click the SETTINGS button to start.
Besides that, you can export the audio file for playback on portable devices, burn it to DVD or share it to YouTube directly.
Select a desirable output method and then click the “Export” button to save the audio track.
Tips: Filmora supports a wide range of audio and video formats. You can easily extract mp3 from mp4 video, or extract the audio from video and then save it in .wav format.

Shanoon Cox
Shanoon Cox is a writer and a lover of all things video.
Follow @Shanoon Cox
Shanoon Cox
Mar 27, 2024• Proven solutions
You have a video that includes a great soundtrack that you’d like to extract it so that you can listen to it using the media player - a portable MP3 player, for instance. That can be a very easy job if you use the professional video editing software- Wondershare Filmora . Just follow this guide to extract audio from video with ease.
If you didn’t have Filmora yet, click the download button below to get started.
Download Mac Version ](https://tools.techidaily.com/wondershare/filmora/download/ )
1. Import video files
Install and run this Wondershare Filmora. Then click the “Import” button to locate and add your target video. You can also directly drag and drop the video to the program. The loaded video will be listed in the media library as the following picture shows.
2. Start extracting audio from video
After importing video to Wondershare Filmora, drag the video from the media library to the video Timeline. You can then right-click the video clip and choose “Audio Detach” to extract audio from the video. After a while, video and audio will be displayed on different tracks. If you don’t want to keep the video file, right-click it and choose “Delete” to remove it from the video timeline.
3. Edit the extracted audio if you like
Double click the extracted file in the audio track and then you will see the audio editing panel.
You can add fade-in and fade-out effects, change the sound volume , adjust the pitch to change the voice , etc. as you like.
If you find some unnecessary sounds in the extracted audio file, and you want to delete them, just put the cursor to the place where you would like the deletion to start and press the “Split” button to split. The end of the deletion area can be marked similarly – play the audio and select the final point of the area to be excluded from the output audio, and then press the “Split” button again.
Click the split part in the audio track, press the Delete button on the keyboard, or click the Delete icon on the toolbar to remove the unwanted audio clip.
4. Save the edited audio file
After that, click the “Export” button to export the extracted audio track. Here different options are provided. For example, you can save the audio in regular formats such as MP3, MP4, WMV, AVI, and so on in the “Device” tab.
To customize the audio Encoder, Sample Rate, Bit Rate or Channel settings, click the SETTINGS button to start.
Besides that, you can export the audio file for playback on portable devices, burn it to DVD or share it to YouTube directly.
Select a desirable output method and then click the “Export” button to save the audio track.
Tips: Filmora supports a wide range of audio and video formats. You can easily extract mp3 from mp4 video, or extract the audio from video and then save it in .wav format.
Shanoon Cox
Shanoon Cox is a writer and a lover of all things video.
Follow @Shanoon Cox
Audacity Mastery: Enhancing Your Podcast Sound and Delivery
Free audio recording & editing software audacity for podcasts is available for Windows, Linux, & macOS. Even though it’s not expressly built for podcasts, it is a popular option for recording podcasts. If you don’t mind a steep learning curve, you can easily record, edit, & export a high-quality podcast with this software.
How to Record a Podcast using Audacity
Despite its complexity, audacity for podcasts doesn’t need a detailed understanding of the software’s internals to begin using it. As a beginner, we explain all of the initial settings and basic editing choices you’ll need to know and how to output in a format that can be used for podcasting.
Here’s how to get started recording your podcast using Audacity for Podcasts:
- By selecting the box to the left of your microphone, you may choose your audio host. Select MME for Windows and Core Audio for Mac OS X.

- Select the audio interface or microphone from the menu to the right of the microphone icon. In order to record your Audacity for Podcasts, Audacity utilizes the device that you pick from this menu.

- Select your headphones by checking the box to the right of a speaker symbol. To playback, the audio files, Audacity for Podcasts utilizes the device you specify from this option.

What you need to know about Audacity’s Input Tester
Test your input before you begin recording your podcast. This helps you to make totally clear that everything is set up properly and that your podcast is recorded.
- The monitor meter may be found on the menu bar at the very top, at the very center. “Click to begin monitoring” is what it says.

- Speak normally into the microphone you’ve placed on your computer.

- Ensure that the Microphone Volume meter doesn’t go over -12dB by adjusting the volume controls.

Audacity for Podcasts Recording Tutorial
Audacity recording is simple after you’ve set up all of the settings you need. Make sure to pick just one (Mono) Recording Channel while you’re recording with a single microphone.
Each microphone is assigned a separate audio channel if you have numerous microphones connected to an audio interface or mixer. There must be a separate microphone and channel for each participant on your podcast so that you can edit them separately and make sure they all sound well together.
Each of these mono channels will be blended into stereo when you export your podcast later.
There is nothing complicated about the actual recording procedure.
- To begin recording your podcast, press the red Record button.

- When you’ve finished recording your podcast, press the black Stop button.

- Once you’ve finished recording, use Ctrl+S to save the project. If Audacity crashes or you shut it by mistake, you won’t be able to recover your edited audio file.
Using Audacity to Edit Your Podcast
Audacity for Podcasts not only allows you to record your podcast, but it also allows you to edit it afterward. It is possible to send your raw podcast to the internet as soon as you complete the recording, but editing may add a degree of polish that makes it more pleasurable for the listener.
You may use Audacity to re-arrange your podcast’s flow by cutting and relocating portions, reducing clipping, and even deleting background noise if one of your mics was too near or someone was talking too loudly. Audacity can even alter the levels of individual recordings.
Some of these editing chores are more difficult than others, but if you just have high-quality equipment & have your settings ideal, the podcast may not need a lot of effort. Check over a few different portions of your podcast to get a sense of how much work has to be done on it before publishing.
In Audacity, you may add music, clips, & sound effects to your podcast intro and outro.
In Audacity, add music, clips, & sound effects for the podcast intro and outro
In Audacity, you may add & move sound clips, such as intro music.
- Click File > Import > Audio or press Ctrl+Shift+I to import your podcast audio into Audacity.

- Make your choice of music for the opening, outro, or anything else you’d want to include.

- It is possible to go back and forth between the past and future by clicking on the top toolbar’s time shift function.

- When your opening music stops, click and drag the main podcast audio track so that it begins when the music ends.

- Add an outro or other sound effects & music that play throughout your podcast by following these similar instructions. There should be a separate channel for each sound file so that they may be easily moved across devices.
- Using the time shift tool, you may relocate an outro to the conclusion of your podcast if necessary. If you wish to add sound effects or music to your podcast, use the time shift tool to move them around.
- To test whether your audio tracks are positioned appropriately, just click the green Play button at any moment. The cursor icon in the toolbar may be used to start listening to a podcast at a different place in the track.
In Audacity, here’s how to export your podcast
After you’ve finished editing your podcast, listen to it one more time to ensure you’re satisfied with the outcome, then save it to ensure you don’t lose your work if anything goes wrong during the export process. When you export your podcast, you’re creating an audio file that you can publish to your podcast host and share with others.
Here’s how to export the Audacity podcast:
- Select File > Export > Export as… from the File menu.
- After giving your podcast a name, click Save.
- If you wish to add metadata, you may do so now, or just hit OK to begin the exporting process.
- This procedure may take a long time if the podcast is lengthy or your machine is sluggish. During this procedure, keep your computer turned on & prevent it from sleeping and hibernating.
- You’re ready to publish your podcast to the podcast host once it’s finished exporting.
Conclusions
For recording, editing, & mixing your own podcast, an Audacity is a great option. And, like many podcasters, you could discover it meets your long-term requirements. With regard to voice effects, we talk about how people may use Filmora to modify and improve their voices. Filmora has the ability to re-speak video and audio, as well as previously recorded voiceovers. Video, audio, and voiceover files may all benefit from the Timeline’s Pitch feature. Change the tonality of a video or recording to give it a unique sound. It’s easy to replace the voices in the videos using Filmora. A video or narrative should accompany your viral in order for it to be effective. Changing Pitch allows you to alter the pitch of your voice. You may modify the pace of the video to alter the voice (Optional). Make a backup copy of the altered media.
For Win 7 or later (64-bit)
For macOS 10.12 or later
- Select the audio interface or microphone from the menu to the right of the microphone icon. In order to record your Audacity for Podcasts, Audacity utilizes the device that you pick from this menu.
- Select your headphones by checking the box to the right of a speaker symbol. To playback, the audio files, Audacity for Podcasts utilizes the device you specify from this option.
What you need to know about Audacity’s Input Tester
Test your input before you begin recording your podcast. This helps you to make totally clear that everything is set up properly and that your podcast is recorded.
- The monitor meter may be found on the menu bar at the very top, at the very center. “Click to begin monitoring” is what it says.
- Speak normally into the microphone you’ve placed on your computer.
- Ensure that the Microphone Volume meter doesn’t go over -12dB by adjusting the volume controls.
Audacity for Podcasts Recording Tutorial
Audacity recording is simple after you’ve set up all of the settings you need. Make sure to pick just one (Mono) Recording Channel while you’re recording with a single microphone.
Each microphone is assigned a separate audio channel if you have numerous microphones connected to an audio interface or mixer. There must be a separate microphone and channel for each participant on your podcast so that you can edit them separately and make sure they all sound well together.
Each of these mono channels will be blended into stereo when you export your podcast later.
There is nothing complicated about the actual recording procedure.
- To begin recording your podcast, press the red Record button.
- When you’ve finished recording your podcast, press the black Stop button.
- Once you’ve finished recording, use Ctrl+S to save the project. If Audacity crashes or you shut it by mistake, you won’t be able to recover your edited audio file.
Using Audacity to Edit Your Podcast
Audacity for Podcasts not only allows you to record your podcast, but it also allows you to edit it afterward. It is possible to send your raw podcast to the internet as soon as you complete the recording, but editing may add a degree of polish that makes it more pleasurable for the listener.
You may use Audacity to re-arrange your podcast’s flow by cutting and relocating portions, reducing clipping, and even deleting background noise if one of your mics was too near or someone was talking too loudly. Audacity can even alter the levels of individual recordings.
Some of these editing chores are more difficult than others, but if you just have high-quality equipment & have your settings ideal, the podcast may not need a lot of effort. Check over a few different portions of your podcast to get a sense of how much work has to be done on it before publishing.
In Audacity, you may add music, clips, & sound effects to your podcast intro and outro.
In Audacity, add music, clips, & sound effects for the podcast intro and outro
In Audacity, you may add & move sound clips, such as intro music.
- Click File > Import > Audio or press Ctrl+Shift+I to import your podcast audio into Audacity.
- Make your choice of music for the opening, outro, or anything else you’d want to include.
- It is possible to go back and forth between the past and future by clicking on the top toolbar’s time shift function.
- When your opening music stops, click and drag the main podcast audio track so that it begins when the music ends.
- Add an outro or other sound effects & music that play throughout your podcast by following these similar instructions. There should be a separate channel for each sound file so that they may be easily moved across devices.
- Using the time shift tool, you may relocate an outro to the conclusion of your podcast if necessary. If you wish to add sound effects or music to your podcast, use the time shift tool to move them around.
- To test whether your audio tracks are positioned appropriately, just click the green Play button at any moment. The cursor icon in the toolbar may be used to start listening to a podcast at a different place in the track.
In Audacity, here’s how to export your podcast
After you’ve finished editing your podcast, listen to it one more time to ensure you’re satisfied with the outcome, then save it to ensure you don’t lose your work if anything goes wrong during the export process. When you export your podcast, you’re creating an audio file that you can publish to your podcast host and share with others.
Here’s how to export the Audacity podcast:
- Select File > Export > Export as… from the File menu.
- After giving your podcast a name, click Save.
- If you wish to add metadata, you may do so now, or just hit OK to begin the exporting process.
- This procedure may take a long time if the podcast is lengthy or your machine is sluggish. During this procedure, keep your computer turned on & prevent it from sleeping and hibernating.
- You’re ready to publish your podcast to the podcast host once it’s finished exporting.
Conclusions
For recording, editing, & mixing your own podcast, an Audacity is a great option. And, like many podcasters, you could discover it meets your long-term requirements. With regard to voice effects, we talk about how people may use Filmora to modify and improve their voices. Filmora has the ability to re-speak video and audio, as well as previously recorded voiceovers. Video, audio, and voiceover files may all benefit from the Timeline’s Pitch feature. Change the tonality of a video or recording to give it a unique sound. It’s easy to replace the voices in the videos using Filmora. A video or narrative should accompany your viral in order for it to be effective. Changing Pitch allows you to alter the pitch of your voice. You may modify the pace of the video to alter the voice (Optional). Make a backup copy of the altered media.
For Win 7 or later (64-bit)
For macOS 10.12 or later
“AudioMastery: The Definitive Guide to Choosing the Best Voice Recorders”
Top 10 Audio Recording Software to Capture Your Voice Easily
Shanoon Cox
Mar 27, 2024• Proven solutions
Whether professional or for amateur purposes, the audio recording software programs are very important. These programs allow manipulating the audio so that it matches the need for a specific project.
The best audio recording software has a variety of tools embedded to polish the audio recorded, in which this article we are going to review the best of them for you.
What is Audio Recording Software?
As the name suggests, the audio recording software is used to record audio using a unique technology. This allows the users to capture their own or the voice they want and transfer it wherever they want. The software also adds effects to the voice and makes it professional to use wherever the user wants to.
What Does a Sound Recorder Use for?
There are several uses of audio recording software program. Some are listed as under:
- In the music field, this software is of great use. It can be used for multitrack recording. The mixing of the sound is then done using the same or different tools.
- The audio recorded can be edited with ease. This includes enhancing and adding effects to it with perfection.
- With microphone use, the recording software can be integrated to make sure that the voice of the user is also recorded if required.
- Some audio recording software programs also come with screen recording, and therefore, these foster multitasking.
List of Top 10 Audio Recording Software Programs
The audio recording software for PC that would make your life easy is mentioned as under.
1.Wondershare DemoCreator
This is by far the best and the most used software program when it comes to audio recording. It is highly reliable and comes with a GUI. The user interface is easy to understand, and so are the functionalities.
With the best and the most advanced controls recording audio has never been this easy. It also acts as Mac audio recording software, and therefore it is highly recommended for all platforms. The frequent updates make this program even easier to use.
Features
- The interface of the program is very easy to use and stress-free.
- The high definition audio can be recorded with ease.
- The program supports 50+ formats to import audio, video, and other files to the system.
- There are highly advanced options for professional audio recording.
- The program can record endless video and audio as far as there is space on your disk.
Pros
- It is one of the programs that support professional audio editing.
- The program is very easy to use as it has a graphical interface.
Cons
- The program is flash software-based, which can slow down the system.
- It does not offer highly advanced audio editing at all.
Supported Platforms
The program can be used with both Windows and Mac.
Go ahead to download and have a try now!
2.WavePad
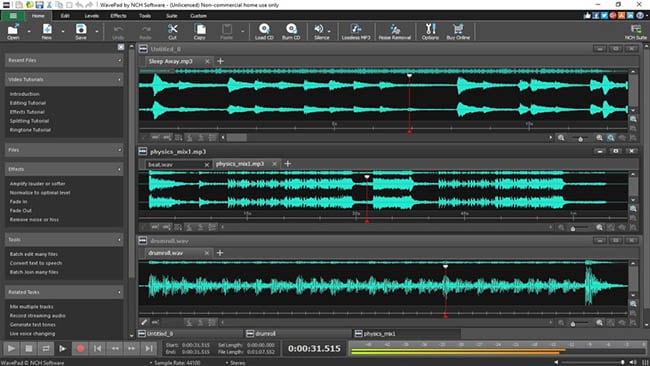
It is one of the best and most used programs to make sure that the audio is recorded with perfection. This program is compatible with most of the audio formats, and therefore it is highly recommended. The overall rating of the program is high as it is used by professionals and, therefore, highly rated as well.
Features
- It has several audio enhancing capabilities, which include amplification and effect addition.
- The audio can be edited, trimmed, and cropped with this program.
- The professional-quality sound recording is used by this program to enhance the capabilities.
Pros
- The best part of this program is its quality of end product that is very high.
- It is a wave editor that gives the users more control over the end product.
Cons
- The mp3 editor of this program does not offer top quality work.
- The program cannot work with multiple files efficiently.
Supported Platforms
It can be installed over Mac, Windows, Android, and iOS.
3.Ocenaudio

As a cross-platform program, this one has a lot to offer. The interface is a bit technical, but overall the use of the program is easy once the hands-on is done. The program is also highly intuitive and allows the users to overcome the day to day audio recording and editing tasks.
Features
- The Ocen Framework is also integrated with this platform to enhance its capabilities.
- The program also records screen if required by the users.
- It is one of the programs that have been rated on other high-end platforms.
Pros
- The program uses auto trim and voice recording controls.
- The sound spectral analysis of the program is highly advanced.
Cons
- The program cannot directly load the file from a CD.
- The program cannot be opened in multiple screens, so the work rate is slow.
Supported Platforms
It is compatible with Mac, Windows, and Linux.
4.Adobe Audition

It can be rightfully regarded as one of the best and the most advanced programs. Backed by years of Adobe experience, it is a program that will get the user a step forward. It is highly recommended to all those users that are looking for a professional level of audio recording.
Features
- It includes multitrack, wave editing, and audio restoration tools to give the best results.
- The essential sound panel has been integrated with the program to get the best oomph effect to the audio.
- The music clips can be integrated within the audio recording to make it sound professional.
Pros
- The platform can be used to create awesome podcasts.
- The audio break can be repaired with perfection.
Cons
- It is expensive, so all the users cannot afford it at all.
- The interface is high tech in nature and requires time to learn.
Supported Platforms
It is supported by Windows and Mac.
5.Audacity

It is free software that is used to record audio professionally. This high-performance program makes sure that the audio which is recorded is also shared with different platforms. The built-in panel is upgraded, and therefore it is highly advance.
Features
- It is ad-free and therefore provides hassle-free work.
- The audio editing and recording have never been as easy as it is with audacity.
- Multitrack editing is also possible with this program.
Pros
- The VST plugin support is provided by the program.
- It is a portable program that can be used for pitch correction.
Cons
- The noise reduction tool of this program needs an upgrade.
- The record to tape feature is currently unavailable.
Supported Platforms
It is supported by Mac, Linux, Windows, and BSD.
6.Wavosaur

It is one of the free programs that can be regarded as better than many paid ones. It is all because the qualities of the program are matchless. The processing of files is done with WAV and Mp3 files filter, which makes the process very much easier.
Features
- The program has multiple document interfaces for multiple file handling.
- The editing features such as cut, copy, paste, and edit can be performed in a single window.
- The waveform representation of the program is accurate and highly advanced.
Pros
- The program offers bit depth convert, pitch shift, and DC offset removal.
- The VST effects can be added to the entire batch of sound files.
Cons
- The audio routing and the multichannel support of the program are not efficient.
- The software sampler extraction is a bit slow when it comes to this program.
Supported Platforms
The program can only be installed on Windows.
7.MixPad
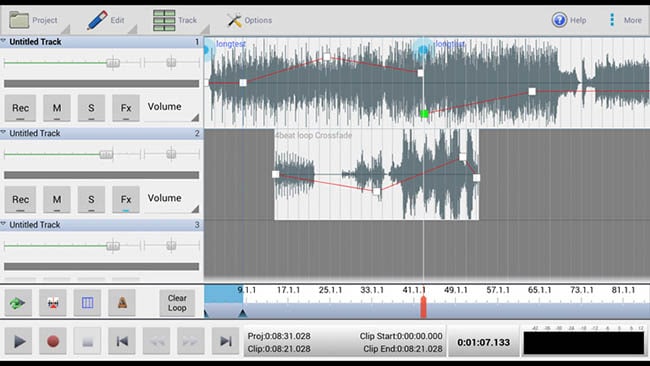
The audio processing and mixing have been made very easy with this platform. The program has an interface that is sleek in design and allows the processing of the audio info with care. The program also supports cloud storage, which means that the entire user’s hard work remains safe and secures all the time.
Features
- The program can mix the unlimited number of tracks all at the same time.
- Depending upon the requirement, the multiple or a single track can be processed at the same time.
- The program supports almost every sound format, so any type of sound can be imported with perfection.
Pros
- The audio effects such as EQ, compression, and reverb can be added with perfection.
- The latency rate is very low, and the program also offers ASIO support for accurate processing.
Cons
- The program only offers the export of the sound that is up to 32 bits.
- The sample rates of up to 96 kHz are only supported, which is less than most of the other mixers.
Supported Platforms
The program can be installed on Mac, Windows, Android, iPad, and Kindle Fire.
8.Sound Forge

If a user wants to completely control the audio editing process, then this software is for them. It is highly advanced and makes sure that the work that is done is highly précised. From Red Book CD creation to sound design and mixing, this program provides the users with complete control and authority over the process.
Features
- The multichannel WAV recording and processing is now possible with the new version of the program.
- The VST plugin support is provided by this program with perfection.
- The VST effects can be chained in a virtual rack.
Pros
- The simple digitization and restoration of the audio have been made simple by this program.
- The one-click solutions allow the users to process the audio tracks easily.
Cons
- The program only offers 32 bits of power, which is very low.
- The multiple VST GUI is not supported by this program.
Supported Platforms
The Sound Forge can be installed on Mac and Windows.
9.Spek

The best part of the software is that it is free and allows the users to overcome the problems which the other audio recorders present. The interface is easy to learn, and therefore the overall usage is easy. The lossless quality is something for which the software is known for. It also supports the FFMPEG library.
Features
- The signal processing is ultra-fast as it uses several threads to process audio.
- The drag and drop support of the program is highly efficient, and the program supports common audio formats.
- The program can be accessed in 19 different languages.
Pros
- The spectral density rulers allow the auto fitting of time.
- The spectral density range of the program is also adjustable.
Cons
- The codec names are, and the audio signal parameters cannot be seen.
- The program is licensed under GPLv3, which is now obsolete.
Supported Platforms
The program is compatible with Windows, Linux, and Mac.
10.Audio Highjack

The program, as the name suggests, makes it possible for the users to completely delve deep into the process of audio editing. The interface, as well as the controls, is very easy to understand and use. For novice users, this program is highly recommended as it makes audio editing a fun-filled activity.
Features
- It provides detailed statistics and min, the max value per channel.
- The processed audio can be listened in real-time to get an idea about the end product.
- The waveform generator and frequency impulse train are embedded within the program.
Pros
- The lame encoder support has been embedded within the recorder to export mp3 files.
- The editor’s look is skin able, which can be changed as per the user choice.
Cons
- The processing options are less as compared to the other recorders.
- The audio files cannot be exported as text, so the program cannot be used with PSpice.
Supported Platforms
The program is only available for Mac.
A Roundup of the Best Audio Recording Software Programs
| No. | Tools | Rating | Supported Formats | Price | Processing Power |
|---|---|---|---|---|---|
| 1 | DemoCreator | 4.5 | .mp3, .m4a, .wav, .wma, .ogg, .flac, .aif, .aiff | $29.99 | 64-bit |
| 2 | WavePad | 4.4 | vox, gsm, WMA, real audio, au, aif, FLAC, and Ogg | $69.95 | 64-bit |
| 3 | Ocenaudio | 4.0 | vox, gsm, WMA, wav, .wma, .ogg, and .flac | Free | 32-bit |
| 4 | Adobe Audition | 4.5 | AIF, AIFF, AIFC | $74.99 | 64-bit |
| 5 | Audacity | 3.9 | mp3, wav, AIFF, au, and ogg | Free | 32-bit |
| 6 | Wavosaur | 3.5 | VST plugins, ASIO driver, multichannel wav files, real-time effect processing. | Free | 32-bit |
| 7 | MixPad | 3.2 | wav, mp3, vox, and gsm | $129 | 32-bit |
| 8 | Sound Forge | 4.0 | SWF, RealMedia 9, WMA, AVI , AIFF, AIF, and SND | Free | 32-bit |
| 9 | Spek | 4.4 | vox, gsm, WMA, Wav, WMA, real audio, au, aif, FLAC, and Ogg | Free | 64-bit |
| 10 | Audio Highjack | 4.2 | .mp3, .m4a, .wav, .wma, aif, FLAC, and Ogg | Free | 64-bit |
Conclusion
With the overall specs and ratings by the users, the Wondershare DemoCreator is the best software that should be used for audio recording.
The program is highly compatible with major operating systems, and therefore it is highly recommended. The overall mechanism is easy, and the program also supports multiple formats.
It is highly technical and is constantly upgraded to make sure that it remains in line with modern technologies. It is a one-stop-shop for all the audio recording needs of the users and therefore highly viable.
With this program, the audio that has been worked on can be shared on most popular social media platforms like YouTube and Facebook.
Shanoon Cox
Shanoon Cox is a writer and a lover of all things video.
Follow @Shanoon Cox
Shanoon Cox
Mar 27, 2024• Proven solutions
Whether professional or for amateur purposes, the audio recording software programs are very important. These programs allow manipulating the audio so that it matches the need for a specific project.
The best audio recording software has a variety of tools embedded to polish the audio recorded, in which this article we are going to review the best of them for you.
What is Audio Recording Software?
As the name suggests, the audio recording software is used to record audio using a unique technology. This allows the users to capture their own or the voice they want and transfer it wherever they want. The software also adds effects to the voice and makes it professional to use wherever the user wants to.
What Does a Sound Recorder Use for?
There are several uses of audio recording software program. Some are listed as under:
- In the music field, this software is of great use. It can be used for multitrack recording. The mixing of the sound is then done using the same or different tools.
- The audio recorded can be edited with ease. This includes enhancing and adding effects to it with perfection.
- With microphone use, the recording software can be integrated to make sure that the voice of the user is also recorded if required.
- Some audio recording software programs also come with screen recording, and therefore, these foster multitasking.
List of Top 10 Audio Recording Software Programs
The audio recording software for PC that would make your life easy is mentioned as under.
1.Wondershare DemoCreator
This is by far the best and the most used software program when it comes to audio recording. It is highly reliable and comes with a GUI. The user interface is easy to understand, and so are the functionalities.
With the best and the most advanced controls recording audio has never been this easy. It also acts as Mac audio recording software, and therefore it is highly recommended for all platforms. The frequent updates make this program even easier to use.
Features
- The interface of the program is very easy to use and stress-free.
- The high definition audio can be recorded with ease.
- The program supports 50+ formats to import audio, video, and other files to the system.
- There are highly advanced options for professional audio recording.
- The program can record endless video and audio as far as there is space on your disk.
Pros
- It is one of the programs that support professional audio editing.
- The program is very easy to use as it has a graphical interface.
Cons
- The program is flash software-based, which can slow down the system.
- It does not offer highly advanced audio editing at all.
Supported Platforms
The program can be used with both Windows and Mac.
Go ahead to download and have a try now!
2.WavePad
It is one of the best and most used programs to make sure that the audio is recorded with perfection. This program is compatible with most of the audio formats, and therefore it is highly recommended. The overall rating of the program is high as it is used by professionals and, therefore, highly rated as well.
Features
- It has several audio enhancing capabilities, which include amplification and effect addition.
- The audio can be edited, trimmed, and cropped with this program.
- The professional-quality sound recording is used by this program to enhance the capabilities.
Pros
- The best part of this program is its quality of end product that is very high.
- It is a wave editor that gives the users more control over the end product.
Cons
- The mp3 editor of this program does not offer top quality work.
- The program cannot work with multiple files efficiently.
Supported Platforms
It can be installed over Mac, Windows, Android, and iOS.
3.Ocenaudio
As a cross-platform program, this one has a lot to offer. The interface is a bit technical, but overall the use of the program is easy once the hands-on is done. The program is also highly intuitive and allows the users to overcome the day to day audio recording and editing tasks.
Features
- The Ocen Framework is also integrated with this platform to enhance its capabilities.
- The program also records screen if required by the users.
- It is one of the programs that have been rated on other high-end platforms.
Pros
- The program uses auto trim and voice recording controls.
- The sound spectral analysis of the program is highly advanced.
Cons
- The program cannot directly load the file from a CD.
- The program cannot be opened in multiple screens, so the work rate is slow.
Supported Platforms
It is compatible with Mac, Windows, and Linux.
4.Adobe Audition
It can be rightfully regarded as one of the best and the most advanced programs. Backed by years of Adobe experience, it is a program that will get the user a step forward. It is highly recommended to all those users that are looking for a professional level of audio recording.
Features
- It includes multitrack, wave editing, and audio restoration tools to give the best results.
- The essential sound panel has been integrated with the program to get the best oomph effect to the audio.
- The music clips can be integrated within the audio recording to make it sound professional.
Pros
- The platform can be used to create awesome podcasts.
- The audio break can be repaired with perfection.
Cons
- It is expensive, so all the users cannot afford it at all.
- The interface is high tech in nature and requires time to learn.
Supported Platforms
It is supported by Windows and Mac.
5.Audacity
It is free software that is used to record audio professionally. This high-performance program makes sure that the audio which is recorded is also shared with different platforms. The built-in panel is upgraded, and therefore it is highly advance.
Features
- It is ad-free and therefore provides hassle-free work.
- The audio editing and recording have never been as easy as it is with audacity.
- Multitrack editing is also possible with this program.
Pros
- The VST plugin support is provided by the program.
- It is a portable program that can be used for pitch correction.
Cons
- The noise reduction tool of this program needs an upgrade.
- The record to tape feature is currently unavailable.
Supported Platforms
It is supported by Mac, Linux, Windows, and BSD.
6.Wavosaur
It is one of the free programs that can be regarded as better than many paid ones. It is all because the qualities of the program are matchless. The processing of files is done with WAV and Mp3 files filter, which makes the process very much easier.
Features
- The program has multiple document interfaces for multiple file handling.
- The editing features such as cut, copy, paste, and edit can be performed in a single window.
- The waveform representation of the program is accurate and highly advanced.
Pros
- The program offers bit depth convert, pitch shift, and DC offset removal.
- The VST effects can be added to the entire batch of sound files.
Cons
- The audio routing and the multichannel support of the program are not efficient.
- The software sampler extraction is a bit slow when it comes to this program.
Supported Platforms
The program can only be installed on Windows.
7.MixPad
The audio processing and mixing have been made very easy with this platform. The program has an interface that is sleek in design and allows the processing of the audio info with care. The program also supports cloud storage, which means that the entire user’s hard work remains safe and secures all the time.
Features
- The program can mix the unlimited number of tracks all at the same time.
- Depending upon the requirement, the multiple or a single track can be processed at the same time.
- The program supports almost every sound format, so any type of sound can be imported with perfection.
Pros
- The audio effects such as EQ, compression, and reverb can be added with perfection.
- The latency rate is very low, and the program also offers ASIO support for accurate processing.
Cons
- The program only offers the export of the sound that is up to 32 bits.
- The sample rates of up to 96 kHz are only supported, which is less than most of the other mixers.
Supported Platforms
The program can be installed on Mac, Windows, Android, iPad, and Kindle Fire.
8.Sound Forge
If a user wants to completely control the audio editing process, then this software is for them. It is highly advanced and makes sure that the work that is done is highly précised. From Red Book CD creation to sound design and mixing, this program provides the users with complete control and authority over the process.
Features
- The multichannel WAV recording and processing is now possible with the new version of the program.
- The VST plugin support is provided by this program with perfection.
- The VST effects can be chained in a virtual rack.
Pros
- The simple digitization and restoration of the audio have been made simple by this program.
- The one-click solutions allow the users to process the audio tracks easily.
Cons
- The program only offers 32 bits of power, which is very low.
- The multiple VST GUI is not supported by this program.
Supported Platforms
The Sound Forge can be installed on Mac and Windows.
9.Spek
The best part of the software is that it is free and allows the users to overcome the problems which the other audio recorders present. The interface is easy to learn, and therefore the overall usage is easy. The lossless quality is something for which the software is known for. It also supports the FFMPEG library.
Features
- The signal processing is ultra-fast as it uses several threads to process audio.
- The drag and drop support of the program is highly efficient, and the program supports common audio formats.
- The program can be accessed in 19 different languages.
Pros
- The spectral density rulers allow the auto fitting of time.
- The spectral density range of the program is also adjustable.
Cons
- The codec names are, and the audio signal parameters cannot be seen.
- The program is licensed under GPLv3, which is now obsolete.
Supported Platforms
The program is compatible with Windows, Linux, and Mac.
10.Audio Highjack
The program, as the name suggests, makes it possible for the users to completely delve deep into the process of audio editing. The interface, as well as the controls, is very easy to understand and use. For novice users, this program is highly recommended as it makes audio editing a fun-filled activity.
Features
- It provides detailed statistics and min, the max value per channel.
- The processed audio can be listened in real-time to get an idea about the end product.
- The waveform generator and frequency impulse train are embedded within the program.
Pros
- The lame encoder support has been embedded within the recorder to export mp3 files.
- The editor’s look is skin able, which can be changed as per the user choice.
Cons
- The processing options are less as compared to the other recorders.
- The audio files cannot be exported as text, so the program cannot be used with PSpice.
Supported Platforms
The program is only available for Mac.
A Roundup of the Best Audio Recording Software Programs
| No. | Tools | Rating | Supported Formats | Price | Processing Power |
|---|---|---|---|---|---|
| 1 | DemoCreator | 4.5 | .mp3, .m4a, .wav, .wma, .ogg, .flac, .aif, .aiff | $29.99 | 64-bit |
| 2 | WavePad | 4.4 | vox, gsm, WMA, real audio, au, aif, FLAC, and Ogg | $69.95 | 64-bit |
| 3 | Ocenaudio | 4.0 | vox, gsm, WMA, wav, .wma, .ogg, and .flac | Free | 32-bit |
| 4 | Adobe Audition | 4.5 | AIF, AIFF, AIFC | $74.99 | 64-bit |
| 5 | Audacity | 3.9 | mp3, wav, AIFF, au, and ogg | Free | 32-bit |
| 6 | Wavosaur | 3.5 | VST plugins, ASIO driver, multichannel wav files, real-time effect processing. | Free | 32-bit |
| 7 | MixPad | 3.2 | wav, mp3, vox, and gsm | $129 | 32-bit |
| 8 | Sound Forge | 4.0 | SWF, RealMedia 9, WMA, AVI , AIFF, AIF, and SND | Free | 32-bit |
| 9 | Spek | 4.4 | vox, gsm, WMA, Wav, WMA, real audio, au, aif, FLAC, and Ogg | Free | 64-bit |
| 10 | Audio Highjack | 4.2 | .mp3, .m4a, .wav, .wma, aif, FLAC, and Ogg | Free | 64-bit |
Conclusion
With the overall specs and ratings by the users, the Wondershare DemoCreator is the best software that should be used for audio recording.
The program is highly compatible with major operating systems, and therefore it is highly recommended. The overall mechanism is easy, and the program also supports multiple formats.
It is highly technical and is constantly upgraded to make sure that it remains in line with modern technologies. It is a one-stop-shop for all the audio recording needs of the users and therefore highly viable.
With this program, the audio that has been worked on can be shared on most popular social media platforms like YouTube and Facebook.
Shanoon Cox
Shanoon Cox is a writer and a lover of all things video.
Follow @Shanoon Cox
Also read:
- Premiere Voice Mimicry Programs - Compilation of the Best for 2024
- In 2024, Revolutionary MP3 File Management Toolkit Windows & Mac Edition, Leading the Industry
- Updated Achieving Crystal-Cleared Voices Tools for Subtracting Unwanted Acoustics in Digital Recordings for 2024
- Updated 2024 Approved How Can You Choose the Best Sound Editor?
- Updated In 2024, Mastering Your Music on a Chromebook The Top 8 DAWs that Will Elevate Your Sound (Updated List, 2023)
- Journalistic Jazzy Numbers for Daily Updates
- 2024 Approved Mastering Sound A Guide to Advanced Editing Techniques with Sony Vegas
- New Master List of Speech Processing Software with Top 8 Selection, Catering to Desktop PCs, Macintosh and Web Interface Usage for 2024
- 2024 Approved Navigating the Future Essential Text to Speech Websites Ranked
- 2024 Approved 8 Best Rain Sound Effect Resources to Download
- New Enhancing Mobile Audio Clarity Ranking the Best Apps to Improve iPhone & Android Sound for 2024
- Updated In 2024, Step-by-Step Integrating Tunes Into KineMaster
- Updated 2024 Approved Capturing Naturalistic Wolf Howls for Creative Endeavors
- Updated In 2024, Top 7 Underrated Transition Sounds for Enhanced Audio Experience (Download Now!)
- New Auditory Cuts and Segments Convenient Methods to Divide Your Music Files
- Updated In 2024, Reviews, Features and Tutorial of Lexis Audio Editor
- New The Essential Guide to REAPER Tools & Techniques for New Users
- New Featured List of Best-Sounding Pop Melodies and Lyrics for Video Production for 2024
- Best Song Identifiers Online You Can Find
- New Audio Fur Phenomenon Sample for 2024
- Updated In 2024, Disabling Background Chatter in TikTok Videos Three Streamlined Techniques
- The Kaleidoscope of Game Audio Spotting the Buttons Sonic Impressions
- 2024 Approved The Art of Remote Sonic Adjustments Controlling Playback Velocity and Tone Online
- New Tech Tip Turning Off Your Mic in Zoom Conferences Across Platforms for 2024
- The Ultimate Guide to Free Mobile Applications Transforming Audio Into Captivating Visuals for iOS & Android Users for 2024
- New Venturing Free Audio Amendments to Visual Projects for 2024
- Updated Hunt for Chuckling Sonic Elements
- Virtual Vigilance Securing Your Cyber Space While Connecting Online
- New Elevating Your Audio Experience on Android The Definitive M4A Playback Manual
- 2024 Approved Mastering Podcasting A Look at the Premier Hosting Services
- Updated In 2024, Evaluating Acoustic Experts A Comprehensive Listening Guide
- New 2024 Approved 6 Must-Visit Online Havens for Terrifying Audio Effects
- 2024 Approved Best Mac App for Amplifying and Blending Car Audio
- In 2024, Optimizing Audio Levels A Guide to Dynamic Ducking in Windows Edition of Adobe Premiere Pro
- Mastering Audio Extraction Removing Sound Tracks From Video on iOS Devices for 2024
- Updated 6 Best Audio Mixers For Enhancing Your Streaming for 2024
- Updated 2024 Approved How to AI DeNoise
- Updated Elevate Your Game Experience A Selection Process for Immersive Vocal Transformation Technology
- New AI-Driven Audio Enhancement Methods for Eliminating Background Noise
- Updated 2024 Approved Seek Out Dreaded Howl Effect
- In 2024, A Beginners Handbook to Professional Music Video Editing
- How to Bypass Apple iPhone SE (2020) Passcode Easily Video Inside | Dr.fone
- How to Bypass iCloud Lock from iPhone 12 Pro
- How to Bypass Google FRP Lock on Samsung Galaxy F54 5G Devices
- New 2024 Approved Sound Design on a Budget How to Find and Integrate Free Sound Effects in Final Cut Pro
- New Guide How To Check iCloud Activation Lock Status On Your iPhone 12
- Fix Tecno Pop 7 Pro Android System Webview Crash 2024 Issue | Dr.fone
- In 2024, How To Check if Your Samsung Galaxy M14 4G Is Unlocked
- How To Transfer Data From Apple iPhone 14 To Other iPhone 11 Pro Max devices? | Dr.fone
- New 2024 Approved Windows Video Editor Showdown Top 5 Picks
- 3 Facts You Need to Know about Screen Mirroring Nokia 105 Classic | Dr.fone
- In 2024, Ways to stop parent tracking your Poco X6 Pro | Dr.fone
- 2024 Approved The Great DVR Debate TiVo vs Comcast - Which One Reigns Supreme?
- Updated 2024 Approved Free 4K Video Editing Top Picks for Exceptional Results
- New In 2024, S Best Final Cut Pro Tutorials Learn From the Experts
- Everything You Need to Know about Lock Screen Settings on your Vivo Y100t
- How to Transfer Text Messages from Google Pixel 7a to New Phone | Dr.fone
- In 2024, What You Want To Know About Two-Factor Authentication for iCloud On your iPhone 11
- How to Fix Error 495 While Download/Updating Android Apps On Asus ROG Phone 8 Pro | Dr.fone
- Why Is My Samsung Galaxy S24 Ultra Offline? Troubleshooting Guide | Dr.fone
- 6 Solutions to Fix Error 505 in Google Play Store on Vivo Y200e 5G | Dr.fone
- New As an Online Marketer, It Is Important to Know the Algorithm of YouTube Platform. Ill Share You the History of Algorithm of YouTube and the New Changes in This Year for 2024
- Best 10 Mock Location Apps Worth Trying On Motorola Razr 40 | Dr.fone
- Complete Tutorial to Use VPNa to Fake GPS Location On Apple iPhone XS | Dr.fone
- How To Get Out of Recovery or DFU Mode on Apple iPhone 7 Plus? | Dr.fone
- Updated In 2024, Mavericks Video Editors Handbook A Step-by-Step Guide
- Getting the Pokemon Go GPS Signal Not Found 11 Error in Xiaomi 13 Ultra | Dr.fone
- Will the iPogo Get You Banned and How to Solve It On Lava Blaze Pro 5G | Dr.fone
- A Step-by-Step Guide on Using ADB and Fastboot to Remove FRP Lock from your Lava Yuva 3
- In 2024, Is Fake GPS Location Spoofer a Good Choice On OnePlus Ace 3? | Dr.fone
- Best Pokemons for PVP Matches in Pokemon Go For Gionee F3 Pro | Dr.fone
- Title: Updated The Comprehensive Tutorial on Detaching Audible Elements From Video Clips
- Author: Paul
- Created at : 2024-05-05 05:34:25
- Updated at : 2024-05-06 05:34:25
- Link: https://voice-adjusting.techidaily.com/updated-the-comprehensive-tutorial-on-detaching-audible-elements-from-video-clips/
- License: This work is licensed under CC BY-NC-SA 4.0.
