
Updated The Complete Audacity Playbook for Creating Top-Tier Podcasts
The Complete Audacity Playbook for Creating Top-Tier Podcasts
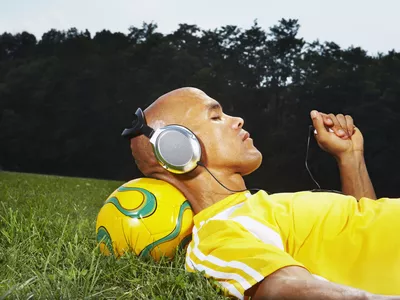
Free audio recording & editing software audacity for podcasts is available for Windows, Linux, & macOS. Even though it’s not expressly built for podcasts, it is a popular option for recording podcasts. If you don’t mind a steep learning curve, you can easily record, edit, & export a high-quality podcast with this software.
How to Record a Podcast using Audacity
Despite its complexity, audacity for podcasts doesn’t need a detailed understanding of the software’s internals to begin using it. As a beginner, we explain all of the initial settings and basic editing choices you’ll need to know and how to output in a format that can be used for podcasting.
Here’s how to get started recording your podcast using Audacity for Podcasts:
- By selecting the box to the left of your microphone, you may choose your audio host. Select MME for Windows and Core Audio for Mac OS X.

- Select the audio interface or microphone from the menu to the right of the microphone icon. In order to record your Audacity for Podcasts, Audacity utilizes the device that you pick from this menu.

- Select your headphones by checking the box to the right of a speaker symbol. To playback, the audio files, Audacity for Podcasts utilizes the device you specify from this option.

What you need to know about Audacity’s Input Tester
Test your input before you begin recording your podcast. This helps you to make totally clear that everything is set up properly and that your podcast is recorded.
- The monitor meter may be found on the menu bar at the very top, at the very center. “Click to begin monitoring” is what it says.

- Speak normally into the microphone you’ve placed on your computer.

- Ensure that the Microphone Volume meter doesn’t go over -12dB by adjusting the volume controls.

Audacity for Podcasts Recording Tutorial
Audacity recording is simple after you’ve set up all of the settings you need. Make sure to pick just one (Mono) Recording Channel while you’re recording with a single microphone.
Each microphone is assigned a separate audio channel if you have numerous microphones connected to an audio interface or mixer. There must be a separate microphone and channel for each participant on your podcast so that you can edit them separately and make sure they all sound well together.
Each of these mono channels will be blended into stereo when you export your podcast later.
There is nothing complicated about the actual recording procedure.
- To begin recording your podcast, press the red Record button.

- When you’ve finished recording your podcast, press the black Stop button.

- Once you’ve finished recording, use Ctrl+S to save the project. If Audacity crashes or you shut it by mistake, you won’t be able to recover your edited audio file.
Using Audacity to Edit Your Podcast
Audacity for Podcasts not only allows you to record your podcast, but it also allows you to edit it afterward. It is possible to send your raw podcast to the internet as soon as you complete the recording, but editing may add a degree of polish that makes it more pleasurable for the listener.
You may use Audacity to re-arrange your podcast’s flow by cutting and relocating portions, reducing clipping, and even deleting background noise if one of your mics was too near or someone was talking too loudly. Audacity can even alter the levels of individual recordings.
Some of these editing chores are more difficult than others, but if you just have high-quality equipment & have your settings ideal, the podcast may not need a lot of effort. Check over a few different portions of your podcast to get a sense of how much work has to be done on it before publishing.
In Audacity, you may add music, clips, & sound effects to your podcast intro and outro.
In Audacity, add music, clips, & sound effects for the podcast intro and outro
In Audacity, you may add & move sound clips, such as intro music.
- Click File > Import > Audio or press Ctrl+Shift+I to import your podcast audio into Audacity.

- Make your choice of music for the opening, outro, or anything else you’d want to include.

- It is possible to go back and forth between the past and future by clicking on the top toolbar’s time shift function.

- When your opening music stops, click and drag the main podcast audio track so that it begins when the music ends.

- Add an outro or other sound effects & music that play throughout your podcast by following these similar instructions. There should be a separate channel for each sound file so that they may be easily moved across devices.
- Using the time shift tool, you may relocate an outro to the conclusion of your podcast if necessary. If you wish to add sound effects or music to your podcast, use the time shift tool to move them around.
- To test whether your audio tracks are positioned appropriately, just click the green Play button at any moment. The cursor icon in the toolbar may be used to start listening to a podcast at a different place in the track.
In Audacity, here’s how to export your podcast
After you’ve finished editing your podcast, listen to it one more time to ensure you’re satisfied with the outcome, then save it to ensure you don’t lose your work if anything goes wrong during the export process. When you export your podcast, you’re creating an audio file that you can publish to your podcast host and share with others.
Here’s how to export the Audacity podcast:
- Select File > Export > Export as… from the File menu.
- After giving your podcast a name, click Save.
- If you wish to add metadata, you may do so now, or just hit OK to begin the exporting process.
- This procedure may take a long time if the podcast is lengthy or your machine is sluggish. During this procedure, keep your computer turned on & prevent it from sleeping and hibernating.
- You’re ready to publish your podcast to the podcast host once it’s finished exporting.
Conclusions
For recording, editing, & mixing your own podcast, an Audacity is a great option. And, like many podcasters, you could discover it meets your long-term requirements. With regard to voice effects, we talk about how people may use Filmora to modify and improve their voices. Filmora has the ability to re-speak video and audio, as well as previously recorded voiceovers. Video, audio, and voiceover files may all benefit from the Timeline’s Pitch feature. Change the tonality of a video or recording to give it a unique sound. It’s easy to replace the voices in the videos using Filmora. A video or narrative should accompany your viral in order for it to be effective. Changing Pitch allows you to alter the pitch of your voice. You may modify the pace of the video to alter the voice (Optional). Make a backup copy of the altered media.
For Win 7 or later (64-bit)
For macOS 10.12 or later
- Select the audio interface or microphone from the menu to the right of the microphone icon. In order to record your Audacity for Podcasts, Audacity utilizes the device that you pick from this menu.
- Select your headphones by checking the box to the right of a speaker symbol. To playback, the audio files, Audacity for Podcasts utilizes the device you specify from this option.
What you need to know about Audacity’s Input Tester
Test your input before you begin recording your podcast. This helps you to make totally clear that everything is set up properly and that your podcast is recorded.
- The monitor meter may be found on the menu bar at the very top, at the very center. “Click to begin monitoring” is what it says.
- Speak normally into the microphone you’ve placed on your computer.
- Ensure that the Microphone Volume meter doesn’t go over -12dB by adjusting the volume controls.
Audacity for Podcasts Recording Tutorial
Audacity recording is simple after you’ve set up all of the settings you need. Make sure to pick just one (Mono) Recording Channel while you’re recording with a single microphone.
Each microphone is assigned a separate audio channel if you have numerous microphones connected to an audio interface or mixer. There must be a separate microphone and channel for each participant on your podcast so that you can edit them separately and make sure they all sound well together.
Each of these mono channels will be blended into stereo when you export your podcast later.
There is nothing complicated about the actual recording procedure.
- To begin recording your podcast, press the red Record button.
- When you’ve finished recording your podcast, press the black Stop button.
- Once you’ve finished recording, use Ctrl+S to save the project. If Audacity crashes or you shut it by mistake, you won’t be able to recover your edited audio file.
Using Audacity to Edit Your Podcast
Audacity for Podcasts not only allows you to record your podcast, but it also allows you to edit it afterward. It is possible to send your raw podcast to the internet as soon as you complete the recording, but editing may add a degree of polish that makes it more pleasurable for the listener.
You may use Audacity to re-arrange your podcast’s flow by cutting and relocating portions, reducing clipping, and even deleting background noise if one of your mics was too near or someone was talking too loudly. Audacity can even alter the levels of individual recordings.
Some of these editing chores are more difficult than others, but if you just have high-quality equipment & have your settings ideal, the podcast may not need a lot of effort. Check over a few different portions of your podcast to get a sense of how much work has to be done on it before publishing.
In Audacity, you may add music, clips, & sound effects to your podcast intro and outro.
In Audacity, add music, clips, & sound effects for the podcast intro and outro
In Audacity, you may add & move sound clips, such as intro music.
- Click File > Import > Audio or press Ctrl+Shift+I to import your podcast audio into Audacity.
- Make your choice of music for the opening, outro, or anything else you’d want to include.
- It is possible to go back and forth between the past and future by clicking on the top toolbar’s time shift function.
- When your opening music stops, click and drag the main podcast audio track so that it begins when the music ends.
- Add an outro or other sound effects & music that play throughout your podcast by following these similar instructions. There should be a separate channel for each sound file so that they may be easily moved across devices.
- Using the time shift tool, you may relocate an outro to the conclusion of your podcast if necessary. If you wish to add sound effects or music to your podcast, use the time shift tool to move them around.
- To test whether your audio tracks are positioned appropriately, just click the green Play button at any moment. The cursor icon in the toolbar may be used to start listening to a podcast at a different place in the track.
In Audacity, here’s how to export your podcast
After you’ve finished editing your podcast, listen to it one more time to ensure you’re satisfied with the outcome, then save it to ensure you don’t lose your work if anything goes wrong during the export process. When you export your podcast, you’re creating an audio file that you can publish to your podcast host and share with others.
Here’s how to export the Audacity podcast:
- Select File > Export > Export as… from the File menu.
- After giving your podcast a name, click Save.
- If you wish to add metadata, you may do so now, or just hit OK to begin the exporting process.
- This procedure may take a long time if the podcast is lengthy or your machine is sluggish. During this procedure, keep your computer turned on & prevent it from sleeping and hibernating.
- You’re ready to publish your podcast to the podcast host once it’s finished exporting.
Conclusions
For recording, editing, & mixing your own podcast, an Audacity is a great option. And, like many podcasters, you could discover it meets your long-term requirements. With regard to voice effects, we talk about how people may use Filmora to modify and improve their voices. Filmora has the ability to re-speak video and audio, as well as previously recorded voiceovers. Video, audio, and voiceover files may all benefit from the Timeline’s Pitch feature. Change the tonality of a video or recording to give it a unique sound. It’s easy to replace the voices in the videos using Filmora. A video or narrative should accompany your viral in order for it to be effective. Changing Pitch allows you to alter the pitch of your voice. You may modify the pace of the video to alter the voice (Optional). Make a backup copy of the altered media.
For Win 7 or later (64-bit)
For macOS 10.12 or later
“Chill-Out Playlists for Non-Profit Video Arrangements”
The popularity of montages is increasing every day, as they allow you to use fewer words and express more. Adding non-copyrighted music to your montages can help you capture the viewer’s attention and communicate your message. We’ll give you the definition of copyright and why it is crucial to use royalty-free music in your montage videos. We have given an overview of some of the most popular royalty-free montage music tracks and where you can download them.
What Is Copyright?
If you are wondering: What is copyright? It’s a sort of intellectual property designed to give its owner the entire right of copying and distributing creative work, often for a limited time. Essentially, the creative work could be in a musical, educational, artistic, or literary form.
Copyright protects the creator of the work from unauthorized use or duplication. The original work must be tangible for copyright laws to protect it.
If you’re caught using copyrighted material that a legal copyright owner owns, you’ll have to pay them civil damages. Infringing upon anyone’s intellectual property rights by using their copyright without their permission means you are guilty of copyright infringement.
Claiming you didn’t know about the artist’s copyrighted material doesn’t excuse you from using it in your montage video without their consent.
If you use copyrighted music in your montage video without the artist’s consent and profit from it commercially, you may have to pay the owner of the song monetary damages. The court may also ask you to give the artist your profits as restitution.
The maximum statutory damage for the act of copyright piracy can go as high as 150,000 dollars along with court costs and attorney fees. What’s the worst part? You could lose your freedom, as copyright infringement can land you in jail in extreme cases.
For these reasons, you might want to pay attention to copyright issues when creating a montage video. Make sure you use non-copyright music when making your video montage.
Top 15 Non-Copyrighted Music for montages
If you are looking for free montage music to keep your audience engaged with your content when viewing it, we have highlighted some great options. There is no shortage of what is available for free to use, allowing small-time and professional video editors to create masterpieces.
1) Endless Inspiration - Alex Toner
Endless Inspiration is a corporate montage music track by Alex Toner. The music track runs 2 minutes and 16 seconds, and it features a tempo of 120. It’s suitable for motivational business presentations, and you can use it on your site, social media podcast, YouTube, vlog, and more.

- Endless Inspiration - Alex Toner
2) Once Again - Benjamin Tissot
Once Again is a cinematic free montage music track by Benjamin Tissot (Bensound) that features electric guitar, marimba, strings, and piano. The emotional mood of this composition makes it ideal for vlogs or daily life montage videos. The duration of the song is 3 minutes and 50 seconds.

- Once Again - Benjamin Tissot
3) Better Days - NEFFEX
Released on 15 March 2022, Better Days is one of the best non-copyrighted music for montage; it is a pop song by NEFFEX. The music track has a happy mood, and its length is 2 minutes 7 seconds. This mid-tempo record is ideal for events.

- Better Days
4) Chocolate Cookie Jam - An Jone
Chocolate Cookie Jam is a country & folk song by An Jone from the album of the same name. The track is 3:22 long, and it has a Creative Commons Attribution license. You can use the song in your birthday montage.

- Chocolate Cookie Jam
5) Captive - Paul Keane
Captive by Pual Keane is a motivational ambient music track ideal for a slow-motion, documentary, or emotional ambient montage video. The track runs for 2 minutes and 10 seconds; it has a tempo of 140 BPM. The song features synthesizers and piano instruments.

- Captive
6) Resolve - Joel Cummins
Resolve is a cinematic song with a dramatic mood that was composed by Joel Cummins. The duration of the song is 2 minutes 18 seconds. You can use it in your vlog montage.

- Resolve
7) Clap and Yell - Bensound
Clap and Yell is a fun and happy pop song by Bensound that features organ, vocal samples, electric guitar, and handclaps. You can use it to add a happy mood to your birthday montage video. Vocal samples are courtesy of Spectrasonics. The length of the song is 2 minutes and 56 seconds. The music track has a tempo of 110 BPM, and you can use it double-time at 220 BPM and half-time at 55 BPM.

- Clap and Yell
8) Winter Journey - Orchestra/Background/Holiday
Winter Journey is a blend of classical music for chamber music and Christmas exploring the winter ideas. The song is an intimate experience, allowing you to celebrate and reflect. The track has a Creative Commons Attribution International License, and it runs 5 minutes and 5 seconds.

- Winter Journey
9) One Fine Summer - Purple Planet
With a length of 2 minutes and 4 seconds, One Fine Summer features uplifting background piano chords. It also has modern electronic vocals that imply freedom or escape. The soft zonal washes in the track suggest traveling or movement, making it suitable for montage videos with documentary or travel themes.

- One Fine Summer
10) Flight of the Mind by Max Tune
Flight of the Mind is a cinematic music track by Max Tune. It features strings, piano arpeggios, percussive, orchestral, and vocals. The music track runs for 2 minutes and 21 seconds and has a tempo of 110 BPM. You can use it in motivational and inspirational montage videos.

- Flight of the Mind
11) Basic Trap Anthem 1 by TeknoAXE
Basic Trap Anthem 1 is a dance/electronic music track by TeknoAXE. It runs 3 minutes and 48 seconds long, and you can use it in your events montage videos. The track was released in 2019, and it is available under a Creative Commons Attribution license.

- Basic Trap Anthem 1
12) Positive Motivation by Purple Planet Music
Positive Motivation is a music track that features positive electric guitar licks that create an instant inspiring feel that suggests an award-winning moment of success. This uplifting track implies inspiration, success, and corporate motivation for business. The duration of the track is 1 minute and 42 seconds.

- Positive Motivation
13) QR - Sphenic [Argofox Release]QR - Sphenic [Argofox Release] is an electronic music track by Argofox. This free montage music track runs 3 minutes and 11 seconds long. You can share, remix, or use this track commercially.

- QR - Sphenic
14) Spacedust - Airtone ft MWIC
Spacedust is a royalty-free montage music track by Airtone featuring MWIC. Its duration is 5 minutes and 18 seconds, and it has a tempo of 80 BPM. This track can make your audience focus on the message you are sending in your montage video. It’s suitable for vlog and birthday montage videos.

- Spacedust
15) Thunder - Telecasted
Thunder is a rock music track by Telecasted from the album Thunder. It has a dark mood and a length of 2 minutes and 37 seconds. You can use this free montage music track and credit the artist.

- Thunder
Bonus! Non-Copyrighted Music & More in Filmora
Filmora has a feature called Stock Media, where you can find three subcategories that you can use when creating montages. These are Giphy, Pixabay, and Unsplash. In the Giphy subcategory, you’ll find download music GIFs and animated GIFs.
Pixabay subcategory features royalty-free montage music, film footage, and photos. You can choose from tons of free high-resolution pictures of songs in the Unsplash subcategory.
Filmora’s Auto Montage Maker allows Windows users to match your video with music. The tool can automatically edit your video and make it smooth with the free montage music you choose.
Here is the kicker: You do not need any editing skills to use this Auto Montage feature, as the tool can automatically match your video with music clips and analyze beat points to switch the view and video effects.
It can also identify the bad parts in your video swiftly, like too dark, jitter, or overexposure. Additionally, it can automatically delete these bad parts to ensure it matches your video with the music you have chosen.
The best part is: You can also edit the video to make it look more professional by customizing it. Filmora allows you to trim, color tune, adjust the speed of your video, and much more.

Wondershare Filmora
Wondershare Filmora11 Express Better
Archive More
Grow Together
Free Download Free Download Learn More

![]()
Summarize:
Using content you do not own is always copyright infringement. If you are worried about copyright infringement or having your montage video taken down is a concern, you can use these free montage music tracks. Montage music can shape the emotions of your viewers and motivate them. It also makes the images in your video look more interesting and entertaining.
Filmora can help you create professional-like montage videos that flow well. The software is user-friendly and features tons of royalty-free music, photos, and videos that you can use to create your montage videos.
Free Download Free Download Learn More
![]()
Summarize:
Using content you do not own is always copyright infringement. If you are worried about copyright infringement or having your montage video taken down is a concern, you can use these free montage music tracks. Montage music can shape the emotions of your viewers and motivate them. It also makes the images in your video look more interesting and entertaining.
Filmora can help you create professional-like montage videos that flow well. The software is user-friendly and features tons of royalty-free music, photos, and videos that you can use to create your montage videos.
From One Siri to Another: How to Switch Up Your Digital Companion’s Voice
iPhone offers a lot of different features that other mobiles don’t provide. There is a reason why people prefer using iPhone. The different versions of the iPhone have different and advanced features. The sleek and stylish body is another factor why people want to have iPhone. Do you know any other interesting thing about Apple?
If you don’t know, then let us tell you something worth knowing. Apple offers a Siri feature in all its devices. Whether you are an iPhone, iPad, or Mac user, Siri is there to help you stay connected to the world without even lifting a finger. You can make calls and send text messages with Siri. If you want to learn more about Siri and Siri voice changer, then let’s get started.
In this article
01 How to Change Siri Voice on iPhone and iPad?
02 How to Change Siri Voice on Mac?
03 3 Nice Voice Changer to Help You Do Siri Voice
For Win 7 or later (64-bit)
For macOS 10.12 or later
Part 1. How to Change Siri Voice on iPhone and iPad?
Whether you are driving, cooking, or whatever, there are various things that Siri can do to help you. Without lifting your finger, your tasks are done with Siri. An interesting thing with Siri is that you can select your preferred language style along with a voice that you like.
It is not at all difficult to change Siri’s voice on iPhone or iPad, but new iPhone/iPad users might get confused. Let us help you hereby sharing the steps to change Siri voice on your Apple device.
Step 1: To change Siri Voice, you need to start by opening the ‘Settings’ app on your iPhone/iPad. Once that is opened, scroll down and look for ‘Siri & Search.’ Tap on it when you locate it.

Step 2: Now, the ‘Siri & Search’ menu will appear on the screen. Here, you need to look for the ‘Siri Voice’ option and then select it.

Step 3: It’s time to change Siri’s voice. Start by selecting your accent under the ‘Variety’ section. You get American, British, Australian, Indian, Irish, and also South African accents.

Step 4: After you have selected a variety, it’s now time to select a ‘Voice’ from the given options. You can listen and choose your desired male or female voice. Your device will take some time to download the voice. Once that’s done, you are good to go.

Part 2. How to Change Siri Voice on Mac?
The amazing Siri function is not just for iPhone and iPad users, but Mac users can also get a great benefit from it. You can manage your small tasks with Siri without any trouble. It is ideal for everyday tasks. You can quickly make calls, send text messages, play your favorite music, and a lot more things could be done with Siri.
This section is for you for any Mac user who wants to change Siri Voice on their device but doesn’t know how to do it. Just follow the steps shared below to change Siri Voice on your MacBook.
Step 1: Start by opening the ‘System Preferences’ section from the Dock. You can also open it by firstly clicking on the Apple Menu and then, from the dropdown menu, select ‘System Preferences.’

Step 2: At this point, a new screen for System Preferences will appear. From that, you have to select the ‘Siri’ option. Now comes the fun part where you have to select the voice variety for your Siri. From the ‘Siri’ screen, click on ‘Voice Variety’ and select your desired voice variety from the list of options.

Step 3: After the voice variety, next is the voice, and for that, hit the ‘Siri Voice’ option. Here, you can select the vocals’ gender, the accent, and you are all done. Keep one thing in mind that not all voice varieties offer different voice options.

Part 3. 3 Nice Voice Changer to Help You Do Siri Voice
As much as Siri is helpful, you can also have equal fun with it. Do you know how that is possible? Have you ever heard about any Siri voice changer? Don’t worry; we have the answer to all your questions. The following section of this article will talk about 3 excellent Siri voice changers that you can use to have fun. Let’s start!
1. Celebrity Voice Changer Parody
Do you know any Siri voice changer that can make you sound like a celebrity? If you want to do so, then ‘Celebrity Voice Changer Parody’ is a great option. You can instantly sound like your favorite celebrity by just speaking on the mic. The voice changer has a huge list of celebrities, and you can speak in English and return, get the celebrity voice.
Are you ready to know the best thing about this Siri voice changer? It promises to maintain the quality of your voice. It does not change the speed, pitch, or tone of your voice. With this, you can sound natural and normal yet like a celebrity.
Like Siri lets you sound like male or female, you can also sound like your favorite male or female celebrity. You only need a strong internet connection to use this Siri voice changer.

2. Live Voice Changer
Live Voice Changer is another Siri voice changer that is nice. With this voice changer, your iOS device transforms into a real-time voice changer. If you are bored with your normal life, then do some pranks with Live Voice Changer and call your friends to have fun. Something extra about the tool is that it is perfect for audio recording.
The voice changer is also great for use. You can use its equalizer, which is 12-band, so that you can sound natural and easily confuse others. With Live Voice Changer and its 15 reverb effects, you can polish your voice more beautifully. Another fascinating thing about this voice changer is that it supports Bluetooth.
The Siri voice changer is very easy to use. You don’t need any technical skills to use the voice changer as it is very clear and simple. Additionally, it is very good to change your voice for games too.

3. Funny Voice Effects & Changer
Who doesn’t want to have fun? Funny Voice Effects & Changer is such a platform that offers you endless fun and laughter. With this Siri voice changer, you can record your voice and apply cool effects. It provides various effects like alien, robot, ghost, male, female, etc.
After you have added your desired effects and filters, you can easily save your recordings from Funny Voice Effects & Changer once it has been modified. Not only this, but the voice changer also allows you to share your fantastic voice with your friends.

Wrapping Up
The article has shared great information reading Siri voice change on iPhone and iPad. Also, we talked about Siri voice change on Mac and gave its step-by-step guideline. Moreover, we shared 3 friendly Siri voice changers that are an amazing option to use.
Wondershare Filmora
Get started easily with Filmora’s powerful performance, intuitive interface, and countless effects  Try AI Voice Changer Try AI Voice Changer Learn More >

02 How to Change Siri Voice on Mac?
03 3 Nice Voice Changer to Help You Do Siri Voice
For Win 7 or later (64-bit)
For macOS 10.12 or later
Part 1. How to Change Siri Voice on iPhone and iPad?
Whether you are driving, cooking, or whatever, there are various things that Siri can do to help you. Without lifting your finger, your tasks are done with Siri. An interesting thing with Siri is that you can select your preferred language style along with a voice that you like.
It is not at all difficult to change Siri’s voice on iPhone or iPad, but new iPhone/iPad users might get confused. Let us help you hereby sharing the steps to change Siri voice on your Apple device.
Step 1: To change Siri Voice, you need to start by opening the ‘Settings’ app on your iPhone/iPad. Once that is opened, scroll down and look for ‘Siri & Search.’ Tap on it when you locate it.
Step 2: Now, the ‘Siri & Search’ menu will appear on the screen. Here, you need to look for the ‘Siri Voice’ option and then select it.
Step 3: It’s time to change Siri’s voice. Start by selecting your accent under the ‘Variety’ section. You get American, British, Australian, Indian, Irish, and also South African accents.
Step 4: After you have selected a variety, it’s now time to select a ‘Voice’ from the given options. You can listen and choose your desired male or female voice. Your device will take some time to download the voice. Once that’s done, you are good to go.
Part 2. How to Change Siri Voice on Mac?
The amazing Siri function is not just for iPhone and iPad users, but Mac users can also get a great benefit from it. You can manage your small tasks with Siri without any trouble. It is ideal for everyday tasks. You can quickly make calls, send text messages, play your favorite music, and a lot more things could be done with Siri.
This section is for you for any Mac user who wants to change Siri Voice on their device but doesn’t know how to do it. Just follow the steps shared below to change Siri Voice on your MacBook.
Step 1: Start by opening the ‘System Preferences’ section from the Dock. You can also open it by firstly clicking on the Apple Menu and then, from the dropdown menu, select ‘System Preferences.’
Step 2: At this point, a new screen for System Preferences will appear. From that, you have to select the ‘Siri’ option. Now comes the fun part where you have to select the voice variety for your Siri. From the ‘Siri’ screen, click on ‘Voice Variety’ and select your desired voice variety from the list of options.
Step 3: After the voice variety, next is the voice, and for that, hit the ‘Siri Voice’ option. Here, you can select the vocals’ gender, the accent, and you are all done. Keep one thing in mind that not all voice varieties offer different voice options.
Part 3. 3 Nice Voice Changer to Help You Do Siri Voice
As much as Siri is helpful, you can also have equal fun with it. Do you know how that is possible? Have you ever heard about any Siri voice changer? Don’t worry; we have the answer to all your questions. The following section of this article will talk about 3 excellent Siri voice changers that you can use to have fun. Let’s start!
1. Celebrity Voice Changer Parody
Do you know any Siri voice changer that can make you sound like a celebrity? If you want to do so, then ‘Celebrity Voice Changer Parody’ is a great option. You can instantly sound like your favorite celebrity by just speaking on the mic. The voice changer has a huge list of celebrities, and you can speak in English and return, get the celebrity voice.
Are you ready to know the best thing about this Siri voice changer? It promises to maintain the quality of your voice. It does not change the speed, pitch, or tone of your voice. With this, you can sound natural and normal yet like a celebrity.
Like Siri lets you sound like male or female, you can also sound like your favorite male or female celebrity. You only need a strong internet connection to use this Siri voice changer.
2. Live Voice Changer
Live Voice Changer is another Siri voice changer that is nice. With this voice changer, your iOS device transforms into a real-time voice changer. If you are bored with your normal life, then do some pranks with Live Voice Changer and call your friends to have fun. Something extra about the tool is that it is perfect for audio recording.
The voice changer is also great for use. You can use its equalizer, which is 12-band, so that you can sound natural and easily confuse others. With Live Voice Changer and its 15 reverb effects, you can polish your voice more beautifully. Another fascinating thing about this voice changer is that it supports Bluetooth.
The Siri voice changer is very easy to use. You don’t need any technical skills to use the voice changer as it is very clear and simple. Additionally, it is very good to change your voice for games too.
3. Funny Voice Effects & Changer
Who doesn’t want to have fun? Funny Voice Effects & Changer is such a platform that offers you endless fun and laughter. With this Siri voice changer, you can record your voice and apply cool effects. It provides various effects like alien, robot, ghost, male, female, etc.
After you have added your desired effects and filters, you can easily save your recordings from Funny Voice Effects & Changer once it has been modified. Not only this, but the voice changer also allows you to share your fantastic voice with your friends.
Wrapping Up
The article has shared great information reading Siri voice change on iPhone and iPad. Also, we talked about Siri voice change on Mac and gave its step-by-step guideline. Moreover, we shared 3 friendly Siri voice changers that are an amazing option to use.
Wondershare Filmora
Get started easily with Filmora’s powerful performance, intuitive interface, and countless effects Try AI Voice Changer Try AI Voice Changer Learn More >
Also read:
- Updated 2024 Approved Understanding Enhanced Functionality in Nero WaveEdito As
- New Taming the Audible Ambiance Step-by-Step Techniques for Eradicating Hidden Harmonies
- Updated 2024 Approved The Hidden Harmonics Techniques for Non-Invasively Stripping Voices From Audio Tracks Using Audacitys Features
- New In 2024, Top-Tier VOIP Games Conversation Tools
- In 2024, Webinar Series The Complete Guide Unpacked
- Updated 2024 Approved The Leading PC Audio Recorders A List of 10 Hits
- Updated Detailed Overview of the Wave Editor Key Functions, Ratings, and Step-by-Step Guides for 2024
- 2024 Approved Mastering the Art of Beat Isolation in Music Production
- Updated In 2024, The Role of AI in Achieving Silent Soundscape Denoising Techniques Unveiled
- New The Ultimate Guide to Audio Length Reduction in Apples iMovie App
- Updated Audio Transformation Made Simple An Instructional Guide on Altering Speed & Pitch Through Digital Platforms
- New In 2024, Seek Out Terrifying Auditory Images
- Updated The Cambridge Audio CXU Odyssey - A Critical Look at Its Performance
- New An Insightful Guide to Determining Best Practices for Audio Format Selection for 2024
- New Techniques for Integrating Audio Tracks Into Moving Pictures Without Payment for 2024
- Updated 2024 Approved Find Scream Sound Effect
- New Discovering the Chirping Noise of Crickets for 2024
- New The Ultimate Guide to Removing Speech From Recordings Using Adobe Audition
- New Unearth Handclap Auditory Illustration
- Audacitys Role in Professional Computer Audio Capture - New Developments
- Updated In 2024, 5 Leading Digital Audio Workstation Options for Professional Guitarists, Updated
- In 2024, Speedy Sonic Transformation Altering Audio Velocity with Ease
- In 2024, Voicing the Future on a Budget The Free, High-Impact Online Platforms Leading the Change
- 2024 Approved Clearing the Auditory Clutter Sequential Steps for Removing Background Audio
- Updated 2024 Approved Detaching Sound Effects From Videos Using Adobe Premiere Pro – Step by Step
- New Siri Voice Changer How to Change Siri Voice on iPhone, iPad or Mac, In 2024
- Updated 2024 Approved Audiovisual Mastery on a Budget The Ultimate List of Free Audio Mixers
- New In 2024, FreeMP3Transcribe Your One-Stop Shop for Easy Conversion of Audio Clips to Written Form – Suited for VideoEditsToolPro Users
- YouTube Sound Library
- The Step-by-Step Guide to Personalizing Mobile Notifications for 2024
- Top 5 Audio Manipulation Apps Perfecting Your Sound Waves
- New Chorus Cutter Suite Construct Individualized Musical Backdrops for 2024
- Uncover the Secrets to Quieting TikToks Background Noise Simple Tricks Revealed for 2024
- Updated Quietude Creators Guide Methods to Extract Silence From MP4, MKV, AVI, MOV, WMV Videos
- Updated 2024 Approved Bridging AIFF and MP3 Techniques for High-Quality Audio Conversion
- New 2024 Approved How to Use Voice Changer Plus on Your iPhone?
- New In 2024, How to Add Transition Between Scenes/Clips
- Updated 2024 Approved REAPER Uncovered A Beginners Handbook on Audio Editing Tools
- Updated Enumeration of Global Podcast Listings Aggregators
- New 2024 Approved Seamless Audio-Visual Integration The Top 5 Audio Video Mixer Innovations
- New In 2024, Unlock the Full Potential of Online Gaming with Morphvox A Players Ultimate Manual to Mastering Changeable Voices
- Updated 2024 Approved Ultimate Guide About Choosing Free Voice Recorder
- Updated Essential Tips for Picking the Ideal Mac-Compatible Music Catalog Tool for 2024
- In 2024, Itel ADB Format Tool for PC vs. Other Unlocking Tools Which One is the Best?
- In 2024, Pokemon Go No GPS Signal? Heres Every Possible Solution On Honor Play 7T | Dr.fone
- Updated Make a Fake Face Online Top Free Tools and Apps for 2024
- Updated Sometimes, You Want to Retain the Audio of a Video, and Here You Need to Convert the Video to MP3. Lets Look at the Top 10 Such Tools without Any Further Ado
- Top Apps and Online Tools To Track Motorola Moto G04 Phone With/Without IMEI Number
- In 2024, Here Are Some Reliable Ways to Get Pokemon Go Friend Codes For Motorola Edge+ (2023) | Dr.fone
- New In 2024, How to Make Your Own GIF on WhatsApp in Simple Ways
- 2024 Approved 10 Best Free Video Hosting Services for Personal and Professional Use
- New The Top-Rated Video Editing Tools for Mac Users for 2024
- In 2024, How to Spy on Text Messages from Computer & Apple iPhone 6 Plus | Dr.fone
- Top 5 Infinix Smart 7 Bypass FRP Tools for PC That Actually Work
- Can Life360 Track You When Your Realme V30 is off? | Dr.fone
- Tutorial to Change Samsung Galaxy A14 5G IMEI without Root A Comprehensive Guide
- How to Track WhatsApp Messages on OnePlus Nord 3 5G Without Them Knowing? | Dr.fone
- How to Cast Apple iPhone 14 to Chromecast? | Dr.fone
- New 2024 Approved Subtitle Your Way to Success FCPX Captioning Made Easy
- In 2024, Hacks to do pokemon go trainer battles For Samsung Galaxy A05 | Dr.fone
- 2024 Approved The Ultimate Guide to Compressing Videos on iPhone and iPad for Free
- How To Translate Video From Japanese to English Online, In 2024
- In 2024, Mastering Wax A Step-by-Step Guide to Editing Videos for Free
- In 2024, Bypassing Google Account With vnROM Bypass For Vivo Y17s
- Process of Screen Sharing Lava Blaze 2 5G to PC- Detailed Steps | Dr.fone
- New 2024 Approved How to Record and Edit an Animoji or Memoji Karaoke Music Video?
- In 2024, How to Screen Mirroring Honor V Purse? | Dr.fone
- In 2024, Top 10 Password Cracking Tools For Honor Magic 6 Pro
- What Is a SIM Network Unlock PIN? Get Your Samsung Galaxy S24 Phone Network-Ready
- Complete Tutorial to Use VPNa to Fake GPS Location On Oppo Find X6 Pro | Dr.fone
- Updated In 2024, You Dont Even Need to Have Advanced Video Editing Skills in Order to Create Visually Stunning Video Collages. In This Article, We Are Going to Take You Through some of the Best Video Collage Apps Of
- In 2024, The Updated Method to Bypass Infinix FRP
- How to Easily Hard reset my Nokia C22 | Dr.fone
- Here are Some of the Best Pokemon Discord Servers to Join On Honor X50i | Dr.fone
- Updated Shake It Off How to Remove Camera Shake in Adobe Premiere Pro
- Title: Updated The Complete Audacity Playbook for Creating Top-Tier Podcasts
- Author: Paul
- Created at : 2024-06-26 12:39:40
- Updated at : 2024-06-27 12:39:40
- Link: https://voice-adjusting.techidaily.com/updated-the-complete-audacity-playbook-for-creating-top-tier-podcasts/
- License: This work is licensed under CC BY-NC-SA 4.0.
