
:max_bytes(150000):strip_icc():format(webp)/trends_MontyRakusen_Getty-5a4aa079482c5200362b0987.jpg)
Updated The Animators Toolkit A Detailed List of the Best Cartoon Sounds Available Online
The Animator’s Toolkit: A Detailed List of the Best Cartoon Sounds Available Online
8 Best Cartoon Sound Effects You Can Download

Benjamin Arango
Mar 27, 2024• Proven solutions
The sound plays a significant role in the videos. Without the right sound effects, your videos become dull. It doesn’t create an impact to grab the attention of the viewers. Especially when it comes to attracting the attention of kids while they watch cartoons.
Are you working on a cartoon video for kids or some animated action cartoons? Use the cartoon sound effects to add more intensity and emotions to the videos. Every time creating a new sound effect for your cartoon video becomes difficult.
If you are on a strict budget, producing new content becomes almost impossible. In such situations, free cartoon sound effects are the best way to enhance your cartoon videos.
In this article, you will learn eight best cartoon sound effects that you can download and make your videos perfect.
8 Best Cartoon Sound Effects Resources
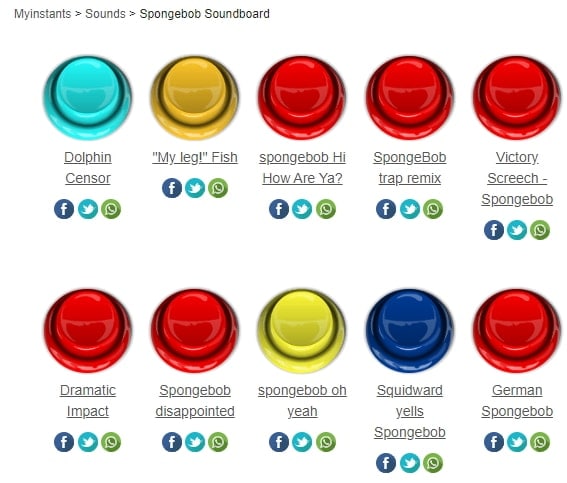
1. Spongebob Sound Effects
MyInstant’s Spongebob soundboard offers a range of cartoon sound effects that can be easily downloaded just by clicking on the Download mp3 sound effect button. You can listen to over 120 classic cartoon sound effects and download it for free. You can also copy the embed link and paste it to your website.
2. Hanna Barbera Sound Effects
From Sounddogs, Hanna Barbera sound effects library, you can find over 2200 cartoon sound effects that are divided into 4 CDs. It has almost all the legendary classic cartoon sound effects from the cartoon shows like Yogi Bear, Huckleberry Hound, the Flintstones, The Jetsons, Quick Draw McGraw, and all the rest of the gang.
You can download the mp3 cartoon sound effects completely free by clicking on the Download ID number mentioned at the right end of each link.
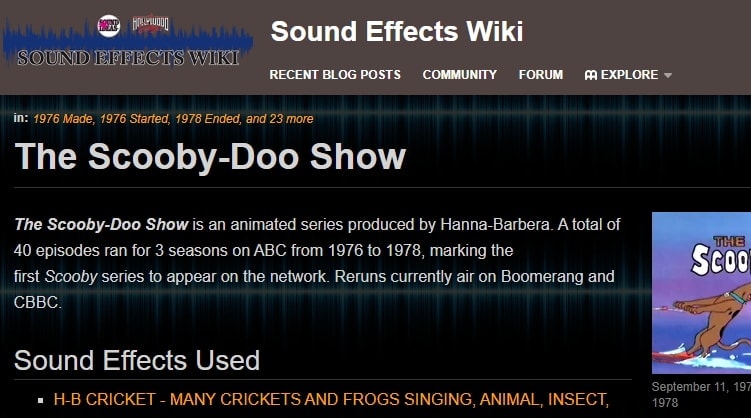
3. Scooby Doo Running Sound
Fandom’s Scooby Doo running sound effects offers all the ideas used in 40 episodes of Scooby Doo throughout the three seasons on ABC. It is over 37000 pages wiki that you can click and browse through the pages to find the right sound effect and download it for free.
4. Tom and Jerry Sound Effects
Pond5 offers 13 Tom and Jerry sound effects that you can listen by scrolling the cursor over the boxes and download the free preview of cartoon sound effects by clicking on Download Preview.
If you want to download the entire cartoon sound effect, you need to register, log in, and pay for it. There are filters like price, collections, duration, etc. to make your selection more precise.
5. Free SFX
In FreeSFX website, you can find a range of comical cartoon sound effects that includes classic effects like descend, boink, impact, pop, musical, running, rip and snap, bounce spring, slide whistle, squelch and splat, horn and loads more.
You need to log in to the website to download free cartoon sound effects.

6.GRSites
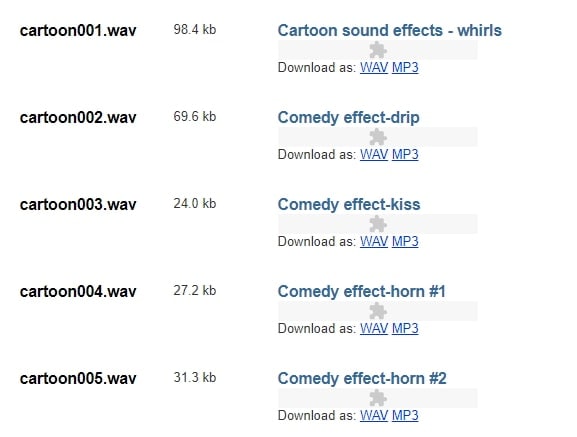
With over 1980 cartoon sound effects, the GRSites is one of the best free sites for downloading both mp3 and WAV files. You can browse from a range of categories to find the best cartoon sound effects for your videos.
7. Cartoon Running Sound Effect
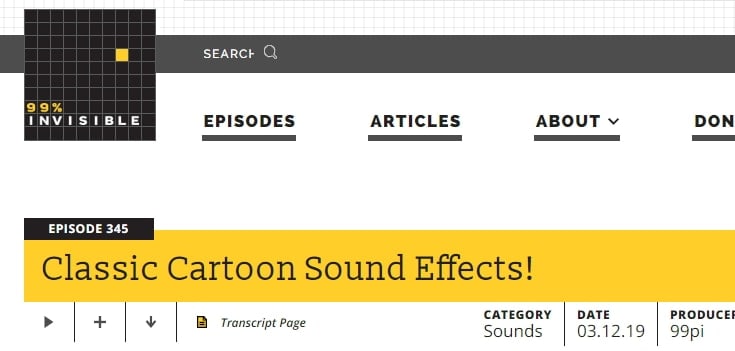
If you are looking for cartoon running sound effect, turn to Episode 345 in 99PercentInvisible. You can download the complete transcript page of around 30 minutes to use it in your video. Use the cartoon running sound effect produced by 99pi to enhance your video.
8. Big Fish Audio
The Big Fish Audio’s cartoon sound FX includes 23 free classic cartoon sound effects. The filters include a range of sound FX types, styles, format, brand, etc.
You can click on the cartoon sound effect and listen to it or add it to your playlist. But, if you wish to download the free cartoon sound effects, you need to register and pay to use the sound effect.

You may also like: How to Extract Audio from Videos on Win/Mac/Phone >>
Conclusion
Make your cartoon videos perfect with the fantastic free cartoon sound effects available for download completely free. With the range of free cartoon sound effects, you don’t need to worry about creating new sounds or expenses. You need to download the free sounds and beautifully enhance it with your creativity. There are several other sites for downloading free cartoon sound effects, but here you can check out some of the trusted ones to use.
Benjamin Arango
Benjamin Arango is a writer and a lover of all things video.
Follow @Benjamin Arango
Benjamin Arango
Mar 27, 2024• Proven solutions
The sound plays a significant role in the videos. Without the right sound effects, your videos become dull. It doesn’t create an impact to grab the attention of the viewers. Especially when it comes to attracting the attention of kids while they watch cartoons.
Are you working on a cartoon video for kids or some animated action cartoons? Use the cartoon sound effects to add more intensity and emotions to the videos. Every time creating a new sound effect for your cartoon video becomes difficult.
If you are on a strict budget, producing new content becomes almost impossible. In such situations, free cartoon sound effects are the best way to enhance your cartoon videos.
In this article, you will learn eight best cartoon sound effects that you can download and make your videos perfect.
8 Best Cartoon Sound Effects Resources
1. Spongebob Sound Effects
MyInstant’s Spongebob soundboard offers a range of cartoon sound effects that can be easily downloaded just by clicking on the Download mp3 sound effect button. You can listen to over 120 classic cartoon sound effects and download it for free. You can also copy the embed link and paste it to your website.
2. Hanna Barbera Sound Effects
From Sounddogs, Hanna Barbera sound effects library, you can find over 2200 cartoon sound effects that are divided into 4 CDs. It has almost all the legendary classic cartoon sound effects from the cartoon shows like Yogi Bear, Huckleberry Hound, the Flintstones, The Jetsons, Quick Draw McGraw, and all the rest of the gang.
You can download the mp3 cartoon sound effects completely free by clicking on the Download ID number mentioned at the right end of each link.
3. Scooby Doo Running Sound
Fandom’s Scooby Doo running sound effects offers all the ideas used in 40 episodes of Scooby Doo throughout the three seasons on ABC. It is over 37000 pages wiki that you can click and browse through the pages to find the right sound effect and download it for free.
4. Tom and Jerry Sound Effects
Pond5 offers 13 Tom and Jerry sound effects that you can listen by scrolling the cursor over the boxes and download the free preview of cartoon sound effects by clicking on Download Preview.
If you want to download the entire cartoon sound effect, you need to register, log in, and pay for it. There are filters like price, collections, duration, etc. to make your selection more precise.
5. Free SFX
In FreeSFX website, you can find a range of comical cartoon sound effects that includes classic effects like descend, boink, impact, pop, musical, running, rip and snap, bounce spring, slide whistle, squelch and splat, horn and loads more.
You need to log in to the website to download free cartoon sound effects.
6.GRSites
With over 1980 cartoon sound effects, the GRSites is one of the best free sites for downloading both mp3 and WAV files. You can browse from a range of categories to find the best cartoon sound effects for your videos.
7. Cartoon Running Sound Effect
If you are looking for cartoon running sound effect, turn to Episode 345 in 99PercentInvisible. You can download the complete transcript page of around 30 minutes to use it in your video. Use the cartoon running sound effect produced by 99pi to enhance your video.
8. Big Fish Audio
The Big Fish Audio’s cartoon sound FX includes 23 free classic cartoon sound effects. The filters include a range of sound FX types, styles, format, brand, etc.
You can click on the cartoon sound effect and listen to it or add it to your playlist. But, if you wish to download the free cartoon sound effects, you need to register and pay to use the sound effect.
You may also like: How to Extract Audio from Videos on Win/Mac/Phone >>
Conclusion
Make your cartoon videos perfect with the fantastic free cartoon sound effects available for download completely free. With the range of free cartoon sound effects, you don’t need to worry about creating new sounds or expenses. You need to download the free sounds and beautifully enhance it with your creativity. There are several other sites for downloading free cartoon sound effects, but here you can check out some of the trusted ones to use.
Benjamin Arango
Benjamin Arango is a writer and a lover of all things video.
Follow @Benjamin Arango
“Decoding Audio Into Text: A Comprehensive Look at Three Modern Online Techniques”
How to Convert MP3 to Text Online [4 Easy Ways]

Shanoon Cox
Mar 27, 2024• Proven solutions
People all over the world use audio and video records. Many people’s lives are made simpler by translating these recordings to text format, which is nothing more than transcription. Let’s start by looking at why people convert mp3 to text.
It is no more difficult to track exact details in an mp3 file collected during a conference, telephone conversation, meeting, or broadcasting. You will have quick access to the files if you use a transcribed text. When you transcribe a recording, you will translate, arrange, and store the data for later reference.
Further, this article will address 4 easy ways that can transcribe mp3 to text, keep reading!
- Method 1: Convert MP3 to Text Online by Media.io
- Method 2: Convert MP3 to Text Online by Veed.io
- Method 3: Convert MP3 to text online by Amberscript
- Method 4: Convert MP3 to text online by Sonix
- Bonus tip: Add text to your video with Wondershare Filmora
Method 2: Convert MP3 to Text Online by Veed.io

Would you like to ease your continuous struggle of concentrating on recordings? Well, then convert your MP3 to a text file and transcribe the speech as your way out. A big thanks to VEED! The online auto transcription tool from VEED is quick, accessible, and clear to use. Veed.io is compatible with Video files, WAVs, OGGs, M4As, which you can transcribe to text with a couple of clicks.
Here are three simple steps to converting an MP3 to text using the handy online mp3 to text converter Veed.io.
Step 1: Launch Veed.io
Start by launching the online converter Veed.io on your browser.

Step 2: Upload your MP3 file
To get started, click on Upload a file to import your MP3 file from your device to the online converter or simply drag and drop the file. You can also choose from the other upload options available such as Dropbox, YouTube link, or record.

Step 3: Convert to text
From the edit menu on the left, go to Subtitles, tap on the Auto Transcribe option, pick your language, and hit Start. You can also choose to add manual subtitles or upload a subtitle file.

Step 4: Download the transcribed file
Once your file is transcribed to text, hit Export and select your required preset from the Preset dropdown. Finally, tap on Export video to save the file to your device.

What are the benefits of using this mp3 to text converter?
At the touch of a button, you can convert audio to text.
- Fast
You can transcribe your audio in a couple of seconds with VEED, avoiding your hours of endless writing.
- Simple
You can change every line and word to ensure that the transcription is just everything you want.
- Adaptable
This audio transcription platform is used to make clear transcripts, descriptions, or individual transcript files.
Method 3: Convert MP3 to text online by Amberscript
Ambertrasncipt is an excellent mp3 to text converter with speech recognition technology. The software allows you to transcribe audio to text automatically in just a few steps. Here’s a quick tutorial on how you can transcribe mp3 to text using Amberscript.
Step 1: Upload a file
Open Amberscript on your browser to get started. Next, click on Choose File to upload your audio file or drag and drop the file on the main interface.

Step 2: Transcribe mp3 to text
For automatic transcription, select Transcription and further choose Automatic under the select service menu. You can also choose to add manual subtitles. Finally, hit Order to start the transcription process.

Step 3: Transfer
After the transcription process is completed, preview and save your transcript. To save the file to your device, hit Export and choose from the available export options such as Text, Subtitles, or audio.

What are the benefits of using this mp3 to text converter?
- Simple
Find essential sections of your text quickly by searching through them.
- SEO-friendly
Use your text to boost your content’s search engine ranking.
- Edit
You can’t change what was said once the audio has been captured. That isn’t a problem with text analysis.
To conduct qualitative research, you’ll need a transcript.
- Research
To conduct qualitative research, you’ll need a transcript.
- Translate
With text, translating your document becomes much more straightforward.
- Quickly
Text is much faster and simpler to operate.
Method 4: Convert MP3 to text online by Sonix
With Sonix you can transcribe, edit, highlight, timestamp, and even translate your transcript in 3 to 4 minutes. Just follow these simple steps and you can convert mp3 to text easily.
Step 1: Sign up for free
First, launch the online tool and sign up for a free account on Sonix or sign in if you have an existing account.

Step 2: Upload your audio file
Drag and drop your MP3 Audio File file (*.MP3) from your PC or import from Google Drive, Dropbox, or YouTube.

Step 3: Convert mp3 to text
Now, select your desired language from the Language dropdown and tap on Transcribe to start the transcription.

Step 4: Edit the transcript
After the transcription process is completed, use the Sonix AudioText Editor to polish your transcript. Simply type in your browser to correct any words.

Step 5: Export
Once all the edits are made, select Export. To save a text version of your MP3 file, choose ‘Text file (.txt)’ from the options list and hit Download.

Bonus tip: Add text to your video with Wondershare Filmora
Adding text to your video is the perfect way to connect with your audience on another level. Whether you want to add an exciting intro, ending credits, or captions to tell your story, Wondershare Filmora lets you do just anything. Filmora is a handy and professional video editor that comes loaded with creative editing tools. It offers a variety of text templates with fancy fonts and stunning transitions you can choose from.


What’s more? Using Filmora is very easy, thanks to its intuitive interface. To inspire you, here is a quick guide on how you can add fancy texts to enhance your video.
Step 1: Import a video to the Filmora timeline
Open the Wondershare Filmora tool and hit New Project. On the main screen, open the Import dropdown and select Import media files to import your video. Now drag the video onto the timeline to start editing.

Step 2: Choose a text template
On the Edit menu at the top, go to Titles. From the available presets, you can choose from the cover opener, ending credits, subtitles and lower thirds. Double click a template to preview it, and select the one you like. Then drag the selected template to the timeline.

Step 3: Edit your text
To edit your custom text, double-click the Text thumbnail on the timeline. Now on the text editor panel, customize your font, color, alignment, and size of your text. Or you can choose a built in text style from the text style library. Further, go to the Animation tab, to add special animations to your text.
Now you can either click ok to save the edits or choose the Advanced option to enter the advanced editing panel. Here you can customize the text with elements, shapes, text boxes, and shadows. You can also adjust the duration of your text as you like.

Step 4: Export your video with titles
Once all the edits are completed, tap the Export button on the top right corner. Then give your video a name, select where you want to save it, choose a resolution, and again hit Export.

CONCLUSION
Converting audio to text is not anymore a menial task and does not require human transcribers sitting all day long to listen to audio files. The automatic online transcription apps and platforms allow anyone to convert mp3 to text extremely fast and efficiently. You can transcribe any audio file just like a native speaker with 99 percent accuracy without knowing much about the process.
This strategy can benefit students, professionals, and others who want to consume information but find it hard to concentrate or remember things.
Shanoon Cox
Shanoon Cox is a writer and a lover of all things video.
Follow @Shanoon Cox
Shanoon Cox
Mar 27, 2024• Proven solutions
People all over the world use audio and video records. Many people’s lives are made simpler by translating these recordings to text format, which is nothing more than transcription. Let’s start by looking at why people convert mp3 to text.
It is no more difficult to track exact details in an mp3 file collected during a conference, telephone conversation, meeting, or broadcasting. You will have quick access to the files if you use a transcribed text. When you transcribe a recording, you will translate, arrange, and store the data for later reference.
Further, this article will address 4 easy ways that can transcribe mp3 to text, keep reading!
- Method 1: Convert MP3 to Text Online by Media.io
- Method 2: Convert MP3 to Text Online by Veed.io
- Method 3: Convert MP3 to text online by Amberscript
- Method 4: Convert MP3 to text online by Sonix
- Bonus tip: Add text to your video with Wondershare Filmora
Method 2: Convert MP3 to Text Online by Veed.io
Would you like to ease your continuous struggle of concentrating on recordings? Well, then convert your MP3 to a text file and transcribe the speech as your way out. A big thanks to VEED! The online auto transcription tool from VEED is quick, accessible, and clear to use. Veed.io is compatible with Video files, WAVs, OGGs, M4As, which you can transcribe to text with a couple of clicks.
Here are three simple steps to converting an MP3 to text using the handy online mp3 to text converter Veed.io.
Step 1: Launch Veed.io
Start by launching the online converter Veed.io on your browser.
Step 2: Upload your MP3 file
To get started, click on Upload a file to import your MP3 file from your device to the online converter or simply drag and drop the file. You can also choose from the other upload options available such as Dropbox, YouTube link, or record.
Step 3: Convert to text
From the edit menu on the left, go to Subtitles, tap on the Auto Transcribe option, pick your language, and hit Start. You can also choose to add manual subtitles or upload a subtitle file.
Step 4: Download the transcribed file
Once your file is transcribed to text, hit Export and select your required preset from the Preset dropdown. Finally, tap on Export video to save the file to your device.
What are the benefits of using this mp3 to text converter?
At the touch of a button, you can convert audio to text.
- Fast
You can transcribe your audio in a couple of seconds with VEED, avoiding your hours of endless writing.
- Simple
You can change every line and word to ensure that the transcription is just everything you want.
- Adaptable
This audio transcription platform is used to make clear transcripts, descriptions, or individual transcript files.
Method 3: Convert MP3 to text online by Amberscript
Ambertrasncipt is an excellent mp3 to text converter with speech recognition technology. The software allows you to transcribe audio to text automatically in just a few steps. Here’s a quick tutorial on how you can transcribe mp3 to text using Amberscript.
Step 1: Upload a file
Open Amberscript on your browser to get started. Next, click on Choose File to upload your audio file or drag and drop the file on the main interface.
Step 2: Transcribe mp3 to text
For automatic transcription, select Transcription and further choose Automatic under the select service menu. You can also choose to add manual subtitles. Finally, hit Order to start the transcription process.
Step 3: Transfer
After the transcription process is completed, preview and save your transcript. To save the file to your device, hit Export and choose from the available export options such as Text, Subtitles, or audio.
What are the benefits of using this mp3 to text converter?
- Simple
Find essential sections of your text quickly by searching through them.
- SEO-friendly
Use your text to boost your content’s search engine ranking.
- Edit
You can’t change what was said once the audio has been captured. That isn’t a problem with text analysis.
To conduct qualitative research, you’ll need a transcript.
- Research
To conduct qualitative research, you’ll need a transcript.
- Translate
With text, translating your document becomes much more straightforward.
- Quickly
Text is much faster and simpler to operate.
Method 4: Convert MP3 to text online by Sonix
With Sonix you can transcribe, edit, highlight, timestamp, and even translate your transcript in 3 to 4 minutes. Just follow these simple steps and you can convert mp3 to text easily.
Step 1: Sign up for free
First, launch the online tool and sign up for a free account on Sonix or sign in if you have an existing account.
Step 2: Upload your audio file
Drag and drop your MP3 Audio File file (*.MP3) from your PC or import from Google Drive, Dropbox, or YouTube.
Step 3: Convert mp3 to text
Now, select your desired language from the Language dropdown and tap on Transcribe to start the transcription.
Step 4: Edit the transcript
After the transcription process is completed, use the Sonix AudioText Editor to polish your transcript. Simply type in your browser to correct any words.
Step 5: Export
Once all the edits are made, select Export. To save a text version of your MP3 file, choose ‘Text file (.txt)’ from the options list and hit Download.
Bonus tip: Add text to your video with Wondershare Filmora
Adding text to your video is the perfect way to connect with your audience on another level. Whether you want to add an exciting intro, ending credits, or captions to tell your story, Wondershare Filmora lets you do just anything. Filmora is a handy and professional video editor that comes loaded with creative editing tools. It offers a variety of text templates with fancy fonts and stunning transitions you can choose from.
What’s more? Using Filmora is very easy, thanks to its intuitive interface. To inspire you, here is a quick guide on how you can add fancy texts to enhance your video.
Step 1: Import a video to the Filmora timeline
Open the Wondershare Filmora tool and hit New Project. On the main screen, open the Import dropdown and select Import media files to import your video. Now drag the video onto the timeline to start editing.
Step 2: Choose a text template
On the Edit menu at the top, go to Titles. From the available presets, you can choose from the cover opener, ending credits, subtitles and lower thirds. Double click a template to preview it, and select the one you like. Then drag the selected template to the timeline.
Step 3: Edit your text
To edit your custom text, double-click the Text thumbnail on the timeline. Now on the text editor panel, customize your font, color, alignment, and size of your text. Or you can choose a built in text style from the text style library. Further, go to the Animation tab, to add special animations to your text.
Now you can either click ok to save the edits or choose the Advanced option to enter the advanced editing panel. Here you can customize the text with elements, shapes, text boxes, and shadows. You can also adjust the duration of your text as you like.
Step 4: Export your video with titles
Once all the edits are completed, tap the Export button on the top right corner. Then give your video a name, select where you want to save it, choose a resolution, and again hit Export.
CONCLUSION
Converting audio to text is not anymore a menial task and does not require human transcribers sitting all day long to listen to audio files. The automatic online transcription apps and platforms allow anyone to convert mp3 to text extremely fast and efficiently. You can transcribe any audio file just like a native speaker with 99 percent accuracy without knowing much about the process.
This strategy can benefit students, professionals, and others who want to consume information but find it hard to concentrate or remember things.
Shanoon Cox
Shanoon Cox is a writer and a lover of all things video.
Follow @Shanoon Cox
Perfecting Your Soundtrack: Techniques for Implementing Automatic Audio Suppression in Final Cut Pro X
How to Do Automatic Audio Ducking in Final Cut Pro X
Benjamin Arango
Oct 26, 2023• Proven solutions
If you are working in post-production, then you might be familiar with the concept of audio ducking. In nutshell, it is a process in which the background sound of a clip is reduced and the voiceover is amplified. Therefore, with the help of sound ducking, we can focus on the dialogues without a noisy background track.
Lately, a lot of people have asked us about the process to do automatic audio ducking in Final Cut Pro X. Since it is a clip-based editing tool, it lacks a dedicated mixer to help us do FCPX audio ducking. Thankfully, there are third-party plugins and tools (like the FCPX AutoDuck) that can help us do the same. In this post, I will let you know how to do audio ducking in Final Cut Pro and its best alternative.
If you don’t want to use any plugins, see this article: How to sync in FCPX.
Part 1: How to Perform Audio Ducking in Final Cut Pro X?
If you have a video in which you have background music and a voiceover, then you can perform sound ducking in it. This will automatically enhance the quality of the voiceover and would mellow down the background music selectively. Sadly, the feature of audio ducking in Final Cut Pro has to be done manually as there are no instant automatic options in the tool presently.

Therefore, you can use any reliable third-party FCPX tool like Audified or AutoDuck to meet your requirements. For instance, let’s consider the example of FCPX AutoDuck, which is a paid macOS application. To perform FCPX audio ducking, you first have to export the music and voiceover as two dedicated files. Later, you can import them to FCPX AutoDuck to perform auto-ducking of the music.
Step 1: Export the Music Files
To perform audio ducking in Final Cut Pro, you can first launch the application on Mac and open your project. Since there is no FCPX audio ducking option, you first have to export the music files.
For this, you can just go to the main menu on Final Cut Pro and select File > Share > Master File. This will help you explore and save all the media files from Final Cut Pro.

Now, once the Master File window would be opened, you can go to the “Role” tab and select “Audio Only” as the output role. This will display a list of the background music and the voiceover file.

You can now select the files of your choice and click on the “Next” button to save them to any desired location on your Mac.
Step 2: Use FCPX AutoDuck to Do Automatic Sound Ducking
Great! Now, you can just open the FCPX AutoDuck application on your Mac via its Application or Spotlight. You can just give it a project name and drag-and-drop the speaker (voiceover) and the music files here. If you want, you can also import a filler file of your choice.

FCPX will also let you select the level of music ducking from its dedication option. There are also different options to set up things like setting up the window or pre-roll for the audio.

In the end, you can click on the “Duck” button and let FCPX AutoDuck perform automatic audio ducking on the files.
Step 3: Insert the Modified File to your Project
Once the FCPX audio ducking process is completed, it will generate an XML file. You can now just drag the XML file and drop it to your project in Final Cut Pro. Here, you can choose to select the XML file in the same project.

You can now copy the modified music clip, go to the timeline, and paste it at the starting of the video. Here, you can just mute the previous music clip and let the auto-duck audio play instead.

Part 2: The Best FCPX Alternative for Mac to Perform Automatic Audio Ducking
As you can see, it is pretty tough to do audio ducking in Final Cut Pro as there is no automatic feature in the tool. Therefore, you can consider using Wondershare Filmora for Mac to perform automatic sound ducking and save your time. It is an inbuilt feature in Filmora that would perform auto-ducking instantly, and you can also mark the level of ducking in the video.
Ideally, you can perform audio ducking on voiceover or another soundtrack in Wondershare Filmora. To perform music ducking via Wondershare Filmora on Mac, you can follow these steps:
Step 1: Import the Video Clip or Record Your Audio
To begin with, just launch Wondershare Filmora on your Mac and just drag-and-drop your media files to the application. You can also go to its menu and choose to import media files.

Once your video is imported, you can drag it to the timeline at the bottom to work on it. If you want, you can click on the voiceover icon (adjacent to the preview section) to record dialogues right away.

Apart from that, you can also import music files to your video or use the extensive range of royalty-free audio files that are available in Filmora.

Step 2: Perform Automatic Audio Ducking
Great! Now, on the timeline of Filmora, you can see your video and the music track. From here, you need to select the track that you want to amplify (like the voiceover).

Afterward, right-click the audio track and select the “Adjust Audio” option from the context menu.

This will open a dedicated Audio Mixer window on the screen. Just go to the Audio tab and enable the “Ducking” option to lower the volume of other audio tracks. You can also select the desired level for music ducking to implement.

Step 3: Export the Edited Video
That’s it! After performing audio ducking on Filmora, you can preview the results and further make the needed changes. In the end, you can click on the “Export” button and save the file in the format and resolution of your choice.

There you go! After following this guide, you can easily learn how to do audio ducking in Final Cut Pro X easily. Since there is no inbuilt FCPX audio ducking option, you can use a third-party tool like FCPX AutoDuck. Apart from that, if you are looking for a better alternative to do sound ducking, then simply use Wondershare Filmora. It is a user-friendly and resourceful application that would let you perform automatic music ducking like a pro.
Benjamin Arango
Benjamin Arango is a writer and a lover of all things video.
Follow @Benjamin Arango
Benjamin Arango
Oct 26, 2023• Proven solutions
If you are working in post-production, then you might be familiar with the concept of audio ducking. In nutshell, it is a process in which the background sound of a clip is reduced and the voiceover is amplified. Therefore, with the help of sound ducking, we can focus on the dialogues without a noisy background track.
Lately, a lot of people have asked us about the process to do automatic audio ducking in Final Cut Pro X. Since it is a clip-based editing tool, it lacks a dedicated mixer to help us do FCPX audio ducking. Thankfully, there are third-party plugins and tools (like the FCPX AutoDuck) that can help us do the same. In this post, I will let you know how to do audio ducking in Final Cut Pro and its best alternative.
If you don’t want to use any plugins, see this article: How to sync in FCPX.
Part 1: How to Perform Audio Ducking in Final Cut Pro X?
If you have a video in which you have background music and a voiceover, then you can perform sound ducking in it. This will automatically enhance the quality of the voiceover and would mellow down the background music selectively. Sadly, the feature of audio ducking in Final Cut Pro has to be done manually as there are no instant automatic options in the tool presently.
Therefore, you can use any reliable third-party FCPX tool like Audified or AutoDuck to meet your requirements. For instance, let’s consider the example of FCPX AutoDuck, which is a paid macOS application. To perform FCPX audio ducking, you first have to export the music and voiceover as two dedicated files. Later, you can import them to FCPX AutoDuck to perform auto-ducking of the music.
Step 1: Export the Music Files
To perform audio ducking in Final Cut Pro, you can first launch the application on Mac and open your project. Since there is no FCPX audio ducking option, you first have to export the music files.
For this, you can just go to the main menu on Final Cut Pro and select File > Share > Master File. This will help you explore and save all the media files from Final Cut Pro.
Now, once the Master File window would be opened, you can go to the “Role” tab and select “Audio Only” as the output role. This will display a list of the background music and the voiceover file.
You can now select the files of your choice and click on the “Next” button to save them to any desired location on your Mac.
Step 2: Use FCPX AutoDuck to Do Automatic Sound Ducking
Great! Now, you can just open the FCPX AutoDuck application on your Mac via its Application or Spotlight. You can just give it a project name and drag-and-drop the speaker (voiceover) and the music files here. If you want, you can also import a filler file of your choice.
FCPX will also let you select the level of music ducking from its dedication option. There are also different options to set up things like setting up the window or pre-roll for the audio.
In the end, you can click on the “Duck” button and let FCPX AutoDuck perform automatic audio ducking on the files.
Step 3: Insert the Modified File to your Project
Once the FCPX audio ducking process is completed, it will generate an XML file. You can now just drag the XML file and drop it to your project in Final Cut Pro. Here, you can choose to select the XML file in the same project.
You can now copy the modified music clip, go to the timeline, and paste it at the starting of the video. Here, you can just mute the previous music clip and let the auto-duck audio play instead.
Part 2: The Best FCPX Alternative for Mac to Perform Automatic Audio Ducking
As you can see, it is pretty tough to do audio ducking in Final Cut Pro as there is no automatic feature in the tool. Therefore, you can consider using Wondershare Filmora for Mac to perform automatic sound ducking and save your time. It is an inbuilt feature in Filmora that would perform auto-ducking instantly, and you can also mark the level of ducking in the video.
Ideally, you can perform audio ducking on voiceover or another soundtrack in Wondershare Filmora. To perform music ducking via Wondershare Filmora on Mac, you can follow these steps:
Step 1: Import the Video Clip or Record Your Audio
To begin with, just launch Wondershare Filmora on your Mac and just drag-and-drop your media files to the application. You can also go to its menu and choose to import media files.
Once your video is imported, you can drag it to the timeline at the bottom to work on it. If you want, you can click on the voiceover icon (adjacent to the preview section) to record dialogues right away.
Apart from that, you can also import music files to your video or use the extensive range of royalty-free audio files that are available in Filmora.
Step 2: Perform Automatic Audio Ducking
Great! Now, on the timeline of Filmora, you can see your video and the music track. From here, you need to select the track that you want to amplify (like the voiceover).
Afterward, right-click the audio track and select the “Adjust Audio” option from the context menu.
This will open a dedicated Audio Mixer window on the screen. Just go to the Audio tab and enable the “Ducking” option to lower the volume of other audio tracks. You can also select the desired level for music ducking to implement.
Step 3: Export the Edited Video
That’s it! After performing audio ducking on Filmora, you can preview the results and further make the needed changes. In the end, you can click on the “Export” button and save the file in the format and resolution of your choice.
There you go! After following this guide, you can easily learn how to do audio ducking in Final Cut Pro X easily. Since there is no inbuilt FCPX audio ducking option, you can use a third-party tool like FCPX AutoDuck. Apart from that, if you are looking for a better alternative to do sound ducking, then simply use Wondershare Filmora. It is a user-friendly and resourceful application that would let you perform automatic music ducking like a pro.
Benjamin Arango
Benjamin Arango is a writer and a lover of all things video.
Follow @Benjamin Arango
Also read:
- Updated 2024 Approved How to Add Audio to Video in Android
- New Unveil Screaming Victim Soundtrack Fragment for 2024
- 2024 Approved Melodic Ensemble for Festive Video Chronicle, To Be Released
- Best Beat Sync Video Editing Apps for 2024
- New In 2024, Banned From Omegle? How to Get Unbanned?
- New The Ultimate Singing Aid Accessible Online MP3 Dimmer Tool for Flawless Performance Freedom.
- In 2024, Top Best 10 AI Music Composers
- Updated Enhancing Visual Storytelling with Background Tunes A Filmora Approach for 2024
- New 2024 Approved Conquering Computer Storage A Comprehensive Approach to Obtaining Podcasts
- Updated Harmonizing Visual Content Adobe Premiere Pros Tools for Subduing Background Noise
- 2024 Approved Expert Advice How to Hush TikToks Auditory Distractions Effortlessly
- Updated Voice Alteration Devices A Guide to Introductions, Assessments, and Substitutes
- Updated The Future of Audio Fabrication Creating Convincing AI Voices Through Advanced Techniques
- New In 2024, Free Film Production Integrating Soundtracks Into Your Workflow
- Updated Capture Conversations Flawlessly The 5 Most Reliable Smartphone Voice Recorders
- New In 2024, Streamlining Sound Quality The Best Three Approaches for Podcast to MP3 Transition
- Guide on How To Change Your Apple ID Email Address On iPhone SE (2022)
- New In 2024, WMM No More Discover These 13 Fantastic Alternatives
- In 2024, A Comprehensive Guide to Apple iPhone 7 Blacklist Removal Tips and Tools
- 2024 Approved 20 Wonderful Stop Motion Ideas for Beginners and Kids
- How To Fix Part of the Touch Screen Not Working on Samsung Galaxy S23 Ultra | Dr.fone
- Top 11 Free Apps to Check IMEI on Vivo Y100i Phones
- Updated Wanna Know the Secret of Recording Your Desktop with Ease? Here Is Everything You Should Know About Desktop Recorder for 2024
- New MTS Video Editing Software Roundup The Best
- In 2024, How to Unlock iPhone 12? | Dr.fone
- Life360 Circle Everything You Need to Know On Asus ROG Phone 8 | Dr.fone
- Title: Updated The Animators Toolkit A Detailed List of the Best Cartoon Sounds Available Online
- Author: Paul
- Created at : 2024-05-20 01:48:43
- Updated at : 2024-05-21 01:48:43
- Link: https://voice-adjusting.techidaily.com/updated-the-animators-toolkit-a-detailed-list-of-the-best-cartoon-sounds-available-online/
- License: This work is licensed under CC BY-NC-SA 4.0.
