
:max_bytes(150000):strip_icc():format(webp)/GettyImages-990620130-ec2a7076e3f043bfa4f540b72d2034c6.jpg)
Updated Sound Cleanup A Comprehensive Tutorial on Removing Drums From Audio Files for 2024
Sound Cleanup: A Comprehensive Tutorial on Removing Drums From Audio Files
Many drummers are interested in getting the best out of audio tracks. With drum remover online tools readily available, it is now easier to do this. A good drum extract online tool will help you practice playing the drums to your favorite songs. It is also a great way for DJs and beatmakers to make drum loops and fills. In this article, we explore the readily available drum extract free online tools that help in achieving this and more.
AI Vocal Remover A cross-platform for facilitating your video editing process by offering valuable benefits!
Free Download Free Download Learn More

Part 1. How to Remove Drums From Any Song: 2 Easy Methods
You’ve probably been there. Wanted to make a drum cover video of our favorite song, but did not know if a drumless version exists. You may have wondered whether there is a way to isolate and remove a drum track easily. Luckily, there are several drum extract free download tools that you can use to take the drums out of any song with just a few clicks. Tools like Media.io . UniConverter , Moises.ai , and LALAL.ai are known to effectively remove drums from audio files. Let’s have a look at the techniques that you can use:
1. Extract Drums from a Song Online With A Web App
Using an online web app is one of the easiest ways to extract drums from your song tracks. This is a great approach for beginners or people who do not have production experience. Probably you do not want to waste time finding the audio files, converting them from iTunes, and bringing them into a DAW. A digital audio workstation (DAW) is an electronic system that is designed for recording, editing, and playing back digital audio files. It usually plays the following functions:
- Loading and editing audio
- Recording new tracks
- Mixing and applying effects
- Mastering
- Exporting finished mixes
After bringing the files to the DAW, you still have to remove drums manually for the song. The process will have a lot of clicking and file management that will take time and extra effort. With a web app drum extractor, the process is super easy. Take Moises.ai , for instance, users extract drums from any public media URL in minutes.

This makes it a great choice when removing drums from music on SoundCloud or the latest video of YouTube. Why would you try Moises.ai?
- Cloud-based AI application – Effectively extracts drums from any public media URL
- User-friendly UI – The platform is simple and easy to use for all experience levels
- Keep Track of Progress – The Moises.ai dashboard keeps a library of all songs you have isolated, allowing you to playback and download on-demand
- Download Separate Files – Once your original audio file has been separated, you can download the vocals, drums, beats, and bass files to your local PC
- Free Version is Available – Try out the service on the free version before committing your money
Although some tracks will not isolate the best with this web app, it gets the work done. Once you download the files, it is easy to bring the songs into DAW to play along. The process makes it simple to create drum covers fast that you can play along with other web mixers.
2. Extract Drums from a Song Online with VST Plugins
For those who want to do more of the work, VST plugins for removing drums from music are a great option. These are software modules that take the form of real-time effects or instruments. They may also have MIDI effects, giving more freedom with audio editing, The inability to adjust or customize settings when extracting drums from a soundtrack is one of the major downfalls of a web-based application. With VST plugins, this issue is no longer a concern.

With VSTs, you are more flexible and able to deliver better results. They are often used in applications that support VST technology, including Cakewalk Sonar, Steinberg Cubase, Sound Forge Pro, Ableton Live, and many others. Some of the most common ones include:
- AudioSourceRe
- UNMIX Drums
- XTrax Stem 2
- Drum Extract
VST plugins are great for customizing your audio results. You have two ways to remove drums from a song using a VST plugin and DAW: using a compressor or an equalizer. When good results are not forthcoming, you can try to EQ or equalize frequencies that seem out of the soundtrack. This will lower the perceived volume of the drums, providing clearer vocals. Another approach is to use a parametric equalizer by reducing the frequencies by some dB for precise results.
- 4k (cymbals)
- 90 Hz (kick drum)
- 150 Hz (snare drum)
Just play around with the EQ, mixing your drum tracks above the recordings. The end will be your kit’s flaming against the original recording for perfect results.
Part 2. Remove and Edit Drums in Audio with Filmora
Removing drums from a song becomes easier with the right tools. In most cases, you will want to remove the drums and process your audio file further. Probably use the file to prepare for karaoke or editing videos on YouTube or TikTok. With Wondershare Filmora, you get to do all this and more. The most recent Filmora Version 13 is an excellent choice for editing audio files on the go. It comes with some amazing AI features that make it super simple to separate vocals, beats, drums, piano, and more in audio tracks.
Free Download For Win 7 or later(64-bit)
Free Download For macOS 10.14 or later
AI Vocal Remover
Extracting drums from songs is made easier with Filmora’s AI Vocal Remover. The AI feature accurately separates vocals and drums from any song in minutes. It is also a great tool for extracting acapella from audio tracks and dubbing videos freely by removing vocals. With the ability to keep the same high-quality for audio and video when removing the vocals, the feature is effective for different kinds of projects:

- Remove Vocals from Audio – With only one click, the feature removes vocals from audio while maintaining high-quality production. This means you can dub any video without covering up the current and create great drum soundtracks within minutes.
- Effective Vocal Separation – The AI-powered feature isolates vocals with exceptional quality without losing the fidelity of your audio. It saves you time and effort that you would have spent doing all that manually.
- Listen to Results Instantly: With Filmora, you do not have to download your processed files to listen to the results. Simply preview and listen to the results in the editor to make sure you are getting the results that you want.
- Remove Other Audio Elements from the Video: The AI Vocal Remover allows you to remove vocals and other audio elements, including drums. You may also go further to remove any unwanted audio elements to enhance your video editing process.
- Dub Videos with Minimal Efforts – The feature allows you to completely remove the original recording and input your own fresh ones. This helps you create highly professional and clearly dubbed videos.
How to Extract Drums from Songs with AI Vocal Remover
The AI Vocal Remover feature on Filmora offers a simple and easy way to extract drums from your favorite songs. Here is a quick guide on how to use the feature:
Step 1Launch Filmora
To start using the AI Vocal Remover feature, launch Filmora on your desktop. Then click “New Project” in the startup window to prepare the software for the next steps.

Step 2Import Your Song or Sound Track
On the customer toolbar, select “Media” and then click on the “Files” icon. This will allow you to import the files you want to edit with Filmora.

Step 3Start the AI Vocal Remover Feature
Drag and drop the files you have imported to Filmora to the timeline so you can start the editing process. Select the song you want to edit in the timeline and select “Audio” option. Then click AI Vocal Remover from the options available. Navigate the AI Vocal Remover to edit the audio as desired.

Conclusion
You may want to extract drums from your favorite songs for various reasons. Maybe you want to create a drum cover video on the latest song or have a drumless version of a certain soundtrack. There are several ways to isolate and remove drums from tracks with ease. Using a web-based drum remover tool or VST plugins is the most common option. However, Wondershare Filmora offers some amazing features that allow you to extract drums from your songs and do more. You get to edit your files further and achieve greater quality.
Free Download Free Download Learn More
Part 1. How to Remove Drums From Any Song: 2 Easy Methods
You’ve probably been there. Wanted to make a drum cover video of our favorite song, but did not know if a drumless version exists. You may have wondered whether there is a way to isolate and remove a drum track easily. Luckily, there are several drum extract free download tools that you can use to take the drums out of any song with just a few clicks. Tools like Media.io . UniConverter , Moises.ai , and LALAL.ai are known to effectively remove drums from audio files. Let’s have a look at the techniques that you can use:
1. Extract Drums from a Song Online With A Web App
Using an online web app is one of the easiest ways to extract drums from your song tracks. This is a great approach for beginners or people who do not have production experience. Probably you do not want to waste time finding the audio files, converting them from iTunes, and bringing them into a DAW. A digital audio workstation (DAW) is an electronic system that is designed for recording, editing, and playing back digital audio files. It usually plays the following functions:
- Loading and editing audio
- Recording new tracks
- Mixing and applying effects
- Mastering
- Exporting finished mixes
After bringing the files to the DAW, you still have to remove drums manually for the song. The process will have a lot of clicking and file management that will take time and extra effort. With a web app drum extractor, the process is super easy. Take Moises.ai , for instance, users extract drums from any public media URL in minutes.
This makes it a great choice when removing drums from music on SoundCloud or the latest video of YouTube. Why would you try Moises.ai?
- Cloud-based AI application – Effectively extracts drums from any public media URL
- User-friendly UI – The platform is simple and easy to use for all experience levels
- Keep Track of Progress – The Moises.ai dashboard keeps a library of all songs you have isolated, allowing you to playback and download on-demand
- Download Separate Files – Once your original audio file has been separated, you can download the vocals, drums, beats, and bass files to your local PC
- Free Version is Available – Try out the service on the free version before committing your money
Although some tracks will not isolate the best with this web app, it gets the work done. Once you download the files, it is easy to bring the songs into DAW to play along. The process makes it simple to create drum covers fast that you can play along with other web mixers.
2. Extract Drums from a Song Online with VST Plugins
For those who want to do more of the work, VST plugins for removing drums from music are a great option. These are software modules that take the form of real-time effects or instruments. They may also have MIDI effects, giving more freedom with audio editing, The inability to adjust or customize settings when extracting drums from a soundtrack is one of the major downfalls of a web-based application. With VST plugins, this issue is no longer a concern.
With VSTs, you are more flexible and able to deliver better results. They are often used in applications that support VST technology, including Cakewalk Sonar, Steinberg Cubase, Sound Forge Pro, Ableton Live, and many others. Some of the most common ones include:
- AudioSourceRe
- UNMIX Drums
- XTrax Stem 2
- Drum Extract
VST plugins are great for customizing your audio results. You have two ways to remove drums from a song using a VST plugin and DAW: using a compressor or an equalizer. When good results are not forthcoming, you can try to EQ or equalize frequencies that seem out of the soundtrack. This will lower the perceived volume of the drums, providing clearer vocals. Another approach is to use a parametric equalizer by reducing the frequencies by some dB for precise results.
- 4k (cymbals)
- 90 Hz (kick drum)
- 150 Hz (snare drum)
Just play around with the EQ, mixing your drum tracks above the recordings. The end will be your kit’s flaming against the original recording for perfect results.
Part 2. Remove and Edit Drums in Audio with Filmora
Removing drums from a song becomes easier with the right tools. In most cases, you will want to remove the drums and process your audio file further. Probably use the file to prepare for karaoke or editing videos on YouTube or TikTok. With Wondershare Filmora, you get to do all this and more. The most recent Filmora Version 13 is an excellent choice for editing audio files on the go. It comes with some amazing AI features that make it super simple to separate vocals, beats, drums, piano, and more in audio tracks.
Free Download For Win 7 or later(64-bit)
Free Download For macOS 10.14 or later
AI Vocal Remover
Extracting drums from songs is made easier with Filmora’s AI Vocal Remover. The AI feature accurately separates vocals and drums from any song in minutes. It is also a great tool for extracting acapella from audio tracks and dubbing videos freely by removing vocals. With the ability to keep the same high-quality for audio and video when removing the vocals, the feature is effective for different kinds of projects:
- Remove Vocals from Audio – With only one click, the feature removes vocals from audio while maintaining high-quality production. This means you can dub any video without covering up the current and create great drum soundtracks within minutes.
- Effective Vocal Separation – The AI-powered feature isolates vocals with exceptional quality without losing the fidelity of your audio. It saves you time and effort that you would have spent doing all that manually.
- Listen to Results Instantly: With Filmora, you do not have to download your processed files to listen to the results. Simply preview and listen to the results in the editor to make sure you are getting the results that you want.
- Remove Other Audio Elements from the Video: The AI Vocal Remover allows you to remove vocals and other audio elements, including drums. You may also go further to remove any unwanted audio elements to enhance your video editing process.
- Dub Videos with Minimal Efforts – The feature allows you to completely remove the original recording and input your own fresh ones. This helps you create highly professional and clearly dubbed videos.
How to Extract Drums from Songs with AI Vocal Remover
The AI Vocal Remover feature on Filmora offers a simple and easy way to extract drums from your favorite songs. Here is a quick guide on how to use the feature:
Step 1Launch Filmora
To start using the AI Vocal Remover feature, launch Filmora on your desktop. Then click “New Project” in the startup window to prepare the software for the next steps.
Step 2Import Your Song or Sound Track
On the customer toolbar, select “Media” and then click on the “Files” icon. This will allow you to import the files you want to edit with Filmora.
Step 3Start the AI Vocal Remover Feature
Drag and drop the files you have imported to Filmora to the timeline so you can start the editing process. Select the song you want to edit in the timeline and select “Audio” option. Then click AI Vocal Remover from the options available. Navigate the AI Vocal Remover to edit the audio as desired.
Conclusion
You may want to extract drums from your favorite songs for various reasons. Maybe you want to create a drum cover video on the latest song or have a drumless version of a certain soundtrack. There are several ways to isolate and remove drums from tracks with ease. Using a web-based drum remover tool or VST plugins is the most common option. However, Wondershare Filmora offers some amazing features that allow you to extract drums from your songs and do more. You get to edit your files further and achieve greater quality.
“The Definitive Collection of FREE Online Tools for Listening to Text Files”
10+ Free Online Audio to Text Converters

Shanoon Cox
Mar 27, 2024• Proven solutions
An audio-to-text converter is a tool that can convert audio files to texts or even record any audio and produce the text of it simultaneously. Audio files are one of the most used methods of storing information. From online classes and long lectures to big business meetings and product information, audio is being shared a lot across the world.
But accessing information from a long audio file can be difficult and time-consuming, which is why there is a need to convert audio to text. Information in the form of text can easily be fully or partly accessed and edited whenever needed. And texts can also easily be shared with whomever you want.
So let’s have a look at some of the best audio-to-text converters that might be of use to you.


10+ Free Online Audio to Text Converters
There is number of audio text converters available in the online market that can help you while studying, researching, or even in your business. Some of these recorders can convert any audio file to texts while some others can record and convert to text at the same time. Here we will talk about the top 11 free applications that can be used to convert audio to text.
| 1 - Filmora | 2 - Audext | 3 - Sonix.ai |
|---|---|---|
| 4 - Virtualspeech.com | 5 - Speechnotes | 6 - SpeechTexter |
| 7 - Textfromtospeech.com | 8 - Dictation.io | 9 - Voice Note |
| 10 - Voice Notebook | 11 - NaturalReaders |
1. Wondershare Filmora
Filmora’s Speech To Text (STT) function allows you to transcript audio/voice to subtitles/text in one click. it can save your plenty of time on transcribing subtitles and boost your editing efficiency by applying speech-to-text.
What you need to do is download the software and subsribe for its plan.
Features
- Built-in function to transcribe subtitles and captions for your video
- High accuracy in generating text, allows you to edit text by yourself
- Supports up to 26 languages of transcription to engage more users all around the world
- Offers various tools for editing your videos and audio
2. Audext
Audext is a free online application that can help you to save a lot of time while transcribing any audio to text. The transcription to text is done with the use of an advanced AI and hence produces faster and more accurate results.
Audext is used by people from different sectors like education, marketing, media, consulting, healthcare, etc. for their work purposes.

Features
- An inbuilt editor for editing the text while transcribing
- Identifies the speaker easily
- Supports a variety of audio and video formats like MP3, WAV, MP4, etc.
- Offers an option of easy upload and export of files
Pricing
- Free
- Transcription costs for one hour are $12
- Or with the subscription $5
3. Sonix.ai
Sonix is a fast and accurate application that can be used to convert audio to text for any purpose. This application offers a 30-minute free transcription after which an affordable amount may be charged.
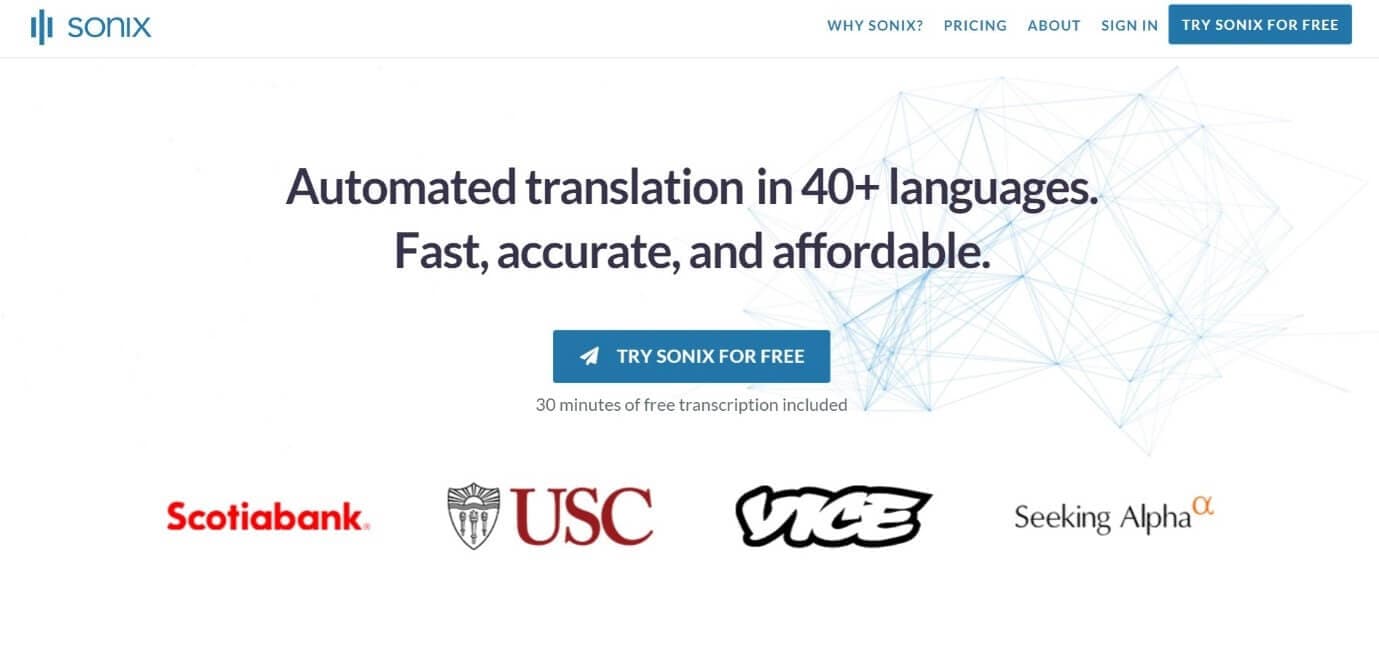
Features
- Automatic transcription of files and accessibility of these files from any device
- Advanced translation of these devices into 30 different languages
- Addition of subtitles into any video for easy understanding
- A Sonix media player that allows to share and publish files easily
Pricing
- Free
- Standard subscription - $10 per hour
- Premium subscription - $5 per hour, and an addition of $22 per month
4. Virtualspeech.com
Virtualspeech is an online tool that can transcribe audio to text free. It is a very simple application that allows fats conversion of audio files to texts. After conversion, the file will be emailed to the user from where it can be downloaded and saved.
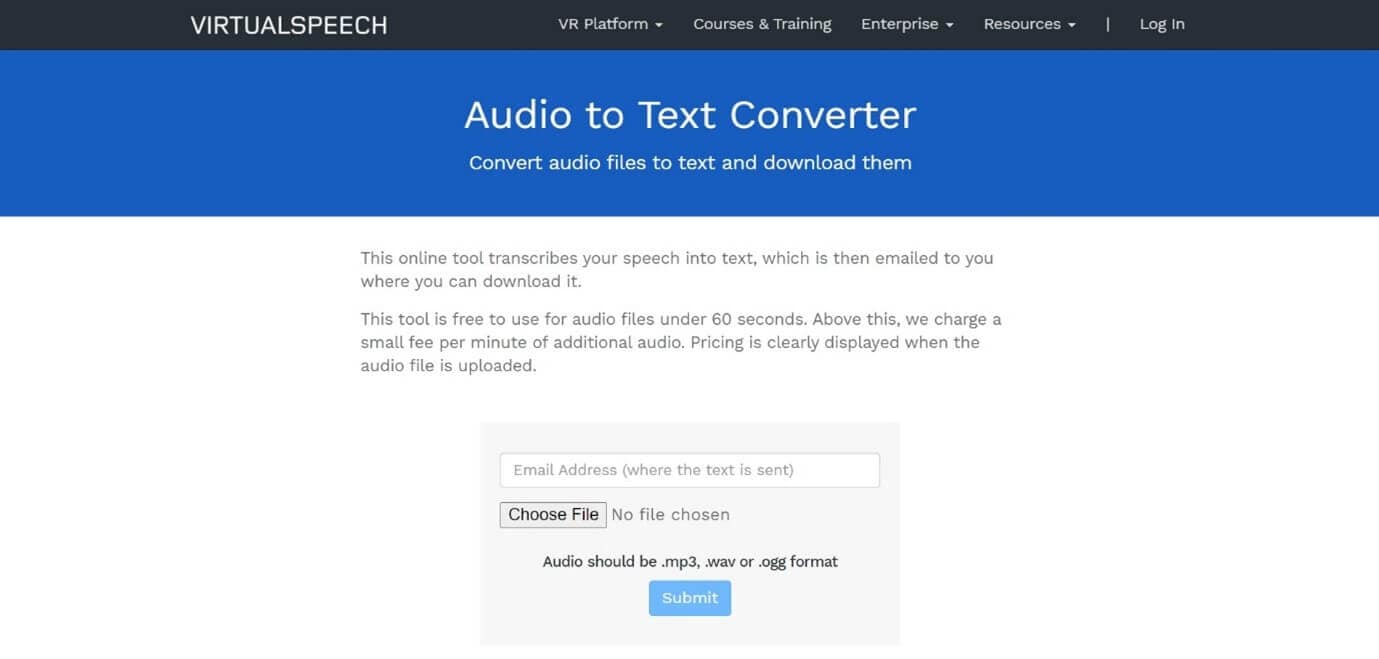
Features
- Free conversion of any audio files under 1 minute.
- Conversion of audio files of formats Mp3, Wav, or Ogg.
- Provides security as the no files are stored on the server and the site is secured with a b SSL
- Speech to text converter within the site
Pricing
- $0.50 per minute after the free minute

Filmora Audio to Text Converter
Filmora - Audio to Text Converter
• Enables you to convert video speech to text in one click
• Extremely accurate in video speech recognition
• Cross-platform supported - (Windows, Mac, iOS, Android)
Transcribe Audio to Text Free Transcribe Audio to Text Free Transcribe Audio to Text Free Learn More >
5. Speechnotes
Speechnotes is a powerful online notepad that can easily convert audio to text. This tool has implemented an efficient and clean design that makes conversion and editing very easy.
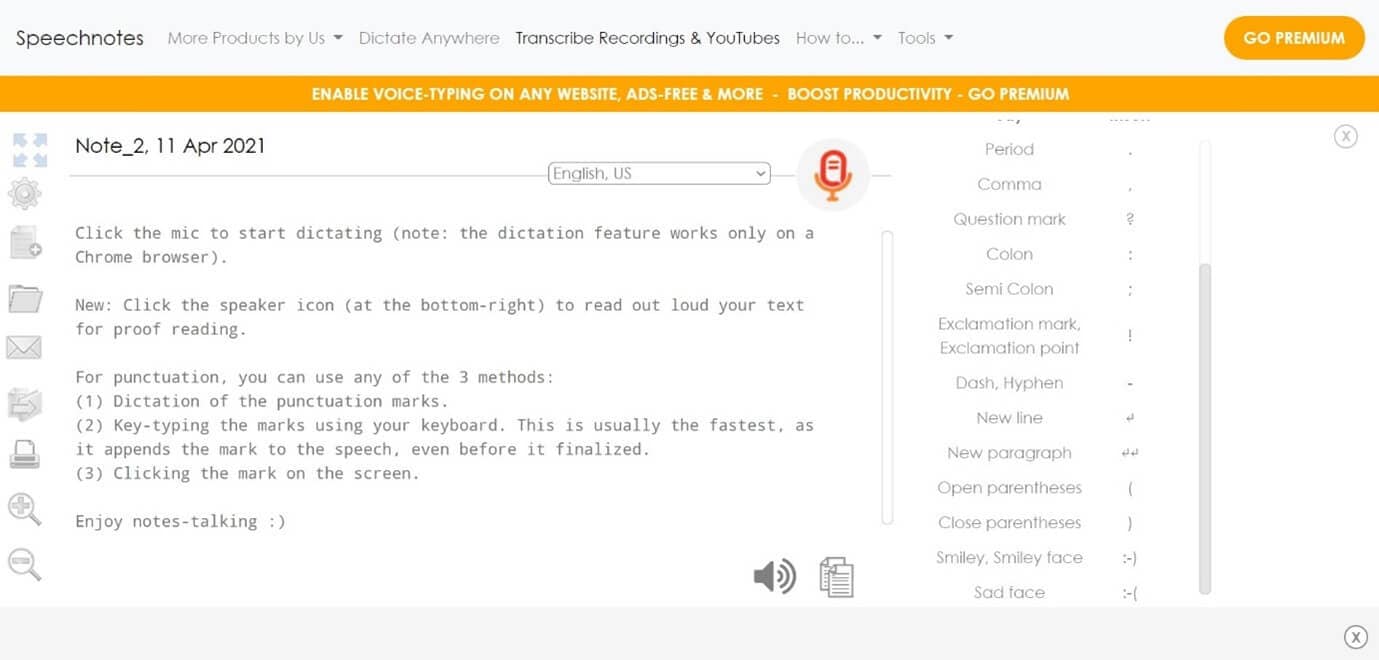
Features
- Best results with an advanced speech recognition technology
- Built-in tools that allow easy editing and correction of the converted text
- Fast working on any web browser and no installation apps required
- Autosave feature that ensures that your data is not lost
- Export to Google Drive option for easy accessibility from any device
Pricing
- Free
- Premium version with the addition of some extra features
6. SpeechTexter
SpeechTexter is a multilingual application that can help you transcribe any type of book, document, blog posts, etc. by using your audio. This tool has a custom dictionary that allows adding short commands for adding frequently used data like phone numbers, punctuation marks, addresses, etc.

Features
- Offers accuracy rate of 90 to 95% percent
- Can be used to increase your fluency in English
- Offers powerful real-time speech recognition
- Easy creation of emails, text notes, blog posts, etc.
- A custom dictionary that can be customized according to the individual use
- Supports more than 60 languages
- Available on both chrome browser and android
Pricing
- Free
7. Textfromtospeech.com
Textfromtospeech is a free online tool that allows you to easily convert audio to text without the need for registration downloading or installation. It has a very simple interface that can record and convert your speech into text with a single click.
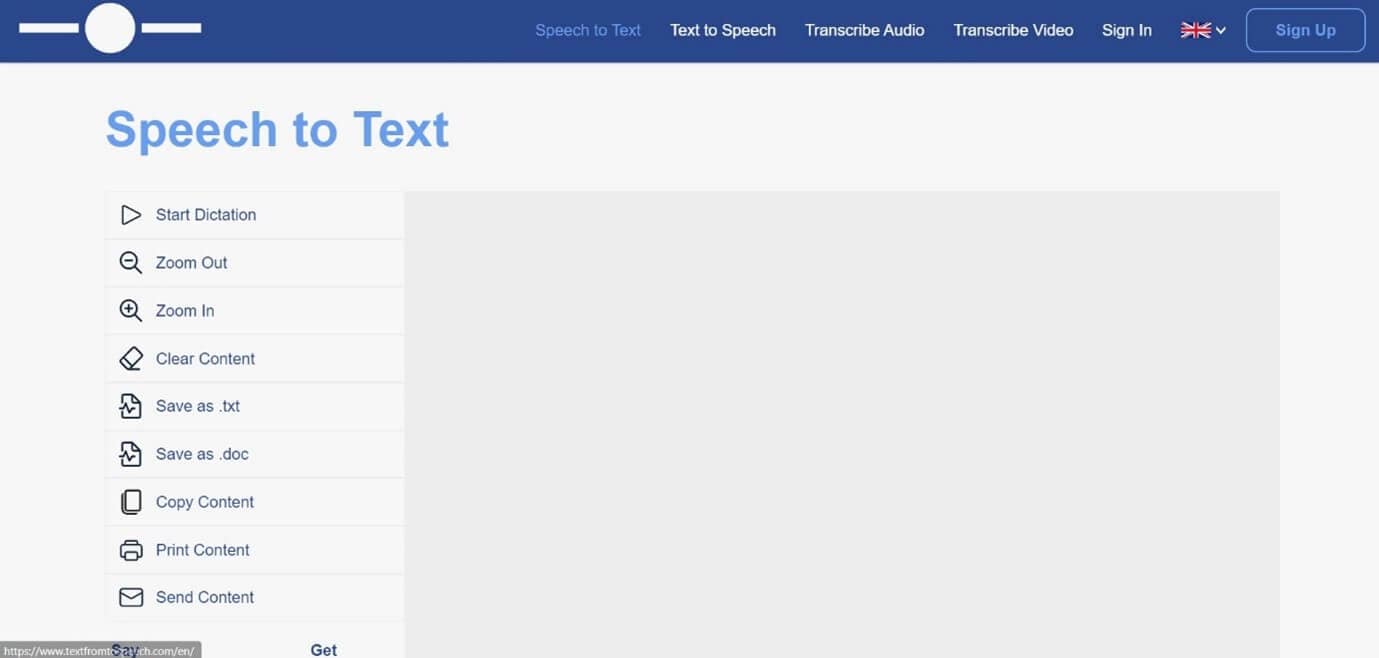
Features
- Free and online text recognition and transcription
- Supports many languages
- Pause and record option while converting large files
- Can use voice commands for insertion of symbols like “comma”, “full stop”, etc.
- Smart capitalization
- Easy saving, copying, and sharing of the dictated text
- Available on mobile devices, tablet, and computer
Pricing
- Free
![]()
A cross-platform for making videos anywhere for all creators

Why your video editing isn’t good enough? How about some creative inspo?
- 100 Million+ Users
- 150+ Countries and Regions
- 4 Million+ Social Media Followers
- 5 Million+ Stock Media for Use
* Secure Download

8. Dictation.io
Dictation is a free and simple tool that offers fast conversion of audio to text. Its interface is like that of a very simple notepad and allows the conversion of audio to text for a number of languages including English, Español, Français, Italiano, Português, and more.

Features
- Advanced speech recognition
- Easy editing within the notes
- Easy sharing to mail, tweets, etc.
- No storing of any data and hence offers the necessary security
Pricing
- Free
9. Voice Note
Voice Note is an online speech recognition tool that can automatically record and type anything including speech, interview, etc. This tool can convert any audio file into text format which can easily be opened in Microsoft Word.
Features
- No saving of data in any servers
- Customizable options for audio and text
- A number of languages to choose from while converting audio to text
- Easy copying and exporting options
- Direct Print option from the site
Price
- Free
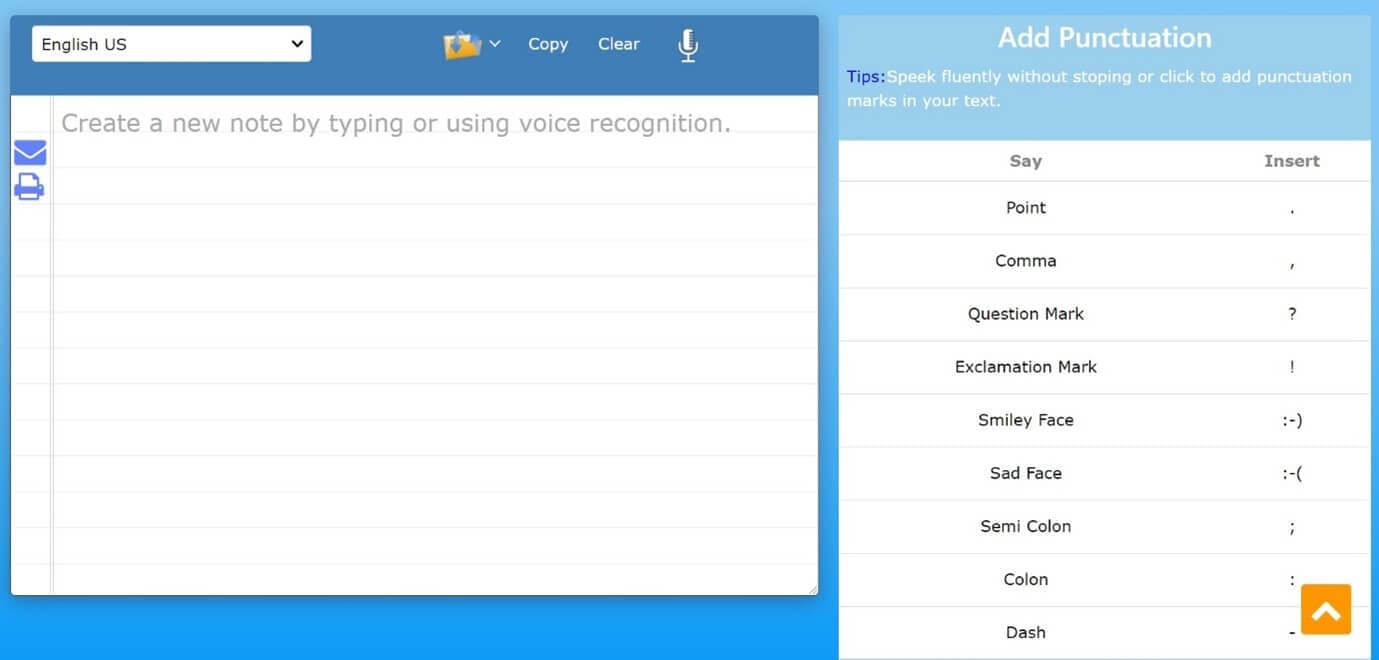
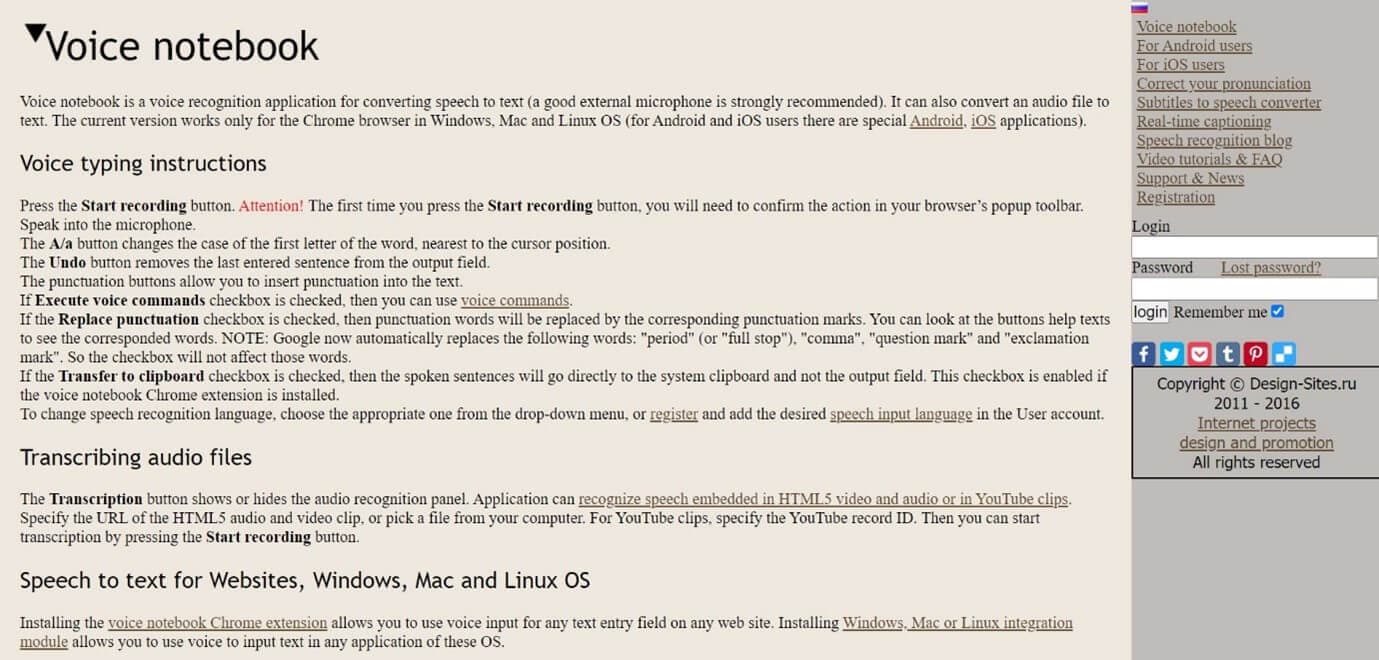
10. Voice Notebook
Voice Notebook is a speech recognition app that can also convert audio files to text. This application is compatible with a wide range of devices like Mac, Windows, Linux OS, Android, and iOS.
Features
- Voice commands are available when you transcribe audio to text
- Has the ability to recognize any speech embedded in YouTube clips or HTML5 audio or video
- Simple interface and easy editing of text
- An option to download into TXT format is available
Price
- Free
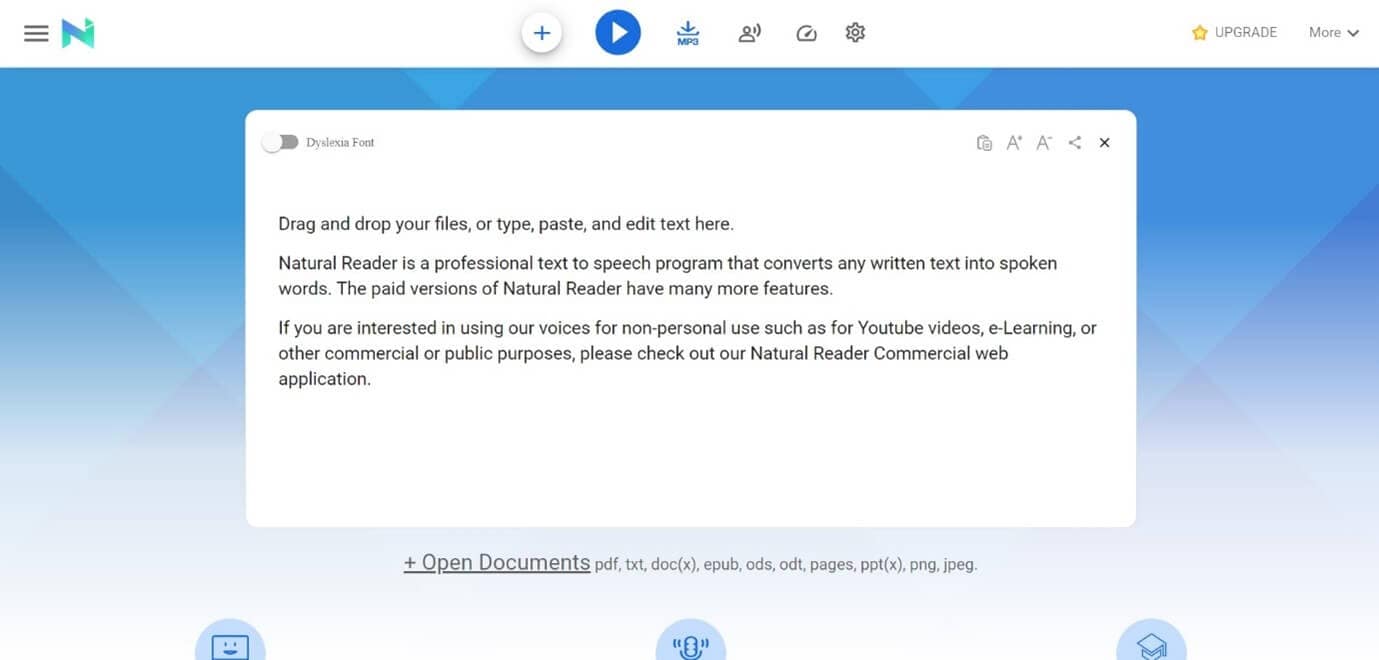
11. NaturalReaders
Natural Readers is a professional program that can convert any text into spoken words. This program offers a lot of features like adjusting the speed of audio, conversion into mp3, selection of voice, etc.
Features
- A font option available for dyslexic people
- Supports formats like pdf, txt, docs, epub, ods, ppt, png, jpeg
- App versions of this online tool are available both for android and apple devices
Pricing
- Free
- Premium plan - $9.99 per month, $59.88 per year
- Plus plan - $19.00 per month, $110.00 per year
Filmora Audio to Text Converter
Filmora - Audio to Text Converter
• Enables you to convert video speech to text in one click
• Extremely accurate in video speech recognition
• Cross-platform supported - (Windows, Mac, iOS, Android)
Transcribe Audio to Text Free Transcribe Audio to Text Free Transcribe Audio to Text Free Learn More >
Conclusion
We have listed above the top 11 tools that can be used to convert audio to text on any device using a browser. Converting audio to text allows you to easily access the required information, edit it, or even share it fully or partially with anyone you wish,
The applications we have listed are free and some of them might charge for the extra features they provide. So no matter what your profession is if you are looking for an app to convert audio to text or record and produce the text of the recordings, choose any one of the listed above applications.
We hope our suggestions help you reduce effort and save time. Please leave your valuable feedback in the comment box below, thank you.
Transform Long Videos into Short Ones Instantly
Turn long videos into viral clips. Effortlessly transform lengthy videos into engaging, shareable clips.

Shanoon Cox
Shanoon Cox is a writer and a lover of all things video.
Follow @Shanoon Cox
Shanoon Cox
Mar 27, 2024• Proven solutions
An audio-to-text converter is a tool that can convert audio files to texts or even record any audio and produce the text of it simultaneously. Audio files are one of the most used methods of storing information. From online classes and long lectures to big business meetings and product information, audio is being shared a lot across the world.
But accessing information from a long audio file can be difficult and time-consuming, which is why there is a need to convert audio to text. Information in the form of text can easily be fully or partly accessed and edited whenever needed. And texts can also easily be shared with whomever you want.
So let’s have a look at some of the best audio-to-text converters that might be of use to you.
10+ Free Online Audio to Text Converters
There is number of audio text converters available in the online market that can help you while studying, researching, or even in your business. Some of these recorders can convert any audio file to texts while some others can record and convert to text at the same time. Here we will talk about the top 11 free applications that can be used to convert audio to text.
| 1 - Filmora | 2 - Audext | 3 - Sonix.ai |
|---|---|---|
| 4 - Virtualspeech.com | 5 - Speechnotes | 6 - SpeechTexter |
| 7 - Textfromtospeech.com | 8 - Dictation.io | 9 - Voice Note |
| 10 - Voice Notebook | 11 - NaturalReaders |
1. Wondershare Filmora
Filmora’s Speech To Text (STT) function allows you to transcript audio/voice to subtitles/text in one click. it can save your plenty of time on transcribing subtitles and boost your editing efficiency by applying speech-to-text.
What you need to do is download the software and subsribe for its plan.
Features
- Built-in function to transcribe subtitles and captions for your video
- High accuracy in generating text, allows you to edit text by yourself
- Supports up to 26 languages of transcription to engage more users all around the world
- Offers various tools for editing your videos and audio
2. Audext
Audext is a free online application that can help you to save a lot of time while transcribing any audio to text. The transcription to text is done with the use of an advanced AI and hence produces faster and more accurate results.
Audext is used by people from different sectors like education, marketing, media, consulting, healthcare, etc. for their work purposes.
Features
- An inbuilt editor for editing the text while transcribing
- Identifies the speaker easily
- Supports a variety of audio and video formats like MP3, WAV, MP4, etc.
- Offers an option of easy upload and export of files
Pricing
- Free
- Transcription costs for one hour are $12
- Or with the subscription $5
3. Sonix.ai
Sonix is a fast and accurate application that can be used to convert audio to text for any purpose. This application offers a 30-minute free transcription after which an affordable amount may be charged.
Features
- Automatic transcription of files and accessibility of these files from any device
- Advanced translation of these devices into 30 different languages
- Addition of subtitles into any video for easy understanding
- A Sonix media player that allows to share and publish files easily
Pricing
- Free
- Standard subscription - $10 per hour
- Premium subscription - $5 per hour, and an addition of $22 per month
4. Virtualspeech.com
Virtualspeech is an online tool that can transcribe audio to text free. It is a very simple application that allows fats conversion of audio files to texts. After conversion, the file will be emailed to the user from where it can be downloaded and saved.
Features
- Free conversion of any audio files under 1 minute.
- Conversion of audio files of formats Mp3, Wav, or Ogg.
- Provides security as the no files are stored on the server and the site is secured with a b SSL
- Speech to text converter within the site
Pricing
- $0.50 per minute after the free minute
Filmora Audio to Text Converter
Filmora - Audio to Text Converter
• Enables you to convert video speech to text in one click
• Extremely accurate in video speech recognition
• Cross-platform supported - (Windows, Mac, iOS, Android)
Transcribe Audio to Text Free Transcribe Audio to Text Free Transcribe Audio to Text Free Learn More >
5. Speechnotes
Speechnotes is a powerful online notepad that can easily convert audio to text. This tool has implemented an efficient and clean design that makes conversion and editing very easy.
Features
- Best results with an advanced speech recognition technology
- Built-in tools that allow easy editing and correction of the converted text
- Fast working on any web browser and no installation apps required
- Autosave feature that ensures that your data is not lost
- Export to Google Drive option for easy accessibility from any device
Pricing
- Free
- Premium version with the addition of some extra features
6. SpeechTexter
SpeechTexter is a multilingual application that can help you transcribe any type of book, document, blog posts, etc. by using your audio. This tool has a custom dictionary that allows adding short commands for adding frequently used data like phone numbers, punctuation marks, addresses, etc.
Features
- Offers accuracy rate of 90 to 95% percent
- Can be used to increase your fluency in English
- Offers powerful real-time speech recognition
- Easy creation of emails, text notes, blog posts, etc.
- A custom dictionary that can be customized according to the individual use
- Supports more than 60 languages
- Available on both chrome browser and android
Pricing
- Free
7. Textfromtospeech.com
Textfromtospeech is a free online tool that allows you to easily convert audio to text without the need for registration downloading or installation. It has a very simple interface that can record and convert your speech into text with a single click.
Features
- Free and online text recognition and transcription
- Supports many languages
- Pause and record option while converting large files
- Can use voice commands for insertion of symbols like “comma”, “full stop”, etc.
- Smart capitalization
- Easy saving, copying, and sharing of the dictated text
- Available on mobile devices, tablet, and computer
Pricing
- Free
![]()
A cross-platform for making videos anywhere for all creators
Why your video editing isn’t good enough? How about some creative inspo?
- 100 Million+ Users
- 150+ Countries and Regions
- 4 Million+ Social Media Followers
- 5 Million+ Stock Media for Use
* Secure Download
8. Dictation.io
Dictation is a free and simple tool that offers fast conversion of audio to text. Its interface is like that of a very simple notepad and allows the conversion of audio to text for a number of languages including English, Español, Français, Italiano, Português, and more.
Features
- Advanced speech recognition
- Easy editing within the notes
- Easy sharing to mail, tweets, etc.
- No storing of any data and hence offers the necessary security
Pricing
- Free
9. Voice Note
Voice Note is an online speech recognition tool that can automatically record and type anything including speech, interview, etc. This tool can convert any audio file into text format which can easily be opened in Microsoft Word.
Features
- No saving of data in any servers
- Customizable options for audio and text
- A number of languages to choose from while converting audio to text
- Easy copying and exporting options
- Direct Print option from the site
Price
- Free
10. Voice Notebook
Voice Notebook is a speech recognition app that can also convert audio files to text. This application is compatible with a wide range of devices like Mac, Windows, Linux OS, Android, and iOS.
Features
- Voice commands are available when you transcribe audio to text
- Has the ability to recognize any speech embedded in YouTube clips or HTML5 audio or video
- Simple interface and easy editing of text
- An option to download into TXT format is available
Price
- Free
11. NaturalReaders
Natural Readers is a professional program that can convert any text into spoken words. This program offers a lot of features like adjusting the speed of audio, conversion into mp3, selection of voice, etc.
Features
- A font option available for dyslexic people
- Supports formats like pdf, txt, docs, epub, ods, ppt, png, jpeg
- App versions of this online tool are available both for android and apple devices
Pricing
- Free
- Premium plan - $9.99 per month, $59.88 per year
- Plus plan - $19.00 per month, $110.00 per year
Filmora Audio to Text Converter
Filmora - Audio to Text Converter
• Enables you to convert video speech to text in one click
• Extremely accurate in video speech recognition
• Cross-platform supported - (Windows, Mac, iOS, Android)
Transcribe Audio to Text Free Transcribe Audio to Text Free Transcribe Audio to Text Free Learn More >
Conclusion
We have listed above the top 11 tools that can be used to convert audio to text on any device using a browser. Converting audio to text allows you to easily access the required information, edit it, or even share it fully or partially with anyone you wish,
The applications we have listed are free and some of them might charge for the extra features they provide. So no matter what your profession is if you are looking for an app to convert audio to text or record and produce the text of the recordings, choose any one of the listed above applications.
We hope our suggestions help you reduce effort and save time. Please leave your valuable feedback in the comment box below, thank you.
Transform Long Videos into Short Ones Instantly
Turn long videos into viral clips. Effortlessly transform lengthy videos into engaging, shareable clips.
Shanoon Cox
Shanoon Cox is a writer and a lover of all things video.
Follow @Shanoon Cox
“REAPER Simplified: Essential Tools and Tips for Aspiring Sound Engineers”
DAW stands for Digital Audio Workstation. It is where you can record, edit, mix or even master your music. You always need good DAW software to help you with the job to produce music or live recording musicians.
A good DAW software must have a multi-track audio recording , virtual instruments, MIDI sequencer, excellent mixing capabilities, and plug-in processor hosting. The software is found for all major operating systems such as Linux , Windows, and Mac. If you want to learn more about DAW, then stay with us. The article will discuss in detail REAPER Recording Software.
In this article
01 What Is REAPER Recording Software?
02 How to Download and Install REAPER Software?
03 Tutorial for Using REAPER Recording Software
Part 1. What Is REAPER Recording Software?
Recording software like REAPER records computer audio is used to produce music, edit it, transform, and customize your music. With REAPER Recording Software , you can record multi-layer audio and MIDI in various formats. REAPER has the easiest interface that allows you to drag and drop to import, split, move and do many other tasks.

This is just one feature of REAPER that sounds very interesting. In this section, we will talk about more of its features.
1. Record and Edit
You can easily record the audio and (MIDI) Musical Instrumental Digital Interface with REAPER recording software. It lets you edit and customize everything. You can record and edit things limitlessly. When it comes to recording, it’s not at all difficult for REAPER software to record various instruments or vocals.
2. Mixing
Initially, the mixer might seem inflexible, but in reality, REAPER has a lot to offer you. It has great automated capabilities for instrument and effect parameters. It doesn’t matter if you are working because you can still bounce or freeze tracks while working.
The mixer is very flexible. With REAPERs mixer, you just have to drag and drop your recordings so that you can create tracks, and also, you can customize the arrangements by moving the portions.
3. Interface
While looking at the interface, you might question yourself about how to use its interface. Some people love to learn about new things, such as the REAPER Recording Software. Whereas, some people seem least interested because the half-empty interface is not intuitive to them.
Whereas, the best thing about its interface is that you can customize it. REAPER allows you to add different wallpapers and layouts to your software interface.
4. Strong Stability
REAPER Recording Software has very strong stability. This is one of its strongest features as compared to other competitors. The RAM is rarely affected by the load time and the used resources. Moreover, the software offers a wide range of languages. You can select your desired language to run the software.
Part 2. How to Download and Install REAPER Software?
REAPER is a Digital Audio Workstation. The perfect platform where you can manipulate and transform your audio. With REAPER Record Computer audio, you can work efficiently in a resource-friendly studio with saving your time. Stay tuned if you plan to learn more about its pricing and requirements.

Pricing of REAPER Software
A reaper is a brilliant software. It has a 60-day trial period. REAPER costs $60 in total to register. It has complete MIDI sequencing. You can also get a discounted license if REAPER is the best private option for you or has commercial usage. You can set the equal license key on every computer for someone with multiple computers.
System Requirements
The recording software has uncountable features. REAPER software facilitates its users at every level by giving the best audio manipulating platform. The best thing about REAPER Recording Software is its compatibility with different operating systems. Let us add more to your knowledge on this.
Windows
REAPER software is available for Windows 7, 8, 10, XP, and Vista. The version of REAPER for Windows is 6.42. This is for Windows 64-bit whereas, a download package is also available for Windows 32-bit.
macOS
For macOS 64-bit, REAPER has a 6.42 version. This version is compatible with macOS 10.5 – 10.14. Whereas, for macOS 10.15+, the available version of REAPER is 6.42 with a 15MB file size.
Linux
REAPER Recording Software is also compatible with Linux x86_64. The REAPER version is 6.42 with an 11 MB file size. This version can also work on AMD64 64-bit.
Downloading and Installing REAPER
Now that REAPER Record Computer Audio has impressed you a lot. You must be thinking about how to download it. If this is on your mind, then we got you. Allow us to share its steps that will guide you to download the software easily.
Step 1: To install REAPER software, first of all, visit its official website. Then locate and head over to its download section.
Step 2: Click on ‘Download REAPER from the download section.’ For Windows users, they can download the Windows installation package. At the same time, Linux and macOS users can select their installation packages.
Step 3: Lastly, after you have downloaded your systems compatible installation package, you simply have to run it and then install it according to your respective operating system.
Part 3. Tutorial for Using REAPER Recording Software
After its attractive features and detailed downloading procedure, it is finally the time to talk about its works. This section of the article will explain to you more about REAPER Recording Software as we are now going to present a tutorial on how to use the software.
Understand the Layout
Understanding and knowing the layout of your software before you start working on it is essential. The crucial components of REAPER software include the Timeline, Arrangement Window, Track Panel, Toolbar, and lastly, Transport.

The Arrangement window holds all the added items. The items are played from left to right order, similar to their timeline arrangement. You can also zoom in and out. Then comes the transport toolbar, which holds the functions to stop, rewind, play, fast forward, adjust the timeline speed, etc. The toolbar holds all the toggle buttons. You can also customize your toolbar.
New Track Creation
For creating a new track on REAPER, go to the Track menu and hit Insert New Track. A track is like another layer to your audio. Multiple layers and tracks make your work complex yet interesting as you can play all the different tracks at the same time. By double-clicking in the Track Control Panel, you can set a name for the added track.

Audio Hardware Settings for Audio Recording
It is best suggested always to check your audio hardware settings before you start to record, edit or mix with REAPER Recording Software. Your primary focus should be on the recording device’s devices should be set as Input Device, whereas the listening device should be set as the Output Device.
For this, you have to select Preferences from the Options menu. A window will appear in front of you, the REAPER Preference window. You have to select the correct Input and Output devices from the dropdown menu from this window.

Arm your Track
Arming your track is very important. For this, head over to the Track Control Panel, and next to your track name, hit the red circle. If you have various tracks, you should solo this track and mute the other tracks.
As soon as the track is armed, a Gain Meter will activate on the side. From this, you can check if you have properly set the microphone or not. This could be tested by tapping on the microphone.

Record
After all, the hardware settings are done, and your track is armed, it’s time to start the recording. For that, just tap on the Record button in the Transport toolbar. A yellow line in the timeline will indicate the end of the recording.

To end the recording, tap on the Stop button from the Transport Toolbar. Lastly, REAPER Recording Software will ask you to save the file. In case you don’t want it, you can also delete it.
Create and Manipulate Clips
Things like manipulation get a lot easier if you split the clips in REAPER. From the items menu, you have to select the option of Split Item on Cursor. This divides your clip into two clips on each side of the cursor. You can also remove the clips by going to the Items Menu. From there, you just have to hit the Remove Item option, or else, simply press the Delete key on your keyboard.

Removing clips will create a gap in the arrangement window that can be filled by dragging forward the remaining clip.
Volume Adjustments – Normalize
By double-clicking on the item or by selecting ‘Item Properties’ from a right-click, you can normalize the item. A new window will appear as Media Item Properties, from where you have to locate the Volume Settings and then select the option of Normalize.
If your item is already loud, then nothing will happen, but if it is not, then the slider will change from 0.00 dB showing an increase in the volume. Lastly, hit the ‘Apply’ or ‘OK’ button to imply the changes.
Fade in/out
With the Media Properties, you can also adjust a Fade in and a Fade out. For this, you simply have to set an end time for the Fade in, whereas a start time is entered for Fade out. Hit the ‘Ok’ or ‘Apply’ button to apply the changes.
From the Arrangement window, fades can be adjusted. For adjusting the fades, hover with your mouse over the red line. You will see a newly shaped cursor. Just drag on the timeline to play and adjust the Fade with this new cursor.

Automate Changes
With REAPER, you can also automate changes in track parameters. We will guide about automation from Track Envelopes. From Track Control Panel, hit the Trim option. A new Envelopes window will open at this point from where you have to check the Volume box.
A new Volume Track will open up. Here, you have to set new Envelope points. That could be done by holding the shift key, right-clicking on the point, and then selecting Create New Point. A green circle will indicate the new point.
By dragging the Envelope point, you can also adjust the volume. Dragging it towards the top will increase the volume, whereas dragging it towards the bottom will eventually decrease.

Finalize the Audio – Render
After all the above steps have been completed to set the order and adjust your desired volume, the last step comes to render your project file. For that, move to the File menu and select the ‘Render’ option. A window will be opened as ‘Render to File.’ Now, from the dropdown menu, select your desired Output Format.
Lastly, hit the Render 1 File button, and then REAPER will export your project. You can immediately listen to it by selecting the ‘Launch File’ option.

Concluding Thoughts
This article is everything you need to learn about REAPER Recording Software. The article that started from an introduction on DAW took you on a roller coaster ride. Everything about REAPER software has been shared.
We hope that this article helps you in all possible ways. The attractive features impress you, and its pricing and system specifications increase your knowledge. Along with that, the shared tutorial will guide you thoroughly on how to use it.
02 How to Download and Install REAPER Software?
03 Tutorial for Using REAPER Recording Software
Part 1. What Is REAPER Recording Software?
Recording software like REAPER records computer audio is used to produce music, edit it, transform, and customize your music. With REAPER Recording Software , you can record multi-layer audio and MIDI in various formats. REAPER has the easiest interface that allows you to drag and drop to import, split, move and do many other tasks.
This is just one feature of REAPER that sounds very interesting. In this section, we will talk about more of its features.
1. Record and Edit
You can easily record the audio and (MIDI) Musical Instrumental Digital Interface with REAPER recording software. It lets you edit and customize everything. You can record and edit things limitlessly. When it comes to recording, it’s not at all difficult for REAPER software to record various instruments or vocals.
2. Mixing
Initially, the mixer might seem inflexible, but in reality, REAPER has a lot to offer you. It has great automated capabilities for instrument and effect parameters. It doesn’t matter if you are working because you can still bounce or freeze tracks while working.
The mixer is very flexible. With REAPERs mixer, you just have to drag and drop your recordings so that you can create tracks, and also, you can customize the arrangements by moving the portions.
3. Interface
While looking at the interface, you might question yourself about how to use its interface. Some people love to learn about new things, such as the REAPER Recording Software. Whereas, some people seem least interested because the half-empty interface is not intuitive to them.
Whereas, the best thing about its interface is that you can customize it. REAPER allows you to add different wallpapers and layouts to your software interface.
4. Strong Stability
REAPER Recording Software has very strong stability. This is one of its strongest features as compared to other competitors. The RAM is rarely affected by the load time and the used resources. Moreover, the software offers a wide range of languages. You can select your desired language to run the software.
Part 2. How to Download and Install REAPER Software?
REAPER is a Digital Audio Workstation. The perfect platform where you can manipulate and transform your audio. With REAPER Record Computer audio, you can work efficiently in a resource-friendly studio with saving your time. Stay tuned if you plan to learn more about its pricing and requirements.
Pricing of REAPER Software
A reaper is a brilliant software. It has a 60-day trial period. REAPER costs $60 in total to register. It has complete MIDI sequencing. You can also get a discounted license if REAPER is the best private option for you or has commercial usage. You can set the equal license key on every computer for someone with multiple computers.
System Requirements
The recording software has uncountable features. REAPER software facilitates its users at every level by giving the best audio manipulating platform. The best thing about REAPER Recording Software is its compatibility with different operating systems. Let us add more to your knowledge on this.
Windows
REAPER software is available for Windows 7, 8, 10, XP, and Vista. The version of REAPER for Windows is 6.42. This is for Windows 64-bit whereas, a download package is also available for Windows 32-bit.
macOS
For macOS 64-bit, REAPER has a 6.42 version. This version is compatible with macOS 10.5 – 10.14. Whereas, for macOS 10.15+, the available version of REAPER is 6.42 with a 15MB file size.
Linux
REAPER Recording Software is also compatible with Linux x86_64. The REAPER version is 6.42 with an 11 MB file size. This version can also work on AMD64 64-bit.
Downloading and Installing REAPER
Now that REAPER Record Computer Audio has impressed you a lot. You must be thinking about how to download it. If this is on your mind, then we got you. Allow us to share its steps that will guide you to download the software easily.
Step 1: To install REAPER software, first of all, visit its official website. Then locate and head over to its download section.
Step 2: Click on ‘Download REAPER from the download section.’ For Windows users, they can download the Windows installation package. At the same time, Linux and macOS users can select their installation packages.
Step 3: Lastly, after you have downloaded your systems compatible installation package, you simply have to run it and then install it according to your respective operating system.
Part 3. Tutorial for Using REAPER Recording Software
After its attractive features and detailed downloading procedure, it is finally the time to talk about its works. This section of the article will explain to you more about REAPER Recording Software as we are now going to present a tutorial on how to use the software.
Understand the Layout
Understanding and knowing the layout of your software before you start working on it is essential. The crucial components of REAPER software include the Timeline, Arrangement Window, Track Panel, Toolbar, and lastly, Transport.
The Arrangement window holds all the added items. The items are played from left to right order, similar to their timeline arrangement. You can also zoom in and out. Then comes the transport toolbar, which holds the functions to stop, rewind, play, fast forward, adjust the timeline speed, etc. The toolbar holds all the toggle buttons. You can also customize your toolbar.
New Track Creation
For creating a new track on REAPER, go to the Track menu and hit Insert New Track. A track is like another layer to your audio. Multiple layers and tracks make your work complex yet interesting as you can play all the different tracks at the same time. By double-clicking in the Track Control Panel, you can set a name for the added track.
Audio Hardware Settings for Audio Recording
It is best suggested always to check your audio hardware settings before you start to record, edit or mix with REAPER Recording Software. Your primary focus should be on the recording device’s devices should be set as Input Device, whereas the listening device should be set as the Output Device.
For this, you have to select Preferences from the Options menu. A window will appear in front of you, the REAPER Preference window. You have to select the correct Input and Output devices from the dropdown menu from this window.
Arm your Track
Arming your track is very important. For this, head over to the Track Control Panel, and next to your track name, hit the red circle. If you have various tracks, you should solo this track and mute the other tracks.
As soon as the track is armed, a Gain Meter will activate on the side. From this, you can check if you have properly set the microphone or not. This could be tested by tapping on the microphone.
Record
After all, the hardware settings are done, and your track is armed, it’s time to start the recording. For that, just tap on the Record button in the Transport toolbar. A yellow line in the timeline will indicate the end of the recording.
To end the recording, tap on the Stop button from the Transport Toolbar. Lastly, REAPER Recording Software will ask you to save the file. In case you don’t want it, you can also delete it.
Create and Manipulate Clips
Things like manipulation get a lot easier if you split the clips in REAPER. From the items menu, you have to select the option of Split Item on Cursor. This divides your clip into two clips on each side of the cursor. You can also remove the clips by going to the Items Menu. From there, you just have to hit the Remove Item option, or else, simply press the Delete key on your keyboard.
Removing clips will create a gap in the arrangement window that can be filled by dragging forward the remaining clip.
Volume Adjustments – Normalize
By double-clicking on the item or by selecting ‘Item Properties’ from a right-click, you can normalize the item. A new window will appear as Media Item Properties, from where you have to locate the Volume Settings and then select the option of Normalize.
If your item is already loud, then nothing will happen, but if it is not, then the slider will change from 0.00 dB showing an increase in the volume. Lastly, hit the ‘Apply’ or ‘OK’ button to imply the changes.
Fade in/out
With the Media Properties, you can also adjust a Fade in and a Fade out. For this, you simply have to set an end time for the Fade in, whereas a start time is entered for Fade out. Hit the ‘Ok’ or ‘Apply’ button to apply the changes.
From the Arrangement window, fades can be adjusted. For adjusting the fades, hover with your mouse over the red line. You will see a newly shaped cursor. Just drag on the timeline to play and adjust the Fade with this new cursor.
Automate Changes
With REAPER, you can also automate changes in track parameters. We will guide about automation from Track Envelopes. From Track Control Panel, hit the Trim option. A new Envelopes window will open at this point from where you have to check the Volume box.
A new Volume Track will open up. Here, you have to set new Envelope points. That could be done by holding the shift key, right-clicking on the point, and then selecting Create New Point. A green circle will indicate the new point.
By dragging the Envelope point, you can also adjust the volume. Dragging it towards the top will increase the volume, whereas dragging it towards the bottom will eventually decrease.
Finalize the Audio – Render
After all the above steps have been completed to set the order and adjust your desired volume, the last step comes to render your project file. For that, move to the File menu and select the ‘Render’ option. A window will be opened as ‘Render to File.’ Now, from the dropdown menu, select your desired Output Format.
Lastly, hit the Render 1 File button, and then REAPER will export your project. You can immediately listen to it by selecting the ‘Launch File’ option.
Concluding Thoughts
This article is everything you need to learn about REAPER Recording Software. The article that started from an introduction on DAW took you on a roller coaster ride. Everything about REAPER software has been shared.
We hope that this article helps you in all possible ways. The attractive features impress you, and its pricing and system specifications increase your knowledge. Along with that, the shared tutorial will guide you thoroughly on how to use it.
Also read:
- Updated 2024 Approved Professionals Guide to the Top Vocal Dampening Software for Musicians and Producers
- 2024 Approved The Art of Initiating Audio Level Decrease with Ease
- New 8 Popular Streaming Audio Recorder That You Cant Miss
- 2024 Approved MAGIX Samplitude Vs. Competitors Unveiling the Top Music Producer
- New In 2024, Detect Clapping Impact Soundscape
- 2024 Approved Learn How to Remove Distortion From Audio for Your Video
- In 2024, Top 10 Audio Normalizers for Windows-Dont Miss It
- New 6 Best Free Online Audio Editor to Use (100 Free)
- New A Step-by-Step Guide to Using Googles Audio Streaming Platform for Podcasts for 2024
- New In 2024, Audible Artistry Providers 10 Online & Desktop Platforms to Revolutionize Your Work
- In 2024, Infusing Auditory Experience in Visual Storytelling
- Updated 2024 Approved Auditory Transformation Online Selecting the Best TTS Services
- Updated In 2024, How to Record on GarageBand? Step by Step Guide
- In 2024, Advanced Audacity Methods for High-Fidelity Computer Audio Recording (2023 Guidebook)
- Updated How To Change Audio Speed and Pitch Online?
- New Streamlining Audio Success Leading Podcast Hosting Options for 2024
- 2024 Approved Unlocking the World of Sound Exploring No-Cost Music Downloads
- Updated The Experts Choice Identifying the Top 11 High-Quality, Fee-Free Speech Alteration Tools for iPhone & Android Users for 2024
- Updated The Beat Makers Playbook Ranking the Top 8 DAW Applications for Contemporary Urban Music for 2024
- Updated Digital Discussion Series In-Depth Knowledge Exploration for 2024
- New Easily Implemented Phonetic Adjustment Features Exploration of Functions, Regulations, and Diverse Methods for 2024
- Updated In 2024, Revolutionizing Communication with Gadgets An Examination of Vocal Alterations and Beyond
- Updated In 2024, Professionals Choice The Best 8 Streaming Audio Capture Tools
- Updated Mastering Sounds and Visuals Discover the Best 5 Multimedia Fusion Systems for 2024
- New Exploring the Mysteries of Omegle Usage & Assessing Risks for Safe Interaction for 2024
- Updated In 2024, Setting Up Audacity on Your Chromebook A Step-by-Step Guide
- New In 2024, Explore These 5 Pinnacle Platforms for Efficient MP3 File Tagging
- New Vimeo Content Specifications Aspect Ratios Disclosed
- New Sound Sleuths Exceptional Music Detection Software to Uncover Your Favorite Tunes on Android for 2024
- Updated Audio Enhancement in Your Windows Environment - Maximizing Sound on Budget for 2024
- New In 2024, Experience the Power of Text to Voice Conversion – Select Best Free Options Amongst 9, 2023
- New In 2024, Audio Revealed Exploring the Ultimate 6 Cost-Free Conversion Methods for Video to Auditory Experiences .
- New 2024 Approved Expert Guide Extracting Silence From Video Files on Windows 10 Without Spending a Penny
- New The Ultimate Guide to Selecting the Best Android Voice Memo Apps
- New Unlocking Audio Potential A User-Friendly Approach to Track Combining in Premiere Pro
- New 2024 Approved The Art of Easing Audio Levels Keyframe Control in Filmora for Mac Users
- The Ultimate Mac User Manual Efficient Techniques for Storing Ambient Sounds
- 2024 Approved Cease iPhones Acoustic Level Modulation
- Updated Audio Spectrum Architectures Curating the Leading 8 Templates for Dynamic Video Soundscapes for 2024
- New Discovering Websites with Free Gaming Ambient Sounds
- Updated 2024 Approved The Elite 10 Audio Erosion Applications and Tools
- New Ultimate DJ Streaming Repository
- New 2024 Approved Navigating Through the Leading Free and Collaborative Windows Audio Processing Applications
- New 2024 Approved Reveal the Vocalization of a Wolveshow
- Updated The Art of Auditory Purity Advanced Strategies to Dismiss Background Noises Using Offline and Online Technologies
- Techniques for Embedding Images Into Music Tracks for 2024
- Updated In 2024, Pro Bargain Beats A Guide to Affordable Audio for Videos
- The Audio Experts Manual to Identifying Superior Sound Formats for 2024
- New 9 Free Voice GeneratorsOnline Generate Voice From Text
- New The Top 5 Audio Production Contenders Analyzing if MAGIX Samplitude Reigns Supreme for 2024
- Top 5 Car Locator Apps for Xiaomi Civi 3 | Dr.fone
- Wondering the Best Alternative to Hola On Honor Magic 6? Here Is the Answer | Dr.fone
- Updated In 2024, Professional-Grade HD Video Editors Our Top 5
- New Visual Vibes Mastering Trendy Video Effects
- How to Cast Vivo S17 Pro to Computer for iPhone and Android? | Dr.fone
- How ZTE Nubia Flip 5G Mirror Screen to PC? | Dr.fone
- In 2024, How to Unlock Vivo V29e Phone with Broken Screen
- In 2024, How to Reset a Itel A05s Phone that is Locked?
- Updated 2024 Approved Create Stunning Videos on Mac A Step-by-Step Guide
- How to Fix the Soft Bricked Samsung Galaxy F34 5G? | Dr.fone
- How To Remove iCloud On Apple iPhone 14 Pro Max Smoothly
- Why is iPogo not working On Realme Narzo N53? Fixed | Dr.fone
- How to Create Chroma Key Written Text Effects in Filmora for 2024
- New Cut, Trim, and Edit The Top Free Video Trimmers for Windows 10
- In 2024, 3 Facts You Need to Know about Screen Mirroring Xiaomi Mix Fold 3 | Dr.fone
- Best Infinix Smart 8 Pattern Lock Removal Tools Remove Android Pattern Lock Without Losing Data
- New In 2024, Free and Fantastic 10 Whiteboard Animation Tools for PC and Mac Users
- Full Guide to Fix iToolab AnyGO Not Working On Xiaomi Redmi A2+ | Dr.fone
- Updated In 2024, Transform Your Footage Mastering the Ken Burns Effect in Final Cut Pro with Ease
- What Is a SIM Network Unlock PIN? Get Your Oppo Find X7 Ultra Phone Network-Ready
- 8 Workable Fixes to the SIM not provisioned MM#2 Error on Realme 12 Pro 5G | Dr.fone
- The Ultimate Guide to Bypassing iCloud Activation Lock from iPhone XS Max
- In 2024, AVS Video Editor A Comprehensive Analysis
- How to Reset your Oppo Find N3 Lock Screen Password
- Can I recover permanently deleted photos from Motorola Edge 2023
- In 2024, All You Need To Know About Mega Greninja For Samsung Galaxy F14 5G | Dr.fone
- Updated 2024 Approved The Ultimate Guide to Trimming Videos Using Kapwing Editor
- 3 Ways to Change Location on Facebook Marketplace for OnePlus 12R | Dr.fone
- In 2024, Why is iPogo not working On Samsung Galaxy A54 5G? Fixed | Dr.fone
- Updated Get Creative with VLC Adding Slow Motion Effects to Your Videos
- New Best Online Stop Motion Software A Comprehensive Review
- 5 Ways to Restart Samsung Galaxy A25 5G Without Power Button | Dr.fone
- In 2024, Top 15 Apps To Hack WiFi Password On Vivo Y55s 5G (2023)
- Calculate Image Dimensions with Ease A Ratio Finder
- How To Remove or Bypass Knox Enrollment Service On Realme GT 5 Pro
- In 2024, Catch or Beat Sleeping Snorlax on Pokemon Go For Apple iPhone 14 Plus | Dr.fone
- In 2024, How to Track Oppo A38 Location without Installing Software? | Dr.fone
- Can Life360 Track You When Your Honor Magic 5 Pro is off? | Dr.fone
- In 2024, 3 Solutions to Find Your Samsung Galaxy S23 FE Current Location of a Mobile Number | Dr.fone
- Title: Updated Sound Cleanup A Comprehensive Tutorial on Removing Drums From Audio Files for 2024
- Author: Paul
- Created at : 2024-05-05 06:02:40
- Updated at : 2024-05-06 06:02:40
- Link: https://voice-adjusting.techidaily.com/updated-sound-cleanup-a-comprehensive-tutorial-on-removing-drums-from-audio-files-for-2024/
- License: This work is licensed under CC BY-NC-SA 4.0.
