
:max_bytes(150000):strip_icc():format(webp)/sofya-NomETWcv2Fo-unsplash-be3fc2855a7e477db0273993fd22e822.jpg)
Updated Perfecting the Journey A Guide to Integrating Visual Sequences
Perfecting the Journey: A Guide to Integrating Visual Sequences
How to Add Video and Audio Transition Between Scenes/Clips

Liza Brown
Mar 27, 2024• Proven solutions
Transition effects appear when one slide/clip replaces another one. It helps make the presentation, slideshow or movie good looking and impressive. Transition effects are widely used in and video editing software, such as Windows Movie Maker, iMovie, DVD Slideshow Builder, etc. You can also use transition sound effects to make amazing videos.
This article will show you how to add transitions (including video and audio transitions) between scenes and clips in Wondershare Filmora . Tips and tricks for transitions are also included.
How to Add Transitions Between clips
Part 1: Add video transitions
1. Download Wondershare Filmora
Wondershare Filmora is an easy-to-use while powerful video editing tool that is available both on Windows and Mac. Download it from the button below to get started.
 Download Mac Version ](https://tools.techidaily.com/wondershare/filmora/download/ )
2. Import video/photos to the project
Before adding video/photo files to the Timeline, you need to import them first into the project. There are mainly 2 ways to import video/photo files: “Import” button on primary windows, or dragging and dropping files from Windows File Explorer to the User’s Album. Wondershare Filmora supports all popular video/audio/photo formats, including but not limited to AVI, MP4, MOV, MPEG, MPG, FLV, M4V, WMV, TS, MOD, TOD, VOB, MP3, WMA, M4A, JPG, PNG, BMP, and GIF. Then drag and drop the media files from the Media album to the video track on timline for editing

3. Add transitions between video and photo files
All clips will be played one by one without a gap. But no transition effects will be applied by default. To add transitions, switch to Transition tab and drag any transition to the joint of two clips from almost 200 transitions (when the white box appears, release your mouse). Now, you could also add transition at the end or start of a clip.

You can also change the transition mode among Overlap, Prefix, and Postfix by double-clicking on the transition on timeline

Tips and Tricks for Transition Effects
1. If you want to set the transition duration, it’s better to enlarge the Timeline view through the Zoom in tool or slider above the Timeline. Next, double click the transition thumbnail to open the setting panel and input the time. Click “Apply to All” if you want all transition effects to have the same duration.
2. To delete a transition, highlight it and click the Delete button in the toolbar above Timeline, or press Delete key on the keyboard.
3. If you especially love a transition, you can add it to Favorite by right clicking transition in the list and selecting “Add to Favorites” from the menu.
4Export video with transitions
When you are happy with your video and transition effects, click “Create” to save the video with transitions. You can save video in all popular formats on the computer by clicking “Format” and choosing a format from the list. If you want to play your video on iPod, iPhone, iPad, click “Device” and select a thumbnail of the device. It’s also available to upload your videos to YouTube to share with your friends. To play video on TV, you can burn it to DVD with your DVD burner.

In the end, if you have problems with adding transitions, please click here to get in touch with supporters.
Part 3: Add audio transitions
Filmora also allows you to add transitions between audio files. Using the fade-in and fade-out feature to make your audio process smoontly. With the complete new waveform and audio keyframing. Check this video to see the details about video transition in Filmora.
Download Mac Version ](https://tools.techidaily.com/wondershare/filmora/download/ )
Liza Brown
Liza Brown is a writer and a lover of all things video.
Follow @Liza Brown
Liza Brown
Mar 27, 2024• Proven solutions
Transition effects appear when one slide/clip replaces another one. It helps make the presentation, slideshow or movie good looking and impressive. Transition effects are widely used in and video editing software, such as Windows Movie Maker, iMovie, DVD Slideshow Builder, etc. You can also use transition sound effects to make amazing videos.
This article will show you how to add transitions (including video and audio transitions) between scenes and clips in Wondershare Filmora . Tips and tricks for transitions are also included.
How to Add Transitions Between clips
Part 1: Add video transitions
1. Download Wondershare Filmora
Wondershare Filmora is an easy-to-use while powerful video editing tool that is available both on Windows and Mac. Download it from the button below to get started.
Download Mac Version ](https://tools.techidaily.com/wondershare/filmora/download/ )
2. Import video/photos to the project
Before adding video/photo files to the Timeline, you need to import them first into the project. There are mainly 2 ways to import video/photo files: “Import” button on primary windows, or dragging and dropping files from Windows File Explorer to the User’s Album. Wondershare Filmora supports all popular video/audio/photo formats, including but not limited to AVI, MP4, MOV, MPEG, MPG, FLV, M4V, WMV, TS, MOD, TOD, VOB, MP3, WMA, M4A, JPG, PNG, BMP, and GIF. Then drag and drop the media files from the Media album to the video track on timline for editing
3. Add transitions between video and photo files
All clips will be played one by one without a gap. But no transition effects will be applied by default. To add transitions, switch to Transition tab and drag any transition to the joint of two clips from almost 200 transitions (when the white box appears, release your mouse). Now, you could also add transition at the end or start of a clip.
You can also change the transition mode among Overlap, Prefix, and Postfix by double-clicking on the transition on timeline
Tips and Tricks for Transition Effects
1. If you want to set the transition duration, it’s better to enlarge the Timeline view through the Zoom in tool or slider above the Timeline. Next, double click the transition thumbnail to open the setting panel and input the time. Click “Apply to All” if you want all transition effects to have the same duration.
2. To delete a transition, highlight it and click the Delete button in the toolbar above Timeline, or press Delete key on the keyboard.
3. If you especially love a transition, you can add it to Favorite by right clicking transition in the list and selecting “Add to Favorites” from the menu.
4Export video with transitions
When you are happy with your video and transition effects, click “Create” to save the video with transitions. You can save video in all popular formats on the computer by clicking “Format” and choosing a format from the list. If you want to play your video on iPod, iPhone, iPad, click “Device” and select a thumbnail of the device. It’s also available to upload your videos to YouTube to share with your friends. To play video on TV, you can burn it to DVD with your DVD burner.
In the end, if you have problems with adding transitions, please click here to get in touch with supporters.
Part 3: Add audio transitions
Filmora also allows you to add transitions between audio files. Using the fade-in and fade-out feature to make your audio process smoontly. With the complete new waveform and audio keyframing. Check this video to see the details about video transition in Filmora.
Download Mac Version ](https://tools.techidaily.com/wondershare/filmora/download/ )
Liza Brown
Liza Brown is a writer and a lover of all things video.
Follow @Liza Brown
Step-by-Step Guide to Saving Your Google Voice Chat on Device and PC
Many people think that the call-recording feature is only helpful to deal with stalkers and obsessive exes. However, there are several other reasons as well.
Call recording features help you in numerous ways such as conducting remote interviews, keeping track of verbal agreements, and recording important meetings for later reference. A myriad of applications are available on iPhone and android.
Since most voice recording applications are expensive, Google voice turns out to be one of the best apps to record calls.

What Is Google Voice?
The Google voice recording app is available on Android and iOS app stores and enables users to record calls, send text messages, customize voicemails, and save call recording transcripts. Previously, this app required a Google Voice invite code for registration. But, now as a Gmail user, you can download and record your calls with Google Voice for free.
How to Use Google Voice
When you will register with Google voice recorder, you will receive a mobile number that connects your work phone, desk phone, mobile phone, and even VoIP lines. Using this app, you can allocate different callers on different phones. Furthermore, the application enables you to record calls and save call transcripts.
How Does Google Voice Work?
When you create a new account on Google voice, you receive a phone number for voicemails, texts, and calls. The number enables you to make international and domestic calls from your mobile devices and web browser. Google audio recorder allows users to choose their existing number. Now let’s explore some features of Google Voice:
- Call routing
- Call blocking
- Listen to voicemail before responding to a call
- Voicemail transcripts
- Google voice call recording
- Conference calling
- Choose a different ringtone for different users
- Free PC to phone calls within North America
- Free PC to PC video and voice calls
- Receive notifications
How to Record Calls with Google Voice?
Google voice is a built-in recording tool for iOS and android devices. This tool enables you to capture and record calls so that you don’t miss any important conversations. For instance, if you are taking an on-call session with your professor, you can record your calls with Google Voice and save them for later reference.
Also, you can use Google voice recording as a default application for incoming calls. However, before that, you should enable the application from Settings. Follow these steps to record your calls with Google Voice:
- Open the application and visit the homepage
- From the upper left corner choose settings
- Click on the ‘Calls’ option from the menu
- Find enable the incoming call options
- Once activated you can record your calls with Google Voice by pressing number 4 on the keypad.
How to Record a Google Voice Call on Android
Here are some steps to Google voice record call on Android:
1. Install Google Voice
Google voice is better than various paid voice recording applications that you can download from Google Play. Initially, most call recording application work fine, but after a while, the apps stop working. In this case, you can download a new app or purchase the subscription.
Therefore, make sure you record your calls with Google Voice and save t money. One drawback of Google Voice is that you can record incoming calls only. Google voice recorder doesn’t support outgoing calls.

2. Create a Google Voice Number
Now open the app and press the ‘Get Started’ tab on the landing page. This will open the ‘Manage accounts page. On this page, you have to choose your Google account to link with your new Google Voice number. After you choose an account, the app leads you to the Terms and Conditions page, where you can read the policy and Accept to proceed.

Alt Text: welcome to Google voice
A new page will open where you should choose a Google Voice number. Tap on ‘Search’ and find your city to pick a number. Also, you can choose suggested cities to get started. A list of numbers will appear on the following page. You can select any number you want to link with your Google account. Now a confirmation page will appear. On this page select the options and click ‘Next’.

Once you choose a new number, you have to verify your account with the existing number. Enter your mobile number and click on ‘Send Code’ to receive a verification code. The app’s algorithm will generate a six-digit code and send it to your existing number. Use this code to verify your identity. If the code is correct, your new Google voice recording number will activate. Now click on ‘Finish’ and you can record your calls with Google Voice.

3. Set Up Incoming Call Recordings
Still, there is a step left to record your calls. You need to go to mobile settings and enable call recording. To enable call recordings, you need to click on the menu icon and navigate to the ‘settings’ from the sidebar menu. Now select the ‘Incoming calls options’ and turn on the recordings.
4. Record Incoming Calls
After completing the setup, you can record incoming calls on your phone using Google Voice. However, every time you receive a call, you must open the dial pad and press 4 to start recording. As soon as you start recording, the caller will receive a verbal alert that notifies that the call is on recording mode. You can stop recording by pressing 4 one more time. This will also inform the user that you stopped the recording.

5. Access Recordings
You can easily check voice recordings for each call. All you need to do is open the last call details and press ‘Voicemail’. This will expand the list of recordings. Now tap on the play button and listen to the audio.
6. Save Transcripts
When you record your calls with Google Voice, the recordings will save in the app storage. However, you can save and share those recordings in your mobile phone storage by selecting the ellipsis (•••) button. You will find the button on the recording page as some options will appear on the screen. You have to choose ‘Copy transcript’ and paste it in the message or notepad. Keep in mind that you can only save transcripts of recorded calls.
Closing Word
Now that you know simple and easy steps to record your calls with Google Voice, you can grab your device and get started. The Google voice recorder is a significantly helpful app with built-in features. You can also create a video out of the recordings using a simple video editor, Wondershare Filmora .
For Win 7 or later (64-bit)
For macOS 10.12 or later
Filmora editing video empowers your story and allows you to splice multiple audio and videos. Learn how to edit audio using Filmora and transform your call recordings into something creative. Here are some benefits of using Wondershare Filmora:
- Audio equalize
- Audio enhancement
- Advanced text editing
- Video and audio controls
- Audio separation
- Audio-mixer
- Speed control
- Add background music
Versatile Video Editor - Wondershare Filmora
An easy yet powerful editor
Numerous effects to choose from
Detailed tutorials provided by the official channel
How to Record Calls with Google Voice?
Google voice is a built-in recording tool for iOS and android devices. This tool enables you to capture and record calls so that you don’t miss any important conversations. For instance, if you are taking an on-call session with your professor, you can record your calls with Google Voice and save them for later reference.
Also, you can use Google voice recording as a default application for incoming calls. However, before that, you should enable the application from Settings. Follow these steps to record your calls with Google Voice:
- Open the application and visit the homepage
- From the upper left corner choose settings
- Click on the ‘Calls’ option from the menu
- Find enable the incoming call options
- Once activated you can record your calls with Google Voice by pressing number 4 on the keypad.
How to Record a Google Voice Call on Android
Here are some steps to Google voice record call on Android:
1. Install Google Voice
Google voice is better than various paid voice recording applications that you can download from Google Play. Initially, most call recording application work fine, but after a while, the apps stop working. In this case, you can download a new app or purchase the subscription.
Therefore, make sure you record your calls with Google Voice and save t money. One drawback of Google Voice is that you can record incoming calls only. Google voice recorder doesn’t support outgoing calls.
2. Create a Google Voice Number
Now open the app and press the ‘Get Started’ tab on the landing page. This will open the ‘Manage accounts page. On this page, you have to choose your Google account to link with your new Google Voice number. After you choose an account, the app leads you to the Terms and Conditions page, where you can read the policy and Accept to proceed.
Alt Text: welcome to Google voice
A new page will open where you should choose a Google Voice number. Tap on ‘Search’ and find your city to pick a number. Also, you can choose suggested cities to get started. A list of numbers will appear on the following page. You can select any number you want to link with your Google account. Now a confirmation page will appear. On this page select the options and click ‘Next’.
Once you choose a new number, you have to verify your account with the existing number. Enter your mobile number and click on ‘Send Code’ to receive a verification code. The app’s algorithm will generate a six-digit code and send it to your existing number. Use this code to verify your identity. If the code is correct, your new Google voice recording number will activate. Now click on ‘Finish’ and you can record your calls with Google Voice.
3. Set Up Incoming Call Recordings
Still, there is a step left to record your calls. You need to go to mobile settings and enable call recording. To enable call recordings, you need to click on the menu icon and navigate to the ‘settings’ from the sidebar menu. Now select the ‘Incoming calls options’ and turn on the recordings.
4. Record Incoming Calls
After completing the setup, you can record incoming calls on your phone using Google Voice. However, every time you receive a call, you must open the dial pad and press 4 to start recording. As soon as you start recording, the caller will receive a verbal alert that notifies that the call is on recording mode. You can stop recording by pressing 4 one more time. This will also inform the user that you stopped the recording.
5. Access Recordings
You can easily check voice recordings for each call. All you need to do is open the last call details and press ‘Voicemail’. This will expand the list of recordings. Now tap on the play button and listen to the audio.
6. Save Transcripts
When you record your calls with Google Voice, the recordings will save in the app storage. However, you can save and share those recordings in your mobile phone storage by selecting the ellipsis (•••) button. You will find the button on the recording page as some options will appear on the screen. You have to choose ‘Copy transcript’ and paste it in the message or notepad. Keep in mind that you can only save transcripts of recorded calls.
Closing Word
Now that you know simple and easy steps to record your calls with Google Voice, you can grab your device and get started. The Google voice recorder is a significantly helpful app with built-in features. You can also create a video out of the recordings using a simple video editor, Wondershare Filmora .
For Win 7 or later (64-bit)
For macOS 10.12 or later
Filmora editing video empowers your story and allows you to splice multiple audio and videos. Learn how to edit audio using Filmora and transform your call recordings into something creative. Here are some benefits of using Wondershare Filmora:
- Audio equalize
- Audio enhancement
- Advanced text editing
- Video and audio controls
- Audio separation
- Audio-mixer
- Speed control
- Add background music
Versatile Video Editor - Wondershare Filmora
An easy yet powerful editor
Numerous effects to choose from
Detailed tutorials provided by the official channel
Essential Audio Software for Musicians: A Comprehensive List of Best Free & Paid Options 2023
FREE 10 Best Online Music Makers

Benjamin Arango
Apr 26, 2024• Proven solutions

Expressing ideas through music was never easy, and even today in the age of powerful digital audio stations like Ableton Live or FruityLoops , producing original music requires a certain set of skills. However, online content producers often need music for their videos, but they neither have the time or the budget to hire a professional musician to create a soundtrack for their project in studio conditions. If you are looking for a quick way to make your own music online, then you should keep reading, because in this article we are going to take you through the ten best online music makers you should check out in 2021.
10 Best Online Music Makers in 2021
The music-making platforms that are currently available online are still not as nearly as powerful as professional software products for music producers. Nonetheless, this doesn’t mean that you can’t use them to create the music you like or just have fun with them. Here are the ten best online music makers in 2019.
1. Typeatone
Price: Free
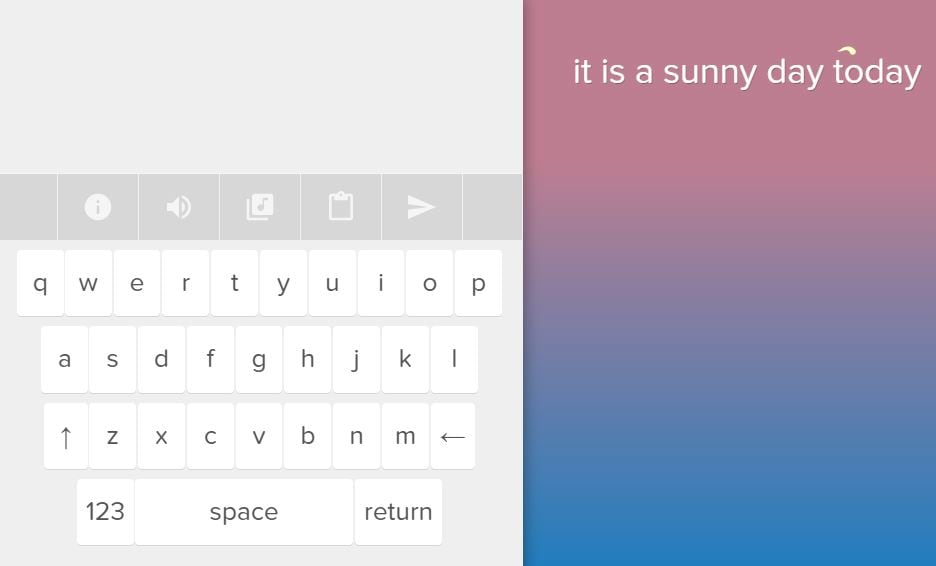
Image from Internet
Have you ever wondered what your words would sound like if they were turned into music? Head over to the Typeatone platform if you want to find out since all you have to do in order to start creating your own music is type in the text. As you type, the platform will automatically start playing your words and once you’re done, you’ll be able to hear your new song. You can also choose between different instruments to make the process of creating music with Typeatone even more entertaining. You can share all of your creations with your friends on social media.
![]()
A cross-platform for making videos anywhere for all creators

Why your video editing isn’t good enough? How about some creative inspo?
- 100 Million+ Users
- 150+ Countries and Regions
- 4 Million+ Social Media Followers
- 5 Million+ Stock Media for Use
* Secure Download

2. Audiotool
Price: Free
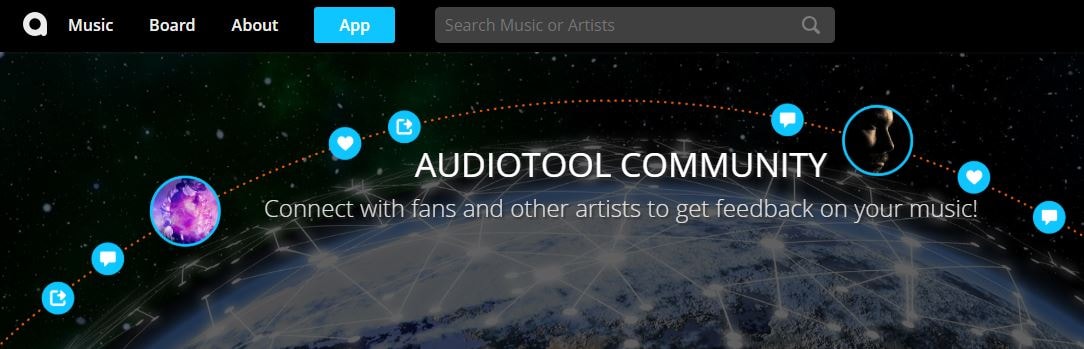
Image from Internet
Electronic music producers who often use synthesizers like Roland TB-303 or Roland TR-909 are going to love the features this online collaborative platform offers. Audiotool hosts a huge music library, you can explore even if you are not a registered user. In order to access the platform’s music studio, you first have to create an account and make sure that you are signed in. Audiotool is also a community of like-minded people where you can meet artists whose work you appreciate or hear what others think about your work. The only downside is that Audiotool’s abundance of features can be overwhelming for the newcomers to the world of electronic music production.
3. AudioSauna
Price: Free
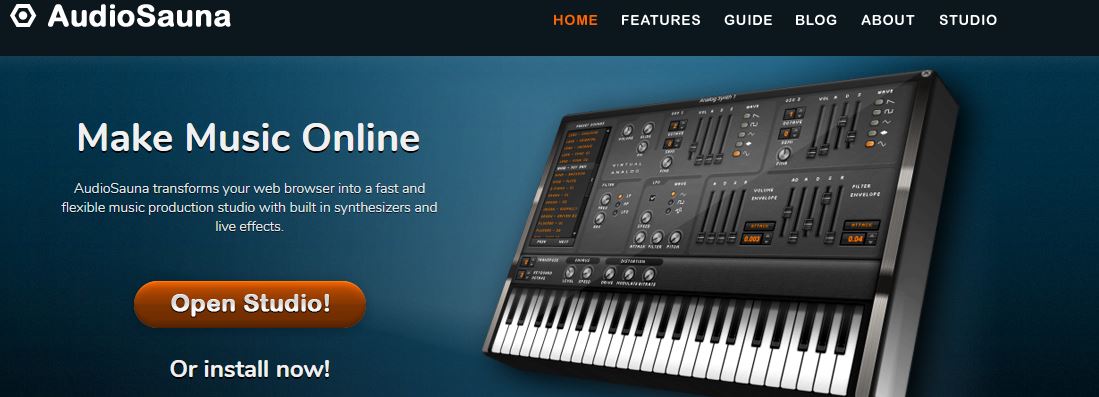
Image from Internet
AudioSauna seems to offer everything its users need to create inspiring music because it is equipped with frequency modulation synth, virtual analog synth and a sampler that provides layering features. Moreover, its intuitive interface makes the process of arranging the song structure or changing several note values simultaneously much easier. Creating an account on AudioSauna will enable to record all your projects and export them as audio files that can be uploaded to SoundCloud or any other audio distribution platform. AudioSauna is a perfect tool for skilled producers who want to create their music online.
4. Soundtrap
Price: Free trial available, subscription plans start at $3.99 per month

Image from Internet
Soundtrap offers a long list of features that enable professional musicians to create their music online. All you have to do is create an account and you will get access to the Sountrap’s studio that let you create new beat patterns, use a synthesizer or even invite friends to make music together. The platform also offers the possibility to connect your own instruments to the Soundtrap’s studio, so that you can record your music as you play it. This online platform also has an Education section where you can share your knowledge with others or learn valuable music lessons.
5. PatternSketch
Price: Free
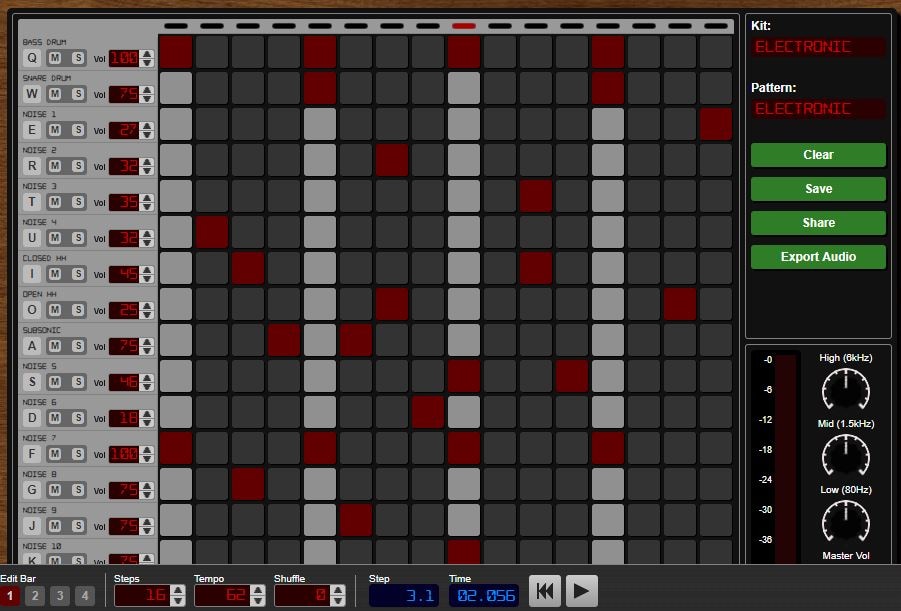
Image from Internet
This basic and yet effective drum machine can help you generate amazing beats for the songs you’re working on. Once you sign up, you will be able to choose from a number of different kits and patterns that are fully customizable or create your own original beats. After you create a pattern you like, you can save it with a single click or send it to your friends via email. Optionally, you can export all of your creations from PatternSketch and save them as wav, mp3 or ogg files, although in some cases mp3 audio files may not loop properly.
6. Soundation
Price: Free version available, pricing plans start at $1.99 per month

Image from Internet
If you choose to create music with the free version of Soundation, you’ll be able to work on up to ten projects, try out over 700 audio effects and loops, and export all your music in low quality. Purchasing the Intro pricing plan will enable you to work on an unlimited number of projects, make live audio recordings, import audio files smaller than 100MB or use an external midi controller. Moreover, opting for any of the annual or monthly subscription plans will allow you to export entire projects and audio files in high resolution from Soundation.
7. Text to Speech
Price: Free

online-music-maker-Text to Speech.jpg
Vocals are often overlooked in contemporary electronic music, but there are so many ways they can be used creatively. The platform lets you turn up to 50000 characters into speech at once, and it also offers several different voices you can choose from. Before you create an audio file you can determine how fast the text is going to be vocalized, so you should try different options and see which one fits your project the best. Text to Speech platform can be used during the process of creating a new song, but the tools it offers are not enough to make an entire song.
8. Looplabs
Price: Free
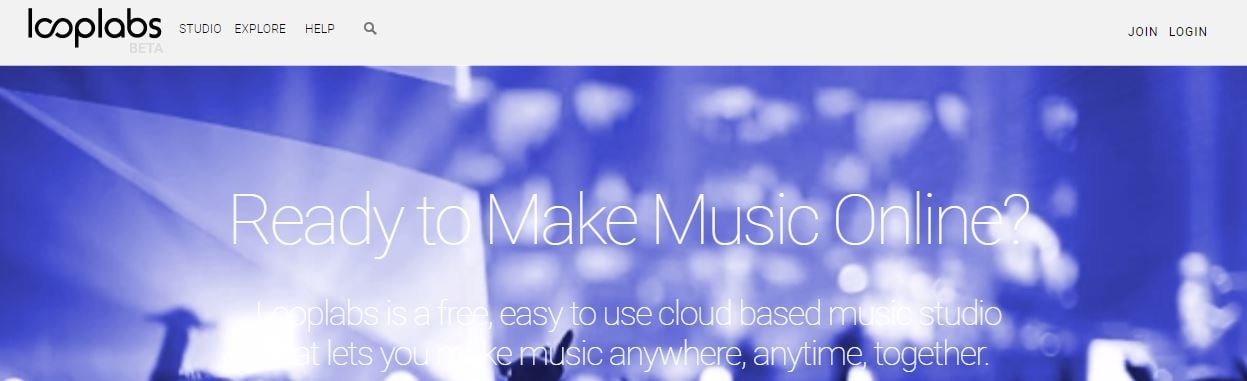
Music enthusiasts who would like to produce different genres of music online should definitely get familiar with Looplabs, as this online music maker lets its users remix songs or make music from scratch. Besides being one of the best places on the Internet to record music, Looplabs is also a community where you can meet people who like your music or discover artists whose work you admire. The Looplab’s studio features samples for a broad range of music genres and musical instruments, and you can use it to make Electro or Funk music equally effectively.
9. Online Sequencer
Price: Free
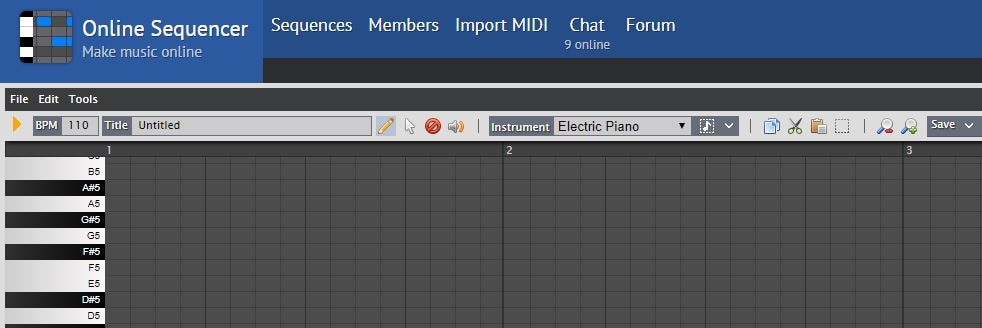
This is a perfect tool for developing an idea for a song, as you can create a sequence in just a few minutes. You can choose from Piano, Drums and Guitar categories of instruments or browse through a huge collection of fully customizable preset sequences that is updated on a daily basis. The platform also lets you import MIDI files and work on projects you’ve already started developing or you can export your sequences as MIDI files from the Online Sequencer and edit them with your DAW. Even though Online Sequencer is a useful tool for making music, the features it offers can’t really be compared with those on Soundation or AudioSauna.
10. Autochords
Price: Free
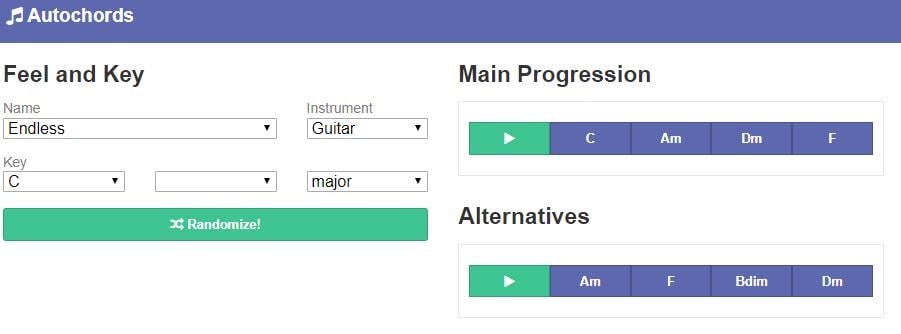
Finding new ideas for songs is often more difficult than it sounds, and if you ever face a creative block you should simply head over to Autochords. This platform suggests chord progressions based on the parameters you set, so you just have to select an instrument and the name of the song to set the feel, and the platform will show you the main progression and its alternatives. Rather than being an online music maker, Autochords is more a tool that helps piano and guitar players understand chord progressions better. iPhone and iPad users can download the Autochords app from the App Store for free.
Read More to Get : Best Free DAW for Windows and Mac for Beginners >>
Conclusion
You don’t have to be a professional musician in order to start making music online, you just have to love music, and an online music maker of your choice will take care of the rest. Do you use online music makers for entertainment or to express your creativity? Leave a comment below and share your opinions with us.
Benjamin Arango
Benjamin Arango is a writer and a lover of all things video.
Follow @Benjamin Arango
Benjamin Arango
Apr 26, 2024• Proven solutions
Expressing ideas through music was never easy, and even today in the age of powerful digital audio stations like Ableton Live or FruityLoops , producing original music requires a certain set of skills. However, online content producers often need music for their videos, but they neither have the time or the budget to hire a professional musician to create a soundtrack for their project in studio conditions. If you are looking for a quick way to make your own music online, then you should keep reading, because in this article we are going to take you through the ten best online music makers you should check out in 2021.
10 Best Online Music Makers in 2021
The music-making platforms that are currently available online are still not as nearly as powerful as professional software products for music producers. Nonetheless, this doesn’t mean that you can’t use them to create the music you like or just have fun with them. Here are the ten best online music makers in 2019.
1. Typeatone
Price: Free
Image from Internet
Have you ever wondered what your words would sound like if they were turned into music? Head over to the Typeatone platform if you want to find out since all you have to do in order to start creating your own music is type in the text. As you type, the platform will automatically start playing your words and once you’re done, you’ll be able to hear your new song. You can also choose between different instruments to make the process of creating music with Typeatone even more entertaining. You can share all of your creations with your friends on social media.
![]()
A cross-platform for making videos anywhere for all creators
Why your video editing isn’t good enough? How about some creative inspo?
- 100 Million+ Users
- 150+ Countries and Regions
- 4 Million+ Social Media Followers
- 5 Million+ Stock Media for Use
* Secure Download
2. Audiotool
Price: Free
Image from Internet
Electronic music producers who often use synthesizers like Roland TB-303 or Roland TR-909 are going to love the features this online collaborative platform offers. Audiotool hosts a huge music library, you can explore even if you are not a registered user. In order to access the platform’s music studio, you first have to create an account and make sure that you are signed in. Audiotool is also a community of like-minded people where you can meet artists whose work you appreciate or hear what others think about your work. The only downside is that Audiotool’s abundance of features can be overwhelming for the newcomers to the world of electronic music production.
3. AudioSauna
Price: Free
Image from Internet
AudioSauna seems to offer everything its users need to create inspiring music because it is equipped with frequency modulation synth, virtual analog synth and a sampler that provides layering features. Moreover, its intuitive interface makes the process of arranging the song structure or changing several note values simultaneously much easier. Creating an account on AudioSauna will enable to record all your projects and export them as audio files that can be uploaded to SoundCloud or any other audio distribution platform. AudioSauna is a perfect tool for skilled producers who want to create their music online.
4. Soundtrap
Price: Free trial available, subscription plans start at $3.99 per month
Image from Internet
Soundtrap offers a long list of features that enable professional musicians to create their music online. All you have to do is create an account and you will get access to the Sountrap’s studio that let you create new beat patterns, use a synthesizer or even invite friends to make music together. The platform also offers the possibility to connect your own instruments to the Soundtrap’s studio, so that you can record your music as you play it. This online platform also has an Education section where you can share your knowledge with others or learn valuable music lessons.
5. PatternSketch
Price: Free
Image from Internet
This basic and yet effective drum machine can help you generate amazing beats for the songs you’re working on. Once you sign up, you will be able to choose from a number of different kits and patterns that are fully customizable or create your own original beats. After you create a pattern you like, you can save it with a single click or send it to your friends via email. Optionally, you can export all of your creations from PatternSketch and save them as wav, mp3 or ogg files, although in some cases mp3 audio files may not loop properly.
6. Soundation
Price: Free version available, pricing plans start at $1.99 per month
Image from Internet
If you choose to create music with the free version of Soundation, you’ll be able to work on up to ten projects, try out over 700 audio effects and loops, and export all your music in low quality. Purchasing the Intro pricing plan will enable you to work on an unlimited number of projects, make live audio recordings, import audio files smaller than 100MB or use an external midi controller. Moreover, opting for any of the annual or monthly subscription plans will allow you to export entire projects and audio files in high resolution from Soundation.
7. Text to Speech
Price: Free

online-music-maker-Text to Speech.jpg
Vocals are often overlooked in contemporary electronic music, but there are so many ways they can be used creatively. The platform lets you turn up to 50000 characters into speech at once, and it also offers several different voices you can choose from. Before you create an audio file you can determine how fast the text is going to be vocalized, so you should try different options and see which one fits your project the best. Text to Speech platform can be used during the process of creating a new song, but the tools it offers are not enough to make an entire song.
8. Looplabs
Price: Free
Music enthusiasts who would like to produce different genres of music online should definitely get familiar with Looplabs, as this online music maker lets its users remix songs or make music from scratch. Besides being one of the best places on the Internet to record music, Looplabs is also a community where you can meet people who like your music or discover artists whose work you admire. The Looplab’s studio features samples for a broad range of music genres and musical instruments, and you can use it to make Electro or Funk music equally effectively.
9. Online Sequencer
Price: Free
This is a perfect tool for developing an idea for a song, as you can create a sequence in just a few minutes. You can choose from Piano, Drums and Guitar categories of instruments or browse through a huge collection of fully customizable preset sequences that is updated on a daily basis. The platform also lets you import MIDI files and work on projects you’ve already started developing or you can export your sequences as MIDI files from the Online Sequencer and edit them with your DAW. Even though Online Sequencer is a useful tool for making music, the features it offers can’t really be compared with those on Soundation or AudioSauna.
10. Autochords
Price: Free
Finding new ideas for songs is often more difficult than it sounds, and if you ever face a creative block you should simply head over to Autochords. This platform suggests chord progressions based on the parameters you set, so you just have to select an instrument and the name of the song to set the feel, and the platform will show you the main progression and its alternatives. Rather than being an online music maker, Autochords is more a tool that helps piano and guitar players understand chord progressions better. iPhone and iPad users can download the Autochords app from the App Store for free.
Read More to Get : Best Free DAW for Windows and Mac for Beginners >>
Conclusion
You don’t have to be a professional musician in order to start making music online, you just have to love music, and an online music maker of your choice will take care of the rest. Do you use online music makers for entertainment or to express your creativity? Leave a comment below and share your opinions with us.
Benjamin Arango
Benjamin Arango is a writer and a lover of all things video.
Follow @Benjamin Arango
Also read:
- Updated Unveiling the Ultimate Collection of FREE Mobile Audio-Visualizing Apps for iOS and Android for 2024
- Updated In 2024, Best Volume Normalizers How to Normalize Audio in Videos?
- New The Elite Selection of 8 Dictation Technologies for Desktop Operations on Various OS and Online Platforms for 2024
- New In 2024, Prime Online Repositories for Obtaining Lofi Melodies and Artwork
- The Fundamentals of Podcast Production An Introduction to Basic Editing Techniques
- New Mastering the Art of Music Video Creation Expert Advice
- Updated 2024 Approved Furry Fidelities High-Quality Dog Soundtracks and Effects
- Speech-to-Text Software Showdown Discover the Top 8 Options for PCs, Macs and Online Accessibility for 2024
- New The Ultimate Guide 10 Leading Audio-to-Text Transcription Applications (Free/Paid) for 2024
- New EasyMP3 Transcriber Free MP3-to-Text Converter for Everyday Use - Available in VideoJot Pro Suite for 2024
- New The Critical Selection Top 5 Most Cutting-Edge Voice Transformation Services Online for 2024
- Updated Easy Steps to Get and Remove Audacity on Ubuntu Linux - 2023 Edition
- New 2024 Approved Perfect Pacing Strategies for Cutting Extra Audio in Your iMovie Projects Across Apple Ecosystems
- Behind the Scenes The Essential Roles of Film Production Team Members for 2024
- Updated Capturing Glass Disintegration Noise Sequence
- New 2024 Approved Expert Recommendations for High-Quality Music Video Designs
- Updated In-Depth Tips Utilizing Voxacells Voice Change Functionality for a More Dynamic Discord Interaction
- New In 2024, Navigating Virtual Connections Safety Essentials for Online Meetups
- New 2024 Approved Audio Cleanup Tips for Silencing Unwanted Sound in Streaming Videos
- Updated Where Can I Find Scary Sound Effect for 2024
- Updated Identify Stomach Gas Acoustics Recording for 2024
- Mastering Call Recording on Google Voice A Comprehensive Guide for 2024
- Updated Advanced Audio Format Switcher Instant MP3 Generation for Modern Listeners
- Updated 2024 Approved Music-Infused Videos Made Easy A Guide to the Leading Apps and Websites for Audio Integration
- New Guides to Efface Auditory Components From Cinematic Pieces for 2024
- 2024 Approved Simplified Steps to Effortlessly Capture Your Ideas in a Podcast Format
- Updated Unleashing the Tremors Deepening Vocal Impact with Filmora Techniques
- Audience Captivation Technique How to Personalize Your Speech with Audacitys Vocal Effects for 2024
- Updated In 2024, Premiere Pro System Requirement How to Set up Computers
- In 2024, Sim Unlock Oppo Reno 10 Pro+ 5G Phones without Code 2 Ways to Remove Android Sim Lock
- new How to Translate YouTube Videos to English Subtitles
- Updated 2024 Approved Unlock Premiere Pros Full Potential System Requirements and Setup
- Updated TikTok Aspect Ratio Explained Tips and Tricks Success for 2024
- Here are Some of the Best Pokemon Discord Servers to Join On Apple iPhone SE (2022) | Dr.fone
- How to recover deleted photos from Android Gallery without backup on Xiaomi Civi 3 Disney 100th Anniversary Edition
- What Does Jailbreaking Apple iPhone XS i Do? Get Answers here
- How to Change Honor X9b Location on Skout | Dr.fone
- Hassle-Free Ways to Remove FRP Lock from Infinix Hot 30i Phones with/without a PC
- Mastering FFmpeg How to Merge Audio and Video with Ease
- New Unleash Your Creativity Best Free Video FX Apps for iOS and Android
- How to Find iSpoofer Pro Activation Key On Oppo A78 5G? | Dr.fone
- In 2024, 5 Best Route Generator Apps You Should Try On Samsung Galaxy S24+ | Dr.fone
- Updated Top 10 Best Free Video Editors for Ubuntu for 2024
- Top 4 Ways to Trace Samsung Galaxy F04 Location | Dr.fone
- In 2024, 8 Ways to Transfer Photos from Honor X50i to iPhone Easily | Dr.fone
- Updated In 2024, From Zero to Hero 10 Free FCPX Plugins for Editors
- Can I use iTools gpx file to catch the rare Pokemon On Xiaomi Redmi Note 13 Pro+ 5G | Dr.fone
- How to Change Lock Screen Wallpaper on Tecno Camon 20 Premier 5G
- New 2024 Approved No Watermark, No Problem 7 Best Video Merger Software
- 2 Ways to Monitor Samsung Galaxy Z Flip 5 Activity | Dr.fone
- Authentication Error Occurred on Realme 11 5G? Here Are 10 Proven Fixes | Dr.fone
- Updated 2024 Approved How to Make a Super Easy Rotating Video Effect
- Title: Updated Perfecting the Journey A Guide to Integrating Visual Sequences
- Author: Paul
- Created at : 2024-05-20 01:48:33
- Updated at : 2024-05-21 01:48:33
- Link: https://voice-adjusting.techidaily.com/updated-perfecting-the-journey-a-guide-to-integrating-visual-sequences/
- License: This work is licensed under CC BY-NC-SA 4.0.
