
:max_bytes(150000):strip_icc():format(webp)/GettyImages-667603173-fac0b8f4b1d9453c866d332dc73821f8.jpg)
Updated Orchestrating Artificial Intelligence Spotlight on Future Musical Innovators for 2024
Orchestrating Artificial Intelligence: Spotlight on Future Musical Innovators
Top Best 10 AI Music Composers in 2024

Benjamin Arango
Mar 27, 2024• Proven solutions
Robots can’t be creative, right? A number of startups that focus on the development of artificial intelligence that is capable of composing music have proved this statement wrong. AI music composers generate original, copyright-free music you can use in your latest YouTube video or social media video ad. You don’t even have to be a sound designer or a musician to produce soundtracks for your videos with AI Music Composers, because you can upload the music that has already been recorded and create variations of it. So, let’s take a look at what AI music composers have to offer in 2024.
| 1 - Amper Music | 2 - AIVA |
|---|---|
| 3 - Jukedeck | 4 - Ecrett Music |
| 5 - Melodrive | 6 - ORB Composer |
| 7 - Amadeus Code | 8 - Humtap |
| 9 - Muzeek | 10 - Brain.fm |
Ten Best AI Music Composers You Should Know About
The AI technologies that can compose music are still relatively novel, and as time passes, they can only develop and grow further. Consequently, each of the AI music composers we featured in this article offers a different range of possibilities. Here are the ten best AI music composers you shouldn’t miss out on in 2024.

Filmora AI Music Editor
Edit Audio with AI Music Editor
Experience the power of Filmora’s AI tools and make your audio or music stand out like never before! Audio Denoise, Audio Ducking, Audio Synchronization, Audio Stretch, etc…
Try It Free Try It Free Try It Free Learn More >
1. Amper Music
Price: Available upon request
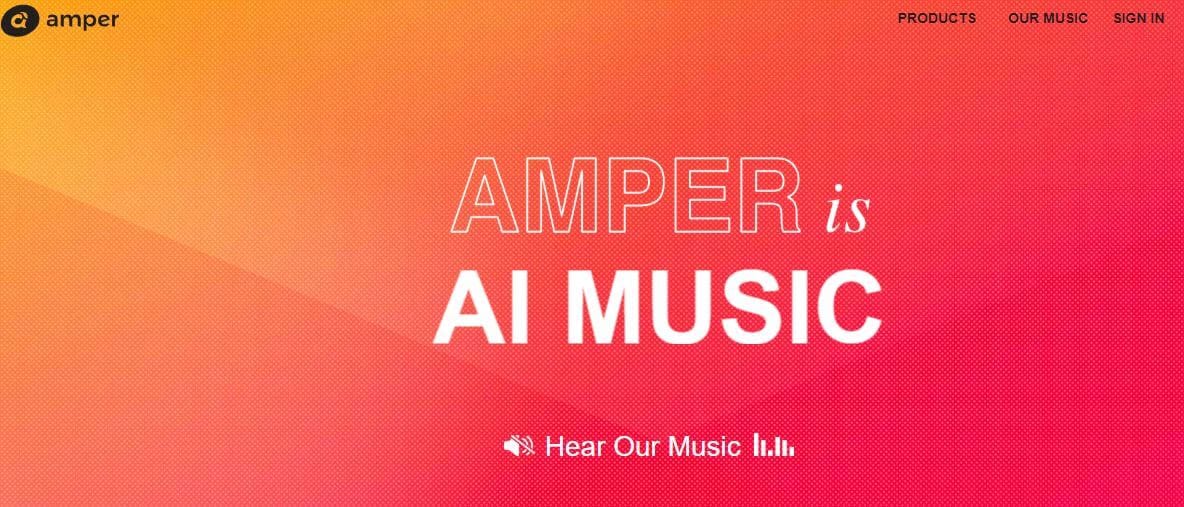
Industry professionals know just how frustrating the music licensing process can be. Amper Music is a cloud-based platform designed to simplify the process of creating soundtracks for movies and video games, as it produces AI generated algorithms that help users create music in a variety of music genres. You must first create an account on this platform, in order to be able to use the free version of Amper Music that provides only a limited amount of features. Upgrading to the pro version of Amper Music will enable you to enjoy the full potential of this rapidly growing AI Music Composer.
2. AIVA
Price: Free version available, subscription plans start from €14 p/month
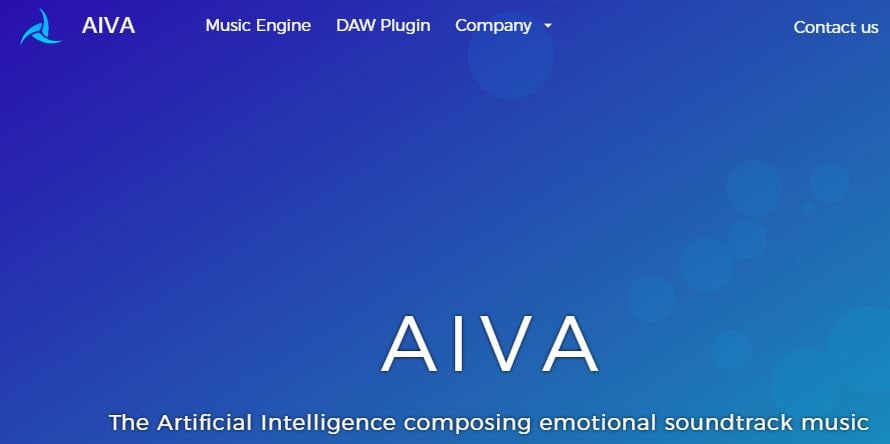
Since 2016, when AIVA Technologies was founded, its team has worked on developing an AI script that can compose emotional soundtracks for ads, video games, or movies. Soon after, the AI published its first oeuvre titled ‘Opus 1 for Piano Solo and in the subsequent years, AIVA released an album and composed music for a video game. Besides enabling its users to create music from scratch, AIVA can also be used to produce variations of existing songs. The music engine that powers this AI music composer makes the production of corporate or social media videos much easier, as it eliminates the need to go through the music licensing process.
3. Jukedeck
Price: Free version available, Pricing plans start from $0.99 per download
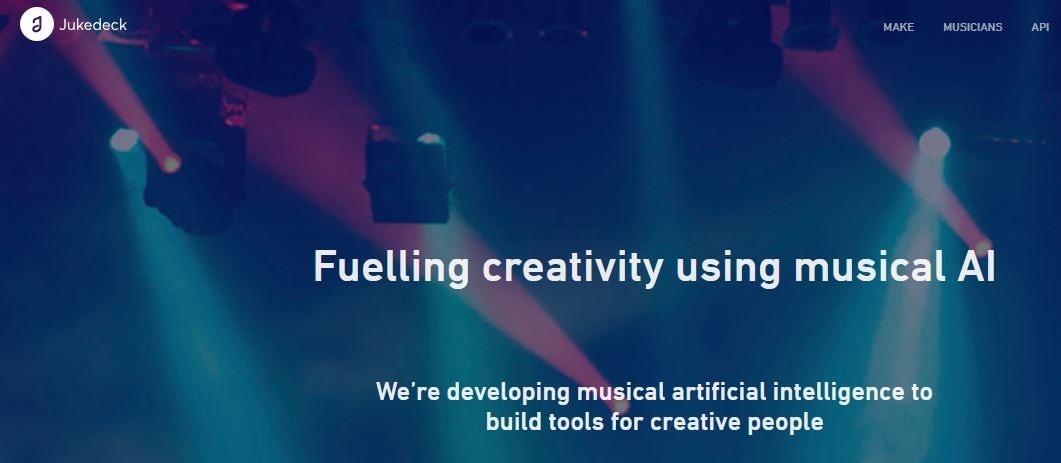
The AI music composer developed by the Jukedeck startup resembles the Amper’s music composer because they both rely on neural networks to analyze music data, that is then used by the AI to learn how to compose original music. Each track that is available through this AI music composer can be edited, so you can change its length or its tempo. You can create music with Jukedeck for free if you decide to give all the rights to the AI composer, while both individuals and small businesses can purchase the license to use the song created with Jukedeck for just $0.99.
Note: Jukedeck has been acquired by TikTok, and we are waiting for a new Jukedeck.
![]()
A cross-platform for making videos anywhere for all creators

Why your video editing isn’t good enough? How about some creative inspo?
- 100 Million+ Users
- 150+ Countries and Regions
- 4 Million+ Social Media Followers
- 5 Million+ Stock Media for Use
* Secure Download

4. Ecrett Music
Price: Subscription plans start at $5
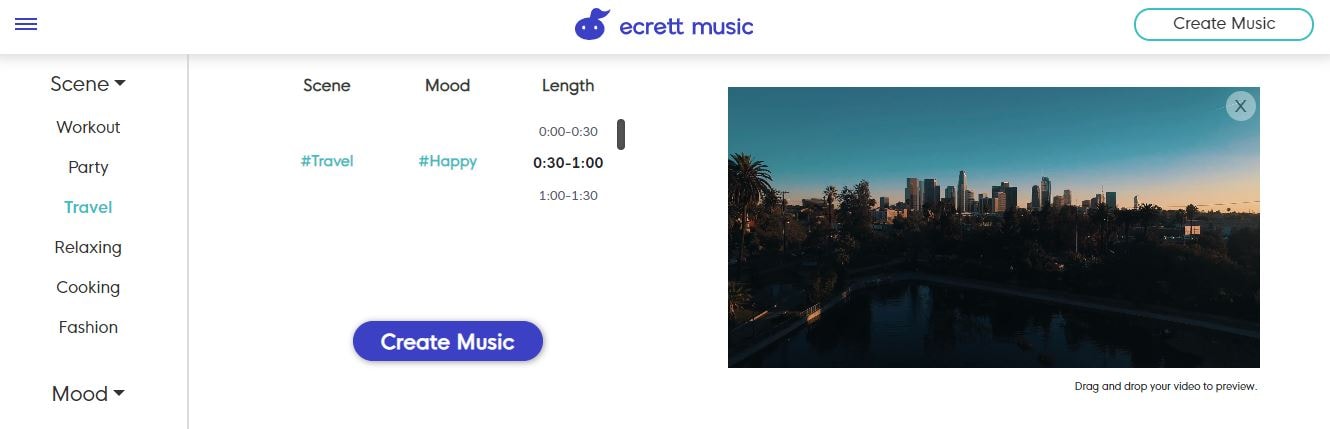
This online AI music composer makes creating stunning soundtracks for videos look easy. You just have to upload a video for which you want to generate music and select the type of scene and the mood of that scene. Party, Travel or Fashion are among the types of scenes you can choose from, while moods range from happy to serious. When done, simply click on the Create Music button, and the platform will automatically generate the soundtrack for your video. In case you are producing videos on a constant basis, you should consider purchasing one of the available subscription plans.
5. Melodrive
Price: Free
Compatibility: iOS, Windows
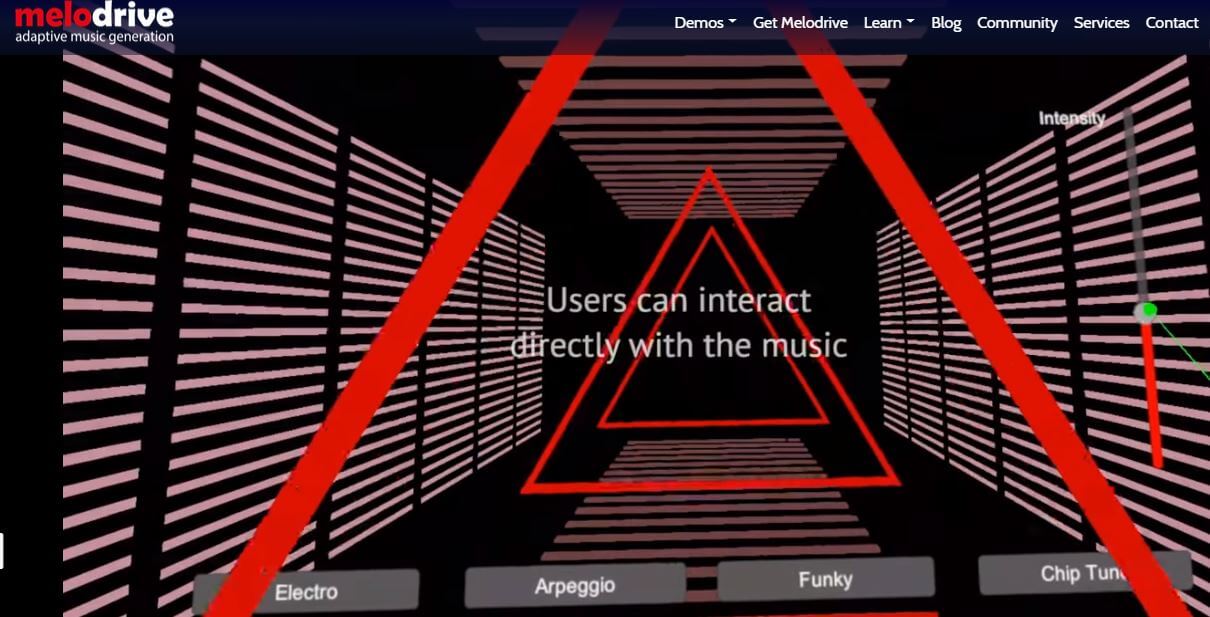
At the moment, the Lite and Indie versions of Melodrive are available for download free of charge, but the Indie version of this AI music composer still offers more options. Melodrive is one of the first AI systems that can compose emotional and unique music in real time. The AI generates music by adapting to the media environment and aims to match the mood and the style of the video. It is worth noting that Melodrive is still under development and that through time its capabilities to compose music are going to become even more refined than they already are.
6. ORB Composer
Price: Pricing plans start at $149,00
Compatibility: macOS, Windows

You can’t generate music automatically with ORB Composer, because the AI creates music based on your choices. That’s why you need to know at least the basic rules of music composition in order to be able to use the ORB Composer properly. The AI music composer comes bundled with a rich collection of chord progressions, that contains almost all chords used in popular music. This tool is aimed at artists who are interested in experimenting with the possibilities of creating music with artificial intelligence and discovering new styles of music. There are six music templates you can choose from, and you can create compositions by simply organizing different blocks of music.

Filmora AI Audio Stretcher
Wondershare Filmora - AI Audio Stretcher
• Retime any audio track to fit the duration of your video almost instantly.
• Rearrange songs without quality loss.
• Cross-platform supported - (Windows, Mac, iOS, Android)
Start Audio Stretch Start Audio Stretch Start Audio Stretch Learn More >
7. Amadeus Code
Price: Free, but the app offers in-app purchases
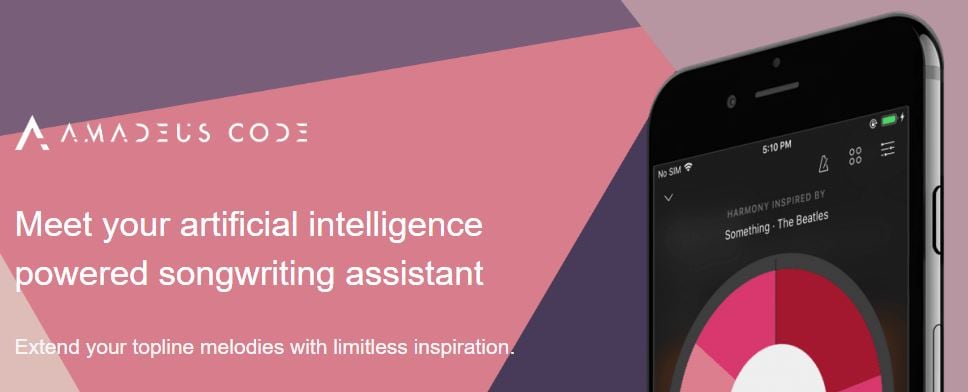
Compatibility: iOS
Both skilled musicians and music enthusiast can use this iOS-based app to create new melodies in just a few minutes. The AI engine that the Amadeus Code uses contains chord progressions of some of the most famous songs ever created and it let you use them to create new and innovative structures of music compositions. Moreover, you can use gestures to create new songs or recreate specific segments of songs you composed earlier. Even though Amadeus Code lets its users export audio and MIDI files to audio editing software, you still have to purchase all songs you want to keep.
8. Humtap
Price: Free
Compatibility: iOS
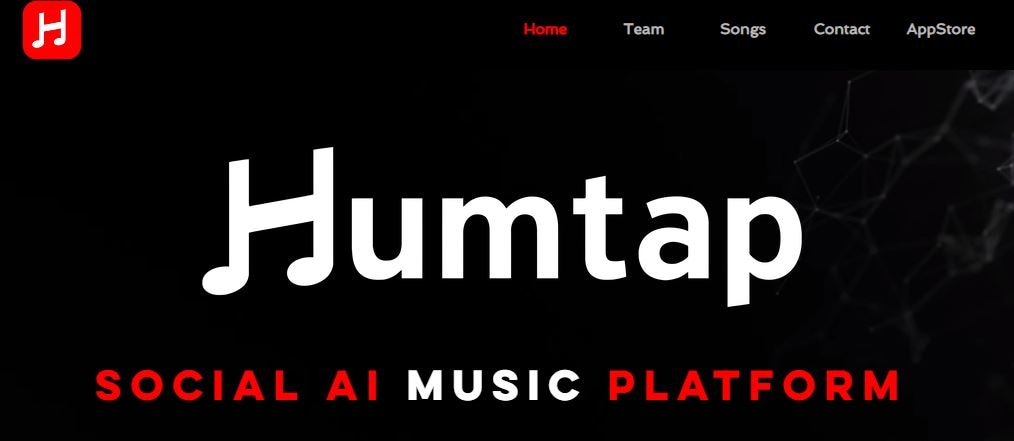
Musicians who have a tough time remembering their own ideas are going to love using Humtap because they can just hum a melody and the app will automatically generate an entire song using different instruments. What’s more, beats can be added with a single tap, and after the music is generated you can proceed to add the vocals as well. Humptap also has video making capabilities, so you can create videos for all songs you compose with this app. All tracks and videos generated with the Humtap AI music composer can be saved to your phone, but you can’t share your new creations to social media directly from the app.
9. Muzeek
Price: Free trial available, pricing plans start from $19 per month
Compatibility: macOS
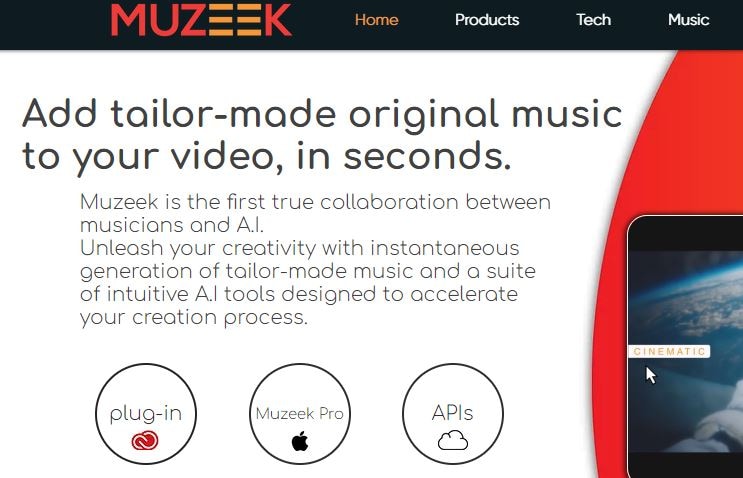
If you are in need of licensed music for the video you’re planning on sharing to social media networks, then Muzeek is one of the best choices you can make. The AI algorithm Muzeek uses analyzes the videos for which you are generating music and it creates soundtracks that perfectly fit the rhythm of the video. All content creators, including online marketing agencies or video game developers, can rely on Muzeek AI music composer to create authentic music in high quality. Moreover, Muzeek can also analyze the video’s original audio and create subtitles from it or adjust its volume automatically.
10. Brain.fm
Price: Subscription plans start from $6,95 per month
Compatibility: Android, online
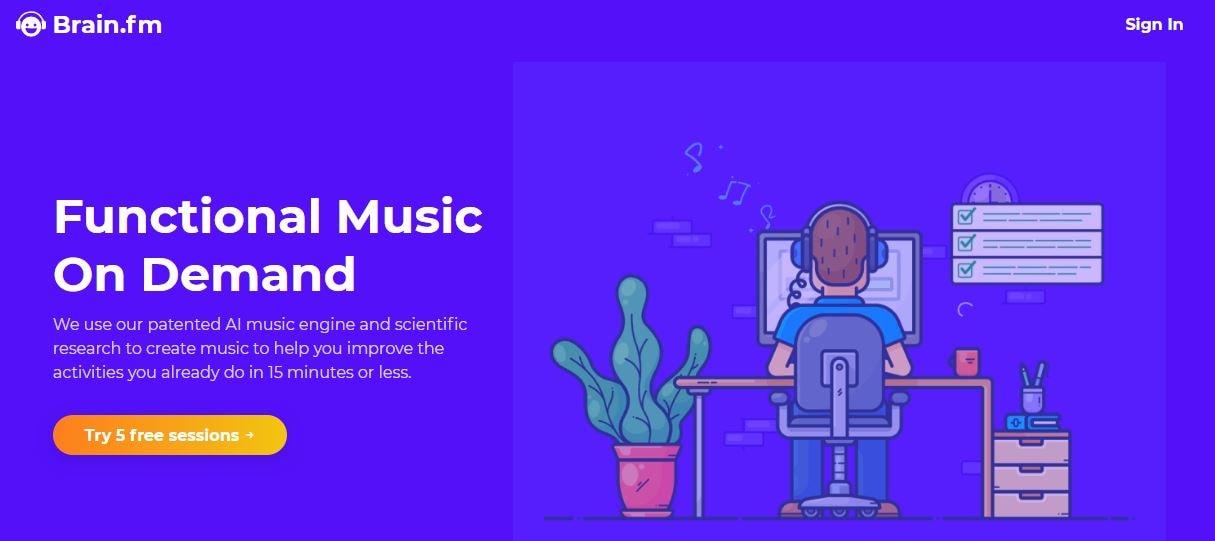
The idea that music can make our brains more productive is at the very core of what Brain.fm platform is all about. A team of scientists, musicians and engineers uses artificial intelligence to generate music designed to make your brain more productive and focused. They claim that the music created with their AI music composer achieve its effects in just ten to fifteen minutes. However, you can’t use Brain.fm to create your own music, as this platform is better suited for people who spend a lot of time at work and have a tough time maintaining their focus while performing important tasks.
Conclusion
The opportunities AI music composers offer are still not properly explored, because most of these technologies are still under development. The results AI music composers we included in this article have managed to achieve so far are impressive because each of them can produce high-quality audio files for all sorts of video content. Which AI music composer do you like to use the most? Leave a comment, and let us know.
Benjamin Arango
Benjamin Arango is a writer and a lover of all things video.
Follow @Benjamin Arango
Benjamin Arango
Mar 27, 2024• Proven solutions
Robots can’t be creative, right? A number of startups that focus on the development of artificial intelligence that is capable of composing music have proved this statement wrong. AI music composers generate original, copyright-free music you can use in your latest YouTube video or social media video ad. You don’t even have to be a sound designer or a musician to produce soundtracks for your videos with AI Music Composers, because you can upload the music that has already been recorded and create variations of it. So, let’s take a look at what AI music composers have to offer in 2024.
| 1 - Amper Music | 2 - AIVA |
|---|---|
| 3 - Jukedeck | 4 - Ecrett Music |
| 5 - Melodrive | 6 - ORB Composer |
| 7 - Amadeus Code | 8 - Humtap |
| 9 - Muzeek | 10 - Brain.fm |
Ten Best AI Music Composers You Should Know About
The AI technologies that can compose music are still relatively novel, and as time passes, they can only develop and grow further. Consequently, each of the AI music composers we featured in this article offers a different range of possibilities. Here are the ten best AI music composers you shouldn’t miss out on in 2024.
Filmora AI Music Editor
Edit Audio with AI Music Editor
Experience the power of Filmora’s AI tools and make your audio or music stand out like never before! Audio Denoise, Audio Ducking, Audio Synchronization, Audio Stretch, etc…
Try It Free Try It Free Try It Free Learn More >
1. Amper Music
Price: Available upon request
Industry professionals know just how frustrating the music licensing process can be. Amper Music is a cloud-based platform designed to simplify the process of creating soundtracks for movies and video games, as it produces AI generated algorithms that help users create music in a variety of music genres. You must first create an account on this platform, in order to be able to use the free version of Amper Music that provides only a limited amount of features. Upgrading to the pro version of Amper Music will enable you to enjoy the full potential of this rapidly growing AI Music Composer.
2. AIVA
Price: Free version available, subscription plans start from €14 p/month
Since 2016, when AIVA Technologies was founded, its team has worked on developing an AI script that can compose emotional soundtracks for ads, video games, or movies. Soon after, the AI published its first oeuvre titled ‘Opus 1 for Piano Solo and in the subsequent years, AIVA released an album and composed music for a video game. Besides enabling its users to create music from scratch, AIVA can also be used to produce variations of existing songs. The music engine that powers this AI music composer makes the production of corporate or social media videos much easier, as it eliminates the need to go through the music licensing process.
3. Jukedeck
Price: Free version available, Pricing plans start from $0.99 per download
The AI music composer developed by the Jukedeck startup resembles the Amper’s music composer because they both rely on neural networks to analyze music data, that is then used by the AI to learn how to compose original music. Each track that is available through this AI music composer can be edited, so you can change its length or its tempo. You can create music with Jukedeck for free if you decide to give all the rights to the AI composer, while both individuals and small businesses can purchase the license to use the song created with Jukedeck for just $0.99.
Note: Jukedeck has been acquired by TikTok, and we are waiting for a new Jukedeck.
![]()
A cross-platform for making videos anywhere for all creators
Why your video editing isn’t good enough? How about some creative inspo?
- 100 Million+ Users
- 150+ Countries and Regions
- 4 Million+ Social Media Followers
- 5 Million+ Stock Media for Use
* Secure Download
4. Ecrett Music
Price: Subscription plans start at $5

This online AI music composer makes creating stunning soundtracks for videos look easy. You just have to upload a video for which you want to generate music and select the type of scene and the mood of that scene. Party, Travel or Fashion are among the types of scenes you can choose from, while moods range from happy to serious. When done, simply click on the Create Music button, and the platform will automatically generate the soundtrack for your video. In case you are producing videos on a constant basis, you should consider purchasing one of the available subscription plans.
5. Melodrive
Price: Free
Compatibility: iOS, Windows
At the moment, the Lite and Indie versions of Melodrive are available for download free of charge, but the Indie version of this AI music composer still offers more options. Melodrive is one of the first AI systems that can compose emotional and unique music in real time. The AI generates music by adapting to the media environment and aims to match the mood and the style of the video. It is worth noting that Melodrive is still under development and that through time its capabilities to compose music are going to become even more refined than they already are.
6. ORB Composer
Price: Pricing plans start at $149,00
Compatibility: macOS, Windows

You can’t generate music automatically with ORB Composer, because the AI creates music based on your choices. That’s why you need to know at least the basic rules of music composition in order to be able to use the ORB Composer properly. The AI music composer comes bundled with a rich collection of chord progressions, that contains almost all chords used in popular music. This tool is aimed at artists who are interested in experimenting with the possibilities of creating music with artificial intelligence and discovering new styles of music. There are six music templates you can choose from, and you can create compositions by simply organizing different blocks of music.
Filmora AI Audio Stretcher
Wondershare Filmora - AI Audio Stretcher
• Retime any audio track to fit the duration of your video almost instantly.
• Rearrange songs without quality loss.
• Cross-platform supported - (Windows, Mac, iOS, Android)
Start Audio Stretch Start Audio Stretch Start Audio Stretch Learn More >
7. Amadeus Code
Price: Free, but the app offers in-app purchases
Compatibility: iOS
Both skilled musicians and music enthusiast can use this iOS-based app to create new melodies in just a few minutes. The AI engine that the Amadeus Code uses contains chord progressions of some of the most famous songs ever created and it let you use them to create new and innovative structures of music compositions. Moreover, you can use gestures to create new songs or recreate specific segments of songs you composed earlier. Even though Amadeus Code lets its users export audio and MIDI files to audio editing software, you still have to purchase all songs you want to keep.
8. Humtap
Price: Free
Compatibility: iOS
Musicians who have a tough time remembering their own ideas are going to love using Humtap because they can just hum a melody and the app will automatically generate an entire song using different instruments. What’s more, beats can be added with a single tap, and after the music is generated you can proceed to add the vocals as well. Humptap also has video making capabilities, so you can create videos for all songs you compose with this app. All tracks and videos generated with the Humtap AI music composer can be saved to your phone, but you can’t share your new creations to social media directly from the app.
9. Muzeek
Price: Free trial available, pricing plans start from $19 per month
Compatibility: macOS
If you are in need of licensed music for the video you’re planning on sharing to social media networks, then Muzeek is one of the best choices you can make. The AI algorithm Muzeek uses analyzes the videos for which you are generating music and it creates soundtracks that perfectly fit the rhythm of the video. All content creators, including online marketing agencies or video game developers, can rely on Muzeek AI music composer to create authentic music in high quality. Moreover, Muzeek can also analyze the video’s original audio and create subtitles from it or adjust its volume automatically.
10. Brain.fm
Price: Subscription plans start from $6,95 per month
Compatibility: Android, online
The idea that music can make our brains more productive is at the very core of what Brain.fm platform is all about. A team of scientists, musicians and engineers uses artificial intelligence to generate music designed to make your brain more productive and focused. They claim that the music created with their AI music composer achieve its effects in just ten to fifteen minutes. However, you can’t use Brain.fm to create your own music, as this platform is better suited for people who spend a lot of time at work and have a tough time maintaining their focus while performing important tasks.
Conclusion
The opportunities AI music composers offer are still not properly explored, because most of these technologies are still under development. The results AI music composers we included in this article have managed to achieve so far are impressive because each of them can produce high-quality audio files for all sorts of video content. Which AI music composer do you like to use the most? Leave a comment, and let us know.
Benjamin Arango
Benjamin Arango is a writer and a lover of all things video.
Follow @Benjamin Arango
The Fins of Conversation: Mastering the Technique of Clownfish-Inspired Sound Effects on Online Platforms
Want to do something interesting? Think about using a voice changer. A voice changer is used to change your voice to make your daily interaction more interesting. A voice changer changes the pitch or tone of your voice. People also use it to add voice effects that could be either of a certain type or any random effect that the user likes.
You can use voice changers on your live stream. You can also use it on platforms like Discord and Skype. A voice changer can be used to make the gaming experience better as well. You can also use voice changer on online games like Fortnite. If you want to know about Clownfish Voice Changer, then let’s get started.
In this article
01 What Is Clownfish Voice Changer?
02 Tips to Use Clownfish Voice Changer on Discord and Fortnite?
03 Guidelines to Better Use Clownfish Voice Changer on Skype
04 Solution to Fix Clownfish Voice Changer Not Working
For Win 7 or later (64-bit)
For macOS 10.12 or later
Part 1. What Is Clownfish Voice Changer?
Clownfish is considered a famous voice changer. Clownfish Voice Changer is used to change voices for various purposes. It is installed on the system as it uses the microphone of the system that it is installed on. Clownfish Voice Changer has an attractive and intuitive interface that gives the user the best experience. It has plug-in support for Virtual Sound Technology (VST).

Clownfish voice provides multiple choices for voice after-effects that are available in the built-in library. These voices include male/female voices, robotic sounds, radio voices along with alien voices. Clownfish Voice Changer PC is compatible with Windows 7/8/8.1/10 and 11. It also has a built-in music player that supports various media formats.
Part 2. Tips to Use Clownfish Voice Changer on Discord and Fortnite?
As we have discussed earlier, what clownfish voice changer is and how amazing it is, now let’s move further. The following section of this article will share the tips that will help someone use Clownfish Discord and also Clownfish on Fortnite.
Before we start, you should know how to configure the Clownfish voice changer on your device. For this, you can follow the steps given below. Let’s begin!
Step 1: Setup Clownfish
After you have successfully downloaded and installed Clownfish Voice Changer, it’s time to setup. For this, firstly, locate the voice changer in your systems tray. Then, right-click on the icon, and from the menu list, select the ‘Setup’ option to set clownfish across different applications.

Step 2: Install Microphone
You cannot use the voice changer until you have attached a microphone to your device. For this, you need to install the microphone by hitting the ‘Install’ button next to the microphone.

Step 3: Set Microphone as Default Device
For the microphone to work in Clownfish, it should be selected as the default device. For doing this, select the ‘Recording’ option from the ‘Sounds’ tabs. A list of all the compatible devices will appear on the screen, you have to right-click on your device and hit the ‘Set as the Default Device’ option.

Step 4: Default Device is Set
After that, right-click on the Clownfish icon in the system tray and hit the ‘Hear Microphone’ option. The Clownfish Voice Changer is set to the default option. In case you ever plan to change it, right-click on the Clownfish icon from the system tray and tap on ‘Set Voice Changer.’

Step 5: Select Voice Changer Effects
Once Clownfish has been installed and successfully configured, you now have complete access to all voice changer options. There are dozens of effects that you can select from.

How to use Clownfish on Discord
If you want to use Clownfish on Discord, then you have to select Clownfish voice changer as the input device. For this, open Discord and head to ‘App Settings’ under the ‘User Settings’ option. There, look for the ‘Voice and Video’ option. A category of ‘Input Device’ will appear on the screen; from the drop-down list, switch to ‘Clownfish Voice Changer.’

How to use Clownfish on Fortnite
For using Clownfish on Fortnite, start by selecting the ‘Menu’ icon. There, head to the ‘Settings’ and select the ‘Audio’ option. Now, you have to set the input device; for that, go to the ‘Voice Chat’ option and select Clownfish Voice Changer as your input device under the ‘Voice Chat Input Device’ category.

Part 3. Guidelines to Better Use Clownfish Voice Changer on Skype
You can use voice changers on various platforms according to their compatibility; for instance, Clownfish is compatible with Skype. The question is, do you know how to use Clownfish voice changer on Skype? If ‘no,’ then let us share some helping guidelines to use Clownfish on Skype in a better way.
Step 1: If you want to change voice on Skype with Clownfish, then, first of all, download and install Skype on your PC or laptop and launch it.

Step 2: After Skype has been successfully launched, head over to ‘Settings’ by clicking on the three dots present next to your username.

Step 3: From the Settings screen, you have to look for the ‘Audio & Video’ tab and then select it. Lastly, you have to select the microphone ‘Clownfish Voice Changer’ under the ‘Microphone’ option, and you are all done.

Part 4. Solution to Fix Clownfish Voice Changer Not Working
While using Clownfish Voice Changer, you might also come across some troubles. They might be because either the voice changer is not updated, or maybe the apps you are using are not up to date. Let us share some fixes with you for smooth Clownfish functioning.
Fix 1: Update Clownfish Voice Changer
The most significant reason why you face trouble is that your Clownfish version is outdated. For this, you should update the voice changer to its latest version by following the steps given below:
Step 1: You have to start by opening the ‘Control Panel’ from the ‘Run’ window. For that, press ‘Windows and R’ together and then type ‘Control’ and press ‘Enter.’ Now, look for the ‘Programs’ section, and under that section, click on the ‘Uninstall a Program.’

Step 2: A list of all the installed programs will appear on the screen. From that list, look for ‘Clownfish Voice Changer’ and then left-click on it. Lastly, select the option of ‘Uninstall.’

Step 3: Once this is done successfully, head over to the official website of Clownfish Voice Changer and install the latest version. Restart your computer and open the application to check if the problem has been resolved or not.

Fix 2: Check the Application’s Version
Another reason that might be causing the problem is an incompatible version of the application with Clownfish. Both the voice changer and the application must have compatible versions. You can take assistance from the steps below to check the version of Skype.
Step 1: Start by opening Skype, and then from the left menu pane, click on your Skype profile. Then, from the quick access menu list, look for the ‘Settings’ option.

Step 2: After the ‘Settings’ window opens, click on the ‘Help & Feedback’ option once located from the left pane. As the Help & Feedback screen opens, you will see the Skype logo on the screen, and under the logo, you will see the version of Skype.

Fix 3: Microphone Installation in Clownfish
The Voice changer is of no use if the microphone cannot be used as a microphone is an essential component for using a voice changer. An outdated microphone or wrongly installed microphone can cause an error in using Clownfish voice change.
Step 1: Run Clownfish on the computer and open it from the taskbar icon by right-clicking it. Keep your mouse over ‘Setup’ till the sub-menu opens.
Step 2: From the sub-menu, click on ‘System Integration.’ Then, select the microphone which is working fine, and click on ‘Install,’ which will install the microphone automatically.

Step 3: After the installation of the microphone, reboot the computer. Check whether the microphone error is resolved or not.

Bottom Line
Clownfish voice changer is a famous and known software with many amazing features and functionalities. The article above has shared great details about the voice changer and its use on Skype, Discord, and Fortnite.
Additionally, let’s talk about video editing software. As the videos need editing after they are filmed so, why not use Wondershare Filmora for editing your videos? The software offers some crazy and cool features like cut, trim, split, crop, etc.
You can also color match, do animation keyframing and advanced color tuning with the Filmora video editor . The software also owns a media library with hundreds of distinct titles, elements, transitions, effects, and whatnot.
For Win 7 or later (64-bit)
For macOS 10.12 or later
02 Tips to Use Clownfish Voice Changer on Discord and Fortnite?
03 Guidelines to Better Use Clownfish Voice Changer on Skype
04 Solution to Fix Clownfish Voice Changer Not Working
For Win 7 or later (64-bit)
For macOS 10.12 or later
Part 1. What Is Clownfish Voice Changer?
Clownfish is considered a famous voice changer. Clownfish Voice Changer is used to change voices for various purposes. It is installed on the system as it uses the microphone of the system that it is installed on. Clownfish Voice Changer has an attractive and intuitive interface that gives the user the best experience. It has plug-in support for Virtual Sound Technology (VST).
Clownfish voice provides multiple choices for voice after-effects that are available in the built-in library. These voices include male/female voices, robotic sounds, radio voices along with alien voices. Clownfish Voice Changer PC is compatible with Windows 7/8/8.1/10 and 11. It also has a built-in music player that supports various media formats.
Part 2. Tips to Use Clownfish Voice Changer on Discord and Fortnite?
As we have discussed earlier, what clownfish voice changer is and how amazing it is, now let’s move further. The following section of this article will share the tips that will help someone use Clownfish Discord and also Clownfish on Fortnite.
Before we start, you should know how to configure the Clownfish voice changer on your device. For this, you can follow the steps given below. Let’s begin!
Step 1: Setup Clownfish
After you have successfully downloaded and installed Clownfish Voice Changer, it’s time to setup. For this, firstly, locate the voice changer in your systems tray. Then, right-click on the icon, and from the menu list, select the ‘Setup’ option to set clownfish across different applications.
Step 2: Install Microphone
You cannot use the voice changer until you have attached a microphone to your device. For this, you need to install the microphone by hitting the ‘Install’ button next to the microphone.
Step 3: Set Microphone as Default Device
For the microphone to work in Clownfish, it should be selected as the default device. For doing this, select the ‘Recording’ option from the ‘Sounds’ tabs. A list of all the compatible devices will appear on the screen, you have to right-click on your device and hit the ‘Set as the Default Device’ option.
Step 4: Default Device is Set
After that, right-click on the Clownfish icon in the system tray and hit the ‘Hear Microphone’ option. The Clownfish Voice Changer is set to the default option. In case you ever plan to change it, right-click on the Clownfish icon from the system tray and tap on ‘Set Voice Changer.’
Step 5: Select Voice Changer Effects
Once Clownfish has been installed and successfully configured, you now have complete access to all voice changer options. There are dozens of effects that you can select from.
How to use Clownfish on Discord
If you want to use Clownfish on Discord, then you have to select Clownfish voice changer as the input device. For this, open Discord and head to ‘App Settings’ under the ‘User Settings’ option. There, look for the ‘Voice and Video’ option. A category of ‘Input Device’ will appear on the screen; from the drop-down list, switch to ‘Clownfish Voice Changer.’
How to use Clownfish on Fortnite
For using Clownfish on Fortnite, start by selecting the ‘Menu’ icon. There, head to the ‘Settings’ and select the ‘Audio’ option. Now, you have to set the input device; for that, go to the ‘Voice Chat’ option and select Clownfish Voice Changer as your input device under the ‘Voice Chat Input Device’ category.
Part 3. Guidelines to Better Use Clownfish Voice Changer on Skype
You can use voice changers on various platforms according to their compatibility; for instance, Clownfish is compatible with Skype. The question is, do you know how to use Clownfish voice changer on Skype? If ‘no,’ then let us share some helping guidelines to use Clownfish on Skype in a better way.
Step 1: If you want to change voice on Skype with Clownfish, then, first of all, download and install Skype on your PC or laptop and launch it.
Step 2: After Skype has been successfully launched, head over to ‘Settings’ by clicking on the three dots present next to your username.
Step 3: From the Settings screen, you have to look for the ‘Audio & Video’ tab and then select it. Lastly, you have to select the microphone ‘Clownfish Voice Changer’ under the ‘Microphone’ option, and you are all done.
Part 4. Solution to Fix Clownfish Voice Changer Not Working
While using Clownfish Voice Changer, you might also come across some troubles. They might be because either the voice changer is not updated, or maybe the apps you are using are not up to date. Let us share some fixes with you for smooth Clownfish functioning.
Fix 1: Update Clownfish Voice Changer
The most significant reason why you face trouble is that your Clownfish version is outdated. For this, you should update the voice changer to its latest version by following the steps given below:
Step 1: You have to start by opening the ‘Control Panel’ from the ‘Run’ window. For that, press ‘Windows and R’ together and then type ‘Control’ and press ‘Enter.’ Now, look for the ‘Programs’ section, and under that section, click on the ‘Uninstall a Program.’
Step 2: A list of all the installed programs will appear on the screen. From that list, look for ‘Clownfish Voice Changer’ and then left-click on it. Lastly, select the option of ‘Uninstall.’
Step 3: Once this is done successfully, head over to the official website of Clownfish Voice Changer and install the latest version. Restart your computer and open the application to check if the problem has been resolved or not.
Fix 2: Check the Application’s Version
Another reason that might be causing the problem is an incompatible version of the application with Clownfish. Both the voice changer and the application must have compatible versions. You can take assistance from the steps below to check the version of Skype.
Step 1: Start by opening Skype, and then from the left menu pane, click on your Skype profile. Then, from the quick access menu list, look for the ‘Settings’ option.
Step 2: After the ‘Settings’ window opens, click on the ‘Help & Feedback’ option once located from the left pane. As the Help & Feedback screen opens, you will see the Skype logo on the screen, and under the logo, you will see the version of Skype.
Fix 3: Microphone Installation in Clownfish
The Voice changer is of no use if the microphone cannot be used as a microphone is an essential component for using a voice changer. An outdated microphone or wrongly installed microphone can cause an error in using Clownfish voice change.
Step 1: Run Clownfish on the computer and open it from the taskbar icon by right-clicking it. Keep your mouse over ‘Setup’ till the sub-menu opens.
Step 2: From the sub-menu, click on ‘System Integration.’ Then, select the microphone which is working fine, and click on ‘Install,’ which will install the microphone automatically.
Step 3: After the installation of the microphone, reboot the computer. Check whether the microphone error is resolved or not.
Bottom Line
Clownfish voice changer is a famous and known software with many amazing features and functionalities. The article above has shared great details about the voice changer and its use on Skype, Discord, and Fortnite.
Additionally, let’s talk about video editing software. As the videos need editing after they are filmed so, why not use Wondershare Filmora for editing your videos? The software offers some crazy and cool features like cut, trim, split, crop, etc.
You can also color match, do animation keyframing and advanced color tuning with the Filmora video editor . The software also owns a media library with hundreds of distinct titles, elements, transitions, effects, and whatnot.
For Win 7 or later (64-bit)
For macOS 10.12 or later
Premier Selection of Romantic Chamber Pieces for Nuptial Cinematography, 2024 Edition
When choosing classic background music for wedding videos, you need to be extra careful. You cannot choose regular songs to capture the emotions of the best moments of your life. The music should connect with your emotions, so whenever you watch the movie, you remember the time you got married. In this post, we will share some mind-blowing classical background music that will make your wedding special and memorable.

10 Best Classical Background Music for Wedding Videos in 2024
A wedding video contains a plethora of scenes and memories. If your video includes rehearsal dinner, photography session, and dinner, you should opt for music that blends with each set. Tears and smiles, every moment calls for a different classical background song. Here are some royalty-free classical background pieces that you can use for your wedding videos this year:
1. Rhythmic Piano
This is an incredible piano piece perfect for wedding videos. It contains beautiful piano with a calm and soothing melody. This classical background will evoke feelings and memories when you will watch your wedding videos in the future. You can use this music for highlights of the wedding in the introduction because it contains emotions for every wedding setting.
2. The Wedding Moment
Over the sky of hope is another masterpiece for wedding ceremony videos. It is bright and joyful classical background music with orchestral strings and bold grand piano. You can choose this song for the first dance at the wedding. The music will incredibly portray your love and emotion for your partner.
3. Happy Wedding Upbeat Background Sound
This classical background music has a clear message of love and affection. You can use this music for multiple scenes at the wedding. The funny elements in this masterpiece will perfectly blend with funny scenes at the wedding. Furthermore, you can use this music for scenes with the audience, enjoying the ceremony.
4. Piano and Strings Wedding
The emotional and mellow introduction of this classical background will beautifully blend with your wedding videos. This heartfelt and cinematic track has a bit of ambient touch that gives a joyful and loving feel. You can add this song when you and your life partners will walk down the aisle.

5. Old Time
Old Time is slow classical background music, which is perfectly designed for wedding ceremonies. It has a simple yet powerful composition that will make your loved ones cry with happiness.
6. Wedding Love Piano
You will enjoy this lovely background music aligned with your first dance as a wedded couple. This composition sounds breathtaking on the grand piano. This classical melody in your video is enough to make your family and friends cry tears of joy.
7. Piano Music Orchestra
You can add this classical background music in the ending to create touching moments filled with powerful feelings. When your wedding video will end with this music, your audience had to take some time to recover from their emotions.
8. The Season of Love
In this short romantic classical background music, the composer played different octaves to create romantic vibes. Thus, it will sound splendid with your wedding video. Although it is a short music piece, there are many versions . You can layer the versions one after another to play with the audience’s joy and feeling.

9. Mid Night Self Expression
This is a unique masterpiece that includes acoustic guitar, accordion, and other unique musical instruments. The song includes a folk melody that will leave your audience in joy and happiness. You can play this song in various wedding settings to add emotions to your video.
10. Wonderful Wedding
This lovely wedding classical background includes nice rhythms, melodies, and ballads that make it perfect for a summary. If you have a segment in your video with highlights of multiple settings, you can use this music for that part.
How to Create a Romantic Wedding Invitation?
If you design your wedding invitation, you can decide the element according to your preferences. Elements such as video clips, pictures, and music add emotions to your video. If even a single element is not perfect, your wedding invitation won’t look as good as you want. Therefore, you should take control and create a romantic wedding invitation on a user-friendly video editor, Wondershare Filmora . Here is the step-by-step guide to creating a romantic wedding invitation with classical background music:
For Win 7 or later (64-bit)
For macOS 10.12 or later
Step 1: Open Wondershare Filmora, create a new project and import your files to get started.

Step 2: Now drag video clips and photos on the timeline and arrange the sequences and clips.

Step 3: If the photo size doesn’t match the video size, you can change the ratio in the crop section. This changes the aspect ratio of the video.

Step 4: Set the ratio for all videos and images.
Step 5: Now open the titles tab and search weddings. You can choose from a myriad of wedding-style templates on Filmora.

Step 6: Once you choose the title, you can drag it on your timeline. The title tag will look incredible at the start and the ending. Thus, you have to choose two title tags.
Step 7: Double-click on the first title and click on the advanced buttons. This feature enables you to customize your tags add change color, text, and fonts.

Step 8: Make the same changes for the second title tag as well.
Step 9: After selecting the right title tag, you can include elements on your images or video clips.
Step 10: Go to the Effects tab and search wedding floral. A wide range of options will appear in the media section. Choose the tags that you like the most and drag them on a new track.
Step 11: Now it’s time to add the titles to introduce the bride and groom. Furthermore, this section will also include the wedding location and other details for the wedding.
Step 12: Move to the transition section add transition presets and search for the effects you like for your video. Choose the transition and drag between the clips.

Step 13: Your wedding invitation is almost ready. All you need to add is classical background music. For that, you can search the music from the audio tab or choose from the above-mentioned options. Also, you can import music from your computer to use in the video
Step 14: You can export the video from the tool and send your friends and family on Whastapp or post it on Facebook.
Closing Words
The above-mentioned classical background music will enhance the sentiments in your wedding videos. Music helps the audience to connect with your emotions. Therefore, you should choose the classical background music carefully according to each segment. It would be best to list the video sections on a piece of paper and write the song’s name in front of it. That way, you will get a complete overview of your video’s layout.
You can use Filmora video editor to create your wedding videos and invitation. Filmora is a user-friendly video editing tool with advanced features. The effects and templates simplify the editing task and you can create emotional wedding videos in minutes. Filmora video editor includes features such as an audio mixer, advanced text editing, audio equalizer, and video stabilizer.
For Win 7 or later (64-bit)
For macOS 10.12 or later
For Win 7 or later (64-bit)
For macOS 10.12 or later
Step 1: Open Wondershare Filmora, create a new project and import your files to get started.
Step 2: Now drag video clips and photos on the timeline and arrange the sequences and clips.
Step 3: If the photo size doesn’t match the video size, you can change the ratio in the crop section. This changes the aspect ratio of the video.
Step 4: Set the ratio for all videos and images.
Step 5: Now open the titles tab and search weddings. You can choose from a myriad of wedding-style templates on Filmora.
Step 6: Once you choose the title, you can drag it on your timeline. The title tag will look incredible at the start and the ending. Thus, you have to choose two title tags.
Step 7: Double-click on the first title and click on the advanced buttons. This feature enables you to customize your tags add change color, text, and fonts.
Step 8: Make the same changes for the second title tag as well.
Step 9: After selecting the right title tag, you can include elements on your images or video clips.
Step 10: Go to the Effects tab and search wedding floral. A wide range of options will appear in the media section. Choose the tags that you like the most and drag them on a new track.
Step 11: Now it’s time to add the titles to introduce the bride and groom. Furthermore, this section will also include the wedding location and other details for the wedding.
Step 12: Move to the transition section add transition presets and search for the effects you like for your video. Choose the transition and drag between the clips.
Step 13: Your wedding invitation is almost ready. All you need to add is classical background music. For that, you can search the music from the audio tab or choose from the above-mentioned options. Also, you can import music from your computer to use in the video
Step 14: You can export the video from the tool and send your friends and family on Whastapp or post it on Facebook.
Closing Words
The above-mentioned classical background music will enhance the sentiments in your wedding videos. Music helps the audience to connect with your emotions. Therefore, you should choose the classical background music carefully according to each segment. It would be best to list the video sections on a piece of paper and write the song’s name in front of it. That way, you will get a complete overview of your video’s layout.
You can use Filmora video editor to create your wedding videos and invitation. Filmora is a user-friendly video editing tool with advanced features. The effects and templates simplify the editing task and you can create emotional wedding videos in minutes. Filmora video editor includes features such as an audio mixer, advanced text editing, audio equalizer, and video stabilizer.
For Win 7 or later (64-bit)
For macOS 10.12 or later
Also read:
- New 2024 Approved Vibrant Music Score for Happy Birthday Feature Film - Future Edition
- In 2024, Audacitys Secret Techniques for Disentangling Primary Soundscapes From Background Tracks
- Updated Effortless Audio Silencing An Audacity Users Manual
- In 2024, Seek Out Cheerful Sonic Enhancements
- New In 2024, Achieving High-Quality Frequency Modulation in Audacity
- The Anticipated Retro-Inspired Ballads & Blues to Listen To for 2024
- New In 2024, The Seas of Sound Enhancing Skype Chats and Fortnite Games with Clownfish-Inspired Audio Effects
- New Unleash Your Creative Potential Top 8 Digital Audio Workstations for Studio-Quality Sound Design for 2024
- Voice Capture Simplified The No-Fuss Tutorial for Perfect Mac Audio Recordings for 2024
- Updated Framing Moments with Notes Composers and Clip Assembly in Filmography
- Updated Exploring Exceptional Background Melodies for Video Content Creation
- 10 Premier Websites to Access High-Quality BGM Libraries for 2024
- Updated In 2024, Premier Choices for Accessing Lofi Beats and Imagery
- 2024 Approved Cinemas Resonating Reign A Compilation of High-Quality, Royalty-Free Piano Melodies for Video Enhancement
- New Harmony MP3 Mastering Toolset Optimized for Windows/Mac Devices for 2024
- New Budget MP3 Refiner for Mac Enthusiasts for 2024
- Updated Techniques for Transforming Your Voice Pitch and Quality
- Updated Resource Hub for Finding Digital Audio Recordings of Cats for 2024
- Hear It Here First Effective Techniques for Capturing and Storing Computer-Based Audio Files in Episodic Format
- Updated In 2024, Zooms Silent Mode A Comprehensive Manual for Device-Based Muting
- New 2024 Approved The Complete Guide to iPhone Speech Memorization and Storage
- In 2024, The Best of Breed Ranking 7 Excellent Phone Editing Programs for Android Enthusiasts
- Updated Revolutionizing Sound The Top 8 Mobile DAW Platforms for Musicians Today
- Updated 2024 Approved Auditory Terror Discovering Extreme Soundscapes Online
- Updated 2024 Approved The Future of Film Fidelity Innovative Techniques to Enhance Your Home Audio
- Updated 2024 Approved Essential List of Best No-Price-Tag Open-Source Audio Cutters for PC Users
- New 2024 Approved Reimagining Your iOS Device Voice An In-Depth Look at Modifying Siri Across Apple Devices
- In 2024, Planning to Use a Pokemon Go Joystick on Tecno Phantom V Fold? | Dr.fone
- Forgotten The Voicemail Password Of Nubia Red Magic 9 Pro? Try These Fixes
- Updated 2024 Approved Top 10 Video Editing Software Options to Replace Final Cut Pro X
- In 2024, How to Access Your Apple iPhone X When You Forget the Passcode? | Dr.fone
- Updated 2024 Approved Unleash Your GoPro Footage A Quik Review and Top PC Video Editing Alternatives
- New In 2024, No Watermark, No Problem 10 Best Free Video Editors for Android
- How to View GPX Files Online and Offline Solutions Of Apple iPhone XS | Dr.fone
- All Things You Need to Know about Wipe Data/Factory Reset For Infinix Zero 30 5G | Dr.fone
- Updated 2024 Approved Cut Your MP4 Videos for Free Top Software Recommendations
- How to Change Xiaomi Redmi A2+ Location on Skout | Dr.fone
- Repair damaged, unplayable video files of Asus ROG Phone 7 Ultimate on Mac
- Updated In 2024, Aspect Ratio Made Simple A Calculator for Image Enthusiasts
- Easy Guide How To Bypass Itel S23+ FRP Android 10/11/12/13
- In 2024, How to Unlock ZTE Axon 40 Lite PIN Code/Pattern Lock/Password
- How to restore wiped music on Samsung Galaxy S24
- New In 2024, Fast and Easy Online Video Reversal 2023S Best Options
- A Detailed Guide on Faking Your Location in Mozilla Firefox On Nokia C12 | Dr.fone
- Cellular Network Not Available for Voice Calls On Vivo V29e | Dr.fone
- How To Fix Part of the Touch Screen Not Working on Nubia Red Magic 8S Pro+ | Dr.fone
- Three Ways to Sim Unlock Lava Yuva 2
- New In 2024, Boost Your Videos Visibility Expert YouTube Thumbnail Creation Tips
- In 2024, Unlocking Made Easy The Best 10 Apps for Unlocking Your Realme C33 2023 Device
- Does Life360 Notify When You Log Out On Vivo Y77t? | Dr.fone
- Bricked Your Vivo Y100A? Heres A Full Solution | Dr.fone
- Title: Updated Orchestrating Artificial Intelligence Spotlight on Future Musical Innovators for 2024
- Author: Paul
- Created at : 2024-05-05 05:59:15
- Updated at : 2024-05-06 05:59:15
- Link: https://voice-adjusting.techidaily.com/updated-orchestrating-artificial-intelligence-spotlight-on-future-musical-innovators-for-2024/
- License: This work is licensed under CC BY-NC-SA 4.0.
