
:max_bytes(150000):strip_icc():format(webp)/Flora_and_Son-f6517d3de531487e89f5e0e99192d13f.jpg)
Updated In 2024, Top 10 Online Tools for Professional Studio Recording - FREE vs PAID Versions
Top 10 Online Tools for Professional Studio Recording - FREE vs PAID Versions
FREE 10 Best Online Music Makers

Benjamin Arango
Apr 26, 2024• Proven solutions


Expressing ideas through music was never easy, and even today in the age of powerful digital audio stations like Ableton Live or FruityLoops , producing original music requires a certain set of skills. However, online content producers often need music for their videos, but they neither have the time or the budget to hire a professional musician to create a soundtrack for their project in studio conditions. If you are looking for a quick way to make your own music online, then you should keep reading, because in this article we are going to take you through the ten best online music makers you should check out in 2021.
10 Best Online Music Makers in 2021
The music-making platforms that are currently available online are still not as nearly as powerful as professional software products for music producers. Nonetheless, this doesn’t mean that you can’t use them to create the music you like or just have fun with them. Here are the ten best online music makers in 2019.
1. Typeatone
Price: Free
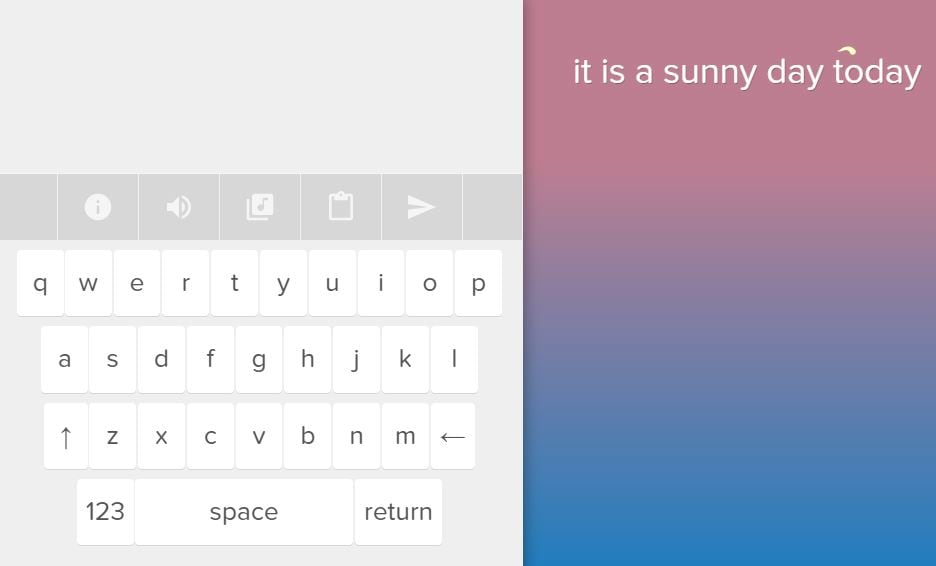
Image from Internet
Have you ever wondered what your words would sound like if they were turned into music? Head over to the Typeatone platform if you want to find out since all you have to do in order to start creating your own music is type in the text. As you type, the platform will automatically start playing your words and once you’re done, you’ll be able to hear your new song. You can also choose between different instruments to make the process of creating music with Typeatone even more entertaining. You can share all of your creations with your friends on social media.
![]()
A cross-platform for making videos anywhere for all creators

Why your video editing isn’t good enough? How about some creative inspo?
- 100 Million+ Users
- 150+ Countries and Regions
- 4 Million+ Social Media Followers
- 5 Million+ Stock Media for Use
* Secure Download

2. Audiotool
Price: Free
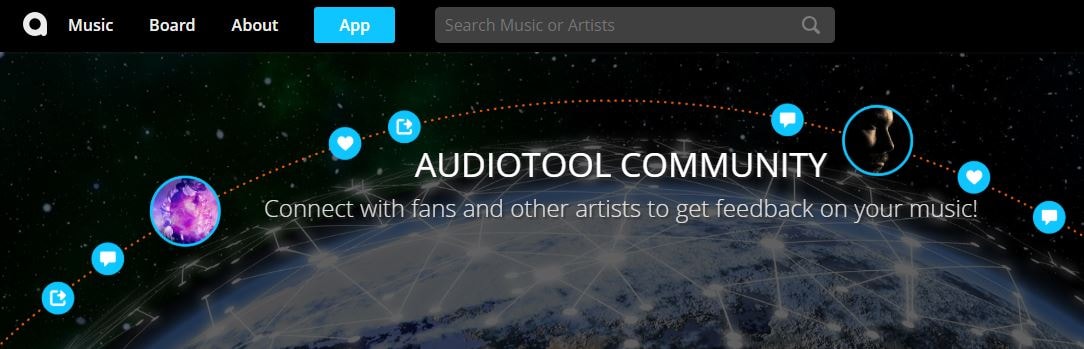
Image from Internet
Electronic music producers who often use synthesizers like Roland TB-303 or Roland TR-909 are going to love the features this online collaborative platform offers. Audiotool hosts a huge music library, you can explore even if you are not a registered user. In order to access the platform’s music studio, you first have to create an account and make sure that you are signed in. Audiotool is also a community of like-minded people where you can meet artists whose work you appreciate or hear what others think about your work. The only downside is that Audiotool’s abundance of features can be overwhelming for the newcomers to the world of electronic music production.
3. AudioSauna
Price: Free
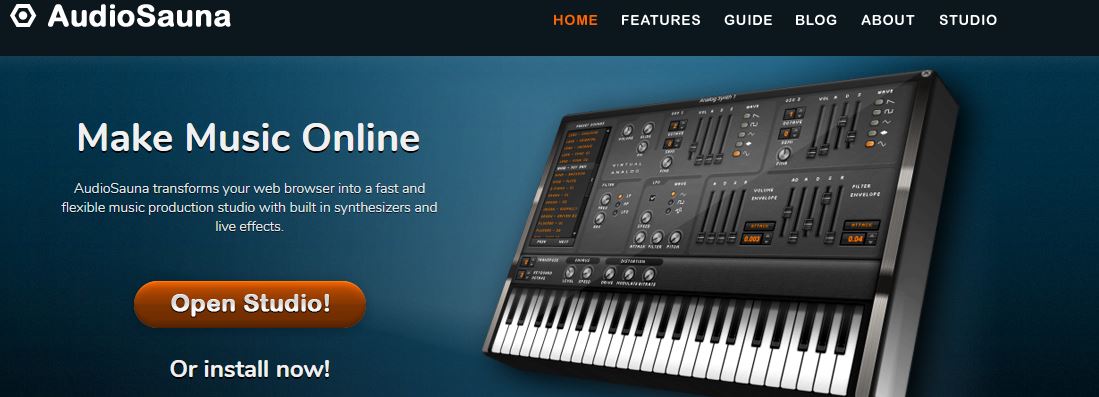
Image from Internet
AudioSauna seems to offer everything its users need to create inspiring music because it is equipped with frequency modulation synth, virtual analog synth and a sampler that provides layering features. Moreover, its intuitive interface makes the process of arranging the song structure or changing several note values simultaneously much easier. Creating an account on AudioSauna will enable to record all your projects and export them as audio files that can be uploaded to SoundCloud or any other audio distribution platform. AudioSauna is a perfect tool for skilled producers who want to create their music online.
4. Soundtrap
Price: Free trial available, subscription plans start at $3.99 per month

Image from Internet
Soundtrap offers a long list of features that enable professional musicians to create their music online. All you have to do is create an account and you will get access to the Sountrap’s studio that let you create new beat patterns, use a synthesizer or even invite friends to make music together. The platform also offers the possibility to connect your own instruments to the Soundtrap’s studio, so that you can record your music as you play it. This online platform also has an Education section where you can share your knowledge with others or learn valuable music lessons.
5. PatternSketch
Price: Free
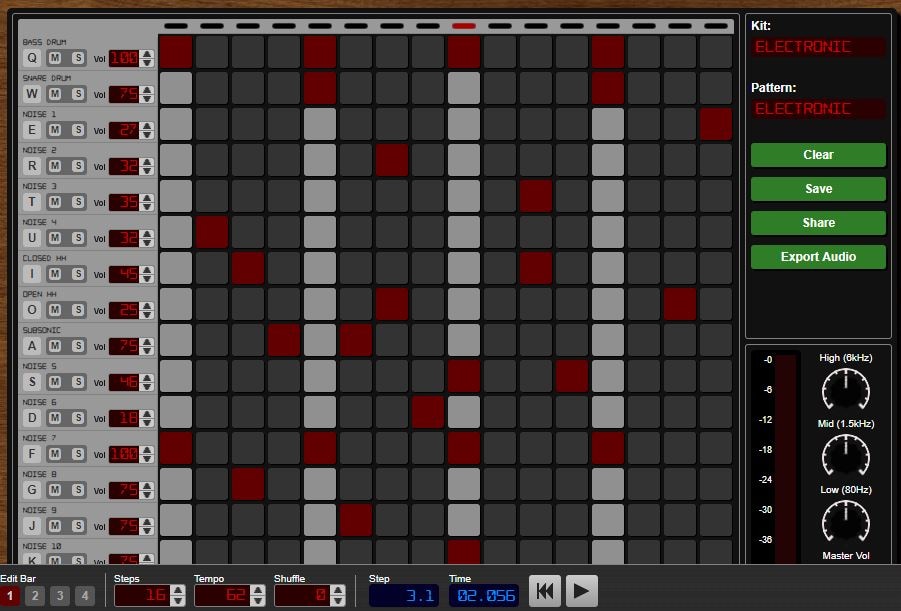
Image from Internet
This basic and yet effective drum machine can help you generate amazing beats for the songs you’re working on. Once you sign up, you will be able to choose from a number of different kits and patterns that are fully customizable or create your own original beats. After you create a pattern you like, you can save it with a single click or send it to your friends via email. Optionally, you can export all of your creations from PatternSketch and save them as wav, mp3 or ogg files, although in some cases mp3 audio files may not loop properly.
6. Soundation
Price: Free version available, pricing plans start at $1.99 per month

Image from Internet
If you choose to create music with the free version of Soundation, you’ll be able to work on up to ten projects, try out over 700 audio effects and loops, and export all your music in low quality. Purchasing the Intro pricing plan will enable you to work on an unlimited number of projects, make live audio recordings, import audio files smaller than 100MB or use an external midi controller. Moreover, opting for any of the annual or monthly subscription plans will allow you to export entire projects and audio files in high resolution from Soundation.
7. Text to Speech
Price: Free

online-music-maker-Text to Speech.jpg
Vocals are often overlooked in contemporary electronic music, but there are so many ways they can be used creatively. The platform lets you turn up to 50000 characters into speech at once, and it also offers several different voices you can choose from. Before you create an audio file you can determine how fast the text is going to be vocalized, so you should try different options and see which one fits your project the best. Text to Speech platform can be used during the process of creating a new song, but the tools it offers are not enough to make an entire song.
8. Looplabs
Price: Free
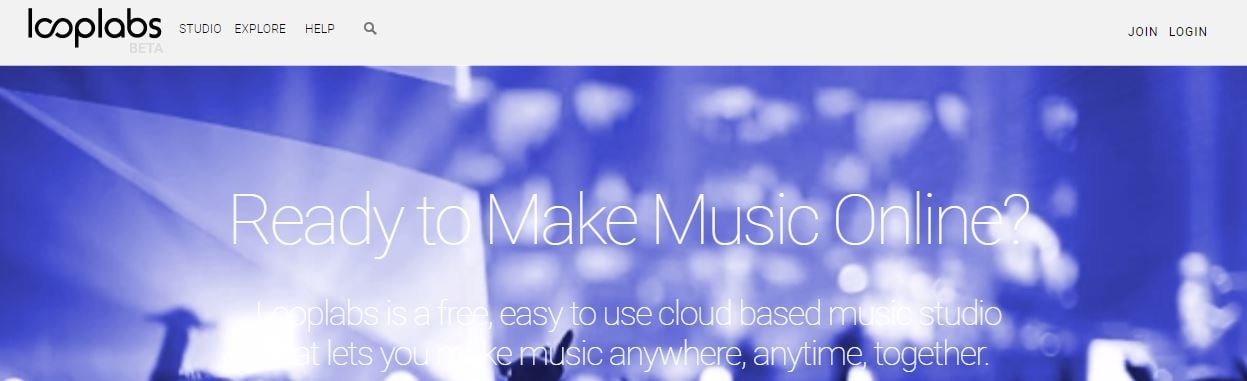
Music enthusiasts who would like to produce different genres of music online should definitely get familiar with Looplabs, as this online music maker lets its users remix songs or make music from scratch. Besides being one of the best places on the Internet to record music, Looplabs is also a community where you can meet people who like your music or discover artists whose work you admire. The Looplab’s studio features samples for a broad range of music genres and musical instruments, and you can use it to make Electro or Funk music equally effectively.
9. Online Sequencer
Price: Free
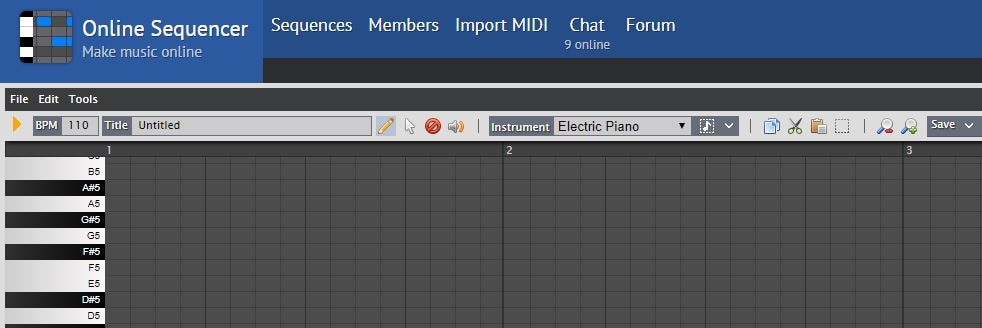
This is a perfect tool for developing an idea for a song, as you can create a sequence in just a few minutes. You can choose from Piano, Drums and Guitar categories of instruments or browse through a huge collection of fully customizable preset sequences that is updated on a daily basis. The platform also lets you import MIDI files and work on projects you’ve already started developing or you can export your sequences as MIDI files from the Online Sequencer and edit them with your DAW. Even though Online Sequencer is a useful tool for making music, the features it offers can’t really be compared with those on Soundation or AudioSauna.
10. Autochords
Price: Free
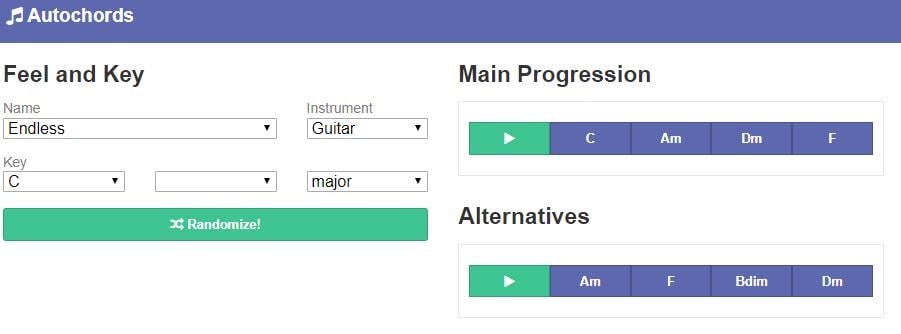
Finding new ideas for songs is often more difficult than it sounds, and if you ever face a creative block you should simply head over to Autochords. This platform suggests chord progressions based on the parameters you set, so you just have to select an instrument and the name of the song to set the feel, and the platform will show you the main progression and its alternatives. Rather than being an online music maker, Autochords is more a tool that helps piano and guitar players understand chord progressions better. iPhone and iPad users can download the Autochords app from the App Store for free.
Read More to Get : Best Free DAW for Windows and Mac for Beginners >>
Conclusion
You don’t have to be a professional musician in order to start making music online, you just have to love music, and an online music maker of your choice will take care of the rest. Do you use online music makers for entertainment or to express your creativity? Leave a comment below and share your opinions with us.
Benjamin Arango
Benjamin Arango is a writer and a lover of all things video.
Follow @Benjamin Arango
Benjamin Arango
Apr 26, 2024• Proven solutions
Expressing ideas through music was never easy, and even today in the age of powerful digital audio stations like Ableton Live or FruityLoops , producing original music requires a certain set of skills. However, online content producers often need music for their videos, but they neither have the time or the budget to hire a professional musician to create a soundtrack for their project in studio conditions. If you are looking for a quick way to make your own music online, then you should keep reading, because in this article we are going to take you through the ten best online music makers you should check out in 2021.
10 Best Online Music Makers in 2021
The music-making platforms that are currently available online are still not as nearly as powerful as professional software products for music producers. Nonetheless, this doesn’t mean that you can’t use them to create the music you like or just have fun with them. Here are the ten best online music makers in 2019.
1. Typeatone
Price: Free
Image from Internet
Have you ever wondered what your words would sound like if they were turned into music? Head over to the Typeatone platform if you want to find out since all you have to do in order to start creating your own music is type in the text. As you type, the platform will automatically start playing your words and once you’re done, you’ll be able to hear your new song. You can also choose between different instruments to make the process of creating music with Typeatone even more entertaining. You can share all of your creations with your friends on social media.
![]()
A cross-platform for making videos anywhere for all creators
Why your video editing isn’t good enough? How about some creative inspo?
- 100 Million+ Users
- 150+ Countries and Regions
- 4 Million+ Social Media Followers
- 5 Million+ Stock Media for Use
* Secure Download
2. Audiotool
Price: Free
Image from Internet
Electronic music producers who often use synthesizers like Roland TB-303 or Roland TR-909 are going to love the features this online collaborative platform offers. Audiotool hosts a huge music library, you can explore even if you are not a registered user. In order to access the platform’s music studio, you first have to create an account and make sure that you are signed in. Audiotool is also a community of like-minded people where you can meet artists whose work you appreciate or hear what others think about your work. The only downside is that Audiotool’s abundance of features can be overwhelming for the newcomers to the world of electronic music production.
3. AudioSauna
Price: Free
Image from Internet
AudioSauna seems to offer everything its users need to create inspiring music because it is equipped with frequency modulation synth, virtual analog synth and a sampler that provides layering features. Moreover, its intuitive interface makes the process of arranging the song structure or changing several note values simultaneously much easier. Creating an account on AudioSauna will enable to record all your projects and export them as audio files that can be uploaded to SoundCloud or any other audio distribution platform. AudioSauna is a perfect tool for skilled producers who want to create their music online.
4. Soundtrap
Price: Free trial available, subscription plans start at $3.99 per month
Image from Internet
Soundtrap offers a long list of features that enable professional musicians to create their music online. All you have to do is create an account and you will get access to the Sountrap’s studio that let you create new beat patterns, use a synthesizer or even invite friends to make music together. The platform also offers the possibility to connect your own instruments to the Soundtrap’s studio, so that you can record your music as you play it. This online platform also has an Education section where you can share your knowledge with others or learn valuable music lessons.
5. PatternSketch
Price: Free
Image from Internet
This basic and yet effective drum machine can help you generate amazing beats for the songs you’re working on. Once you sign up, you will be able to choose from a number of different kits and patterns that are fully customizable or create your own original beats. After you create a pattern you like, you can save it with a single click or send it to your friends via email. Optionally, you can export all of your creations from PatternSketch and save them as wav, mp3 or ogg files, although in some cases mp3 audio files may not loop properly.
6. Soundation
Price: Free version available, pricing plans start at $1.99 per month
Image from Internet
If you choose to create music with the free version of Soundation, you’ll be able to work on up to ten projects, try out over 700 audio effects and loops, and export all your music in low quality. Purchasing the Intro pricing plan will enable you to work on an unlimited number of projects, make live audio recordings, import audio files smaller than 100MB or use an external midi controller. Moreover, opting for any of the annual or monthly subscription plans will allow you to export entire projects and audio files in high resolution from Soundation.
7. Text to Speech
Price: Free

online-music-maker-Text to Speech.jpg
Vocals are often overlooked in contemporary electronic music, but there are so many ways they can be used creatively. The platform lets you turn up to 50000 characters into speech at once, and it also offers several different voices you can choose from. Before you create an audio file you can determine how fast the text is going to be vocalized, so you should try different options and see which one fits your project the best. Text to Speech platform can be used during the process of creating a new song, but the tools it offers are not enough to make an entire song.
8. Looplabs
Price: Free
Music enthusiasts who would like to produce different genres of music online should definitely get familiar with Looplabs, as this online music maker lets its users remix songs or make music from scratch. Besides being one of the best places on the Internet to record music, Looplabs is also a community where you can meet people who like your music or discover artists whose work you admire. The Looplab’s studio features samples for a broad range of music genres and musical instruments, and you can use it to make Electro or Funk music equally effectively.
9. Online Sequencer
Price: Free
This is a perfect tool for developing an idea for a song, as you can create a sequence in just a few minutes. You can choose from Piano, Drums and Guitar categories of instruments or browse through a huge collection of fully customizable preset sequences that is updated on a daily basis. The platform also lets you import MIDI files and work on projects you’ve already started developing or you can export your sequences as MIDI files from the Online Sequencer and edit them with your DAW. Even though Online Sequencer is a useful tool for making music, the features it offers can’t really be compared with those on Soundation or AudioSauna.
10. Autochords
Price: Free
Finding new ideas for songs is often more difficult than it sounds, and if you ever face a creative block you should simply head over to Autochords. This platform suggests chord progressions based on the parameters you set, so you just have to select an instrument and the name of the song to set the feel, and the platform will show you the main progression and its alternatives. Rather than being an online music maker, Autochords is more a tool that helps piano and guitar players understand chord progressions better. iPhone and iPad users can download the Autochords app from the App Store for free.
Read More to Get : Best Free DAW for Windows and Mac for Beginners >>
Conclusion
You don’t have to be a professional musician in order to start making music online, you just have to love music, and an online music maker of your choice will take care of the rest. Do you use online music makers for entertainment or to express your creativity? Leave a comment below and share your opinions with us.
Benjamin Arango
Benjamin Arango is a writer and a lover of all things video.
Follow @Benjamin Arango
How to Change Your Voice on Audacity?
What does free open source audio software mean? Audacity voice changer is the answer. Along with being free, it is a cross-platform software, which means that it can be used with different software packages. Audacity is easy to use multi-track audio editing and recording software.
It has a simple and clean-looking interface for better user understandability. Audacity has plug-in support for multiple audio formats like LV2, AU, and VST. We will further discuss Audacity as an audio voice changer, and how to use the software under various conditions will also be discussed in the article.
In this article
01 How Can You Use Voice Changer in Audacity?
02 How to Change Pitch in Audacity?
03 How to Change Male Voice to Female Voice with Audacity?
04 How to Create Robot Voice in Audacity?
Part 1. How Can You Use Voice Changer in Audacity?
Voice changers are also commonly referred to as voice enhancers, which can completely change and transform your voice. You can pull pranks on friends with voice changers if you are bored. If you want to hide your identity, you can modify your voice and do that. With voice changers, you can change the tone and the pitch of your voice and add various voice effects.
Voice changer comes with a wide range of sound effects ranging from baby sound, kid, male, female, monster, demon, animal sounds, and a lot more than this. Some great voice changers include AV Voice Changer , MorphVOX Voice Changer , Voicemod , Clownfish Voice Changer , and others. Do you know that these voice changers can be used with Audacity? Let’s tell you how.
Step 1: If you are interested in using a voice changer in Audacity, start by downloading your favorite voice changer to your PC. Once done, install it and after successful installation, launch it.

Step 2: As we have mentioned earlier that you are offered various voice effects in voice changers, so after launching it, select your preferred voice effect, whether it be a baby voice, animal voice, or celebrity voice.

Step 3: On the other side, launch Audacity on your PC. Once it opens, you will see the top menu; just below that, a microphone icon will be seen. Tap on that icon so that the drop-down menu appears, there select the name of your voice changer.

Part 2. How to Change Pitch in Audacity?
Audacity, the audio voice changer, offers a ‘Change Pitch’ feature with which you can change the pitch of the audio without damaging its tempo. You can separately change the speed. With this feature, you can also adjust and play with the frequency and semitones.
The audio editor also features to estimate the starting pitch; for instance, if A3 is a quiet note, followed by a large and loud note like C4, Audacity will detect C4. In case both notes have the same volume, Audacity will detect A3. With Audacity, you also get the ‘To’ and ‘From’ controls if you plan to change the pitch manually. To learn more about changing pitch, follow the steps below:
Step 1: For changing pitch in Audacity, start by launching the software. After launching, you can either record the audio or else, from the ‘File’ section, you can also ‘Open’ any file from your device.

Step 2: Audacity lets you change the pitch of a whole file or else for a small portion as well. Now, to change the pitch of a small portion, click and drag the mouse along the recording. Or else, click on the name of the track to select it completely.

Step 3: After this, head over to the top menu and click on the ‘Effect’ section. A drop-down menu list will appear, locate and select the ‘Change Pitch’ option. You can either use the sliders to adjust the pitch or else write the percentage to change.

Step 4: You can preview the file and check how it sounds once done. When you are satisfied, hit the ‘OK’ button to save the changes. You can also adjust the Speed and Tempo of the track.

Part 3. How to Change Male Voice to Female Voice with Audacity?
The most fun voice transformation is from low pitch to higher pitch. In general, modifying the male voice to a female voice, as the male pitch has a negative value and changing it to a positive pitch, modifies your voice to a female voice. What else could be better to use than the amazing Audacity voice changer? Let’s share the steps that will help you change your male voice to female.
Step 1: First, start by opening the Audacity audio editor. Once it has launched successfully, you should import the audio file. You can record audio with Audacity. Along with this, you can also import files from your device from the ‘File’ section, followed by the ‘Open’ option.

Step 2: After your audio track is visible on the timeline, you have to select the part of the file that you want to edit. You can easily select it by clicking and dragging the mouse. If not this, you can also work with the whole track; for this, simply click on the track name to select it.

Step 3: After you are satisfied with the selection, head to the top menu and select the ‘Effects’ options. A drop-down list appears after this, and you have to look for the ‘Change Pitch’ option and select it.

Step 4: Normally, you can adjust the pitch by taking help from the sliders, but you can also change the pitch manually by adding a percentage. The male pitch originally will have a negative value; change it and set a positive value. You can keep changing until you are satisfied.

Step 5: Lastly, don’t forget to save the changes by hitting the ‘OK’ button at the button and saving the file to your respective device.

Part 4. How to Create Robot Voice in Audacity?
As we have mentioned, Audacity is an audio voice changer, so you must know that Audacity also can change your voice into a robotic voice. Among the different voices, the robot voice sounds interesting, and it’s fun to create. If you are excited to learn to create robot voice in Audacity, follow the guiding steps shared below:
Step 1: For creating an extraordinary robotic voice, start by launching Audacity on your device. After it opens, it’s time to record your voice to create a robot voice. Or else, head to the ‘File’ tab and import your audio file from your device to Audacity from the ‘Open’ option.

Step 2: After this, to start the editing, you need a stereo track on the timeline. For doing this, navigate ‘Tracks’ from the top menu and click on it. Next, hover on the ‘Add New’ option to open its sub-menu. You will see the ‘Stereo Track’ option, select it, and copy-paste the audio file in the new section.

Step 3: Let’s start with the fun part, the editing and adjusting different features. Start by opening the ‘Effects’ tab, and from the long list of options, select ‘Echo.’ There, you can enter the ‘Delay Time’ and change other fields as well.

Step 4: Preview the audio and move on to the next setting. Open the ‘Effects’ section and look for the ‘Change Pitch’ option. You can change and adjust the pitch according to your desire and preview the file again.

Step 5: For creating a robot voice, you can also set the tempo. For that, head to the ‘Change Tempo’ option under the ‘Effects’ section and set the value to minus. Keep adjusting the different effects until you get your perfect robot voice.

Bottom Line
Audacity is not only a great audio editor; it is also a stunning audio voice changer. The software comes with a lot of effects that can completely transform your voice to an unrecognizable level. You can sound like a robot, male, female, and whatever you want with Audacity voice changer. Do you know any video editor that offers sound effects?
If you don’t know, let us introduce Wondershare Filmora Video Editor . This wonderous software is loaded with many editing features to create the best videos. Not only trim, cut, crop, but the software also offers you features like split-screen, chroma key background, keyframing, color match, motion tracking, and whatnot.
Apart from this, this video editor is a hub for cool sound effects and editing elements from its media library, Filmstock. You get a wide range of sound effects, titles, transitions, and many more elements.
For Win 7 or later (64-bit)
For macOS 10.12 or later
02 How to Change Pitch in Audacity?
03 How to Change Male Voice to Female Voice with Audacity?
04 How to Create Robot Voice in Audacity?
Part 1. How Can You Use Voice Changer in Audacity?
Voice changers are also commonly referred to as voice enhancers, which can completely change and transform your voice. You can pull pranks on friends with voice changers if you are bored. If you want to hide your identity, you can modify your voice and do that. With voice changers, you can change the tone and the pitch of your voice and add various voice effects.
Voice changer comes with a wide range of sound effects ranging from baby sound, kid, male, female, monster, demon, animal sounds, and a lot more than this. Some great voice changers include AV Voice Changer , MorphVOX Voice Changer , Voicemod , Clownfish Voice Changer , and others. Do you know that these voice changers can be used with Audacity? Let’s tell you how.
Step 1: If you are interested in using a voice changer in Audacity, start by downloading your favorite voice changer to your PC. Once done, install it and after successful installation, launch it.
Step 2: As we have mentioned earlier that you are offered various voice effects in voice changers, so after launching it, select your preferred voice effect, whether it be a baby voice, animal voice, or celebrity voice.
Step 3: On the other side, launch Audacity on your PC. Once it opens, you will see the top menu; just below that, a microphone icon will be seen. Tap on that icon so that the drop-down menu appears, there select the name of your voice changer.
Part 2. How to Change Pitch in Audacity?
Audacity, the audio voice changer, offers a ‘Change Pitch’ feature with which you can change the pitch of the audio without damaging its tempo. You can separately change the speed. With this feature, you can also adjust and play with the frequency and semitones.
The audio editor also features to estimate the starting pitch; for instance, if A3 is a quiet note, followed by a large and loud note like C4, Audacity will detect C4. In case both notes have the same volume, Audacity will detect A3. With Audacity, you also get the ‘To’ and ‘From’ controls if you plan to change the pitch manually. To learn more about changing pitch, follow the steps below:
Step 1: For changing pitch in Audacity, start by launching the software. After launching, you can either record the audio or else, from the ‘File’ section, you can also ‘Open’ any file from your device.
Step 2: Audacity lets you change the pitch of a whole file or else for a small portion as well. Now, to change the pitch of a small portion, click and drag the mouse along the recording. Or else, click on the name of the track to select it completely.
Step 3: After this, head over to the top menu and click on the ‘Effect’ section. A drop-down menu list will appear, locate and select the ‘Change Pitch’ option. You can either use the sliders to adjust the pitch or else write the percentage to change.
Step 4: You can preview the file and check how it sounds once done. When you are satisfied, hit the ‘OK’ button to save the changes. You can also adjust the Speed and Tempo of the track.
Part 3. How to Change Male Voice to Female Voice with Audacity?
The most fun voice transformation is from low pitch to higher pitch. In general, modifying the male voice to a female voice, as the male pitch has a negative value and changing it to a positive pitch, modifies your voice to a female voice. What else could be better to use than the amazing Audacity voice changer? Let’s share the steps that will help you change your male voice to female.
Step 1: First, start by opening the Audacity audio editor. Once it has launched successfully, you should import the audio file. You can record audio with Audacity. Along with this, you can also import files from your device from the ‘File’ section, followed by the ‘Open’ option.
Step 2: After your audio track is visible on the timeline, you have to select the part of the file that you want to edit. You can easily select it by clicking and dragging the mouse. If not this, you can also work with the whole track; for this, simply click on the track name to select it.
Step 3: After you are satisfied with the selection, head to the top menu and select the ‘Effects’ options. A drop-down list appears after this, and you have to look for the ‘Change Pitch’ option and select it.
Step 4: Normally, you can adjust the pitch by taking help from the sliders, but you can also change the pitch manually by adding a percentage. The male pitch originally will have a negative value; change it and set a positive value. You can keep changing until you are satisfied.
Step 5: Lastly, don’t forget to save the changes by hitting the ‘OK’ button at the button and saving the file to your respective device.
Part 4. How to Create Robot Voice in Audacity?
As we have mentioned, Audacity is an audio voice changer, so you must know that Audacity also can change your voice into a robotic voice. Among the different voices, the robot voice sounds interesting, and it’s fun to create. If you are excited to learn to create robot voice in Audacity, follow the guiding steps shared below:
Step 1: For creating an extraordinary robotic voice, start by launching Audacity on your device. After it opens, it’s time to record your voice to create a robot voice. Or else, head to the ‘File’ tab and import your audio file from your device to Audacity from the ‘Open’ option.
Step 2: After this, to start the editing, you need a stereo track on the timeline. For doing this, navigate ‘Tracks’ from the top menu and click on it. Next, hover on the ‘Add New’ option to open its sub-menu. You will see the ‘Stereo Track’ option, select it, and copy-paste the audio file in the new section.
Step 3: Let’s start with the fun part, the editing and adjusting different features. Start by opening the ‘Effects’ tab, and from the long list of options, select ‘Echo.’ There, you can enter the ‘Delay Time’ and change other fields as well.
Step 4: Preview the audio and move on to the next setting. Open the ‘Effects’ section and look for the ‘Change Pitch’ option. You can change and adjust the pitch according to your desire and preview the file again.
Step 5: For creating a robot voice, you can also set the tempo. For that, head to the ‘Change Tempo’ option under the ‘Effects’ section and set the value to minus. Keep adjusting the different effects until you get your perfect robot voice.
Bottom Line
Audacity is not only a great audio editor; it is also a stunning audio voice changer. The software comes with a lot of effects that can completely transform your voice to an unrecognizable level. You can sound like a robot, male, female, and whatever you want with Audacity voice changer. Do you know any video editor that offers sound effects?
If you don’t know, let us introduce Wondershare Filmora Video Editor . This wonderous software is loaded with many editing features to create the best videos. Not only trim, cut, crop, but the software also offers you features like split-screen, chroma key background, keyframing, color match, motion tracking, and whatnot.
Apart from this, this video editor is a hub for cool sound effects and editing elements from its media library, Filmstock. You get a wide range of sound effects, titles, transitions, and many more elements.
For Win 7 or later (64-bit)
For macOS 10.12 or later
How to Add Audio to Video [3 Creative Ways for Free]
The audio or music of video can dramatically affect our perception of a video – no matter whether it’s a home movie, a commercial, or a video presentation. But what if all you have is silent footage or with just a crackled and distorted audio file that needs to be replaced, and at this time, you want to add a sound to the video?
To solve this problem, I humbly recommend Wondershare Filmora . With it, you can easily add audio to video, record the voiceover directly and add it to video, or replace the original audio track (stream) with a new audio file.
In case you want to add music to video with some online tools, please leave a comment below so I can test some online solutions and share with you the best online tools to add audio to video free. I recommend Filmora because its requirement on the network isn’t so high compared to the online tools.
Below is a creative way of adding sound effects to video.
For Win 7 or later (64-bit)
For macOS 10.12 or later
- User-friendly interface enables you to edit your videos easily;
- Supports almost any video and audio formats (including WMV,MOV,FLV,MTS,etc);
- Convenient to add audio to video without quality loss;
- Adding audio to video is so easy
- Supported OS: Windows (Windows 10 included) & Mac OS X (above 10.6).
You May also like 15 Free Music Sites for Commercial Use >>
How to Add Audio to Video Easily
Now see the easy steps to add audio to video files or replace the original audio track with a new voiceover or music.
Step 1: Add audio and video files to the program
After downloading and installing Wondershare Filmora, you can either click Import on the primary windows and select audio and video files from your computer or simply drag and drop audio and video files to the project media library. Filmora also features a free Audio Library, which provides different genres of music and sound effects.
You can preview it and add the proper audio to your video.

You may also like: 10 Best Free Audio Editor for Windows and Mac
Step 2: Add a new audio file to the video
Drag the audio and video files from the media library or Audio Library and place them on the respective tracks of the timeline, namely, place the audio file to the Audio Track. This way, the audio file(s) will be merged into the video.

Step 3: Record and add your voiceover to video
Instead of adding music to the video , you can also record and add voiceover to the video. It’s a fun way to add narration or complementary audio to video. To do so, click the Record button on the toolbar above timeline, the Record dialog will appear.
Click the red Record button, and you can start to talk in 3 seconds. The voiceover will be added to the User’s Album and timeline when completed.

Step 4: Replace audio track of the video
This is similar to adding audio to video. Just an extra step is required: delete the original audio file. To do so, right-click the video you want to replace audio in it, and select Audio Detach . After that, delete the audio file from the track.
As described above, you can then drag and drop a new audio file from User’s Album to the Audio track.

You can click to see more details about How to Replace Audio in Video >>
Step 5: Adjust the audio file and be creative
Various audio editing tools are available: set volume, speed up, slow down, change pitch and add fade in/out effect. Double-click the audio file on the timeline to change the settings and drag the slide bar.
Hit “Return” to confirm the settings and go back to the main interface.

You can also change your voice by adjusting the pitch or speed of the audio file, check the detailed guide about How to change voice with Filmora Voice Changer
Step 6: Export video with new audio track
Click “Create” and select “Format” when all is ready. From the list, choose any format you want as the output format. If necessary, also change the advanced settings. Finally, click the “Create” button to export a new video file to the specified folder on the computer.
Besides export video to your computer, you can also create video for devices like the iPhone, iPad, iPod, directly upload video to YouTube, or burn it to DVD for playing on TV. All in one video editor, no extra software required.

Conclusion
Above are the steps about how to add audio to video with Filmora video editor on Windows and Mac. Typically, you can add your voiceover to the video or detach the original audio and replace it with your voiceover or music file. Whichever you choose, you can adjust the audio settings to get a better result.
For Win 7 or later (64-bit)
For macOS 10.12 or later
For Win 7 or later (64-bit)
For macOS 10.12 or later
- User-friendly interface enables you to edit your videos easily;
- Supports almost any video and audio formats (including WMV,MOV,FLV,MTS,etc);
- Convenient to add audio to video without quality loss;
- Adding audio to video is so easy
- Supported OS: Windows (Windows 10 included) & Mac OS X (above 10.6).
You May also like 15 Free Music Sites for Commercial Use >>
How to Add Audio to Video Easily
Now see the easy steps to add audio to video files or replace the original audio track with a new voiceover or music.
Step 1: Add audio and video files to the program
After downloading and installing Wondershare Filmora, you can either click Import on the primary windows and select audio and video files from your computer or simply drag and drop audio and video files to the project media library. Filmora also features a free Audio Library, which provides different genres of music and sound effects.
You can preview it and add the proper audio to your video.
You may also like: 10 Best Free Audio Editor for Windows and Mac
Step 2: Add a new audio file to the video
Drag the audio and video files from the media library or Audio Library and place them on the respective tracks of the timeline, namely, place the audio file to the Audio Track. This way, the audio file(s) will be merged into the video.
Step 3: Record and add your voiceover to video
Instead of adding music to the video , you can also record and add voiceover to the video. It’s a fun way to add narration or complementary audio to video. To do so, click the Record button on the toolbar above timeline, the Record dialog will appear.
Click the red Record button, and you can start to talk in 3 seconds. The voiceover will be added to the User’s Album and timeline when completed.
Step 4: Replace audio track of the video
This is similar to adding audio to video. Just an extra step is required: delete the original audio file. To do so, right-click the video you want to replace audio in it, and select Audio Detach . After that, delete the audio file from the track.
As described above, you can then drag and drop a new audio file from User’s Album to the Audio track.
You can click to see more details about How to Replace Audio in Video >>
Step 5: Adjust the audio file and be creative
Various audio editing tools are available: set volume, speed up, slow down, change pitch and add fade in/out effect. Double-click the audio file on the timeline to change the settings and drag the slide bar.
Hit “Return” to confirm the settings and go back to the main interface.
You can also change your voice by adjusting the pitch or speed of the audio file, check the detailed guide about How to change voice with Filmora Voice Changer
Step 6: Export video with new audio track
Click “Create” and select “Format” when all is ready. From the list, choose any format you want as the output format. If necessary, also change the advanced settings. Finally, click the “Create” button to export a new video file to the specified folder on the computer.
Besides export video to your computer, you can also create video for devices like the iPhone, iPad, iPod, directly upload video to YouTube, or burn it to DVD for playing on TV. All in one video editor, no extra software required.
Conclusion
Above are the steps about how to add audio to video with Filmora video editor on Windows and Mac. Typically, you can add your voiceover to the video or detach the original audio and replace it with your voiceover or music file. Whichever you choose, you can adjust the audio settings to get a better result.
For Win 7 or later (64-bit)
For macOS 10.12 or later
Also read:
- Updated 2024 Approved Auditory Indicators of Dog Frustration Pinpointing the Anger in Barks
- New In 2024, Future-Proof Audio Editing Platforms Top Choices
- Updated In 2024, Mastering Audio Magic Top 10 Radio Sound Effects
- Updated In 2024, Capturing Sound in Presentations A Step-by-Step Windows & Mac Tutorial
- New How to Locate Horrific Noise Profiles for Filmmaking
- New Elevating Video Clarity Methods for Eradicating Inaudible Roughness in Soundtracks
- In 2024, AudiSynchX Enhancing Audio Cohesion for Multimedia Projects Using Adobe Premiere Pro
- 2024 Approved The Premier Platforms for Live Chat and Screen Sharing Alternatives to Omegle
- 2024 Approved Enhancing Film Production Adding Audio Elements in Magix Pro 2023 Edition
- New 2024 Approved The Ultimate Guide Disabling Audio for Windows 10 Films Without Extras
- 2024 Approved Low-Hassle Chromebook Sound Recording A Step-by-Step Approach
- In 2024, Where Can I Find Bell Sound Effect?
- New 2024 Approved YouTube Acoustic Library
- Updated 7 Most Popular Voice Editing Apps for Android Users for 2024
- Updated Essential Online Tools to Refine Your Music with Superior MP3 Processing for 2024
- 2024 Approved Top Characteristics of Mac Audio Processing Tools
- New Virtual Error Sounds Library 2023 – Complimentary Access and Downloads for 2024
- Updated In 2024, Essential Mobile Audio Cutting Software The Ultimate List for iPhones and Tablets
- 2024 Approved Zoom Meets Fun 6 Must-Try Voice Change Tools to Brighten Up Online Interactions
- Updated Beyond Free Photos Understanding Pexels.coms Role in Creative Projects for 2024
- In 2024, Audio Division Made Simple Techniques for Cutting Sound Files
- 2024 Approved Mastering Sound Design with Linux A Deep Dive Into Top Audio Tools
- Updated In 2024, Step-by-Step Guide to Audio Keyframing with Adobe Premiere Pro on Apple Devices, 2023 Edition
- The Ultimate Checklist for Pairing AirPods with Laptops and Desktops
- Updated 2024 Approved How to Add Transition Between Scenes/Clips
- New In 2024, TOP 3 Online Services for Augmenting MP3 Sound Intensity and Clarity
- New Ode Omission Module Assemble Bespoke Musical Frameworks for 2024
- Updated Perfecting the Journey A Guide to Integrating Visual Sequences
- New Simplified Approach to Sound Wave Suppression with Audacity for 2024
- Updated 2024 Approved 10 Best Omegle Alternatives Meet New People Online
- New Step-by-Step Splitting Audio and Visuals in iMovie Using a Mac
- In 2024, Melodic Mastery Manual Top-Notch Audio Editors, Their Strengths, Weaknesses, and Alternatives
- Updated Muting TikTok Audio Made Easy A Comprehensive Guide to Sound Management
- New Premier Online Spots for Fetching Lofi Visuals & Melodies for 2024
- Updated In 2024, Download 8 Best Audio Spectrum Templates for Video
- In 2024, How to Transcribe Audio to Text Free on Android and iOS
- In 2024, Ultimate Audio Cleaner for Videos Windows & Mac Edition
- New In 2024, From Full Spectrum to Focus Extracting Core Rhythms for Multimedia Use
- Updated The Secret Weapon of Gamers Vocal Charisma Mastering Morphvox Techniques for In-Game Broadcasts for 2024
- New 2024 Approved Auditory Alchemy Transforming Deformed Audio Into Clear Melodies
- New Digital Dating Defense Adequate Measures for a Harmless Hangout for 2024
- New Best Value Volume Scaling Software 5 Top Gratis Options
- In 2024, The Ultimate Guide Seamless MP4 Audio Extraction Techniques
- A Complete Guide to Audio Logging for Your Conversations in Google Voice for 2024
- Updated The Insiders Guide to Quieting Ambient Sounds on Stage or Studio Setup
- Updated Text to Talk Discover the Leading Free Voice Synthesis Tools for 2024
- Lose the Extra Bits Effortless MP3 Downscaling for Spotless Sing-Along Sessions. For 2024
- Updated Discover Budget-Friendly Tips for Syncing Sound with Videography
- Updated Finding High-Quality Wolf Howl Noises for Projects for 2024
- In 2024, The Most Useful Tips for Pokemon Go Ultra League On Lava Blaze 2 5G | Dr.fone
- Updated 2024 Approved Video Speed Controllers Best Software for Windows, Mac, and More
- Updated In 2024, Guide To Slowing Down Videos in Snapchat Discussing the Details
- New Best AVI Video Splitters Top 16 Tools to Cut and Edit Your Videos Multi-Platform Support for 2024
- Updated Unlock TikToks Full Potential Understanding Aspect Ratio for 2024
- Is GSM Flasher ADB Legit? Full Review To Bypass Your Vivo V30 Lite 5GFRP Lock
- New 2024 Approved Easy Way to Create a DIY Green Screen Video Effect
- The Easiest Methods to Hard Reset Infinix Hot 30 5G | Dr.fone
- In 2024, All You Need To Know About Mega Greninja For Poco C55 | Dr.fone
- In 2024, How to Bypass FRP on Tecno Spark Go (2023)?
- How Can We Unlock Our Honor Phone Screen?
- Full Guide to Bypass Motorola Moto G34 5G FRP
- Pokemon Go Error 12 Failed to Detect Location On Apple iPhone 6s Plus? | Dr.fone
- Hassle-Free Ways to Remove FRP Lock from Realme Phones with/without a PC
- In 2024, How Do You Get Sun Stone Evolutions in Pokémon For Samsung Galaxy A54 5G? | Dr.fone
- How to Find iSpoofer Pro Activation Key On Apple iPhone SE (2022)? | Dr.fone
- For People Wanting to Mock GPS on Honor 80 Pro Straight Screen Edition Devices | Dr.fone
- In 2024, Catch or Beat Sleeping Snorlax on Pokemon Go For Apple iPhone 15 Plus | Dr.fone
- In 2024, 3 Methods to Mirror Google Pixel Fold to Roku | Dr.fone
- 2024 Approved Linux Lovers, Unite! 10 Best Video Editors to Replace Adobe Premiere
- Ways to stop parent tracking your Xiaomi 14 Ultra | Dr.fone
- In 2024, Unlocking Made Easy The Best 10 Apps for Unlocking Your Xiaomi 13T Device
- How to Flash Dead Vivo Y100A Safely | Dr.fone
- In 2024, Full guide to iPhone 14 Pro Max iCloud Bypass
- In 2024, How To Bypass iCloud Activation Lock on Mac For Apple iPhone 14 Pro?
- Title: Updated In 2024, Top 10 Online Tools for Professional Studio Recording - FREE vs PAID Versions
- Author: Paul
- Created at : 2024-05-05 06:08:49
- Updated at : 2024-05-06 06:08:49
- Link: https://voice-adjusting.techidaily.com/updated-in-2024-top-10-online-tools-for-professional-studio-recording-free-vs-paid-versions/
- License: This work is licensed under CC BY-NC-SA 4.0.
