
:max_bytes(150000):strip_icc():format(webp)/is-audible-worth-it-00616437e29b4d108264ba36057bbdde.jpg)
Updated In 2024, Adding Effective Audio to Your QuickTime Projects 2023 Edition
“Adding Effective Audio to Your QuickTime Projects: 2023 Edition”
How to Add Audio to QuickTime Video Files

Shanoon Cox
Mar 27, 2024• Proven solutions
Sometimes you may want to replace the original audio of a QuickTime video or add your own audio file. Instead of compressing the video again, Wondershare Filmora (originally Wondershare Video Editor) makes it really easy to do this in just a few steps. Now follow the detailed guide below to learn how to easily add audio to QuickTime video files. You can download this software first:
How to Add Audio to QuickTime Video Files
 Download Mac Version ](https://tools.techidaily.com/wondershare/filmora/download/ )
1 Import your QuickTime video files to the program
After you install this video editor, click the shortcut on the desktop to launch it. Then a window will pop up to let your select the aspect ratio between 16:9 and 4:3. After making your choice, click the “Import” button or drag and drop your QuickTime video & audio files to this program. Since this program supports a vast range of formats, you don’t have to convert the original video format to edit it.

2 Add audio to QuickTime video files
After that, place both of the video and audio files to the corresponding tracks of the timeline. Make sure that the lengths of them are approximately the same. If not, you would need to edit the video and or audio streams (for example, deleting unnecessary fragments) in order to make their lengths equal. You can click the “Split” icon above the Timeline to split and cut the unwanted part of the files. After syncing the video and audio files perfectly, you can right click and further adjust the audio file in the editing panel, like changing the playing speed, volume, pitch, etc.
Tip: You can also replace the original soundtrack of the QuickTime video file. To do this, just right click the video file and choose “Audio Detach”. Then the audio file will appear on the audio track. Then right click the audio file and choose “Delete” to delete the audio.

3 Export the new video file
After adding audio to the QuickTime video, hit the “Create” to export your video file. You can go to the “Format” tab to save the new video file in different formats. Or go to the “Device” tab if you want to watch the new file on your portable media device like iPod, iPhone, etc. There will be dozens of preset output profiles for converting your video file to almost every kind of media devices like iPod, iPhone, Xbox 360, mobile phones and different players. You can also directly share your video on YouTube or Facebook in the “YouTube” tab or burn to a DVD if you like.

Watch the video below to check how to edit videos with Filmora video editor.
Download Mac Version ](https://tools.techidaily.com/wondershare/filmora/download/ )
You may also interested in: How to edit video with QuickTime
Shanoon Cox
Shanoon Cox is a writer and a lover of all things video.
Follow @Shanoon Cox
Shanoon Cox
Mar 27, 2024• Proven solutions
Sometimes you may want to replace the original audio of a QuickTime video or add your own audio file. Instead of compressing the video again, Wondershare Filmora (originally Wondershare Video Editor) makes it really easy to do this in just a few steps. Now follow the detailed guide below to learn how to easily add audio to QuickTime video files. You can download this software first:
How to Add Audio to QuickTime Video Files
Download Mac Version ](https://tools.techidaily.com/wondershare/filmora/download/ )
1 Import your QuickTime video files to the program
After you install this video editor, click the shortcut on the desktop to launch it. Then a window will pop up to let your select the aspect ratio between 16:9 and 4:3. After making your choice, click the “Import” button or drag and drop your QuickTime video & audio files to this program. Since this program supports a vast range of formats, you don’t have to convert the original video format to edit it.
2 Add audio to QuickTime video files
After that, place both of the video and audio files to the corresponding tracks of the timeline. Make sure that the lengths of them are approximately the same. If not, you would need to edit the video and or audio streams (for example, deleting unnecessary fragments) in order to make their lengths equal. You can click the “Split” icon above the Timeline to split and cut the unwanted part of the files. After syncing the video and audio files perfectly, you can right click and further adjust the audio file in the editing panel, like changing the playing speed, volume, pitch, etc.
Tip: You can also replace the original soundtrack of the QuickTime video file. To do this, just right click the video file and choose “Audio Detach”. Then the audio file will appear on the audio track. Then right click the audio file and choose “Delete” to delete the audio.
3 Export the new video file
After adding audio to the QuickTime video, hit the “Create” to export your video file. You can go to the “Format” tab to save the new video file in different formats. Or go to the “Device” tab if you want to watch the new file on your portable media device like iPod, iPhone, etc. There will be dozens of preset output profiles for converting your video file to almost every kind of media devices like iPod, iPhone, Xbox 360, mobile phones and different players. You can also directly share your video on YouTube or Facebook in the “YouTube” tab or burn to a DVD if you like.
Watch the video below to check how to edit videos with Filmora video editor.
Download Mac Version ](https://tools.techidaily.com/wondershare/filmora/download/ )
You may also interested in: How to edit video with QuickTime
Shanoon Cox
Shanoon Cox is a writer and a lover of all things video.
Follow @Shanoon Cox
“Melodic Compilation: A Comprehensive Guide to Exclusive Online Sites for Video Tune Libraries”
FREE Top 10 Best Websites to Download Sound Clips for Videos

Liza Brown
Mar 27, 2024• Proven solutions

Are you working on animation , video, game, music, or maybe some other media file? Sound is a vital factor for all. It is the effect of the sound that can make or break a project.
But it can be difficult to find perfect and quality free sound clips. There are thousands of software for creating excellent videos, adding sounds , titles, overlays, tracks, and more. But what if you don’t wish to create a piece for just jazzing up your already existing video?
Free sound clips are great resources to download for videos if you don’t want to create sound effects.
Many people want to know the source of high-quality free audio for videos. These free sound samples are easy to find on the Internet.
In this article, you will get to know the 10 best websites to download free sound clips.
10 Best Free Sound Samples to Use
1. Freesound
Licensed under the Creative Commons License , the Freesound comprises of a large sound database. You can choose from the huge collection of sounds and decide which one is free and which sound needs attribution.
You can ensure if the sound can be used in commercial products or not. If you are not a professional and just need free sound samples for personal use, you may use free sound download from any site. The features of Freesound include-
- You can search for sounds or browse by tags or geotags
- The pack feature helps you to find a bunch of similar sounds very easily
- Preview the sound without logging in
- For downloading the sound, you need to log in
- Add your audio samples to contribute to the database
- You get 5 free sound clips download
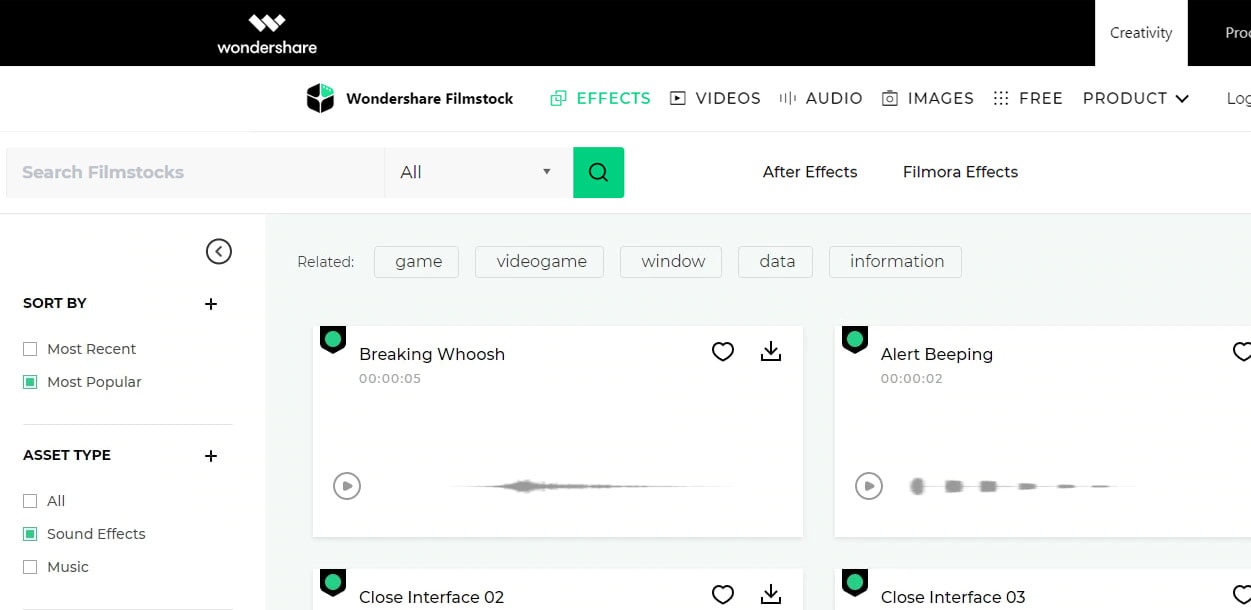
2. Filmstock
Filmstock from the house of Wondershare is one of the greatest libraries for free sound clips.
Any budget filmmaker would love to have this invaluable resource not just for free audio clips for videos but also for royalty-free sound clips.
You can bring your cinematic video to life from the Filmstock free-stuff one-stop-shop. The features of Filmstock include-
- Royalty-free video effects, audio, and stock media
- There are genres like science fiction, sci-fi, ufo, technology games
- Huge selection of curated quality stock images
- Filmstock library is continuously updated
- No attribution required for any project on Filmstock
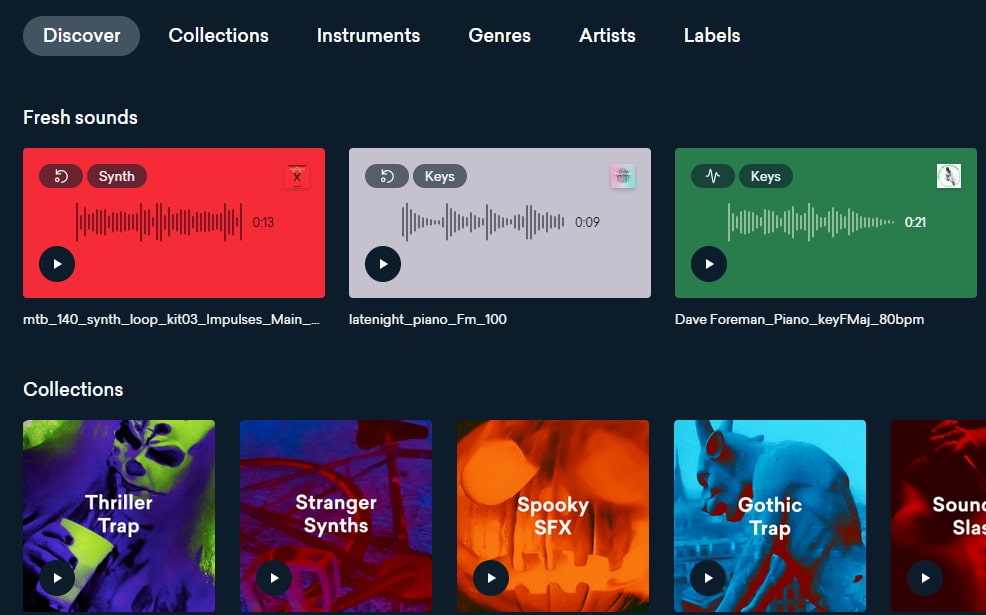
3. Landr
With a simple interface, Landr offers the best loops, packs, and samples to you. Make use of powerful Artificial Intelligence (AI) and you can spend lesser time searching and browsing. The features of Landr includes-
- You can browse free sound clips from the various collection of instruments
- Quickly find the right sound from the millions of free sound samples
- Get access to Selector tool powered by AI to make your browsing session faster
- Nourish your ideas with the curated collection and smart browsing
- The filter sounds by instrument, mood, BPM or key
- Go pro with your sampling
- Royalty-free sounds from today’s best artists, producers, and labels
4. Audio Micro
Audio Micro is one of the best tools for downloading horror-based free sound clips. Once you register with Audio Micro, you can easily download free audio clips for videos.
For downloading sound for commercial uses like TV or mass reproduction, you must be a paid subscriber. The features of Audio Micro are-
- Get access to the collection of royalty-free music and 2000 free good quality sound effects
- High-quality audio content for commercial use, available at competitive prices without any hidden cost
- Research, locate, purchase, and download stock audio
- Easy and fast search option with free sound collection visible from the navigation bar on the homepage
5. Audio Blocks
It is an intuitive platform to download loops, sound effects, and music. It has a low-cost subscription model and the content is constantly updated based on the search results. The features of Audio Blocks are-
- Unlimited royalty-free audio
- Loop, sound effects, and music download
- Low-cost subscription offers more content at a nominal price
- There are flexible plans for every budget
- Use content multiple times for commercial and personal projects
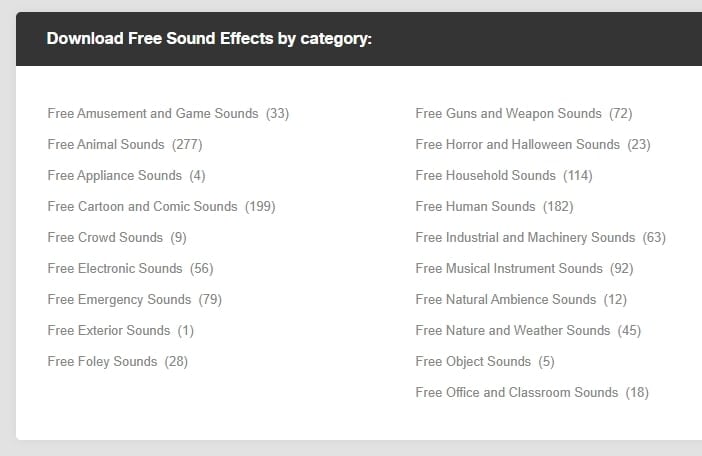
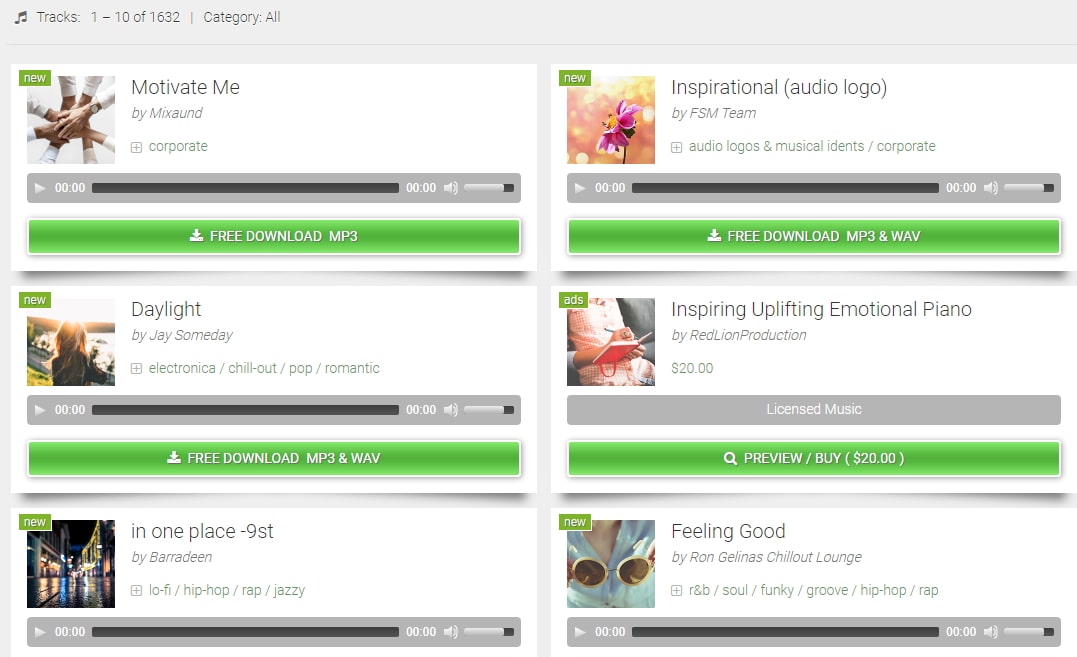
6. Free Stock Music
Whether YouTube project or your personal Vlog, Free Stock Music offers royalty-free music for a range of media platforms.
For any non-copyrighted sound clips free download, always feel free to reach Free Stock Music. The features are-
- Free access to non-copyrighted music
- Just put the attribution in credits to use the sound clips
- Unlimited royalty-free music in all moods, lengths, tempos, and categories
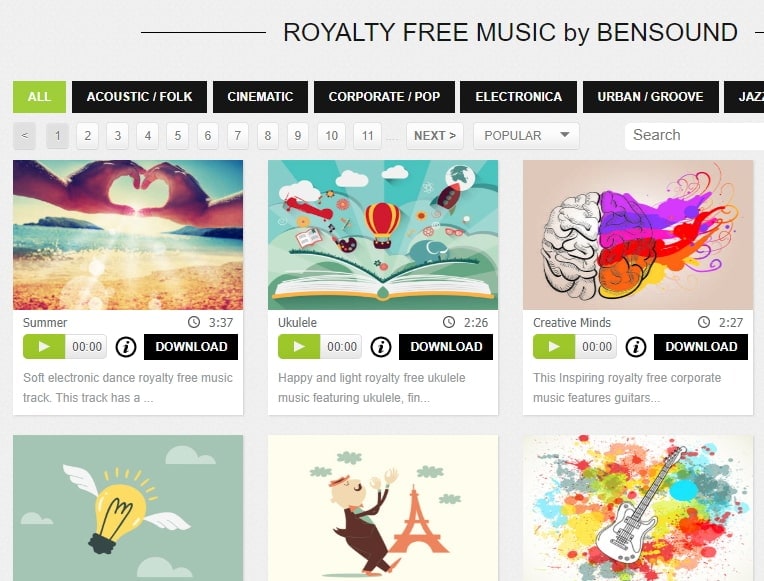
7. Bensound
Available under the Creative Common License, Bensound is used for multimedia projects like web applications or videos.
You can use the free tracks available with Bensound stock music in the various website background score, animations, web adverts, slideshows, etc. The features of Bensound include-
- Royalty-free stock music in various genres like electronica, urban, cinematic, jazz, rock, etc.
- Download free sound clips from the huge collection and add attributions in credits
- If you don’t wish to give credits and use the high-quality premium tracks, get the Bensound Pro License
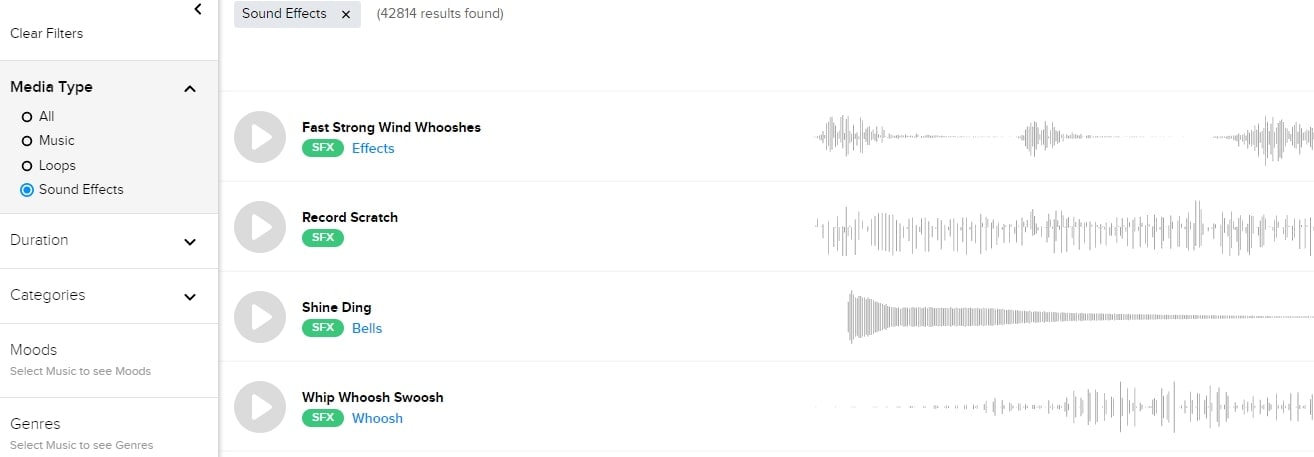
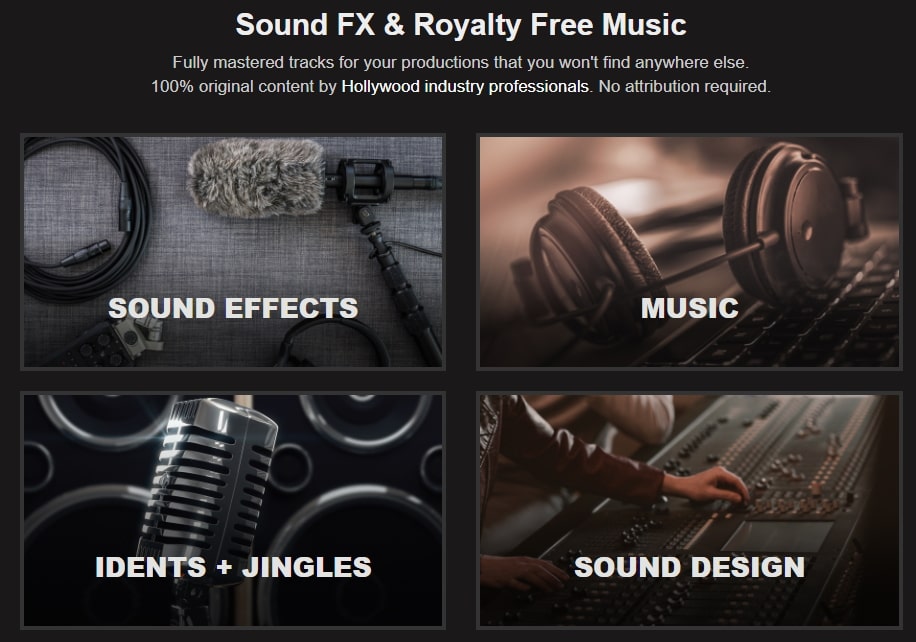
8. Sounds Crate
Are you looking for the best soundtrack for your video? Sounds Crate offers some of the best royalty-free music and sound FX.
With the tracks completely mastered for your production, Sound Crate offers 100% quality content created by industry professionals from Hollywood. The Sound Crate features include-
- Sound FX for electricity, gun, explosion, weapons, sci-fi, vehicles, movements, etc.
- Royalty-free music in diverse genres
- You can also use idents for corporate, news jingles, holiday idents, etc.
- Download and use the royalty-free sound clips easily
- Over 10000 plus HD assets
- No attribution required
- Browse from unlimited music, sound effects, etc.
9. ZapSlat
Do your audio and video editing projects need some cool soundtracks to jazz it up? Look no further. ZapSlat is one of the best free sound download sites to make your project successful. The features of ZapSlat are-
- Comprises over 54,000 professional free sound effects and royalty-free music files
- Variety of free sound effect packs
- Download royalty-free music from a variety of genres
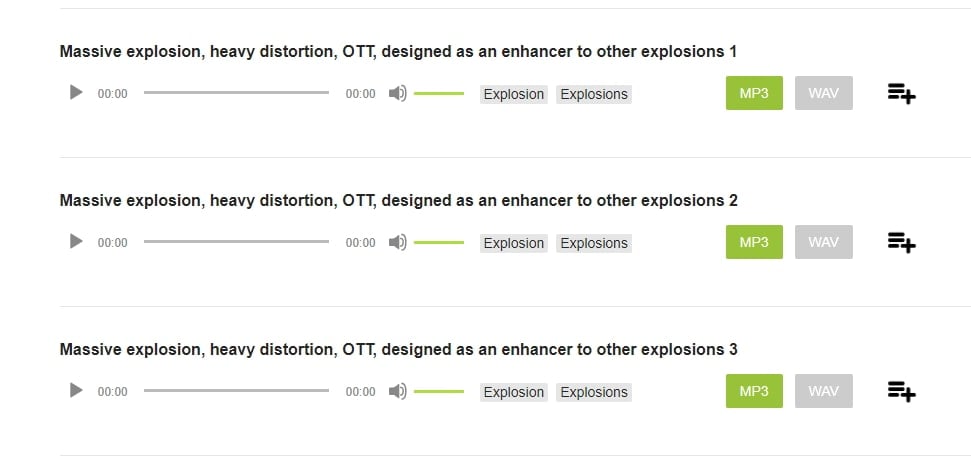
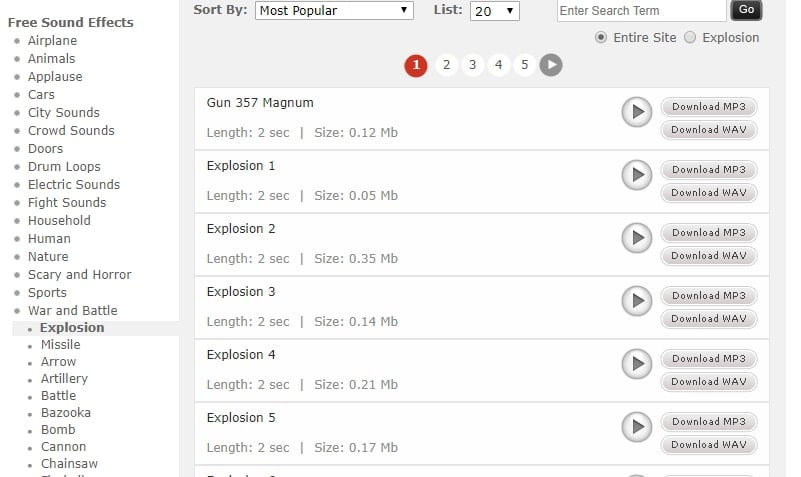
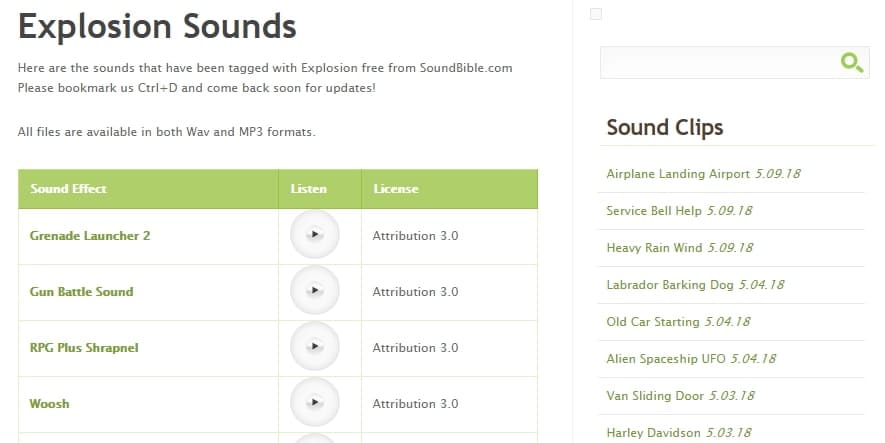
10. Sound Bible
Choose the best from 2000 free sound clips licensed under Creative Commons. To use the sound effect for commercial video, you can select from the royalty-free sounds. The features of SoundBible are-
- Download free sound clips without logging in or creating an account
- 2000 free sounds
- Copyright-free sound resources are weekly updated
Conclusion
Now that you know the best 10 free sound clip download sites, make use of it in your videos. Without worrying about the expense, you can use these sites to download free sound clips.
Liza Brown
Liza Brown is a writer and a lover of all things video.
Follow @Liza Brown
Liza Brown
Mar 27, 2024• Proven solutions
Are you working on animation , video, game, music, or maybe some other media file? Sound is a vital factor for all. It is the effect of the sound that can make or break a project.
But it can be difficult to find perfect and quality free sound clips. There are thousands of software for creating excellent videos, adding sounds , titles, overlays, tracks, and more. But what if you don’t wish to create a piece for just jazzing up your already existing video?
Free sound clips are great resources to download for videos if you don’t want to create sound effects.
Many people want to know the source of high-quality free audio for videos. These free sound samples are easy to find on the Internet.
In this article, you will get to know the 10 best websites to download free sound clips.
10 Best Free Sound Samples to Use
1. Freesound
Licensed under the Creative Commons License , the Freesound comprises of a large sound database. You can choose from the huge collection of sounds and decide which one is free and which sound needs attribution.
You can ensure if the sound can be used in commercial products or not. If you are not a professional and just need free sound samples for personal use, you may use free sound download from any site. The features of Freesound include-
- You can search for sounds or browse by tags or geotags
- The pack feature helps you to find a bunch of similar sounds very easily
- Preview the sound without logging in
- For downloading the sound, you need to log in
- Add your audio samples to contribute to the database
- You get 5 free sound clips download
2. Filmstock
Filmstock from the house of Wondershare is one of the greatest libraries for free sound clips.
Any budget filmmaker would love to have this invaluable resource not just for free audio clips for videos but also for royalty-free sound clips.
You can bring your cinematic video to life from the Filmstock free-stuff one-stop-shop. The features of Filmstock include-
- Royalty-free video effects, audio, and stock media
- There are genres like science fiction, sci-fi, ufo, technology games
- Huge selection of curated quality stock images
- Filmstock library is continuously updated
- No attribution required for any project on Filmstock
3. Landr
With a simple interface, Landr offers the best loops, packs, and samples to you. Make use of powerful Artificial Intelligence (AI) and you can spend lesser time searching and browsing. The features of Landr includes-
- You can browse free sound clips from the various collection of instruments
- Quickly find the right sound from the millions of free sound samples
- Get access to Selector tool powered by AI to make your browsing session faster
- Nourish your ideas with the curated collection and smart browsing
- The filter sounds by instrument, mood, BPM or key
- Go pro with your sampling
- Royalty-free sounds from today’s best artists, producers, and labels
4. Audio Micro
Audio Micro is one of the best tools for downloading horror-based free sound clips. Once you register with Audio Micro, you can easily download free audio clips for videos.
For downloading sound for commercial uses like TV or mass reproduction, you must be a paid subscriber. The features of Audio Micro are-
- Get access to the collection of royalty-free music and 2000 free good quality sound effects
- High-quality audio content for commercial use, available at competitive prices without any hidden cost
- Research, locate, purchase, and download stock audio
- Easy and fast search option with free sound collection visible from the navigation bar on the homepage
5. Audio Blocks
It is an intuitive platform to download loops, sound effects, and music. It has a low-cost subscription model and the content is constantly updated based on the search results. The features of Audio Blocks are-
- Unlimited royalty-free audio
- Loop, sound effects, and music download
- Low-cost subscription offers more content at a nominal price
- There are flexible plans for every budget
- Use content multiple times for commercial and personal projects
6. Free Stock Music
Whether YouTube project or your personal Vlog, Free Stock Music offers royalty-free music for a range of media platforms.
For any non-copyrighted sound clips free download, always feel free to reach Free Stock Music. The features are-
- Free access to non-copyrighted music
- Just put the attribution in credits to use the sound clips
- Unlimited royalty-free music in all moods, lengths, tempos, and categories
7. Bensound
Available under the Creative Common License, Bensound is used for multimedia projects like web applications or videos.
You can use the free tracks available with Bensound stock music in the various website background score, animations, web adverts, slideshows, etc. The features of Bensound include-
- Royalty-free stock music in various genres like electronica, urban, cinematic, jazz, rock, etc.
- Download free sound clips from the huge collection and add attributions in credits
- If you don’t wish to give credits and use the high-quality premium tracks, get the Bensound Pro License
8. Sounds Crate
Are you looking for the best soundtrack for your video? Sounds Crate offers some of the best royalty-free music and sound FX.
With the tracks completely mastered for your production, Sound Crate offers 100% quality content created by industry professionals from Hollywood. The Sound Crate features include-
- Sound FX for electricity, gun, explosion, weapons, sci-fi, vehicles, movements, etc.
- Royalty-free music in diverse genres
- You can also use idents for corporate, news jingles, holiday idents, etc.
- Download and use the royalty-free sound clips easily
- Over 10000 plus HD assets
- No attribution required
- Browse from unlimited music, sound effects, etc.
9. ZapSlat
Do your audio and video editing projects need some cool soundtracks to jazz it up? Look no further. ZapSlat is one of the best free sound download sites to make your project successful. The features of ZapSlat are-
- Comprises over 54,000 professional free sound effects and royalty-free music files
- Variety of free sound effect packs
- Download royalty-free music from a variety of genres
10. Sound Bible
Choose the best from 2000 free sound clips licensed under Creative Commons. To use the sound effect for commercial video, you can select from the royalty-free sounds. The features of SoundBible are-
- Download free sound clips without logging in or creating an account
- 2000 free sounds
- Copyright-free sound resources are weekly updated
Conclusion
Now that you know the best 10 free sound clip download sites, make use of it in your videos. Without worrying about the expense, you can use these sites to download free sound clips.
Liza Brown
Liza Brown is a writer and a lover of all things video.
Follow @Liza Brown
Mastering Free Audio Recording: Using Audacity’s Capabilities
Natural audio recording software, such as Voice Memos for Macs or Sound Recorder for Windows PCs, is included with every machine. These applications enable users to record audio using either the desktop’s internal or an external microphone, and they generally have basic audio editing features.
However, when you’re looking for a higher-quality recording program, Audacity is the way to go. Audacity is a free audio editor with a lot of cutting-edge features. More significantly, recording using Audacity is as simple as clicking a button.
In this Audacity Record Computer Audio guide, we will show you all the methods of recording internal audio on your computer and Mac.
In this article
01 Record Audio On Audacity with a Microphone
02 Record Sounds Playing on Your Computer Using Audacity on Win
03 Record Sounds Playing on Your Computer Using Audacity on Mac
04 Set up Audacity to Record as Schedule
Part 1: How to Record Audio On Audacity with a Microphone On Windows and Mac Computers?
For both Windows and Mac, the procedures for recording audio from a microphone are the same if you’re utilizing your desktop’s built-in mic or an external microphone. Here’s your step-by-step guide to audacity record using a microphone:
Step 1: Launch Audacity and get to know the Device Toolbar, situated underneath the playback controls. You may modify the Audio Host and the Recording and Playback Devices—all of which are required for Audacity recording.

Step 2: To begin, select Tracks under the Add New tab, Stereo Track, or Mono Track to create a new track.

Step 3: Select Recording Device from the options list. Select your microphone from the dropdown menu and hit the Record option.

Step 4: A soundwave emerges along the track as you talk into the speaker. The Recording Level may be found at the top of the display. To pause or stop the recording, click Stop or Pause until you select Record anew.

Step 5: With the mouse over any recording area, click the Delete button to cut out any portion of it quickly. Click Ctrl + A, then Delete to erase whatever you’ve just saved. Alternatively, press the X button to delete the track completely.

Part 2: How to Record Sounds Playing on Your Computer Using Audacity On Windows?
Unlike Mac, Windows makes it simple to capture audio from a movie or media file running on your desktop. There seem to be two primary methods for accomplishing audacity record desktop audio in this way:
1. Use MME as the Audio Host
Step 1: To use MME as your audio host, go to Tracks in the Add New tab in Stereo Track and create a new file.

Step 2: Change the Audio Host (to the left of Recording Device) to MME—this is the standard setting, so you might not have to change anything.

Step 3: Choose desired option from the Recording Device dropdown menu. Based on your configuration, this might be referred to as Wave Out or Loopback. When you’re uncertain, try it out.

Step 4: To record your audio source, click Record, then play it back.
2. Use WASAPI as the Audio Host
WASAPI provides higher-resolution digital recordings. If capturing audio from an external monitor, it’s also a good idea to utilize it.
Step 1: Convert the Audio Host from MME to Windows WASAPI after creating a fresh Stereo Track.

Step 2: Switch the Recording Device to Speaker (loopback). To display the entire label, you might have to slide the toolbar’s knobs outwards. Begin recording by pressing the red dot and then listen to the audio source. Audacity will capture the audio even if your PC is muted.
Part 3: How to Record Sounds Playing on Your Computer Using Audacity on Mac?
Unfortunately, there’s no ready-made method to record computer audio using Audacity on a Mac. Some alternative ways to use Audacity to record from Mac including using a loopback cable, or download and using a third-party software. You can try some Audacity alternatives to record the computer audio on Mac.
For Win 7 or later (64-bit)
For macOS 10.12 or later
If you have installed Filmora already, you can use it to record the sound playing on your Mac with some tricks.
Step 1: Luanch Filmora, and then click the Record button and select Record PC Screen.

Step 2: Set up the recording settings based on the need. Since we’re going to record the playing audio from the Mac computer, select Microphone and System Audio On and click the Red button to start.

Step 3: Now you have a screen captured video with sound included. Since we need th audio only, we can attache the audio from the video first and then do some editing such as adding fade in and fade out effect, or remove unwanted audio clip.

Part 4: How to Set up Audacity to Record as Schedule?
A streaming video recorder or cassette can be used to arrange a recording. All of those are identical to Time Recordings in that they are used to schedule recording. The Timer record configuration dialog box may be used to set the beginning and finish of the recording. This is how you do it:
Step 1: By definition, the recording’s Start Date and Time are set to the present time. It will begin recording on the present day and hour by default when you don’t alter it. There is no default setting for the End Date and Time. You must either choose a date and time to determine the end time.

Step 2: There is a Checkbox to Save the work immediately. By Ticking the option, you may choose the path or Folder where the file will be saved when the recording is finished.

Conclusion
Well, there you have it – your complete Audacity Record Computer Audio guide. One thing is for certain that Audacity allows some great ways of recording audio from internal and external components of your Windows and Mac. However, if your Audacity is having issues, we would highly recommend opting for another software, such as Wondershare Filmora.
Wondershare Filmora is the finest thing that has come out in recent years for recording audio from a desktop. It is intended not just for pros but also for any enthusiast videographer who desires to create a high-quality movie for their family and friends. Download it today to make your movie a delightful journey with high-quality audio recording.
02 Record Sounds Playing on Your Computer Using Audacity on Win
03 Record Sounds Playing on Your Computer Using Audacity on Mac
04 Set up Audacity to Record as Schedule
Part 1: How to Record Audio On Audacity with a Microphone On Windows and Mac Computers?
For both Windows and Mac, the procedures for recording audio from a microphone are the same if you’re utilizing your desktop’s built-in mic or an external microphone. Here’s your step-by-step guide to audacity record using a microphone:
Step 1: Launch Audacity and get to know the Device Toolbar, situated underneath the playback controls. You may modify the Audio Host and the Recording and Playback Devices—all of which are required for Audacity recording.
Step 2: To begin, select Tracks under the Add New tab, Stereo Track, or Mono Track to create a new track.
Step 3: Select Recording Device from the options list. Select your microphone from the dropdown menu and hit the Record option.
Step 4: A soundwave emerges along the track as you talk into the speaker. The Recording Level may be found at the top of the display. To pause or stop the recording, click Stop or Pause until you select Record anew.
Step 5: With the mouse over any recording area, click the Delete button to cut out any portion of it quickly. Click Ctrl + A, then Delete to erase whatever you’ve just saved. Alternatively, press the X button to delete the track completely.
Part 2: How to Record Sounds Playing on Your Computer Using Audacity On Windows?
Unlike Mac, Windows makes it simple to capture audio from a movie or media file running on your desktop. There seem to be two primary methods for accomplishing audacity record desktop audio in this way:
1. Use MME as the Audio Host
Step 1: To use MME as your audio host, go to Tracks in the Add New tab in Stereo Track and create a new file.
Step 2: Change the Audio Host (to the left of Recording Device) to MME—this is the standard setting, so you might not have to change anything.
Step 3: Choose desired option from the Recording Device dropdown menu. Based on your configuration, this might be referred to as Wave Out or Loopback. When you’re uncertain, try it out.
Step 4: To record your audio source, click Record, then play it back.
2. Use WASAPI as the Audio Host
WASAPI provides higher-resolution digital recordings. If capturing audio from an external monitor, it’s also a good idea to utilize it.
Step 1: Convert the Audio Host from MME to Windows WASAPI after creating a fresh Stereo Track.
Step 2: Switch the Recording Device to Speaker (loopback). To display the entire label, you might have to slide the toolbar’s knobs outwards. Begin recording by pressing the red dot and then listen to the audio source. Audacity will capture the audio even if your PC is muted.
Part 3: How to Record Sounds Playing on Your Computer Using Audacity on Mac?
Unfortunately, there’s no ready-made method to record computer audio using Audacity on a Mac. Some alternative ways to use Audacity to record from Mac including using a loopback cable, or download and using a third-party software. You can try some Audacity alternatives to record the computer audio on Mac.
For Win 7 or later (64-bit)
For macOS 10.12 or later
If you have installed Filmora already, you can use it to record the sound playing on your Mac with some tricks.
Step 1: Luanch Filmora, and then click the Record button and select Record PC Screen.
Step 2: Set up the recording settings based on the need. Since we’re going to record the playing audio from the Mac computer, select Microphone and System Audio On and click the Red button to start.
Step 3: Now you have a screen captured video with sound included. Since we need th audio only, we can attache the audio from the video first and then do some editing such as adding fade in and fade out effect, or remove unwanted audio clip.
Part 4: How to Set up Audacity to Record as Schedule?
A streaming video recorder or cassette can be used to arrange a recording. All of those are identical to Time Recordings in that they are used to schedule recording. The Timer record configuration dialog box may be used to set the beginning and finish of the recording. This is how you do it:
Step 1: By definition, the recording’s Start Date and Time are set to the present time. It will begin recording on the present day and hour by default when you don’t alter it. There is no default setting for the End Date and Time. You must either choose a date and time to determine the end time.
Step 2: There is a Checkbox to Save the work immediately. By Ticking the option, you may choose the path or Folder where the file will be saved when the recording is finished.
Conclusion
Well, there you have it – your complete Audacity Record Computer Audio guide. One thing is for certain that Audacity allows some great ways of recording audio from internal and external components of your Windows and Mac. However, if your Audacity is having issues, we would highly recommend opting for another software, such as Wondershare Filmora.
Wondershare Filmora is the finest thing that has come out in recent years for recording audio from a desktop. It is intended not just for pros but also for any enthusiast videographer who desires to create a high-quality movie for their family and friends. Download it today to make your movie a delightful journey with high-quality audio recording.
Also read:
- Updated 2024 Approved Top 10 Audio Normalizers for Windows. Dont Miss It
- New The Digital DJ Harnessing Software to Separate Song Beats
- The Uncharted Territory of Jazz Music Fundamentals for 2024
- In 2024, Premier List of Zero-Price Online Acoustic Regulators
- New Pushing Boundaries in Sound Design Top 5 Innovative Audio Distortion Applications
- New Essential Online Hubs for Natural Environment Recordings
- Pioneering Linux Audio Capture Discovering the Five Most-Loved Recorders and Tips for Excellence
- New In 2024, Singing Simplified Accessible Audio Enhancers for Every Musicians Toolkit
- Mastering Voice Removal Techniques in Adobe Audition An Experts Guide to 6 Essential Steps for 2024
- New 2024 Approved Most Acclaimed Digital Music Cutter Tools – Updated
- New Romantic Renditions Best Music Selections for Wedding Film Production for 2024
- Updated The Definitive Guide to Sound Sanctity Expert Approaches for Reducing Auditory Interference (On/Offline Methods) for 2024
- 2024 Approved Clarity in Capture State-of-the-Art Techniques for Dampening Sound Distortion
- Updated Essential Audio Workstation Applications on Chrome OS for Aspiring Musicians
- The Ultimate Guide to Tweaking Siris Sound Palette on iPhone, iPad, and Mac
- New Best Online Tools to Remove Noise From Audio for 2024
- In 2024, Be the Life of Your Virtual Gathering Top 6 Voice Changes for Zoom That Add Fun and Flair
- In 2024, Sculpt Your Media Techniques for Excising Audio in iPhones & Mac Videos
- New 2024 Approved From Raw to Refined Mastering the Art of Professional MP3 File Adjustments
- Updated 2024 Approved CoherenceCore The Innovative Approach to Synchronized Sound Design in Adobe Premiere Pro 2023
- Updated Outstanding Digital Audio Workstation Alternatives to Audacity
- Updated MP3 to MP4 Converter How to Convert MP3 to MP4, In 2024
- Exploring the Best A Ranked List of 10 Podcast Transcription Software Options
- Updated The Complete Audio Enhancement Manual From Raw Footage to Final Cut 2023S Methodology for 2024
- Updated 2024 Approved Top 8 Dictation Software for Windows, Mac and Online-2023 List
- The Audio-Visual Connection Top Music Picks That Elevate Your Diverse Video Projects
- New Crafting an Impressive Visual Saga Your In-Depth Tutorial on Podcast Cover Artistry
- Updated 2024 Approved DJ Haven Platforms for Exclusive Audio Mixes
- Updated 2024 Approved The Ultimate Guide to Finding and Downloading Pristine Birdsong MP3s
- Shape the Perception of Your Digital Dialogue Key Voice Transformation Tools for Skype Users for 2024
- Updated Crucial Guidelines for Crafting Your Ultimate YouTube Sound Bank for 2024
- New 2024 Approved Maximize Your Viewing Experience with These 4 Pioneering Audio Boosters Online
- Updated Top 10 Online Platforms for Sourcing Professional-Quality Montage Tracks
- Updated 2024 Approved Mac Video Editing Made Easy Download Splice Now
- Uncovering the Secrets of the Best OGG Converters for 2024
- Updated How To Generate Speech From Text | The Best Text-to-Speech Converters
- In 2024, How to Lock Apps on Tecno Spark Go (2023) to Protect Your Individual Information
- How to Fix the Soft Bricked Infinix Smart 8? | Dr.fone
- Can't open MOV files on HTC
- Why Apple Account Disabled From your Apple iPhone XR? How to Fix
- How to Transfer Videos from Samsung Galaxy XCover 6 Pro Tactical Edition to iPad | Dr.fone
- In 2024, How to Transfer Contacts from Poco C51 to Other Android Devices Devices? | Dr.fone
- 2024 Approved Top Video Metadata Editors for Windows and macOS
- In 2024, Why Your WhatsApp Location is Not Updating and How to Fix On Apple iPhone 14 Pro | Dr.fone
- How to Factory Reset Lava Yuva 2 Pro without Losing Data | Dr.fone
- How to Change Google Play Location On Xiaomi Redmi Note 12 Pro 4G | Dr.fone
- New 2024 Approved Gaming Intro Mastery The Top 10 Online Creators
- In 2024, 10 Free Location Spoofers to Fake GPS Location on your Nubia Z50 Ultra | Dr.fone
- In 2024, A Step-by-Step Guide on Using ADB and Fastboot to Remove FRP Lock from your Itel S23
- How to Restore Deleted OnePlus Open Photos An Easy Method Explained.
- In 2024, Top 10 Telegram Spy Tools On Lava Storm 5G for Parents | Dr.fone
- Does find my friends work on OnePlus 12 | Dr.fone
- In 2024, Make a Movie Online for Free Top 9 Options
- How To Change Your Apple ID Password On your Apple iPhone 15 Plus
- Updated 2024 Approved Fuel Creativity with 10 Awesome Collection of 2D Animation Examples
- Reliable User Guide to Fix Honor X9b Running Slow and Freezing | Dr.fone
- Hassle-Free Ways to Remove FRP Lock on Nokia XR21 Phones with/without a PC
- In 2024, Why Your WhatsApp Location is Not Updating and How to Fix On Samsung Galaxy A05 | Dr.fone
- How to Screen Mirroring Vivo Y100A to PC? | Dr.fone
- How to Bypass Apple iPhone 13 Passcode Easily Video Inside
- 2024 Approved From Photo to Cartoon The Ultimate App Roundup
- In 2024, FRP Hijacker by Hagard Download and Bypass your Infinix FRP Locks
- Title: Updated In 2024, Adding Effective Audio to Your QuickTime Projects 2023 Edition
- Author: Paul
- Created at : 2024-05-05 05:42:27
- Updated at : 2024-05-06 05:42:27
- Link: https://voice-adjusting.techidaily.com/updated-in-2024-adding-effective-audio-to-your-quicktime-projects-2023-edition/
- License: This work is licensed under CC BY-NC-SA 4.0.
