
:max_bytes(150000):strip_icc():format(webp)/how-to-use-a-ps5-controller-on-your-pc-or-mac-5089439-b56739aa27bd48858200878a6b64f952.jpg)
Updated How to Record Audio on PowerPoint? Guideline for Windows and Mac
How to Record Audio on PowerPoint? [Guideline for Windows and Mac]
Pandemic times have bought us very close to technology and the computerized world. We used various tools and software, we also learned about much new software in this time. We even came across some amazing features of tools that we have been using since our childhood. One best example of this scenario is PowerPoint.
We have been working on PowerPoint, making slides for a long time, but we recently came across the PowerPoint record audio feature. This is the most helpful feature one could imagine. When you cannot express yourself and your point in words, then the use of this PowerPoint voice recording feature jumps in. Stay with us to learn more about audio recording on PowerPoint.
In this article
01 How to Record Audio on PowerPoint in Windows?
02 How to Record Audio on PowerPoint in Mac?
03 7 PowerPoint Presentation Tips to Make Creative Slideshows
Part 1: How to Record Audio on PowerPoint in Windows?
Powerpoint is a presentation-based program. The Microsoft Office product is available for both Windows and macOS. PowerPoint is mostly used in offices for demonstration purposes. It is widely used by teachers to deliver their lectures. With record voice-over PowerPoint, its users can make better presentations.
A question arises here that how to record audio in PowerPoint presentations? If this same question is riding on your mind, then the wait is over. Let us share the steps that should be followed to record audio on PowerPoint in Windows.
Step 1: Firstly, you should open PowerPoint and add a blank slide to record voice-over PowerPoint. You can also record any old presentation by opening the slide where you plan to record audio.

Step 2: then, from the top menu bar, you are requested to head over to the ‘Insert’ section. From the Insert section, select the ‘Media’ option visible at the extreme right side.

Step 3: The Media offers 3 further options. Among those options, you have to hit the ‘Audio’ option. This will open a drop-down from where you have to click on ‘Record Audio.’

Step 4: Now, a small window for Record Sound will show up. Here, set a name for your recording and hit the Record button to start the recording.

Step 5: Once you have completed the recording, click on the Stop button to end the recording and then hit the ‘Ok’ button to exit the recording window.

Step 6: At the end, a speaker icon will appear on the screen. When you hover on that icon, it will show the option to play the recording. You can adjust the speaker icon on the slide, and lastly, save your changes to PowerPoint.

Part 2: How to Record Audio on PowerPoint in Mac?
As mentioned earlier, PowerPoint is available for both Windows and macOS, so how can we forget about Mac users? This section of the article will be talking about how to record audio on a PowerPoint Mac. If you are a Mac user and you plan to learn about this, then the following section is for you. By following the steps below, you can record audio on Powerpoint in Mac.
Step 1: Firstly, open PowerPoint and create a new presentation to record voice-over PowerPoint in Mac. You can also import any file from your Mac to PowerPoint for audio recording.

Step 2: After that, you have to open the slide where you want to record the audio. Then from the menu bar at the top, navigate to the ‘Insert’ section. In the Insert section, there will be an ‘Audio’ tab. Tap on it and then select the ‘Record Audio’ option.

Step 3: At this point, a Record Audio panel will show up on the right side of the screen. From that panel, click on the ‘Record’ button to start the recording.

Step 4: After you have completed the recording, hit the ‘Stop’ button. Now, PowerPoint will ask you to either Insert or Discard the audio. Upon clicking on ‘Insert,’ a speaker icon will pop up on the screen. You can listen to your recording from that speaker icon.

Part 3: 7 PowerPoint Presentation Tips to Make Creative Slideshows
Now that all the Windows and Mac users are satisfied after learning about PowerPoint voice recording, it’s the perfect time to share some very useful tips. In the coming part, we are going to share 7 tips that will aid in making creative slideshows.
1. Minimalism
The most crucial tip when it comes to making creative slides is the amount of information. It is said that ‘Less is More.’ While making your slides, you should always add less information to the slides, and you should speak more.
The slides must contain minimal data. Too many wordy slides look boring, and they can never sustain your audiences’ interest. So, it is best suggested to add less and make your slides neat and spacious.
2. Use Design Elements
Adding stock images and background images is a very common trend for making slides. A tip that will make your slides unique and equally attractive is design elements. Choosing a bold color for the background and then adding elements to it makes them shine. The elements dominate on a strong colored background. Images can never be this dominating or expressive.
Also, changing the common trends will make your presentation different and classic as compared to regularly designed slides.
3. One Story at a Time
A very common mistake that people generally make because they are unaware of it is the content. The best practice for quality presentation slides is to add and discuss one story per slide. You should never confuse your audience by sharing multiple things from the same slide.
If you plan to discuss various things, then make separate slides for each story. This way, the audience gets sufficient time to digest and understand one story before moving on to another.
4. Alignment and Symmetry
While making your slides, one key factor that can either make or break your presentation is consistency and alignment. You should never present a rough slide. Always align the text, images, and headings of your slides. Symmetry and consistency are also very important. Follow the same consistent pattern in all slides.
5. Formatting and Settings
Making your slides creative doesn’t mean making them like a rainbow. Simplicity has its own magic and grace. The more your slide is simple and clean, the more readable it is. You should always keep simple colors for text and headings.
Playing with different fonts and styles for headings might also disturb your presentation visually. Selecting the correct font size, style with appropriate colors is essential.
6. Add and Adjust
Always follow the ‘Add and Adjust’ policy. You should never throw data and elements on the slides and present them. The best practice is to add the content, the images and then adjust everything. You should always arrange the text in bullets with proper headings.
For the case of an image, you should add it, inspect it and if needed, crop it. Adding things with perfection makes your presentation stand out and shine differently.
7. Animation
Static slides are too mainstream for today’s fast world. The last tip to make creative slides that can retain your audiences’ attention is animation. By adding a few animated elements to your presentation makes it look classy and quirky. With animation, you can also maintain the interest of your audience.
Last Words
The article has discussed in detail that how someone could record a voice-over PowerPoint. A complete step-by-step guideline has been shared for both Mac and Windows users on audio recording with PowerPoint. We also talked about 7 tips that will surely improve the quality of your slides.
By using the right and effective tool, you can still make creative slides without bothering to follow any tips. Such a tool is Filmora by Wondershare. This is an all-in-one video editing software. With Filmora, you can make the perfect video slideshow by adding multiple images.
You can collectively import images from your device to Filmora, or else you can also take things from its stock library. Filmora also has a wide range of editing effects, filters, and transitions that can make your content aesthetic and perfect.
Versatile Video Editor - Wondershare Filmora
An easy yet powerful editor
Numerous effects to choose from
Detailed tutorials provided by the official channel
02 How to Record Audio on PowerPoint in Mac?
03 7 PowerPoint Presentation Tips to Make Creative Slideshows
Part 1: How to Record Audio on PowerPoint in Windows?
Powerpoint is a presentation-based program. The Microsoft Office product is available for both Windows and macOS. PowerPoint is mostly used in offices for demonstration purposes. It is widely used by teachers to deliver their lectures. With record voice-over PowerPoint, its users can make better presentations.
A question arises here that how to record audio in PowerPoint presentations? If this same question is riding on your mind, then the wait is over. Let us share the steps that should be followed to record audio on PowerPoint in Windows.
Step 1: Firstly, you should open PowerPoint and add a blank slide to record voice-over PowerPoint. You can also record any old presentation by opening the slide where you plan to record audio.
Step 2: then, from the top menu bar, you are requested to head over to the ‘Insert’ section. From the Insert section, select the ‘Media’ option visible at the extreme right side.
Step 3: The Media offers 3 further options. Among those options, you have to hit the ‘Audio’ option. This will open a drop-down from where you have to click on ‘Record Audio.’
Step 4: Now, a small window for Record Sound will show up. Here, set a name for your recording and hit the Record button to start the recording.
Step 5: Once you have completed the recording, click on the Stop button to end the recording and then hit the ‘Ok’ button to exit the recording window.
Step 6: At the end, a speaker icon will appear on the screen. When you hover on that icon, it will show the option to play the recording. You can adjust the speaker icon on the slide, and lastly, save your changes to PowerPoint.
Part 2: How to Record Audio on PowerPoint in Mac?
As mentioned earlier, PowerPoint is available for both Windows and macOS, so how can we forget about Mac users? This section of the article will be talking about how to record audio on a PowerPoint Mac. If you are a Mac user and you plan to learn about this, then the following section is for you. By following the steps below, you can record audio on Powerpoint in Mac.
Step 1: Firstly, open PowerPoint and create a new presentation to record voice-over PowerPoint in Mac. You can also import any file from your Mac to PowerPoint for audio recording.
Step 2: After that, you have to open the slide where you want to record the audio. Then from the menu bar at the top, navigate to the ‘Insert’ section. In the Insert section, there will be an ‘Audio’ tab. Tap on it and then select the ‘Record Audio’ option.
Step 3: At this point, a Record Audio panel will show up on the right side of the screen. From that panel, click on the ‘Record’ button to start the recording.
Step 4: After you have completed the recording, hit the ‘Stop’ button. Now, PowerPoint will ask you to either Insert or Discard the audio. Upon clicking on ‘Insert,’ a speaker icon will pop up on the screen. You can listen to your recording from that speaker icon.
Part 3: 7 PowerPoint Presentation Tips to Make Creative Slideshows
Now that all the Windows and Mac users are satisfied after learning about PowerPoint voice recording, it’s the perfect time to share some very useful tips. In the coming part, we are going to share 7 tips that will aid in making creative slideshows.
1. Minimalism
The most crucial tip when it comes to making creative slides is the amount of information. It is said that ‘Less is More.’ While making your slides, you should always add less information to the slides, and you should speak more.
The slides must contain minimal data. Too many wordy slides look boring, and they can never sustain your audiences’ interest. So, it is best suggested to add less and make your slides neat and spacious.
2. Use Design Elements
Adding stock images and background images is a very common trend for making slides. A tip that will make your slides unique and equally attractive is design elements. Choosing a bold color for the background and then adding elements to it makes them shine. The elements dominate on a strong colored background. Images can never be this dominating or expressive.
Also, changing the common trends will make your presentation different and classic as compared to regularly designed slides.
3. One Story at a Time
A very common mistake that people generally make because they are unaware of it is the content. The best practice for quality presentation slides is to add and discuss one story per slide. You should never confuse your audience by sharing multiple things from the same slide.
If you plan to discuss various things, then make separate slides for each story. This way, the audience gets sufficient time to digest and understand one story before moving on to another.
4. Alignment and Symmetry
While making your slides, one key factor that can either make or break your presentation is consistency and alignment. You should never present a rough slide. Always align the text, images, and headings of your slides. Symmetry and consistency are also very important. Follow the same consistent pattern in all slides.
5. Formatting and Settings
Making your slides creative doesn’t mean making them like a rainbow. Simplicity has its own magic and grace. The more your slide is simple and clean, the more readable it is. You should always keep simple colors for text and headings.
Playing with different fonts and styles for headings might also disturb your presentation visually. Selecting the correct font size, style with appropriate colors is essential.
6. Add and Adjust
Always follow the ‘Add and Adjust’ policy. You should never throw data and elements on the slides and present them. The best practice is to add the content, the images and then adjust everything. You should always arrange the text in bullets with proper headings.
For the case of an image, you should add it, inspect it and if needed, crop it. Adding things with perfection makes your presentation stand out and shine differently.
7. Animation
Static slides are too mainstream for today’s fast world. The last tip to make creative slides that can retain your audiences’ attention is animation. By adding a few animated elements to your presentation makes it look classy and quirky. With animation, you can also maintain the interest of your audience.
Last Words
The article has discussed in detail that how someone could record a voice-over PowerPoint. A complete step-by-step guideline has been shared for both Mac and Windows users on audio recording with PowerPoint. We also talked about 7 tips that will surely improve the quality of your slides.
By using the right and effective tool, you can still make creative slides without bothering to follow any tips. Such a tool is Filmora by Wondershare. This is an all-in-one video editing software. With Filmora, you can make the perfect video slideshow by adding multiple images.
You can collectively import images from your device to Filmora, or else you can also take things from its stock library. Filmora also has a wide range of editing effects, filters, and transitions that can make your content aesthetic and perfect.
Versatile Video Editor - Wondershare Filmora
An easy yet powerful editor
Numerous effects to choose from
Detailed tutorials provided by the official channel
Comprehensive Catalog of Podcast Indexing Services
Submitting your podcast show on different platforms is essential to get the right audiences. As we all know, the more podcast directories you publish your show, the more listeners you get.
Yet, finding the ideal choices can take time and effort with many podcast directories available online. Worry less. We’ve compiled a list of the best podcast directories you can always count on to publish your podcast show anytime.
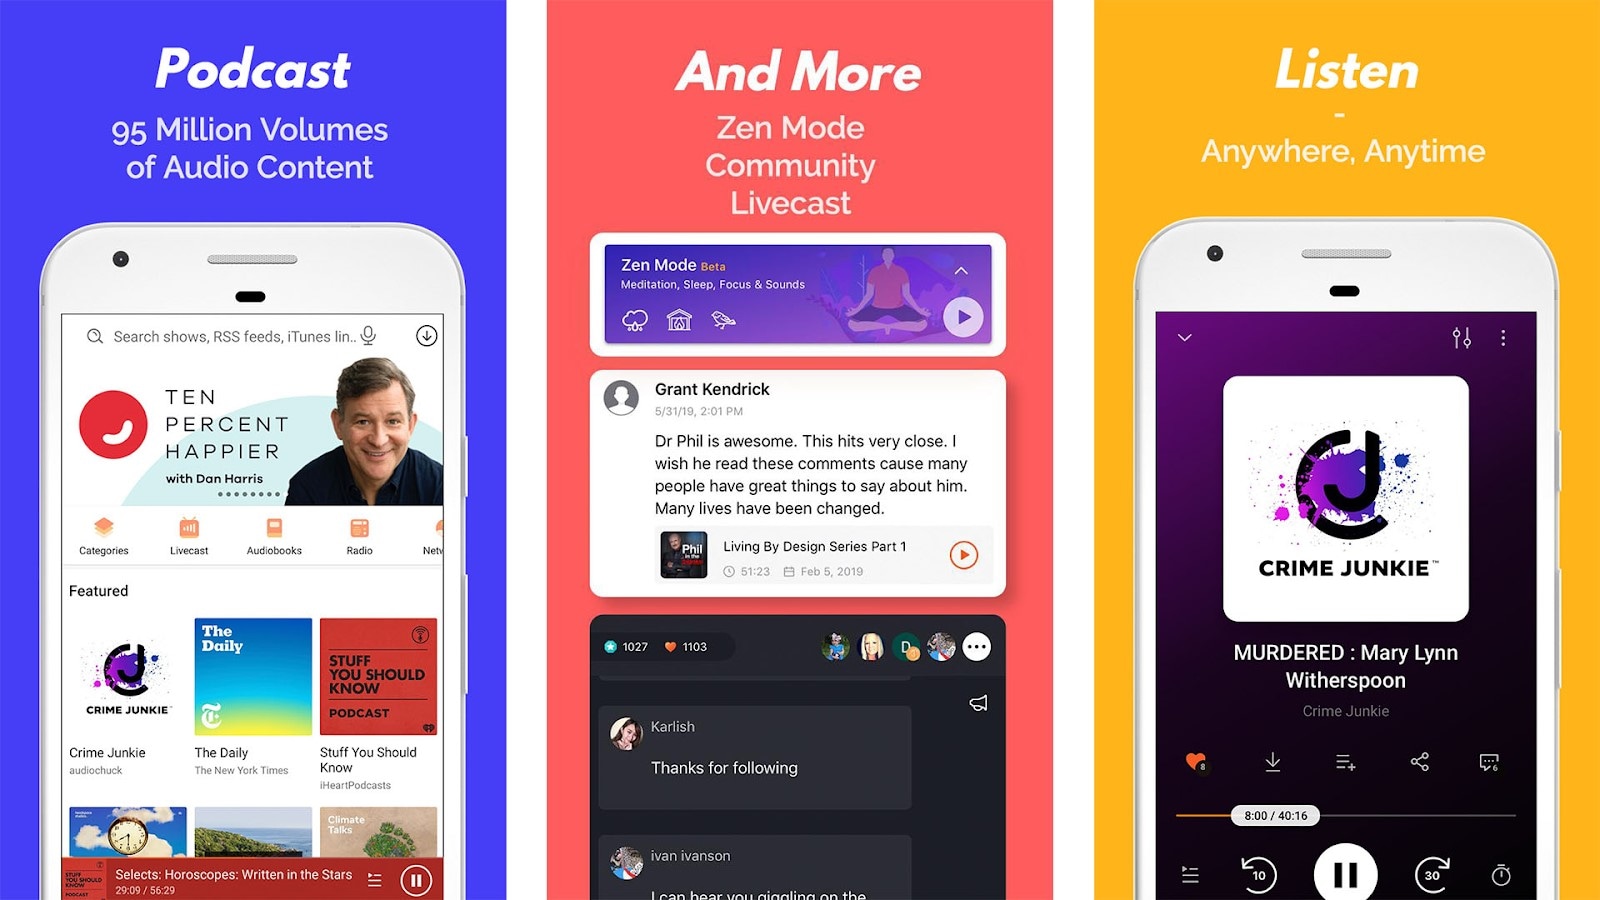
- YouTube
- Spotify
- Apple Podcasts
- Google Podcasts
- Pandora
- Audible
- NPR One
- Tune In
- Podcast Addict
- RadioPublic
- Overcast
- Pocket Casts
- CastBox
- Stitcher
- More choices to submit your podcast shows
- How to submit a show to podcast directories?
- Hot FAQs on Podcast Directories
Part 1. What are podcast directories?
A podcast directory is a listening app. It’s the place where podcasts and their listeners meet. Podcast listeners search for, subscribe to, and listen to your Podcast using their podcast directory of choice. Popular podcast directories include Apple Podcasts, Spotify, and Google Podcasts.
Part 2. 15 Top podcast directories to focus on in 2024
Thankfully, research conducted by EdisonResearch shows the weekly audience reach of top podcast directories. So this list will help us locate the best podcasting directories. And it can multiply your audience size and quickly reach a more extensive user base.
According to Edison Research, the top 15 Podcast Networks are:
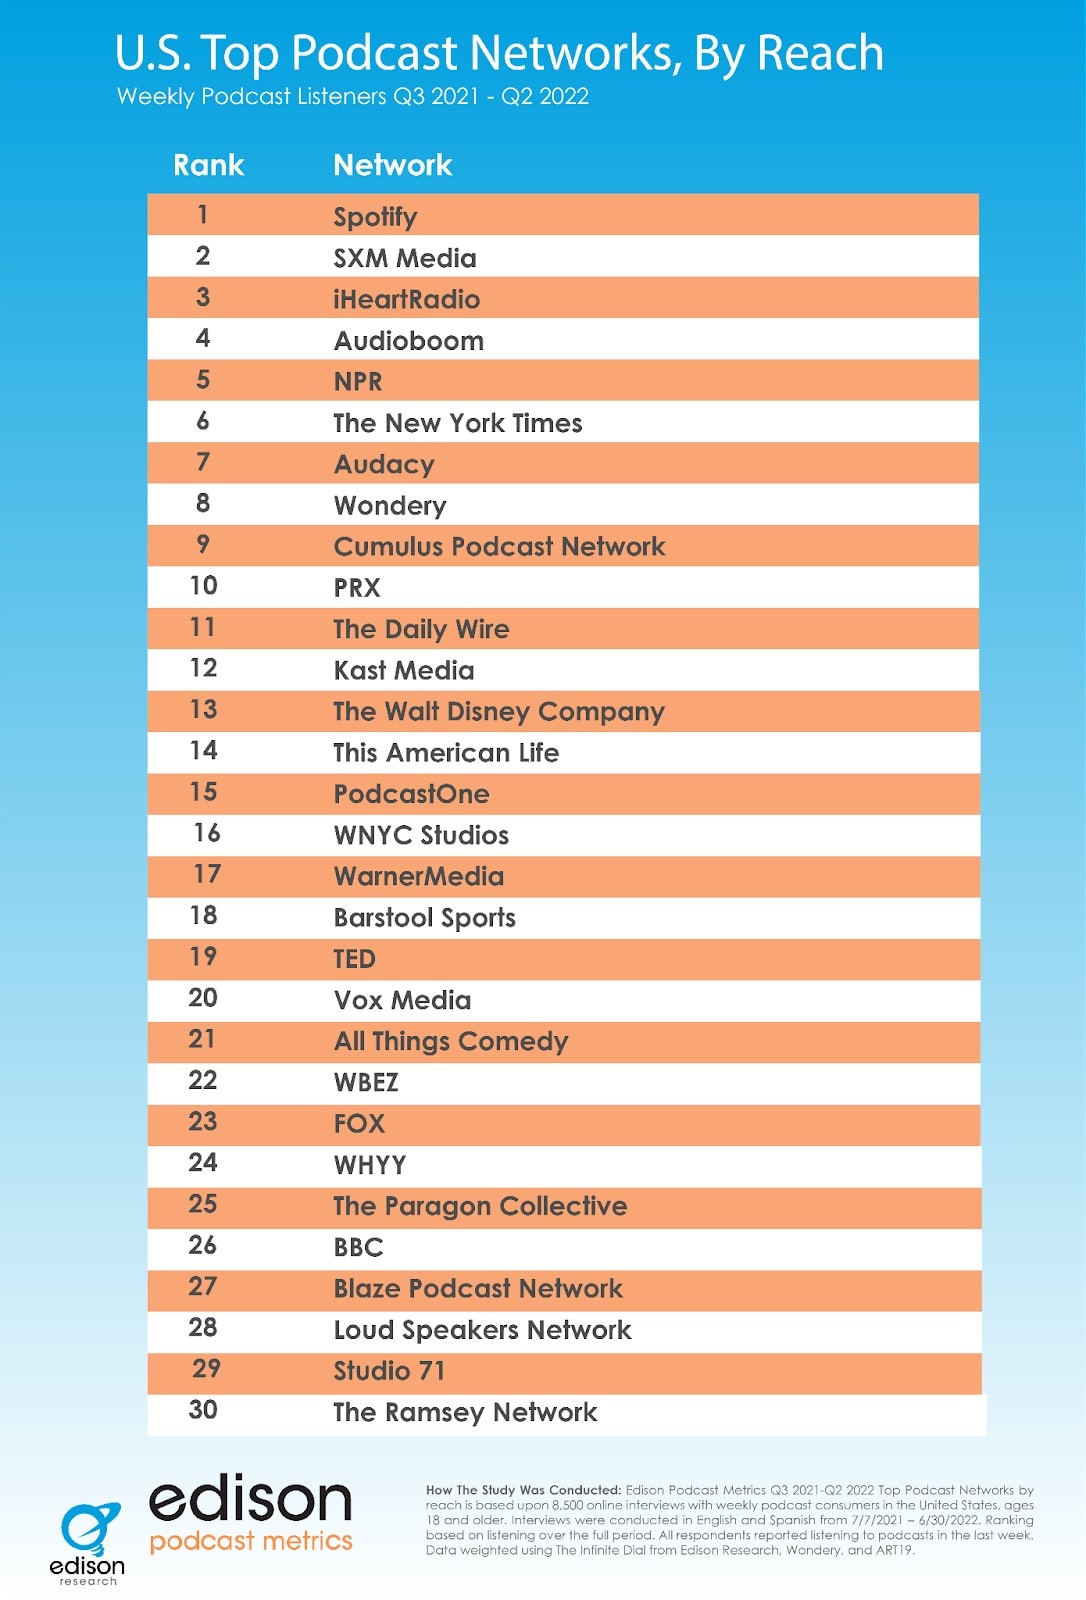
You must retain that Edison’s research only analyzes the US podcast services. Yet, our guide has compiled the best podcasting directories to connect with users worldwide.
Below you will find the list of top podcast directories and their reviews. But keep in mind that when it comes to podcast directories, there is no such thing as best or worse. Instead, it’s all about the user base and audience reach. So, it is best to submit your podcasts to multiple podcasting directories.
1. YouTube
With a monthly active user base of 2.5 billion, YouTube should be the top choice of any podcast creator. According to a recent survey by Statista, YouTube took over Spotify to become the largest platform for podcast consumption worldwide. Additionally, 47.7% of the US audience prefers YouTube over other platforms for listening to podcasts.
Not to forget, YouTube comes pre-installed on all smartphones and is also accessible via the Web to users worldwide. Another benefit of YouTube is that it is free for creators and users. Plus, once you grow your user base, it also allows you to get surplus revenue.

Of course, YouTube is a video-only platform. Still, you can use tools like Wondershare Filmora to create video-based podcasts seamlessly. You can simply convert the video podcasts into an audio format using Filmora itself and then reupload the same Podcast to even audio-based podcast directories.
Free Download For Win 7 or later(64-bit)
Free Download For macOS 10.14 or later
Tools like Fimora also allow you to directly publish the created Podcast on YouTube (so you do not have to worry about video requirements mandatory for YouTube).
- User Review of YouTube on G2: “YouTube is one of those sites that you can’t live without for a business. Everyone knows what YouTube is, and users (globally) use the platform daily.”
- Monthly User Base: Over 2.5 billion active users.
- Supported OS: All major OS and web browsers.
2. Spotify
Spotify has over 389 million listeners across 187 markets worldwide. Available on all major OS and its web presence makes it one of the best directories of podcasts on the internet.
Aside from its audience base, Spotify also provides real-time insights, like who your audience is, what they like, which episodes they prefer, and even what songs they want. All these insights will also help you plan your future content according to the audience.
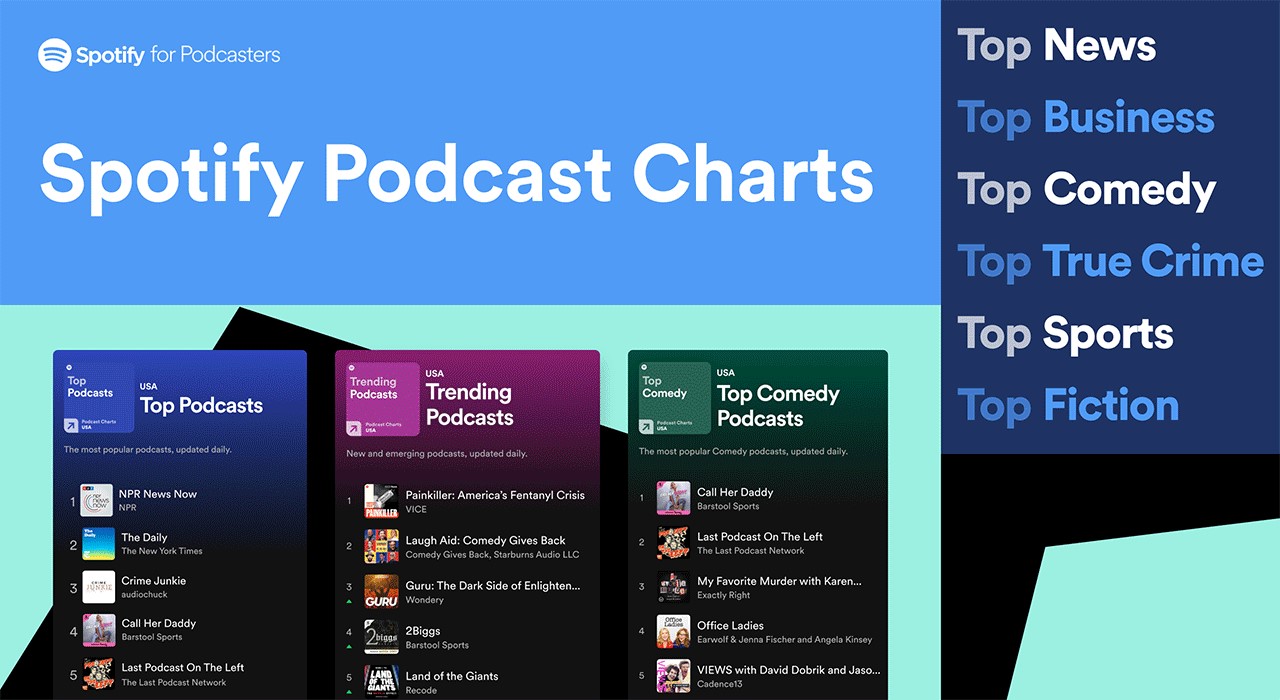
Spotify’s personalized recommendations and algorithms are another pluses, given you can get discovered easily/ Like YouTube, Spotify allows you to upload even video podcasts. While you can also create and upload podcasts in audio format only.
- User Review of Spotify on G2: “I can find any song, artist, album, and even podcasts at any time and no commercials.”
- Monthly User Base: Over 360 million active users.
- Supported OS: All major OS and web browsers.
3. Apple Podcasts
Apple Podcast is another top directory for a podcast that creators cannot ignore. Given it is an exclusive-podcast platform, its 28.5 million active user base in more than 170 countries and regions is enough to tell its greatness.
It is essential to understand that YouTube and Spotify are not exclusive podcast platforms like Apple Podcasts. And while Spotify and YouTube are best for connecting novice podcast listeners, Apple Podcast is the way to go if you want to connect with a dedicated podcast community.
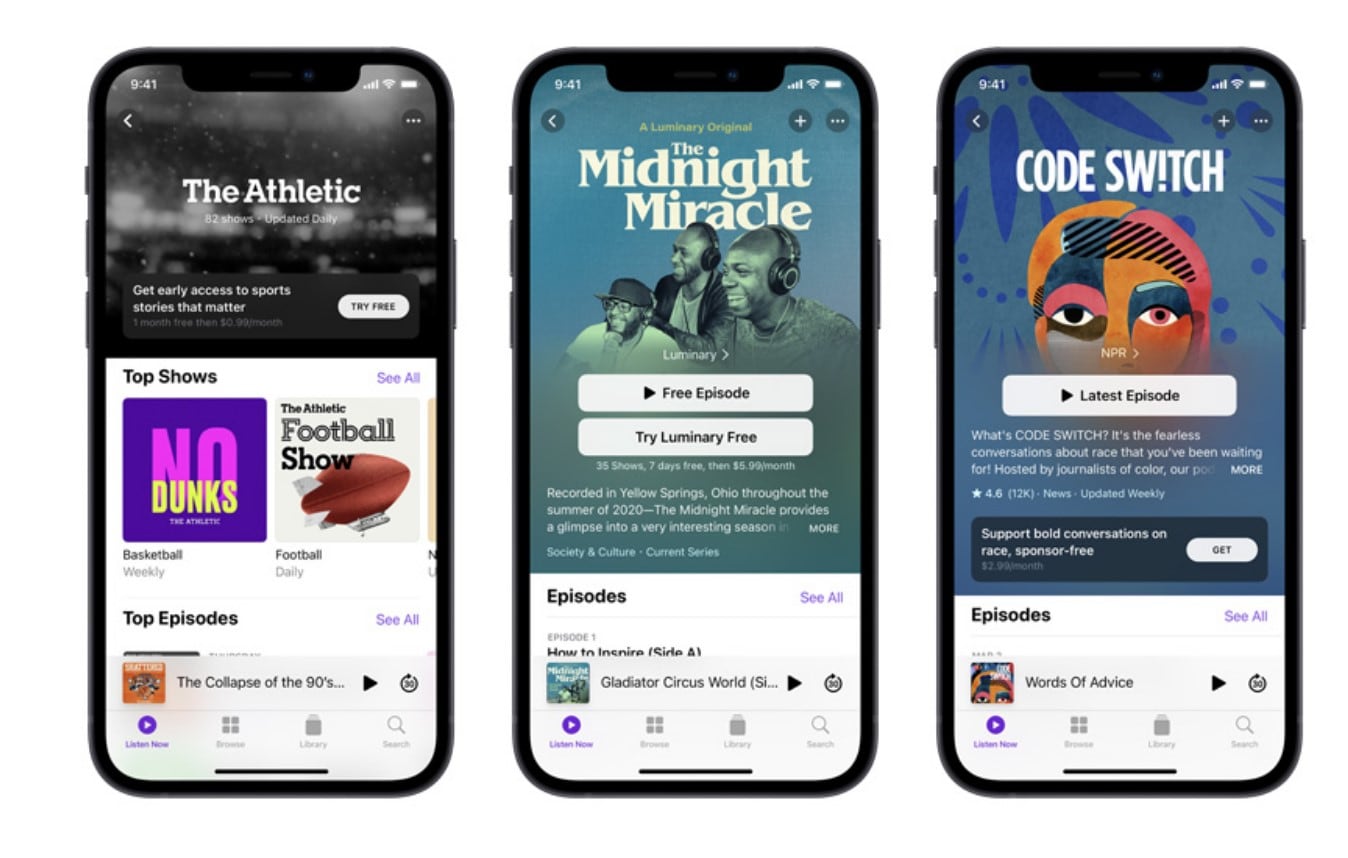
The best thing about the Apple Podcast directory is it allows you to create a podcast (via Apple Podcast Connect), but you must be an Apple user. However, you can submit your podcasts to Apple Podcast via RSS feed even if you are not an Apple user.
In all, given Apple Podcast is available for Apple users and is known by default on all Apple devices (the most prominent smartphone company in the world), Apple Podcast is a must-use podcast directory.
- User Review of Apple Podcast: “Apple once again nails with simplicity, millions of shows of my interest, and freemium service.”
- Monthly User Base: Over 28.5 million active users.
- Supported OS: All Apple devices.
4. Google Podcasts
Google Podcasts has over 100 million downloads on Play Store alone and is also available on the web, App Store, Blackberry, and ChromeOS users. A completely subscription-free and ad-free platform, Google Podcasts is one of the top podcasting directories among users.
However, unlike the Apple Podcast directory, it does not have a studio, so you can only submit your podcasts via RSS feeds. Still, its user base and the advanced algorithms are an opportunity to connect with users who like the subjects you discuss.
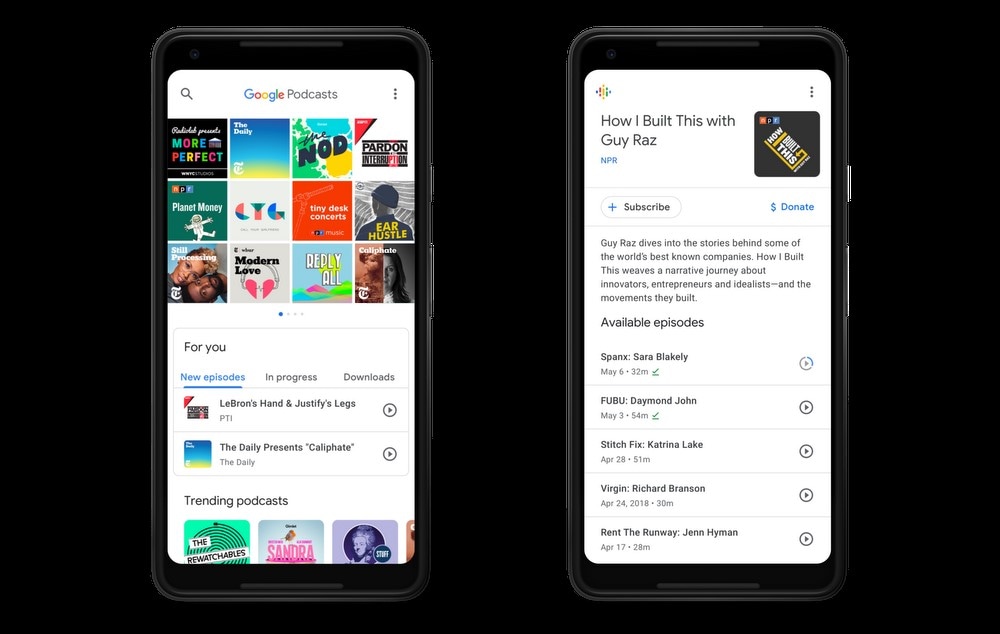
Like Spotify and Apple Podcast directories, Google Podcasts also show you real-time analytics and guide you about users so that you can plan your content accordingly. Given that it only requires a Google account to start, it is another top podcast directory you cannot ignore.
- User Review of Google Podcast
“Google Podcast includes everything that a podcast listener wants. It’s simple, free, and includes valuable options like Sleep Timer, Playback speed, and more.”
- Monthly User Base: Over 30 million active users.
- Supported OS: Dedicated apps for all major OS and web presence.
5. Pandora
Pandora has over 64 million monthly active users, with a listener spending up to 24 hours/monthly on the platform. It explains that users spend up to 45 minutes on the Pandora platform tuning in to their favorite podcasts. Again, its search-based algorithms allow you to get discovered by users that like subjects and topics on which you’re creating podcasts, meaning it is simple to connect with a large user base conveniently.
Pandora only accepts podcasts via RSS feed, which should be in MP3 format. But recent notifications have shown more audio formats will be added.
However, it is vital to retain that Pandora Podcast’s team critically analyzes all submissions manually. So, it might take up to 4-6 weeks for your first Podcast to appear on the platform.
- User Review of Pandora Podcast
“Pandora Podcasts recommendations are a blessing for me, who always finds it confusing to locate the right episode to spend my time on.”
- Monthly User Base: Over 64 million active users.
- Supported OS: Dedicated apps for all major OS and web presence.
6. Audible
Although popular among audiobook lovers, Audible has a considerable podcast following too. Its monthly active user base is around 41 million. The biggest benefit of registering your Podcast on the Audible directory of podcasts is that it connects with users who use Alexa to discover new podcasts.
Besides Audible, the Podcast will also be available for users of the Amazon Music app. That means you can connect with even more users via one submission only. Not to forget, Amazon Prime Video (a massive following) users get a free subscription to Amazon Music, so there’s a perfect chance that you will connect with users conveniently.
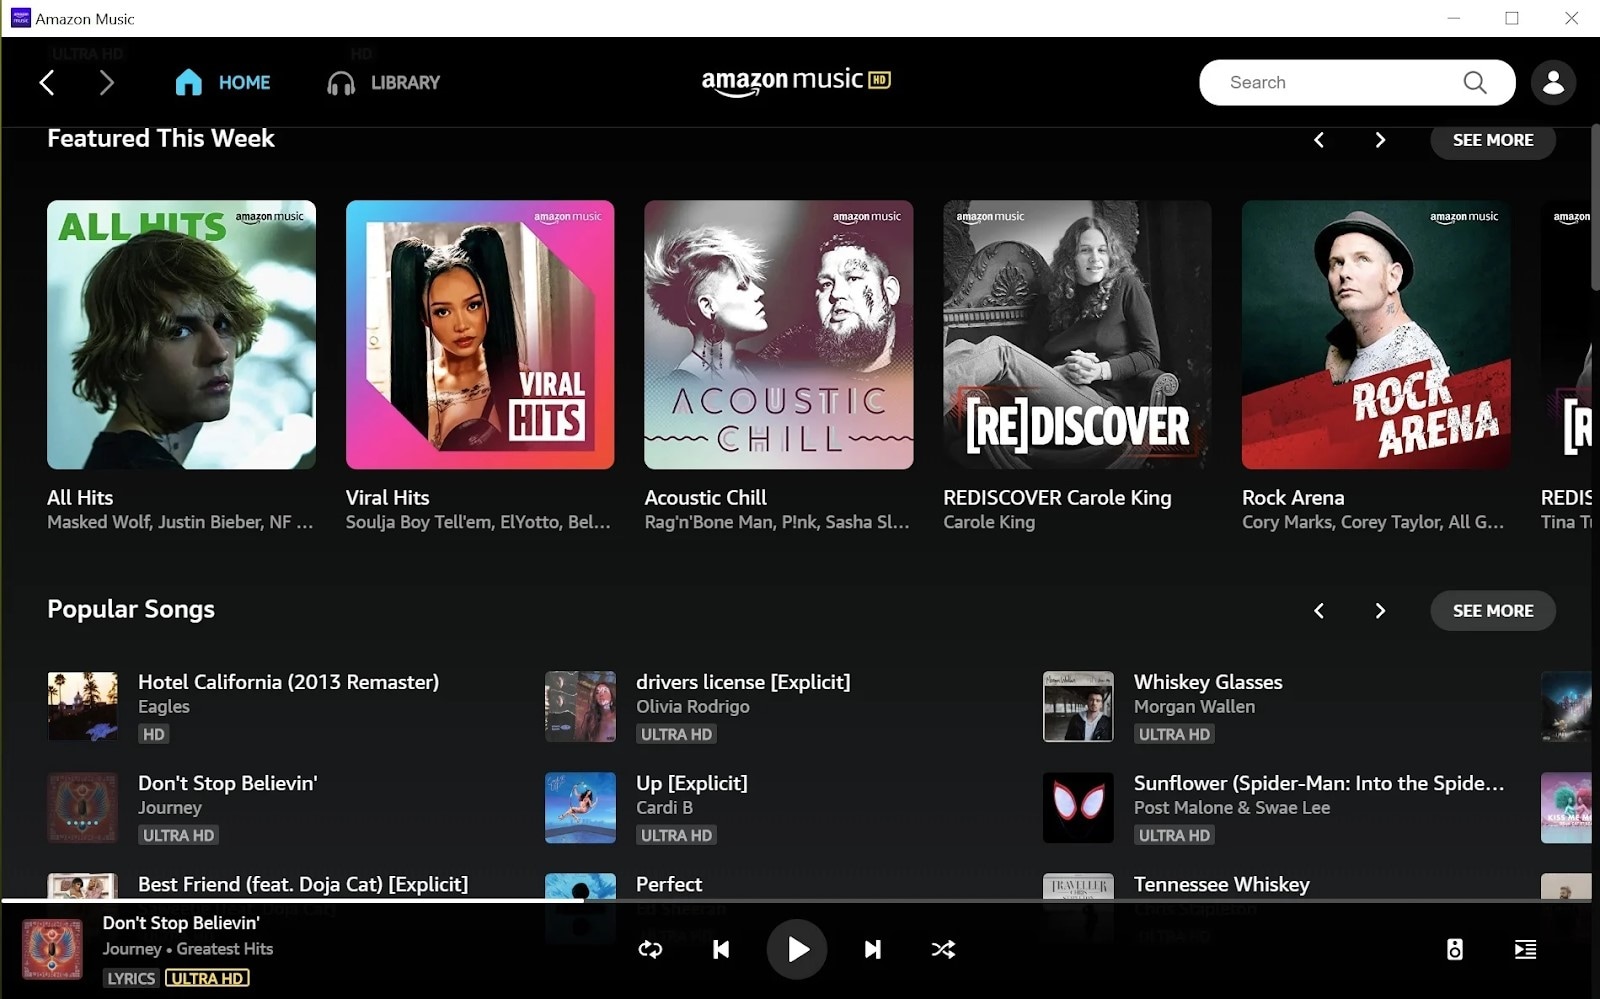
It is important to note that both Amazon Music and Audible offer podcasts for entirely free to users, so a more extensive user base prefers these platforms over paid platforms.
- User Review of Pandora Podcast
“You get to listen to any audiobook in the “included” library no matter which subscription you purchase..”
- Monthly User Base: Over 64 million active users.
- Supported OS: Android, iOS,
7. NPR One
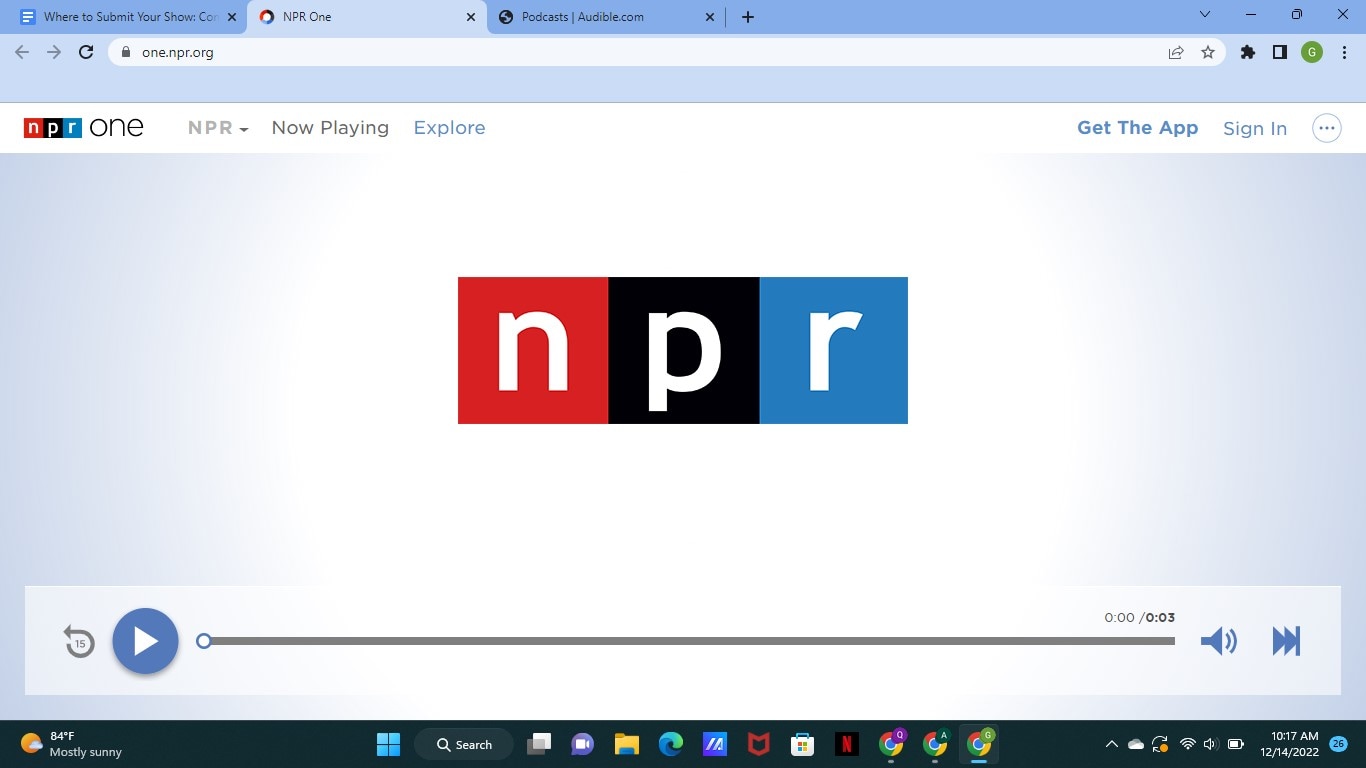
With an average listener spending up to 145 minutes weekly, the NPR One podcast directory is one of the best podcast directories you can trust to submit your show online. The podcast directory has a userbase of over 500 thousand users globally, and
- User Review of NPR One Podcast
“I’ve been using this app for years now. It’s been my trusty companion to give me the news. I primarily use it with the sleep timer. I’m not a super picky consumer, especially when I don’t pay for the app!
But for many months now, the sleep timer will frequently think the time is up and shut off the player well before it should. The player will often shut off within 5 minutes of using the 30 min sleep timer. It’s annoying to open the player hit resume, and reset the sleep timer.”
- Monthly User Base: 500 thousand
- Supported OS: Android, iOS
8. Tune In
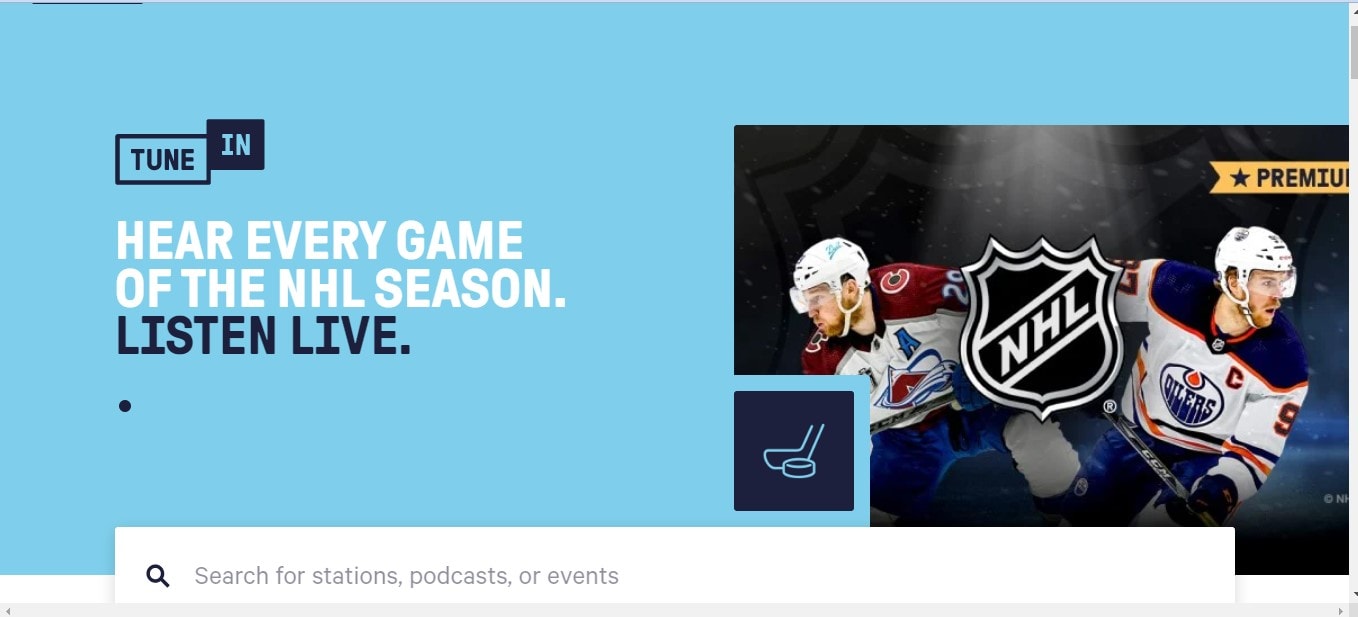
Technically, TuneIn is a radio. But lately, it has become prevalent amongst podcast listeners to find their favorite shows and also listen to music. The podcast directory has a global user base of over 75 million and a monthly visit of 7million+, which makes it a great spot for any podcaster to publish their show.
- User Review of Tune In Podcast
“I’ve been using the app for 4 years. I like it, but there are some annoying “features.”
the screen won’t time out when the app is active.
the developers must have recently made a change. I used to search through my list of “recent” (there were about 20) to look for new episodes of my favorite podcasts.
Now, the app only allows me to see the last four podcasts or stations I have listened to. So it is not helpful.’
- Monthly User Base: Over 7 million active users
- Supported OS: Dedicated apps for all major OS and web presence.
9. Podcast Addict
With over 10 million downloads on Google Playstore, Podcast Addict is one of Android’s most popular podcast apps. You can publish your podcast show, as it allows you to connect with the ideal audience quickly and easily.
Also, Podcast Addict is one of the few podcast directories available in various languages, including French and German. So it’s a perfect choice non-English podcasters.
- User Review of PodcastAddit
**”**Been using this for years. It does everything I could ever want when listening/ referencing/ re-listening to my favorite podcasts and a lot more.
I’ve suffered through having to use other podcast players (e.g., listening to something “exclusive”), but I couldn’t stand the inane simplicity of other players long enough to finish their content.
Also, it takes a bit to get used to (especially if you’re coming from other stripped-down players), but very worth the small effort for a powerful app.”
- Monthly User Base: Over 750 thousand active users.
- Supported OS: Dedicated Android App and web presence.
10. RadioPublic

Having been in the game for over 15 years, RadioPublic is another excellent podcast directory you can count on to submit your show. Although the platform does not have a massive user base compared to its competitors, it will help you grow your listeners and business by getting your podcast show to the right audience.
On RadioPublic, an average listener spends up to 72 minutes every day finding new podcast shows and listening to new episodes from their favorite podcasts. And given that the platform offers many robust features, listeners can enjoy a seamless listening experience on any device.
Overall, the RadioPublic podcast directory offers you a smart way to publish your show and grow your audience without going through stress.
- User Review of RadioPublic
“Glad I waited a while to find a podcast website provider. Starting from scratch in WordPress seemed too much hassle. Luckily the site came along while I was dithering about what to do.
The RadioPublic team onboarded the other 5 billion podcasts as one of the first examples, and I’m delighted to have chosen this option. Already, my pod site feels “complete” to look at, and more features are coming soon that will help with marketing, understanding listeners, and building a podcast brand.”
- Monthly User Base: Over 300 Thousand active users
- Supported OS: Dedicated apps for all major OS and web presence.
11. Overcast
Overcast is a dedicated podcast app for Apple devices, and what makes it a great podcast directory is that it offers unique features that attract many listeners.
On this platform, you’ll be allowed to display advertising slots, enabling listeners to subscribe to your podcast show within a few clicks. Plus, unlike many of its competitors, listeners have control over what podcast show is displayed in the featured podcast section. It is helpful as it lets listeners quickly discover every new episode you publish.
Overall, many incredible features make Overcast a good choice, and chances are your Podcast will get to real listeners when you publish them here.
- User Review of Overcast
**”**Nice alternative to Apple’s. I’ve been well pleased so far. It isn’t always the most intuitive, but I’ve eventually figured out how to achieve almost everything I’ve wanted to. The benefits of adding a show via RSS have become immediately clear.
Being a subscriber to a show and getting early access episodes and bonus material right in my podcast manager makes it easy to stay up with all my shows.”
- Monthly User Base: Over 70 Thousand active users.
- Supported OS: Dedicated app for iOS and web presence.
12. Pocket Casts
If you’re looking for a free podcast directory to publish your Podcast show, Pocket Casts is the ideal one for you. This podcast directory is packed with many rich features that podcasters will find very helpful. In addition, thanks to its beautifully designed website interface, you won’t find the platform difficult to use.
Besides, many listeners love Pocket Podcasts as it offers them incredible features—for example, improved discovery options, playback speed options, and lots more. In addition, they’ve enhanced how they find and listen to podcasts on the platform. You can’t go wrong publishing your show on a platform like this one.
- User Review of Pocket Casts
“Wonderful app, the most reliable one I’ve found. Even with accounts, most others lose all your progress data which hasn’t happened once with this, and I’ve switched phones 3 times. The progress tracker is so accurate you can pause on one device, open the same account and continue listening. Most apps can’t even keep things downloaded. Search does take a minute but finds stuff no other app does.”
- Monthly User Base: Over 1 Million active users.
- Supported OS: Dedicated apps for all major OS and web presence.
13. CastBox
CastBox is another unique podcast directory that podcasters trust to publish their show online. The platform boasts an optimized SEO and artificial intelligence that lets listeners find new podcast shows. Thanks to its massive user base of up to 20 Million users, your Podcast could reach a wide range of audiences quickly and easily.
Also, CastBox offers social media features that allow listeners to comment and share your podcast show on their social media page, thus helping you get your show to more listeners and potentially increase your fanbase.
- User Review of CastBox
“I’ve been a podcaster for years and an avid podcast listener for a while. So I searched high and low for the best podcast app and distribution service, Castbox. They have a great app and website, a huge content library, and a superb feature set. Also, their app allows offline listening, as I can download my favorite podcast show.”
- Monthly User Base: Over 1 million active users
- Supported OS: Dedicated apps for all major OS and web presence.
14. Stitcher
Last but not least podcast directory on our list is Stitcher. The platform boasts more than 14.5 Million active listeners, with an average listener having up to 25 hours of listening duration per month.
Stitcher helps you alleviate the stress of getting your show to the right audience, and thanks to the platform’s easy podcast submission requirements, you only need to have at least one podcast episode on your RSS Feed to get approved.
Also, Stitcher offers a unique analytic tool that allows you to track the performance of your show on the platform, and what more impressive is that it’s integrated into more than fifty car models. In addition, it works with any vehicle that supports Apple’s CarPlay and Android Auto, which makes it a great choice for podcasters who believe their audience loves to listen to their show while driving.
- User Review of Stitcher
“So glad I switched! I have my podcasts but didn’t listen to them much - partially because Apple Podcasts is so hard to use. I switched to Stitcher to listen to The Magnus Archives, and I love it!”
- Monthly User Base: Over 1.5 million active users.
- Supported OS: Dedicated apps for all major OS and web presence.
Part 3. More choices to submit your podcast shows
The above Podcast directories are great choices you can always count on any day. However, if you’re looking for more options, the following are reliable podcasting directories to choose from;
Part 4. How to submit a show to podcast directories?
Submitting a podcast show to podcast directories is pretty simple. Here, we used Spotify as an example to show you how you can easily submit your podcast show within a few clicks. The steps are as follows;
Step1 Create a Spotify account using the email attached to your podcast host.
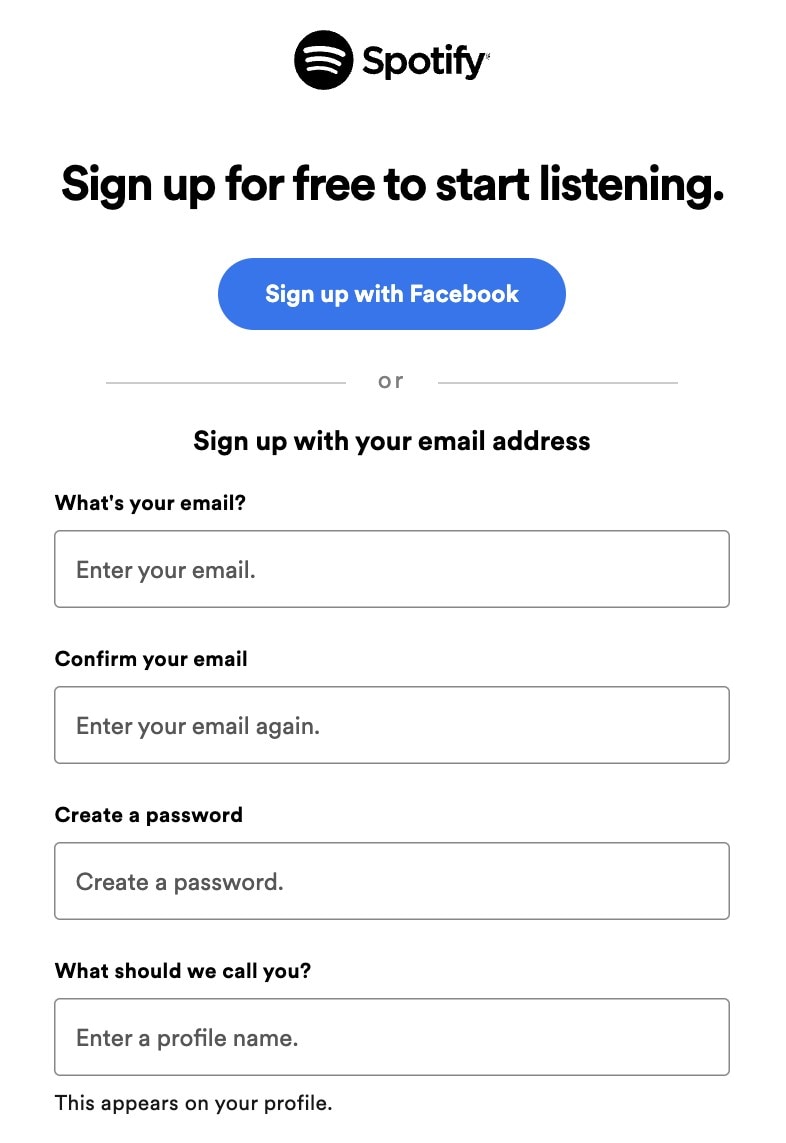
Step2 Open Spotify for Podcasters in your browser and login into your account. Then, click Get Started on the new screen.
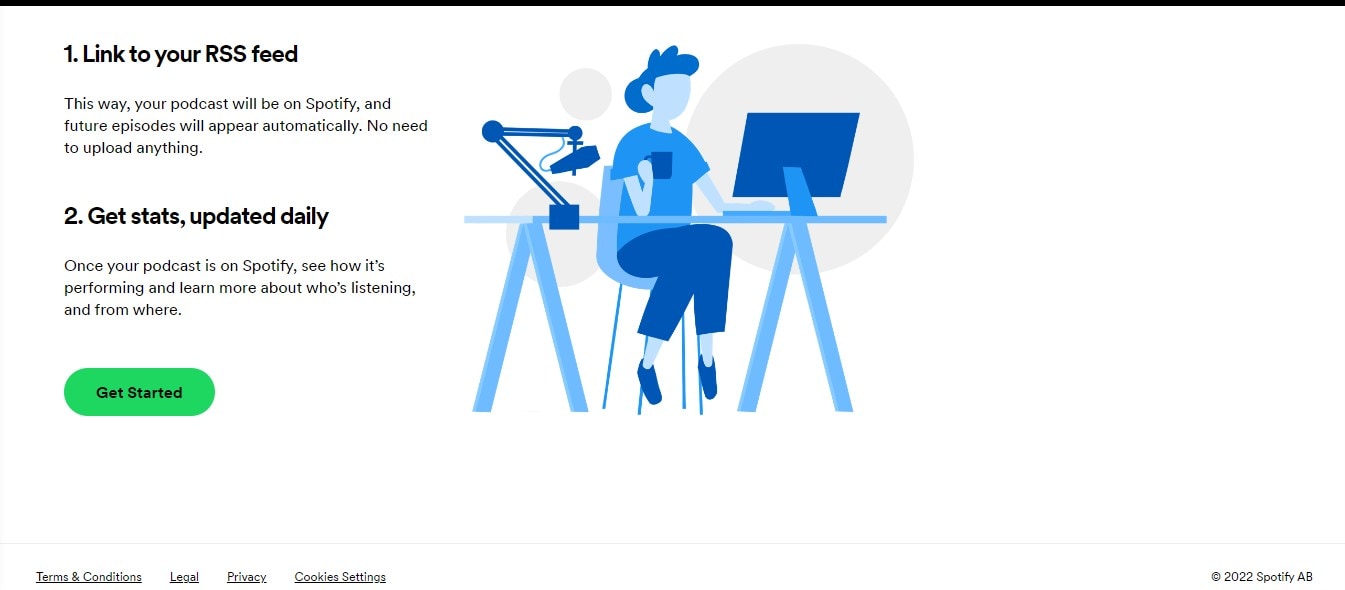
Step3 Provide your Podcast’s RSS Feed and click Next to proceed.
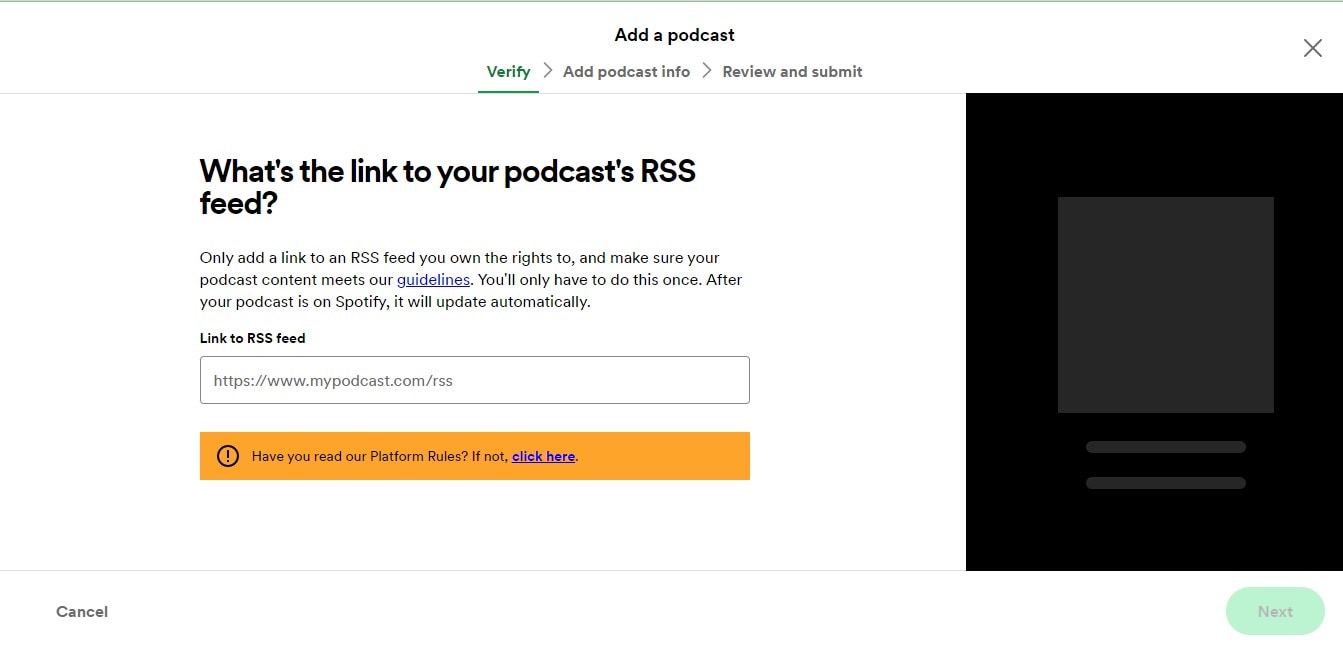
Step4 You’ll be asked to add information about your Podcast, from its description to the title, artwork, etc.
Step5 Verify the Podcast by submitting the code sent to your email.
Step6 Review the information you’ve provided so far and submit it to Spotify for review.
Once you complete the steps, keep an eye on the submitted Podcast, as Spotify won’t message you even if your Podcast has been published.
Hot FAQs on Podcast Directories
1. Are podcast directories free?
Almost all top podcast directories are entirely free for creators. All you have to do is sign up on the platforms. Then, check the platform’s requirements to submit your podcast episodes, like the format, cover photos, and description. Of course, the requirements vary depending on the platform.
2. Can any podcast be on a directory of podcasts?
Yes, you can choose from any podcast directory to publish your Podcast. There’s no limitation. When submitting, you must select the ideal category for your podcast show so it can be displayed to the right audience.
3. Does it cost to join a podcast directory?
Yes, and the cost of joining a podcast directory varies depending on your platform.
Conclusion
The podcast directories introduced above are reliable for submitting podcast shows. So, chances are there, no matter what your podcast show is about. It’ll help you connect with the right audience. However, one thing is vital you need to make sure you choose the podcast directory that suits you.
Part 1. What are podcast directories?
A podcast directory is a listening app. It’s the place where podcasts and their listeners meet. Podcast listeners search for, subscribe to, and listen to your Podcast using their podcast directory of choice. Popular podcast directories include Apple Podcasts, Spotify, and Google Podcasts.
Part 2. 15 Top podcast directories to focus on in 2024
Thankfully, research conducted by EdisonResearch shows the weekly audience reach of top podcast directories. So this list will help us locate the best podcasting directories. And it can multiply your audience size and quickly reach a more extensive user base.
According to Edison Research, the top 15 Podcast Networks are:
You must retain that Edison’s research only analyzes the US podcast services. Yet, our guide has compiled the best podcasting directories to connect with users worldwide.
Below you will find the list of top podcast directories and their reviews. But keep in mind that when it comes to podcast directories, there is no such thing as best or worse. Instead, it’s all about the user base and audience reach. So, it is best to submit your podcasts to multiple podcasting directories.
1. YouTube
With a monthly active user base of 2.5 billion, YouTube should be the top choice of any podcast creator. According to a recent survey by Statista, YouTube took over Spotify to become the largest platform for podcast consumption worldwide. Additionally, 47.7% of the US audience prefers YouTube over other platforms for listening to podcasts.
Not to forget, YouTube comes pre-installed on all smartphones and is also accessible via the Web to users worldwide. Another benefit of YouTube is that it is free for creators and users. Plus, once you grow your user base, it also allows you to get surplus revenue.
Of course, YouTube is a video-only platform. Still, you can use tools like Wondershare Filmora to create video-based podcasts seamlessly. You can simply convert the video podcasts into an audio format using Filmora itself and then reupload the same Podcast to even audio-based podcast directories.
Free Download For Win 7 or later(64-bit)
Free Download For macOS 10.14 or later
Tools like Fimora also allow you to directly publish the created Podcast on YouTube (so you do not have to worry about video requirements mandatory for YouTube).
- User Review of YouTube on G2: “YouTube is one of those sites that you can’t live without for a business. Everyone knows what YouTube is, and users (globally) use the platform daily.”
- Monthly User Base: Over 2.5 billion active users.
- Supported OS: All major OS and web browsers.
2. Spotify
Spotify has over 389 million listeners across 187 markets worldwide. Available on all major OS and its web presence makes it one of the best directories of podcasts on the internet.
Aside from its audience base, Spotify also provides real-time insights, like who your audience is, what they like, which episodes they prefer, and even what songs they want. All these insights will also help you plan your future content according to the audience.
Spotify’s personalized recommendations and algorithms are another pluses, given you can get discovered easily/ Like YouTube, Spotify allows you to upload even video podcasts. While you can also create and upload podcasts in audio format only.
- User Review of Spotify on G2: “I can find any song, artist, album, and even podcasts at any time and no commercials.”
- Monthly User Base: Over 360 million active users.
- Supported OS: All major OS and web browsers.
3. Apple Podcasts
Apple Podcast is another top directory for a podcast that creators cannot ignore. Given it is an exclusive-podcast platform, its 28.5 million active user base in more than 170 countries and regions is enough to tell its greatness.
It is essential to understand that YouTube and Spotify are not exclusive podcast platforms like Apple Podcasts. And while Spotify and YouTube are best for connecting novice podcast listeners, Apple Podcast is the way to go if you want to connect with a dedicated podcast community.
The best thing about the Apple Podcast directory is it allows you to create a podcast (via Apple Podcast Connect), but you must be an Apple user. However, you can submit your podcasts to Apple Podcast via RSS feed even if you are not an Apple user.
In all, given Apple Podcast is available for Apple users and is known by default on all Apple devices (the most prominent smartphone company in the world), Apple Podcast is a must-use podcast directory.
- User Review of Apple Podcast: “Apple once again nails with simplicity, millions of shows of my interest, and freemium service.”
- Monthly User Base: Over 28.5 million active users.
- Supported OS: All Apple devices.
4. Google Podcasts
Google Podcasts has over 100 million downloads on Play Store alone and is also available on the web, App Store, Blackberry, and ChromeOS users. A completely subscription-free and ad-free platform, Google Podcasts is one of the top podcasting directories among users.
However, unlike the Apple Podcast directory, it does not have a studio, so you can only submit your podcasts via RSS feeds. Still, its user base and the advanced algorithms are an opportunity to connect with users who like the subjects you discuss.
Like Spotify and Apple Podcast directories, Google Podcasts also show you real-time analytics and guide you about users so that you can plan your content accordingly. Given that it only requires a Google account to start, it is another top podcast directory you cannot ignore.
- User Review of Google Podcast
“Google Podcast includes everything that a podcast listener wants. It’s simple, free, and includes valuable options like Sleep Timer, Playback speed, and more.”
- Monthly User Base: Over 30 million active users.
- Supported OS: Dedicated apps for all major OS and web presence.
5. Pandora
Pandora has over 64 million monthly active users, with a listener spending up to 24 hours/monthly on the platform. It explains that users spend up to 45 minutes on the Pandora platform tuning in to their favorite podcasts. Again, its search-based algorithms allow you to get discovered by users that like subjects and topics on which you’re creating podcasts, meaning it is simple to connect with a large user base conveniently.
Pandora only accepts podcasts via RSS feed, which should be in MP3 format. But recent notifications have shown more audio formats will be added.
However, it is vital to retain that Pandora Podcast’s team critically analyzes all submissions manually. So, it might take up to 4-6 weeks for your first Podcast to appear on the platform.
- User Review of Pandora Podcast
“Pandora Podcasts recommendations are a blessing for me, who always finds it confusing to locate the right episode to spend my time on.”
- Monthly User Base: Over 64 million active users.
- Supported OS: Dedicated apps for all major OS and web presence.
6. Audible
Although popular among audiobook lovers, Audible has a considerable podcast following too. Its monthly active user base is around 41 million. The biggest benefit of registering your Podcast on the Audible directory of podcasts is that it connects with users who use Alexa to discover new podcasts.
Besides Audible, the Podcast will also be available for users of the Amazon Music app. That means you can connect with even more users via one submission only. Not to forget, Amazon Prime Video (a massive following) users get a free subscription to Amazon Music, so there’s a perfect chance that you will connect with users conveniently.
It is important to note that both Amazon Music and Audible offer podcasts for entirely free to users, so a more extensive user base prefers these platforms over paid platforms.
- User Review of Pandora Podcast
“You get to listen to any audiobook in the “included” library no matter which subscription you purchase..”
- Monthly User Base: Over 64 million active users.
- Supported OS: Android, iOS,
7. NPR One
With an average listener spending up to 145 minutes weekly, the NPR One podcast directory is one of the best podcast directories you can trust to submit your show online. The podcast directory has a userbase of over 500 thousand users globally, and
- User Review of NPR One Podcast
“I’ve been using this app for years now. It’s been my trusty companion to give me the news. I primarily use it with the sleep timer. I’m not a super picky consumer, especially when I don’t pay for the app!
But for many months now, the sleep timer will frequently think the time is up and shut off the player well before it should. The player will often shut off within 5 minutes of using the 30 min sleep timer. It’s annoying to open the player hit resume, and reset the sleep timer.”
- Monthly User Base: 500 thousand
- Supported OS: Android, iOS
8. Tune In
Technically, TuneIn is a radio. But lately, it has become prevalent amongst podcast listeners to find their favorite shows and also listen to music. The podcast directory has a global user base of over 75 million and a monthly visit of 7million+, which makes it a great spot for any podcaster to publish their show.
- User Review of Tune In Podcast
“I’ve been using the app for 4 years. I like it, but there are some annoying “features.”
the screen won’t time out when the app is active.
the developers must have recently made a change. I used to search through my list of “recent” (there were about 20) to look for new episodes of my favorite podcasts.
Now, the app only allows me to see the last four podcasts or stations I have listened to. So it is not helpful.’
- Monthly User Base: Over 7 million active users
- Supported OS: Dedicated apps for all major OS and web presence.
9. Podcast Addict
With over 10 million downloads on Google Playstore, Podcast Addict is one of Android’s most popular podcast apps. You can publish your podcast show, as it allows you to connect with the ideal audience quickly and easily.
Also, Podcast Addict is one of the few podcast directories available in various languages, including French and German. So it’s a perfect choice non-English podcasters.
- User Review of PodcastAddit
**”**Been using this for years. It does everything I could ever want when listening/ referencing/ re-listening to my favorite podcasts and a lot more.
I’ve suffered through having to use other podcast players (e.g., listening to something “exclusive”), but I couldn’t stand the inane simplicity of other players long enough to finish their content.
Also, it takes a bit to get used to (especially if you’re coming from other stripped-down players), but very worth the small effort for a powerful app.”
- Monthly User Base: Over 750 thousand active users.
- Supported OS: Dedicated Android App and web presence.
10. RadioPublic
Having been in the game for over 15 years, RadioPublic is another excellent podcast directory you can count on to submit your show. Although the platform does not have a massive user base compared to its competitors, it will help you grow your listeners and business by getting your podcast show to the right audience.
On RadioPublic, an average listener spends up to 72 minutes every day finding new podcast shows and listening to new episodes from their favorite podcasts. And given that the platform offers many robust features, listeners can enjoy a seamless listening experience on any device.
Overall, the RadioPublic podcast directory offers you a smart way to publish your show and grow your audience without going through stress.
- User Review of RadioPublic
“Glad I waited a while to find a podcast website provider. Starting from scratch in WordPress seemed too much hassle. Luckily the site came along while I was dithering about what to do.
The RadioPublic team onboarded the other 5 billion podcasts as one of the first examples, and I’m delighted to have chosen this option. Already, my pod site feels “complete” to look at, and more features are coming soon that will help with marketing, understanding listeners, and building a podcast brand.”
- Monthly User Base: Over 300 Thousand active users
- Supported OS: Dedicated apps for all major OS and web presence.
11. Overcast
Overcast is a dedicated podcast app for Apple devices, and what makes it a great podcast directory is that it offers unique features that attract many listeners.
On this platform, you’ll be allowed to display advertising slots, enabling listeners to subscribe to your podcast show within a few clicks. Plus, unlike many of its competitors, listeners have control over what podcast show is displayed in the featured podcast section. It is helpful as it lets listeners quickly discover every new episode you publish.
Overall, many incredible features make Overcast a good choice, and chances are your Podcast will get to real listeners when you publish them here.
- User Review of Overcast
**”**Nice alternative to Apple’s. I’ve been well pleased so far. It isn’t always the most intuitive, but I’ve eventually figured out how to achieve almost everything I’ve wanted to. The benefits of adding a show via RSS have become immediately clear.
Being a subscriber to a show and getting early access episodes and bonus material right in my podcast manager makes it easy to stay up with all my shows.”
- Monthly User Base: Over 70 Thousand active users.
- Supported OS: Dedicated app for iOS and web presence.
12. Pocket Casts
If you’re looking for a free podcast directory to publish your Podcast show, Pocket Casts is the ideal one for you. This podcast directory is packed with many rich features that podcasters will find very helpful. In addition, thanks to its beautifully designed website interface, you won’t find the platform difficult to use.
Besides, many listeners love Pocket Podcasts as it offers them incredible features—for example, improved discovery options, playback speed options, and lots more. In addition, they’ve enhanced how they find and listen to podcasts on the platform. You can’t go wrong publishing your show on a platform like this one.
- User Review of Pocket Casts
“Wonderful app, the most reliable one I’ve found. Even with accounts, most others lose all your progress data which hasn’t happened once with this, and I’ve switched phones 3 times. The progress tracker is so accurate you can pause on one device, open the same account and continue listening. Most apps can’t even keep things downloaded. Search does take a minute but finds stuff no other app does.”
- Monthly User Base: Over 1 Million active users.
- Supported OS: Dedicated apps for all major OS and web presence.
13. CastBox
CastBox is another unique podcast directory that podcasters trust to publish their show online. The platform boasts an optimized SEO and artificial intelligence that lets listeners find new podcast shows. Thanks to its massive user base of up to 20 Million users, your Podcast could reach a wide range of audiences quickly and easily.
Also, CastBox offers social media features that allow listeners to comment and share your podcast show on their social media page, thus helping you get your show to more listeners and potentially increase your fanbase.
- User Review of CastBox
“I’ve been a podcaster for years and an avid podcast listener for a while. So I searched high and low for the best podcast app and distribution service, Castbox. They have a great app and website, a huge content library, and a superb feature set. Also, their app allows offline listening, as I can download my favorite podcast show.”
- Monthly User Base: Over 1 million active users
- Supported OS: Dedicated apps for all major OS and web presence.
14. Stitcher
Last but not least podcast directory on our list is Stitcher. The platform boasts more than 14.5 Million active listeners, with an average listener having up to 25 hours of listening duration per month.
Stitcher helps you alleviate the stress of getting your show to the right audience, and thanks to the platform’s easy podcast submission requirements, you only need to have at least one podcast episode on your RSS Feed to get approved.
Also, Stitcher offers a unique analytic tool that allows you to track the performance of your show on the platform, and what more impressive is that it’s integrated into more than fifty car models. In addition, it works with any vehicle that supports Apple’s CarPlay and Android Auto, which makes it a great choice for podcasters who believe their audience loves to listen to their show while driving.
- User Review of Stitcher
“So glad I switched! I have my podcasts but didn’t listen to them much - partially because Apple Podcasts is so hard to use. I switched to Stitcher to listen to The Magnus Archives, and I love it!”
- Monthly User Base: Over 1.5 million active users.
- Supported OS: Dedicated apps for all major OS and web presence.
Part 3. More choices to submit your podcast shows
The above Podcast directories are great choices you can always count on any day. However, if you’re looking for more options, the following are reliable podcasting directories to choose from;
Part 4. How to submit a show to podcast directories?
Submitting a podcast show to podcast directories is pretty simple. Here, we used Spotify as an example to show you how you can easily submit your podcast show within a few clicks. The steps are as follows;
Step1 Create a Spotify account using the email attached to your podcast host.
Step2 Open Spotify for Podcasters in your browser and login into your account. Then, click Get Started on the new screen.
Step3 Provide your Podcast’s RSS Feed and click Next to proceed.
Step4 You’ll be asked to add information about your Podcast, from its description to the title, artwork, etc.
Step5 Verify the Podcast by submitting the code sent to your email.
Step6 Review the information you’ve provided so far and submit it to Spotify for review.
Once you complete the steps, keep an eye on the submitted Podcast, as Spotify won’t message you even if your Podcast has been published.
Hot FAQs on Podcast Directories
1. Are podcast directories free?
Almost all top podcast directories are entirely free for creators. All you have to do is sign up on the platforms. Then, check the platform’s requirements to submit your podcast episodes, like the format, cover photos, and description. Of course, the requirements vary depending on the platform.
2. Can any podcast be on a directory of podcasts?
Yes, you can choose from any podcast directory to publish your Podcast. There’s no limitation. When submitting, you must select the ideal category for your podcast show so it can be displayed to the right audience.
3. Does it cost to join a podcast directory?
Yes, and the cost of joining a podcast directory varies depending on your platform.
Conclusion
The podcast directories introduced above are reliable for submitting podcast shows. So, chances are there, no matter what your podcast show is about. It’ll help you connect with the right audience. However, one thing is vital you need to make sure you choose the podcast directory that suits you.
A Practical Approach to Balancing Loudness and Clarity with VLC Normalization
How To Normalize Volume in VLC
How to normalize volume, why should we do it, and what is it after all? – these are the questions when it comes to editing our audio files, as well as the video clips we tend to change the sound of. So, first of all, the volume normalization is pretty much explained as follows: The process when a constant amount of gain is applied to the audio recording, bringing the amplitude to a desirable level, which is “the norm” for the project. If it is a little bit difficult to understand, we have to highlight that when this tool is applied to our volume, the whole recording has the same amount of gain across it, every piece affected the same way. Accordingly, when we normalize volume, the relative dynamics are not changed.
But, why bother at all and why not leave it the way it is? Well, the answer to this is almost the same as on why editing exists in general, right? Things are not perfect! This is the fact that prompts us to make our video clips and audio better, improve it at least on the level which can get us the right amount of viewers and listeners. Everyone have had some pain listening to several podcasts, when the volume was too high or too low, or there were so much background noise that the whole recording was hurting the ears of a person! People will not convert to being loyal subscribers, viewers and listeners if their user experience is not favored. So, it is in our best interest to serve their best interest, with a little bit of editing.
When it comes to normalizing audio, there are two reasons we refer to this tool. First is when we feel we need to get the maximum volume, and the second is when we need to match different volumes.
In the first case, you might have somewhat quite voice recording, and would like to make it better without changing its dynamic range, while making it as loud as possible. And when it comes to matching volumes, it is logical that you need to manipulate your editing this way in case you have a group of audio files, each or some of them are at different volumes, so, understandably, if not necessarily, you would like to make them come closer to the same volume.
So, until we give you the step-by step guide on how to normalize your volume in VLC player, we also need to inform you about audio normalization types. Here, generally, we come across three of them: a so-called peak normalization, helping adjust the recording based on the highest signal level present in the recording; another is called loudness normalization and it adjusts the recording based on perceived loudness. Last but not least, RMS (Root-Mean-Square), changes the value of all the samples, where their average electrical volume overall is a specified level.
Using any of this, making it better to listen to your voice, without people being annoyed and their ears becoming exhausting with what you have to offer, you will be making it enjoyable for them and easy to come back to your content, as they will not be obliged to change the volume on their own audio players. Instead, their experience with you will be calm and effortless, which you are aiming to achieve.
So, not, what about VLC? – this is a very popular media player, favorite for a lot of people all around the world, so you should already be quite familiar with what it is, at least by having streamed videos and movies there. Speaking more of what it represents, it is a free-to-use, robust, and feature-packed software that plays a wide range of audio, image, and video files. It is worth noting that it can also play multimedia files directly from extractable devices or the PC and additionally, the program can stream from popular websites such as Disney+, Hulu, Netflix, and so on.
As if it was not enough, you can do simple video and audio editing in VLC Media Player, which a lot of people are unaware of! For example, you can easily trim and cut videos. So, as it happens, we can also normalize volume in VLC Media Player. It is a very handy feature and it works on Windows as well as on Mac. Sooo… How to do that? Because, actually, it is so simple that you might be surprised you didn’t know about this earlier. To learn how to normalize volume in VLC, follow this simple guideline:
First, of course, as every time working with any software, you need to have VLC Media Player installed on your device. Once you have it installed, open VLC. Go to the Tools and Preferences and there, you will need to check the single box which is next to Normalize volume in Effects. Now, set the level to the one that works best for you. Then, when you are happy with the result, you can Save.
This is not something perfect, because it’s so simple to do and actually what it does is just help adjust the general volume, so it leaves the specifics alone.

But, it might be the case that you are not so satisfied with the simple editing and want a little more to get from the editing process on VLC. So, you can do more with the Audio Effects menu there. And the steps are as follows:
First, on your VLC player, find Tools and then, in the menu, go to Preferences. The window will open, and there you need to select All in Show settings – actually it is a little bit hard to find because this is in the bottom left corner of the window. From there, you will need to navigate to Audio, and then, a little below, click on Filters and highlight it. The checkbox next to the Dynamic range compressor will probably be unchecked – so, check in it.

Next, see where Compressor is in the left panel? Select it. And now, you are free to make the changes to the levels as you see fit.

Here, if you are a little bit overwhelmed with the wide range of options to work on, you can just concentrate the most on Makeup gain, Threshold, and Ratio. The first one is by which you adjust in quiet sequences to raise the volume, the second will help you reduce louder sequences to even things out, and ratio is the maximum level of all audio within a movie, let’s say.
Don’t underestimate Attack time and release time, either. They graduate the changes to ramp them up at first, then down again, rather than initiating them immediately. So, if you set them to your liking as well, this will ensure that you have a more fluid transition in and out of the scene and there are less sudden, sometimes scary volume changes.
Therefore, you are now equipped with the most information you will need to normalize volume in VLC Player – so free to give it a go, play around with the different settings and carry out the best result imaginable for you!
How to normalize audio in Wondershare Filmora?
Now, even though we already know how to normalize audio in VLC in the simplest, as well as in the more advanced way, it might be even better if we know some more about normalizing audios in different programs. Something worth discussing is a software called Wondershare Filmora , which carries out the same task wonderfully. Although, unlike VLC Media Player, it is a real video editor , but don’t panic if you have never laid your hand on editing – it is one of the easiest to use ini the word, operating also both on Mac and Windows, and its interface is utterly understandable for beginners right away. And, actually, it is a qhile that Wondershare Filmora X introduced the feature to normalize the audio for the first time. What to say more - you might want to stop now and download the latest version of Filmora because now we are about to learn how to normalize audio from the video there – so, tune in!
Free Download For Win 7 or later(64-bit)
Free Download For macOS 10.14 or later
When it is done installing, open the software. Now, click and drag the video of which the audio you want to normalize. Now you can select the clip you have chosen – if there are multiple, select all of them, then right-click and choose Detach Audio.

Now if you have this kind of graphic before your eyes, you can be pretty sure without even listening, that the noises are really, really different from each other, which highlights once again how useful audio normalization can be:

Select these files, right-click and choose Adjust Audio. New panel will be opened on left top and there, you will see Audio Normalization – check the box there.


After you have clicked on it, wait until the normalization completes.

Soon, all audio will be normalized, and you will already be able to see on the graphics that the volumes are almost on the same level and when you listen to it, you will make sure that there is no longer apparent difference between how they sound. And from there on, you can save the file you just normalized!
So, in this article, we learned a lot about normalizing volumes, why and how it is done, and, more specifically, how to get this task completed in VLC Media Player as well as in Wondershare Filmora X. you can proceed to putting this new information into a good use and come back to learn more about video and audio editing here!
Free Download For macOS 10.14 or later
When it is done installing, open the software. Now, click and drag the video of which the audio you want to normalize. Now you can select the clip you have chosen – if there are multiple, select all of them, then right-click and choose Detach Audio.
Now if you have this kind of graphic before your eyes, you can be pretty sure without even listening, that the noises are really, really different from each other, which highlights once again how useful audio normalization can be:
Select these files, right-click and choose Adjust Audio. New panel will be opened on left top and there, you will see Audio Normalization – check the box there.
After you have clicked on it, wait until the normalization completes.
Soon, all audio will be normalized, and you will already be able to see on the graphics that the volumes are almost on the same level and when you listen to it, you will make sure that there is no longer apparent difference between how they sound. And from there on, you can save the file you just normalized!
So, in this article, we learned a lot about normalizing volumes, why and how it is done, and, more specifically, how to get this task completed in VLC Media Player as well as in Wondershare Filmora X. you can proceed to putting this new information into a good use and come back to learn more about video and audio editing here!
Also read:
- In 2024, Tips for Finding Cracks and Crunches Sounds in Media Production
- New The Art of Harmonizing Moving Images and Sounds (A 2023 Approach) for 2024
- A Curated List of 8 Exceptional Downloads Realistic and Authentic Rain Audio Samples for 2024
- Updated 2024 Approved Trimming Sound Out of MP4 Videos for Editing Purposes
- Deciphering the Newest Advances in Nero WaveEdito for 2024
- 2024 Approved How to Record Sound on Mac? 5 Useful Tips for You
- Updated In 2024, Sonic Imagery Graphically Representing Audio & Crafting Animation Masterpieces in Adobe After Effects
- New The Comprehensive Tutorial on Detaching Audible Elements From Video Clips
- Soundscape Seeking Outstanding Claps and Cheers
- New The Cyber Soundscape Changing Audio Speeds and Tones on the Web
- 2024 Approved Unlocking Your Computers Potential Leading Free Voice Recording Applications
- New 2024 Approved Harmonic Wave of Shared Excitement
- How to Clone Voice in 2 Ways-Create AI Voices for 2024
- New In 2024, From Amateur to Artist A Foundational Guide to Editing Podcast Content
- The Ultimate Encyclopedia of Affordable Audio Recorder Applications for 2024
- Updated Mastering Dynamic Volume Control in Final Cut Pro X An Introduction to Automatic Audio Ducking for 2024
- New 2024 Approved Ranking the Best 6 Apps to Transform Your Voice in Seconds
- Updated 2024 Approved Creative Tips for Adding Free Music to Your Video Projects
- New In 2024, AVS Audio Mastery Product Insights, Benefits, and Alternative Recommendations for Sound Enthusiasts
- Mastering the Soundtrack The Quintessential Rock Playlist
- Cutting-Edge Audio to Text Transcription Software of the Year, 2023 Edition for 2024
- New In 2024, The Intricacies of Omegle A Comprehensive Guide to Its Functioning and Safety Measures
- New Essential Tips for Incorporating Music Seamlessly Into Video Productions Without Financial Barriers
- The Ultimate Guide to Implementing Audio Keyframes Using Adobe Premiere Pro for Mac Users
- 2024 Approved The Premier Chromecast Mics Reviewed Ranking the Best S Market
- 2024 Approved Cutting Edge Audio Editing with Sony Vegas Pro – Complete Guide
- In 2024, Unlocking Your Musics Potential Comprehensive Tips on MP3 File Modification
- New 2024 Approved 10 Best Song Editor Windows, Mac
- New In 2024, Tempo Tweak Tools Fast-Paced Guide to Speed Alteration of Sound
- The Encyclopedia of Joyous Jamming Searching for Humor in Waves for 2024
- New In 2024, Essential Techniques for No-Cost Audio Capture via Audacity
- What You Want To Know About Two-Factor Authentication for iCloud From your Apple iPhone 11 Pro
- How to Bypass Google FRP Lock on Itel P55T Devices
- Easy Tutorial for Activating iCloud on iPhone 15 Safe and Legal
- Top 15 Augmented Reality Games Like Pokémon GO To Play On OnePlus Open | Dr.fone
- 4 Ways to Transfer Music from Realme Narzo N53 to iPhone | Dr.fone
- The Magnificent Art of Pokemon Go Streaming On Lava Yuva 2 Pro? | Dr.fone
- In 2024, How To Enable USB Debugging on a Locked Samsung Galaxy M54 5G Phone
- In 2024, Animation Mastery The 10 Best 2D Software for Creators Free & Paid
- Updated What Is Motion Tracking and How to Use It
- In 2024, A Complete Guide To OEM Unlocking on Vivo Y77t
- New The Best Websites to Reverse Videos Online for 2024
- In This Article, We Introduce You Our Top 5 Picks of Video to Ppt Converter for 2024
- There Are Many Vlogging Cameras You Can Find in the Market. However, to Get a Good Start in Vlogging, some Sony Vlogging Cameras and Canon Vlog Cameras Are to Consider. This Article Introduces You to the Respective List
- How To Do Honor Magic 5 Pro Screen Sharing | Dr.fone
- In 2024, How To Unlock Stolen iPhone 15 Plus In Different Conditionsin | Dr.fone
- Title: Updated How to Record Audio on PowerPoint? Guideline for Windows and Mac
- Author: Paul
- Created at : 2024-05-20 01:48:21
- Updated at : 2024-05-21 01:48:21
- Link: https://voice-adjusting.techidaily.com/updated-how-to-record-audio-on-powerpoint-guideline-for-windows-and-mac/
- License: This work is licensed under CC BY-NC-SA 4.0.
