
:max_bytes(150000):strip_icc():format(webp)/african-american-woman-opening-packages-of-shoes-on-sofa-580503483-5a735094d8fdd50036b63f8a.jpg)
Updated From Visual to Audible Harness the Power of Audio Extraction Tools for Videos on Cross-Platform Systems (Windows, macOS & Mobile Devices - New Insights 2023)
From Visual to Audible: Harness the Power of Audio Extraction Tools for Videos on Cross-Platform Systems (Windows, macOS & Mobile Devices - New Insights 2023)
How to Extract Audio from Videos on Win/Mac/Phone

Shanoon Cox
Mar 27, 2024• Proven solutions
Remake a remix from raw audio, dub the movie dialogues in a different language or simply use the same audio in one of yours YouTube or Instagram video, all it requires is a high-end audio extractor program and you are good to go.
So if you are on an exploration of some good audio extractor software from a video, here we are to guide you all along the way for each of the platforms ranging from phones to PC.
You will Learn :
- How to Make Audio Extraction from Videos Using Mac and Windows?
- How to Extract Audio on Mac Using QuickTime?
- How to Make Audio Extraction on Windows Using Movie Maker?
- How to Extract Audio from Videos on Mobile Phones
- How to Extract Audio from Video Online?
- How to Extract Audio from YouTube Video?
- How to Extract Audio from a Facebook Video?
- How to Extract Audio from an Instagram Video?
- How to Extract Audio from Streaming Video?
So, let’s begin!
How to Make Audio Extraction from Videos Using Mac and Windows?
When you extract audio from videos on PC, you need a tool to make it done. That can be a very easy job if you use the professional video editing software-Wondershare Filmora . Just follow this guide to extract audio from video with ease.
Wondershare filmora is one of the best professional video editing software which can make a job of audio extraction from a video.
Here’s how to extract audio from a video using Filmora:


Step 1: Download Wondershare Filmora and run the program.
Step 2: Click on “import” button and include the desired video. You can also directly drag and drop the video to the program. The loaded video will be listed in the media library like the following picture shows.
Step 3: Start extracting audio from video.
After importing video to Wondershare Filmora, drag the video from the media library to the video Timeline.
Step 4: You can then right-click the video clip and choose “Audio Detach” to extract audio from the video.
After a while, video and audio will be displayed on different tracks. This will extract the audio from the video and display both the files separately.
If you don’t want to keep the video file, right-click it and choose “Delete” to remove it from the video timeline. Bring the video to the video timeline from the library by drag option.
Step 5: Edit the audio you desired.
Then double click to edit the audio in the popup window.
Here you can change the Volume, Fade in, Fade out, and Pitch, etc. as you like.
If you want to delete part of the audio, just put the cursor to the place where you would like the deletion to start and press the “Split” button above the timeline.
The end of the deletion area is marked similarly – play the audio and select the final point of the area to be excluded from the output audio, and then press the “Split” button again.
Besides that, you can also add an image to the newly extracted audio. Here is a detailed guide about it >>
Step 6: Select the desired output method and save the audio file
After that, click the “Create” button to export the audio track. Choose the desired file format and adjust settings accordingly.
Here different options are provided.
For example, you can save the audio in regular formats such as MP3, MP4, WMV, AVI and so on in the “Format” tab and adjust the settings such as Encoder, Sample Rate, Bit Rate, and Channel as you like.
Or export it for playback on portable devices, burn it to DVD disc or share it to YouTube directly.
After you select the desired output method, simply select a desirable output method and then click the “Create” button to save the audio track.
How to Extract Audio on Mac Using QuickTime?
This section entails you about how to extract audio from video mac
QuickTime Player is a pre-installed player in Mac PCs that you can utilize to extract the audio from a video with merely some clicks away in seconds. Hence, you don’t need to download this player. All you need is to follow the below step:
Step 1: Open the QuickTime Player.
Step 2: Open the targeted video on this player.
Step 3: Click on “file” from the top bar of the player.
Step 4: On the “export as” option, click on “audio-only”.

Step 5: Give a name to the audio file, select a location to store and click on “save”.
How to Make Audio Extraction on Windows Using Movie Maker?
On Windows you can use the free utility, Movie Maker, to extract the audio and save as an MP4 file.
Movie Maker is a free utility on windows that you can utilize for multiple purposes. So, if you are wondering how to extract audio from video in windows movie maker then look no further! All you have to do is:
Step 1: Download “movie maker” and “photo gallery” if you don’t own one or both of them already.
Step 2: Due to the sharing of ample coherent features, both of these software has to be downloaded together.
Step 3: Open “movie maker” and select “add video and photo” option to select the desired targeted video from a location on your computer.
Step 4: After the loading of the video, you need to click on “file”.
Step 5: Select “save movie” and scroll down to click “audio-only”.

Step 6: Name the audio file and save the file. The file gets saved with MP4 file format by default. You can save the file with WMA format as well but the most common and standard format is MP4 that can easily be played on any of the mobile devices having any operating system.
Step 7: The progress bar is displayed during the conversion of a video into the audio-only file. This may take some time as time varies depending upon the length and size of the file to be extracted from.
Step 8: When it’s done converting, you can play the audio right away or may move the file to another folder wherever you want it to be.
How to Extract Audio from Videos on Mobile Phones
Extracting the audio from a video file through mobile phones is often a tedious process to do so. But all thanks to the applications that come for a specific or general mobile operating systems to make a slow-paced job much easier and faster.
We have several mobile applications specific foe android phones and iPhone users that can do video to audio conversions within a wink of an eye. So, let’s explore the ways:
How to Extract Audio Using Android
This section entails you about how to extract audio from videos on android by the converter App, Video to Mp3 Converter .

Step 1: First off, Make and save or simply download a video in the local memory or SD card on your phone if you don’t already have a video.
Step 2: Open video to MP3 converter.
Step 3: You’ll see 4 options in the middle of the interface.
Step 4: Press the “video to audio” option.
Step 5: Select the targeted video file from where you want to extract the audio.
Step 6: You will be given a simple and advanced option. The simple option lets you perform basic operations on the video while the advance option will let you perform operations like bit rate and audio encoding etc.
Step 7: If you want the best quality audio output then set the quality to maximum, 9.
Step 8: Click on the “convert” button at the bottom to start the conversion process.
Step 9: When completed with the process, you can play the audio right away or may set it as a new ringtone as well.
How to Extract Audio from Video on iPhone or iPda?
This section entails you about how to extract audio from the iPhone video by MP3 Converter -Audio Extractor .

This is one of the free applications available on both iPhones and iPad. These handy applications will let you extract the audio from any of the videos on the phone. So if you are seeking about how to extract audio from a video file using your phone then the MP3 converter will serve the purpose.
Step 1: Open the MP3 converter application.
Step 2: Tap on the plus sign in the middle of the screen at the bottom.
Step 3: Select the import option according to where you want to choose the video, either the camera gallery or iCloud.
Step 4: Select a targeted video and tap on the “Add” button at the bottom right.
Step 5: Click on the video on the following screen.
Step 6: Select “convert”.
Step 7: Select MP3 by clicking on the “default mode”.
Step 8: If m4a is the desired file format you can to convert your audio file in then click on “advanced mode” and select the desired output format.
Step 9: You may also amend other settings like Audio Sample, Output Range etc.
Step 10: Click on “converted media” to access the converted audio file.
Step 11: You can play the audio right away or you may click “open in” option which lets you provide several options like saving, storing and sending to some platforms.
How to Extract Audio from Video Online?
This section entails you about how to extract audio from videos online by the Audio converter .
You don’t have to own an application-specific for audio extraction. You can do the same with online software, named as an audio converter.
This will save the internal memory of your system since you don’t need to download an app.
The steps are very simple as defined below:
Step 1: Open “audio converter” and Click on the “open files” option.
Step 2: Choose the file in the window from where you need the audio to be extracted with 2048 Mb as the maximum file size supported by this converter.

Step 3: While the sound extraction process is still going on, select the audio file format you want to convert in.
Step 4: If you are confused with the file formats options, then go with the default on, MP3 which is a standard format.
Step 5: Tap on the “convert” button and wait until the extraction process completes.
Step 6: After being extracted, click on “download”.
How to Extract Audio from YouTube Video?
Audials One , It is a user-friendly software suitable for audio extraction from a YouTube video. You can extract the file and save it in any of the file formats like WMV, MP4, and MP3, etc.
Before starting off with the extraction process, you will require a video file locally.
Below are the steps to extract audio from a YouTube publication using Audials one.
Step 1: Download and run Audials One
Step 2: Open this software and select “converter” below Universal Converter in the left window. Click on files>>add files

Step 3: Select a downloaded file of YouTube
Step 4: Tap on “close” when prompted with a window of adding files being done.
Step 5: Check the “Convert video to audio” checkbox.
Step 6: Select “start”.
Step 7: The free version of Audials one will allow 30 minutes of recording. You need to buy a pro version to be able to extract audio for a YouTube video longer than 30 minutes. Click on “no thanks” if you don’t need to upgrade the version. The conversion process will be continued.
Step 8: After conversion, you can play the audio by clicking the “edit” option given at the right corner and then tap on “open folder”
How to Extract Audio from a Facebook Video?
You can easily extract audio from the Facebook video by Any Audio Converter . Steps are as following:
Step 1: Download the converter software.
Step 2: Tap on “Add URLs”. This will pop a dialogue box. Select the plus tab and paste there the download link.
Step 3: Tap the “start download” option to begin the downloading process.

Step 4: Tap on the “Set output profile” option and from the drop-down, select MP3 Audio.
Step 5: The customize the audio configuration, click on “ Audio Options” which gives you Volume, Channel, Bit Rate, Audio Codec options respectively.
Step 6: To save the output file in a specified folder, tap on the “setting” option.
Step 7: Select “convert now!” option which will initiate the conversion of Facebook video into an MP3 audio file.
Not only limited to this option, but you can also perform basic editing operation as well by using this software.
How to Extract Audio from an Instagram Video?
You can easily download an Instagram video through this online application Instagram Video Downloader and can extract the audio from an Instagram video with very few steps:
Step 1: Open the post on the Instagram platform from which you want to extract the audio.
Step 2: Locate the post URL link and copy it.
Step 3: Then paste the copied link in the white bar on the top.

Step 4: Click on “submit” to download the Instagram video.
Step 5: Then convert the video into an MP3 audio file by selecting the desired file format.
How to Extract Multiple Audio Tracks from the Video?
Here you’ll get to know how to extract audio from video with the use of Handbrake software in order to extract multiple audio tracks from a video.
Step 1: Download and open handbrake software.
Step 2: You have to select a video having multiple audio tracks on “source selection” pane.
Step 3: File selection will generate an interface beneath. Select “audio tab” and expand the first dropdown which lists down all the audio tracks in a selected file. Select one of them and name the file and enter the output directory.
Step 4: Tap on “start encode” which will convert the audio in MP4 format. Now the audio extraction from the video is done using VLC player.
Step 5: Open the VLC player and select the “convert” option inside “media”.
Step 6: Tap on “add” in the Open Media pane then select the recently created handbrake video. From the drop-down next to the Convert/Save option, tap on “convert”.
Step 7: Below profile, tap on “MP3” on the following screen, name the file and enter the directory then select “start” and voila! You are done.
How to Extract Audio from Streaming Video?
You can use Video Downloader if you use Chrome as a web browser or DownloadHelper for Firefox users in order to download any streaming video as a file locally in your system. If one asks how to extract audio from the mp4 video, the process remains the same.
After the downloading process, there exist several programs for audio extraction from a video.
Below are the steps for the VLC player :
Step 1: Open VLC player, select “media” then click “convert/save” option, click “Add” beside File Selection box.
Step 2: Browse the desired downloaded file from PC and press “OK”.
Step 3: Select “audio-MP3” from “profile” and then select “start”.

Conclusion
Depending upon the availability of resources, all of the aforementioned approaches are great in their own way.
But considering that Wondershare filmora runs smoothly given the easiest interface and requiring least steps to perform audio extraction whilst being compatible with Mac and Windows both operating system, I would personally recommend this software for ease of accessibility and usability.
Shanoon Cox
Shanoon Cox is a writer and a lover of all things video.
Follow @Shanoon Cox
Shanoon Cox
Mar 27, 2024• Proven solutions
Remake a remix from raw audio, dub the movie dialogues in a different language or simply use the same audio in one of yours YouTube or Instagram video, all it requires is a high-end audio extractor program and you are good to go.
So if you are on an exploration of some good audio extractor software from a video, here we are to guide you all along the way for each of the platforms ranging from phones to PC.
You will Learn :
- How to Make Audio Extraction from Videos Using Mac and Windows?
- How to Extract Audio on Mac Using QuickTime?
- How to Make Audio Extraction on Windows Using Movie Maker?
- How to Extract Audio from Videos on Mobile Phones
- How to Extract Audio from Video Online?
- How to Extract Audio from YouTube Video?
- How to Extract Audio from a Facebook Video?
- How to Extract Audio from an Instagram Video?
- How to Extract Audio from Streaming Video?
So, let’s begin!
How to Make Audio Extraction from Videos Using Mac and Windows?
When you extract audio from videos on PC, you need a tool to make it done. That can be a very easy job if you use the professional video editing software-Wondershare Filmora . Just follow this guide to extract audio from video with ease.
Wondershare filmora is one of the best professional video editing software which can make a job of audio extraction from a video.
Here’s how to extract audio from a video using Filmora:
Step 1: Download Wondershare Filmora and run the program.
Step 2: Click on “import” button and include the desired video. You can also directly drag and drop the video to the program. The loaded video will be listed in the media library like the following picture shows.
Step 3: Start extracting audio from video.
After importing video to Wondershare Filmora, drag the video from the media library to the video Timeline.
Step 4: You can then right-click the video clip and choose “Audio Detach” to extract audio from the video.
After a while, video and audio will be displayed on different tracks. This will extract the audio from the video and display both the files separately.
If you don’t want to keep the video file, right-click it and choose “Delete” to remove it from the video timeline. Bring the video to the video timeline from the library by drag option.
Step 5: Edit the audio you desired.
Then double click to edit the audio in the popup window.
Here you can change the Volume, Fade in, Fade out, and Pitch, etc. as you like.
If you want to delete part of the audio, just put the cursor to the place where you would like the deletion to start and press the “Split” button above the timeline.
The end of the deletion area is marked similarly – play the audio and select the final point of the area to be excluded from the output audio, and then press the “Split” button again.
Besides that, you can also add an image to the newly extracted audio. Here is a detailed guide about it >>
Step 6: Select the desired output method and save the audio file
After that, click the “Create” button to export the audio track. Choose the desired file format and adjust settings accordingly.
Here different options are provided.
For example, you can save the audio in regular formats such as MP3, MP4, WMV, AVI and so on in the “Format” tab and adjust the settings such as Encoder, Sample Rate, Bit Rate, and Channel as you like.
Or export it for playback on portable devices, burn it to DVD disc or share it to YouTube directly.
After you select the desired output method, simply select a desirable output method and then click the “Create” button to save the audio track.
How to Extract Audio on Mac Using QuickTime?
This section entails you about how to extract audio from video mac
QuickTime Player is a pre-installed player in Mac PCs that you can utilize to extract the audio from a video with merely some clicks away in seconds. Hence, you don’t need to download this player. All you need is to follow the below step:
Step 1: Open the QuickTime Player.
Step 2: Open the targeted video on this player.
Step 3: Click on “file” from the top bar of the player.
Step 4: On the “export as” option, click on “audio-only”.
Step 5: Give a name to the audio file, select a location to store and click on “save”.
How to Make Audio Extraction on Windows Using Movie Maker?
On Windows you can use the free utility, Movie Maker, to extract the audio and save as an MP4 file.
Movie Maker is a free utility on windows that you can utilize for multiple purposes. So, if you are wondering how to extract audio from video in windows movie maker then look no further! All you have to do is:
Step 1: Download “movie maker” and “photo gallery” if you don’t own one or both of them already.
Step 2: Due to the sharing of ample coherent features, both of these software has to be downloaded together.
Step 3: Open “movie maker” and select “add video and photo” option to select the desired targeted video from a location on your computer.
Step 4: After the loading of the video, you need to click on “file”.
Step 5: Select “save movie” and scroll down to click “audio-only”.
Step 6: Name the audio file and save the file. The file gets saved with MP4 file format by default. You can save the file with WMA format as well but the most common and standard format is MP4 that can easily be played on any of the mobile devices having any operating system.
Step 7: The progress bar is displayed during the conversion of a video into the audio-only file. This may take some time as time varies depending upon the length and size of the file to be extracted from.
Step 8: When it’s done converting, you can play the audio right away or may move the file to another folder wherever you want it to be.
How to Extract Audio from Videos on Mobile Phones
Extracting the audio from a video file through mobile phones is often a tedious process to do so. But all thanks to the applications that come for a specific or general mobile operating systems to make a slow-paced job much easier and faster.
We have several mobile applications specific foe android phones and iPhone users that can do video to audio conversions within a wink of an eye. So, let’s explore the ways:
How to Extract Audio Using Android
This section entails you about how to extract audio from videos on android by the converter App, Video to Mp3 Converter .
Step 1: First off, Make and save or simply download a video in the local memory or SD card on your phone if you don’t already have a video.
Step 2: Open video to MP3 converter.
Step 3: You’ll see 4 options in the middle of the interface.
Step 4: Press the “video to audio” option.
Step 5: Select the targeted video file from where you want to extract the audio.
Step 6: You will be given a simple and advanced option. The simple option lets you perform basic operations on the video while the advance option will let you perform operations like bit rate and audio encoding etc.
Step 7: If you want the best quality audio output then set the quality to maximum, 9.
Step 8: Click on the “convert” button at the bottom to start the conversion process.
Step 9: When completed with the process, you can play the audio right away or may set it as a new ringtone as well.
How to Extract Audio from Video on iPhone or iPda?
This section entails you about how to extract audio from the iPhone video by MP3 Converter -Audio Extractor .
This is one of the free applications available on both iPhones and iPad. These handy applications will let you extract the audio from any of the videos on the phone. So if you are seeking about how to extract audio from a video file using your phone then the MP3 converter will serve the purpose.
Step 1: Open the MP3 converter application.
Step 2: Tap on the plus sign in the middle of the screen at the bottom.
Step 3: Select the import option according to where you want to choose the video, either the camera gallery or iCloud.
Step 4: Select a targeted video and tap on the “Add” button at the bottom right.
Step 5: Click on the video on the following screen.
Step 6: Select “convert”.
Step 7: Select MP3 by clicking on the “default mode”.
Step 8: If m4a is the desired file format you can to convert your audio file in then click on “advanced mode” and select the desired output format.
Step 9: You may also amend other settings like Audio Sample, Output Range etc.
Step 10: Click on “converted media” to access the converted audio file.
Step 11: You can play the audio right away or you may click “open in” option which lets you provide several options like saving, storing and sending to some platforms.
How to Extract Audio from Video Online?
This section entails you about how to extract audio from videos online by the Audio converter .
You don’t have to own an application-specific for audio extraction. You can do the same with online software, named as an audio converter.
This will save the internal memory of your system since you don’t need to download an app.
The steps are very simple as defined below:
Step 1: Open “audio converter” and Click on the “open files” option.
Step 2: Choose the file in the window from where you need the audio to be extracted with 2048 Mb as the maximum file size supported by this converter.
Step 3: While the sound extraction process is still going on, select the audio file format you want to convert in.
Step 4: If you are confused with the file formats options, then go with the default on, MP3 which is a standard format.
Step 5: Tap on the “convert” button and wait until the extraction process completes.
Step 6: After being extracted, click on “download”.
How to Extract Audio from YouTube Video?
Audials One , It is a user-friendly software suitable for audio extraction from a YouTube video. You can extract the file and save it in any of the file formats like WMV, MP4, and MP3, etc.
Before starting off with the extraction process, you will require a video file locally.
Below are the steps to extract audio from a YouTube publication using Audials one.
Step 1: Download and run Audials One
Step 2: Open this software and select “converter” below Universal Converter in the left window. Click on files>>add files
Step 3: Select a downloaded file of YouTube
Step 4: Tap on “close” when prompted with a window of adding files being done.
Step 5: Check the “Convert video to audio” checkbox.
Step 6: Select “start”.
Step 7: The free version of Audials one will allow 30 minutes of recording. You need to buy a pro version to be able to extract audio for a YouTube video longer than 30 minutes. Click on “no thanks” if you don’t need to upgrade the version. The conversion process will be continued.
Step 8: After conversion, you can play the audio by clicking the “edit” option given at the right corner and then tap on “open folder”
How to Extract Audio from a Facebook Video?
You can easily extract audio from the Facebook video by Any Audio Converter . Steps are as following:
Step 1: Download the converter software.
Step 2: Tap on “Add URLs”. This will pop a dialogue box. Select the plus tab and paste there the download link.
Step 3: Tap the “start download” option to begin the downloading process.
Step 4: Tap on the “Set output profile” option and from the drop-down, select MP3 Audio.
Step 5: The customize the audio configuration, click on “ Audio Options” which gives you Volume, Channel, Bit Rate, Audio Codec options respectively.
Step 6: To save the output file in a specified folder, tap on the “setting” option.
Step 7: Select “convert now!” option which will initiate the conversion of Facebook video into an MP3 audio file.
Not only limited to this option, but you can also perform basic editing operation as well by using this software.
How to Extract Audio from an Instagram Video?
You can easily download an Instagram video through this online application Instagram Video Downloader and can extract the audio from an Instagram video with very few steps:
Step 1: Open the post on the Instagram platform from which you want to extract the audio.
Step 2: Locate the post URL link and copy it.
Step 3: Then paste the copied link in the white bar on the top.
Step 4: Click on “submit” to download the Instagram video.
Step 5: Then convert the video into an MP3 audio file by selecting the desired file format.
How to Extract Multiple Audio Tracks from the Video?
Here you’ll get to know how to extract audio from video with the use of Handbrake software in order to extract multiple audio tracks from a video.
Step 1: Download and open handbrake software.
Step 2: You have to select a video having multiple audio tracks on “source selection” pane.
Step 3: File selection will generate an interface beneath. Select “audio tab” and expand the first dropdown which lists down all the audio tracks in a selected file. Select one of them and name the file and enter the output directory.
Step 4: Tap on “start encode” which will convert the audio in MP4 format. Now the audio extraction from the video is done using VLC player.
Step 5: Open the VLC player and select the “convert” option inside “media”.
Step 6: Tap on “add” in the Open Media pane then select the recently created handbrake video. From the drop-down next to the Convert/Save option, tap on “convert”.
Step 7: Below profile, tap on “MP3” on the following screen, name the file and enter the directory then select “start” and voila! You are done.
How to Extract Audio from Streaming Video?
You can use Video Downloader if you use Chrome as a web browser or DownloadHelper for Firefox users in order to download any streaming video as a file locally in your system. If one asks how to extract audio from the mp4 video, the process remains the same.
After the downloading process, there exist several programs for audio extraction from a video.
Below are the steps for the VLC player :
Step 1: Open VLC player, select “media” then click “convert/save” option, click “Add” beside File Selection box.
Step 2: Browse the desired downloaded file from PC and press “OK”.
Step 3: Select “audio-MP3” from “profile” and then select “start”.
Conclusion
Depending upon the availability of resources, all of the aforementioned approaches are great in their own way.
But considering that Wondershare filmora runs smoothly given the easiest interface and requiring least steps to perform audio extraction whilst being compatible with Mac and Windows both operating system, I would personally recommend this software for ease of accessibility and usability.
Shanoon Cox
Shanoon Cox is a writer and a lover of all things video.
Follow @Shanoon Cox
The Ultimate Selection of Downloadable Cartoon Soundscapes for Animators (2023 Edition)
8 Best Cartoon Sound Effects You Can Download

Benjamin Arango
Mar 27, 2024• Proven solutions
The sound plays a significant role in the videos. Without the right sound effects, your videos become dull. It doesn’t create an impact to grab the attention of the viewers. Especially when it comes to attracting the attention of kids while they watch cartoons.
Are you working on a cartoon video for kids or some animated action cartoons? Use the cartoon sound effects to add more intensity and emotions to the videos. Every time creating a new sound effect for your cartoon video becomes difficult.
If you are on a strict budget, producing new content becomes almost impossible. In such situations, free cartoon sound effects are the best way to enhance your cartoon videos.
In this article, you will learn eight best cartoon sound effects that you can download and make your videos perfect.
8 Best Cartoon Sound Effects Resources
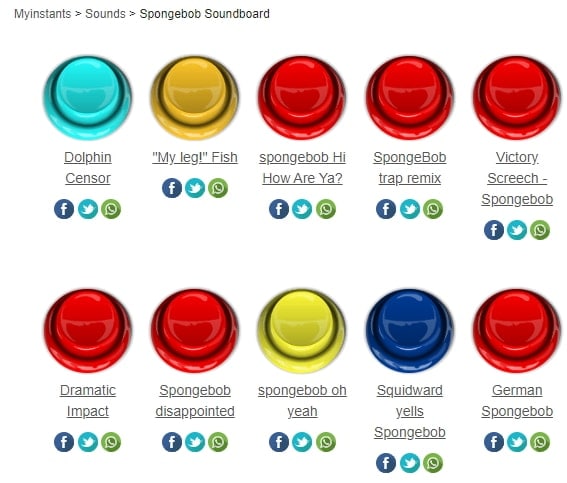
1. Spongebob Sound Effects
MyInstant’s Spongebob soundboard offers a range of cartoon sound effects that can be easily downloaded just by clicking on the Download mp3 sound effect button. You can listen to over 120 classic cartoon sound effects and download it for free. You can also copy the embed link and paste it to your website.
2. Hanna Barbera Sound Effects
From Sounddogs, Hanna Barbera sound effects library, you can find over 2200 cartoon sound effects that are divided into 4 CDs. It has almost all the legendary classic cartoon sound effects from the cartoon shows like Yogi Bear, Huckleberry Hound, the Flintstones, The Jetsons, Quick Draw McGraw, and all the rest of the gang.
You can download the mp3 cartoon sound effects completely free by clicking on the Download ID number mentioned at the right end of each link.
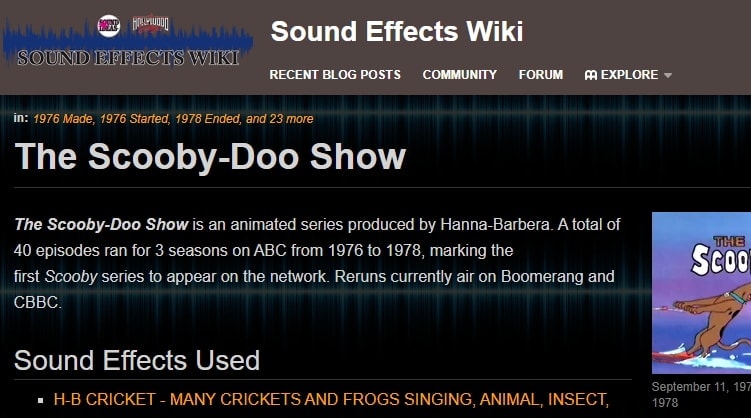
3. Scooby Doo Running Sound
Fandom’s Scooby Doo running sound effects offers all the ideas used in 40 episodes of Scooby Doo throughout the three seasons on ABC. It is over 37000 pages wiki that you can click and browse through the pages to find the right sound effect and download it for free.
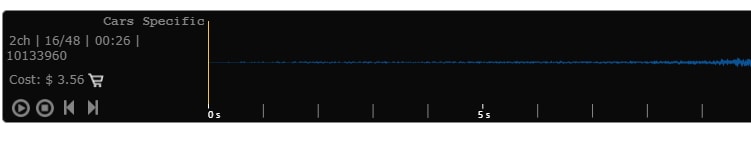
4. Tom and Jerry Sound Effects
Pond5 offers 13 Tom and Jerry sound effects that you can listen by scrolling the cursor over the boxes and download the free preview of cartoon sound effects by clicking on Download Preview.
If you want to download the entire cartoon sound effect, you need to register, log in, and pay for it. There are filters like price, collections, duration, etc. to make your selection more precise.
5. Free SFX
In FreeSFX website, you can find a range of comical cartoon sound effects that includes classic effects like descend, boink, impact, pop, musical, running, rip and snap, bounce spring, slide whistle, squelch and splat, horn and loads more.
You need to log in to the website to download free cartoon sound effects.

6.GRSites
With over 1980 cartoon sound effects, the GRSites is one of the best free sites for downloading both mp3 and WAV files. You can browse from a range of categories to find the best cartoon sound effects for your videos.
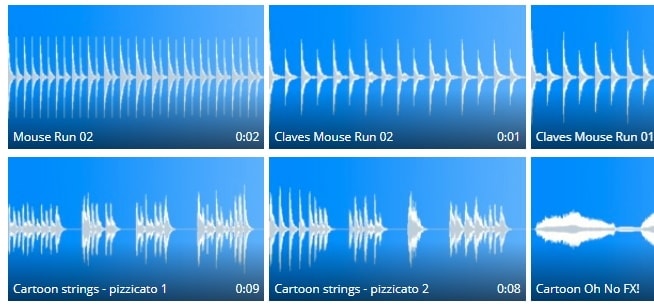
7. Cartoon Running Sound Effect
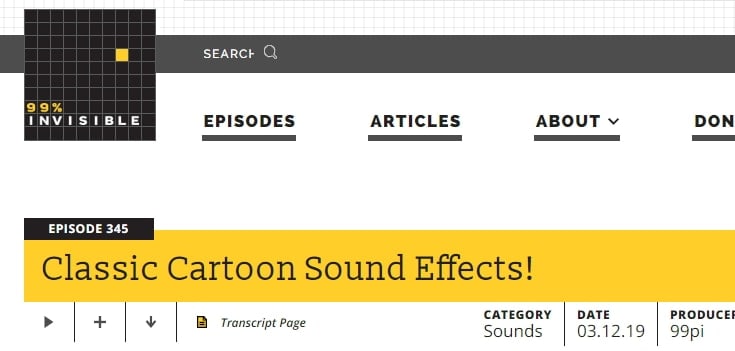
If you are looking for cartoon running sound effect, turn to Episode 345 in 99PercentInvisible. You can download the complete transcript page of around 30 minutes to use it in your video. Use the cartoon running sound effect produced by 99pi to enhance your video.
8. Big Fish Audio
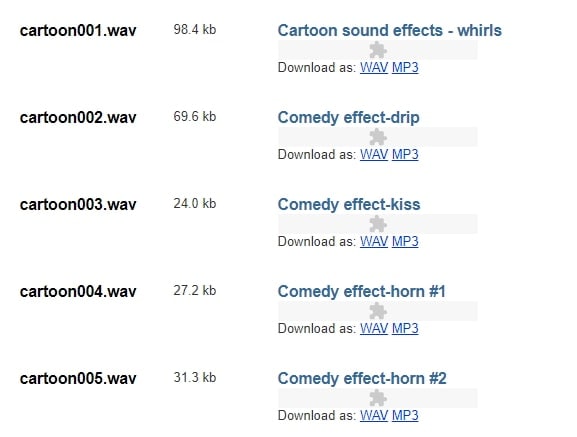
The Big Fish Audio’s cartoon sound FX includes 23 free classic cartoon sound effects. The filters include a range of sound FX types, styles, format, brand, etc.
You can click on the cartoon sound effect and listen to it or add it to your playlist. But, if you wish to download the free cartoon sound effects, you need to register and pay to use the sound effect.

You may also like: How to Extract Audio from Videos on Win/Mac/Phone >>
Conclusion
Make your cartoon videos perfect with the fantastic free cartoon sound effects available for download completely free. With the range of free cartoon sound effects, you don’t need to worry about creating new sounds or expenses. You need to download the free sounds and beautifully enhance it with your creativity. There are several other sites for downloading free cartoon sound effects, but here you can check out some of the trusted ones to use.
Benjamin Arango
Benjamin Arango is a writer and a lover of all things video.
Follow @Benjamin Arango
Benjamin Arango
Mar 27, 2024• Proven solutions
The sound plays a significant role in the videos. Without the right sound effects, your videos become dull. It doesn’t create an impact to grab the attention of the viewers. Especially when it comes to attracting the attention of kids while they watch cartoons.
Are you working on a cartoon video for kids or some animated action cartoons? Use the cartoon sound effects to add more intensity and emotions to the videos. Every time creating a new sound effect for your cartoon video becomes difficult.
If you are on a strict budget, producing new content becomes almost impossible. In such situations, free cartoon sound effects are the best way to enhance your cartoon videos.
In this article, you will learn eight best cartoon sound effects that you can download and make your videos perfect.
8 Best Cartoon Sound Effects Resources
1. Spongebob Sound Effects
MyInstant’s Spongebob soundboard offers a range of cartoon sound effects that can be easily downloaded just by clicking on the Download mp3 sound effect button. You can listen to over 120 classic cartoon sound effects and download it for free. You can also copy the embed link and paste it to your website.
2. Hanna Barbera Sound Effects
From Sounddogs, Hanna Barbera sound effects library, you can find over 2200 cartoon sound effects that are divided into 4 CDs. It has almost all the legendary classic cartoon sound effects from the cartoon shows like Yogi Bear, Huckleberry Hound, the Flintstones, The Jetsons, Quick Draw McGraw, and all the rest of the gang.
You can download the mp3 cartoon sound effects completely free by clicking on the Download ID number mentioned at the right end of each link.
3. Scooby Doo Running Sound
Fandom’s Scooby Doo running sound effects offers all the ideas used in 40 episodes of Scooby Doo throughout the three seasons on ABC. It is over 37000 pages wiki that you can click and browse through the pages to find the right sound effect and download it for free.
4. Tom and Jerry Sound Effects
Pond5 offers 13 Tom and Jerry sound effects that you can listen by scrolling the cursor over the boxes and download the free preview of cartoon sound effects by clicking on Download Preview.
If you want to download the entire cartoon sound effect, you need to register, log in, and pay for it. There are filters like price, collections, duration, etc. to make your selection more precise.
5. Free SFX
In FreeSFX website, you can find a range of comical cartoon sound effects that includes classic effects like descend, boink, impact, pop, musical, running, rip and snap, bounce spring, slide whistle, squelch and splat, horn and loads more.
You need to log in to the website to download free cartoon sound effects.
6.GRSites
With over 1980 cartoon sound effects, the GRSites is one of the best free sites for downloading both mp3 and WAV files. You can browse from a range of categories to find the best cartoon sound effects for your videos.
7. Cartoon Running Sound Effect
If you are looking for cartoon running sound effect, turn to Episode 345 in 99PercentInvisible. You can download the complete transcript page of around 30 minutes to use it in your video. Use the cartoon running sound effect produced by 99pi to enhance your video.
8. Big Fish Audio
The Big Fish Audio’s cartoon sound FX includes 23 free classic cartoon sound effects. The filters include a range of sound FX types, styles, format, brand, etc.
You can click on the cartoon sound effect and listen to it or add it to your playlist. But, if you wish to download the free cartoon sound effects, you need to register and pay to use the sound effect.
You may also like: How to Extract Audio from Videos on Win/Mac/Phone >>
Conclusion
Make your cartoon videos perfect with the fantastic free cartoon sound effects available for download completely free. With the range of free cartoon sound effects, you don’t need to worry about creating new sounds or expenses. You need to download the free sounds and beautifully enhance it with your creativity. There are several other sites for downloading free cartoon sound effects, but here you can check out some of the trusted ones to use.
Benjamin Arango
Benjamin Arango is a writer and a lover of all things video.
Follow @Benjamin Arango
“Windows Users: Top 10 Essential Audio Leveling Tools “
An audio normalizer is a tool that helps to change the overall volume of audio by a set amount to reach a predetermined level. In simple words, it can be defined as turning up the volume of an audio file without losing the audio quality.
Sound normalization is done for mainly two reasons. One is to increase the volume of a quiet audio file without making changes in its dynamic range for easy and better hearing. The other reason is to achieve matching volumes for different audio files.
While the sound of the audio gets increased during audio normalization, the noise will also get increased. So make sure that normalization is done properly within the right limit.
Top 10 Audio Normalizers for Windows
Audio normalization was commonly done in the early days when digital audio was enjoyed. The performance of many audio components was limited in signal-to-noise ratio and dynamic range, and sound normalization helped.
Normalization is still a useful feature that helps to equalize volume in different files. Let us look at some of the best audio normalizers available in Windows.
1. Wondershare Filmora
For Win 7 or later (64-bit)
For macOS 10.12 or later
Wondershare Filmora is a widely used video editing application famous for its extensive video and audio editing features. The Auto Normalization in Filmora is an AI integrated feature that analyses the volume of all the clips you have selected. It then automatically adjusts the volumes to 23.0LUFS, the standard loudness level of European audio programs.
To enable Auto Normalization on Filmora:
Go to the timeline and double click on the audio clip you wish to normalize, and from the window that appears, go to Audio, select Audio Normalization, and tap OK.
The audio will be analyzed and normalized automatically within some time.
2. Audacity
Audacity is a free and open-sourced audio software used on all operating systems. Its simple interface and compatibility across different platforms are the main reasons for its popularity.
The sound normalization feature of audacity can be used to set the peak amplitude of any track. It also allows to equalize the balance of the right and left channels of any stereo tracks.
Open audacity, click on Effect from the top toolbar, and then select Normalize. Three different options will be given for you to apply.
You can remove the DC offset, independently normalize stereo channels or normalize the maximum amplitude to your desired decibel.
3. Adobe Premiere Pro
As you all might know Adobe premium pro is a wonderful video editing application used by beginners and professionals alike. To normalize audio on adobe premium pro, go to the timeline, right-click on the audio file, and tap on Audio Gain…
A small window will appear, from which you can select the Normalize Max Peak to: option. The dB can be manually adjusted to your desired limit.
Click OK after making the necessary adjustments, and the changes will take place instantly.
4. MP3Gain
MP3Gain is an audio normalizing tool that analyses and adjusts the volumes of mp3 files so that they all have the same volume. They also ensure the original quality after the sound normalization process.
After the installation of MP3 gain on your device open it. Select Options, then Filename Display, and then Show File Only. Then tap on Add File(s) and add the files you need to normalize to MP3Gain.
This application can be used to play several songs at the same volume and the need to adjust the volume at the beginning of each song can be avoided.
5. VLC Video Player
Even though you might be familiar with VLC as a video player, it has many features that help to make changes in the audio and video of a file.
The player has a built-in sound normalization feature that can be enabled when needed. Open the player and tap on Tools from the top toolbar and then on the Preferences option. Choose to show All settings from the bottom right and select Filters under the Audio from the left panel. Tick mark the Volume normalizer option and hit the Save button.
The volume level can also be adjusted from the Volume normalizer panel under the Filters option.
6. Final Cut Pro
Final cut pro x is a non-linear and nondestructive video application commonly used on Apple devices. This application offers improved rendering, playback, and transcoding.
To normalize audio on final cut pro x, open the application and tap on the Modify option, then on Audio, and finally on Apply Normalization Gain.
To normalize more than one audio clip make sure that the audio level of each clip is set to 0 dB. This can be done by tapping on Edit and then on Remove Attributes. So for better results, make sure that the audio level of each clip is set to 0dB before normalization.
7. Handbrake
Handbrake is an open-source video transcoder that can convert any video format to any desired codecs. It also has some video and audio editing features. The sound normalization feature in Handbrake allows the user to adjust the dynamic range of some of the audio formats.
To increase the audio gain on Handbrake, select Source on the app and make sure the video file and destination are correct. Then click on the Audio option and adjust the Gain.
8. Reaper
Reaper is an all-in-one audio production application that offers extensive audio editing features, including MIDI recording, editing, mixing, processing, etc. To bring the volume level to a higher level using an audio normalizer in Reaper, open the application and import the audio files.
Reaper offers keyboard shortcuts for applying different features and normalizing audio on PC. The shortcut is Control + Shift + N.
This app also allows manual normalization using a knob which can be done according to the user preference.
9. AIMP
AIMP is a freeware audio player used by many android and windows users to enjoy music. This player offers an audio normalization feature that can be applied to all the files by default.
To do so, go to DSP manager in AIMP and click on the Volume normalization tab. Mark the Normalize volume option and make changes to the settings.
You can adjust the target volume level, the upper threshold of the preamp, and the lower threshold of preamp in the settings. The app also allows making changes to the gain values.
10. Movavi
Movavi is a video editor with a very intuitive interface and a big collection of effects. Normalizing the audio using Movavi is very simple, and to do so, open the application and import the file first to the timeline.
Double click on the file on the timeline and click on Clip Properties. From the General tab, tick mark the Normalize box, and the whole audio track will be normalized.
What is the best audio normalizer for you?
An audio normalizer can be used for a variety of purposes. Some people use it to play songs without having to adjust the volume for each song manually, others use it for enhancing the volume of songs that has a very low volume, and some others use it for video editing purposes.
A list of applications with sound normalizers has been listed above, and you can choose any one of them depending on your purpose. Some of these apps, like Wondershare Filmora, Final Cut Pro X offers extensive audio editing features and audio normalization, which can be very helpful in video editing. If you wish to increase the volume of the files while playing, you can go with VLC, MP3Gain, etc. Hope our suggestion helps to provide you with a better audio experience.
Versatile Video Editor - Wondershare Filmora
An easy yet powerful editor
Numerous effects to choose from
Detailed tutorials provided by the official channel
Also read:
- New The Editors Guide to Beat Matching Seamless Integration of Music and Motion in FCPX for 2024
- New In 2024, Clearing Up Cacophony 3 Easy Steps to Mute Audio Echoes
- New In 2024, 15 Cinematic Royalty Free Piano Music for Film and Videos
- Amplify Everyday Life with These Expert-Picked, Top MP3 Voice Recorders
- New In 2024, Mastering Frequency Adjustment in Audacity Without Compromising Sound Fidelity
- New Crucial Guidelines for Crafting Your Ultimate YouTube Sound Bank for 2024
- New In 2024, Free & Easy A Comparative Analysis of 3 Effective Audio-to-Text Techniques for the Modern Era
- Updated 2024 Approved Optimizing Pitch Alteration in Audacity A Guide to Quality Retention
- Elevating Visuals with Vocal Synchrony A Curated List of Pivotal Song Choices for 2024
- New 2024 Approved Streamlined Processes for Converting Podcasts Into MP3 Files
- New 2024 Approved Explore the Finest 6 Mobile Applications for Instantaneous Voice Change
- Top Budget-Friendly Mac Audio Converter Tool for 2024
- Design an Animated Scene Powered by Sound Without Spending Money for 2024
- New 2024 Approved The Ultimate Technique for Harmonizing Volume in DaVinci Resolve
- New 2024 Approved Chortle Chart Discovering the Worlds Loudest Laughter
- In 2024, The Ultimate Guide to the Top 8 Acoustic Themes for Professional Video Enhancement
- Updated 2024 Approved Learn to Record Sound Proficiently Apowersofts Tutorial and Its 4 Alternate Tools
- Efficient Methods for Turning WhatsApp Audio Into MP3 Files in Minutes for 2024
- In 2024, Best Online Tools to Remove Noise From Audio
- Updated Meet the Seven Star Voice Alteration Apps Dominating the Android Marketplace for 2024
- In 2024, Vibrant Music Score for Happy Birthday Feature Film - Future Edition
- New 2024 Approved Audience-Friendly Approach to PC Audio Recording Using Audacity Gratis
- Directory Exploration for Podcast Submission and Upload
- Updated Streamlining Access The Best Approaches for Downloading Spotify Music Content
- Updated The Ultimate List of No-Cost Audio-to-Text Transformation Tools for Multimedia Creators
- Updated 2024 Approved Optimal Audio Removal Programs for Windows Videos
- Updated In 2024, Best Platforms for Acquiring Lofi Tunes Downloads
- Updated Boosting Windows Volume Without Spending a Dime - Free Techniques Revealed for 2024
- 2024 Approved Incorporate Tune Into iMovie Video Composition
- New In 2024, Mastering Free Audio Recording Using Audacitys Capabilities
- Updated How to Change Audio Speed and Pitch in Adobe Rush for 2024
- New In 2024, Instruction 1 (Same Diffits Level) Provide a List of Five Alternative Phrases that Convey Similar Meaning to Thrilling Adventure Series for Young Explorers
- New In 2024, Mastering Your Vocal Range Top 10 Innovative Pitch-Changing Solutions
- 2024 Approved Premier Audio Tweaking Tools for iPhone/iPad Users This Year
- Updated In 2024, Voice Generating Services with Zero Cost – Top 9 Pick
- Enhancing Video Experience The Role of Background Music Integration
- 2024 Approved The Symphony of Visualization Presenting Audible Patterns with Waveforms & Enlivening Them Through Animation Using Blackmagic Design Fusion Studio
- Updated In 2024, The Sound of Depth Amplifying Voice Intensity Through Filmora Editing
- New In 2024, Your Guide to Affordable Comedy Audio Tracks 5 Sites Every Content Maker Should Know
- 2024 Approved The Comprehensive Guide to 15 Top Tools and Online Resources for Effortlessly Infusing Music Into Your Video Content
- 2024 Approved Melodic Ensemble for Festive Video Chronicle, To Be Released
- New Unveiling the Top 10 Free Audio Recording Apps for Professional Podcasters for 2024
- From Disruption to Deliberation Repairing the Fidelity of Frequencies
- 8 Best DAW Software for Mac Fully Review for 2024
- Updated 2024 Approved Blending Photos and Tunes for Free A Guide to Enhancing Imagery with Music on Computers & Smartphones
- Discovering Preeminent Software for Mac Music File Management for 2024
- Updated The Quiet Revolution Cutting-Edge Approaches to Taming Sibilance in Audio Editing for 2024
- 2024 Approved Mastering Sound Integration Enhancing Videos with Adobe Premiere Pro
- Undeleted lost videos from Xperia 1 V
- Best Ways to Slow Down Motion in CapCut for 2024
- Updated In 2024, To Add SRT to MP4 Is Not as Hard as You Might Think. All You Just Need Is the Right Tool to Help You Get the Job Done. Read This Article and Learn the 8 Latest Methods to Merge SRT with MP4 Effortlessly
- In 2024, How to Remove Forgotten PIN Of Your Vivo Y100 5G
- Ways To Find Unlocking Codes For Nokia G310 Phones
- Planning to Use a Pokemon Go Joystick on Motorola G24 Power? | Dr.fone
- Top 4 Android System Repair Software for Honor 70 Lite 5G Bricked Devices | Dr.fone
- How to Change/Add Location Filters on Snapchat For your Xiaomi 13T | Dr.fone
- New 2024 Approved PC Video Dubbing Made Easy Top Software Options
- Three methods to recover lost data on Poco F5 Pro 5G
- In 2024, Guide to Mirror Your Vivo V27 Pro to Other Android devices | Dr.fone
- Forgot Pattern Lock? Heres How You Can Unlock Honor Magic Vs 2 Pattern Lock Screen
- The Fastest Way to Convert 4K Videos to MP4 No Technical Expertise Needed for 2024
- Updated In 2024, Convert Time-Lapse to Normal Video
- How to Unlock Realme Phone without PIN
- The Complete Guide to Motorola Moto G24 FRP Bypass Everything You Need to Know
- In 2024, Top 11 Free Apps to Check IMEI on Oppo F23 5G Phones
- How To Simulate GPS Movement With Location Spoofer On Tecno Camon 20 Pro 5G? | Dr.fone
- New 2024 Approved How to Create Custom Lower Thirds in Filmora
- Updated 2024 Approved The Quickest YouTube Video Downloaders and Converters
- Updated 2024 Approved Overview About Supported iPhone Video Formats and Best iPhone Video Editor & Converter
- Updated 2024 Approved Discover the Best Video Editing Apps for Kids Free, Paid, and Everything in Between
- How To Restore Missing Pictures Files from Oppo A38.
- In 2024, Quick Steps to Change Weather Location on Apple iPhone 15 Plus | Dr.fone
- New Transition Like a Pro 3 Expert Techniques in Final Cut Pro for 2024
- Why is iPogo not working On Tecno Spark Go (2023)? Fixed | Dr.fone
- In 2024, Complete Guide on Unlocking Apple iPhone 11 with a Broken Screen? | Dr.fone
- 5 Solutions For Xiaomi Redmi Note 12 Pro+ 5G Unlock Without Password
- In 2024, Full Guide to Catch 100 IV Pokémon Using a Map On Motorola G24 Power | Dr.fone
- How to Come up With the Best Pokemon Team On Tecno Pop 8? | Dr.fone
- Top 10 AirPlay Apps in Honor Magic 5 Pro for Streaming | Dr.fone
- What is Geo-Blocking and How to Bypass it On Infinix Zero 30 5G? | Dr.fone
- How To Transfer WhatsApp From Apple iPhone XS Max to other iPhone devices? | Dr.fone
- The Updated Method to Bypass Sony FRP
- In 2024, Does Airplane Mode Turn off GPS Location On OnePlus Open? | Dr.fone
- Updated In 2024, How to Use the Logo Intro Templates for Your Next Video
- In 2024, How Can I Catch the Regional Pokémon without Traveling On Vivo S18e | Dr.fone
- How to retrieve erased call logs from Honor 90 GT?
- Why Your Honor Magic 5 Lite Screen Might be Unresponsive and How to Fix It | Dr.fone
- Unleash Your Creativity The Best Online Waveform Generators to Explore for 2024
- AddROM Bypass An Android Tool to Unlock FRP Lock Screen For your Gionee
- How to share/fake gps on Uber for Samsung Galaxy A34 5G | Dr.fone
- How To Unlock Realme C33 2023 Phone Without Password?
- Updated No Budget, No Problem Best Free MOD Video Editors for 2024
- Title: Updated From Visual to Audible Harness the Power of Audio Extraction Tools for Videos on Cross-Platform Systems (Windows, macOS & Mobile Devices - New Insights 2023)
- Author: Paul
- Created at : 2024-05-20 01:48:16
- Updated at : 2024-05-21 01:48:16
- Link: https://voice-adjusting.techidaily.com/updated-from-visual-to-audible-harness-the-power-of-audio-extraction-tools-for-videos-on-cross-platform-systems-windows-macos-and-mobile-devices-new-insight/
- License: This work is licensed under CC BY-NC-SA 4.0.
