
:max_bytes(150000):strip_icc():format(webp)/003_the-best-lgbt-movies-on-netflix-right-now-june-2022-5069913-8dbc370e568349c8a347c650353f17b1.jpg)
Updated 2024 Approved Sonic Treasure Trove The Ultimate Collection of Websites for Free Audio Files
“Sonic Treasure Trove: The Ultimate Collection of Websites for Free Audio Files “
FREE Top 10 Best Websites to Download Sound Clips for Videos

Liza Brown
Mar 27, 2024• Proven solutions


Are you working on animation , video, game, music, or maybe some other media file? Sound is a vital factor for all. It is the effect of the sound that can make or break a project.
But it can be difficult to find perfect and quality free sound clips. There are thousands of software for creating excellent videos, adding sounds , titles, overlays, tracks, and more. But what if you don’t wish to create a piece for just jazzing up your already existing video?
Free sound clips are great resources to download for videos if you don’t want to create sound effects.
Many people want to know the source of high-quality free audio for videos. These free sound samples are easy to find on the Internet.
In this article, you will get to know the 10 best websites to download free sound clips.
10 Best Free Sound Samples to Use
1. Freesound
Licensed under the Creative Commons License , the Freesound comprises of a large sound database. You can choose from the huge collection of sounds and decide which one is free and which sound needs attribution.
You can ensure if the sound can be used in commercial products or not. If you are not a professional and just need free sound samples for personal use, you may use free sound download from any site. The features of Freesound include-
- You can search for sounds or browse by tags or geotags
- The pack feature helps you to find a bunch of similar sounds very easily
- Preview the sound without logging in
- For downloading the sound, you need to log in
- Add your audio samples to contribute to the database
- You get 5 free sound clips download
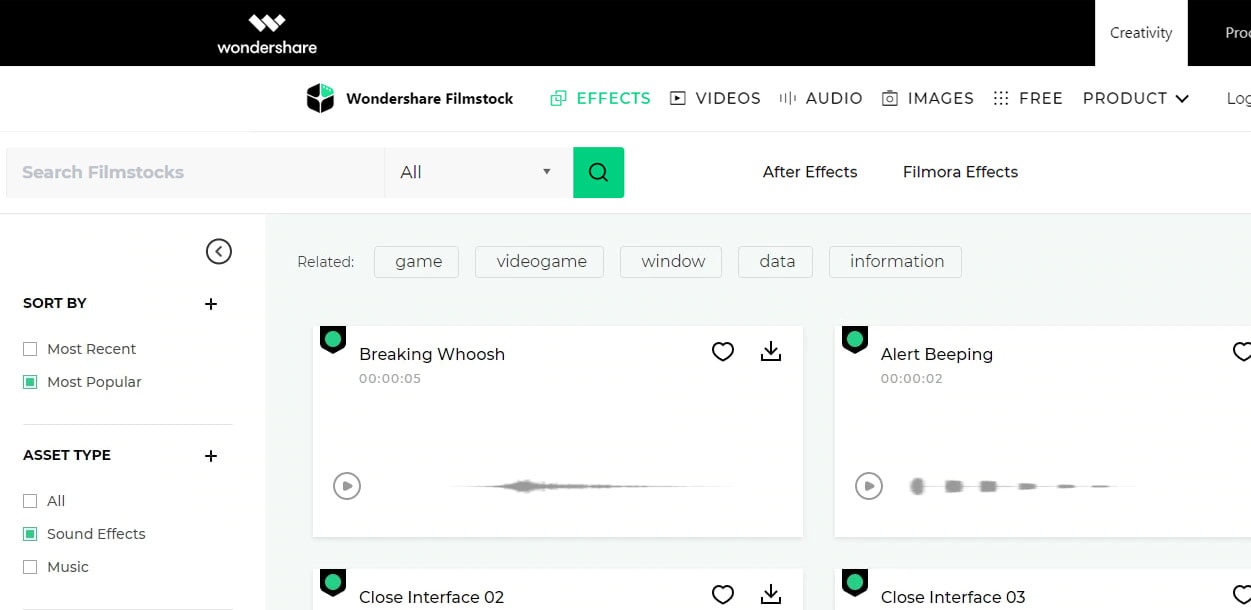
2. Filmstock
Filmstock from the house of Wondershare is one of the greatest libraries for free sound clips.
Any budget filmmaker would love to have this invaluable resource not just for free audio clips for videos but also for royalty-free sound clips.
You can bring your cinematic video to life from the Filmstock free-stuff one-stop-shop. The features of Filmstock include-
- Royalty-free video effects, audio, and stock media
- There are genres like science fiction, sci-fi, ufo, technology games
- Huge selection of curated quality stock images
- Filmstock library is continuously updated
- No attribution required for any project on Filmstock
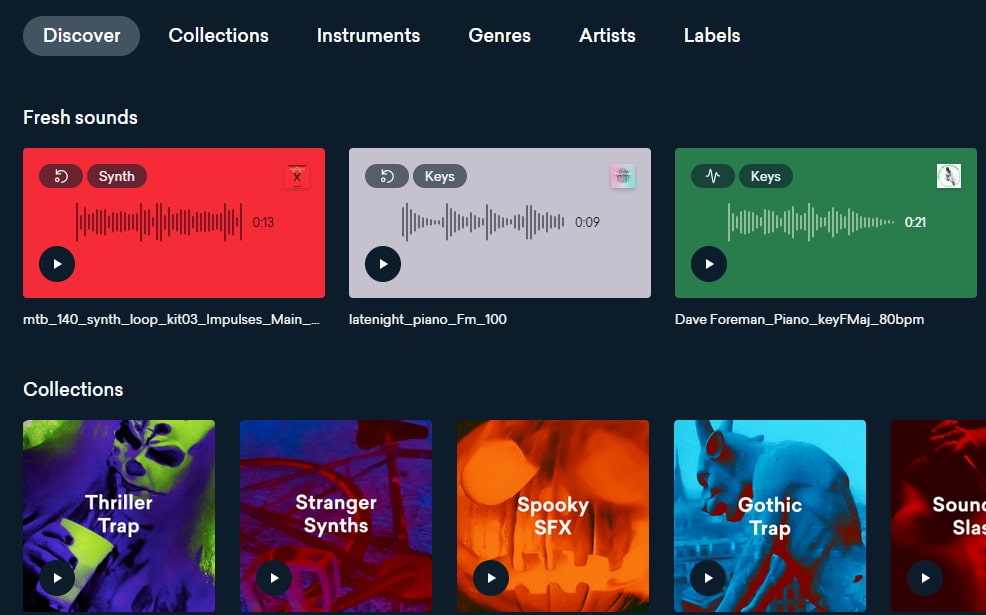
3. Landr
With a simple interface, Landr offers the best loops, packs, and samples to you. Make use of powerful Artificial Intelligence (AI) and you can spend lesser time searching and browsing. The features of Landr includes-
- You can browse free sound clips from the various collection of instruments
- Quickly find the right sound from the millions of free sound samples
- Get access to Selector tool powered by AI to make your browsing session faster
- Nourish your ideas with the curated collection and smart browsing
- The filter sounds by instrument, mood, BPM or key
- Go pro with your sampling
- Royalty-free sounds from today’s best artists, producers, and labels
4. Audio Micro
Audio Micro is one of the best tools for downloading horror-based free sound clips. Once you register with Audio Micro, you can easily download free audio clips for videos.
For downloading sound for commercial uses like TV or mass reproduction, you must be a paid subscriber. The features of Audio Micro are-
- Get access to the collection of royalty-free music and 2000 free good quality sound effects
- High-quality audio content for commercial use, available at competitive prices without any hidden cost
- Research, locate, purchase, and download stock audio
- Easy and fast search option with free sound collection visible from the navigation bar on the homepage
5. Audio Blocks
It is an intuitive platform to download loops, sound effects, and music. It has a low-cost subscription model and the content is constantly updated based on the search results. The features of Audio Blocks are-
- Unlimited royalty-free audio
- Loop, sound effects, and music download
- Low-cost subscription offers more content at a nominal price
- There are flexible plans for every budget
- Use content multiple times for commercial and personal projects
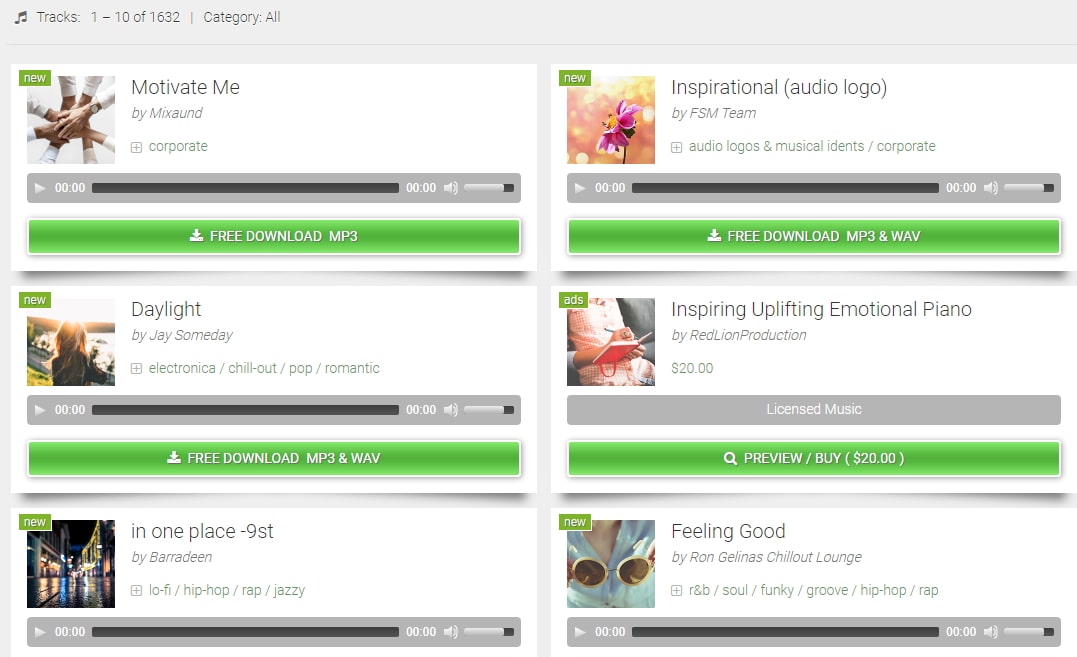
6. Free Stock Music
Whether YouTube project or your personal Vlog, Free Stock Music offers royalty-free music for a range of media platforms.
For any non-copyrighted sound clips free download, always feel free to reach Free Stock Music. The features are-
- Free access to non-copyrighted music
- Just put the attribution in credits to use the sound clips
- Unlimited royalty-free music in all moods, lengths, tempos, and categories
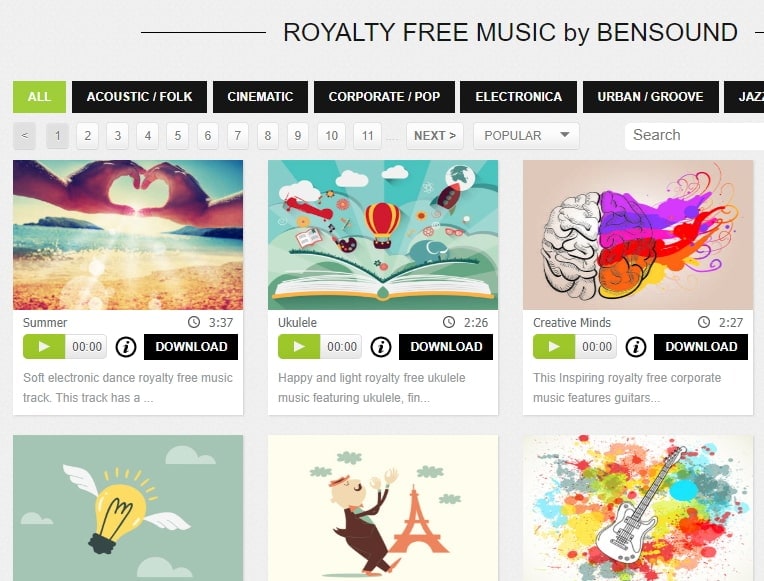
7. Bensound
Available under the Creative Common License, Bensound is used for multimedia projects like web applications or videos.
You can use the free tracks available with Bensound stock music in the various website background score, animations, web adverts, slideshows, etc. The features of Bensound include-
- Royalty-free stock music in various genres like electronica, urban, cinematic, jazz, rock, etc.
- Download free sound clips from the huge collection and add attributions in credits
- If you don’t wish to give credits and use the high-quality premium tracks, get the Bensound Pro License
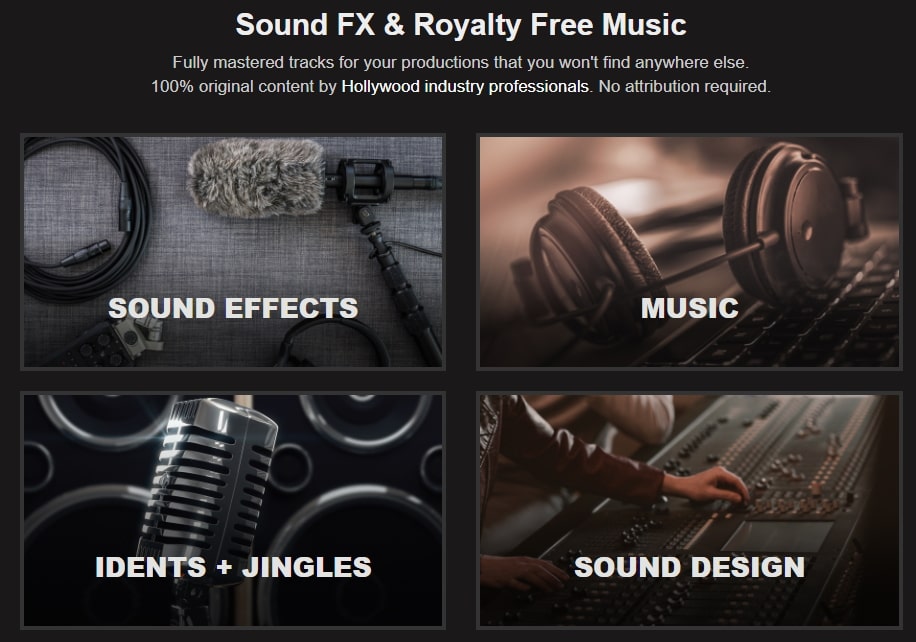
8. Sounds Crate
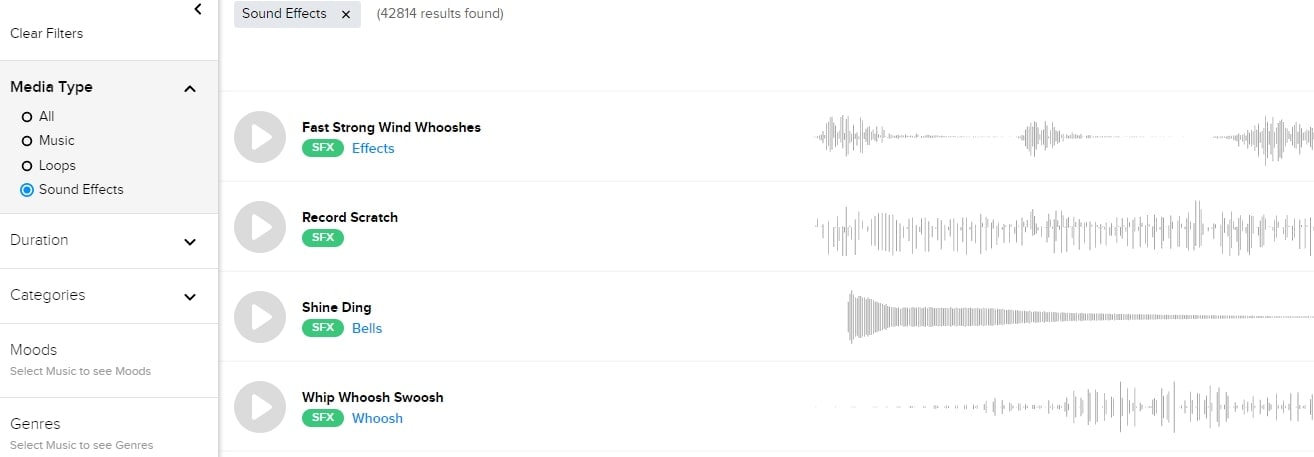
Are you looking for the best soundtrack for your video? Sounds Crate offers some of the best royalty-free music and sound FX.
With the tracks completely mastered for your production, Sound Crate offers 100% quality content created by industry professionals from Hollywood. The Sound Crate features include-
- Sound FX for electricity, gun, explosion, weapons, sci-fi, vehicles, movements, etc.
- Royalty-free music in diverse genres
- You can also use idents for corporate, news jingles, holiday idents, etc.
- Download and use the royalty-free sound clips easily
- Over 10000 plus HD assets
- No attribution required
- Browse from unlimited music, sound effects, etc.
9. ZapSlat
Do your audio and video editing projects need some cool soundtracks to jazz it up? Look no further. ZapSlat is one of the best free sound download sites to make your project successful. The features of ZapSlat are-
- Comprises over 54,000 professional free sound effects and royalty-free music files
- Variety of free sound effect packs
- Download royalty-free music from a variety of genres
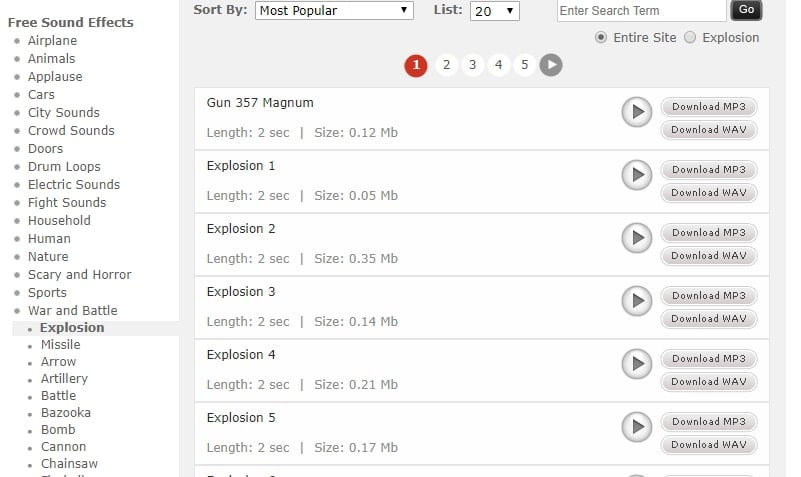
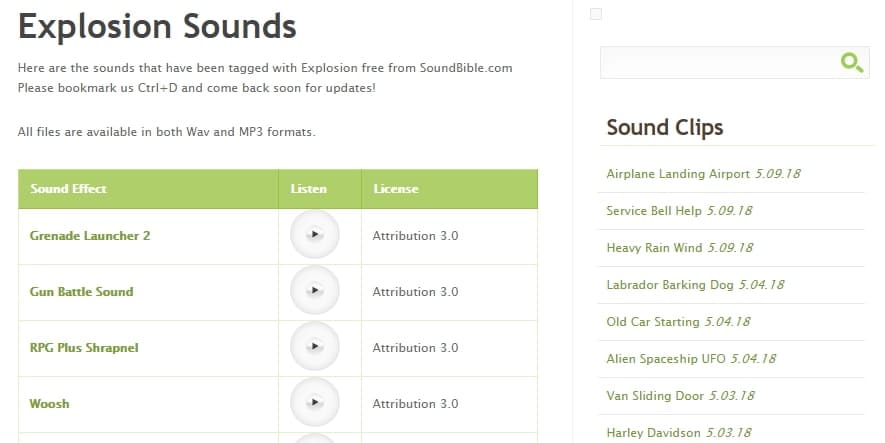
10. Sound Bible
Choose the best from 2000 free sound clips licensed under Creative Commons. To use the sound effect for commercial video, you can select from the royalty-free sounds. The features of SoundBible are-
- Download free sound clips without logging in or creating an account
- 2000 free sounds
- Copyright-free sound resources are weekly updated
Conclusion
Now that you know the best 10 free sound clip download sites, make use of it in your videos. Without worrying about the expense, you can use these sites to download free sound clips.
Liza Brown
Liza Brown is a writer and a lover of all things video.
Follow @Liza Brown
Liza Brown
Mar 27, 2024• Proven solutions
Are you working on animation , video, game, music, or maybe some other media file? Sound is a vital factor for all. It is the effect of the sound that can make or break a project.
But it can be difficult to find perfect and quality free sound clips. There are thousands of software for creating excellent videos, adding sounds , titles, overlays, tracks, and more. But what if you don’t wish to create a piece for just jazzing up your already existing video?
Free sound clips are great resources to download for videos if you don’t want to create sound effects.
Many people want to know the source of high-quality free audio for videos. These free sound samples are easy to find on the Internet.
In this article, you will get to know the 10 best websites to download free sound clips.
10 Best Free Sound Samples to Use
1. Freesound
Licensed under the Creative Commons License , the Freesound comprises of a large sound database. You can choose from the huge collection of sounds and decide which one is free and which sound needs attribution.
You can ensure if the sound can be used in commercial products or not. If you are not a professional and just need free sound samples for personal use, you may use free sound download from any site. The features of Freesound include-
- You can search for sounds or browse by tags or geotags
- The pack feature helps you to find a bunch of similar sounds very easily
- Preview the sound without logging in
- For downloading the sound, you need to log in
- Add your audio samples to contribute to the database
- You get 5 free sound clips download
2. Filmstock
Filmstock from the house of Wondershare is one of the greatest libraries for free sound clips.
Any budget filmmaker would love to have this invaluable resource not just for free audio clips for videos but also for royalty-free sound clips.
You can bring your cinematic video to life from the Filmstock free-stuff one-stop-shop. The features of Filmstock include-
- Royalty-free video effects, audio, and stock media
- There are genres like science fiction, sci-fi, ufo, technology games
- Huge selection of curated quality stock images
- Filmstock library is continuously updated
- No attribution required for any project on Filmstock
3. Landr
With a simple interface, Landr offers the best loops, packs, and samples to you. Make use of powerful Artificial Intelligence (AI) and you can spend lesser time searching and browsing. The features of Landr includes-
- You can browse free sound clips from the various collection of instruments
- Quickly find the right sound from the millions of free sound samples
- Get access to Selector tool powered by AI to make your browsing session faster
- Nourish your ideas with the curated collection and smart browsing
- The filter sounds by instrument, mood, BPM or key
- Go pro with your sampling
- Royalty-free sounds from today’s best artists, producers, and labels
4. Audio Micro
Audio Micro is one of the best tools for downloading horror-based free sound clips. Once you register with Audio Micro, you can easily download free audio clips for videos.
For downloading sound for commercial uses like TV or mass reproduction, you must be a paid subscriber. The features of Audio Micro are-
- Get access to the collection of royalty-free music and 2000 free good quality sound effects
- High-quality audio content for commercial use, available at competitive prices without any hidden cost
- Research, locate, purchase, and download stock audio
- Easy and fast search option with free sound collection visible from the navigation bar on the homepage
5. Audio Blocks
It is an intuitive platform to download loops, sound effects, and music. It has a low-cost subscription model and the content is constantly updated based on the search results. The features of Audio Blocks are-
- Unlimited royalty-free audio
- Loop, sound effects, and music download
- Low-cost subscription offers more content at a nominal price
- There are flexible plans for every budget
- Use content multiple times for commercial and personal projects
6. Free Stock Music
Whether YouTube project or your personal Vlog, Free Stock Music offers royalty-free music for a range of media platforms.
For any non-copyrighted sound clips free download, always feel free to reach Free Stock Music. The features are-
- Free access to non-copyrighted music
- Just put the attribution in credits to use the sound clips
- Unlimited royalty-free music in all moods, lengths, tempos, and categories
7. Bensound
Available under the Creative Common License, Bensound is used for multimedia projects like web applications or videos.
You can use the free tracks available with Bensound stock music in the various website background score, animations, web adverts, slideshows, etc. The features of Bensound include-
- Royalty-free stock music in various genres like electronica, urban, cinematic, jazz, rock, etc.
- Download free sound clips from the huge collection and add attributions in credits
- If you don’t wish to give credits and use the high-quality premium tracks, get the Bensound Pro License
8. Sounds Crate
Are you looking for the best soundtrack for your video? Sounds Crate offers some of the best royalty-free music and sound FX.
With the tracks completely mastered for your production, Sound Crate offers 100% quality content created by industry professionals from Hollywood. The Sound Crate features include-
- Sound FX for electricity, gun, explosion, weapons, sci-fi, vehicles, movements, etc.
- Royalty-free music in diverse genres
- You can also use idents for corporate, news jingles, holiday idents, etc.
- Download and use the royalty-free sound clips easily
- Over 10000 plus HD assets
- No attribution required
- Browse from unlimited music, sound effects, etc.
9. ZapSlat
Do your audio and video editing projects need some cool soundtracks to jazz it up? Look no further. ZapSlat is one of the best free sound download sites to make your project successful. The features of ZapSlat are-
- Comprises over 54,000 professional free sound effects and royalty-free music files
- Variety of free sound effect packs
- Download royalty-free music from a variety of genres
10. Sound Bible
Choose the best from 2000 free sound clips licensed under Creative Commons. To use the sound effect for commercial video, you can select from the royalty-free sounds. The features of SoundBible are-
- Download free sound clips without logging in or creating an account
- 2000 free sounds
- Copyright-free sound resources are weekly updated
Conclusion
Now that you know the best 10 free sound clip download sites, make use of it in your videos. Without worrying about the expense, you can use these sites to download free sound clips.
Liza Brown
Liza Brown is a writer and a lover of all things video.
Follow @Liza Brown
Mastering Sound: A Guide to Advanced Editing Techniques with Sony Vegas [2023 Edition]
Sony Vegas Audio Editor: How to Edit Audio in Vegas Pro

Benjamin Arango
Mar 27, 2024• Proven solutions
Being the most commonly used professional video editing tool, Sony (Magix) Vegas Pro provides complete control over audio files inside every project. If you are new to this platform then following details will help you to get complete information about how to edit audio volume, apply unique effects, remove noise and adjust fade in as well as fade out options for projects.
You May Also Like: How to Edit YouTube Audio >>
Sony (Magix) Vegas Audio Editor: How to edit audio in Vegas Pro
This tutorial is divided into 6 different sections that contain complete details about all possible audio track adjustments and customization options.
- Section 1: Edit volume for audio track
- Section 2: Fade in and Fade Out
- Section 3: Speed up or Slow down
- Section 4: Reverse audio clip
- Section 5: Noise Removal
- Section 6: Apply unique Audio Effects
Section 1: Edit volume for audio track
First of all you need to import your desired audio file to timeline of Vegas Pro; it can be done by using drag and drop option directly. On Vegas timeline you will find so many sound adjustment options that appear on audio track header.

- Mute the Audio Track: Press M

- Manage volume control for all events of loaded track: Use Volume Slider switch that is denoted by dB.
- Pan Slider: It is possible to make adjustments for audio pan using a slider named as Center. Users can slide it to left side or right side as per audio project requirements.
Note:
1. Put on your headphone to better verify the output result.
2. To reset the volume, just double click on the options.
Those who want to control volume separately for different portions of audio file can go to Audio Envelop (go Insert > Audio Envelopes)and then make all essential settings as:
Mute: A blue line is visible on timeline at your selected audio event, simply double click over it for addition of a specific point and then right click for mute adjustments. From appeared drop down menu you can select muted or not muted and the adjustments will be effective on right side of event point.

Volume: Check the deep blue line on selected event and then double click over it for addition of a marking point. Drag this point up or down for appropriate volume settings and use right click option for additional adjustments.

Pan: Pan Adjustments can be done using red lien control over event. Double click over it and move the point up or down to set pan at specific range. Use right click button for advanced options.

Section 2: Fade in and Fade Out
Some professional settings to audio project can be made using fade in/out options. Users can pull the fade adjust curser to any direction for easy customization.
Hover your cursor on the audio event in timeline, you will find the fade in/out offset handle at the up side corner of the audio event. Pull the Fade in/out offset handle as long as you want:

Section 3: Speed up or Slow down
If you want to change the speed of specific portions of your audio project then hold CTRL button and then start moving your curser over Trim Event handle. If you drag it to right side then it will directly speed up your audio clip and dragging to left side will automatically reduce speed.

Section 4: Reverse audio clip
One can easily reverse his selected audio clip; simply right click over it and then choose Reverse option from drop down menu; it will help to move audio frames in reverse order.

Section 5: Noise Removal
One classic feature of Vegas Pro is its Sound Restoration in Audio FX control. But it does not work as good compared to Audacity. Check this article to see how to remove noise from audio using Sony Vegas Pro & Audacity.
Or check this video tutorial below:
Section 6: Apply unique Audio Effects
If you want to add specific effects to your audio files then use two simple methods on Vegas Pro with its Audio FX tool: One is to add effects on entire video file and second option is to make changes to specific layers of audio project. Use these steps to achieve great results:
To entire audio layer

To an individual portion of the audio layer

Step 1: First of all go to Track Description Box and then press the Track FX icon, an audio track FX will soon appear on your device screen. The three basic controls are always activated, that are Track Compressor, Track EQ and Track Noise Gate.

For additional personalization you need to use plug-in chain button from right corner.

Step 2: Now select any desired effect from list that can make your audio track more impressive and press Add; once applied then hit OK.

Step 3: Make required adjustments with the help of slider or users can also open the drop down box on screen for selection of present templates as per need.

Recommendation
The Vegas Pro is rated as a professional editing software tool due to its advanced user interface, high price range and availability on Mac devices only. If you are searching for some video editing tools that can work on Windows as well as Mac devices then Wondershare Filmora is one of the best options for you all.
Download Mac Version ](https://tools.techidaily.com/wondershare/filmora/download/ )
Benjamin Arango
Benjamin Arango is a writer and a lover of all things video.
Follow @Benjamin Arango
Benjamin Arango
Mar 27, 2024• Proven solutions
Being the most commonly used professional video editing tool, Sony (Magix) Vegas Pro provides complete control over audio files inside every project. If you are new to this platform then following details will help you to get complete information about how to edit audio volume, apply unique effects, remove noise and adjust fade in as well as fade out options for projects.
You May Also Like: How to Edit YouTube Audio >>
Sony (Magix) Vegas Audio Editor: How to edit audio in Vegas Pro
This tutorial is divided into 6 different sections that contain complete details about all possible audio track adjustments and customization options.
- Section 1: Edit volume for audio track
- Section 2: Fade in and Fade Out
- Section 3: Speed up or Slow down
- Section 4: Reverse audio clip
- Section 5: Noise Removal
- Section 6: Apply unique Audio Effects
Section 1: Edit volume for audio track
First of all you need to import your desired audio file to timeline of Vegas Pro; it can be done by using drag and drop option directly. On Vegas timeline you will find so many sound adjustment options that appear on audio track header.
- Mute the Audio Track: Press M
- Manage volume control for all events of loaded track: Use Volume Slider switch that is denoted by dB.
- Pan Slider: It is possible to make adjustments for audio pan using a slider named as Center. Users can slide it to left side or right side as per audio project requirements.
Note:
1. Put on your headphone to better verify the output result.
2. To reset the volume, just double click on the options.
Those who want to control volume separately for different portions of audio file can go to Audio Envelop (go Insert > Audio Envelopes)and then make all essential settings as:
Mute: A blue line is visible on timeline at your selected audio event, simply double click over it for addition of a specific point and then right click for mute adjustments. From appeared drop down menu you can select muted or not muted and the adjustments will be effective on right side of event point.
Volume: Check the deep blue line on selected event and then double click over it for addition of a marking point. Drag this point up or down for appropriate volume settings and use right click option for additional adjustments.
Pan: Pan Adjustments can be done using red lien control over event. Double click over it and move the point up or down to set pan at specific range. Use right click button for advanced options.
Section 2: Fade in and Fade Out
Some professional settings to audio project can be made using fade in/out options. Users can pull the fade adjust curser to any direction for easy customization.
Hover your cursor on the audio event in timeline, you will find the fade in/out offset handle at the up side corner of the audio event. Pull the Fade in/out offset handle as long as you want:
Section 3: Speed up or Slow down
If you want to change the speed of specific portions of your audio project then hold CTRL button and then start moving your curser over Trim Event handle. If you drag it to right side then it will directly speed up your audio clip and dragging to left side will automatically reduce speed.
Section 4: Reverse audio clip
One can easily reverse his selected audio clip; simply right click over it and then choose Reverse option from drop down menu; it will help to move audio frames in reverse order.
Section 5: Noise Removal
One classic feature of Vegas Pro is its Sound Restoration in Audio FX control. But it does not work as good compared to Audacity. Check this article to see how to remove noise from audio using Sony Vegas Pro & Audacity.
Or check this video tutorial below:
Section 6: Apply unique Audio Effects
If you want to add specific effects to your audio files then use two simple methods on Vegas Pro with its Audio FX tool: One is to add effects on entire video file and second option is to make changes to specific layers of audio project. Use these steps to achieve great results:
To entire audio layer
To an individual portion of the audio layer
Step 1: First of all go to Track Description Box and then press the Track FX icon, an audio track FX will soon appear on your device screen. The three basic controls are always activated, that are Track Compressor, Track EQ and Track Noise Gate.
For additional personalization you need to use plug-in chain button from right corner.
Step 2: Now select any desired effect from list that can make your audio track more impressive and press Add; once applied then hit OK.
Step 3: Make required adjustments with the help of slider or users can also open the drop down box on screen for selection of present templates as per need.
Recommendation
The Vegas Pro is rated as a professional editing software tool due to its advanced user interface, high price range and availability on Mac devices only. If you are searching for some video editing tools that can work on Windows as well as Mac devices then Wondershare Filmora is one of the best options for you all.
Download Mac Version ](https://tools.techidaily.com/wondershare/filmora/download/ )
Benjamin Arango
Benjamin Arango is a writer and a lover of all things video.
Follow @Benjamin Arango
The Fundamentals of Adding Sound to Still Art Forms
Almost everyone shoots videos and photos now. But sometimes, it’s hard to record videos while boring to capture images. What if a hybrid mingles still images with an audio file? You can add audio to photo easily.
Images with a soundtrack are simpler to create and more interactive than video; they naturally improve the project without time commitment or complexity. The question that appears is; how to add audio to a photo/image and create great multimedia photography?
In this post, we will describe and clear all your queries on how to add audio to photo. Whether you wish to combine audio and image on the computer or add audio to iPhone pictures, you can all find the answer.
In this article
01 [Can I add audio to the photo?](#Part 1)
02 [How to add audio to a photo?](#Part 2)
03 [Secret about adding audio to the photo?](#Part 3)
Part 1 Can I add audio to the photo?

Yes, it’s possible to add audio to photo, and we have various methods to do this. One of the simplest methods is arranging images into slideshows and adding audio.
Yes, there are different ways by which you can add audio to photo online or offline, including both the easiest and most brutal ways. Let’s list out some general courses as follows!
● The first and common way is by making a slideshow or photo collage like a video and adding background music as audio.
● You can use an image collage app or add audio to a photo app for Android or iPhone devices.
● Lastly, you can add audio to the photo online editor or online video editing program and include voiceover or background music.
All in all, it’s possible to add audio to photo provided you’ve to look straightforward and quick ways of doing so.
Part 2 How to add audio to a photo?
ACDSee supports images with embedded audio and photos with associated audio files. Images with embedded audio are JPEG or TIFF images saved inside the photo folder. You can embed audio inside the folder of photos by adding audio to the photo online.
Images with associated audio are photos are merged with individual WAV audio files. The photo folders and their associated audio files contain the same file name and are placed within the same folder.
You can associate any WAV file with a photo by assigning them the same name and locating them in the same folder or adding audio to the photo.
Note: If you rename or move either an audio file or an image file associated with it, you must rename both the folders or they will not associate for longer. It does not apply to photos with embedded audio.
Steps to add audio to photo via ACDSee
Do one of the following:
● Select an image in Manage mode.
● Open an image in View mode.
Step1 Click Tools | Image Audio | Edit
Step2 In the Edit Audio dialog box, click the Browse button
Step3 Select a WAV file and click Save
Step4 If you would like to truncate or clip the audio file, select the Use markers checkbox and drag the Start marker and End marker sliders. Do one of the following
● Click the Truncate button to remove the beginning and end of the audio file (the sections outside of the start and end markers).
● Click the Clip button to remove the audio file section inside the start and end markers.
Step5 To hear a preview of the file, click the Play button
Step6 Click OK
Part 3 Secret about adding audio to the photo?
If you’re looking to add audio to a photo in a straightforward manner, here’s a tip for you than going complex. It’s because the software or programs available are highly problematic when it comes to better understanding. Thus, using the ideal program is the best way out (and a secret)!
We have to admit that customization is quite trendy among the young generation. Customizing a unique album is a cool thing, too.
A professional editing tool would be an ideal helper to do this (hence, the reason you’re here). While a great variety of music management software and video editors support adding audio to images, Wondershare Filmora stands out for its efficiency, simplicity, and robust capability.
To get started, consider a free trial copy of Wondershare Filmora
Step1 Import Media
Hit the “Import” tab to load your songs from ripped CDs or downloaded from the internet.
Then drag and drop your image in a format like JPEG, JPG, JPE, GIF, BMP, DIB, PNG, JFIF, TIFF, TIF to the media library panel. Now you’ll consider using all the imported files displayed as thumbnails in the Media library.
Step2 Drag and Drop to add photos to audio
Drag songs and photos from the Media Library to the Timeline accordingly.
Filmora assists you in adding various photos to the audio. You can highlight the image and hover your mouse to the last section.
Click the “set duration” icon on the toolbar and set it to fit your music file’s length.
Tips: You can zoom-out or zoom-in on the Timeline in the top right corner by dragging the timeline slider to find the ideal position easily.
Check the effect in the preview window after this. If possible, you can ramp up your creation, e.g., add captions, apply special effects, transitions, and even create a picture-in-picture effect.

Step3 Save Music with Photos
When you’re satisfied with the outcomes, hit the Export tab.
Then, select MP4 under the format tab in the output window, or if you want to play the media on your phone, you can choose the device in the Export window and choose target devices among iPad, iPhone, or Apple TV, etc. Filmora will create a proper setting for phone device saving.

Bonus tips
Rip audio from video: If you wish to extract audio from a movie trailer, film, comedy, TV show, etc., highlight the video file in the Timeline tab, right-click it and choose the “Audio Detach” tab, then you can eliminate the original video stream and save in a new MP3 format, and now you can freely add your images to the ripped music.
Or, you can delete the original audio file and add a new one.
Conclusion
So, that’s all you had to know about adding audio to photo. We’ve discussed all the questions you’re wandering on how to add audio to photo online and mentioned the different ways by which you can do the same.
As the uploading speed is slow, we highly suggest using Filmora to add audio to photos. Besides, Filmora provides 50 plus sounds that you can use. Try it now!
02 [How to add audio to a photo?](#Part 2)
03 [Secret about adding audio to the photo?](#Part 3)
Part 1 Can I add audio to the photo?
Yes, it’s possible to add audio to photo, and we have various methods to do this. One of the simplest methods is arranging images into slideshows and adding audio.
Yes, there are different ways by which you can add audio to photo online or offline, including both the easiest and most brutal ways. Let’s list out some general courses as follows!
● The first and common way is by making a slideshow or photo collage like a video and adding background music as audio.
● You can use an image collage app or add audio to a photo app for Android or iPhone devices.
● Lastly, you can add audio to the photo online editor or online video editing program and include voiceover or background music.
All in all, it’s possible to add audio to photo provided you’ve to look straightforward and quick ways of doing so.
Part 2 How to add audio to a photo?
ACDSee supports images with embedded audio and photos with associated audio files. Images with embedded audio are JPEG or TIFF images saved inside the photo folder. You can embed audio inside the folder of photos by adding audio to the photo online.
Images with associated audio are photos are merged with individual WAV audio files. The photo folders and their associated audio files contain the same file name and are placed within the same folder.
You can associate any WAV file with a photo by assigning them the same name and locating them in the same folder or adding audio to the photo.
Note: If you rename or move either an audio file or an image file associated with it, you must rename both the folders or they will not associate for longer. It does not apply to photos with embedded audio.
Steps to add audio to photo via ACDSee
Do one of the following:
● Select an image in Manage mode.
● Open an image in View mode.
Step1 Click Tools | Image Audio | Edit
Step2 In the Edit Audio dialog box, click the Browse button
Step3 Select a WAV file and click Save
Step4 If you would like to truncate or clip the audio file, select the Use markers checkbox and drag the Start marker and End marker sliders. Do one of the following
● Click the Truncate button to remove the beginning and end of the audio file (the sections outside of the start and end markers).
● Click the Clip button to remove the audio file section inside the start and end markers.
Step5 To hear a preview of the file, click the Play button
Step6 Click OK
Part 3 Secret about adding audio to the photo?
If you’re looking to add audio to a photo in a straightforward manner, here’s a tip for you than going complex. It’s because the software or programs available are highly problematic when it comes to better understanding. Thus, using the ideal program is the best way out (and a secret)!
We have to admit that customization is quite trendy among the young generation. Customizing a unique album is a cool thing, too.
A professional editing tool would be an ideal helper to do this (hence, the reason you’re here). While a great variety of music management software and video editors support adding audio to images, Wondershare Filmora stands out for its efficiency, simplicity, and robust capability.
To get started, consider a free trial copy of Wondershare Filmora
Step1 Import Media
Hit the “Import” tab to load your songs from ripped CDs or downloaded from the internet.
Then drag and drop your image in a format like JPEG, JPG, JPE, GIF, BMP, DIB, PNG, JFIF, TIFF, TIF to the media library panel. Now you’ll consider using all the imported files displayed as thumbnails in the Media library.
Step2 Drag and Drop to add photos to audio
Drag songs and photos from the Media Library to the Timeline accordingly.
Filmora assists you in adding various photos to the audio. You can highlight the image and hover your mouse to the last section.
Click the “set duration” icon on the toolbar and set it to fit your music file’s length.
Tips: You can zoom-out or zoom-in on the Timeline in the top right corner by dragging the timeline slider to find the ideal position easily.
Check the effect in the preview window after this. If possible, you can ramp up your creation, e.g., add captions, apply special effects, transitions, and even create a picture-in-picture effect.
Step3 Save Music with Photos
When you’re satisfied with the outcomes, hit the Export tab.
Then, select MP4 under the format tab in the output window, or if you want to play the media on your phone, you can choose the device in the Export window and choose target devices among iPad, iPhone, or Apple TV, etc. Filmora will create a proper setting for phone device saving.
Bonus tips
Rip audio from video: If you wish to extract audio from a movie trailer, film, comedy, TV show, etc., highlight the video file in the Timeline tab, right-click it and choose the “Audio Detach” tab, then you can eliminate the original video stream and save in a new MP3 format, and now you can freely add your images to the ripped music.
Or, you can delete the original audio file and add a new one.
Conclusion
So, that’s all you had to know about adding audio to photo. We’ve discussed all the questions you’re wandering on how to add audio to photo online and mentioned the different ways by which you can do the same.
As the uploading speed is slow, we highly suggest using Filmora to add audio to photos. Besides, Filmora provides 50 plus sounds that you can use. Try it now!
Also read:
- Updated In 2024, Full Screen Vimeo Video Details with Aspect Ratio Information
- New 2024 Approved Streamlining Creativity Top 10 Plugin Essentials for Efficient Media Production
- In 2024, The Leading Voice Alteration and Production Software for Aspiring Sopranos & Tenors
- New 2024 Approved 6 Best Websites to Download Whoosh Sound Effect (Easily)
- 2024 Approved The Freestyle Producers Guide 2023S No-Cost Audio Mixing Leaders
- The Ultimate Guide to Affordable Stock Photography Insights From Pexels.com for 2024
- Updated 2024 Approved Mastering the Airwaves An In-Depth Look at the Leading Free & Paid Podcast to Text Conversion Applications
- Streamlining Access The Best Approaches for Downloading Spotify Music Content
- Updated Most Trending Free Digital Repositories for Guitar Mood Melodies and Images for 2024
- In 2024, Detailed Vimeo Video Data Sheet with Emphasis on Aspect Ratio Information
- Updated The Art of Acoustic Correction Multiple Strategies for Overcoming Distorted Sound Phenomena for 2024
- New Enhance Virtual Interactions Applying Clownfish Voice Modification Technology to Discord, Fortnite, and Skype Platforms
- Pro-Level MP3 Cutting Discover the Top 5 Online Platforms for 2024
- New In 2024, Discover Top 9 Podcast Microphone Models Designed for Expert Level Use
- New Auditory Feast Bird Calls and Songs
- New Exploring the Ultimate Selection of Gratis VST Enhancers, Updated
- New The Ultimate Guide to Recording Sounds in PowerPoint Operating Windows and macOS Systems
- Critically Acclaimed Audio Repository Top 10 Music Capture Apps
- Silent Elements Unveiled Techniques for Retrieving Sound From Videos
- Updated Harnessing Free Tools to Turn Audio Into Text The Essential Guide with Top Three Strategies (Step by Step) for 2024
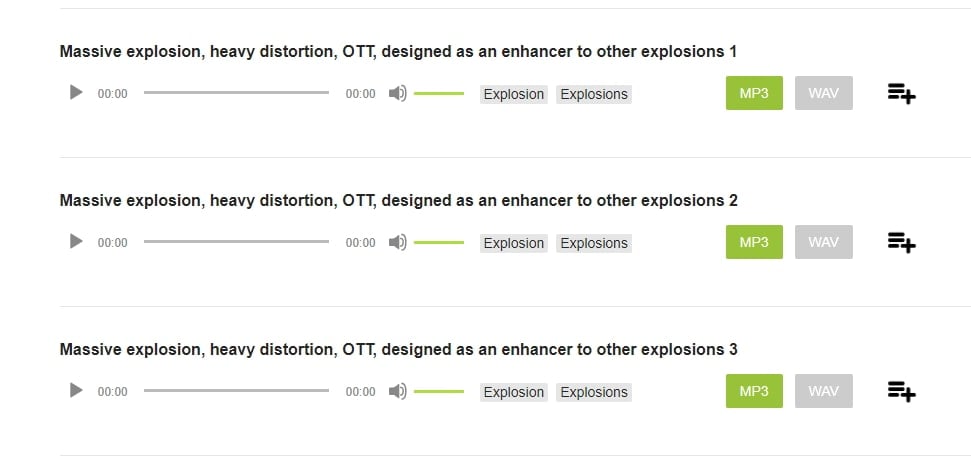
- Updated Finding Repository of Explosive Roar Samples for 2024
- New Professional Linux Sound Capture A Rundown of Top Software for Studio-Quality Audio for 2024
- New 2024 Approved Brisk Remediation of Sound File Integration Challenges in Adobe Premiere Pro
- New 2024 Approved Best Audio Editors to Remove Background Noise From Audio
- Updated Mastering the Use of Atmospheric Audio to Enhance Narrative in Films
- Online Learning Campaign Comprehensive Insights Streamed Live
- 2024 Approved Explore the Best-Kept Secret 7 Premium Transition Sounds Available for Download
- New 2024 Approved Premier Selection of Inexpensive Audio Editing Utilities Available Worldwide
- Updated In 2024, Unlocking Podcast Quality Learn How to Craft a Professional Audio Experience
- New Explore the Best Selection of 7 Internet-Based Audio Trimming Utilities for 2024
- New Adding Sounds to MKV Videos Techniques and Procedures (Revamped) for 2024
- The Leading Audio Tinkering Tools IOS and Android Edition, Revised
- 2024 Approved Advanced Audio File Adapter Free Conversion of High-End MPA Sounds to Universal MP3 Format (2023 Version)
- 2024 Approved Explore the Highest-Rated Voice Customization Tools Available on Android
- 2024 Approved A Symphony for the Ears Ranking the Top 8 Filmmaking Sonic Experiences
- Updated The Premier List of PC Audio Capture Tools Uncovering Top Performers for 2024
- 2024 Approved Chart Wolfs Sonorous Call Pattern
- New In 2024, Unveil the Ultimate Collection of Audio Filtration Techniques
- New Auditory Landmarks Pinpointing Button-Induced Sounds in Software
- Updated 2024 Approved Audiovisual Mastery on a Budget The Ultimate List of Free Audio Mixers
- New Best Real-Time Voice Changer Apps 2024
- Updated The SFX Seekers Companion Navigating to 8 Exceptional Online Locations for Accessing Premium-Quality, No-Cost Audio Assets for 2024
- Top 10 iOS & Android Music Editing Tools of the Year 2024
- New How to Choose the Best Voice Changer for Gaming for 2024
- Updated VibeVault Download and Spin Professional DJ Music for 2024
- Improve Auditory Experience Through Crossfade Adjustments for 2024
- Fix the Error of Unfortunately the Process.com.android.phone Has Stopped on Nokia C12 | Dr.fone
- Updated The Ultimate List of 3D Video Editing Software Free & Paid
- Updated In 2024, The Battle for Video Supremacy Adobe Premiere vs After Effects
- Updated Expert Recommendations Top MP3 Conversion Software for Mac for 2024
- New Waht Is AI Pixel Art Generator, In 2024
- Methods to Change GPS Location On Oppo Find X6 | Dr.fone
- How To Transfer Data From iPhone X To Other iPhone 13 devices? | Dr.fone
- In 2024, Kids in the Directors Chair Making Movies Made Easy
- Updated Run Lumafusion on Mac Download and Alternative Options for 2024
- In 2024, How To Reach More Users by Using Instagram Live Shopping
- Updated In 2024, Whats the Difference Between Adobe Premiere and After Effects? A Beginners Guide
- Disabling Apple iPhone XR Parental Restrictions With/Without Password | Dr.fone
- Updated In 2024, The Ultimate Guide to Vertical Video Editing on iOS and Android
- Google Play Services Wont Update? 12 Fixes are Here on Xiaomi 13T Pro | Dr.fone
- Updated In 2024, The Ultimate Guide to Picking the Right Video to Audio Converter Software
- All About Factory Reset, What Is It and What It Does to Your Honor 100? | Dr.fone
- FRP Hijacker by Hagard Download and Bypass your Xiaomi Redmi Note 12 4G FRP Locks
- Title: Updated 2024 Approved Sonic Treasure Trove The Ultimate Collection of Websites for Free Audio Files
- Author: Paul
- Created at : 2024-05-05 06:02:37
- Updated at : 2024-05-06 06:02:37
- Link: https://voice-adjusting.techidaily.com/updated-2024-approved-sonic-treasure-trove-the-ultimate-collection-of-websites-for-free-audio-files/
- License: This work is licensed under CC BY-NC-SA 4.0.
