
:max_bytes(150000):strip_icc():format(webp)/GettyImages-769729481-5bd367dcc9e77c007c015257.jpg)
The Upcoming Guide to Cost-Free Cinematic Auditory Conversion - Discover the Top 6 Techniques .
“The Upcoming Guide to Cost-Free Cinematic Auditory Conversion - Discover the Top 6 Techniques .”
If you have the footage in which only the sound has all the meat, you might want to remove the visuals from the clip and keep only the audio track to save some space on your storage media. Because the videos nowadays are usually in MP4 format, and the most commonly used audio type is MP3, it becomes imperative to learn how to convert MP4 to MP3.
It is also important to know which tools are best for such kind of conversion and what benefits and downsides they come with if installed on your PC.
That said, here, you will learn how to convert video to audio using six extremely popular and widely used programs.
| 1 - Filmora | 2 - VLC media player | 3 - Audacity |
|---|---|---|
| 4 - QuickTime | 5 - Media Converter | 6 - Video to MP3 Converter |
Watch a Video First to Take a Quick View of These Programs
For Win 7 or later (64-bit)
For macOS 10.14 or later


1 Filmora - [Windows, Mac, iPhone & Android]
A product by Wondershare that is one of the most versatile development organizations, Filmora , is available for Windows and Mac platforms. The tool is a full-fledged post-production program that many professionals use because it is lightweight and due to its simple UI and not-so-steep learning curve.
The instructions given below explain how to convert video to audio with Filmora:
Step 1: Import Source Media
Launch Wondershare Filmora (a Windows computer here used here), click anywhere inside the Media window present at the upper-left section, and select and import a source video file to the program.
For Win 7 or later (64-bit)
For macOS 10.14 or later

Step 2: Add Media to Timeline
Drag the imported footage to the Timeline at the bottom of the window. Optionally, right-click the media in the Timeline itself, and click Detach Audio to separate the audio track from the video. Trim off the unwanted sections from the clip if need be.

Step 3: Convert Video to Audio
Click EXPORT from the top-center of the window, go to the Video tab on the Export box, select MP3 from the bottom of the Format list in the left pane, choose other preferences by clicking the SETTINGS button from the right, and click EXPORT from the bottom-right corner.

Benefits of Using Filmora
Some of the advantages of using Filmora to convert video clips to audio are:
- Easy audio separation from the video
- Ability to export videos directly to audio
- Ability to adjust the audio and remove the background noise
- Ability to record voice and integrate it into the audio clip
Disadvantages: Doesn’t have many audio formats for exporting.
Supported Audio Formats: At the time of this writing, Filmora supports only MP3 audio format while exporting directly.
For Win 7 or later (64-bit)
For macOS 10.14 or later
2 VLC Media Player [Windows, Mac & Linux]
A well-known application that supports almost all media formats and is available for Windows, Mac, and Linux platforms, the VLC media player has its built-in Converter that can transcode your video clips to audio for free.
The steps given below explain how to convert video to audio with VLC media player:
Step 1: Import Source Video

Launch VLC media player, click Media from the menu bar at the top, and click Convert / Save from the menu. Make sure that the File tab is selected on the Open Media box, click Add from the right side of the File Selection field, and click Convert / Save from the bottom.

Step 2: Select Output Format and Preferences
On the Convert box, make sure that the Convert radio button is selected, choose an audio format from the Profile drop-down list, optionally click the Settings (Wrench) icon present next to the drop-down list itself, choose other output preferences for the audio and click Save to get back to the Convert box.
Step 3: Choose Output Folder and Convert

Click Browse from the Destination section to select an output folder, enter a name for the exported file in the Destination file field, and click Start to convert audio to video with VLC media player.
Benefits of Using VLC media player
Some advantages that VLC offers include:
- Doesn’t require any other application to be installed for conversion
- Makes the process quite simple and absolutely free
Disadvantages: Doesn’t have editing tools to manipulate the clips before converting.
Supported Audio Formats: VLC media player supports OGG (Vorbis), MP3, and FLAC format while exporting.
3 Audacity [Windows, Mac & Linux]
Audacity is yet another cross-platform tool that is specifically dedicated to audio formats and is also used by many professionals to produce industry-standard audio clips. Even though Audacity is an open-source and free program, some new users may find it challenging to understand the interface.
The steps are given below explain the process of converting video to audio with Audacity:
Step 1: Install Supported Tools
Assuming that Audacity is already installed on your PC, to import video files to the program, go to https://lame.buanzo.org/#lamewindl and download and install ffmpeg for Windows for Audacity if it is not already installed. You can do a quick online search for other platforms and see if your copy of Audacity needs the tools or plugins required to import the videos.
Step 2: Import Source Video
Go to file> Open from the menu bar and select and import the video that you want to convert to audio.
Step 3: Convert Video to Audio

Make the required manipulations to the audio, go to file> Export, and choose your preferred audio format from the list. Choose a destination folder and other output preferences on the Export Audio box, and click Save to convert video to audio with Audacity.
Benefits of Using Audacity
Some benefits that Audacity offers include:
- Granular editing and fine-tuning of audio tracks
- Wide range of output preferences
- Ability to produce industry-standard outputs
- Offers plethora of options and tools to add various effects to the sounds
Disadvantages: Some new users may find it challenging to understand the interface. Audacity also needs additional tools to be installed to support video files as inputs.
Supported Audio Formats: Audacity supports almost all major audio formats including MP3, OGG, WAV, etc.
4 QuickTime [Mac]
QuickTime is the default media player that comes along with macOS and is installed automatically. Being a proprietary of Apple Inc., QuickTime natively supports all the formats developed by the company, along with some other most popular file types such as MP4, MP3, etc.
To convert a video file to audio with QuickTime on Mac, you can follow the instructions given below:
Step 1: Import Source Video
Launch QuickTime on your Mac computer, go to file from the menu bar, click Open File, use the box that opens to locate and select the video that you want to convert, and click Open from the bottom-right corner.
Step 2: Convert to Audio

Click file again, go to Export this time, and then click audio Only from the sub menu that appears. On the next box, enter a name for the output file in the Export As field, choose a destination folder from the Where drop-down list, optionally click the drop-down button from the right side of the Where field to configure other preferences, and click Save to convert video to audio with QuickTime.
Benefits of Using QuickTime
Some advantages of using QuickTime to convert video to audio include:
- Mac users don’t need to install any third-party conversion tool or additional plugin
- Conversion process is easy and almost seamless
Disadvantages: Doesn’t give any option to choose an output format and doesn’t allow editing the clips either.
Supported Audio Formats: By default, QuickTime player converts videos files to M4A audio format.
5 Media Converter – video to mp3 [iPhone]
Among several iOS apps that have been developed for video to audio conversion, Media Converter – video to mp3 is one of those that has decent star ratings and user reviews. The app is around 66MB in size and can be obtained from the App Store.
The process on how to convert video to audio with Media Converter is explained below:
- Launch Media Converter
- Import the source video to the app
- Choose Extract Audio from the Conversion Type menu
- Select your preferred output audio format
- Begin the conversion process

Benefits of Using Media Converter
A couple of advantages of using Media Converter to convert video to audio are listed below:
- Eliminates the use of PC or laptop
- Can be obtained easily
- Can be used even while moving
Disadvantages: Doesn’t have the flexibility of granular editing as it is there when using a computer program.
Supported Audio Formats: The audio formats that Media Converter supports include MP3, M4A, OGG, WAV, FLAC, etc.
6 Video to MP3 Converter [Android]
With around 4.5-star rating on Play Store, Video to MP3 Converter is another app that can convert your video files to audio right on your Android smartphone. In addition, the app also allows basic video trimming that may come in handy while making the entire clip more informative by removing unwanted sections from it.

You can learn how to convert video to audio with Video to MP3 Converter by following the instructions given below:
- Launch Video to MP3 Converter
- Import the source video clip from your Android smart device’s storage
- Trim the footage to keep only the important part
- Set output preferences
- Extract the audio from the video
Benefits of Using Video to MP3 Converter
Some advantages of using Video to MP3 Converter include:
- It supports every popular video format such as MP4, 3GP, WMV, etc.
- Has simple UI
- Offers various audio bitrates to choose from while exporting
- Allows basic trimming
Disadvantages: Doesn’t have many editing options thus, no granular manipulations can be done to the media files while using the app.
Supported Audio Formats: Video to MP3 Converter supports MP3 formats at this writing.
Conclusion
Learning how to convert MP4 to MP3 is a simple process, and as long as you have a decent computer or an iOS or Android smartphone, you can extract the audio in the format of your choice from the video clips almost instantly. Furthermore, if you are a professional and want to prepare media clips for the clients or your channel, using advanced tools like Wondershare Filmora or Audacity would give you the best conversion experience.
For Win 7 or later (64-bit)
For macOS 10.14 or later
Watch a Video First to Take a Quick View of These Programs
For Win 7 or later (64-bit)
For macOS 10.14 or later
1 Filmora - [Windows, Mac, iPhone & Android]
A product by Wondershare that is one of the most versatile development organizations, Filmora , is available for Windows and Mac platforms. The tool is a full-fledged post-production program that many professionals use because it is lightweight and due to its simple UI and not-so-steep learning curve.
The instructions given below explain how to convert video to audio with Filmora:
Step 1: Import Source Media
Launch Wondershare Filmora (a Windows computer here used here), click anywhere inside the Media window present at the upper-left section, and select and import a source video file to the program.
For Win 7 or later (64-bit)
For macOS 10.14 or later
Step 2: Add Media to Timeline
Drag the imported footage to the Timeline at the bottom of the window. Optionally, right-click the media in the Timeline itself, and click Detach Audio to separate the audio track from the video. Trim off the unwanted sections from the clip if need be.
Step 3: Convert Video to Audio
Click EXPORT from the top-center of the window, go to the Video tab on the Export box, select MP3 from the bottom of the Format list in the left pane, choose other preferences by clicking the SETTINGS button from the right, and click EXPORT from the bottom-right corner.
Benefits of Using Filmora
Some of the advantages of using Filmora to convert video clips to audio are:
- Easy audio separation from the video
- Ability to export videos directly to audio
- Ability to adjust the audio and remove the background noise
- Ability to record voice and integrate it into the audio clip
Disadvantages: Doesn’t have many audio formats for exporting.
Supported Audio Formats: At the time of this writing, Filmora supports only MP3 audio format while exporting directly.
For Win 7 or later (64-bit)
For macOS 10.14 or later
2 VLC Media Player [Windows, Mac & Linux]
A well-known application that supports almost all media formats and is available for Windows, Mac, and Linux platforms, the VLC media player has its built-in Converter that can transcode your video clips to audio for free.
The steps given below explain how to convert video to audio with VLC media player:
Step 1: Import Source Video
Launch VLC media player, click Media from the menu bar at the top, and click Convert / Save from the menu. Make sure that the File tab is selected on the Open Media box, click Add from the right side of the File Selection field, and click Convert / Save from the bottom.
Step 2: Select Output Format and Preferences
On the Convert box, make sure that the Convert radio button is selected, choose an audio format from the Profile drop-down list, optionally click the Settings (Wrench) icon present next to the drop-down list itself, choose other output preferences for the audio and click Save to get back to the Convert box.
Step 3: Choose Output Folder and Convert
Click Browse from the Destination section to select an output folder, enter a name for the exported file in the Destination file field, and click Start to convert audio to video with VLC media player.
Benefits of Using VLC media player
Some advantages that VLC offers include:
- Doesn’t require any other application to be installed for conversion
- Makes the process quite simple and absolutely free
Disadvantages: Doesn’t have editing tools to manipulate the clips before converting.
Supported Audio Formats: VLC media player supports OGG (Vorbis), MP3, and FLAC format while exporting.
3 Audacity [Windows, Mac & Linux]
Audacity is yet another cross-platform tool that is specifically dedicated to audio formats and is also used by many professionals to produce industry-standard audio clips. Even though Audacity is an open-source and free program, some new users may find it challenging to understand the interface.
The steps are given below explain the process of converting video to audio with Audacity:
Step 1: Install Supported Tools
Assuming that Audacity is already installed on your PC, to import video files to the program, go to https://lame.buanzo.org/#lamewindl and download and install ffmpeg for Windows for Audacity if it is not already installed. You can do a quick online search for other platforms and see if your copy of Audacity needs the tools or plugins required to import the videos.
Step 2: Import Source Video
Go to file> Open from the menu bar and select and import the video that you want to convert to audio.
Step 3: Convert Video to Audio
Make the required manipulations to the audio, go to file> Export, and choose your preferred audio format from the list. Choose a destination folder and other output preferences on the Export Audio box, and click Save to convert video to audio with Audacity.
Benefits of Using Audacity
Some benefits that Audacity offers include:
- Granular editing and fine-tuning of audio tracks
- Wide range of output preferences
- Ability to produce industry-standard outputs
- Offers plethora of options and tools to add various effects to the sounds
Disadvantages: Some new users may find it challenging to understand the interface. Audacity also needs additional tools to be installed to support video files as inputs.
Supported Audio Formats: Audacity supports almost all major audio formats including MP3, OGG, WAV, etc.
4 QuickTime [Mac]
QuickTime is the default media player that comes along with macOS and is installed automatically. Being a proprietary of Apple Inc., QuickTime natively supports all the formats developed by the company, along with some other most popular file types such as MP4, MP3, etc.
To convert a video file to audio with QuickTime on Mac, you can follow the instructions given below:
Step 1: Import Source Video
Launch QuickTime on your Mac computer, go to file from the menu bar, click Open File, use the box that opens to locate and select the video that you want to convert, and click Open from the bottom-right corner.
Step 2: Convert to Audio
Click file again, go to Export this time, and then click audio Only from the sub menu that appears. On the next box, enter a name for the output file in the Export As field, choose a destination folder from the Where drop-down list, optionally click the drop-down button from the right side of the Where field to configure other preferences, and click Save to convert video to audio with QuickTime.
Benefits of Using QuickTime
Some advantages of using QuickTime to convert video to audio include:
- Mac users don’t need to install any third-party conversion tool or additional plugin
- Conversion process is easy and almost seamless
Disadvantages: Doesn’t give any option to choose an output format and doesn’t allow editing the clips either.
Supported Audio Formats: By default, QuickTime player converts videos files to M4A audio format.
5 Media Converter – video to mp3 [iPhone]
Among several iOS apps that have been developed for video to audio conversion, Media Converter – video to mp3 is one of those that has decent star ratings and user reviews. The app is around 66MB in size and can be obtained from the App Store.
The process on how to convert video to audio with Media Converter is explained below:
- Launch Media Converter
- Import the source video to the app
- Choose Extract Audio from the Conversion Type menu
- Select your preferred output audio format
- Begin the conversion process
Benefits of Using Media Converter
A couple of advantages of using Media Converter to convert video to audio are listed below:
- Eliminates the use of PC or laptop
- Can be obtained easily
- Can be used even while moving
Disadvantages: Doesn’t have the flexibility of granular editing as it is there when using a computer program.
Supported Audio Formats: The audio formats that Media Converter supports include MP3, M4A, OGG, WAV, FLAC, etc.
6 Video to MP3 Converter [Android]
With around 4.5-star rating on Play Store, Video to MP3 Converter is another app that can convert your video files to audio right on your Android smartphone. In addition, the app also allows basic video trimming that may come in handy while making the entire clip more informative by removing unwanted sections from it.
You can learn how to convert video to audio with Video to MP3 Converter by following the instructions given below:
- Launch Video to MP3 Converter
- Import the source video clip from your Android smart device’s storage
- Trim the footage to keep only the important part
- Set output preferences
- Extract the audio from the video
Benefits of Using Video to MP3 Converter
Some advantages of using Video to MP3 Converter include:
- It supports every popular video format such as MP4, 3GP, WMV, etc.
- Has simple UI
- Offers various audio bitrates to choose from while exporting
- Allows basic trimming
Disadvantages: Doesn’t have many editing options thus, no granular manipulations can be done to the media files while using the app.
Supported Audio Formats: Video to MP3 Converter supports MP3 formats at this writing.
Conclusion
Learning how to convert MP4 to MP3 is a simple process, and as long as you have a decent computer or an iOS or Android smartphone, you can extract the audio in the format of your choice from the video clips almost instantly. Furthermore, if you are a professional and want to prepare media clips for the clients or your channel, using advanced tools like Wondershare Filmora or Audacity would give you the best conversion experience.
For Win 7 or later (64-bit)
For macOS 10.14 or later
“Best Audio Libraries: Top 10 Sites for High-Quality Video Soundtracks (2023 Edition)”
FREE Top 10 Best Websites to Download Sound Clips for Videos

Liza Brown
Mar 27, 2024• Proven solutions


Are you working on animation , video, game, music, or maybe some other media file? Sound is a vital factor for all. It is the effect of the sound that can make or break a project.
But it can be difficult to find perfect and quality free sound clips. There are thousands of software for creating excellent videos, adding sounds , titles, overlays, tracks, and more. But what if you don’t wish to create a piece for just jazzing up your already existing video?
Free sound clips are great resources to download for videos if you don’t want to create sound effects.
Many people want to know the source of high-quality free audio for videos. These free sound samples are easy to find on the Internet.
In this article, you will get to know the 10 best websites to download free sound clips.
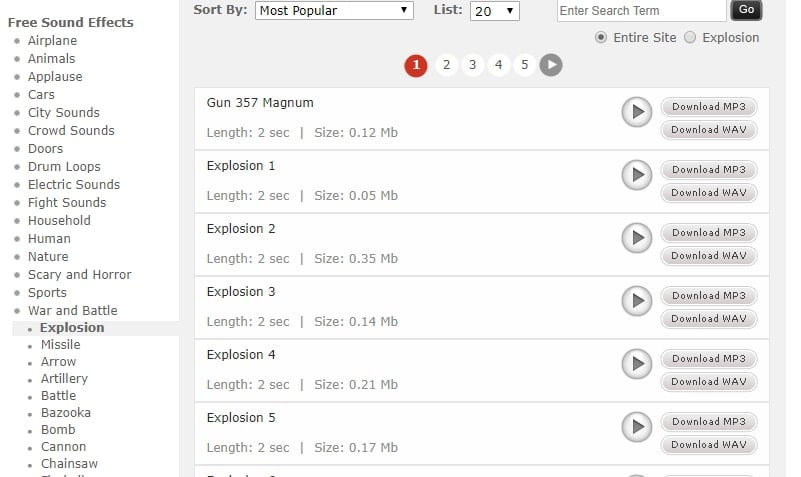
10 Best Free Sound Samples to Use
1. Freesound
Licensed under the Creative Commons License , the Freesound comprises of a large sound database. You can choose from the huge collection of sounds and decide which one is free and which sound needs attribution.
You can ensure if the sound can be used in commercial products or not. If you are not a professional and just need free sound samples for personal use, you may use free sound download from any site. The features of Freesound include-
- You can search for sounds or browse by tags or geotags
- The pack feature helps you to find a bunch of similar sounds very easily
- Preview the sound without logging in
- For downloading the sound, you need to log in
- Add your audio samples to contribute to the database
- You get 5 free sound clips download
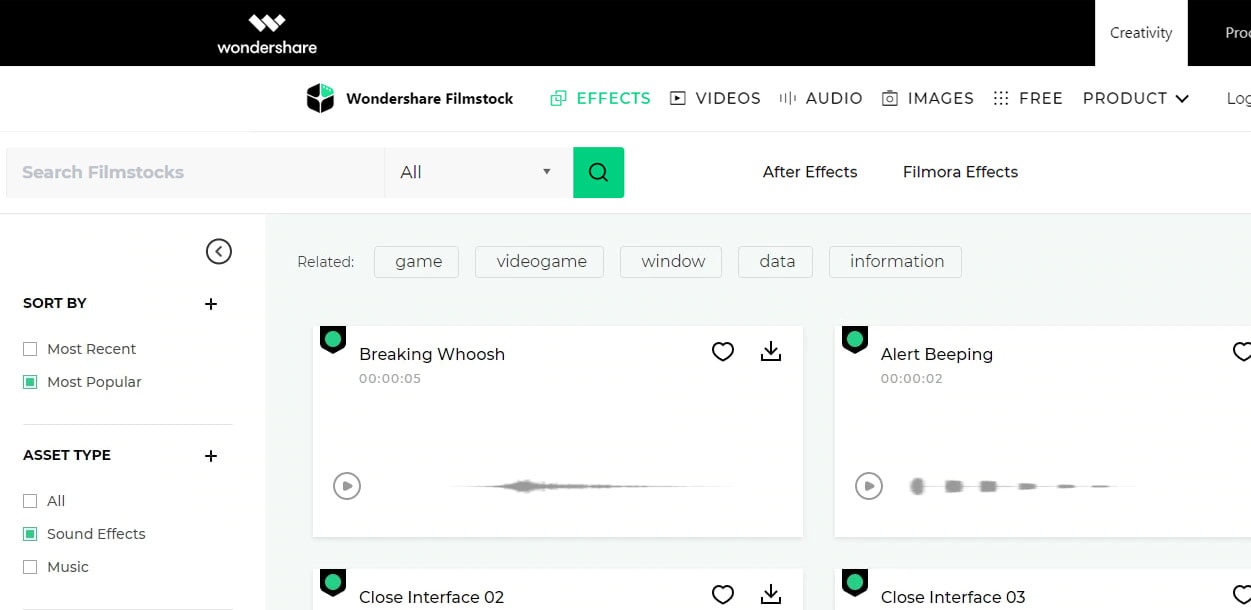
2. Filmstock
Filmstock from the house of Wondershare is one of the greatest libraries for free sound clips.
Any budget filmmaker would love to have this invaluable resource not just for free audio clips for videos but also for royalty-free sound clips.
You can bring your cinematic video to life from the Filmstock free-stuff one-stop-shop. The features of Filmstock include-
- Royalty-free video effects, audio, and stock media
- There are genres like science fiction, sci-fi, ufo, technology games
- Huge selection of curated quality stock images
- Filmstock library is continuously updated
- No attribution required for any project on Filmstock
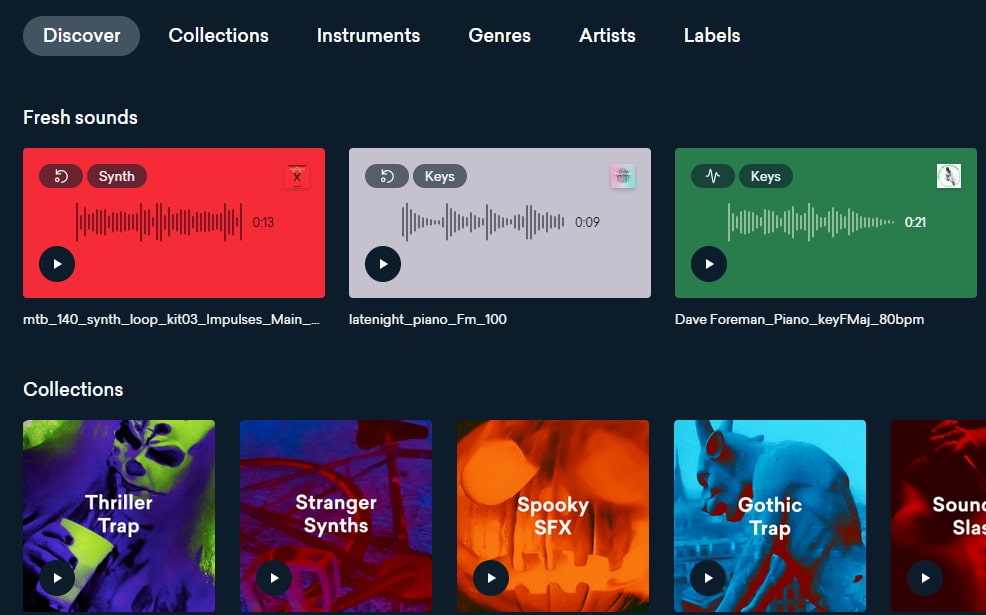
3. Landr
With a simple interface, Landr offers the best loops, packs, and samples to you. Make use of powerful Artificial Intelligence (AI) and you can spend lesser time searching and browsing. The features of Landr includes-
- You can browse free sound clips from the various collection of instruments
- Quickly find the right sound from the millions of free sound samples
- Get access to Selector tool powered by AI to make your browsing session faster
- Nourish your ideas with the curated collection and smart browsing
- The filter sounds by instrument, mood, BPM or key
- Go pro with your sampling
- Royalty-free sounds from today’s best artists, producers, and labels
4. Audio Micro
Audio Micro is one of the best tools for downloading horror-based free sound clips. Once you register with Audio Micro, you can easily download free audio clips for videos.
For downloading sound for commercial uses like TV or mass reproduction, you must be a paid subscriber. The features of Audio Micro are-
- Get access to the collection of royalty-free music and 2000 free good quality sound effects
- High-quality audio content for commercial use, available at competitive prices without any hidden cost
- Research, locate, purchase, and download stock audio
- Easy and fast search option with free sound collection visible from the navigation bar on the homepage
5. Audio Blocks
It is an intuitive platform to download loops, sound effects, and music. It has a low-cost subscription model and the content is constantly updated based on the search results. The features of Audio Blocks are-
- Unlimited royalty-free audio
- Loop, sound effects, and music download
- Low-cost subscription offers more content at a nominal price
- There are flexible plans for every budget
- Use content multiple times for commercial and personal projects
6. Free Stock Music
Whether YouTube project or your personal Vlog, Free Stock Music offers royalty-free music for a range of media platforms.
For any non-copyrighted sound clips free download, always feel free to reach Free Stock Music. The features are-
- Free access to non-copyrighted music
- Just put the attribution in credits to use the sound clips
- Unlimited royalty-free music in all moods, lengths, tempos, and categories
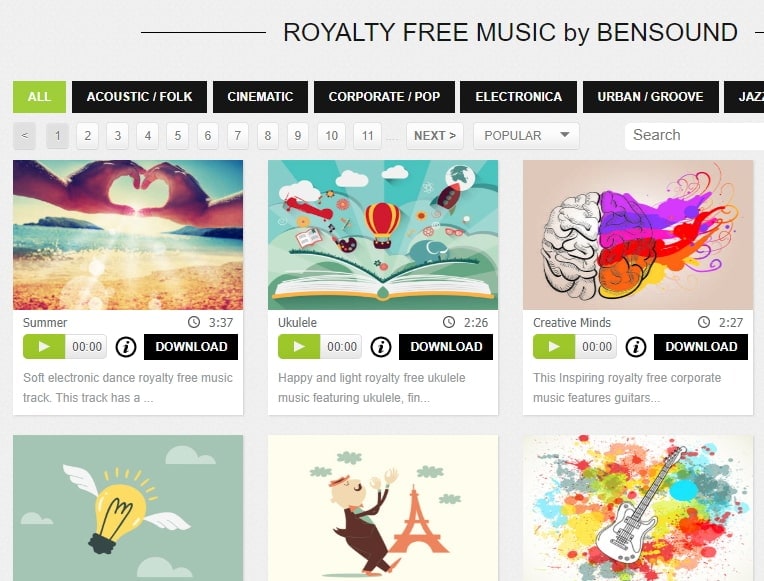
7. Bensound
Available under the Creative Common License, Bensound is used for multimedia projects like web applications or videos.
You can use the free tracks available with Bensound stock music in the various website background score, animations, web adverts, slideshows, etc. The features of Bensound include-
- Royalty-free stock music in various genres like electronica, urban, cinematic, jazz, rock, etc.
- Download free sound clips from the huge collection and add attributions in credits
- If you don’t wish to give credits and use the high-quality premium tracks, get the Bensound Pro License
8. Sounds Crate
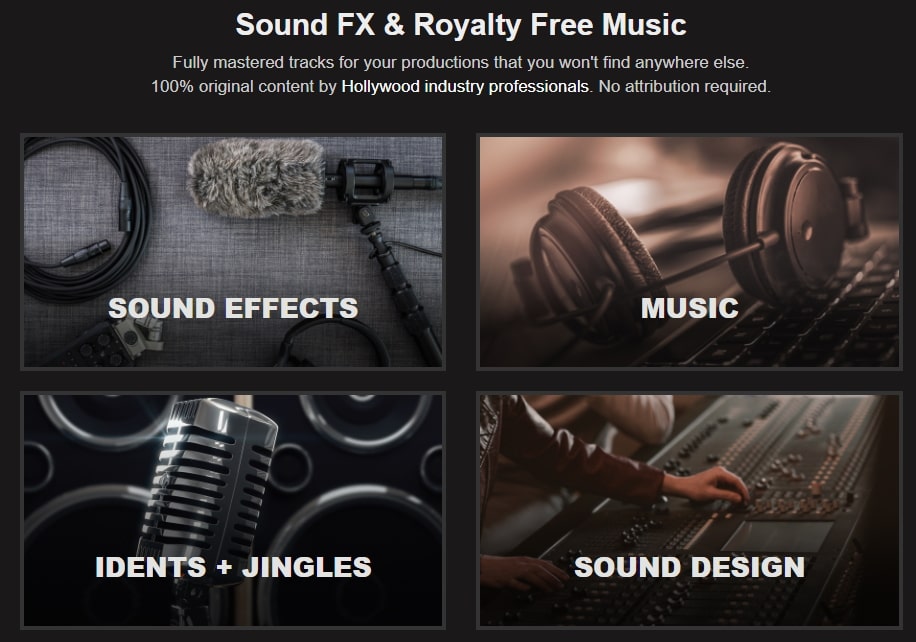
Are you looking for the best soundtrack for your video? Sounds Crate offers some of the best royalty-free music and sound FX.
With the tracks completely mastered for your production, Sound Crate offers 100% quality content created by industry professionals from Hollywood. The Sound Crate features include-
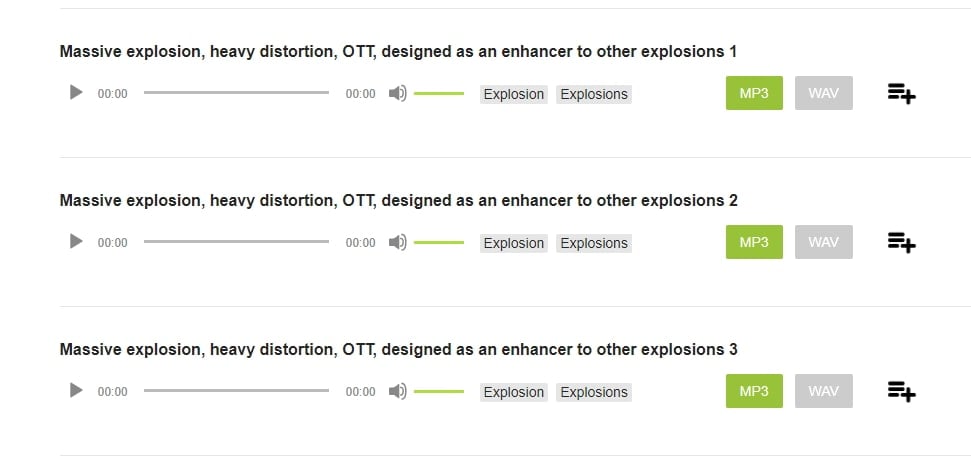
- Sound FX for electricity, gun, explosion, weapons, sci-fi, vehicles, movements, etc.
- Royalty-free music in diverse genres
- You can also use idents for corporate, news jingles, holiday idents, etc.
- Download and use the royalty-free sound clips easily
- Over 10000 plus HD assets
- No attribution required
- Browse from unlimited music, sound effects, etc.
9. ZapSlat
Do your audio and video editing projects need some cool soundtracks to jazz it up? Look no further. ZapSlat is one of the best free sound download sites to make your project successful. The features of ZapSlat are-
- Comprises over 54,000 professional free sound effects and royalty-free music files
- Variety of free sound effect packs
- Download royalty-free music from a variety of genres
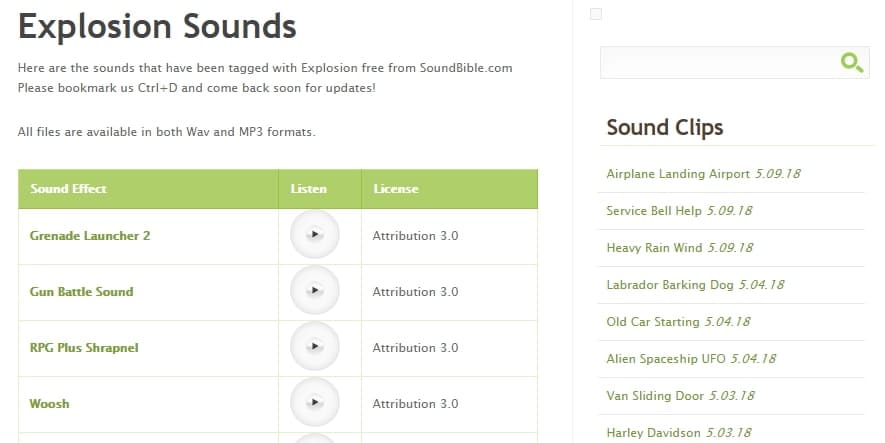
10. Sound Bible
Choose the best from 2000 free sound clips licensed under Creative Commons. To use the sound effect for commercial video, you can select from the royalty-free sounds. The features of SoundBible are-
- Download free sound clips without logging in or creating an account
- 2000 free sounds
- Copyright-free sound resources are weekly updated
Conclusion
Now that you know the best 10 free sound clip download sites, make use of it in your videos. Without worrying about the expense, you can use these sites to download free sound clips.
Liza Brown
Liza Brown is a writer and a lover of all things video.
Follow @Liza Brown
Liza Brown
Mar 27, 2024• Proven solutions
Are you working on animation , video, game, music, or maybe some other media file? Sound is a vital factor for all. It is the effect of the sound that can make or break a project.
But it can be difficult to find perfect and quality free sound clips. There are thousands of software for creating excellent videos, adding sounds , titles, overlays, tracks, and more. But what if you don’t wish to create a piece for just jazzing up your already existing video?
Free sound clips are great resources to download for videos if you don’t want to create sound effects.
Many people want to know the source of high-quality free audio for videos. These free sound samples are easy to find on the Internet.
In this article, you will get to know the 10 best websites to download free sound clips.
10 Best Free Sound Samples to Use
1. Freesound
Licensed under the Creative Commons License , the Freesound comprises of a large sound database. You can choose from the huge collection of sounds and decide which one is free and which sound needs attribution.
You can ensure if the sound can be used in commercial products or not. If you are not a professional and just need free sound samples for personal use, you may use free sound download from any site. The features of Freesound include-
- You can search for sounds or browse by tags or geotags
- The pack feature helps you to find a bunch of similar sounds very easily
- Preview the sound without logging in
- For downloading the sound, you need to log in
- Add your audio samples to contribute to the database
- You get 5 free sound clips download
2. Filmstock
Filmstock from the house of Wondershare is one of the greatest libraries for free sound clips.
Any budget filmmaker would love to have this invaluable resource not just for free audio clips for videos but also for royalty-free sound clips.
You can bring your cinematic video to life from the Filmstock free-stuff one-stop-shop. The features of Filmstock include-
- Royalty-free video effects, audio, and stock media
- There are genres like science fiction, sci-fi, ufo, technology games
- Huge selection of curated quality stock images
- Filmstock library is continuously updated
- No attribution required for any project on Filmstock
3. Landr
With a simple interface, Landr offers the best loops, packs, and samples to you. Make use of powerful Artificial Intelligence (AI) and you can spend lesser time searching and browsing. The features of Landr includes-
- You can browse free sound clips from the various collection of instruments
- Quickly find the right sound from the millions of free sound samples
- Get access to Selector tool powered by AI to make your browsing session faster
- Nourish your ideas with the curated collection and smart browsing
- The filter sounds by instrument, mood, BPM or key
- Go pro with your sampling
- Royalty-free sounds from today’s best artists, producers, and labels
4. Audio Micro
Audio Micro is one of the best tools for downloading horror-based free sound clips. Once you register with Audio Micro, you can easily download free audio clips for videos.
For downloading sound for commercial uses like TV or mass reproduction, you must be a paid subscriber. The features of Audio Micro are-
- Get access to the collection of royalty-free music and 2000 free good quality sound effects
- High-quality audio content for commercial use, available at competitive prices without any hidden cost
- Research, locate, purchase, and download stock audio
- Easy and fast search option with free sound collection visible from the navigation bar on the homepage
5. Audio Blocks
It is an intuitive platform to download loops, sound effects, and music. It has a low-cost subscription model and the content is constantly updated based on the search results. The features of Audio Blocks are-
- Unlimited royalty-free audio
- Loop, sound effects, and music download
- Low-cost subscription offers more content at a nominal price
- There are flexible plans for every budget
- Use content multiple times for commercial and personal projects
6. Free Stock Music
Whether YouTube project or your personal Vlog, Free Stock Music offers royalty-free music for a range of media platforms.
For any non-copyrighted sound clips free download, always feel free to reach Free Stock Music. The features are-
- Free access to non-copyrighted music
- Just put the attribution in credits to use the sound clips
- Unlimited royalty-free music in all moods, lengths, tempos, and categories
7. Bensound
Available under the Creative Common License, Bensound is used for multimedia projects like web applications or videos.
You can use the free tracks available with Bensound stock music in the various website background score, animations, web adverts, slideshows, etc. The features of Bensound include-
- Royalty-free stock music in various genres like electronica, urban, cinematic, jazz, rock, etc.
- Download free sound clips from the huge collection and add attributions in credits
- If you don’t wish to give credits and use the high-quality premium tracks, get the Bensound Pro License
8. Sounds Crate
Are you looking for the best soundtrack for your video? Sounds Crate offers some of the best royalty-free music and sound FX.
With the tracks completely mastered for your production, Sound Crate offers 100% quality content created by industry professionals from Hollywood. The Sound Crate features include-
- Sound FX for electricity, gun, explosion, weapons, sci-fi, vehicles, movements, etc.
- Royalty-free music in diverse genres
- You can also use idents for corporate, news jingles, holiday idents, etc.
- Download and use the royalty-free sound clips easily
- Over 10000 plus HD assets
- No attribution required
- Browse from unlimited music, sound effects, etc.
9. ZapSlat
Do your audio and video editing projects need some cool soundtracks to jazz it up? Look no further. ZapSlat is one of the best free sound download sites to make your project successful. The features of ZapSlat are-
- Comprises over 54,000 professional free sound effects and royalty-free music files
- Variety of free sound effect packs
- Download royalty-free music from a variety of genres
10. Sound Bible
Choose the best from 2000 free sound clips licensed under Creative Commons. To use the sound effect for commercial video, you can select from the royalty-free sounds. The features of SoundBible are-
- Download free sound clips without logging in or creating an account
- 2000 free sounds
- Copyright-free sound resources are weekly updated
Conclusion
Now that you know the best 10 free sound clip download sites, make use of it in your videos. Without worrying about the expense, you can use these sites to download free sound clips.
Liza Brown
Liza Brown is a writer and a lover of all things video.
Follow @Liza Brown
How to Cut Audio in iMovie on Mac & iPhone?
Cutting Audio in iMovie: A Guide for Mac and iPhone Users

Marion Dubois
Apr 30, 2024• Proven solutions
Sometimes, we find the desired audio or soundtrack for our videos longer or shorter than we want, and that is where audio editing comes. Audio editing refers to manipulating audio to alter the length, speed, and volume or create additional effects such as loops. Are you new to audio trimming? Don’t worry, as our article today would show how to cut audio in iMovie on Mac and iPhone.
Part 1: How to Cut Music in iMovie on Mac?
Cutting music is audio editing carried out when the music or soundtrack seems longer than desired. To cut music or soundtrack in iMovie using Mac involves the following steps:
Step 1: Adjust the Playhead to Cut the Clip
You can cut an audio clip only when the specified audio is in the timeline. To perform the operation, right-click on the clip and pick out a split clip. This operation cuts the clip into two and divides the two pieces wherever the playhead is situated.
Step 2: Select Split Clip
Right-click and select the Split Clip. Once this step is over, you have successfully cut the audio clip.
Part 2: Cut Audio in iMovie Alternative – Wondershare Filmora
Generally, as humans, we feel more satisfied when we have options or choices because we get fed up with doing the same over and over again the same way without changes. Wondershare Filmora is an alternative for iMovie and can easily carry out the function of various forms of audio editing.
If you wish to trim off the beginning or the ending of a mp3 file quite swiftly, this section is for you. Things can get specifically weird if you want to import heavy mp3 files to your space-limited MP3 player to play.
You’re required to choose an intelligent MP3 trimmer to trim an MP3 file to any length. Here, we suggest this robust video editing software — Wondershare Filmora, which enables you to precisely extract an MP3 file or audio segment effortlessly without losing any original audio quality.
You can get both the Windows and Mac versions of this great video editor. It embodies the following features:
- Import videos, audio, or photos from various sources and edit them in one place.
- Three different video cutting methods to meet different editing needs.
- Various editing tools help you edit the video completely, including rotation, picture-in-picture, green screen, cropping, etc.
- Output the edited video to more than 20 different formats or locations as needed.
- Use more than 1,000 video effects in the effect store to customize videos.
Using Filmora is quite effortless. The following tutorial will display how to cut audio in it easily and quickly.
Step 1: Import MP3 Files for Editing
Firstly, drag the specific MP3 file or audio clip into the media library, or you can directly import audio files or video from portable devices such as your digital camera, smartphone, or camcorder, etc.
Step 2: Drag MP3 Files to the Timeline below for Cutting
Filmora provides two ways to cut audio/video files. You can either select to cut from the beginning or the end by trimming. You can also split it into various segments from the mid-sections.
Move the slider ahead to the cutting point within the midsection, and then tap the scissor icon to split it into little sections as desired.
When executed, please select the part that you don’t want to, hit the Delete button to remove.
Step 3: Export to Save
Hit the Export tab to save your edited project. If you want to save in the original MP3 format, select MP3 before you export.
Part 3: How to Trim Music in iMovie on iPhone
This section will offer you a guide on how to cut out parts of audio in an iMovie project on an iPad or iPhone. After adding music to your project, the audio is trimmed to the desired length using iMovie’s inbuilt tool.
Step #1: Open iMovie on your iPhone or iPad.
Step #2: Tap the movie project you want to edit.
It will display a list of your projects, among which you must select the one you want to edit.
If you want to edit a current section of video not even opened in iMovie, you have to make a new iMovie project to add your audio and video. Select the + icon, choose the Movie tab, select the video(s), and then choose the Create movie button.
Step #3: Hit the Edit button below the name of your project.
This opens your project in the editor. And, you’re already in the editor if you just created a new project in the previous step.
Step #4: Add audio to your project.
You can skip this step if your project already contains the audio. Hit the + icon in the upper-left timeline’s corner.
Choose Audio.
Go with a specific category:
Soundtracks are audio tracks provided by iMovie which are free to use in your project.
Select My Music to locate the file and use a song from iTunes or the music app.
Sound effects are shorter sounds—mostly below 10 seconds duration.
Choose an audio file for the preview.
Select the + icon to add the file to your project.
Step #5: Hit the audio bar on the timeline.
It is present below the multi-frame version of your video in the screen’s bottom area.
Now, detach the MP3 segment or audio from the video by tapping the video on the timeline and selecting the Detach button at the screen’s bottom area.
Step #6: Tap and drag the beginning of the audio track.
Drag or move the audio track to the exact point where you wish it to start from—the audio track’s left-end marks of the yellow bar starting your audio.
Step #7: Tap and drag the end of the audio track.
You can drag the yellow bar at the end and move it to the exact point where you want the audio to end.
If you can’t see the yellow bar on the far-right end of the audio track, swipe left below the audio track to scroll to the end.
To move the audio track to another location, select and hold it for about one second, and then move it to the desired video’s location.
Step #8: Select the Play tab for preview.
It’s the sideways triangle just below the video preview.
Step #9: Select the Done button when you’re finished.
It is present at the screen’s top-left corner. You have now confirmed the changes done to your project.
If you want to play it on any other device, tap the Share button at the bottom after choosing the Done tab and select Save Video to export it.
Part 4: Audio Editing Tips for iMovie Users
Here are some guidelines or tips for various audio editing processes, starting from cutting trim music on iMovie, using iMovie to trim audio and video together, and other audio and video editing tips.
- Use Waveforms to See What You Hear
Sound is just as relevant as the images in a video, and should focus just as much during editing. To efficiently and adequately edit audio, you need a good set of speakers and headphones to hear the sound, and you also need to be able to see the sound.
If the waveforms don’t appear, go to the “view” drop-down menu and select “show waveforms”, the waveform would show you the sound intensity level of a sound clip and definitely would give you an idea of what part will need to be turned up or down.
- Audio Adjustments
With the audio button situated at the top right, you have access to some essential audio editing tools for changing the sound level of your chosen clip or changing the relative volume of other films in the project.
The audio editing window also contains primary noise reduction and audio equalization tools and a range of effects – from robot to echo- which would affect how people sound in your video.
- Editing Audio with the Timeline
iMovie permits you to adjust the audio within the clips themselves, each volume as a bar. You can shift up and down to increase or decrease the audio level. The clips also have “fade in” and “fade out” buttons at the beginning and end, which are draggable to adjust the fade length.
Conclusion
Finally, with the answers to the question, how to cut audio in iMovie, you can follow the simple step guide and feel free to edit your audio or video to your taste using iMovie or Wondershare Filmora.
Marion Dubois
Marion Dubois is a writer and a lover of all things video.
Follow @Marion Dubois
Marion Dubois
Apr 30, 2024• Proven solutions
Sometimes, we find the desired audio or soundtrack for our videos longer or shorter than we want, and that is where audio editing comes. Audio editing refers to manipulating audio to alter the length, speed, and volume or create additional effects such as loops. Are you new to audio trimming? Don’t worry, as our article today would show how to cut audio in iMovie on Mac and iPhone.
Part 1: How to Cut Music in iMovie on Mac?
Cutting music is audio editing carried out when the music or soundtrack seems longer than desired. To cut music or soundtrack in iMovie using Mac involves the following steps:
Step 1: Adjust the Playhead to Cut the Clip
You can cut an audio clip only when the specified audio is in the timeline. To perform the operation, right-click on the clip and pick out a split clip. This operation cuts the clip into two and divides the two pieces wherever the playhead is situated.
Step 2: Select Split Clip
Right-click and select the Split Clip. Once this step is over, you have successfully cut the audio clip.
Part 2: Cut Audio in iMovie Alternative – Wondershare Filmora
Generally, as humans, we feel more satisfied when we have options or choices because we get fed up with doing the same over and over again the same way without changes. Wondershare Filmora is an alternative for iMovie and can easily carry out the function of various forms of audio editing.
If you wish to trim off the beginning or the ending of a mp3 file quite swiftly, this section is for you. Things can get specifically weird if you want to import heavy mp3 files to your space-limited MP3 player to play.
You’re required to choose an intelligent MP3 trimmer to trim an MP3 file to any length. Here, we suggest this robust video editing software — Wondershare Filmora, which enables you to precisely extract an MP3 file or audio segment effortlessly without losing any original audio quality.
You can get both the Windows and Mac versions of this great video editor. It embodies the following features:
- Import videos, audio, or photos from various sources and edit them in one place.
- Three different video cutting methods to meet different editing needs.
- Various editing tools help you edit the video completely, including rotation, picture-in-picture, green screen, cropping, etc.
- Output the edited video to more than 20 different formats or locations as needed.
- Use more than 1,000 video effects in the effect store to customize videos.
Using Filmora is quite effortless. The following tutorial will display how to cut audio in it easily and quickly.
Step 1: Import MP3 Files for Editing
Firstly, drag the specific MP3 file or audio clip into the media library, or you can directly import audio files or video from portable devices such as your digital camera, smartphone, or camcorder, etc.
Step 2: Drag MP3 Files to the Timeline below for Cutting
Filmora provides two ways to cut audio/video files. You can either select to cut from the beginning or the end by trimming. You can also split it into various segments from the mid-sections.
Move the slider ahead to the cutting point within the midsection, and then tap the scissor icon to split it into little sections as desired.
When executed, please select the part that you don’t want to, hit the Delete button to remove.
Step 3: Export to Save
Hit the Export tab to save your edited project. If you want to save in the original MP3 format, select MP3 before you export.
Part 3: How to Trim Music in iMovie on iPhone
This section will offer you a guide on how to cut out parts of audio in an iMovie project on an iPad or iPhone. After adding music to your project, the audio is trimmed to the desired length using iMovie’s inbuilt tool.
Step #1: Open iMovie on your iPhone or iPad.
Step #2: Tap the movie project you want to edit.
It will display a list of your projects, among which you must select the one you want to edit.
If you want to edit a current section of video not even opened in iMovie, you have to make a new iMovie project to add your audio and video. Select the + icon, choose the Movie tab, select the video(s), and then choose the Create movie button.
Step #3: Hit the Edit button below the name of your project.
This opens your project in the editor. And, you’re already in the editor if you just created a new project in the previous step.
Step #4: Add audio to your project.
You can skip this step if your project already contains the audio. Hit the + icon in the upper-left timeline’s corner.
Choose Audio.
Go with a specific category:
Soundtracks are audio tracks provided by iMovie which are free to use in your project.
Select My Music to locate the file and use a song from iTunes or the music app.
Sound effects are shorter sounds—mostly below 10 seconds duration.
Choose an audio file for the preview.
Select the + icon to add the file to your project.
Step #5: Hit the audio bar on the timeline.
It is present below the multi-frame version of your video in the screen’s bottom area.
Now, detach the MP3 segment or audio from the video by tapping the video on the timeline and selecting the Detach button at the screen’s bottom area.
Step #6: Tap and drag the beginning of the audio track.
Drag or move the audio track to the exact point where you wish it to start from—the audio track’s left-end marks of the yellow bar starting your audio.
Step #7: Tap and drag the end of the audio track.
You can drag the yellow bar at the end and move it to the exact point where you want the audio to end.
If you can’t see the yellow bar on the far-right end of the audio track, swipe left below the audio track to scroll to the end.
To move the audio track to another location, select and hold it for about one second, and then move it to the desired video’s location.
Step #8: Select the Play tab for preview.
It’s the sideways triangle just below the video preview.
Step #9: Select the Done button when you’re finished.
It is present at the screen’s top-left corner. You have now confirmed the changes done to your project.
If you want to play it on any other device, tap the Share button at the bottom after choosing the Done tab and select Save Video to export it.
Part 4: Audio Editing Tips for iMovie Users
Here are some guidelines or tips for various audio editing processes, starting from cutting trim music on iMovie, using iMovie to trim audio and video together, and other audio and video editing tips.
- Use Waveforms to See What You Hear
Sound is just as relevant as the images in a video, and should focus just as much during editing. To efficiently and adequately edit audio, you need a good set of speakers and headphones to hear the sound, and you also need to be able to see the sound.
If the waveforms don’t appear, go to the “view” drop-down menu and select “show waveforms”, the waveform would show you the sound intensity level of a sound clip and definitely would give you an idea of what part will need to be turned up or down.
- Audio Adjustments
With the audio button situated at the top right, you have access to some essential audio editing tools for changing the sound level of your chosen clip or changing the relative volume of other films in the project.
The audio editing window also contains primary noise reduction and audio equalization tools and a range of effects – from robot to echo- which would affect how people sound in your video.
- Editing Audio with the Timeline
iMovie permits you to adjust the audio within the clips themselves, each volume as a bar. You can shift up and down to increase or decrease the audio level. The clips also have “fade in” and “fade out” buttons at the beginning and end, which are draggable to adjust the fade length.
Conclusion
Finally, with the answers to the question, how to cut audio in iMovie, you can follow the simple step guide and feel free to edit your audio or video to your taste using iMovie or Wondershare Filmora.
Marion Dubois
Marion Dubois is a writer and a lover of all things video.
Follow @Marion Dubois
Also read:
- Best Free Online Transcribers Convert Your Audio Files with Ease
- Updated Uncover Audible Patter of Hands in Collaboration
- Updated Essential Introduction Audio Tracks The Top 8 for Digital Creators for 2024
- Updated 2024 Approved The Best Free Apps for Mobile Sound Recording Leading the Charge Without Audacity - Updated
- In 2024, Essential Tips for Picking the Ideal Mac-Compatible Music Catalog Tool
- Understanding the Functionality of Googles Audio Streaming Service for 2024
- New 2024 Approved Aria Elimination Kit Compose One-of-a-Kind Background Scores
- Updated Audiovisual Excellence Unlocked – A Review of AVS Editors Innovative Features & Related Comparisons
- Updated Best Bet AIFF to MP3 Suite Fast and Easy High-Quality Converting
- New In 2024, Elevate Your Sound Integrating Cost-Free Plugin Autotune in Audacity
- Pitch Perfect Cleanup The Best Affordable Applications for Removing Unwanted Vocals for 2024
- New Explore & Download the Latest Electronic Dance Music (EDM)
- New 2024 Approved Beginners Guide to Making Audio-Integrated Movies Without Costs
- Flawless Audio Engineering Choosing Your Customized EQ Pathways
- 2024 Approved Mastering Sound Integration Enhancing Videos with Adobe Premiere Pro
- In 2024, Audio Editing Techniques for MP4 Files
- Master Windows Audio Arranger Pro
- Updated Audio Absence Efficient Ways to Extract Silent Videos From iPhone Recordings
- New The Insiders Guide to Removing Background Noise From Videos in Adobe Premiere Pro for 2024
- Updated 2024 Approved Adobe Audition Unveiled The Ultimate Guide to Its Latest Functions and User Experiences (Revised )
- New Top 10 Legal Platforms for Acquiring Customized Ending Tunes for 2024
- 2024 Approved Melody Compendium The 15 Best Music Selections for Different Visual Media Types
- Updated Turn Off Sounds & Import Unique Music for Windows Movie Editor
- 2024 Approved Finding Auditory Representations of Steel Trumpets
- Updated A Beginners Guide to Setting Up Audacity in Ubuntu for 2024
- New 2024 Approved Harmonic Wave of Shared Excitement
- New Classical Background Music Options for Wedding Videos
- New In 2024, Decoding the Secrets to Seamless Spotify Conversion for Unlimited Listening
- New Abyss of Harmony Premium Selection of Free, Original Piano Compositions for Screen Projects
- New In 2024, The Ultimate Guide to Selecting the Best Android Voice Memo Apps
- New In 2024, How to Slow Down Music without Changing Pitch?
- Updated 2024 Approved Transforming Music Production in Logic Pro X with These Essential Plugin Tools (Free/Paid)
- New 2024 Approved DIY Sound Capture How to Use Audacity Free of Charge
- 2024 Approved Probe for Silly Sonic Impressions
- New 2024 Approved 10 Best Voice Recording Apps for Android Devices Free Included
- Updated In 2024, Enhancing Film Quality with Simplified Audio Layer Control in Premiere Pro 2023
- In 2024, Level 9 Masterclass Selecting The Top 9 Portable Microphones For Professional Podcasters
- 15 Must-Have Tech Gadgets and Digital Platforms to Transform Your Videos With Impactful Music Integration A Side-by-Side Analysis
- The Essential Playlist of Audio-Enhancing Technology Top 15 Apps and Websites for Music in Media for 2024
- Fix Unfortunately Settings Has Stopped on Vivo V29 Quickly | Dr.fone
- How to Screen Mirroring Vivo Y02T to PC? | Dr.fone
- New 2024 Approved Edit Like a Pro Top-Rated Free 4K Video Editing Software
- Unlock Your iPhone 7 Plus in Minutes with ICCID Code Everything You Need to Know
- Updated In 2024, The Ultimate List 28 Video to GIF Converter Options
- 10 Free Location Spoofers to Fake GPS Location on your Xiaomi Redmi K70 | Dr.fone
- 5 Easy Ways to Change Location on YouTube TV On Vivo V30 Pro | Dr.fone
- The way to get back lost call history from Infinix Hot 30i
- 2024 Approved Make Your Text Pop 8 Top-Rated Neon Generators Online
- New Final Cut Pro X Crash Fix Get Back to Editing
- How To Stream Anything From OnePlus Nord CE 3 Lite 5G to Apple TV | Dr.fone
- Ways to stop parent tracking your Realme C67 4G | Dr.fone
- Hard Reset Vivo V29e in 3 Efficient Ways | Dr.fone
- In 2024, Full Guide to Catch 100 IV Pokémon Using a Map On Oppo Reno 8T 5G | Dr.fone
- In 2024, Full Guide to Catch 100 IV Pokémon Using a Map On OnePlus Open | Dr.fone
- In 2024, How to Share/Fake Location on WhatsApp for Realme GT Neo 5 SE | Dr.fone
- New Free TikTok Watermark Removers Compare and Choose
- In 2024, Best 3 Software to Transfer Files to/from Your Xiaomi 14 Ultra via a USB Cable | Dr.fone
- Updated 13 Powerful Video Editors That Outshine Windows Movie Maker
- How to Track a Lost Vivo T2 Pro 5G for Free? | Dr.fone
- Possible solutions to restore deleted videos from Realme GT 5
- In 2024, How to Share/Fake Location on WhatsApp for Asus ROG Phone 8 | Dr.fone
- In 2024, How to Bypass iCloud Lock on Apple iPhone 7
- New Discover the Power of YouTube Audio Downloading A Detailed Guide for 2024
- In 2024, 3 Ways for Android Pokemon Go Spoofing On Poco C50 | Dr.fone
- In 2024, Top 5 Tracking Apps to Track Realme Note 50 without Them Knowing | Dr.fone
- Cannot play MKV files on Samsung Galaxy XCover 6 Pro Tactical Edition
- In 2024, Did Your Apple iPhone 13 Pro Passcode Change Itself? Unlock It Now
- In 2024, Is GSM Flasher ADB Legit? Full Review To Bypass Your Vivo Y36 Phone FRP Lock
- In 2024, For People Wanting to Mock GPS on Vivo Y100 Devices | Dr.fone
- Top 5 Best Tools to Convert Text to Audio Online for Free
- New 2024 Approved The Best Free iMovie Replacements You Need to Know About
- In 2024, How to Bypass Google FRP Lock from Infinix Note 30 VIP Racing Edition Devices
- In 2024, Change Location on Yik Yak For your Poco X6 to Enjoy More Fun | Dr.fone
- In 2024, The Updated Method to Bypass Xiaomi Redmi Note 13 Pro+ 5G FRP
- Is GSM Flasher ADB Legit? Full Review To Bypass Your Samsung Galaxy M54 5GFRP Lock
- Title: The Upcoming Guide to Cost-Free Cinematic Auditory Conversion - Discover the Top 6 Techniques .
- Author: Paul
- Created at : 2024-05-20 01:47:39
- Updated at : 2024-05-21 01:47:39
- Link: https://voice-adjusting.techidaily.com/the-upcoming-guide-to-cost-free-cinematic-auditory-conversion-discover-the-top-6-techniques/
- License: This work is licensed under CC BY-NC-SA 4.0.
