
:max_bytes(150000):strip_icc():format(webp)/Apple-Watch-Ultra-2-23e8ec3e4ee04c6e98c9d654a35f59ec.jpg)
New The Ultimate Guide to GarageBand Tracking Techniques for 2024
The Ultimate Guide to GarageBand Tracking Techniques
Apple GarageBand is an in-built tool in Mac that lets you make incredible music with or without an instrument. The software acts as a music creation tool that enables you to record, mix, and master the music world. GarageBand recording has become popular due to a diverse range of editing functions. Essentially, do you want to know how to record on GarageBand? Be our guest! We have covered your basis.
In this article
01 What is GarageBand Recording Software?
02 How to Download and Install GarageBand Recording Software?
03 Tutorial for How to Record on GarageBand
Part 1: What is GarageBand Recording Software?
GarageBand for podcasting and GarageBand voice recording is the two phenomenal usages of Apple GarageBand . The Mac users have access to a sound library constituting synths, loops, and instrument presets. The user can add a song, start a track, and develop a musical career effortlessly.
The app is free for iOS, macOS, and iPadOS; sharing and creating music is effortless. Additionally, the Apple iCloud integration plays a pivotal role in adding tracks across devices. The workability is as easy as it can get. Willing to know how to record on GarageBand? Keep following us!
As far as the interface is concerned, it has been designed to make music easier and compatible with beginners. The “Quick Help” function can be enabled to get useful hints every time you have to hover over the cursor. The music artist can also get creative with Transform Pad Smart Control. It helps produce morph and tweak sounds as you deem necessary.

Along with this, there is a great collection of lessons for piano and guitar. It makes the user get right into the feels. One can also get instant feedback on your playing to hone the skills flawlessly.
So, are you with us? Let us begin! Now that we have established the performance of Apple GarageBand, let us look at its features.
Groove Track Feature
The Groove Track feature is considered a spell checker for rhythm. It adjusts and synchronizes the timing of the chosen track to the groove under action.
Smart Controls
The smart controls are designed to shape any sound in the library with a customized set of buttons, sliders, and knobs—the look of the smart control changes with each instrument.
Logic Remote
The logic remote helps navigate the song to browse the Sound Library and access smart controls. One can also use the tool by using multi-touch gestures.
Drummer Feature
The “Drummer” plays a pivotal role in adding the virtual session drummer and producing beats. There are around 33 players from genres, including Hip Hop, Rock, and EDM. The different groove and fill combinations make the process effortless.
Amps and Stompboxes
The Bass Amp designer helps dial-up modern and classic tones. One can also build their guitar rig via 25 legendary amps and cabinets. Moreover, there are 35 creative and fun stompbox effects.
Are you willing to know how to record voice on GarageBand? Should we? Let us first understand the procedure to download and install Apple GarageBand.
Part 2: How to Download and Install GarageBand Recording Software?
Do you need to make a GarageBand podcast? Before getting done with the process, ensure that your Mac computer completes the minimum system requirements. The Mac computer requires MacOS 11.0 or later. Apple GarageBand covers the size of 783.1 MB; therefore, you should have this storage.

Image alt: install apple garageband
MacOS 11 requires at least 20GB of free hard drive storage to handle the installation process. A 4GB RAM and 1.1 GHz processor are also system requirements to download Apple GarageBand . The software comes in-built with the macOS computer. However, if you don’t find it, install it through the following procedure:
Step 1: Launching App Store
To begin, launch App Store from your macOS computer. After that, go to the search bar and type “GarageBand.”
Step 2: Installing GarageBand
Click on Apple GarageBand from there. The “Get” option appears. Click on it and get done with the process.
Part 3: Tutorial for How to Record on GarageBand
Want to know how to record on GarageBand? Do you have a concern about how to record voice on GarageBand? Worry no more! We are here at your disposal!
Apple GarageBand may offer ease of use for musicians and artists. However, understanding how it works is mandatory. The section of the article reflects upon the complete procedure to record on Apple GarageBand to conclude the process. Henceforth, let us not wait any longer! Time to dive in!
Step 1: Initiating the Project
Tempo and time signature can also be tailored as per need. Launch Apple GarageBand from your Mac computer and then plug in your external microphone. As soon as the interface pops up, click on “Voice.” Expand the “Details” menu located in the bottom left corner of the project selection box. Tap “Input Device” and choose the microphone from your list. Moving on, click on “Choose” in the bottom right corner.

Step 2: Adding the New Track
Moving on, you are expected to add a new track. To do this, click on the button with (+), located in the top left corner of the tracks panel. GarageBand offers four tracks. Pick one as you deem necessary. Tap the “Audio” option and then plug in the external microphone or guitar. Hit the “Input” dropdown and choose the list. Click on “Create” afterward.

Step 3: Recording the Sound
Now, it is time to record the sound. Pick the track that you will be recording by clicking on the track panel. Use the square bottom to stop it. Hit red circle to begin recording.

Step 4: Recording the Multiple Tracks
Moreover, you can record multiple tracks as well. To begin, choose the track where the first track was recorded through the track header. Navigate the play head to the start of the original take. Tap the red circle to initiate the recording process. Now, click on the number in the recorded segment in the top left corner. Pick the take you have to keep and then “Delete Unused Takes to get rid of other takes.

Step 5: Exporting the File
After you are done, it is time to export the finished project. Navigate to the top bar and click on “Share.” Choose “ Export Song to Disk “ from the context menu that appears, choose “Export Song to Disk.” A dialogue box appears.

Step 6: Saving Process
Rename the file, enter the file location, format, and sound quality—hit “Export” when you are done. The project can be saved in MP3 , WAV, and AIFF.

Wrapping Up
There is a diverse range of voice recorders and music-creating software in the business, creating chaos. Apple GarageBand recording is one such Mac recording studio doing wonders in the market. With advanced features and multiple functions, one can count on the tool to create magic in the music fraternity. The users are expected to test the features first before making the call.
02 How to Download and Install GarageBand Recording Software?
03 Tutorial for How to Record on GarageBand
Part 1: What is GarageBand Recording Software?
GarageBand for podcasting and GarageBand voice recording is the two phenomenal usages of Apple GarageBand . The Mac users have access to a sound library constituting synths, loops, and instrument presets. The user can add a song, start a track, and develop a musical career effortlessly.
The app is free for iOS, macOS, and iPadOS; sharing and creating music is effortless. Additionally, the Apple iCloud integration plays a pivotal role in adding tracks across devices. The workability is as easy as it can get. Willing to know how to record on GarageBand? Keep following us!
As far as the interface is concerned, it has been designed to make music easier and compatible with beginners. The “Quick Help” function can be enabled to get useful hints every time you have to hover over the cursor. The music artist can also get creative with Transform Pad Smart Control. It helps produce morph and tweak sounds as you deem necessary.
Along with this, there is a great collection of lessons for piano and guitar. It makes the user get right into the feels. One can also get instant feedback on your playing to hone the skills flawlessly.
So, are you with us? Let us begin! Now that we have established the performance of Apple GarageBand, let us look at its features.
Groove Track Feature
The Groove Track feature is considered a spell checker for rhythm. It adjusts and synchronizes the timing of the chosen track to the groove under action.
Smart Controls
The smart controls are designed to shape any sound in the library with a customized set of buttons, sliders, and knobs—the look of the smart control changes with each instrument.
Logic Remote
The logic remote helps navigate the song to browse the Sound Library and access smart controls. One can also use the tool by using multi-touch gestures.
Drummer Feature
The “Drummer” plays a pivotal role in adding the virtual session drummer and producing beats. There are around 33 players from genres, including Hip Hop, Rock, and EDM. The different groove and fill combinations make the process effortless.
Amps and Stompboxes
The Bass Amp designer helps dial-up modern and classic tones. One can also build their guitar rig via 25 legendary amps and cabinets. Moreover, there are 35 creative and fun stompbox effects.
Are you willing to know how to record voice on GarageBand? Should we? Let us first understand the procedure to download and install Apple GarageBand.
Part 2: How to Download and Install GarageBand Recording Software?
Do you need to make a GarageBand podcast? Before getting done with the process, ensure that your Mac computer completes the minimum system requirements. The Mac computer requires MacOS 11.0 or later. Apple GarageBand covers the size of 783.1 MB; therefore, you should have this storage.
Image alt: install apple garageband
MacOS 11 requires at least 20GB of free hard drive storage to handle the installation process. A 4GB RAM and 1.1 GHz processor are also system requirements to download Apple GarageBand . The software comes in-built with the macOS computer. However, if you don’t find it, install it through the following procedure:
Step 1: Launching App Store
To begin, launch App Store from your macOS computer. After that, go to the search bar and type “GarageBand.”
Step 2: Installing GarageBand
Click on Apple GarageBand from there. The “Get” option appears. Click on it and get done with the process.
Part 3: Tutorial for How to Record on GarageBand
Want to know how to record on GarageBand? Do you have a concern about how to record voice on GarageBand? Worry no more! We are here at your disposal!
Apple GarageBand may offer ease of use for musicians and artists. However, understanding how it works is mandatory. The section of the article reflects upon the complete procedure to record on Apple GarageBand to conclude the process. Henceforth, let us not wait any longer! Time to dive in!
Step 1: Initiating the Project
Tempo and time signature can also be tailored as per need. Launch Apple GarageBand from your Mac computer and then plug in your external microphone. As soon as the interface pops up, click on “Voice.” Expand the “Details” menu located in the bottom left corner of the project selection box. Tap “Input Device” and choose the microphone from your list. Moving on, click on “Choose” in the bottom right corner.
Step 2: Adding the New Track
Moving on, you are expected to add a new track. To do this, click on the button with (+), located in the top left corner of the tracks panel. GarageBand offers four tracks. Pick one as you deem necessary. Tap the “Audio” option and then plug in the external microphone or guitar. Hit the “Input” dropdown and choose the list. Click on “Create” afterward.
Step 3: Recording the Sound
Now, it is time to record the sound. Pick the track that you will be recording by clicking on the track panel. Use the square bottom to stop it. Hit red circle to begin recording.
Step 4: Recording the Multiple Tracks
Moreover, you can record multiple tracks as well. To begin, choose the track where the first track was recorded through the track header. Navigate the play head to the start of the original take. Tap the red circle to initiate the recording process. Now, click on the number in the recorded segment in the top left corner. Pick the take you have to keep and then “Delete Unused Takes to get rid of other takes.
Step 5: Exporting the File
After you are done, it is time to export the finished project. Navigate to the top bar and click on “Share.” Choose “ Export Song to Disk “ from the context menu that appears, choose “Export Song to Disk.” A dialogue box appears.
Step 6: Saving Process
Rename the file, enter the file location, format, and sound quality—hit “Export” when you are done. The project can be saved in MP3 , WAV, and AIFF.
Wrapping Up
There is a diverse range of voice recorders and music-creating software in the business, creating chaos. Apple GarageBand recording is one such Mac recording studio doing wonders in the market. With advanced features and multiple functions, one can count on the tool to create magic in the music fraternity. The users are expected to test the features first before making the call.
Master List of Robust Voice Transformation Applications: Converting Masculine Vocals to Female
If you’ve been searching for the best android and iOS voice-changing apps around the internet, you’re on the right spot. Voice-changing applications are always fun. They’re handy when you’re pulling a prank on a friend, or you want some amazing effects to test your voice. Thus, we provide you with all the best male to female voice changer apps in the list below.
Record & Edit Voice Fast before Changing Voice
Before changing your voice from male to female, I suggest you edit your voice first. Filmora is an easy-to-use yet powerful video editor helping you quickly edit voice no matter your voice or the audio extracted from videos. Explore Filmora’s audio editing features and get ready for changing voice!
For Win 7 or later (64-bit)
For macOS 10.12 or later


Part 1: Changing Voice Online for Free with Media.io
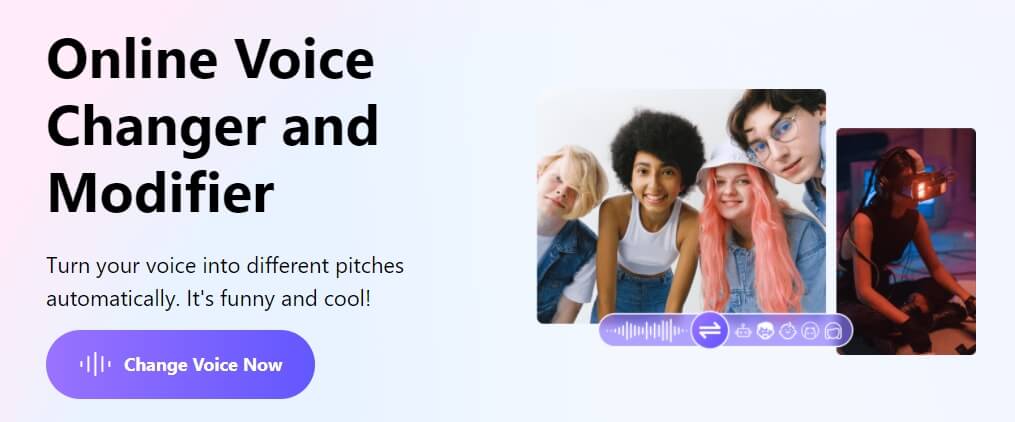
If you want to change voice without downloading and installing any app on your mobile phone, you can try some online solutions. Media.io is an all-in-one online video toolkit that allows you to edit, convert and compress video, audio and image files easily. The online voice changer from Media.io can transform your voice to a male voice, female voice, child voice, robot voice, and Donald Duck voice. If you wish to have voice filters, you won’t have any problems in the future with the Media.io voice changer.

This online voice changer works best on the Chrome browser, so you can utilize it whether using a Windows, Mac, Linux, or Chromebook device. As a result, you can deceive your family or friends by speaking in another people’s voice rather than your own. Doesn’t that sound like fun?
![]()
A cross-platform for making videos anywhere for all creators

Why your video editing isn’t good enough? How about some creative inspo?
- 100 Million+ Users
- 150+ Countries and Regions
- 4 Million+ Social Media Followers
- 5 Million+ Stock Media for Use
* Secure Download

Part 2: Best Male to Female Voice Changer Apps for iPhone and Android
- Girls Voice Changer
- Voice Changer Voice Recorder Editor & Effect
- VoiceFX
- Voice Changer
- Voice Changer - Audio effects
- Magic Call App
- Voice Changer and Sound Recorder
- Super Voice Editor
- Voice Changer with Effects
- Voice Changer - Girls Voice changer Male to Female
1. Girls Voice Changer
Available for: Android, iOS
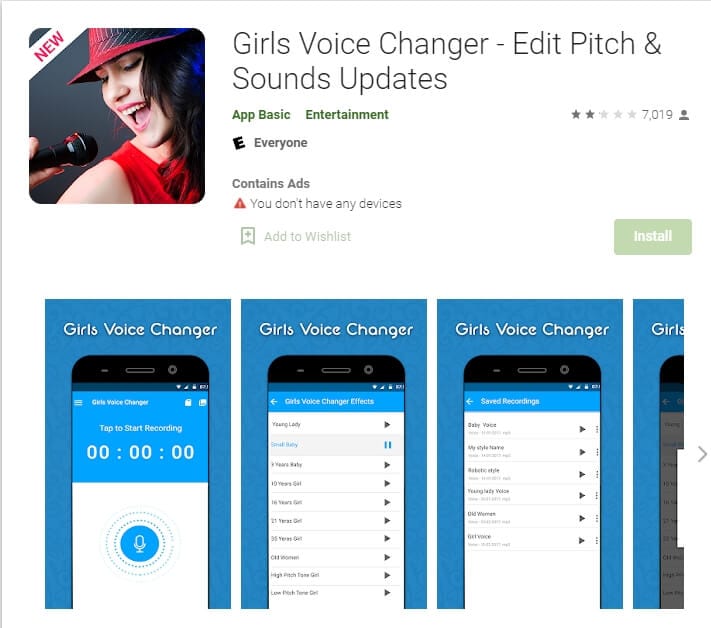
This girl voice changer app is highly portable and easy for any user to use comfortably. It is specifically more popular for changing male voice to female and for pitch adjustments. It’s completely free, so download on your android if you have a storage of about 8MB ready, and start using it!
This male-to-female voice changer app has several options in the library. Though the pitch adjustments are easy to make, some users have informed a lack of performance on very high-pitched settings. However, the smoothness of an android application also depends on how much space is readily available in the device. So next time you’re bored at a part, you have the perfect partner!
2. Voice Changer Voice Recorder Editor & Effect
Available for: Android
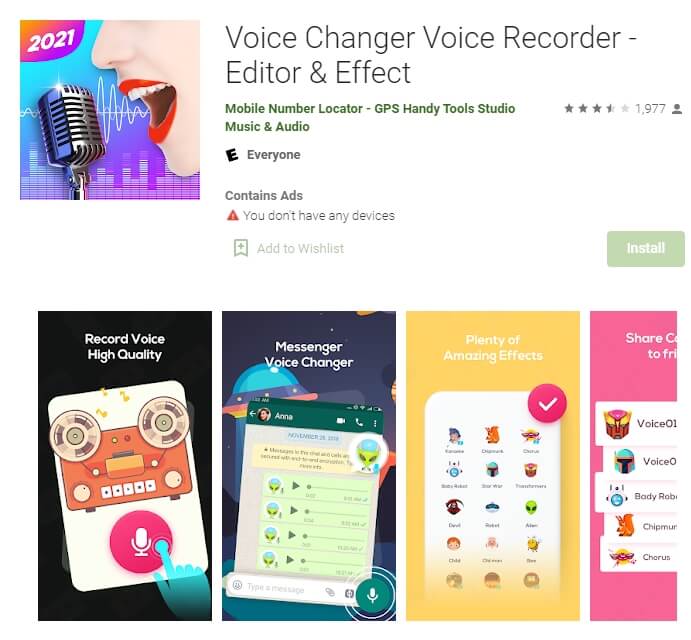
This voice changer application is for multi-purpose. Yes, you can use it as a girl voice changer smoothly and with ease. But apart from male to female voice changing, The “voice changer - voice editor application” can also be used to autotune your voice.
Now autotune is a big feature that every singer uses to make their voices tuned perfectly. With this app, you can also do the same to record your music or have fun while you are bored. The application is pretty to use and can be used as a girl voice changer not only for entertainment but also if you’re practicing. Many people who wish to seek a career in background voices might find this useful.
3. VoiceFX
Available for: Android

The VoiceFX application is filled with a lot of exciting options and features. If you are looking for an app that is more than just a male-to-female voice changer app, the voice fx is highly recommended.
You can also convert your voice into a robot or even an animal from male to female voice. Yes, you read it right. You can turn your manly voice into any of the fictional cartoons you want. This one’s a very easy and efficient way of filming a video with added effects or developing a mini-game with different voice characters. If you haven’t forgotten, there was a very big trend of converting famous music into chipmunk voices. With this app, you can convert your favorite songs into a chipmunk addition song without any problem.
4. Voice Changer
Available for: Android

The voice changer is a very famous male-to-female voice changer app. With over 10 million downloads on the google play store, the voice changer is highly recommended for users who have fun changing their voices from male to female. Compared to other voice changer applications, The Voice changer app has a very elegant and sleek design that makes it very easy to use.
Apart from the male to female voice change option, There are more than 50 other options that you can enjoy. Furthermore, you can share your creations with your friends through Bluetooth or other social media.
5. Voice Changer - Audio effects
Available for: Android

There are a lot of girl voice changer applications on the google play store. But not all of them are up to the mark. The Voice changer - audio effects is another highly recommended voice changer application.
The Voice Changer - Audio effects have a lot of other things to offer as well. Converting your voice from a male to a female has never been easier. Not only can you convert your voice into a girl, but you can also modify it. Furthermore, you can talk to your friends on the phone while you use the voice changer application. Moreover, the voices of animals and robots can also be an alternative to the female voice if you ever get bored of it.
6. Magic Call App
Available for: Android

The magic call is a real-time voice changer app that you can use for changing your voice during a call specifically. It is a really fun app which you can use with your friends to prank even your family!
This is a perfect option for people looking for a real-time girl voice changer app. The main purpose of this application is real-time calls. The magic call is ideal specifically for a male-to-female voice modification. And you can operate this application easily in call durations.
All you have to do is open the voice changer app and dial your call. Apart from Female voice, you can also convert your voice into a cartoon or an animal.
7. Voice Changer and Sound Recorder
Available for: iOS

If you are an iPhone user, then you must know that finding a voice changer on the apple store is like digging a diamond from the ground.
The Voice changer and sound recorder application is found exclusively on the apple store for people who love girl voice changer apps. It is a live call voice changer app, which means converting your voice from a male to a female in between the call. Furthermore, you can even add background voices such as traffic and echo to make your call even funnier. If you are looking for an excuse to get off from your call, then this application has got your back.
8. Super Voice Editor
Available for: Android
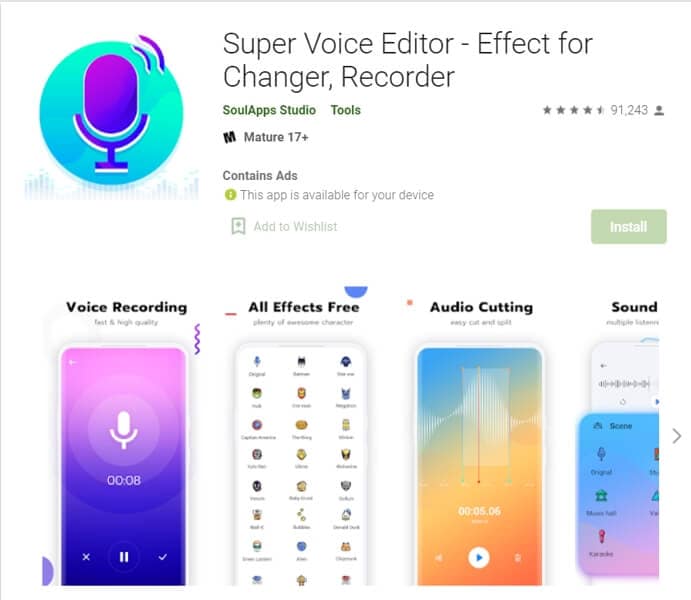
This one is a fun application for people searching for a voice changer app male to female. Not only can you record the audio that you edit, but also use it in real-time! Amazing right? Super voice editor enables you to add effects to your voice while you’re on a call as well. This feature means, next time you’re pulling a prank on the birthday boy, he won’t ever know! Sound like the wonder woman or dexter from his laboratory. The Super-Voice editor is perfect for kids playing in the house and even teenagers looking for something interesting. The SoulApps studio has made it easy for you to sound like your dream faces on the screen. With an MP3 cutter and Ringtone maker, this girl voice changer app is pure creativity.
9. Voice Changer with Effects
Available for: Android

Our list of girl voice changers, Voice changer with effects, is a very practical application that we highly recommend to our users.
With over 50 million downloads on google play, Voice changer with effects is highly suited for anyone looking for more than just a male-to-female voice changer. It has over 40 plus options such as helium, chipmunk, zombie, alien, and many more. With this application, you can even import a favorite audio clip of yours, and then you can easily convert it into a voice you like. If you want to modify your ringtone to an audio clip you just converted, then there is no better application than this one.
10. Voice Changer - Girls Voice changer Male to Female
Available for: Android

If you are looking for a girl voice changer app solely, this application perfectly fits you. The application is specifically designed only to change your voice from a male to a female. Although this application does provide options apart from female voice conversions, those features don’t function ideally. However, if you want a girl voice changer, you won’t have any trouble.
You can use this application while you are on a call. Hence, you can fool your family or friends by using a girl voice instead of your own. We recommend this as an average application that would fit your needs sufficiently.
In conclusion, you have now gone through the list of the perfect options for your android or iOS. Therefore, now you must be ready to choose the best girl voice changer app. So head on to your play store and search for your favorite app right now!
For Win 7 or later (64-bit)
For macOS 10.12 or later
Part 1: Changing Voice Online for Free with Media.io
If you want to change voice without downloading and installing any app on your mobile phone, you can try some online solutions. Media.io is an all-in-one online video toolkit that allows you to edit, convert and compress video, audio and image files easily. The online voice changer from Media.io can transform your voice to a male voice, female voice, child voice, robot voice, and Donald Duck voice. If you wish to have voice filters, you won’t have any problems in the future with the Media.io voice changer.
This online voice changer works best on the Chrome browser, so you can utilize it whether using a Windows, Mac, Linux, or Chromebook device. As a result, you can deceive your family or friends by speaking in another people’s voice rather than your own. Doesn’t that sound like fun?
![]()
A cross-platform for making videos anywhere for all creators
Why your video editing isn’t good enough? How about some creative inspo?
- 100 Million+ Users
- 150+ Countries and Regions
- 4 Million+ Social Media Followers
- 5 Million+ Stock Media for Use
* Secure Download
Part 2: Best Male to Female Voice Changer Apps for iPhone and Android
- Girls Voice Changer
- Voice Changer Voice Recorder Editor & Effect
- VoiceFX
- Voice Changer
- Voice Changer - Audio effects
- Magic Call App
- Voice Changer and Sound Recorder
- Super Voice Editor
- Voice Changer with Effects
- Voice Changer - Girls Voice changer Male to Female
1. Girls Voice Changer
Available for: Android, iOS
This girl voice changer app is highly portable and easy for any user to use comfortably. It is specifically more popular for changing male voice to female and for pitch adjustments. It’s completely free, so download on your android if you have a storage of about 8MB ready, and start using it!
This male-to-female voice changer app has several options in the library. Though the pitch adjustments are easy to make, some users have informed a lack of performance on very high-pitched settings. However, the smoothness of an android application also depends on how much space is readily available in the device. So next time you’re bored at a part, you have the perfect partner!
2. Voice Changer Voice Recorder Editor & Effect
Available for: Android
This voice changer application is for multi-purpose. Yes, you can use it as a girl voice changer smoothly and with ease. But apart from male to female voice changing, The “voice changer - voice editor application” can also be used to autotune your voice.
Now autotune is a big feature that every singer uses to make their voices tuned perfectly. With this app, you can also do the same to record your music or have fun while you are bored. The application is pretty to use and can be used as a girl voice changer not only for entertainment but also if you’re practicing. Many people who wish to seek a career in background voices might find this useful.
3. VoiceFX
Available for: Android
The VoiceFX application is filled with a lot of exciting options and features. If you are looking for an app that is more than just a male-to-female voice changer app, the voice fx is highly recommended.
You can also convert your voice into a robot or even an animal from male to female voice. Yes, you read it right. You can turn your manly voice into any of the fictional cartoons you want. This one’s a very easy and efficient way of filming a video with added effects or developing a mini-game with different voice characters. If you haven’t forgotten, there was a very big trend of converting famous music into chipmunk voices. With this app, you can convert your favorite songs into a chipmunk addition song without any problem.
4. Voice Changer
Available for: Android
The voice changer is a very famous male-to-female voice changer app. With over 10 million downloads on the google play store, the voice changer is highly recommended for users who have fun changing their voices from male to female. Compared to other voice changer applications, The Voice changer app has a very elegant and sleek design that makes it very easy to use.
Apart from the male to female voice change option, There are more than 50 other options that you can enjoy. Furthermore, you can share your creations with your friends through Bluetooth or other social media.
5. Voice Changer - Audio effects
Available for: Android
There are a lot of girl voice changer applications on the google play store. But not all of them are up to the mark. The Voice changer - audio effects is another highly recommended voice changer application.
The Voice Changer - Audio effects have a lot of other things to offer as well. Converting your voice from a male to a female has never been easier. Not only can you convert your voice into a girl, but you can also modify it. Furthermore, you can talk to your friends on the phone while you use the voice changer application. Moreover, the voices of animals and robots can also be an alternative to the female voice if you ever get bored of it.
6. Magic Call App
Available for: Android
The magic call is a real-time voice changer app that you can use for changing your voice during a call specifically. It is a really fun app which you can use with your friends to prank even your family!
This is a perfect option for people looking for a real-time girl voice changer app. The main purpose of this application is real-time calls. The magic call is ideal specifically for a male-to-female voice modification. And you can operate this application easily in call durations.
All you have to do is open the voice changer app and dial your call. Apart from Female voice, you can also convert your voice into a cartoon or an animal.
7. Voice Changer and Sound Recorder
Available for: iOS
If you are an iPhone user, then you must know that finding a voice changer on the apple store is like digging a diamond from the ground.
The Voice changer and sound recorder application is found exclusively on the apple store for people who love girl voice changer apps. It is a live call voice changer app, which means converting your voice from a male to a female in between the call. Furthermore, you can even add background voices such as traffic and echo to make your call even funnier. If you are looking for an excuse to get off from your call, then this application has got your back.
8. Super Voice Editor
Available for: Android
This one is a fun application for people searching for a voice changer app male to female. Not only can you record the audio that you edit, but also use it in real-time! Amazing right? Super voice editor enables you to add effects to your voice while you’re on a call as well. This feature means, next time you’re pulling a prank on the birthday boy, he won’t ever know! Sound like the wonder woman or dexter from his laboratory. The Super-Voice editor is perfect for kids playing in the house and even teenagers looking for something interesting. The SoulApps studio has made it easy for you to sound like your dream faces on the screen. With an MP3 cutter and Ringtone maker, this girl voice changer app is pure creativity.
9. Voice Changer with Effects
Available for: Android
Our list of girl voice changers, Voice changer with effects, is a very practical application that we highly recommend to our users.
With over 50 million downloads on google play, Voice changer with effects is highly suited for anyone looking for more than just a male-to-female voice changer. It has over 40 plus options such as helium, chipmunk, zombie, alien, and many more. With this application, you can even import a favorite audio clip of yours, and then you can easily convert it into a voice you like. If you want to modify your ringtone to an audio clip you just converted, then there is no better application than this one.
10. Voice Changer - Girls Voice changer Male to Female
Available for: Android
If you are looking for a girl voice changer app solely, this application perfectly fits you. The application is specifically designed only to change your voice from a male to a female. Although this application does provide options apart from female voice conversions, those features don’t function ideally. However, if you want a girl voice changer, you won’t have any trouble.
You can use this application while you are on a call. Hence, you can fool your family or friends by using a girl voice instead of your own. We recommend this as an average application that would fit your needs sufficiently.
In conclusion, you have now gone through the list of the perfect options for your android or iOS. Therefore, now you must be ready to choose the best girl voice changer app. So head on to your play store and search for your favorite app right now!
“Efficient Methods for Audio Trimming in Apple Videos”
How to Cut Audio from Video on iPhone/Mac

Liza Brown
Jan 23, 2024• Proven solutions
Having to cut audio from video is not an impossible task but without the right knowledge, it looks difficult. The first thing anyone diving into video editing needs to know is that it requires good software that works with the device you will be using to cut the audio. After understanding the need for software and securing the right one, it is also expedient to know the acceptable audio format that would go well with your editing duties.
In this article, you will not just be exposed to the software to use on iPhone and Mac. But, you will also have a detailed guide of how you can use that software like a pro in editing videos. If this is what you want, continue reading.
Section1. How to mute the audio on the video
Section2. Requirements to extract the music of the video and save

Section 1. How to mute the audio on the video
Part1. Steps to cut the audio from videos on Mac
Part2. Steps to cut the audio from videos on iPhone
Steps to cut the audio from videos on Mac
If you are using a Mac for editing, knowing that Filmora is the best way to go about it is good but knowing how to navigate is key. Not to worry, the steps you need to get started are all listed in these three steps.
Step 1: Import Video to Filmora
Import the video to your Filmora. You can also directly drag the video into the Filmora interface.

Step 2: Mute the audio
After dragging the video to the timeline, right-click the stand-alone video, choose “mute”.

Step 3: Save your edit
Click the “export” button on the interface and select the desired video format

Steps to cut the audio from videos on iPhone
If you want to do the mute on an iPhone, you will need to also follow some steps to get it done on your iMovie.
Step 1: Open the iMovie
Opening the iMovie app goes beyond just clicking it to open, you also have to follow up this process by clicking the continue button that pops up. If the app has opened and you can see an inviting interface, move to the next step.
Step 2: Select a video you want
There are different pages on the interface but your concern is on the project page. On that page, click on the plus sign button as it directs you to start or input a new video. After clicking on the plus sign, it will bring up movies that you would further select.

Don’t hesitate to select the movie you want to edit. Complete the process by clicking the “create movie” button beneath the gallery of movies.
Step 3: Mute the audio
Muting the audio becomes straightforward when you have moved it to the interface. In this step, click on the video clip button as seen in the picture then mute it by selecting the mute option (the picture below shows the mute sign at the lower-left corner) from the audio button. When this is done, your video has been silenced.

Don’t forget to save it when you are done editing by clicking on the “done button” that is visible at the left corner positioned at the top of the screen.
Section 2. Requirements to extract the music of the video and save
There are some times when you just want to extract the audio leaving out the video. Maybe the song accompanying the video is excellent but the video quality is bad, or maybe the video is not as great as the song. Whatever the reason may be, you can extract the music of your video and save it using. The two best apps to do this are Filmora and MP3 Converter -Audio Extractor. Below are the steps to extract audio using Filmora
Step1. import the video into the Filmora
Another way to import a video is to drag and drop the video into the program. Using any of these two steps allows your video to be listed in the media library
Step 2 Next, right-click the video and choose “Audio Detach.” After some time, the video and audio will load as two separate files.

You can choose to delete the video or keep it. If you want to delete it, simply right-click and choose delete. This will remove the video entirely.
Step 3. Edit the extracted audio by doubling clicking on it. When you do, the audio editing tools would be displayed. You can adjust the music volume, change voice, and do other edits.

Step 4. If the audio has some sounds you would like to take out, place your cursor at the exact place you want the deletion to start. Next, press the split button. This step can be used to delete any aspect of the music sound you don’t like.
Step 5. Having extracted, edited, and deleted unnecessary sounds from the music, click the export button. You will be provided with different options to save the audio. Click on the one you prefer.

You can also customize your audio encoder after extracting and saving the music. Simply click Settings to get started.
Conclusion
As previously stated, editing a video requires choosing the right software that would support a successful editing journey. Although there are many options mac users can select from when looking for video editing software, the one that is highly recommended is theFilmora software. Aside from being an easy to use App, it supports a wide range of audio. Audio formats like MP3, MPA, WMA, M4V, WAV are all working well with this software which makes it a great choice.
For iPhone users, a good video editing software that can be used to successfully cut out audio even as a novice is the iMovie. With iMovie software. Video editing is a lot easier and faster with this software. Plus, the software also supports many audio formats which is a good advantage to your editing quest.
Learn More: How to Add Music/ Audio to a GIF on Mac>>>


Liza Brown
Liza Brown is a writer and a lover of all things video.
Follow @Liza Brown
Liza Brown
Jan 23, 2024• Proven solutions
Having to cut audio from video is not an impossible task but without the right knowledge, it looks difficult. The first thing anyone diving into video editing needs to know is that it requires good software that works with the device you will be using to cut the audio. After understanding the need for software and securing the right one, it is also expedient to know the acceptable audio format that would go well with your editing duties.
In this article, you will not just be exposed to the software to use on iPhone and Mac. But, you will also have a detailed guide of how you can use that software like a pro in editing videos. If this is what you want, continue reading.
Section1. How to mute the audio on the video
Section2. Requirements to extract the music of the video and save
Section 1. How to mute the audio on the video
Part1. Steps to cut the audio from videos on Mac
Part2. Steps to cut the audio from videos on iPhone
Steps to cut the audio from videos on Mac
If you are using a Mac for editing, knowing that Filmora is the best way to go about it is good but knowing how to navigate is key. Not to worry, the steps you need to get started are all listed in these three steps.
Step 1: Import Video to Filmora
Import the video to your Filmora. You can also directly drag the video into the Filmora interface.
Step 2: Mute the audio
After dragging the video to the timeline, right-click the stand-alone video, choose “mute”.
Step 3: Save your edit
Click the “export” button on the interface and select the desired video format
Steps to cut the audio from videos on iPhone
If you want to do the mute on an iPhone, you will need to also follow some steps to get it done on your iMovie.
Step 1: Open the iMovie
Opening the iMovie app goes beyond just clicking it to open, you also have to follow up this process by clicking the continue button that pops up. If the app has opened and you can see an inviting interface, move to the next step.
Step 2: Select a video you want
There are different pages on the interface but your concern is on the project page. On that page, click on the plus sign button as it directs you to start or input a new video. After clicking on the plus sign, it will bring up movies that you would further select.
Don’t hesitate to select the movie you want to edit. Complete the process by clicking the “create movie” button beneath the gallery of movies.
Step 3: Mute the audio
Muting the audio becomes straightforward when you have moved it to the interface. In this step, click on the video clip button as seen in the picture then mute it by selecting the mute option (the picture below shows the mute sign at the lower-left corner) from the audio button. When this is done, your video has been silenced.
Don’t forget to save it when you are done editing by clicking on the “done button” that is visible at the left corner positioned at the top of the screen.
Section 2. Requirements to extract the music of the video and save
There are some times when you just want to extract the audio leaving out the video. Maybe the song accompanying the video is excellent but the video quality is bad, or maybe the video is not as great as the song. Whatever the reason may be, you can extract the music of your video and save it using. The two best apps to do this are Filmora and MP3 Converter -Audio Extractor. Below are the steps to extract audio using Filmora
Step1. import the video into the Filmora
Another way to import a video is to drag and drop the video into the program. Using any of these two steps allows your video to be listed in the media library
Step 2 Next, right-click the video and choose “Audio Detach.” After some time, the video and audio will load as two separate files.
You can choose to delete the video or keep it. If you want to delete it, simply right-click and choose delete. This will remove the video entirely.
Step 3. Edit the extracted audio by doubling clicking on it. When you do, the audio editing tools would be displayed. You can adjust the music volume, change voice, and do other edits.
Step 4. If the audio has some sounds you would like to take out, place your cursor at the exact place you want the deletion to start. Next, press the split button. This step can be used to delete any aspect of the music sound you don’t like.
Step 5. Having extracted, edited, and deleted unnecessary sounds from the music, click the export button. You will be provided with different options to save the audio. Click on the one you prefer.
You can also customize your audio encoder after extracting and saving the music. Simply click Settings to get started.
Conclusion
As previously stated, editing a video requires choosing the right software that would support a successful editing journey. Although there are many options mac users can select from when looking for video editing software, the one that is highly recommended is theFilmora software. Aside from being an easy to use App, it supports a wide range of audio. Audio formats like MP3, MPA, WMA, M4V, WAV are all working well with this software which makes it a great choice.
For iPhone users, a good video editing software that can be used to successfully cut out audio even as a novice is the iMovie. With iMovie software. Video editing is a lot easier and faster with this software. Plus, the software also supports many audio formats which is a good advantage to your editing quest.
Learn More: How to Add Music/ Audio to a GIF on Mac>>>
Liza Brown
Liza Brown is a writer and a lover of all things video.
Follow @Liza Brown
Also read:
- Updated Discover the 5 Premier Voice Recording Gadgets Optimized for MP3 Files for 2024
- New 2024 Approved The Premier Selection of Logic Pro X Extensions 8 Plugins to Elevate Your Sound Design
- New In 2024, Discovering Preeminent Software for Mac Music File Management
- New Dive Into Sound Design An Overview of Fundamental Wave Editor Features for 2024
- In 2024, Unlocking Sound Recording Potential in Linux The 5 Top Auditory Tools & Their Mastery Techniques
- New Premier Top 10 Audio Manipulation Software for Windows and Mac Users
- Updated In 2024, Audio Enhancement for Videos Without Breaking the Bank Exploring Three Free Approaches
- Exploring Android The Most Popular and Acclaimed Voice Capture Apps for 2024
- New Omegle Reinstated Guide to Regaining Profile Approval Status for 2024
- New 2024 Approved The Essential Guide to Achieving Professional-Level Audio on Your Own Setup
- The Ultimate Guide Top 7 No-Cost Vocal Transformation Apps
- Updated In 2024, Discover the 5 Premier Voice Recording Gadgets Optimized for MP3 Files
- Updated In 2024, Maximizing Creativity A Look at the 6 Best Free Online Audio Adjustment Applications
- 2024 Approved Unearth the Sound Artifact Signifying a Bells Ring
- Expert Picks Top Speech Transcription Tools for Android and iOS Users
- In 2024, 3 Top-Ranked Online Tools for Enhancing Audio Clarity
- Progressive Audio Fade-Out Effects in Adobe Rushs 2023 Update for 2024
- Updated In 2024, Top Choices for Instrumental Scores in Video Production
- The Ultimate Guide to Adding Background Music in iMovie Videos for 2024
- Discovering the Finest Zero-Cost, Open-Source Audio Management on Windows
- New Navigating Through Music Production Software Landscape Can MAGIX Samplitude Be Considered Supreme for 2024
- Updated The Songbird Anthology (MP3 Version)
- Premium Audio Excision Tools for Windows Media Files
- Updated Voice Easy A Curated List of Software for Simplified Vocal Recordings
- In 2024, The Background in Your Footage Might Be Bland or Unpleasant. This Article Will Discuss Video Background Templates You Can Use to Spice Things up and Make Your Videos Go Viral
- Xiaomi Redmi Note 13 Pro+ 5G Bootloop Problem, How to Fix it Without Data Loss | Dr.fone
- In 2024, How to Unlock iPhone 6 Plus When We Dont Have Apple ID or Password?
- 2024 Approved Blender - A Video Editor for Every Professional
- How to Stop My Spouse from Spying on My Xiaomi Redmi K70 | Dr.fone
- 2024 Approved Ratio Matters The Influence of Aspect Ratio on Video Aesthetics
- 5 Solutions For Realme C55 Unlock Without Password
- In 2024, How Can I Use a Fake GPS Without Mock Location On Samsung Galaxy S21 FE 5G (2023)? | Dr.fone
- Discover the Top-Rated YouTube to MP3 Converters Features, Pros, and Cons for 2024
- Is it Possible to Use Miracast with Apple iPhone 11 Pro Max? | Dr.fone
- How to Restore Deleted Poco C51 Photos An Easy Method Explained.
- In 2024, Catch or Beat Sleeping Snorlax on Pokemon Go For Oppo A56s 5G | Dr.fone
- Authentication Error Occurred on Motorola Moto G84 5G? Here Are 10 Proven Fixes | Dr.fone
- Updated Discover the Best Animation Creators for Every Level of Expertise for 2024
- In 2024, Tips and Tricks for Setting Up your Motorola G24 Power Phone Pattern Lock
- Title: New The Ultimate Guide to GarageBand Tracking Techniques for 2024
- Author: Paul
- Created at : 2024-05-05 06:07:42
- Updated at : 2024-05-06 06:07:42
- Link: https://voice-adjusting.techidaily.com/new-the-ultimate-guide-to-garageband-tracking-techniques-for-2024/
- License: This work is licensed under CC BY-NC-SA 4.0.
