
:max_bytes(150000):strip_icc():format(webp)/GettyImages-850120538-4d2af54c23a641c8a5f2e00ef7a9aa37.jpg)
New The Premier Virtual Communities Where Strangers Become Friends for 2024
The Premier Virtual Communities Where Strangers Become Friends
Top 10 Best Websites Like Omegle

Liza Brown
Mar 27, 2024• Proven solutions
One of the main reasons we use the Internet is to be social. Interaction brings comfort and satisfaction to most normal people, and most people need to interact. It is for this reason that Facebook is so popular. Nevertheless, there are other websites where people can meet. People usually post comments on these sites and return later to see if someone else has responded. However, many sites facilitate real-time online conversations that are as close as you can get to face-to-face communications.
Omegle’s website allows members to converse via video, audio, or plain text. You can talk to a stranger and meet random people there. Unfortunately, Omegle has become overpopulated like most big sites. Also, on Omegle, many people prey upon others and make illicit conversations due to which using Omegle is getting difficult day by day. This article brings you a list of 10 websites like Omegle that serve the same purpose as Omegle. You can say them as Omegle alternatives, but they are more secure and more fun to use.
![]()
A cross-platform for making videos anywhere for all creators

Why your video editing isn’t good enough? How about some creative inspo?
- 100 Million+ Users
- 150+ Countries and Regions
- 4 Million+ Social Media Followers
- 5 Million+ Stock Media for Use
* Secure Download

Best Websites Like Omegle (Omegle Alternatives)
1. Chatroulette

The webcam-based Chatroulette service is notable for pairing users with random strangers using a random pairing algorithm. Instead of using guns, you parry verbally with typewritten messages and/or a digital camera, and the person who does not agree with you leaves the chat (“kills the conversation”).
A 17-year-old child who created it in 2009 ran it out of a chamber in his parents’ house. Despite not running any advertisements, this website grew to a massive size through word of mouth. In recent years, after much trial and error, it has finally reached the stage where it can distinguish between appropriate and inappropriate behavior.
Moderators screen violators who have not adhered to the site’s terms of service. Users who do not do so will not be able to access the site. Approximately half of the users of this website are under thirty, and there are more men than women. There’s no doubt that it’s R-rated. Like Omegle, this site is a great alternative.
Features:
  * Anonymously Chat With Strangers.
  * Millions of Users Across Different Countries
  * Android and iOS apps are also available.
  * Fewer Scammers and Bots.
  * One of the best monitoring and moderating systems.
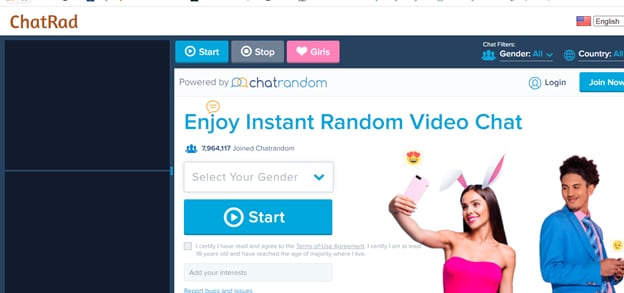
2. ChatRandom
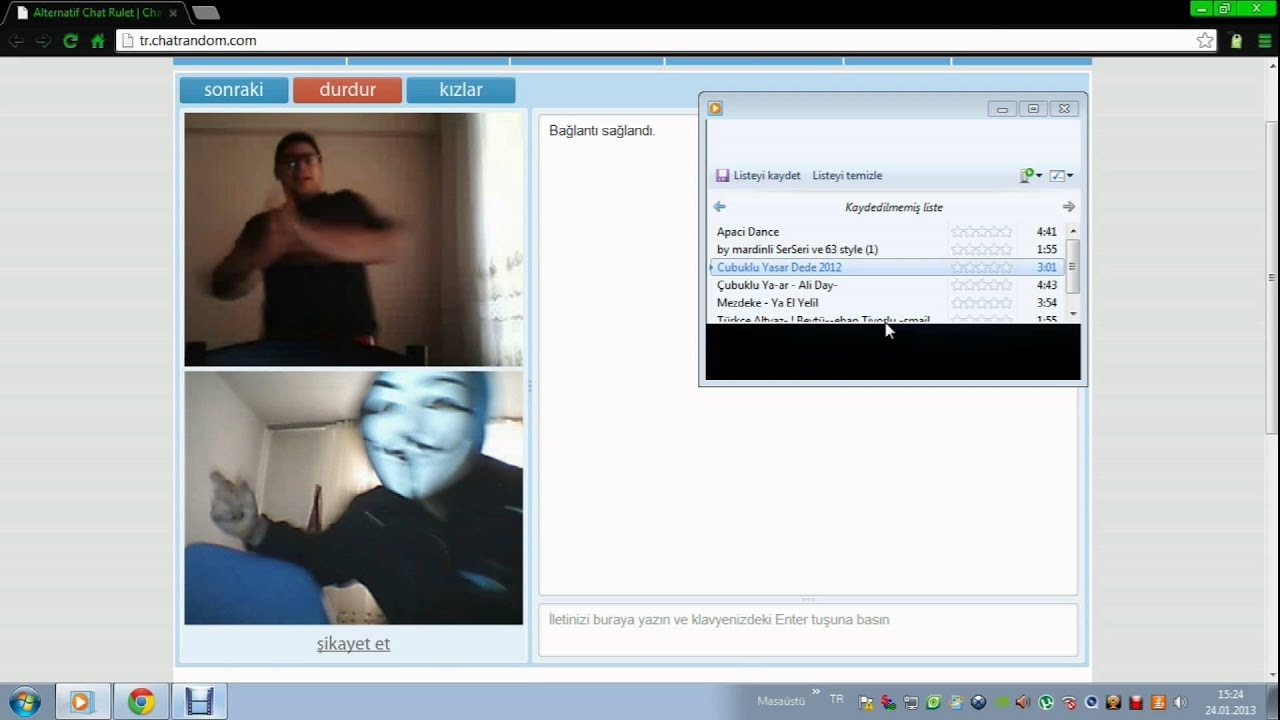
The ChatRandom service is a wonderful, chaotic, and people-packed place where users share all kinds of information. There is no shortage of fun stuff on ChatRandom, no matter what you want. Even though this stranger chat website has declined in popularity, it remains popular in the minds of many. The community is moderate, and there are a variety of people in it.
There have been a couple of changes to the site over the years, and what makes it one of the best websites like Omegle is its polished UI, better matchmaking algorithm, and general trend of catering to both genders.
Features:
  * You do not need to register to chat on Chatrandom; it is free to use.
  * Users of the site can access most of its features free of charge.
  * A total of 20 languages are available for users to use.
  * Chat rooms are available for members to connect.
  * Members are matched by their unique code.
  * On the site, you can video chat with others.
  * You can easily use the site's features.
3. YouNow
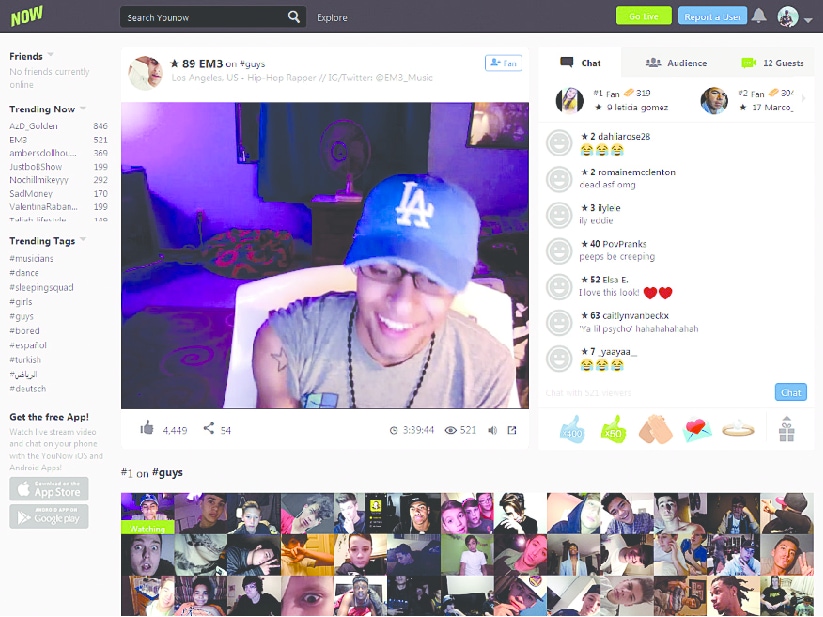
Is YouNow an app for broadcasting, chatting, streaming, or watching live videos? In contrast to Omegle, YouNow’s goal is to create a large audience, and trend, and build a loyal following.
Users can comment or buy gold bars to share with others during the viewing process. A user must be 13 years of age or older to use the chat app. Users of YouNow must register to begin chatting, unlike Omegle, which doesn’t require them to create a Facebook or Twitter account before chatting.
Though both platforms still have privacy concerns, YouNow lets you customize your usernames so that they don’t match anything about your Facebook or Twitter identities. Additionally, YouNow has stricter guidelines that prohibit sexual content, nudity, and bullying. However, there is no guarantee that such content will be monitored or removed.
The community guidelines can be broken, and you can report violators, but there’s no way to guarantee you won’t be exposed to objectionable live content. As long as you retain ownership of your content, posting content to the app gives the app permission to use it how it likes.
Features:
  * Allows you to integrate social media platforms.
  * Web, Android, and iOS versions are available.
  * Allows you to start a broadcast.
  * You can join the broadcast of other streams also to interact with them.
  * You can also make friends and send and receive gifts from them
,.
4. TinyChat

An alternative chat platform, TinyChat, offers chat rooms with video feeds of 12 each. With this chat site, you do not have to pay because you can invite people you know and set up topics for your chat. The platform offers the most extensive video and voice chat service online for five million minutes of airtime each day.
Numerous chat rooms are available, including those set up by residents of your area. TinyChat hosts live video streaming of TV shows that will let you watch them as they happen. If you can’t find a topic that interests you, create one. With TinyChat, you can connect with others through your webcam through audio, video, or text communication, just like with Omegle.
TinyChat is also a browser-based IM client and can be accessed from a PC, mobile device, or browser. While Omegle does not offer coins or points for unlocking special achievements or increasing your chances of landing in the live directory, it does provide you with a chance to interact with other users. A 500-coin token will also be awarded to you if you promote your room via TinyChat.
Features:
  * The process of starting a video call is very simple.
  * There are no issues with the webcam.
  * In your chat, you can control how many people participate.
  * It's possible to block someone if you don't want to communicate with them.
  * You can improve your experience with a variety of features.
5. FaceFlow
Users can have up to three video chats at the same time with these guys, taking social networking to a whole new level. In addition to offering free video chat and video conferencing with your friends, you can also communicate with strangers via FaceFlow. The new feature allows users to create a searchable profile and share their favorite online videos and pictures.
Aside from being simply another webcam chat service, this site is more like the amazing services offered by Skype. There is a one-to-one video chat feature as well as text chat. Furthermore, FaceFlow has released a multiplayer game called Flappy in which you have to team up against someone in order to complete the game.
Features
  * Signing up takes no time at all;
  * The service supports five languages;
  * It has a modern interface;
  * It offers a lot of free features;
  * FaceFlow can connect with your friends and family while still using a dating website.
6. CamSurf
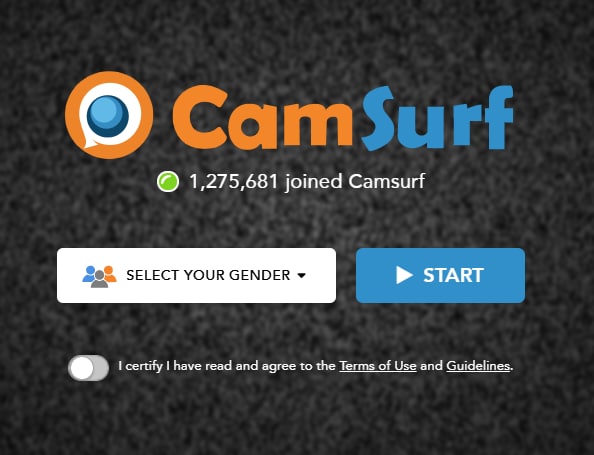
There are many websites similar to Omegle, but Camsurf has a unique twist - it is wild. If you’re trying to have fun, then you should visit this website. CamSurf has consistently delivered the most bizarre video chats we’ve ever experienced. The CamSurf website itself is straightforward and almost identical to the OmeTV website.
These two have a major difference in the types of people they attract. CamSurf has a vastly wider audience than OmeTV. While some individuals on OmeTV are looking for genuine conversation, on CamSurf, you’ll find people looking for genuine chat. It is our top choice for next time.
Features:
  * Feature-rich website.
  * A huge range of topics is available to discuss.
  * You Mostly find genuine people here.
7. ChatRad
This site claims to be a G-rated alternative to chat sites like Chatroulette, and it is quite harsh toward behavior that is not appropriate. People need to act the same in the real world, where they don’t run around naked or try to expose themselves all of the time… at least not in my world. Despite being a random video chat site, ChatRad is managed by a team of 24x7 moderators, so anything 18 and older can take advantage of the service in a safe environment regardless of their sexual orientation.
Features:
  * Very Strict Policies For Disrespectful People
  * The chat is moderated 24/7 by an active team of moderators.
  * It offers a very safe environment for people.
8.Bazoocam
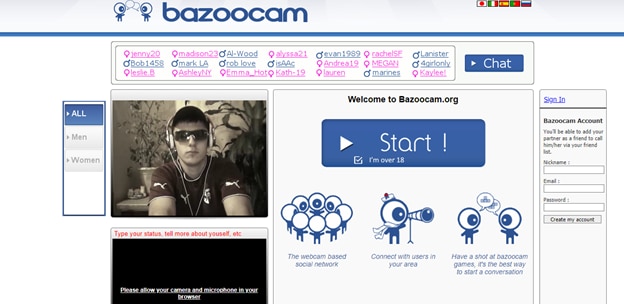
The Bazoocam webcam chat environment is another random digital camera chat site that maintains a high level of cleanliness. Like most of the other websites mentioned, you’re paired up with an interloper haphazardly. Press “skip” and move on to the next person if you are unsatisfied with what you see.
As icebreakers or when you are bored of talking about yourself, you can join one of the multiplayer games on Boomcam. You are advised to do something unusual if you’re bored, but you are urged to wear your clothes. Put your best foot forward when playing golf in fancy dress or taking part in your favorite music. Try playing a string or wind instrument, and you’ll find many people to talk to.
Features
  * The site offers a very high level of cleanliness.
  * You can chat with the person of your choice.
  * If you don't like a person you can skip to check the next candidate.
  * It also offers a lot of multiplayer games to play with strangers.
  * It will never let you get bored.
9. CamGo

Getting to know new people and making new connections is fun with Camgo. Start a conversation with strangers, develop relationships without worrying about running into Covid, and explore webcam dating! Camgo’s Safe Search feature uses artificial intelligence to discover potential matchmaking partners. Your webcam chat loop will be kept out of the reach of people you don’t want to see! By chatting online with new people from your home, you can meet new people in a much easier and safe manner.
Features:
  * Easy To Meet New Strangers.
  * The site is completely safe to use.
  * It offers a great video chatting experience.
10. iMeetzu

It is similar to Omegle in that there are random live video chats and text chat rooms available, but iMeetzu goes over and above that. Once you get past the randomness, you are given the option of joining a free online dating service or friend finder.
Over a thousand new members are joining every day on this one of the fastest-growing social networking sites. If you’re looking to find a date or if you practice your lines, this is the closest you can get to practice face-to-face before you dive back into the dating pool.
Features:
  * It is identical to Omegle.
  * As it is a new platform so there are mostly genuine users.
  * You can do both text and video chats with strangers.
  * You can also join group chats.
Conclusion
These are some of the best Omegle alternative sites. Every site has its own unique features, but if you compare them in functionality, they are quite similar. It’s just the working of every site is different. You can try these sites one by one and stick to those that you find the most suitable and according to your taste.


Liza Brown
Liza Brown is a writer and a lover of all things video.
Follow @Liza Brown
Liza Brown
Mar 27, 2024• Proven solutions
One of the main reasons we use the Internet is to be social. Interaction brings comfort and satisfaction to most normal people, and most people need to interact. It is for this reason that Facebook is so popular. Nevertheless, there are other websites where people can meet. People usually post comments on these sites and return later to see if someone else has responded. However, many sites facilitate real-time online conversations that are as close as you can get to face-to-face communications.
Omegle’s website allows members to converse via video, audio, or plain text. You can talk to a stranger and meet random people there. Unfortunately, Omegle has become overpopulated like most big sites. Also, on Omegle, many people prey upon others and make illicit conversations due to which using Omegle is getting difficult day by day. This article brings you a list of 10 websites like Omegle that serve the same purpose as Omegle. You can say them as Omegle alternatives, but they are more secure and more fun to use.
![]()
A cross-platform for making videos anywhere for all creators
Why your video editing isn’t good enough? How about some creative inspo?
- 100 Million+ Users
- 150+ Countries and Regions
- 4 Million+ Social Media Followers
- 5 Million+ Stock Media for Use
* Secure Download
Best Websites Like Omegle (Omegle Alternatives)
1. Chatroulette
The webcam-based Chatroulette service is notable for pairing users with random strangers using a random pairing algorithm. Instead of using guns, you parry verbally with typewritten messages and/or a digital camera, and the person who does not agree with you leaves the chat (“kills the conversation”).
A 17-year-old child who created it in 2009 ran it out of a chamber in his parents’ house. Despite not running any advertisements, this website grew to a massive size through word of mouth. In recent years, after much trial and error, it has finally reached the stage where it can distinguish between appropriate and inappropriate behavior.
Moderators screen violators who have not adhered to the site’s terms of service. Users who do not do so will not be able to access the site. Approximately half of the users of this website are under thirty, and there are more men than women. There’s no doubt that it’s R-rated. Like Omegle, this site is a great alternative.
Features:
  * Anonymously Chat With Strangers.
  * Millions of Users Across Different Countries
  * Android and iOS apps are also available.
  * Fewer Scammers and Bots.
  * One of the best monitoring and moderating systems.
2. ChatRandom
The ChatRandom service is a wonderful, chaotic, and people-packed place where users share all kinds of information. There is no shortage of fun stuff on ChatRandom, no matter what you want. Even though this stranger chat website has declined in popularity, it remains popular in the minds of many. The community is moderate, and there are a variety of people in it.
There have been a couple of changes to the site over the years, and what makes it one of the best websites like Omegle is its polished UI, better matchmaking algorithm, and general trend of catering to both genders.
Features:
  * You do not need to register to chat on Chatrandom; it is free to use.
  * Users of the site can access most of its features free of charge.
  * A total of 20 languages are available for users to use.
  * Chat rooms are available for members to connect.
  * Members are matched by their unique code.
  * On the site, you can video chat with others.
  * You can easily use the site's features.
3. YouNow
Is YouNow an app for broadcasting, chatting, streaming, or watching live videos? In contrast to Omegle, YouNow’s goal is to create a large audience, and trend, and build a loyal following.
Users can comment or buy gold bars to share with others during the viewing process. A user must be 13 years of age or older to use the chat app. Users of YouNow must register to begin chatting, unlike Omegle, which doesn’t require them to create a Facebook or Twitter account before chatting.
Though both platforms still have privacy concerns, YouNow lets you customize your usernames so that they don’t match anything about your Facebook or Twitter identities. Additionally, YouNow has stricter guidelines that prohibit sexual content, nudity, and bullying. However, there is no guarantee that such content will be monitored or removed.
The community guidelines can be broken, and you can report violators, but there’s no way to guarantee you won’t be exposed to objectionable live content. As long as you retain ownership of your content, posting content to the app gives the app permission to use it how it likes.
Features:
  * Allows you to integrate social media platforms.
  * Web, Android, and iOS versions are available.
  * Allows you to start a broadcast.
  * You can join the broadcast of other streams also to interact with them.
  * You can also make friends and send and receive gifts from them
,.
4. TinyChat
An alternative chat platform, TinyChat, offers chat rooms with video feeds of 12 each. With this chat site, you do not have to pay because you can invite people you know and set up topics for your chat. The platform offers the most extensive video and voice chat service online for five million minutes of airtime each day.
Numerous chat rooms are available, including those set up by residents of your area. TinyChat hosts live video streaming of TV shows that will let you watch them as they happen. If you can’t find a topic that interests you, create one. With TinyChat, you can connect with others through your webcam through audio, video, or text communication, just like with Omegle.
TinyChat is also a browser-based IM client and can be accessed from a PC, mobile device, or browser. While Omegle does not offer coins or points for unlocking special achievements or increasing your chances of landing in the live directory, it does provide you with a chance to interact with other users. A 500-coin token will also be awarded to you if you promote your room via TinyChat.
Features:
  * The process of starting a video call is very simple.
  * There are no issues with the webcam.
  * In your chat, you can control how many people participate.
  * It's possible to block someone if you don't want to communicate with them.
  * You can improve your experience with a variety of features.
5. FaceFlow
Users can have up to three video chats at the same time with these guys, taking social networking to a whole new level. In addition to offering free video chat and video conferencing with your friends, you can also communicate with strangers via FaceFlow. The new feature allows users to create a searchable profile and share their favorite online videos and pictures.
Aside from being simply another webcam chat service, this site is more like the amazing services offered by Skype. There is a one-to-one video chat feature as well as text chat. Furthermore, FaceFlow has released a multiplayer game called Flappy in which you have to team up against someone in order to complete the game.
Features
  * Signing up takes no time at all;
  * The service supports five languages;
  * It has a modern interface;
  * It offers a lot of free features;
  * FaceFlow can connect with your friends and family while still using a dating website.
6. CamSurf
There are many websites similar to Omegle, but Camsurf has a unique twist - it is wild. If you’re trying to have fun, then you should visit this website. CamSurf has consistently delivered the most bizarre video chats we’ve ever experienced. The CamSurf website itself is straightforward and almost identical to the OmeTV website.
These two have a major difference in the types of people they attract. CamSurf has a vastly wider audience than OmeTV. While some individuals on OmeTV are looking for genuine conversation, on CamSurf, you’ll find people looking for genuine chat. It is our top choice for next time.
Features:
  * Feature-rich website.
  * A huge range of topics is available to discuss.
  * You Mostly find genuine people here.
7. ChatRad
This site claims to be a G-rated alternative to chat sites like Chatroulette, and it is quite harsh toward behavior that is not appropriate. People need to act the same in the real world, where they don’t run around naked or try to expose themselves all of the time… at least not in my world. Despite being a random video chat site, ChatRad is managed by a team of 24x7 moderators, so anything 18 and older can take advantage of the service in a safe environment regardless of their sexual orientation.
Features:
  * Very Strict Policies For Disrespectful People
  * The chat is moderated 24/7 by an active team of moderators.
  * It offers a very safe environment for people.
8.Bazoocam
The Bazoocam webcam chat environment is another random digital camera chat site that maintains a high level of cleanliness. Like most of the other websites mentioned, you’re paired up with an interloper haphazardly. Press “skip” and move on to the next person if you are unsatisfied with what you see.
As icebreakers or when you are bored of talking about yourself, you can join one of the multiplayer games on Boomcam. You are advised to do something unusual if you’re bored, but you are urged to wear your clothes. Put your best foot forward when playing golf in fancy dress or taking part in your favorite music. Try playing a string or wind instrument, and you’ll find many people to talk to.
Features
  * The site offers a very high level of cleanliness.
  * You can chat with the person of your choice.
  * If you don't like a person you can skip to check the next candidate.
  * It also offers a lot of multiplayer games to play with strangers.
  * It will never let you get bored.
9. CamGo
Getting to know new people and making new connections is fun with Camgo. Start a conversation with strangers, develop relationships without worrying about running into Covid, and explore webcam dating! Camgo’s Safe Search feature uses artificial intelligence to discover potential matchmaking partners. Your webcam chat loop will be kept out of the reach of people you don’t want to see! By chatting online with new people from your home, you can meet new people in a much easier and safe manner.
Features:
  * Easy To Meet New Strangers.
  * The site is completely safe to use.
  * It offers a great video chatting experience.
10. iMeetzu
It is similar to Omegle in that there are random live video chats and text chat rooms available, but iMeetzu goes over and above that. Once you get past the randomness, you are given the option of joining a free online dating service or friend finder.
Over a thousand new members are joining every day on this one of the fastest-growing social networking sites. If you’re looking to find a date or if you practice your lines, this is the closest you can get to practice face-to-face before you dive back into the dating pool.
Features:
  * It is identical to Omegle.
  * As it is a new platform so there are mostly genuine users.
  * You can do both text and video chats with strangers.
  * You can also join group chats.
Conclusion
These are some of the best Omegle alternative sites. Every site has its own unique features, but if you compare them in functionality, they are quite similar. It’s just the working of every site is different. You can try these sites one by one and stick to those that you find the most suitable and according to your taste.
Liza Brown
Liza Brown is a writer and a lover of all things video.
Follow @Liza Brown
“Mute Sound Effects and Integrate Fresh Soundtracks Within Windows Film Maker Toolkit”
How to Mute Audio in Windows Movie Maker?

Shanoon Cox
Mar 27, 2024• Proven solutions
Recording high-quality videos with Smartphones and consumer-level cameras is easy, but unfortunately the same can’t be said for the sound. The camera microphones often record low-quality audio and they pick up background noises that can make the video unwatchable.
In case you were looking for a quick way to mute or remove the audio in your videos, you came to the right place because in this article we are going to show you how you can mute audio in Windows Movie Maker or add new audio files to videos. We’re also going to provide you with an alternative solution that lets you have more control over the audio editing process.
- Part 1: How to Mute Audio in Windows Movie Maker?
- Part 2: Adding a New Audio Clip to a Video
- Part 3: A Better Way to Replace Original Audio on Windows
Part 1: How to Mute Audio in Windows Movie Maker?
Muting the audio in a video clip is simple, regardless of the video editing software you’re using. Windows Movie Maker lets you mute audio in just a few steps, so let’s see how you can mute videos with this video editor.
Step 1: In order to start editing a video, you must first import it into Windows Movie Maker. Click on the Add Videos and Photos icon in the software’s Home tab and proceed to select the clip you’d like to mute.

Click on the Open button in the Add Videos and Photos window and your clip will be imported into the software.
Step 2: After you added a clip to the storyboard you can preview it in order to decide which parts of the video you’d like to mute. Click on the Edit menu in the software’s ribbon, to gain access to the video editing tools Windows Movie Maker has to offer.
If you would like to mute only a portion of a video clip, you should position the playhead on the storyline at the exact location in the video where you want to make the cut and then click on the Split button.
Step 3: Make sure that the clip you want to mute is selected and click on the Video Volume icon on the left side of the Edit tab.

Drag the slider all the way to the left to mute the audio. Click the Play button in the preview window to make sure that video’s sound is muted.
Part 2: Adding a New Audio Clip to a Video
Windows Movie Maker also lets you replace the existing audio clip with a new one. Once again, this process is easy and it can be completed in a few steps.
Step 1: After you’ve muted the audio, click on the Add Music icon, that is located next to the Add Photos and Videos icon in the Home tab.

A drop-down menu will appear offering you to select music from an online source or to import an audio file from your computer. Moreover, you can select the starting point of the song you’re importing so you don’t have to adjust the position of the audio file in your project manually.
In order to do this, you just have to position the playhead at the desired location and select the Add music at the current point option from the drop-down menu. You can change the position of the audio file by dragging it to a new location in the storyboard. Using MP3 or WMA audio file is recommended since other audio file formats may not be compatible with Windows Movie maker.
Step 2: The audio file you imported will be automatically added to the video clip on the Storyboard. Click Play in the preview window to check if you like the result. Head over to the File menu and click on the Save Movie option. Windows Movie Maker will offer you a number of different options and if you’d like to save your video to the computer, you should select the For Computer option.

Part 3: Wondershare Filmora - A Better Way to Replace Audio Files in Videos on Windows OS
Windows Movie Maker has been discontinued a while ago, and its video and audio editing tools only enable you to perform basic video editing tasks. We suggest using Wondershare Filmora if you would like to mute or replace audio files in your videos because it offers more powerful audio and video editing features. Here’s how you can mute or replace audio files in Wondershare Filmora.
Step 1: Import the video clip into the software, by clicking on the Import button and then selecting the Import Media Files option. If you want to replace the audio of the clip you can also select the new audio file from your hard drive and click on the Open button. Filmora offers a rich royalty free music library, you can use if you already don’t have the music you want to add to your video.
Step 2: Drag and drop the video file to the timeline and then right-click on it. Select the Audio Detach option from the context menu. The audio file will appear in the newly created audio track, and you can just click on the Volume icon located at the begging of the audio track to mute that audio track.

For more details, check our guide about How to remove audio from video in Filmora on Windows.
If you want to add a new audio clip to your project and replace the old one, you should select the existing audio file and press the delete button on your keyboard. You can then drag and drop the new audio file to the timeline from the software’s Media Bin, or the Music tab, in case you decide to use songs featured in Filmora’s music library. You can cut, trim or adjust the start and end position of the audio file or use some of the audio effects the software offers. When done, click on the Export button and select the output format that is most suitable for the project you’re working on.
Conclusion
Videos that have poor sound quality won’t impress anyone, but you shouldn’t worry because muting or replacing audio files is a task that requires almost no effort. Windows Movie Maker can be used to quickly mute an audio file, but if you want to have access to more professional audio editing tools using Wondershare Filmora is a much better option. What’s your favorite method of replacing audio files in videos? Leave a comment and let us know.
Shanoon Cox
Shanoon Cox is a writer and a lover of all things video.
Follow @Shanoon Cox
Shanoon Cox
Mar 27, 2024• Proven solutions
Recording high-quality videos with Smartphones and consumer-level cameras is easy, but unfortunately the same can’t be said for the sound. The camera microphones often record low-quality audio and they pick up background noises that can make the video unwatchable.
In case you were looking for a quick way to mute or remove the audio in your videos, you came to the right place because in this article we are going to show you how you can mute audio in Windows Movie Maker or add new audio files to videos. We’re also going to provide you with an alternative solution that lets you have more control over the audio editing process.
- Part 1: How to Mute Audio in Windows Movie Maker?
- Part 2: Adding a New Audio Clip to a Video
- Part 3: A Better Way to Replace Original Audio on Windows
Part 1: How to Mute Audio in Windows Movie Maker?
Muting the audio in a video clip is simple, regardless of the video editing software you’re using. Windows Movie Maker lets you mute audio in just a few steps, so let’s see how you can mute videos with this video editor.
Step 1: In order to start editing a video, you must first import it into Windows Movie Maker. Click on the Add Videos and Photos icon in the software’s Home tab and proceed to select the clip you’d like to mute.
Click on the Open button in the Add Videos and Photos window and your clip will be imported into the software.
Step 2: After you added a clip to the storyboard you can preview it in order to decide which parts of the video you’d like to mute. Click on the Edit menu in the software’s ribbon, to gain access to the video editing tools Windows Movie Maker has to offer.
If you would like to mute only a portion of a video clip, you should position the playhead on the storyline at the exact location in the video where you want to make the cut and then click on the Split button.
Step 3: Make sure that the clip you want to mute is selected and click on the Video Volume icon on the left side of the Edit tab.
Drag the slider all the way to the left to mute the audio. Click the Play button in the preview window to make sure that video’s sound is muted.
Part 2: Adding a New Audio Clip to a Video
Windows Movie Maker also lets you replace the existing audio clip with a new one. Once again, this process is easy and it can be completed in a few steps.
Step 1: After you’ve muted the audio, click on the Add Music icon, that is located next to the Add Photos and Videos icon in the Home tab.
A drop-down menu will appear offering you to select music from an online source or to import an audio file from your computer. Moreover, you can select the starting point of the song you’re importing so you don’t have to adjust the position of the audio file in your project manually.
In order to do this, you just have to position the playhead at the desired location and select the Add music at the current point option from the drop-down menu. You can change the position of the audio file by dragging it to a new location in the storyboard. Using MP3 or WMA audio file is recommended since other audio file formats may not be compatible with Windows Movie maker.
Step 2: The audio file you imported will be automatically added to the video clip on the Storyboard. Click Play in the preview window to check if you like the result. Head over to the File menu and click on the Save Movie option. Windows Movie Maker will offer you a number of different options and if you’d like to save your video to the computer, you should select the For Computer option.
Part 3: Wondershare Filmora - A Better Way to Replace Audio Files in Videos on Windows OS
Windows Movie Maker has been discontinued a while ago, and its video and audio editing tools only enable you to perform basic video editing tasks. We suggest using Wondershare Filmora if you would like to mute or replace audio files in your videos because it offers more powerful audio and video editing features. Here’s how you can mute or replace audio files in Wondershare Filmora.
Step 1: Import the video clip into the software, by clicking on the Import button and then selecting the Import Media Files option. If you want to replace the audio of the clip you can also select the new audio file from your hard drive and click on the Open button. Filmora offers a rich royalty free music library, you can use if you already don’t have the music you want to add to your video.
Step 2: Drag and drop the video file to the timeline and then right-click on it. Select the Audio Detach option from the context menu. The audio file will appear in the newly created audio track, and you can just click on the Volume icon located at the begging of the audio track to mute that audio track.
For more details, check our guide about How to remove audio from video in Filmora on Windows.
If you want to add a new audio clip to your project and replace the old one, you should select the existing audio file and press the delete button on your keyboard. You can then drag and drop the new audio file to the timeline from the software’s Media Bin, or the Music tab, in case you decide to use songs featured in Filmora’s music library. You can cut, trim or adjust the start and end position of the audio file or use some of the audio effects the software offers. When done, click on the Export button and select the output format that is most suitable for the project you’re working on.
Conclusion
Videos that have poor sound quality won’t impress anyone, but you shouldn’t worry because muting or replacing audio files is a task that requires almost no effort. Windows Movie Maker can be used to quickly mute an audio file, but if you want to have access to more professional audio editing tools using Wondershare Filmora is a much better option. What’s your favorite method of replacing audio files in videos? Leave a comment and let us know.
Shanoon Cox
Shanoon Cox is a writer and a lover of all things video.
Follow @Shanoon Cox
Elevating and Dimming Audio in Audacity: A Step-by-Step Approach
Audacity is a free, open access, cross-platform sound editing and recording tool. It is compatible with Windows, Mac OS X, Linux, and various other operating systems. All of these aspects have contributed to Audacity’s worldwide popularity. Audacity features an amplified effect that alters the loudness of your chosen audio and other practical tools that can change the sound in different ways.
As a result, Audacity can not only assist you in modifying the level of an audio file, but it can also help you equalize, reduce, normalize, and so on.
Yes, you have heard it right, Audacity increase volume, but the primary question is how? But don’t worry, you will get the answer after reading the article. This article will explain how you can increase or decrease the volume of a whole and a specific segment of the audio file. Let’s get started.
In this article
01 How to Increase or Decrease Volume Without Distortion and Clipping in Audacity
02 How to Increase Volume of Multiple Files in Audacity?
03 How to Increase Volume in Certain Parts of Track?
04 What’s the Difference between Normalize and Amplify?
Part 1: How to Increase or Decrease Volume Without Distortion and Clipping in Audacity
Audio clipping occurs when the audio input becomes too loud for an amplifier to produce, and the surplus signal creates distortion. When editing, you cannot add additional volume to your audio clip forever because this would result in clipping. In this case, you can use the Audacity application to emphasize your material by turning the volume up or down without distortion and clipping on a track or recording.
Learn how Audacity increase volume without distortion by following the procedure described below:
Step 1: First, download and install the Audacity software on your computer.
Step 2: Select the File from the menu above and click Open to open the audio file.

Step 3: Choose the audio track, go to the Effect menu and pick the Amplify option from the drop-down menu.

Note: You can increase or decrease the volume by double-clicking the track and using the slider under the Gain title.
Step 4: Increase or decrease the volume by sliding the slider or typing the amplification value in the text box next to it in the Amplify window as needed.

Note: Ensure that the Allow Clipping checkbox remains unchecked to avoid clipping. Moreover, keep in mind that increasing the volume to a greater extent can result in distortion.
Related: How to Change Audio Volume in Filmora
Part 2: How to Increase Volume of Multiple Files in Audacity?
Audacity is an open-source audio editing tool. It is used for various purposes, like audio recording, music creation, and audio file editing. It also allows you to increase and decrease the volume of audio files.
You may also apply the modifications to multiple files at once, rather than one at a time. Check out the instructions below to learn how to change the volume of multiple audio files:
Step 1: Select the Import option from the File menu, and then pick the Audio option. Browse to your audio files, choose all of them, and then click the Open option.

Step 2: To select all the files, press Ctrl + A, click on the Effect option in the menu bar and pick Amplify.

Step 3: Now, either enter the value in the text box next to the Amplification Decibels tab or use the slider under it. To verify the operation of increasing the volume, check the allow clipping checkbox. When you’re through with the options, click the Ok button.

Step 4: Amplification will be applied to all the tracks. Go to the File option from the above menu to export the files and then select the Export option.

If you’re running Audacity on macOS computer, you can watch the video tutorial below to apply effects to multiple files.
Part 3: How to Increase Volume in Certain Parts of Track?
The audacity software also allows you to alter a specific section of an audio file. The selection tool can assist in locating a particular area of the track. After you’ve chosen a section of the audio file, you may utilize the amplification effect to increase its loudness. Check out the instructions below to learn how you can achieve it:
Step 1: Launch the Audacity software on the computer. To open the audio file, go to the File menu and select Open. You may also open the file by dragging it.
Step 2: Ensure that the Selection tool is active now. Click and hold the mouse left-click to move from one spot on the track to another.

Step 3: After picking the part, go to the Effect option from the menu and select Amplify.

Step 4: Now, for that specific region, modify the amplification and click OK. This will only change the volume for the area you have selected.

Part 4: What’s the Difference between Normalize and Amplify?
Amplify and Normalize are two essential features of the Audacity tool. Many people think they are the same thing, they are right up to some extent, but there exists a big difference between both the features. Before discussing the differences, you need to know what the terms Normalize and Amplify imply.
Amplify
It is the quickest approach to comprehend the effect’s name if you want to know precisely what impacts are. The frequency of the vibration is enhanced to increase the amplification effect. As previously said, it raises a tiny sound.
Furthermore, because this amplification is extended to all frequencies and amplitude, the noise increases. If you choose ten sources and magnify them by ten decibels, each source will be ten decibels louder than your present sound.

Normalize
The meaning of normalizing is standardized, which is also a feature of its name. Whenever you pick an audio input and use the normalize feature, the level is adjusted automatically according to the previously indicated average volume size in Oda City.
As a result, when one sound source is normalized, there is no discernible difference between it and the amplification mechanism. Still, the effect is evident when several sound sources are performed concurrently.
By pressing Ctrl + A and selecting all ten various audio sources, you may compute the required standard of every sound source, enhance the audio input that is smaller than the normal, and create the audio signal more significant than the standard. Shrink the size of each noise source, such as the name, and normalize the sound.

Related: Best Audio Normalizers for Windows
Differences
To differentiate the meaning and impact precisely, amplification means increasing or reducing the sound, whereas normalizing means equalizing the sound. Simply defined, if you magnify ten sources by ten decibels, each of the shorter and louder noises equals ten decibels in their actual loudness.
When the ten sources are normalized, the louder sounds grow louder, conforming to the standard sound source size. Because the amplifying is done regardless, the little noises are going insane during this procedure.
Conclusion
All in all, Audacity does an excellent job at audio editing. If you simply need to modify an audio file, Audacity is a great option. For increasing and decreasing the volume of single and multiple audio files, Audacity is still one of the best bets in the market. We hope that now know how Audacity increase volume of the audio files after reading this article.
02 How to Increase Volume of Multiple Files in Audacity?
03 How to Increase Volume in Certain Parts of Track?
04 What’s the Difference between Normalize and Amplify?
Part 1: How to Increase or Decrease Volume Without Distortion and Clipping in Audacity
Audio clipping occurs when the audio input becomes too loud for an amplifier to produce, and the surplus signal creates distortion. When editing, you cannot add additional volume to your audio clip forever because this would result in clipping. In this case, you can use the Audacity application to emphasize your material by turning the volume up or down without distortion and clipping on a track or recording.
Learn how Audacity increase volume without distortion by following the procedure described below:
Step 1: First, download and install the Audacity software on your computer.
Step 2: Select the File from the menu above and click Open to open the audio file.
Step 3: Choose the audio track, go to the Effect menu and pick the Amplify option from the drop-down menu.
Note: You can increase or decrease the volume by double-clicking the track and using the slider under the Gain title.
Step 4: Increase or decrease the volume by sliding the slider or typing the amplification value in the text box next to it in the Amplify window as needed.
Note: Ensure that the Allow Clipping checkbox remains unchecked to avoid clipping. Moreover, keep in mind that increasing the volume to a greater extent can result in distortion.
Related: How to Change Audio Volume in Filmora
Part 2: How to Increase Volume of Multiple Files in Audacity?
Audacity is an open-source audio editing tool. It is used for various purposes, like audio recording, music creation, and audio file editing. It also allows you to increase and decrease the volume of audio files.
You may also apply the modifications to multiple files at once, rather than one at a time. Check out the instructions below to learn how to change the volume of multiple audio files:
Step 1: Select the Import option from the File menu, and then pick the Audio option. Browse to your audio files, choose all of them, and then click the Open option.
Step 2: To select all the files, press Ctrl + A, click on the Effect option in the menu bar and pick Amplify.
Step 3: Now, either enter the value in the text box next to the Amplification Decibels tab or use the slider under it. To verify the operation of increasing the volume, check the allow clipping checkbox. When you’re through with the options, click the Ok button.
Step 4: Amplification will be applied to all the tracks. Go to the File option from the above menu to export the files and then select the Export option.
If you’re running Audacity on macOS computer, you can watch the video tutorial below to apply effects to multiple files.
Part 3: How to Increase Volume in Certain Parts of Track?
The audacity software also allows you to alter a specific section of an audio file. The selection tool can assist in locating a particular area of the track. After you’ve chosen a section of the audio file, you may utilize the amplification effect to increase its loudness. Check out the instructions below to learn how you can achieve it:
Step 1: Launch the Audacity software on the computer. To open the audio file, go to the File menu and select Open. You may also open the file by dragging it.
Step 2: Ensure that the Selection tool is active now. Click and hold the mouse left-click to move from one spot on the track to another.
Step 3: After picking the part, go to the Effect option from the menu and select Amplify.
Step 4: Now, for that specific region, modify the amplification and click OK. This will only change the volume for the area you have selected.
Part 4: What’s the Difference between Normalize and Amplify?
Amplify and Normalize are two essential features of the Audacity tool. Many people think they are the same thing, they are right up to some extent, but there exists a big difference between both the features. Before discussing the differences, you need to know what the terms Normalize and Amplify imply.
Amplify
It is the quickest approach to comprehend the effect’s name if you want to know precisely what impacts are. The frequency of the vibration is enhanced to increase the amplification effect. As previously said, it raises a tiny sound.
Furthermore, because this amplification is extended to all frequencies and amplitude, the noise increases. If you choose ten sources and magnify them by ten decibels, each source will be ten decibels louder than your present sound.
Normalize
The meaning of normalizing is standardized, which is also a feature of its name. Whenever you pick an audio input and use the normalize feature, the level is adjusted automatically according to the previously indicated average volume size in Oda City.
As a result, when one sound source is normalized, there is no discernible difference between it and the amplification mechanism. Still, the effect is evident when several sound sources are performed concurrently.
By pressing Ctrl + A and selecting all ten various audio sources, you may compute the required standard of every sound source, enhance the audio input that is smaller than the normal, and create the audio signal more significant than the standard. Shrink the size of each noise source, such as the name, and normalize the sound.
Related: Best Audio Normalizers for Windows
Differences
To differentiate the meaning and impact precisely, amplification means increasing or reducing the sound, whereas normalizing means equalizing the sound. Simply defined, if you magnify ten sources by ten decibels, each of the shorter and louder noises equals ten decibels in their actual loudness.
When the ten sources are normalized, the louder sounds grow louder, conforming to the standard sound source size. Because the amplifying is done regardless, the little noises are going insane during this procedure.
Conclusion
All in all, Audacity does an excellent job at audio editing. If you simply need to modify an audio file, Audacity is a great option. For increasing and decreasing the volume of single and multiple audio files, Audacity is still one of the best bets in the market. We hope that now know how Audacity increase volume of the audio files after reading this article.
Also read:
- 2024 Approved Elevating Your Speaking Style Expert Techniques for Changing Your Voice Characteristics
- New Speedy Sonic Transformation Altering Audio Velocity with Ease
- 5 Leading Digital Audio Workstation Options for Professional Guitarists, Updated
- Updated The Most Advanced Real-Time Speech Modification Tools
- New How to Cut Audio in iMovie on Mac & iPhone for 2024
- Innovative Top 10 Applications for Switching Masculine and Feminine Vocal Traits for 2024
- 2024 Approved Getting Started in Recording Insights Into REAPERs Software Design
- Updated 2024 Approved Voice-Over Wizardry Identifying Leading Software and Websites for Creativity
- New Discover the Leading 7 Android Apps for Improved Voice Clarity and Quality for 2024
- Updated In 2024, Easy Access to FREE Guitar-Centric Background Media and Sounds
- In 2024, Where Can I Find Laughing Sound Effect?
- Essential Websites for Optimizing MP3 Audio Volume The Top 3 List
- 2024 Approved Transform Your Zoom Chats Explore These 6 Fun Voice Altering Software Options
- Beginner-Friendly Choir Separation Technology for Professional Use for 2024
- In 2024, How to Remove Audio From MOV Files on Windows/Mac
- In 2024, Harmonizing Screens A List of the Top 15 Scores for Various Genre Videos
- 2024 Approved KineMaster Soundscape Techniques for Music Insertion
- Updated Voice-Activated Data Collection on iOS Ranking the Top 10 Apps
- New IMovie Pro Tips How to Detach Audio Tracks Efficiently on a Mac for 2024
- The Art of Concealing the Boundaries Between Sounds with Fades
- Unlock the Power of Seamless Movement with These 7 Trendy Transition Audio Files (No Cost)
- Updated In 2024, Top 15 Non Copyrighted Music for Montages
- Updated How to Enhance Your MKV-2023 File with Audio Content
- Updated Essential Guide to Podcast Submission Portals for 2024
- New In 2024, 15 Iconic Cartoon Characters of All Time
- New If You Are Into GIFs and Want to Know a Great Extent of Information About It Then We Have Got You Covered in This Article. Here Is What We Have Learned so Far About It for 2024
- Samsung Galaxy F15 5G Bootloop Problem, How to Fix it Without Data Loss | Dr.fone
- Updated Create Stunning Highlights Top Video Editing Tools for Desktop and Mobile for 2024
- Solved Warning Camera Failed on Oppo Reno 11 5G | Dr.fone
- New 2024 Approved From TVs to Monitors 5 Vital Facts About 16X9 Aspect Ratio Calculators
- New In 2024, VLLO for Mac Download Now & Discover Similar Apps
- The Easiest Methods to Hard Reset Itel P55 | Dr.fone
- How To Unlock The iPhone 12 Pro SIM Lock 4 Easy Methods
- New In 2024, The Ultimate Guide to GIF for Discord Profile
- In 2024, Android to Apple How To Transfer Photos From Lava Blaze 2 Pro to iPad Easily | Dr.fone
- Installation and Registration | Wondershare Virbo
- Pokémon Go Cooldown Chart On Oppo A59 5G | Dr.fone
- In 2024, How Do I SIM Unlock My Apple iPhone 12 mini?
- New In 2024, Motion Tracking Software for Text Top Picks
- Vivo G2 Camera Not Working Unexpected Error? Fix It Now | Dr.fone
- Your Complete Guide To Reset Poco X5 Pro | Dr.fone
- In 2024, Resolve Your Apple iPhone 13 Pro Max Keeps Asking for Outlook Password | Dr.fone
- In 2024, 3 Facts You Need to Know about Screen Mirroring Vivo X90S | Dr.fone
- Updated In 2024, The Ultimate Cheat Sheet Mastering Facebook Video Aspect Ratios
- In 2024, The Best iSpoofer Alternative to Try On Xiaomi Redmi Note 12 Pro 5G | Dr.fone
- How To Enable USB Debugging on a Locked Xiaomi Redmi Note 12 5G Phone
- Updated Free TV Streaming 9 Sites You Need To Know
- Title: New The Premier Virtual Communities Where Strangers Become Friends for 2024
- Author: Paul
- Created at : 2024-05-05 06:06:38
- Updated at : 2024-05-06 06:06:38
- Link: https://voice-adjusting.techidaily.com/new-the-premier-virtual-communities-where-strangers-become-friends-for-2024/
- License: This work is licensed under CC BY-NC-SA 4.0.
