
:max_bytes(150000):strip_icc():format(webp)/youtube-s-free-streaming-movies-and-tv-shows-1357439-ddbc3cf482e24a539c67009c07310ae1.png)
New Mastering Tempo Adjustment in Songs without Shifting Tonal Accuracy for 2024
Mastering Tempo Adjustment in Songs without Shifting Tonal Accuracy
Who doesn’t enjoy music? Some people enjoy listening to it, whereas others find it interesting to edit and play with the music. When you talk about editing music, you can trim it, split it, combine audio, and a lot more could be done.
One interesting thing that people do is that they slow down music. This could be done for various reasons, like learning or teaching how to sing or play an instrument. While working with music, the pitch is disturbed but do you know a way to slow down MP3 without changing its pitch? Let us introduce some great tools that could be used for doing this.
In this article
01 How to Slow Down Music without Changing Pitch on Windows and Mac?
02 How to Slow Down Music Online?
03 How to Slow Down Music on Mobile Phone?
Part 1. How to Slow Down Music without Changing Pitch on Windows and Mac? [with Wondershare Filmora]
Are you thinking about editing audio? How can you forget about Wondershare Filmora ? Whenever it comes to audio editing, the top editor that comes to mind is Filmora Audio Editor. The best part about this editing software is that it is easy to use and extremely inexpensive. You don’t have to spend a lot to get all the amazing features and functionalities from Filmora audio editor.
Are you looking for software to add Voiceover? Here it is! With Filmora Audio Editor, you can easily add voiceovers and add background music to your videos. Moreover, the software is known for its Trimming, Adjusting, and Splitting Audio features. Do you want to know more about Wondershare Filmora Audio Editor?
Key Feature of Filmora Audio Editor
- An exciting feature of Filmora is ‘Detach Audio from Video.’ With this feature, you can separate the audio from the video and then use them individually.
- With Filmora Audio Editor, you can easily mute video clips from the ‘Mute Video’ feature. It also offers an ‘Audio Denoise’ feature.
- The brilliant Filmora editing software has an ‘Audio Mixer’ as well as an ‘Audio Equalizer.’
For Win 7 or later (64-bit)
For macOS 10.12 or later
Wondershare Filmora Audio Editor is an impressive software with tons of surprising features. If you are interested in using Filmora Editor to slow down songs, then follow the steps given below.
Step 1: Import Music File on the Software
The process to slow down music starts when you open Wondershare Filmora and create a new project. After the project has been created, you should import the music file from the File tab. There, hover onto the ‘Import Media’ option, and from the sub-menu, select ‘Import Media Files.’

Step 2: Drag the Music File
You can locate the file from your device for importing it. Once the file has been imported successfully, it will appear in the ‘Folder’ section under Project Media. From there, you have to drag it to the timeline so that you can now slow down the music.

Step 3: Slow Down the Speed
To slow down the music, click on the audio file in the timeline. From this, a menu will get highlighted above the timeline. From that menu, select the ‘Speed’ option. A sub-menu will show up, from which you should hit the ‘Custom Speed’ option.

Step 4: Adjust Song Speed
At this point, the ‘Custom Speed’ window will appear. You will see a slider on the screen for adjusting the Speed of the music. By dragging the slider to the left side, you can easily reduce the music speed. Are you ready to know something interesting? Filmora also shares the updated ‘Duration’ of the music after the speed has been changed.

Step 5: Exporting Slow Music
After you have reduced the music speed, you can export it by hitting the ‘Export’ button. Head over to the ‘Local’ section and select ‘MP3’ as your output format. Your music file is all set and ready to be exported.

Part 2. How to Slow Down Music Online?
Some people just like to work online, and they prefer using online tools. Audio Trimmer is an ideal option for any such person who uses online tools and wants to slow down music. Do you want to know the fascinating thing about Audio Trimmer?
Well, the tool is extremely easy to understand as any new user can easily work with Audio Trimmer. No technical knowledge is required for using the online tool. An interesting thing about Audio Trimmer is the wide range of formats that it supports, for instance, MP3, APE, FLAC, AAC, M4A, WAV, and others.
The tool does not require any installation. With Audio Trimmer, you can reduce or increase the speed of the song with great ease, and it does not even damage the quality of the music. With Audio Trimmer, you can slow down an MP3 song by just 3 steps. Are you ready to learn about its working?
Step 1: You can start by uploading the music file to Audio Trimmer. This could be done by hitting the ‘Choose File’ button and then locating the file from your device to upload it.

Step 2: After the file has been uploaded successfully, you will see it on the screen along with a ‘Speed’ slider. To slow down music, with Audio Trimmer, you should drag the slider to the left side.

Step 3: Once you are satisfied and got the desired speed, you should tap on the ‘Change Speed’ button. This will move to the next screen, from where you can quickly download the music file by clicking on the ‘Download’ button.

Part 3. How to Slow Down Music on Mobile Phone?
Imagine you don’t have your laptop with you, now you can’t use any software to slow down music, neither can you use any online tool. What are you going to do in such a situation? Let us bring a cool solution to you.
You can slow down songs quickly from your mobile phone. ‘Music Speed Changer ’ is an application that you can download on your mobile and use to slow down your desired music. You can change the song’s speed from 15% to 500% of the original speed. The application also offers an ‘Equalizer.’ Importantly, it supports a wide variety of audio file formats.
The application also has a built-in audio recorder. Music Speed Changer has a modern designed UI, but it is very easy to use. Let us help you a little by sharing its guideline with you.
Step 1: You can start by installing the application and opening it. After that, you have to locate and open the music file that you want to work with.

Step 2: Once that is done, you will see an upward arrow in the bottom left corner; hit that. It will open a new screen where you will see the option of ‘Tempo.’

Step 3: Now, you can slide the ‘Tempo’ to the left side to reduce the speed, which will eventually slow down music. Lastly, hit the three vertical dots from the top right corner and select the option ‘Save Edited Track’ to save the new music file.

Final Words
Whether you are a music lover or a passionate music learner, this article is for you. For every person who has been struggling to slow down music, we have bought the best solution for you. We talked about online music slower, a mobile application, and also shared the best audio editor, Filmora, that could be used for this purpose.
Versatile Video Editor - Wondershare Filmora
An easy and powerful video editor.
Numerous effects to choose from.
02 How to Slow Down Music Online?
03 How to Slow Down Music on Mobile Phone?
Part 1. How to Slow Down Music without Changing Pitch on Windows and Mac? [with Wondershare Filmora]
Are you thinking about editing audio? How can you forget about Wondershare Filmora ? Whenever it comes to audio editing, the top editor that comes to mind is Filmora Audio Editor. The best part about this editing software is that it is easy to use and extremely inexpensive. You don’t have to spend a lot to get all the amazing features and functionalities from Filmora audio editor.
Are you looking for software to add Voiceover? Here it is! With Filmora Audio Editor, you can easily add voiceovers and add background music to your videos. Moreover, the software is known for its Trimming, Adjusting, and Splitting Audio features. Do you want to know more about Wondershare Filmora Audio Editor?
Key Feature of Filmora Audio Editor
- An exciting feature of Filmora is ‘Detach Audio from Video.’ With this feature, you can separate the audio from the video and then use them individually.
- With Filmora Audio Editor, you can easily mute video clips from the ‘Mute Video’ feature. It also offers an ‘Audio Denoise’ feature.
- The brilliant Filmora editing software has an ‘Audio Mixer’ as well as an ‘Audio Equalizer.’
For Win 7 or later (64-bit)
For macOS 10.12 or later
Wondershare Filmora Audio Editor is an impressive software with tons of surprising features. If you are interested in using Filmora Editor to slow down songs, then follow the steps given below.
Step 1: Import Music File on the Software
The process to slow down music starts when you open Wondershare Filmora and create a new project. After the project has been created, you should import the music file from the File tab. There, hover onto the ‘Import Media’ option, and from the sub-menu, select ‘Import Media Files.’
Step 2: Drag the Music File
You can locate the file from your device for importing it. Once the file has been imported successfully, it will appear in the ‘Folder’ section under Project Media. From there, you have to drag it to the timeline so that you can now slow down the music.
Step 3: Slow Down the Speed
To slow down the music, click on the audio file in the timeline. From this, a menu will get highlighted above the timeline. From that menu, select the ‘Speed’ option. A sub-menu will show up, from which you should hit the ‘Custom Speed’ option.
Step 4: Adjust Song Speed
At this point, the ‘Custom Speed’ window will appear. You will see a slider on the screen for adjusting the Speed of the music. By dragging the slider to the left side, you can easily reduce the music speed. Are you ready to know something interesting? Filmora also shares the updated ‘Duration’ of the music after the speed has been changed.
Step 5: Exporting Slow Music
After you have reduced the music speed, you can export it by hitting the ‘Export’ button. Head over to the ‘Local’ section and select ‘MP3’ as your output format. Your music file is all set and ready to be exported.
Part 2. How to Slow Down Music Online?
Some people just like to work online, and they prefer using online tools. Audio Trimmer is an ideal option for any such person who uses online tools and wants to slow down music. Do you want to know the fascinating thing about Audio Trimmer?
Well, the tool is extremely easy to understand as any new user can easily work with Audio Trimmer. No technical knowledge is required for using the online tool. An interesting thing about Audio Trimmer is the wide range of formats that it supports, for instance, MP3, APE, FLAC, AAC, M4A, WAV, and others.
The tool does not require any installation. With Audio Trimmer, you can reduce or increase the speed of the song with great ease, and it does not even damage the quality of the music. With Audio Trimmer, you can slow down an MP3 song by just 3 steps. Are you ready to learn about its working?
Step 1: You can start by uploading the music file to Audio Trimmer. This could be done by hitting the ‘Choose File’ button and then locating the file from your device to upload it.
Step 2: After the file has been uploaded successfully, you will see it on the screen along with a ‘Speed’ slider. To slow down music, with Audio Trimmer, you should drag the slider to the left side.
Step 3: Once you are satisfied and got the desired speed, you should tap on the ‘Change Speed’ button. This will move to the next screen, from where you can quickly download the music file by clicking on the ‘Download’ button.
Part 3. How to Slow Down Music on Mobile Phone?
Imagine you don’t have your laptop with you, now you can’t use any software to slow down music, neither can you use any online tool. What are you going to do in such a situation? Let us bring a cool solution to you.
You can slow down songs quickly from your mobile phone. ‘Music Speed Changer ’ is an application that you can download on your mobile and use to slow down your desired music. You can change the song’s speed from 15% to 500% of the original speed. The application also offers an ‘Equalizer.’ Importantly, it supports a wide variety of audio file formats.
The application also has a built-in audio recorder. Music Speed Changer has a modern designed UI, but it is very easy to use. Let us help you a little by sharing its guideline with you.
Step 1: You can start by installing the application and opening it. After that, you have to locate and open the music file that you want to work with.
Step 2: Once that is done, you will see an upward arrow in the bottom left corner; hit that. It will open a new screen where you will see the option of ‘Tempo.’
Step 3: Now, you can slide the ‘Tempo’ to the left side to reduce the speed, which will eventually slow down music. Lastly, hit the three vertical dots from the top right corner and select the option ‘Save Edited Track’ to save the new music file.
Final Words
Whether you are a music lover or a passionate music learner, this article is for you. For every person who has been struggling to slow down music, we have bought the best solution for you. We talked about online music slower, a mobile application, and also shared the best audio editor, Filmora, that could be used for this purpose.
Versatile Video Editor - Wondershare Filmora
An easy and powerful video editor.
Numerous effects to choose from.
Cutting Through Clutter: Effective Background Noise Removal in iMovie
A well-edited video gains everyone’s attention with its stunning visuals and acoustics. An important factor that counts in designing such a video is the absence of noise. Any sound or voice in the background that disrupts content integrity is noise. However, you can remove background noises in iMovie, a specified software for Mac.
The focus of this article will be on reducing background noise in iMovie in detail. Readers will also acquire knowledge of alternative tools with similar functionalities. There will be a brief introduction to reducing background noise in iMovie and other tools. Feel free to read about these tools and determine which aligns with your demands.
AI Audio Editor A cross-platform for facilitating your video editing process by offering valuable benefits!
Free Download Free Download Learn More

Part 1: Some Basic Recording-Level Considerations One Should Make to Avoid Noise in Videos
The advancements in AI technology have made noise reduction seamless. Although, there are some pre-recording measures one can take to minimize noise. This section on reducing background noise in iMovie will mention those measures. The following primary considerations can make a big difference in terms of noise:
1. Pick the Right Location
If you are recording an audio or video, the first step is to choose the right surroundings. Although no location can be completely noise-free, one can try. Places with less population and more nature are noise-free as usual. Book a studio for video or audio recording, as you don’t need much effort. They offer pre-arranged setups and space, which also includes noise-canceling equipment.
2. Microphone Quality and Position
For professional-grade audio and video creation, the microphone is a necessity. A high-quality microphone is proficient in providing high-quality sound. There are two microphone options: an external microphone or a device-integrated microphone. Moreover, the position and settings of microphones determine the clarity of voice. If the microphone is set closer to the speaker, it will deliver a decent speech sound.
3. Wind Protection and Interference
The noise of wind is an obstacle for everyone who prefers outdoor shoots. It not only declines audio clarity but annoys the viewers. To reduce wind noise, use a windscreen or furry cover. To avoid other types of interference, keep the recorder away from electrical devices. This may include smartphones, laptops, and similar devices.
4. Audio and Gain Levels
While recording, it is important to keep track of audio levels for improvement. Creators can use headphones to detect audio levels and maintain unwanted noises. In addition, we advise you to set the gain at an appropriate level for clarity. A high gain value can decline audio quality through noise and other distortions.
5. Right Formats and Editing
Before you start recording, make sure to choose a high-quality audio format. The popular and widely used high-quality formats are WAV and FLAC. Moreover, choose the right editing software that has noise reduction ability. The software should also retain audio quality during and after editing. These tools also offer audio enhancement effects that can do the trick.
Part 2: Basic Solution to Background Noise Removal for Mac Users: iMovie
iMovie is a built-in application designed for macOS devices for creating and editing. Mac users can employ this software to edit their movies by introducing music effects. In iMovie, users can share their projects online or streamline them on Apple TV. With its video and audio editing abilities, you can reduce background noise iMovie.
The software offers audio enhancement for speech clarity and audio equalizer. With its audio denoise function, reducing background noise in iMovie is seamless. The feature rests on its main editing interface and is easy to utilize. In addition, it can multiple audio formats are editable in it, like ACC, MP3, and more.
Steps to Reduce Background Noise in iMovie
Are you a Mac user and want to learn about removing background noise in iMovie? Use this perfect step-by-step guide to gain knowledge about noise reduction:
Step 1
Initiate iMovie, press the “Create New” button and import media. Then, use the drag-and-drop technique to bring your media to the timeline.

Step 2
Navigate towards the toolbar at the top right and explore options. Locate and click the “Noise Reduction and Equalizer” button to start editing.

Step 3
From the given options, access the “Reduce background noise” slider. Change the position of this slider to adjust the percentage of noise reduction.

Step 4
Now, play your video to see the results and adjust the intensity of the noise. Once you are satisfied with the results, export your video or save it to iMovie.

Part 3: Some Other Top-Notch Facilities for Background Noise Removal on Mac
While the iMovie remove background noise function is your first option, a backup never hurts. In this section, the focus will be on some desktop alternatives of iMovie. Users will gain knowledge of some premium video editing tools for this purpose. Keep reading to learn more about this software for efficient and productive editing:
1. Wondershare UniConverter
On top of our list of iMovie remove background noise alternatives is UniConverter. The software assists in 6 different types of background noise removal. Users can remove static, echo, humming, wind noise, chatting, and hissing. The software supports the majority of audio formats like MP3, WAV, and more. You can level up your bad audio quality in three simple steps.

Pros
- The software supports batch processing to remove noise for productive editing.
- Along with noise reduction, users can employ its vocal remover for speech clarity.
Cons
- It is not able to assist in some advanced editing techniques.
2. Krisp
This is a desktop software that clarifies your voice during video calls. It enhances voice using three techniques including background voice, noise, and echo. Whether it’s an animal’s voice in the background or a human chatting. It is an AI-driven software that detects background voices and removes them accurately.

Pros
- Its AI meeting assistant can transcribe your videos, and you don’t need to worry about taking notes.
- It collaborates with all your platforms to enhance the quality of your content.
Cons
- While enhancing audio in it, your voice can start to sound robotic.
3. Adobe Audition
Adobe Audition is another reduce background noise iMovie alternative. It assists in audio denoise with its custom noise reduction options and effects. The tool falls into professional software categories that help with audio and video editing. In addition, users can adjust the level of frequency to high, low, and medium. It operates on sliders to adjust the value of noise elements in a video.

Pros
- It has pre-assembled sound effects that are completely free to use.
- To avoid background noises prior to editing, you can record voiceovers and podcasts in it.
Cons
- The user interface might be too technical for those with basic-level editing skills.
4. HitPaw Video Converter
HitPaw Video Converter is a versatile platform assisting in video, audio, and photo editing tasks. The software employs AI assistance to bring clarity to your audio projects. With this iMovie background noise reduction alternative, noise removal is a few clicks away. Users just need to upload their video or audio, and it will elevate their quality. Moreover, it supports multiple audio and video formats to diversify your options.

Pros
- The interface of this iMovie background noise reduction alternative is straightforward.
- With its AI photo and video enhancer, you can uplift their visual and overall quality.
Cons
- The customer care of HitPaw takes a while to respond, which is a turn-off for users.
Bonus Part: A Comprehensive Solution for Vocal Removal: Wondershare Filmora
Whilst reducing background noise in iMovie is operational, its alternatives exist. In addition to noise control, users can also manage vocals. To perform this in an efficient way, none other than Wondershare Filmora can assist. It is a professional and updated video editing software with multi-functionalities. Editors can employ its AI Vocal Remover feature to edit vocals and export them.
The method of accessing this tool is straightforward and requires a few steps. This function separates vocals from background voices, which are further editable. You can simply delete the background noise track and export the video with vocals only. Moreover, its timeline editing feature brings precision to projects.
Free Download For Win 7 or later(64-bit)
Free Download For macOS 10.14 or later
Exclusive Sound Editing Features of Wondershare Filmora
Wondershare Filmora brings its users an extensive range of audio and video editing features. There is so much one can do with their hands on this software. This section of the article will discuss other audio-relative features of Filmora:
1. AI Audio Denoise
There are multiple forms of background noises and techniques to remove them. Filmora’s denoise features provide multiple techniques for denoising. Users can employ its audio enhancement feature to improve speech. Moreover, it has wind removal, hiss, and hum removing options. You can also employ its reverb reduction to minimize echo in your content.
2. Silence Detection
One of the many ways of uplifting your content’s audio is to remove the silent pauses. Locating and eliminating silent parts of video is difficult by yourself. This AI auto-detects and eliminates the silent parts of videos with precision. It will optimize your videos for the audience, as the pauses may irritate them.
3. Audio Ducking
Being a content creator can be challenging in terms of precise editing. In Filmora, you do not need to adjust the audio elements of each track separately. With its audio ducking feature, users can fade one audio track to clarify the other. It auto-detects the speech parts of videos and decreases the music levels in them.
4. Auto Beat Sync
If you wish to align your video footage with an external audio track, this is the best option. Filmora’s audio beat sync streamlines your content with its functionality. Its Auto Montage Maker synchronizes content and adds effects according to beat points. Moreover, it can auto-enhance your content by fixing the overexposed or dark portions.
Using AI Vocal Remover in Wondershare Filmora
After familiarizing yourself with a few of Filmora’s functionalities, let’s discuss further. This section of our article will guide you about accessing vocal remover. Follow the guide mentioned below to remove vocals from your video:
Step 1Initiate a New Project to Import Media
Once you download this software on your device, start it and access its main display. Continue to create a new project by clicking on the “New Project” button. Upon accessing the editing interface, use the “Command + I” keys to import media.

Step 2Start Vocal Remover
Now, bring the imported media to the timeline, select it, and navigate towards the top toolbar. From there, access the “Tools” option and choose the “Audio” option. From the audio expansion panel, choose the “AI Vocal Remover” option. The vocal removal progress will appear on the screen.

Step 3Set Preferences and Export Media
Once the vocals have been separated from background noise, make customizations. After this, delete the background noise and navigate towards the top right corner. From there, click the “Export” button and download your video on your device.

Free Download For Win 7 or later(64-bit)
Free Download For macOS 10.14 or later
Conclusion
In this article, the focus of attention remained on removing background noises in iMovie. Users also learned about some of its alternatives to use when it’s not working. In addition, the article sheds on a most reliable alternative named Wondershare Filmora.
It assists as a multifunctional tool with audio denoise and vocal remover features. Both are worthy of enhancing audio by removing or separating background noises. If you are in search of a background noise remover, this is your tool.
Free Download Free Download Learn More
Part 1: Some Basic Recording-Level Considerations One Should Make to Avoid Noise in Videos
The advancements in AI technology have made noise reduction seamless. Although, there are some pre-recording measures one can take to minimize noise. This section on reducing background noise in iMovie will mention those measures. The following primary considerations can make a big difference in terms of noise:
1. Pick the Right Location
If you are recording an audio or video, the first step is to choose the right surroundings. Although no location can be completely noise-free, one can try. Places with less population and more nature are noise-free as usual. Book a studio for video or audio recording, as you don’t need much effort. They offer pre-arranged setups and space, which also includes noise-canceling equipment.
2. Microphone Quality and Position
For professional-grade audio and video creation, the microphone is a necessity. A high-quality microphone is proficient in providing high-quality sound. There are two microphone options: an external microphone or a device-integrated microphone. Moreover, the position and settings of microphones determine the clarity of voice. If the microphone is set closer to the speaker, it will deliver a decent speech sound.
3. Wind Protection and Interference
The noise of wind is an obstacle for everyone who prefers outdoor shoots. It not only declines audio clarity but annoys the viewers. To reduce wind noise, use a windscreen or furry cover. To avoid other types of interference, keep the recorder away from electrical devices. This may include smartphones, laptops, and similar devices.
4. Audio and Gain Levels
While recording, it is important to keep track of audio levels for improvement. Creators can use headphones to detect audio levels and maintain unwanted noises. In addition, we advise you to set the gain at an appropriate level for clarity. A high gain value can decline audio quality through noise and other distortions.
5. Right Formats and Editing
Before you start recording, make sure to choose a high-quality audio format. The popular and widely used high-quality formats are WAV and FLAC. Moreover, choose the right editing software that has noise reduction ability. The software should also retain audio quality during and after editing. These tools also offer audio enhancement effects that can do the trick.
Part 2: Basic Solution to Background Noise Removal for Mac Users: iMovie
iMovie is a built-in application designed for macOS devices for creating and editing. Mac users can employ this software to edit their movies by introducing music effects. In iMovie, users can share their projects online or streamline them on Apple TV. With its video and audio editing abilities, you can reduce background noise iMovie.
The software offers audio enhancement for speech clarity and audio equalizer. With its audio denoise function, reducing background noise in iMovie is seamless. The feature rests on its main editing interface and is easy to utilize. In addition, it can multiple audio formats are editable in it, like ACC, MP3, and more.
Steps to Reduce Background Noise in iMovie
Are you a Mac user and want to learn about removing background noise in iMovie? Use this perfect step-by-step guide to gain knowledge about noise reduction:
Step 1
Initiate iMovie, press the “Create New” button and import media. Then, use the drag-and-drop technique to bring your media to the timeline.
Step 2
Navigate towards the toolbar at the top right and explore options. Locate and click the “Noise Reduction and Equalizer” button to start editing.
Step 3
From the given options, access the “Reduce background noise” slider. Change the position of this slider to adjust the percentage of noise reduction.
Step 4
Now, play your video to see the results and adjust the intensity of the noise. Once you are satisfied with the results, export your video or save it to iMovie.
Part 3: Some Other Top-Notch Facilities for Background Noise Removal on Mac
While the iMovie remove background noise function is your first option, a backup never hurts. In this section, the focus will be on some desktop alternatives of iMovie. Users will gain knowledge of some premium video editing tools for this purpose. Keep reading to learn more about this software for efficient and productive editing:
1. Wondershare UniConverter
On top of our list of iMovie remove background noise alternatives is UniConverter. The software assists in 6 different types of background noise removal. Users can remove static, echo, humming, wind noise, chatting, and hissing. The software supports the majority of audio formats like MP3, WAV, and more. You can level up your bad audio quality in three simple steps.
Pros
- The software supports batch processing to remove noise for productive editing.
- Along with noise reduction, users can employ its vocal remover for speech clarity.
Cons
- It is not able to assist in some advanced editing techniques.
2. Krisp
This is a desktop software that clarifies your voice during video calls. It enhances voice using three techniques including background voice, noise, and echo. Whether it’s an animal’s voice in the background or a human chatting. It is an AI-driven software that detects background voices and removes them accurately.
Pros
- Its AI meeting assistant can transcribe your videos, and you don’t need to worry about taking notes.
- It collaborates with all your platforms to enhance the quality of your content.
Cons
- While enhancing audio in it, your voice can start to sound robotic.
3. Adobe Audition
Adobe Audition is another reduce background noise iMovie alternative. It assists in audio denoise with its custom noise reduction options and effects. The tool falls into professional software categories that help with audio and video editing. In addition, users can adjust the level of frequency to high, low, and medium. It operates on sliders to adjust the value of noise elements in a video.
Pros
- It has pre-assembled sound effects that are completely free to use.
- To avoid background noises prior to editing, you can record voiceovers and podcasts in it.
Cons
- The user interface might be too technical for those with basic-level editing skills.
4. HitPaw Video Converter
HitPaw Video Converter is a versatile platform assisting in video, audio, and photo editing tasks. The software employs AI assistance to bring clarity to your audio projects. With this iMovie background noise reduction alternative, noise removal is a few clicks away. Users just need to upload their video or audio, and it will elevate their quality. Moreover, it supports multiple audio and video formats to diversify your options.
Pros
- The interface of this iMovie background noise reduction alternative is straightforward.
- With its AI photo and video enhancer, you can uplift their visual and overall quality.
Cons
- The customer care of HitPaw takes a while to respond, which is a turn-off for users.
Bonus Part: A Comprehensive Solution for Vocal Removal: Wondershare Filmora
Whilst reducing background noise in iMovie is operational, its alternatives exist. In addition to noise control, users can also manage vocals. To perform this in an efficient way, none other than Wondershare Filmora can assist. It is a professional and updated video editing software with multi-functionalities. Editors can employ its AI Vocal Remover feature to edit vocals and export them.
The method of accessing this tool is straightforward and requires a few steps. This function separates vocals from background voices, which are further editable. You can simply delete the background noise track and export the video with vocals only. Moreover, its timeline editing feature brings precision to projects.
Free Download For Win 7 or later(64-bit)
Free Download For macOS 10.14 or later
Exclusive Sound Editing Features of Wondershare Filmora
Wondershare Filmora brings its users an extensive range of audio and video editing features. There is so much one can do with their hands on this software. This section of the article will discuss other audio-relative features of Filmora:
1. AI Audio Denoise
There are multiple forms of background noises and techniques to remove them. Filmora’s denoise features provide multiple techniques for denoising. Users can employ its audio enhancement feature to improve speech. Moreover, it has wind removal, hiss, and hum removing options. You can also employ its reverb reduction to minimize echo in your content.
2. Silence Detection
One of the many ways of uplifting your content’s audio is to remove the silent pauses. Locating and eliminating silent parts of video is difficult by yourself. This AI auto-detects and eliminates the silent parts of videos with precision. It will optimize your videos for the audience, as the pauses may irritate them.
3. Audio Ducking
Being a content creator can be challenging in terms of precise editing. In Filmora, you do not need to adjust the audio elements of each track separately. With its audio ducking feature, users can fade one audio track to clarify the other. It auto-detects the speech parts of videos and decreases the music levels in them.
4. Auto Beat Sync
If you wish to align your video footage with an external audio track, this is the best option. Filmora’s audio beat sync streamlines your content with its functionality. Its Auto Montage Maker synchronizes content and adds effects according to beat points. Moreover, it can auto-enhance your content by fixing the overexposed or dark portions.
Using AI Vocal Remover in Wondershare Filmora
After familiarizing yourself with a few of Filmora’s functionalities, let’s discuss further. This section of our article will guide you about accessing vocal remover. Follow the guide mentioned below to remove vocals from your video:
Step 1Initiate a New Project to Import Media
Once you download this software on your device, start it and access its main display. Continue to create a new project by clicking on the “New Project” button. Upon accessing the editing interface, use the “Command + I” keys to import media.
Step 2Start Vocal Remover
Now, bring the imported media to the timeline, select it, and navigate towards the top toolbar. From there, access the “Tools” option and choose the “Audio” option. From the audio expansion panel, choose the “AI Vocal Remover” option. The vocal removal progress will appear on the screen.
Step 3Set Preferences and Export Media
Once the vocals have been separated from background noise, make customizations. After this, delete the background noise and navigate towards the top right corner. From there, click the “Export” button and download your video on your device.
Free Download For Win 7 or later(64-bit)
Free Download For macOS 10.14 or later
Conclusion
In this article, the focus of attention remained on removing background noises in iMovie. Users also learned about some of its alternatives to use when it’s not working. In addition, the article sheds on a most reliable alternative named Wondershare Filmora.
It assists as a multifunctional tool with audio denoise and vocal remover features. Both are worthy of enhancing audio by removing or separating background noises. If you are in search of a background noise remover, this is your tool.
Universal Ledger of Podcast Navigation Points and Directories
Submitting your podcast show on different platforms is essential to get the right audiences. As we all know, the more podcast directories you publish your show, the more listeners you get.
Yet, finding the ideal choices can take time and effort with many podcast directories available online. Worry less. We’ve compiled a list of the best podcast directories you can always count on to publish your podcast show anytime.
- YouTube
- Spotify
- Apple Podcasts
- Google Podcasts
- Pandora
- Audible
- NPR One
- Tune In
- Podcast Addict
- RadioPublic
- Overcast
- Pocket Casts
- CastBox
- Stitcher
- More choices to submit your podcast shows
- How to submit a show to podcast directories?
- Hot FAQs on Podcast Directories
Part 1. What are podcast directories?
A podcast directory is a listening app. It’s the place where podcasts and their listeners meet. Podcast listeners search for, subscribe to, and listen to your Podcast using their podcast directory of choice. Popular podcast directories include Apple Podcasts, Spotify, and Google Podcasts.
Part 2. 15 Top podcast directories to focus on in 2024
Thankfully, research conducted by EdisonResearch shows the weekly audience reach of top podcast directories. So this list will help us locate the best podcasting directories. And it can multiply your audience size and quickly reach a more extensive user base.
According to Edison Research, the top 15 Podcast Networks are:
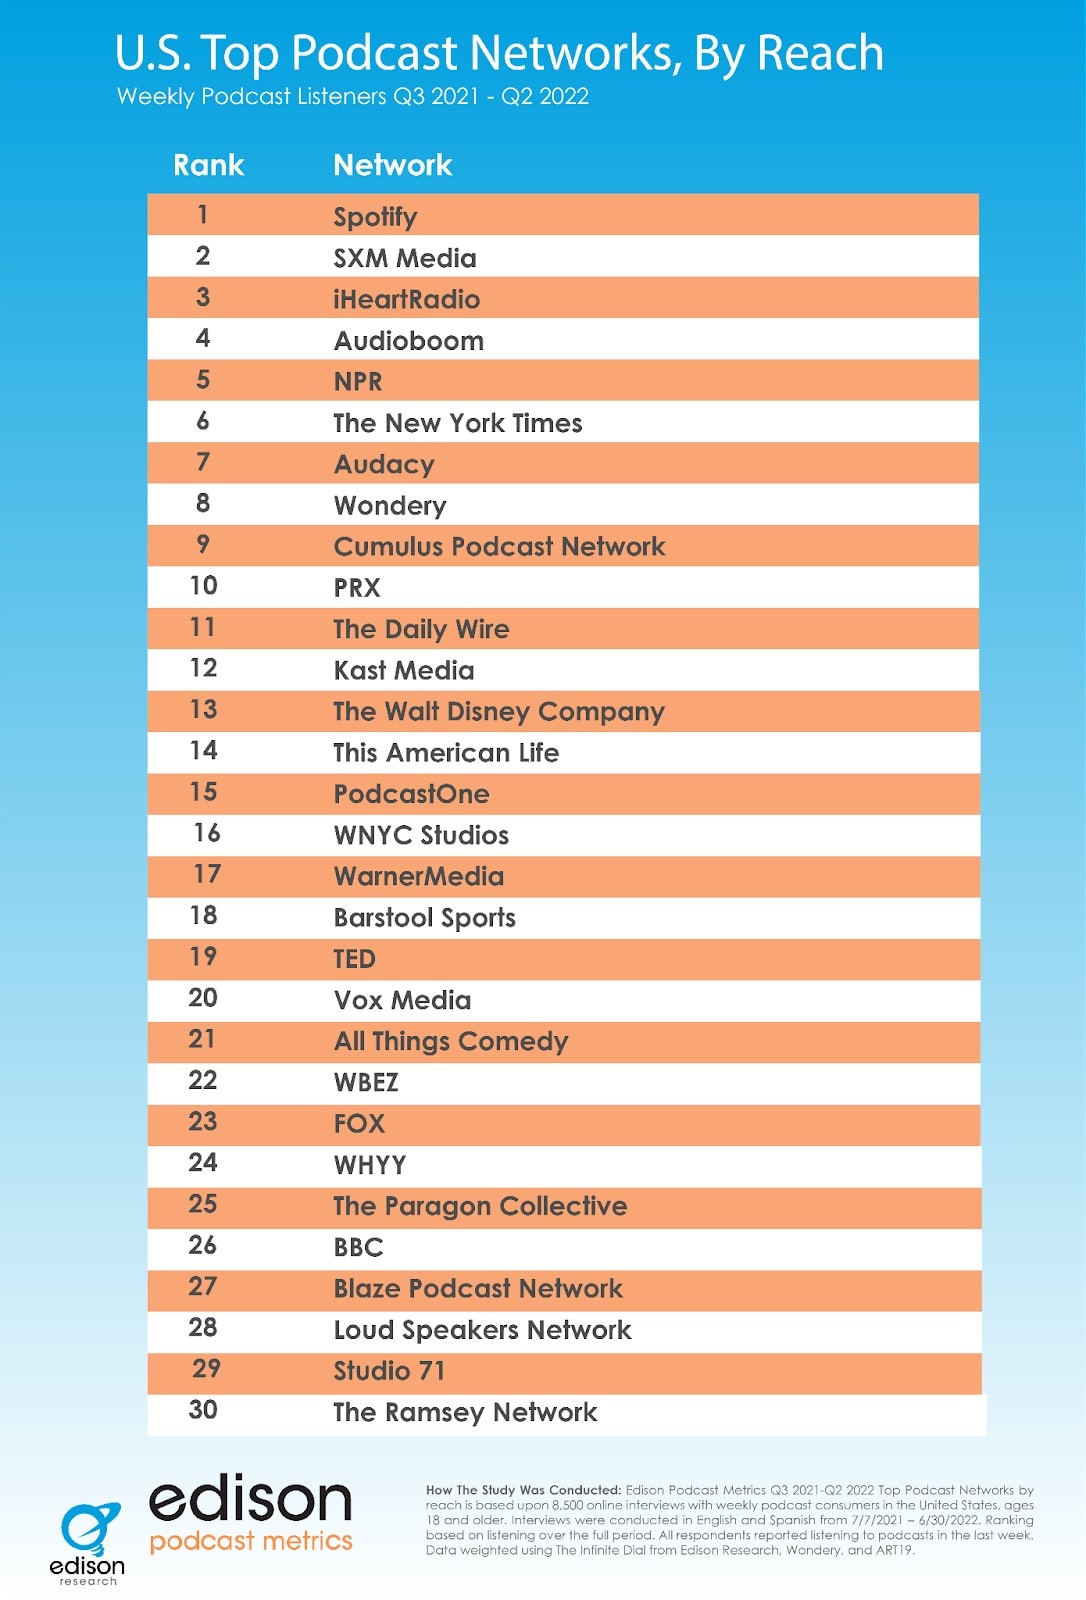
You must retain that Edison’s research only analyzes the US podcast services. Yet, our guide has compiled the best podcasting directories to connect with users worldwide.
Below you will find the list of top podcast directories and their reviews. But keep in mind that when it comes to podcast directories, there is no such thing as best or worse. Instead, it’s all about the user base and audience reach. So, it is best to submit your podcasts to multiple podcasting directories.
1. YouTube
With a monthly active user base of 2.5 billion, YouTube should be the top choice of any podcast creator. According to a recent survey by Statista, YouTube took over Spotify to become the largest platform for podcast consumption worldwide. Additionally, 47.7% of the US audience prefers YouTube over other platforms for listening to podcasts.
Not to forget, YouTube comes pre-installed on all smartphones and is also accessible via the Web to users worldwide. Another benefit of YouTube is that it is free for creators and users. Plus, once you grow your user base, it also allows you to get surplus revenue.

Of course, YouTube is a video-only platform. Still, you can use tools like Wondershare Filmora to create video-based podcasts seamlessly. You can simply convert the video podcasts into an audio format using Filmora itself and then reupload the same Podcast to even audio-based podcast directories.
Free Download For Win 7 or later(64-bit)
Free Download For macOS 10.14 or later
Tools like Fimora also allow you to directly publish the created Podcast on YouTube (so you do not have to worry about video requirements mandatory for YouTube).
- User Review of YouTube on G2: “YouTube is one of those sites that you can’t live without for a business. Everyone knows what YouTube is, and users (globally) use the platform daily.”
- Monthly User Base: Over 2.5 billion active users.
- Supported OS: All major OS and web browsers.
2. Spotify
Spotify has over 389 million listeners across 187 markets worldwide. Available on all major OS and its web presence makes it one of the best directories of podcasts on the internet.
Aside from its audience base, Spotify also provides real-time insights, like who your audience is, what they like, which episodes they prefer, and even what songs they want. All these insights will also help you plan your future content according to the audience.
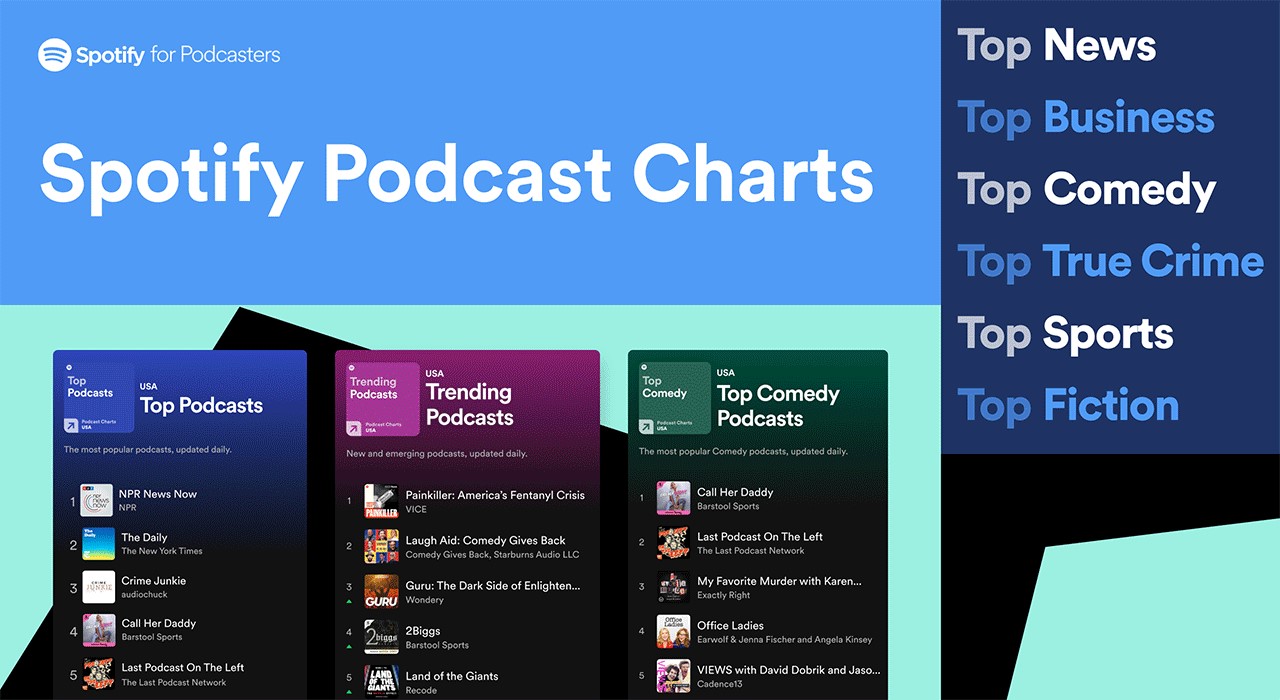
Spotify’s personalized recommendations and algorithms are another pluses, given you can get discovered easily/ Like YouTube, Spotify allows you to upload even video podcasts. While you can also create and upload podcasts in audio format only.
- User Review of Spotify on G2: “I can find any song, artist, album, and even podcasts at any time and no commercials.”
- Monthly User Base: Over 360 million active users.
- Supported OS: All major OS and web browsers.
3. Apple Podcasts
Apple Podcast is another top directory for a podcast that creators cannot ignore. Given it is an exclusive-podcast platform, its 28.5 million active user base in more than 170 countries and regions is enough to tell its greatness.
It is essential to understand that YouTube and Spotify are not exclusive podcast platforms like Apple Podcasts. And while Spotify and YouTube are best for connecting novice podcast listeners, Apple Podcast is the way to go if you want to connect with a dedicated podcast community.
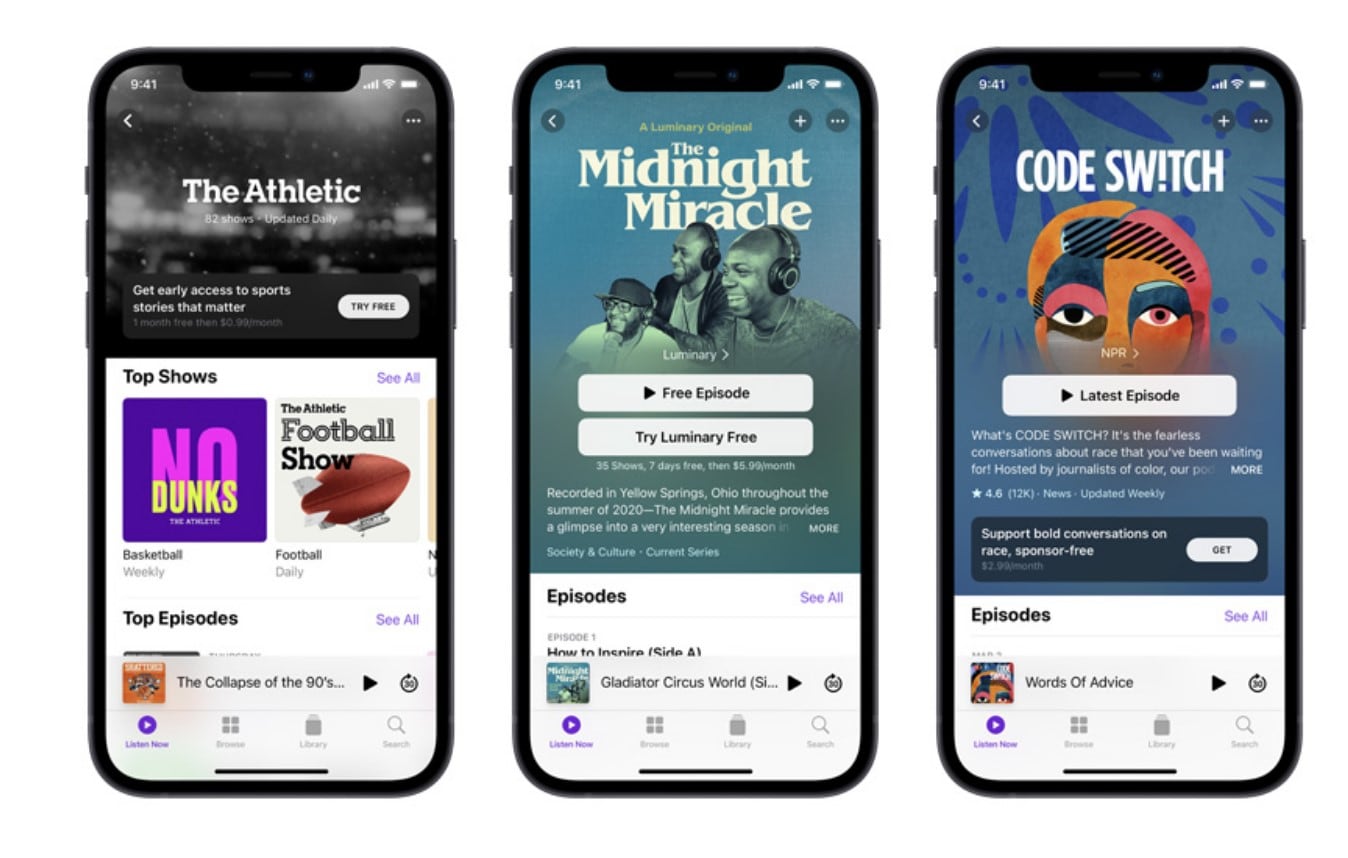
The best thing about the Apple Podcast directory is it allows you to create a podcast (via Apple Podcast Connect), but you must be an Apple user. However, you can submit your podcasts to Apple Podcast via RSS feed even if you are not an Apple user.
In all, given Apple Podcast is available for Apple users and is known by default on all Apple devices (the most prominent smartphone company in the world), Apple Podcast is a must-use podcast directory.
- User Review of Apple Podcast: “Apple once again nails with simplicity, millions of shows of my interest, and freemium service.”
- Monthly User Base: Over 28.5 million active users.
- Supported OS: All Apple devices.
4. Google Podcasts
Google Podcasts has over 100 million downloads on Play Store alone and is also available on the web, App Store, Blackberry, and ChromeOS users. A completely subscription-free and ad-free platform, Google Podcasts is one of the top podcasting directories among users.
However, unlike the Apple Podcast directory, it does not have a studio, so you can only submit your podcasts via RSS feeds. Still, its user base and the advanced algorithms are an opportunity to connect with users who like the subjects you discuss.
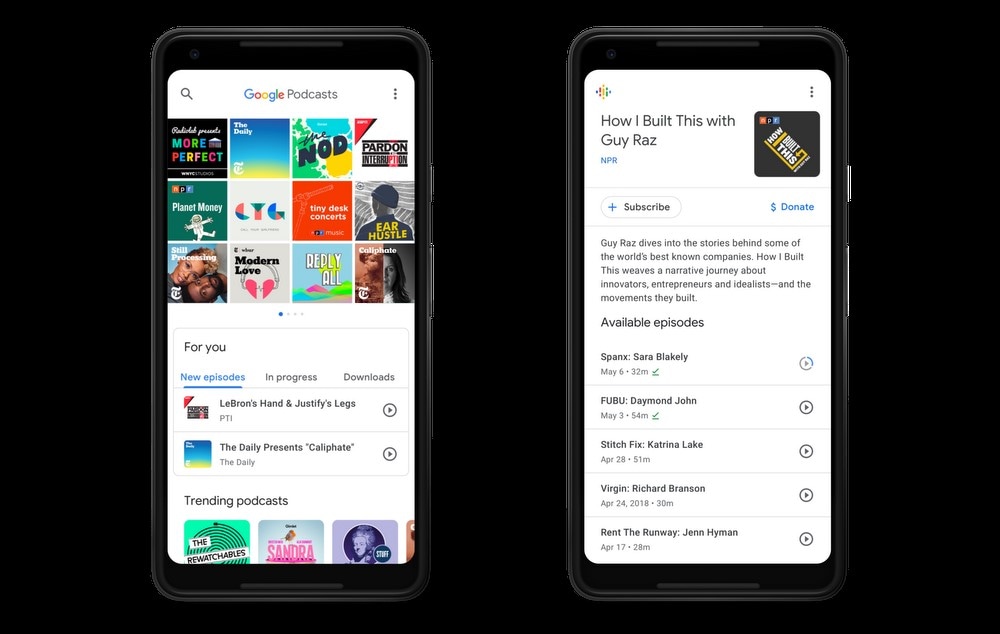
Like Spotify and Apple Podcast directories, Google Podcasts also show you real-time analytics and guide you about users so that you can plan your content accordingly. Given that it only requires a Google account to start, it is another top podcast directory you cannot ignore.
- User Review of Google Podcast
“Google Podcast includes everything that a podcast listener wants. It’s simple, free, and includes valuable options like Sleep Timer, Playback speed, and more.”
- Monthly User Base: Over 30 million active users.
- Supported OS: Dedicated apps for all major OS and web presence.
5. Pandora
Pandora has over 64 million monthly active users, with a listener spending up to 24 hours/monthly on the platform. It explains that users spend up to 45 minutes on the Pandora platform tuning in to their favorite podcasts. Again, its search-based algorithms allow you to get discovered by users that like subjects and topics on which you’re creating podcasts, meaning it is simple to connect with a large user base conveniently.
Pandora only accepts podcasts via RSS feed, which should be in MP3 format. But recent notifications have shown more audio formats will be added.
However, it is vital to retain that Pandora Podcast’s team critically analyzes all submissions manually. So, it might take up to 4-6 weeks for your first Podcast to appear on the platform.
- User Review of Pandora Podcast
“Pandora Podcasts recommendations are a blessing for me, who always finds it confusing to locate the right episode to spend my time on.”
- Monthly User Base: Over 64 million active users.
- Supported OS: Dedicated apps for all major OS and web presence.
6. Audible
Although popular among audiobook lovers, Audible has a considerable podcast following too. Its monthly active user base is around 41 million. The biggest benefit of registering your Podcast on the Audible directory of podcasts is that it connects with users who use Alexa to discover new podcasts.
Besides Audible, the Podcast will also be available for users of the Amazon Music app. That means you can connect with even more users via one submission only. Not to forget, Amazon Prime Video (a massive following) users get a free subscription to Amazon Music, so there’s a perfect chance that you will connect with users conveniently.
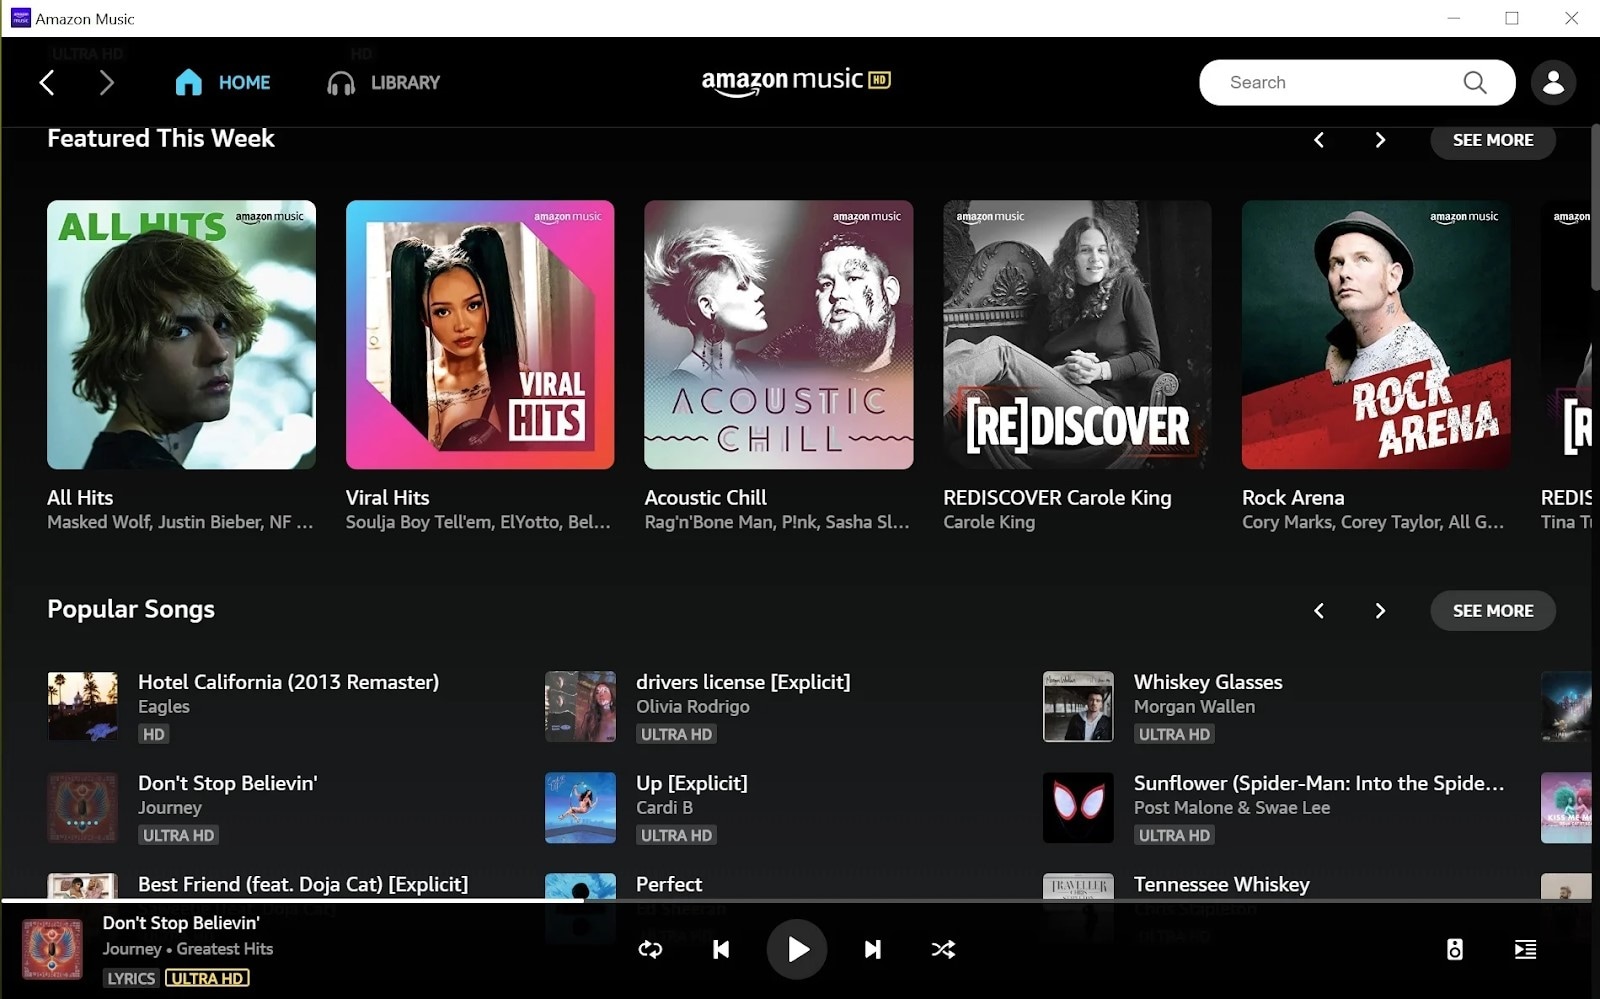
It is important to note that both Amazon Music and Audible offer podcasts for entirely free to users, so a more extensive user base prefers these platforms over paid platforms.
- User Review of Pandora Podcast
“You get to listen to any audiobook in the “included” library no matter which subscription you purchase..”
- Monthly User Base: Over 64 million active users.
- Supported OS: Android, iOS,
7. NPR One
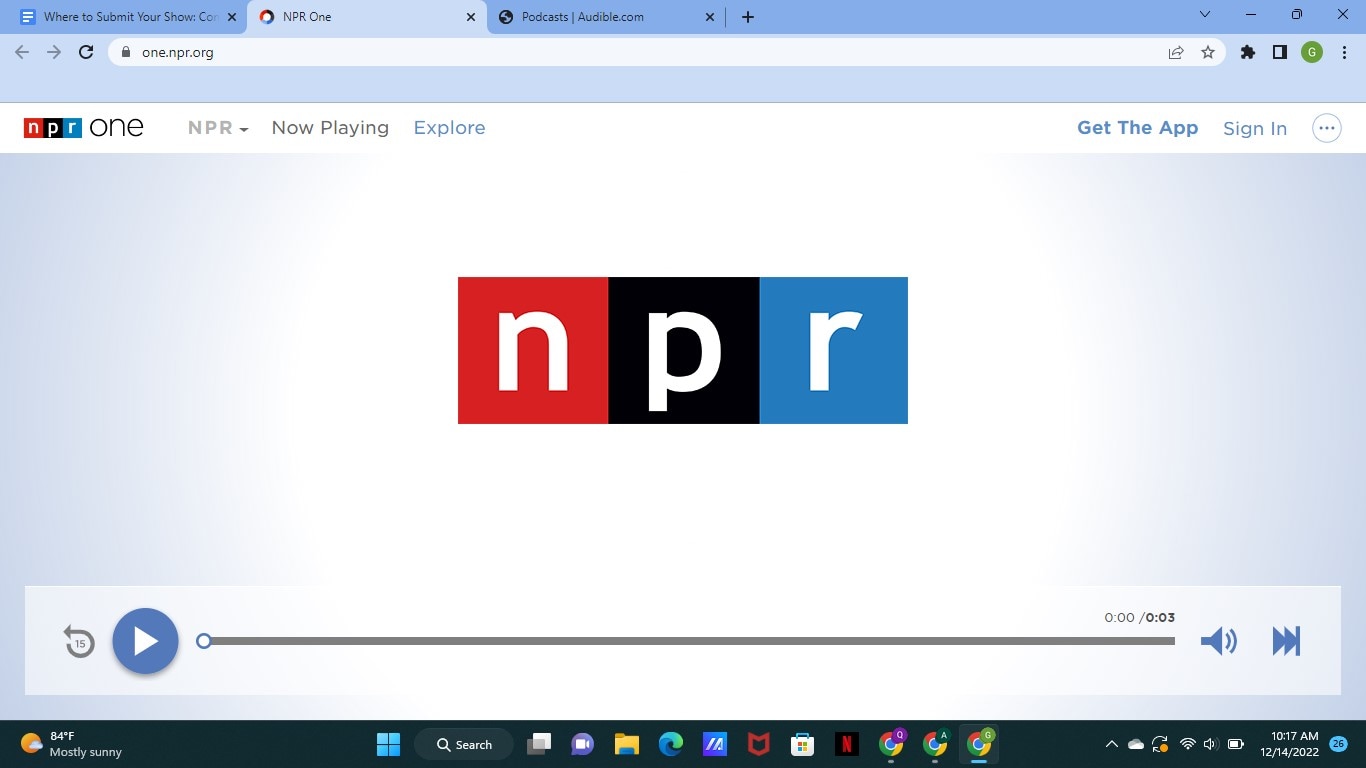
With an average listener spending up to 145 minutes weekly, the NPR One podcast directory is one of the best podcast directories you can trust to submit your show online. The podcast directory has a userbase of over 500 thousand users globally, and
- User Review of NPR One Podcast
“I’ve been using this app for years now. It’s been my trusty companion to give me the news. I primarily use it with the sleep timer. I’m not a super picky consumer, especially when I don’t pay for the app!
But for many months now, the sleep timer will frequently think the time is up and shut off the player well before it should. The player will often shut off within 5 minutes of using the 30 min sleep timer. It’s annoying to open the player hit resume, and reset the sleep timer.”
- Monthly User Base: 500 thousand
- Supported OS: Android, iOS
8. Tune In

Technically, TuneIn is a radio. But lately, it has become prevalent amongst podcast listeners to find their favorite shows and also listen to music. The podcast directory has a global user base of over 75 million and a monthly visit of 7million+, which makes it a great spot for any podcaster to publish their show.
- User Review of Tune In Podcast
“I’ve been using the app for 4 years. I like it, but there are some annoying “features.”
the screen won’t time out when the app is active.
the developers must have recently made a change. I used to search through my list of “recent” (there were about 20) to look for new episodes of my favorite podcasts.
Now, the app only allows me to see the last four podcasts or stations I have listened to. So it is not helpful.’
- Monthly User Base: Over 7 million active users
- Supported OS: Dedicated apps for all major OS and web presence.
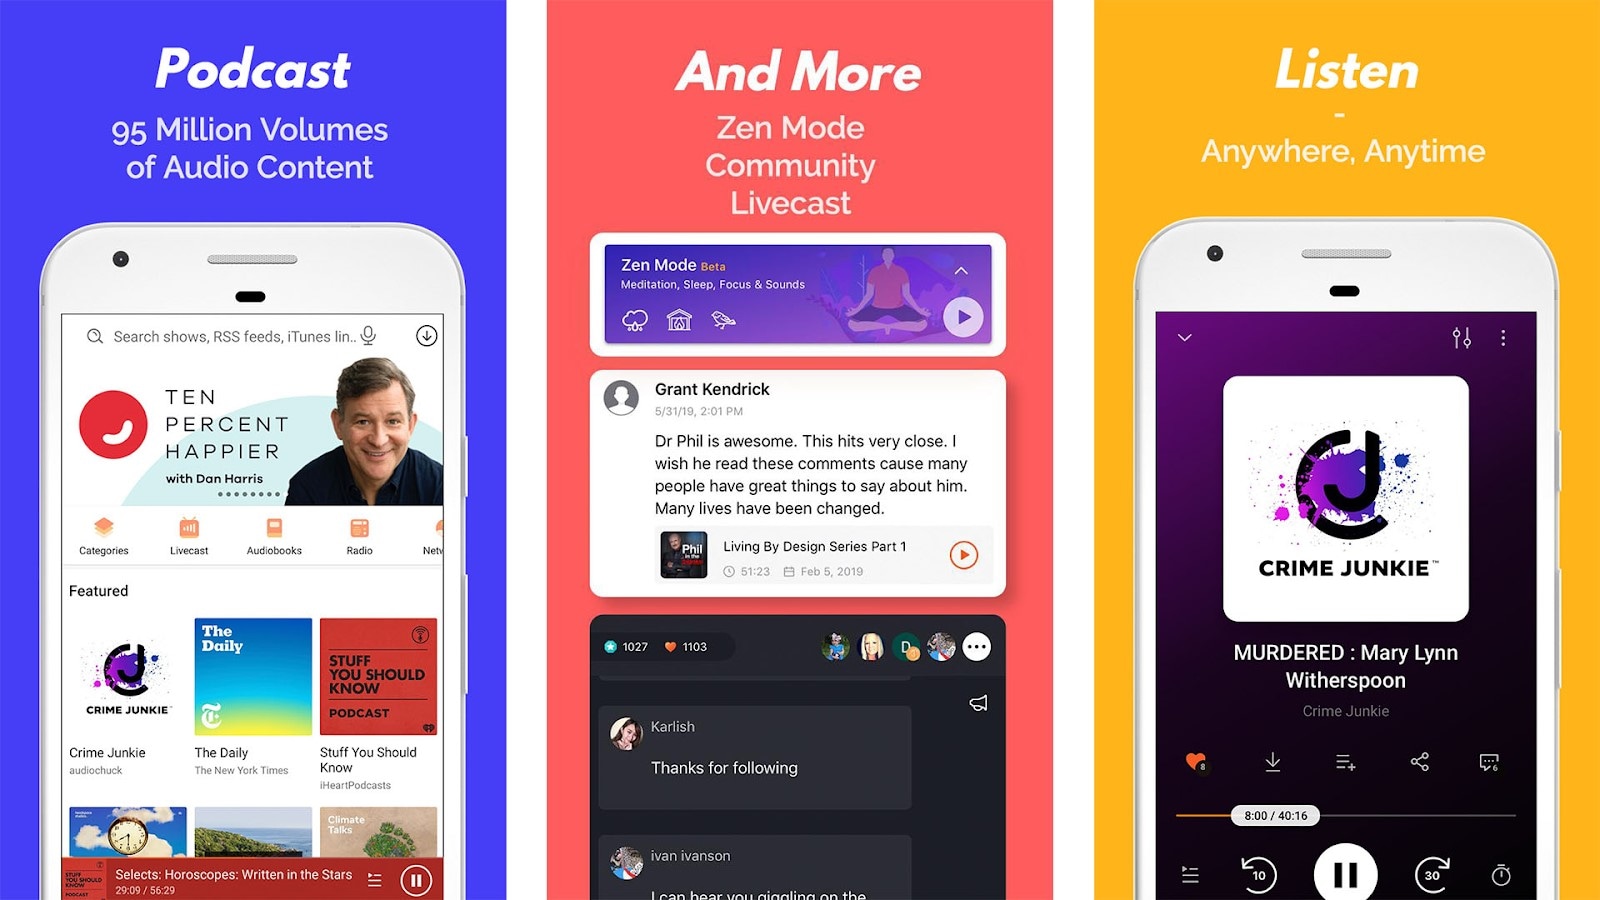
9. Podcast Addict
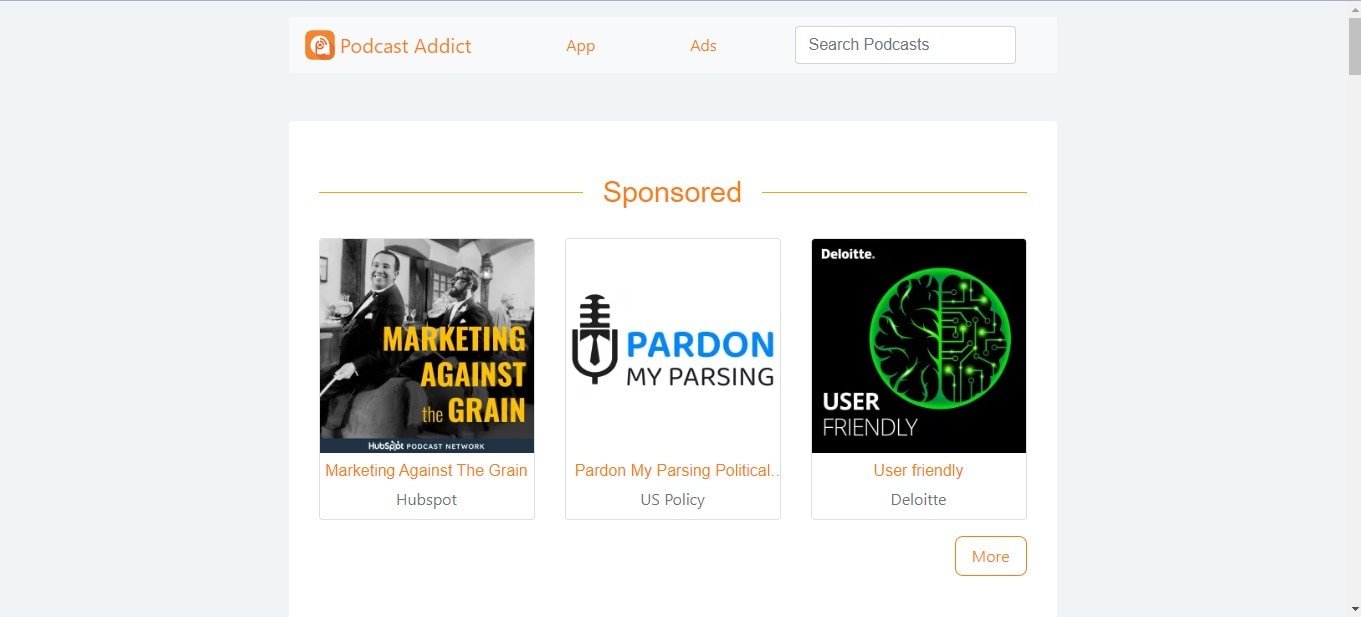
With over 10 million downloads on Google Playstore, Podcast Addict is one of Android’s most popular podcast apps. You can publish your podcast show, as it allows you to connect with the ideal audience quickly and easily.
Also, Podcast Addict is one of the few podcast directories available in various languages, including French and German. So it’s a perfect choice non-English podcasters.
- User Review of PodcastAddit
**”**Been using this for years. It does everything I could ever want when listening/ referencing/ re-listening to my favorite podcasts and a lot more.
I’ve suffered through having to use other podcast players (e.g., listening to something “exclusive”), but I couldn’t stand the inane simplicity of other players long enough to finish their content.
Also, it takes a bit to get used to (especially if you’re coming from other stripped-down players), but very worth the small effort for a powerful app.”
- Monthly User Base: Over 750 thousand active users.
- Supported OS: Dedicated Android App and web presence.
10. RadioPublic

Having been in the game for over 15 years, RadioPublic is another excellent podcast directory you can count on to submit your show. Although the platform does not have a massive user base compared to its competitors, it will help you grow your listeners and business by getting your podcast show to the right audience.
On RadioPublic, an average listener spends up to 72 minutes every day finding new podcast shows and listening to new episodes from their favorite podcasts. And given that the platform offers many robust features, listeners can enjoy a seamless listening experience on any device.
Overall, the RadioPublic podcast directory offers you a smart way to publish your show and grow your audience without going through stress.
- User Review of RadioPublic
“Glad I waited a while to find a podcast website provider. Starting from scratch in WordPress seemed too much hassle. Luckily the site came along while I was dithering about what to do.
The RadioPublic team onboarded the other 5 billion podcasts as one of the first examples, and I’m delighted to have chosen this option. Already, my pod site feels “complete” to look at, and more features are coming soon that will help with marketing, understanding listeners, and building a podcast brand.”
- Monthly User Base: Over 300 Thousand active users
- Supported OS: Dedicated apps for all major OS and web presence.
11. Overcast
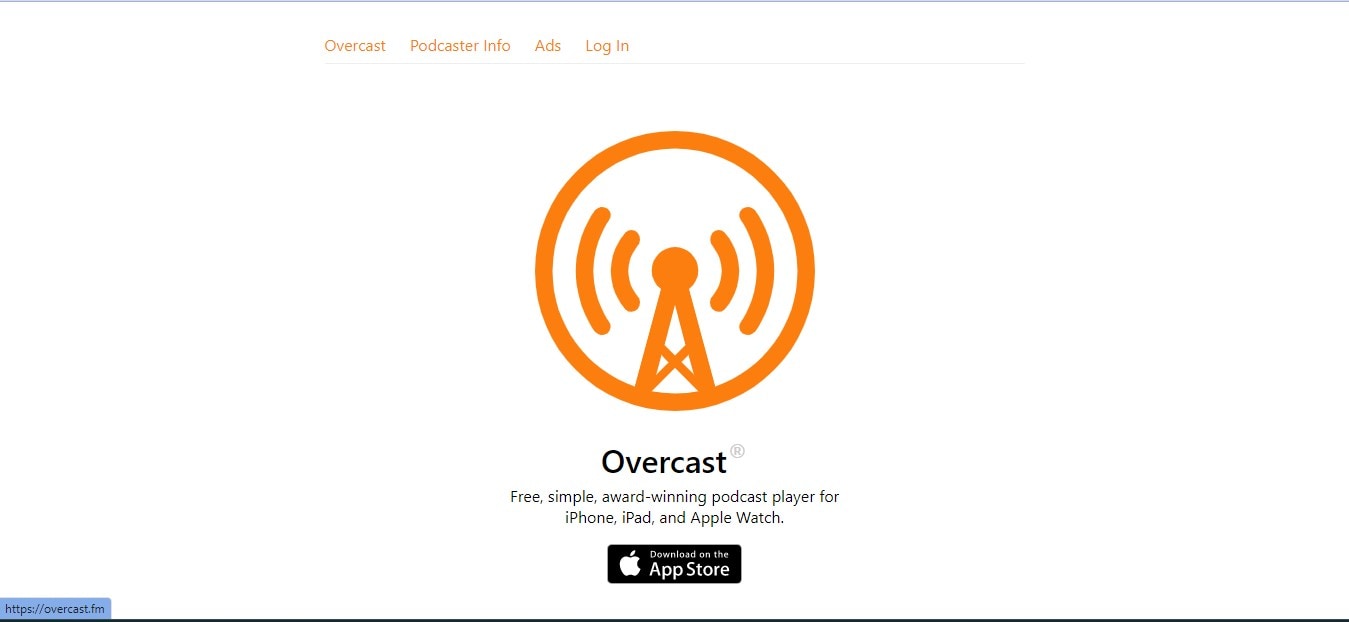
Overcast is a dedicated podcast app for Apple devices, and what makes it a great podcast directory is that it offers unique features that attract many listeners.
On this platform, you’ll be allowed to display advertising slots, enabling listeners to subscribe to your podcast show within a few clicks. Plus, unlike many of its competitors, listeners have control over what podcast show is displayed in the featured podcast section. It is helpful as it lets listeners quickly discover every new episode you publish.
Overall, many incredible features make Overcast a good choice, and chances are your Podcast will get to real listeners when you publish them here.
- User Review of Overcast
**”**Nice alternative to Apple’s. I’ve been well pleased so far. It isn’t always the most intuitive, but I’ve eventually figured out how to achieve almost everything I’ve wanted to. The benefits of adding a show via RSS have become immediately clear.
Being a subscriber to a show and getting early access episodes and bonus material right in my podcast manager makes it easy to stay up with all my shows.”
- Monthly User Base: Over 70 Thousand active users.
- Supported OS: Dedicated app for iOS and web presence.
12. Pocket Casts
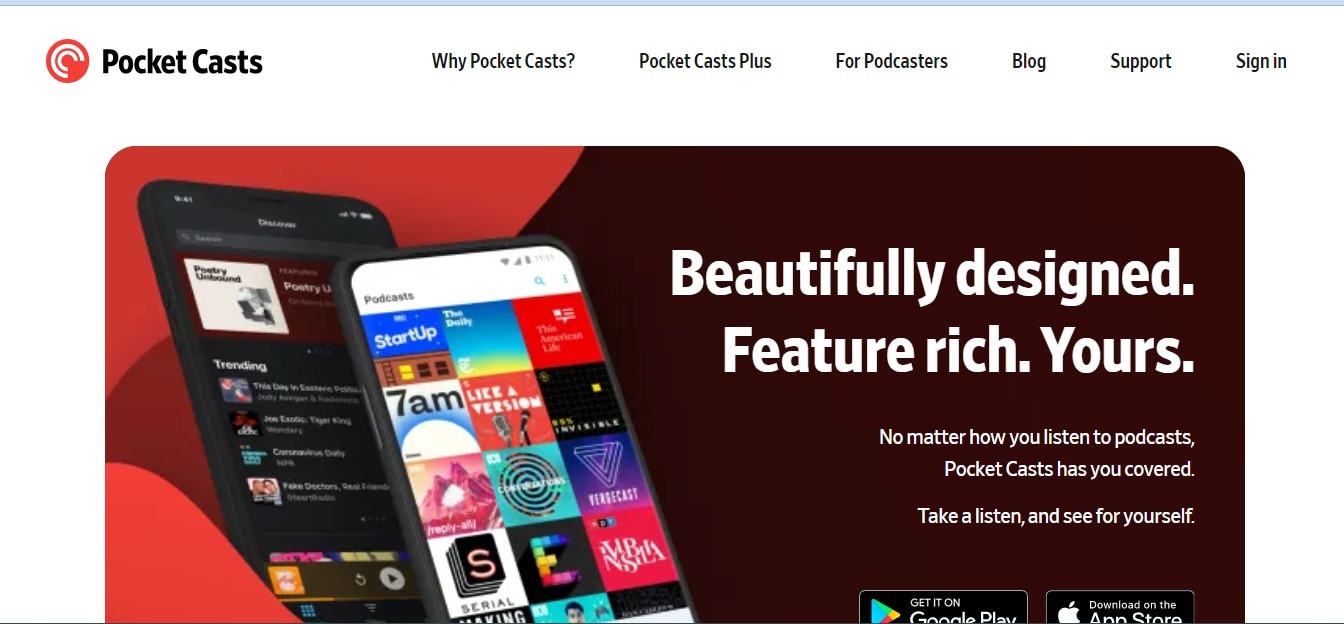
If you’re looking for a free podcast directory to publish your Podcast show, Pocket Casts is the ideal one for you. This podcast directory is packed with many rich features that podcasters will find very helpful. In addition, thanks to its beautifully designed website interface, you won’t find the platform difficult to use.
Besides, many listeners love Pocket Podcasts as it offers them incredible features—for example, improved discovery options, playback speed options, and lots more. In addition, they’ve enhanced how they find and listen to podcasts on the platform. You can’t go wrong publishing your show on a platform like this one.
- User Review of Pocket Casts
“Wonderful app, the most reliable one I’ve found. Even with accounts, most others lose all your progress data which hasn’t happened once with this, and I’ve switched phones 3 times. The progress tracker is so accurate you can pause on one device, open the same account and continue listening. Most apps can’t even keep things downloaded. Search does take a minute but finds stuff no other app does.”
- Monthly User Base: Over 1 Million active users.
- Supported OS: Dedicated apps for all major OS and web presence.
13. CastBox
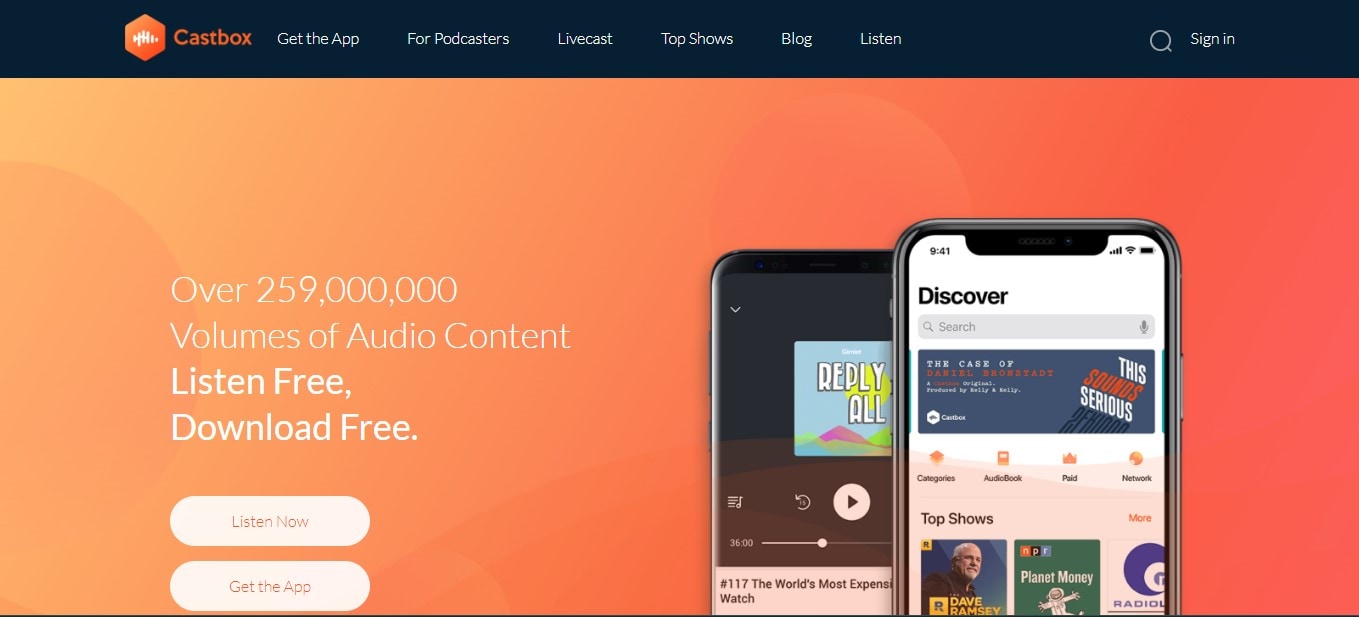
CastBox is another unique podcast directory that podcasters trust to publish their show online. The platform boasts an optimized SEO and artificial intelligence that lets listeners find new podcast shows. Thanks to its massive user base of up to 20 Million users, your Podcast could reach a wide range of audiences quickly and easily.
Also, CastBox offers social media features that allow listeners to comment and share your podcast show on their social media page, thus helping you get your show to more listeners and potentially increase your fanbase.
- User Review of CastBox
“I’ve been a podcaster for years and an avid podcast listener for a while. So I searched high and low for the best podcast app and distribution service, Castbox. They have a great app and website, a huge content library, and a superb feature set. Also, their app allows offline listening, as I can download my favorite podcast show.”
- Monthly User Base: Over 1 million active users
- Supported OS: Dedicated apps for all major OS and web presence.
14. Stitcher
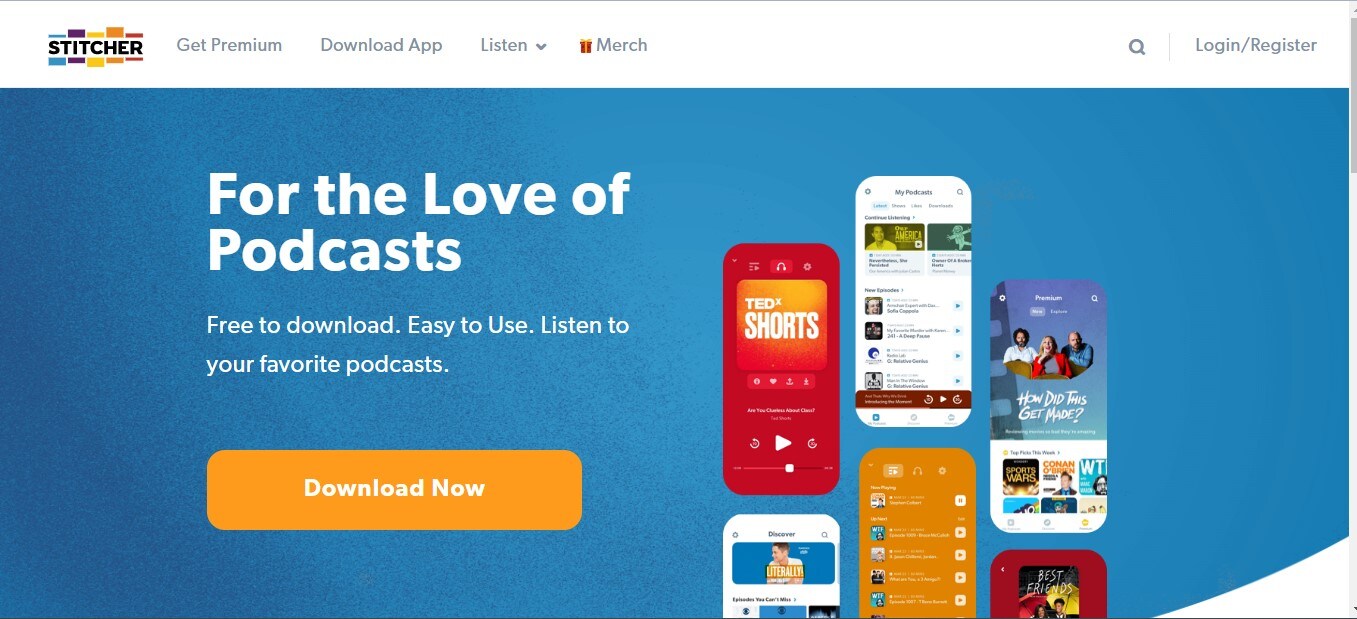
Last but not least podcast directory on our list is Stitcher. The platform boasts more than 14.5 Million active listeners, with an average listener having up to 25 hours of listening duration per month.
Stitcher helps you alleviate the stress of getting your show to the right audience, and thanks to the platform’s easy podcast submission requirements, you only need to have at least one podcast episode on your RSS Feed to get approved.
Also, Stitcher offers a unique analytic tool that allows you to track the performance of your show on the platform, and what more impressive is that it’s integrated into more than fifty car models. In addition, it works with any vehicle that supports Apple’s CarPlay and Android Auto, which makes it a great choice for podcasters who believe their audience loves to listen to their show while driving.
- User Review of Stitcher
“So glad I switched! I have my podcasts but didn’t listen to them much - partially because Apple Podcasts is so hard to use. I switched to Stitcher to listen to The Magnus Archives, and I love it!”
- Monthly User Base: Over 1.5 million active users.
- Supported OS: Dedicated apps for all major OS and web presence.
Part 3. More choices to submit your podcast shows
The above Podcast directories are great choices you can always count on any day. However, if you’re looking for more options, the following are reliable podcasting directories to choose from;
Part 4. How to submit a show to podcast directories?
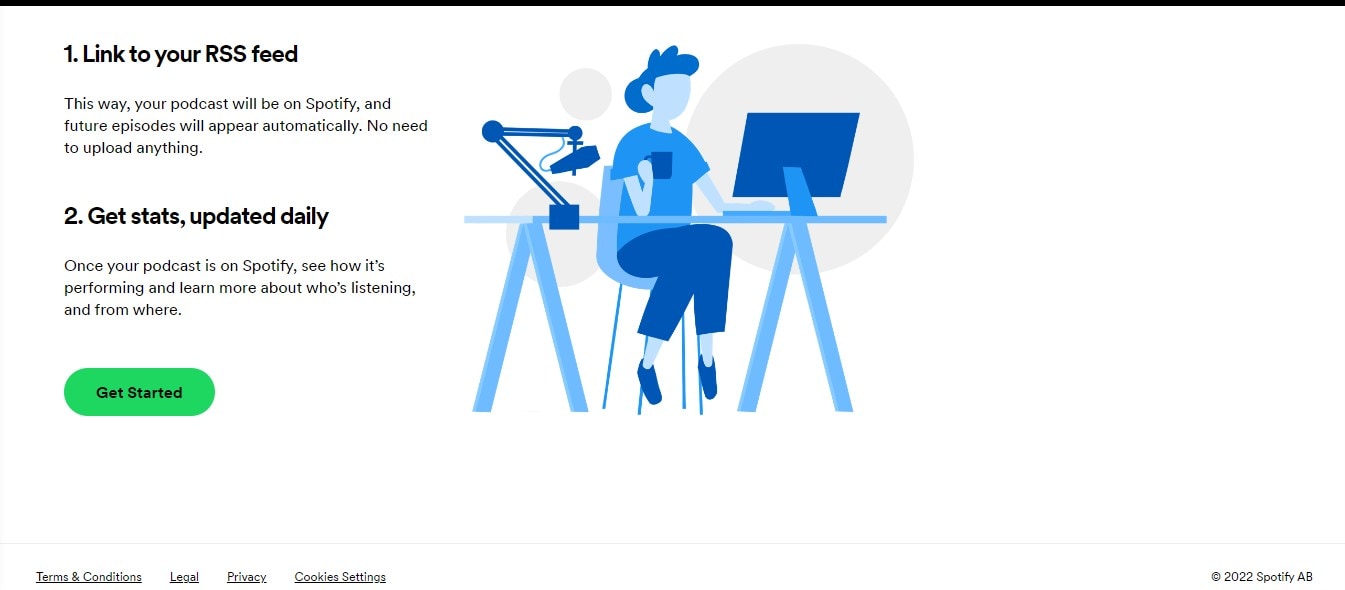
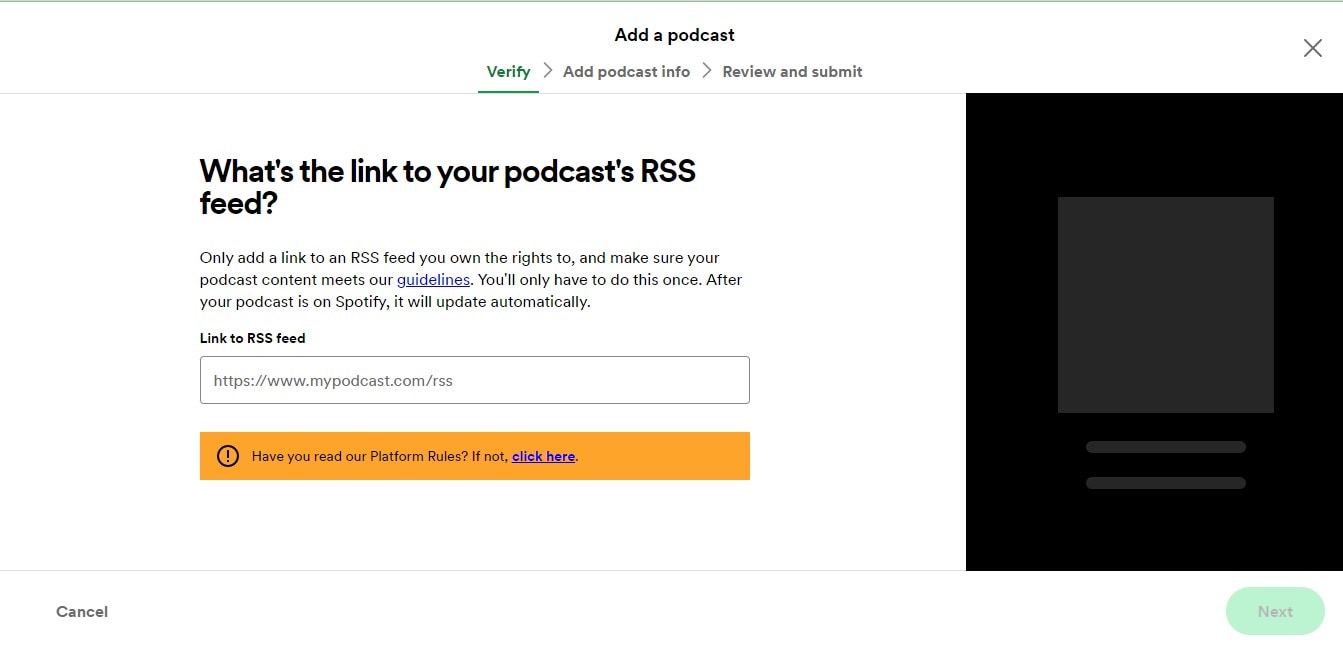
Submitting a podcast show to podcast directories is pretty simple. Here, we used Spotify as an example to show you how you can easily submit your podcast show within a few clicks. The steps are as follows;
Step1 Create a Spotify account using the email attached to your podcast host.
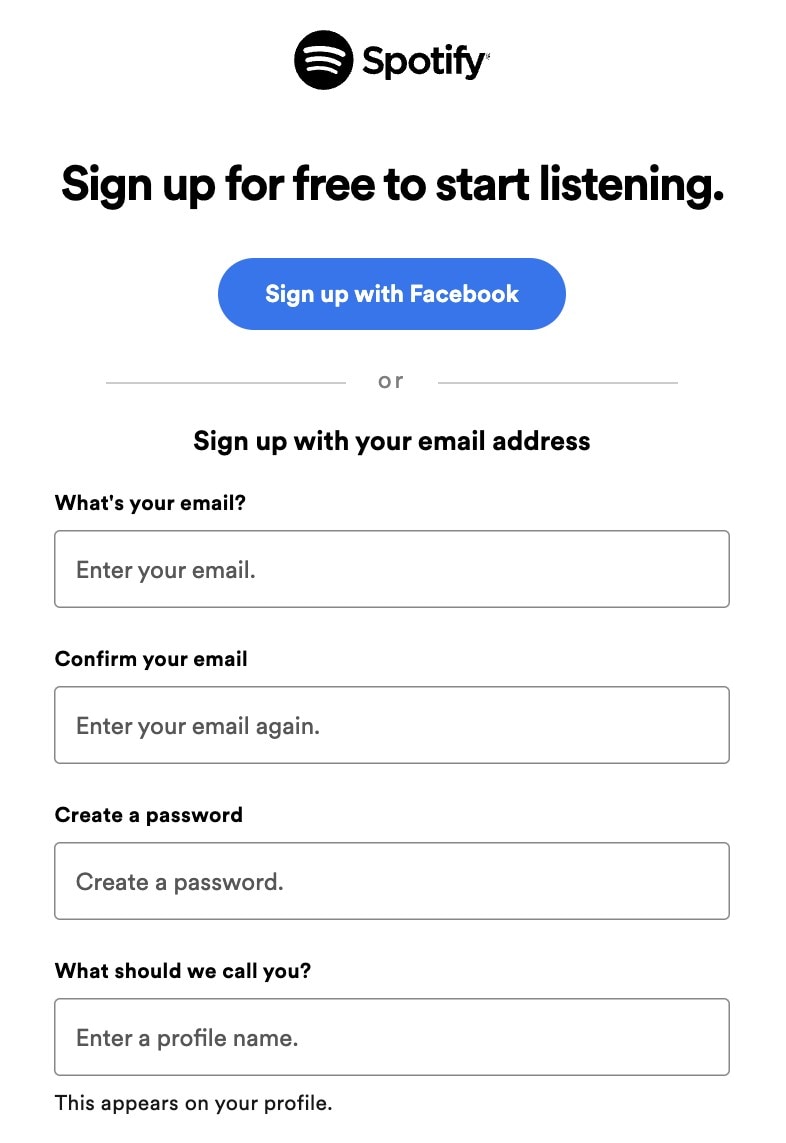
Step2 Open Spotify for Podcasters in your browser and login into your account. Then, click Get Started on the new screen.
Step3 Provide your Podcast’s RSS Feed and click Next to proceed.
Step4 You’ll be asked to add information about your Podcast, from its description to the title, artwork, etc.
Step5 Verify the Podcast by submitting the code sent to your email.
Step6 Review the information you’ve provided so far and submit it to Spotify for review.
Once you complete the steps, keep an eye on the submitted Podcast, as Spotify won’t message you even if your Podcast has been published.
Hot FAQs on Podcast Directories
1. Are podcast directories free?
Almost all top podcast directories are entirely free for creators. All you have to do is sign up on the platforms. Then, check the platform’s requirements to submit your podcast episodes, like the format, cover photos, and description. Of course, the requirements vary depending on the platform.
2. Can any podcast be on a directory of podcasts?
Yes, you can choose from any podcast directory to publish your Podcast. There’s no limitation. When submitting, you must select the ideal category for your podcast show so it can be displayed to the right audience.
3. Does it cost to join a podcast directory?
Yes, and the cost of joining a podcast directory varies depending on your platform.
Conclusion
The podcast directories introduced above are reliable for submitting podcast shows. So, chances are there, no matter what your podcast show is about. It’ll help you connect with the right audience. However, one thing is vital you need to make sure you choose the podcast directory that suits you.
Part 1. What are podcast directories?
A podcast directory is a listening app. It’s the place where podcasts and their listeners meet. Podcast listeners search for, subscribe to, and listen to your Podcast using their podcast directory of choice. Popular podcast directories include Apple Podcasts, Spotify, and Google Podcasts.
Part 2. 15 Top podcast directories to focus on in 2024
Thankfully, research conducted by EdisonResearch shows the weekly audience reach of top podcast directories. So this list will help us locate the best podcasting directories. And it can multiply your audience size and quickly reach a more extensive user base.
According to Edison Research, the top 15 Podcast Networks are:
You must retain that Edison’s research only analyzes the US podcast services. Yet, our guide has compiled the best podcasting directories to connect with users worldwide.
Below you will find the list of top podcast directories and their reviews. But keep in mind that when it comes to podcast directories, there is no such thing as best or worse. Instead, it’s all about the user base and audience reach. So, it is best to submit your podcasts to multiple podcasting directories.
1. YouTube
With a monthly active user base of 2.5 billion, YouTube should be the top choice of any podcast creator. According to a recent survey by Statista, YouTube took over Spotify to become the largest platform for podcast consumption worldwide. Additionally, 47.7% of the US audience prefers YouTube over other platforms for listening to podcasts.
Not to forget, YouTube comes pre-installed on all smartphones and is also accessible via the Web to users worldwide. Another benefit of YouTube is that it is free for creators and users. Plus, once you grow your user base, it also allows you to get surplus revenue.
Of course, YouTube is a video-only platform. Still, you can use tools like Wondershare Filmora to create video-based podcasts seamlessly. You can simply convert the video podcasts into an audio format using Filmora itself and then reupload the same Podcast to even audio-based podcast directories.
Free Download For Win 7 or later(64-bit)
Free Download For macOS 10.14 or later
Tools like Fimora also allow you to directly publish the created Podcast on YouTube (so you do not have to worry about video requirements mandatory for YouTube).
- User Review of YouTube on G2: “YouTube is one of those sites that you can’t live without for a business. Everyone knows what YouTube is, and users (globally) use the platform daily.”
- Monthly User Base: Over 2.5 billion active users.
- Supported OS: All major OS and web browsers.
2. Spotify
Spotify has over 389 million listeners across 187 markets worldwide. Available on all major OS and its web presence makes it one of the best directories of podcasts on the internet.
Aside from its audience base, Spotify also provides real-time insights, like who your audience is, what they like, which episodes they prefer, and even what songs they want. All these insights will also help you plan your future content according to the audience.
Spotify’s personalized recommendations and algorithms are another pluses, given you can get discovered easily/ Like YouTube, Spotify allows you to upload even video podcasts. While you can also create and upload podcasts in audio format only.
- User Review of Spotify on G2: “I can find any song, artist, album, and even podcasts at any time and no commercials.”
- Monthly User Base: Over 360 million active users.
- Supported OS: All major OS and web browsers.
3. Apple Podcasts
Apple Podcast is another top directory for a podcast that creators cannot ignore. Given it is an exclusive-podcast platform, its 28.5 million active user base in more than 170 countries and regions is enough to tell its greatness.
It is essential to understand that YouTube and Spotify are not exclusive podcast platforms like Apple Podcasts. And while Spotify and YouTube are best for connecting novice podcast listeners, Apple Podcast is the way to go if you want to connect with a dedicated podcast community.
The best thing about the Apple Podcast directory is it allows you to create a podcast (via Apple Podcast Connect), but you must be an Apple user. However, you can submit your podcasts to Apple Podcast via RSS feed even if you are not an Apple user.
In all, given Apple Podcast is available for Apple users and is known by default on all Apple devices (the most prominent smartphone company in the world), Apple Podcast is a must-use podcast directory.
- User Review of Apple Podcast: “Apple once again nails with simplicity, millions of shows of my interest, and freemium service.”
- Monthly User Base: Over 28.5 million active users.
- Supported OS: All Apple devices.
4. Google Podcasts
Google Podcasts has over 100 million downloads on Play Store alone and is also available on the web, App Store, Blackberry, and ChromeOS users. A completely subscription-free and ad-free platform, Google Podcasts is one of the top podcasting directories among users.
However, unlike the Apple Podcast directory, it does not have a studio, so you can only submit your podcasts via RSS feeds. Still, its user base and the advanced algorithms are an opportunity to connect with users who like the subjects you discuss.
Like Spotify and Apple Podcast directories, Google Podcasts also show you real-time analytics and guide you about users so that you can plan your content accordingly. Given that it only requires a Google account to start, it is another top podcast directory you cannot ignore.
- User Review of Google Podcast
“Google Podcast includes everything that a podcast listener wants. It’s simple, free, and includes valuable options like Sleep Timer, Playback speed, and more.”
- Monthly User Base: Over 30 million active users.
- Supported OS: Dedicated apps for all major OS and web presence.
5. Pandora
Pandora has over 64 million monthly active users, with a listener spending up to 24 hours/monthly on the platform. It explains that users spend up to 45 minutes on the Pandora platform tuning in to their favorite podcasts. Again, its search-based algorithms allow you to get discovered by users that like subjects and topics on which you’re creating podcasts, meaning it is simple to connect with a large user base conveniently.
Pandora only accepts podcasts via RSS feed, which should be in MP3 format. But recent notifications have shown more audio formats will be added.
However, it is vital to retain that Pandora Podcast’s team critically analyzes all submissions manually. So, it might take up to 4-6 weeks for your first Podcast to appear on the platform.
- User Review of Pandora Podcast
“Pandora Podcasts recommendations are a blessing for me, who always finds it confusing to locate the right episode to spend my time on.”
- Monthly User Base: Over 64 million active users.
- Supported OS: Dedicated apps for all major OS and web presence.
6. Audible
Although popular among audiobook lovers, Audible has a considerable podcast following too. Its monthly active user base is around 41 million. The biggest benefit of registering your Podcast on the Audible directory of podcasts is that it connects with users who use Alexa to discover new podcasts.
Besides Audible, the Podcast will also be available for users of the Amazon Music app. That means you can connect with even more users via one submission only. Not to forget, Amazon Prime Video (a massive following) users get a free subscription to Amazon Music, so there’s a perfect chance that you will connect with users conveniently.
It is important to note that both Amazon Music and Audible offer podcasts for entirely free to users, so a more extensive user base prefers these platforms over paid platforms.
- User Review of Pandora Podcast
“You get to listen to any audiobook in the “included” library no matter which subscription you purchase..”
- Monthly User Base: Over 64 million active users.
- Supported OS: Android, iOS,
7. NPR One
With an average listener spending up to 145 minutes weekly, the NPR One podcast directory is one of the best podcast directories you can trust to submit your show online. The podcast directory has a userbase of over 500 thousand users globally, and
- User Review of NPR One Podcast
“I’ve been using this app for years now. It’s been my trusty companion to give me the news. I primarily use it with the sleep timer. I’m not a super picky consumer, especially when I don’t pay for the app!
But for many months now, the sleep timer will frequently think the time is up and shut off the player well before it should. The player will often shut off within 5 minutes of using the 30 min sleep timer. It’s annoying to open the player hit resume, and reset the sleep timer.”
- Monthly User Base: 500 thousand
- Supported OS: Android, iOS
8. Tune In
Technically, TuneIn is a radio. But lately, it has become prevalent amongst podcast listeners to find their favorite shows and also listen to music. The podcast directory has a global user base of over 75 million and a monthly visit of 7million+, which makes it a great spot for any podcaster to publish their show.
- User Review of Tune In Podcast
“I’ve been using the app for 4 years. I like it, but there are some annoying “features.”
the screen won’t time out when the app is active.
the developers must have recently made a change. I used to search through my list of “recent” (there were about 20) to look for new episodes of my favorite podcasts.
Now, the app only allows me to see the last four podcasts or stations I have listened to. So it is not helpful.’
- Monthly User Base: Over 7 million active users
- Supported OS: Dedicated apps for all major OS and web presence.
9. Podcast Addict
With over 10 million downloads on Google Playstore, Podcast Addict is one of Android’s most popular podcast apps. You can publish your podcast show, as it allows you to connect with the ideal audience quickly and easily.
Also, Podcast Addict is one of the few podcast directories available in various languages, including French and German. So it’s a perfect choice non-English podcasters.
- User Review of PodcastAddit
**”**Been using this for years. It does everything I could ever want when listening/ referencing/ re-listening to my favorite podcasts and a lot more.
I’ve suffered through having to use other podcast players (e.g., listening to something “exclusive”), but I couldn’t stand the inane simplicity of other players long enough to finish their content.
Also, it takes a bit to get used to (especially if you’re coming from other stripped-down players), but very worth the small effort for a powerful app.”
- Monthly User Base: Over 750 thousand active users.
- Supported OS: Dedicated Android App and web presence.
10. RadioPublic
Having been in the game for over 15 years, RadioPublic is another excellent podcast directory you can count on to submit your show. Although the platform does not have a massive user base compared to its competitors, it will help you grow your listeners and business by getting your podcast show to the right audience.
On RadioPublic, an average listener spends up to 72 minutes every day finding new podcast shows and listening to new episodes from their favorite podcasts. And given that the platform offers many robust features, listeners can enjoy a seamless listening experience on any device.
Overall, the RadioPublic podcast directory offers you a smart way to publish your show and grow your audience without going through stress.
- User Review of RadioPublic
“Glad I waited a while to find a podcast website provider. Starting from scratch in WordPress seemed too much hassle. Luckily the site came along while I was dithering about what to do.
The RadioPublic team onboarded the other 5 billion podcasts as one of the first examples, and I’m delighted to have chosen this option. Already, my pod site feels “complete” to look at, and more features are coming soon that will help with marketing, understanding listeners, and building a podcast brand.”
- Monthly User Base: Over 300 Thousand active users
- Supported OS: Dedicated apps for all major OS and web presence.
11. Overcast
Overcast is a dedicated podcast app for Apple devices, and what makes it a great podcast directory is that it offers unique features that attract many listeners.
On this platform, you’ll be allowed to display advertising slots, enabling listeners to subscribe to your podcast show within a few clicks. Plus, unlike many of its competitors, listeners have control over what podcast show is displayed in the featured podcast section. It is helpful as it lets listeners quickly discover every new episode you publish.
Overall, many incredible features make Overcast a good choice, and chances are your Podcast will get to real listeners when you publish them here.
- User Review of Overcast
**”**Nice alternative to Apple’s. I’ve been well pleased so far. It isn’t always the most intuitive, but I’ve eventually figured out how to achieve almost everything I’ve wanted to. The benefits of adding a show via RSS have become immediately clear.
Being a subscriber to a show and getting early access episodes and bonus material right in my podcast manager makes it easy to stay up with all my shows.”
- Monthly User Base: Over 70 Thousand active users.
- Supported OS: Dedicated app for iOS and web presence.
12. Pocket Casts
If you’re looking for a free podcast directory to publish your Podcast show, Pocket Casts is the ideal one for you. This podcast directory is packed with many rich features that podcasters will find very helpful. In addition, thanks to its beautifully designed website interface, you won’t find the platform difficult to use.
Besides, many listeners love Pocket Podcasts as it offers them incredible features—for example, improved discovery options, playback speed options, and lots more. In addition, they’ve enhanced how they find and listen to podcasts on the platform. You can’t go wrong publishing your show on a platform like this one.
- User Review of Pocket Casts
“Wonderful app, the most reliable one I’ve found. Even with accounts, most others lose all your progress data which hasn’t happened once with this, and I’ve switched phones 3 times. The progress tracker is so accurate you can pause on one device, open the same account and continue listening. Most apps can’t even keep things downloaded. Search does take a minute but finds stuff no other app does.”
- Monthly User Base: Over 1 Million active users.
- Supported OS: Dedicated apps for all major OS and web presence.
13. CastBox
CastBox is another unique podcast directory that podcasters trust to publish their show online. The platform boasts an optimized SEO and artificial intelligence that lets listeners find new podcast shows. Thanks to its massive user base of up to 20 Million users, your Podcast could reach a wide range of audiences quickly and easily.
Also, CastBox offers social media features that allow listeners to comment and share your podcast show on their social media page, thus helping you get your show to more listeners and potentially increase your fanbase.
- User Review of CastBox
“I’ve been a podcaster for years and an avid podcast listener for a while. So I searched high and low for the best podcast app and distribution service, Castbox. They have a great app and website, a huge content library, and a superb feature set. Also, their app allows offline listening, as I can download my favorite podcast show.”
- Monthly User Base: Over 1 million active users
- Supported OS: Dedicated apps for all major OS and web presence.
14. Stitcher
Last but not least podcast directory on our list is Stitcher. The platform boasts more than 14.5 Million active listeners, with an average listener having up to 25 hours of listening duration per month.
Stitcher helps you alleviate the stress of getting your show to the right audience, and thanks to the platform’s easy podcast submission requirements, you only need to have at least one podcast episode on your RSS Feed to get approved.
Also, Stitcher offers a unique analytic tool that allows you to track the performance of your show on the platform, and what more impressive is that it’s integrated into more than fifty car models. In addition, it works with any vehicle that supports Apple’s CarPlay and Android Auto, which makes it a great choice for podcasters who believe their audience loves to listen to their show while driving.
- User Review of Stitcher
“So glad I switched! I have my podcasts but didn’t listen to them much - partially because Apple Podcasts is so hard to use. I switched to Stitcher to listen to The Magnus Archives, and I love it!”
- Monthly User Base: Over 1.5 million active users.
- Supported OS: Dedicated apps for all major OS and web presence.
Part 3. More choices to submit your podcast shows
The above Podcast directories are great choices you can always count on any day. However, if you’re looking for more options, the following are reliable podcasting directories to choose from;
Part 4. How to submit a show to podcast directories?
Submitting a podcast show to podcast directories is pretty simple. Here, we used Spotify as an example to show you how you can easily submit your podcast show within a few clicks. The steps are as follows;
Step1 Create a Spotify account using the email attached to your podcast host.
Step2 Open Spotify for Podcasters in your browser and login into your account. Then, click Get Started on the new screen.
Step3 Provide your Podcast’s RSS Feed and click Next to proceed.
Step4 You’ll be asked to add information about your Podcast, from its description to the title, artwork, etc.
Step5 Verify the Podcast by submitting the code sent to your email.
Step6 Review the information you’ve provided so far and submit it to Spotify for review.
Once you complete the steps, keep an eye on the submitted Podcast, as Spotify won’t message you even if your Podcast has been published.
Hot FAQs on Podcast Directories
1. Are podcast directories free?
Almost all top podcast directories are entirely free for creators. All you have to do is sign up on the platforms. Then, check the platform’s requirements to submit your podcast episodes, like the format, cover photos, and description. Of course, the requirements vary depending on the platform.
2. Can any podcast be on a directory of podcasts?
Yes, you can choose from any podcast directory to publish your Podcast. There’s no limitation. When submitting, you must select the ideal category for your podcast show so it can be displayed to the right audience.
3. Does it cost to join a podcast directory?
Yes, and the cost of joining a podcast directory varies depending on your platform.
Conclusion
The podcast directories introduced above are reliable for submitting podcast shows. So, chances are there, no matter what your podcast show is about. It’ll help you connect with the right audience. However, one thing is vital you need to make sure you choose the podcast directory that suits you.
Also read:
- Updated 2024 Approved Transform Your Skype Speech Patterns with These 5 Must-Have Voice Change Tools
- New 2024 Approved ONLINE MP3 CUTTER AND JOINER
- Updated 2024 Approved Free & Value-Oriented Mac Audio Editing Suite
- The Freestyle Audio Editors Guide to the Top 12 Tools Without a Price Tag for 2024
- Updated Unlocking the Potential of Sound in Animated Windows GIF Creations for 2024
- 2024 Approved Achieving Pure Acoustics Online Approaches to Dissipate Digital Background Noise
- Updated In 2024, Cutting the Waves A Review of Best Free & Paid Linux Audio Editors
- Complete Directory Assortment of Podcast Resource Centers for 2024
- Updated 2024 Approved The Ultimate Guide to Podcasting Leveraging the Power of Audacity
- Essential List of Best No-Price-Tag Open-Source Audio Cutters for PC Users for 2024
- New 2024 Approved Step-by-Step Tutorial for Incorporating Soundtracks in Adobe After Effects
- In 2024, The Future of Film Fidelity Innovative Techniques to Enhance Your Home Audio
- Updated In 2024, The Top 7 Techniques for Adding Humor Through Vocal Modification on the Phone
- Updated 2024 Approved Best Song Finder Apps to Recognize Music on Android
- Updated Your Complete Reference to iPhone Sound Recording Capabilities for 2024
- Updated 2024 Approved The Comprehensive Technique for Merging Diverse Auditory Elements
- New 10 Leading Alternatives for Interacting and Networking in Cyberspace for 2024
- In 2024, Most Affordable Mac Audiophiles Editing App
- New In 2024, Acoustic Enhancements for Podcasts Top Locations for Sound Libraries
- Updated 2024 Approved A Guide to Optimal Mac-Compatible Audio Data Labelers
- In 2024, The Definitive Guide to Android and iOS Voice Amplifiers During Calls
- In 2024, The Audio Experts Manual to Identifying Superior Sound Formats
- Updated Steps for Integrating Soundtracks Into MKV Format (MKV v2.0.2 Release)
- Updated How To Record Your Computer Audio in Audacity for 2024
- Updated 2024 Approved The Ultimate Guide 10 Superior Sound Recording Programs
- In 2024, Basic Vocal Transformation Techniques Summary of Features and Alternative Solutions
- Updated Comprehensive Guide to Attaching Audios in Magix Movie Editor 2023
- Cutting Out Clutter Strategies to Refine Audible Landscapes with Web-Based Audio Processors
- 2024 Approved A Guide to the Premier 8 Sounds for YouTube Launches and Introduction Scenes
- Updated Find Monster Sounds Effect for 2024
- New Innovative Insights A Curated List S Pivotal Social Media and Marketing Podcasts
- 2024 Approved Key Considerations to Put Together an Invaluable Audiovisual Treasure Trove on YouTube
- In 2024, Compilation of Top Soundscapes Adopting the Perfect Audio Accompaniment for Your Montage Creation
- New Extracting Silence How to Delete Sound From MP4/MKV/AVI/MOV Videos for 2024
- 2024 Approved Polishing Your Projects Soundtrack Effective Methods for Removing Unwanted Audio Noise in VideoWorks Pro
- New Enhancing Film Production Adding Audio Elements in Magix Pro 2023 Edition for 2024
- How to Change Location on TikTok to See More Content On your Realme 10T 5G | Dr.fone
- Itel P55+ Not Connecting to Wi-Fi? 12 Quick Ways to Fix | Dr.fone
- In 2024, Complete Tutorial to Use VPNa to Fake GPS Location On Apple iPhone 12 | Dr.fone
- Updated In 2024, 8 Reliable Online Tools to Convert Facebook Videos to MP3
- New What Makes a Great Video to Audio Converter? Key Features to Look For
- In 2024, How To Unlock Cricket Apple iPhone 15 for Free
- How to Change Google Play Location On Xiaomi Redmi 13C 5G | Dr.fone
- Movavi Video Editor Plus Review for 2024
- 9 Solutions to Fix Infinix Hot 30i System Crash Issue | Dr.fone
- How to Change Lock Screen Wallpaper on Tecno Spark 20
- In 2024, 4 Ways to Transfer Music from Samsung Galaxy S23 FE to iPhone | Dr.fone
- In 2024, Where Is the Best Place to Catch Dratini On Oppo A79 5G | Dr.fone
- What is Fake GPS Location Pro and Is It Good On HTC U23? | Dr.fone
- In 2024, Full Guide to Unlock Apple iPhone 14 Pro with iTunes | Dr.fone
- Unlock Itel S23+ Phone Password Without Factory Reset Full Guide Here
- 5 Easy Ways to Change Location on YouTube TV On Infinix Zero 5G 2023 Turbo | Dr.fone
- Updated Top-Rated Free MOD Video Editing Tools 2023 Update
- In 2024, Latest way to get Shiny Meltan Box in Pokémon Go Mystery Box On Samsung Galaxy XCover 7 | Dr.fone
- 9 Solutions to Fix Honor Magic 5 Lite System Crash Issue | Dr.fone
- Title: New Mastering Tempo Adjustment in Songs without Shifting Tonal Accuracy for 2024
- Author: Paul
- Created at : 2024-05-05 05:57:27
- Updated at : 2024-05-06 05:57:27
- Link: https://voice-adjusting.techidaily.com/new-mastering-tempo-adjustment-in-songs-without-shifting-tonal-accuracy-for-2024/
- License: This work is licensed under CC BY-NC-SA 4.0.
