
:max_bytes(150000):strip_icc():format(webp)/GettyImages-534572567-56facec43df78c784197b92d.jpg)
New Mastering Silence Techniques for Eliminating Sibilance in Recordings
Mastering Silence: Techniques for Eliminating Sibilance in Recordings
Creating content can be fun most of the time. The shoot is perfect and the scenes are spotless. You are confident that you got everything right. But then, when you listen to the recording, you notice a continuous hissing sound. This takes you back as you have to decide to remove hiss from audio before editing the video. Luckily, several hiss removal approaches will work just fine. In this article, we take you through the audio cleanup process to help you with your hiss reduction efforts.
AI Vocal Remover A cross-platform for facilitating your video editing process by offering valuable benefits!
Free Download Free Download Learn More

Part 1. Audio Hiss: What is it and Why Remove it
A hiss is a broadband noise across the audible spectrum of your audio. It becomes more intense in high frequencies, affecting the quality of the vocals and instrumentals in your audio. A hiss could sound like blue noise and is often caused by the electronic components themselves, which is referred to as self or inherent noise.

A hiss is measured by decibels and is usually difficult to avoid because it is produced by electronic components. You will usually hear the hiss as air that is getting out of a narrow passage. You may also hear a reverb, which is a sound that occurs in space and sends sound waves out in all directions. Since this is a component of the original recording, it is impossible to delete it. However, hiss reduction is possible with the right editing software.
Causes of Hiss in Audio Recordings
- Electronic components such as microphones, video cameras, and interfaces create self-noise because of the heat energy created by the moving parts
- Audio circuits generate self-noise, with the noise floor being the level of the inherent noise in the circuit
- Screening and quality of electronic components, which cheap and poorly made equipment producing more hiss
- Poor-quality audio cables contribute to hiss and hum when they are picked up during recording
Importance of Removing Hiss for a Professional Sound
Removing hiss from audio is important for a professional sound because it makes the sound clearer and polished. The polished sound leads to
- Improved clarity and focus on the main vocals or instruments in a recording sound
- A more professional and smooth sound
- Increases listener engagement
- More understandable vocals and more vibrant instrumentals
Part 2. Remove Hiss from Audio With Premiere Pro: Step-by-Step Guide
When you discover hiss or reverb sound in your recordings, you may use professional video editing software to reduce it. Audacity remove hiss is a good option when you are on a budget. However, it may take longer and require more effort to reduce hiss with the software. Another great and effective approach is to remove hiss Premiere Pro. The software removes hisses, background noises, and low ambient noises in your recording. Let’s explore the steps you need to take:
Step 1: Set Up Your Project
Once you have downloaded and installed Adobe Premiere Pro, launch it on your desktop. Import the audio files with background noise or hiss.

Go to File, then import and select the files you want from your computer. Another way is to drag and drop those files from your computer’s folder onto the Premiere Pro. Then create a new sequence by right-clicking on the files and selecting New Sequence or drag the files into the Timeline.
Step 2: Add the DeNoise Effect
Hiss removal on Premiere Pro is made possible by the denoise effect. On the Windows menu, find effects and make sure the DeNoise has a checkmark on it. All the effects available are accessible on the Effects tab from the project panel. Type DeNoise in the search box, click and drag it to the audio track, then play the audio to listen to the effect in action.

Step 3: Adjust Settings
When you add an effect to your clicks, it shows in the Effects Control panel. Adjust the custom settings of the DeNoise effect until it sounds just right. Open the Clip Fx Editor from the Custom Setup to modify the amount of DeNoise you want to apply. The Gain slider and presets allow you to make appropriate adjustments.

Step 4: Repair the Audio
Using the Essential Sound Panel, repair the audio appropriately. The panel offers tools for removing background hisses and noises affecting your recording. With those simple 4 steps, you will reduce hiss in your recording and make your audio clearer.
Part 3. Remove Hiss from Audio with Wondershare Filmora : Quick Alternative
Wondershare Filmora is a great video editing software with great audio capabilities. When removing reverb and hiss in your audio, the AI Audio DeNoise feature automates the process. Filmora combines AI algorithms, helping you to remove different kinds of background noises in video and audio files. There is also a wide range of features that make editing with Filmora a breeze. With the AI Copilot, you have a virtual friend to help you in every step of your editing journey.
Free Download For Win 7 or later(64-bit)
Free Download For macOS 10.14 or later
AI Audio Denoise
Removing hiss and other background noises with Filmora is quick and easy with the AI Audio DeNoise feature. The AI DeNoise features offer several benefits that automatically improve the quality of your audio:
- Removing Background Noise Accurately: Users have three noise reduction options to use separately or combined for accurate noise reduction. The first is AI Voice Enhancement which increases the voice in low volume, removing a small amount of background noise. Then you have Reverb Reduction which reduces audio reverberation to improve the clarity of voice in reverberant environments like empty halls. The other option is Hiss Reduction which removes electrical noise from audio transmission and recording devices.
- Clean up Audio: The AI-powered feature reduces background noise easily and efficiently. Save more time editing your files while improving the audio quality.
- Meet Needs of Multiple Scenes: By reducing or removing noise from your video, the AI Audio DeNoise feature helps you produce quality videos and audio for all scenarios. You can edit the audio specifically for a podcast, an online meeting, or even online courses.
To remove hiss and reverb from audio with Filmora, follow these simple steps:
Step 1Import and Select the Audio File
Once you launch Filmora, import your audio or video files to Filmora and add them to the Timeline. Then click on the clip you want to remove the noise and the audio settings window will appear.

Step 2Adjust Audio Appropriately
Adjust the audio denoise functions to improve the quality of the audio. This includes the hiss reduction, reverb reduction, and voice enhancement. This will improve the overall quality of your audio.

Part 4. Tips and Tricks to Avoid Hiss and Reverb Noise
The problem of hissing sound and reverb noise usually comes from the equipment itself. However, some background noise may add to the problem. Making a few adjustments to the recording stage may help in reducing hiss and background noise:
- Optimize the Recording Space
The noise-producing items in your recording space may add to the hissing noise in your audio. While most of the noise may seem innocent, they may amplify themselves when listening to the recorded footage. Optimizing your space before you start, such as closing the windows and doors or turning off your electronic devices will help to reduce the noise.
- Reduce Subject-to-Microphone Distance
Keeping the microphone as close as possible to the subject will drastically improve the speech-to-noise ratio. The microphone will record more of the subject’s voice than the background noise, giving you a clearer audio output.
- Use a Microphone with Gain-Boost
An enhanced gain microphone preamp helps to reduce hiss and notice from the audio in an incredible way. Specifically, the camera’s preamplifier does not add gain because the volume setting is kept low.
- Use Directional Microphones
Usually, microphones signal outside their axis. This is often the case for cardioid polar and short gun patterns. This quality is great for reducing noise when you use directional microphones. The microphone will only focus on what you are interested in, ignoring the background noise.
- Turn Off Camera’s Auto-Gain
The AGC or Auto Gain Control feature is popular in modern cameras. It automatically adjusts the gain for low- and high-volume sounds to make them even. However, it can enhance everything for a quiet setting, causing hissing background noise. Turning the feature off gives you more control over what sounds to focus on.
- Reduce the Number of Open Microphones
Open microphones will continue recording audio even when you are not interested in that sound. Keeping this number low will help reduce hissing sound by focusing only on what you are recording.
Conclusion
Hiss and reverb background noise is an annoying problem. The unwanted sounds affect the quality of your audio and the level of engagement in your footage. While eliminating causes of hiss when recording is the best way to reduce it, sometimes you may notice when it is too late. Using the right editing software will help you reduce the noise and improve the quality of your audio. Wondershare Filmora allows you to do this with the AI Audio Denoise feature. The AI-powered feature will automatically reduce hiss noise and reverb in your clips, giving you clearer and more engaging audio.
Free Download Free Download Learn More
Part 1. Audio Hiss: What is it and Why Remove it
A hiss is a broadband noise across the audible spectrum of your audio. It becomes more intense in high frequencies, affecting the quality of the vocals and instrumentals in your audio. A hiss could sound like blue noise and is often caused by the electronic components themselves, which is referred to as self or inherent noise.
A hiss is measured by decibels and is usually difficult to avoid because it is produced by electronic components. You will usually hear the hiss as air that is getting out of a narrow passage. You may also hear a reverb, which is a sound that occurs in space and sends sound waves out in all directions. Since this is a component of the original recording, it is impossible to delete it. However, hiss reduction is possible with the right editing software.
Causes of Hiss in Audio Recordings
- Electronic components such as microphones, video cameras, and interfaces create self-noise because of the heat energy created by the moving parts
- Audio circuits generate self-noise, with the noise floor being the level of the inherent noise in the circuit
- Screening and quality of electronic components, which cheap and poorly made equipment producing more hiss
- Poor-quality audio cables contribute to hiss and hum when they are picked up during recording
Importance of Removing Hiss for a Professional Sound
Removing hiss from audio is important for a professional sound because it makes the sound clearer and polished. The polished sound leads to
- Improved clarity and focus on the main vocals or instruments in a recording sound
- A more professional and smooth sound
- Increases listener engagement
- More understandable vocals and more vibrant instrumentals
Part 2. Remove Hiss from Audio With Premiere Pro: Step-by-Step Guide
When you discover hiss or reverb sound in your recordings, you may use professional video editing software to reduce it. Audacity remove hiss is a good option when you are on a budget. However, it may take longer and require more effort to reduce hiss with the software. Another great and effective approach is to remove hiss Premiere Pro. The software removes hisses, background noises, and low ambient noises in your recording. Let’s explore the steps you need to take:
Step 1: Set Up Your Project
Once you have downloaded and installed Adobe Premiere Pro, launch it on your desktop. Import the audio files with background noise or hiss.
Go to File, then import and select the files you want from your computer. Another way is to drag and drop those files from your computer’s folder onto the Premiere Pro. Then create a new sequence by right-clicking on the files and selecting New Sequence or drag the files into the Timeline.
Step 2: Add the DeNoise Effect
Hiss removal on Premiere Pro is made possible by the denoise effect. On the Windows menu, find effects and make sure the DeNoise has a checkmark on it. All the effects available are accessible on the Effects tab from the project panel. Type DeNoise in the search box, click and drag it to the audio track, then play the audio to listen to the effect in action.
Step 3: Adjust Settings
When you add an effect to your clicks, it shows in the Effects Control panel. Adjust the custom settings of the DeNoise effect until it sounds just right. Open the Clip Fx Editor from the Custom Setup to modify the amount of DeNoise you want to apply. The Gain slider and presets allow you to make appropriate adjustments.
Step 4: Repair the Audio
Using the Essential Sound Panel, repair the audio appropriately. The panel offers tools for removing background hisses and noises affecting your recording. With those simple 4 steps, you will reduce hiss in your recording and make your audio clearer.
Part 3. Remove Hiss from Audio with Wondershare Filmora : Quick Alternative
Wondershare Filmora is a great video editing software with great audio capabilities. When removing reverb and hiss in your audio, the AI Audio DeNoise feature automates the process. Filmora combines AI algorithms, helping you to remove different kinds of background noises in video and audio files. There is also a wide range of features that make editing with Filmora a breeze. With the AI Copilot, you have a virtual friend to help you in every step of your editing journey.
Free Download For Win 7 or later(64-bit)
Free Download For macOS 10.14 or later
AI Audio Denoise
Removing hiss and other background noises with Filmora is quick and easy with the AI Audio DeNoise feature. The AI DeNoise features offer several benefits that automatically improve the quality of your audio:
- Removing Background Noise Accurately: Users have three noise reduction options to use separately or combined for accurate noise reduction. The first is AI Voice Enhancement which increases the voice in low volume, removing a small amount of background noise. Then you have Reverb Reduction which reduces audio reverberation to improve the clarity of voice in reverberant environments like empty halls. The other option is Hiss Reduction which removes electrical noise from audio transmission and recording devices.
- Clean up Audio: The AI-powered feature reduces background noise easily and efficiently. Save more time editing your files while improving the audio quality.
- Meet Needs of Multiple Scenes: By reducing or removing noise from your video, the AI Audio DeNoise feature helps you produce quality videos and audio for all scenarios. You can edit the audio specifically for a podcast, an online meeting, or even online courses.
To remove hiss and reverb from audio with Filmora, follow these simple steps:
Step 1Import and Select the Audio File
Once you launch Filmora, import your audio or video files to Filmora and add them to the Timeline. Then click on the clip you want to remove the noise and the audio settings window will appear.
Step 2Adjust Audio Appropriately
Adjust the audio denoise functions to improve the quality of the audio. This includes the hiss reduction, reverb reduction, and voice enhancement. This will improve the overall quality of your audio.
Part 4. Tips and Tricks to Avoid Hiss and Reverb Noise
The problem of hissing sound and reverb noise usually comes from the equipment itself. However, some background noise may add to the problem. Making a few adjustments to the recording stage may help in reducing hiss and background noise:
- Optimize the Recording Space
The noise-producing items in your recording space may add to the hissing noise in your audio. While most of the noise may seem innocent, they may amplify themselves when listening to the recorded footage. Optimizing your space before you start, such as closing the windows and doors or turning off your electronic devices will help to reduce the noise.
- Reduce Subject-to-Microphone Distance
Keeping the microphone as close as possible to the subject will drastically improve the speech-to-noise ratio. The microphone will record more of the subject’s voice than the background noise, giving you a clearer audio output.
- Use a Microphone with Gain-Boost
An enhanced gain microphone preamp helps to reduce hiss and notice from the audio in an incredible way. Specifically, the camera’s preamplifier does not add gain because the volume setting is kept low.
- Use Directional Microphones
Usually, microphones signal outside their axis. This is often the case for cardioid polar and short gun patterns. This quality is great for reducing noise when you use directional microphones. The microphone will only focus on what you are interested in, ignoring the background noise.
- Turn Off Camera’s Auto-Gain
The AGC or Auto Gain Control feature is popular in modern cameras. It automatically adjusts the gain for low- and high-volume sounds to make them even. However, it can enhance everything for a quiet setting, causing hissing background noise. Turning the feature off gives you more control over what sounds to focus on.
- Reduce the Number of Open Microphones
Open microphones will continue recording audio even when you are not interested in that sound. Keeping this number low will help reduce hissing sound by focusing only on what you are recording.
Conclusion
Hiss and reverb background noise is an annoying problem. The unwanted sounds affect the quality of your audio and the level of engagement in your footage. While eliminating causes of hiss when recording is the best way to reduce it, sometimes you may notice when it is too late. Using the right editing software will help you reduce the noise and improve the quality of your audio. Wondershare Filmora allows you to do this with the AI Audio Denoise feature. The AI-powered feature will automatically reduce hiss noise and reverb in your clips, giving you clearer and more engaging audio.
Speedy Sound Alteration Techniques for Audio Files
If you have a music file, and you notice that it is a bit slow or fast, making the entire ambiance kind of dull or overly exciting respectively, you can change audio speed to get the track right as per your mood. However, when you make any such adjustments, some unwanted effects can be experienced, such as format limitations while exporting, changes in the pitch of the sound, etc.
That said, here, you will learn how to change audio speed with the least adverse effects using some of the most popular and highly recommended tools.
How to Change Audio Speed in Filmora
Being a lightweight and less resource-intensive post-production tool, Filmora is admired by several professionals across the globe and is many times preferred over other editing programs like Adobe Premiere Pro and Final Cut Pro X. Easy-to-understand UI and large-sized, clearly visible options and buttons are what make Filmora extremely popular among those who are new to the industry and don’t have a computer with a powerful processor, gigantic memory, and enormous GPU.
For Win 7 or later (64-bit)
For macOS 10.12 or later
You can follow the steps given below to learn how to change audio speed with Wondershare Filmora:
Step 1: Import Audio and Add to Filmora Timeline
Launch Filmora on your Windows or Mac computer, make sure that the Media icon is selected from the standard toolbar at the top, click the + icon in the Media (also referred to as Library here) window (on Mac) or anywhere in the Media window itself (on Windows) from the upper-left corner of the interface, and import the audio file that you want to manage the playback speed of. Next, drag the media file from the Library to the timeline.

Step 2: Increase or Decrease Audio Speed
Ensure that the audio track is selected in the timeline. Click the Speedometer icon from the timeline toolbar at the upper section, hover mouse to the Slow option from the menu, and click your preferred value form the submenu to reduce the sound speed. Likewise, hover the mouse to the Fast option, and choose a value from the submenu to increase it.

Note: Usually, the audio pitch wouldn’t change as long as you pick the values anywhere between 0.5x and 5x. However, if you select any option beyond this range, you may experience variations in the pitch according the value you selected.
Step 3: Set Custom Speed or Reverse the Audio
Click the Speedometer icon from above the timeline, and click Custom Speed from the menu. Use the slider to slow down (move to the left) or speed up (move to the right) the audio on the Custom Speed box. Alternatively, you can manually enter your preferred value in the available field for granular control. In addition, you can also check the Reverse Speed box to reverse the audio if need be.

Step 4: Export the Output
Click EXPORT from the top-center area of the interface, go to the Local tab on the Export box that opens next, select your preferred audio format from the Format list in the left, make necessary customizations from the right pane, and click EXPORT from the bottom-right corner of the box to export the audio with the modified speed.

How to Change the Speed of Audio with Video in Filmora
The process to change audio speed that also has a video is identical to what is explained in the previous section. The only additional step required in this case is separating the audio track from that of video.
You can learn how to get this done by following the instructions given below:
Step 1: Import File to Media Window and then Add to Timeline
Use the method explained in Step 1 of the previous section to import a file to Filmora, drag the media to the timeline, and click MATCH TO MEDIA when the Project Setting box appears and prompts for confirmation. Note: Except for the Project Setting box, the rest of the process for adding audio and video files to the timeline is the same.
Step 2: Separate Audio from Video
Select and then right-click the video track with audio in the timeline, and click Detach Audio from the context menu.

Step 3: Adjust the Audio Speed
After the audio is detached, you can select the audio track and follow the method explained in the previous section to adjust its speed as needed. As for the video, you can use the trimming and cropping options to adjust its duration and size and export the entire project as explained in Step 4 of the previous section. Note: To export the project as video, all you need to do is, choose a video format like MP4 or something similar to that when on the Export box.
How to Change Audio Speed without Changing Pitch in Audacity for Free
One of the most downloaded, used, and admired applications, Audacity, is an open-source and free audio editing software available for Windows, Mac, and Linux computers in both x32 and x64 variants. The software has all the professionals’ tools for basic to advanced sound editing to produce industry-standard outputs.
You can follow the steps given below to learn how to change audio speed with Audacity without changing the pitch of the sound:
- Launch Audacity
- Click File
- Go to Import > Audio

- Import the audio you want to speed up or slow down
- Press Ctrl + A on the keyboard to select the whole audio track
- Go to the Effect menu
- Click Change Tempo

- In the Percent Change field, enter a value with or without minus (-) to reduce or increase the tempo of the audio respectively.

- Click OK
- Go to file> Export
- Select your preferred option from the submenu to export the modified audio as needed
Note: Changing the tempo usually doesn’t change the pitch of the audio up to some extent. However, you can expect some variations in the pitch if the new tempo value is too high or too low.
Conclusion
You may want to slow down or speed up audio if the existing one is not up to the mark, and you wish to manage the ambiance with the help of the music track either while playing a video or when merely a soundtrack is to be played during some event. In either case, the best tool for all your needs is Wondershare Filmora, and if you are looking for a program dedicated to audio only, Audacity is something worth trying.
Versatile Video Editor - Wondershare Filmora
An easy yet powerful editor
Numerous effects to choose from
Detailed tutorials provided by the official channel
For Win 7 or later (64-bit)
For macOS 10.12 or later
You can follow the steps given below to learn how to change audio speed with Wondershare Filmora:
Step 1: Import Audio and Add to Filmora Timeline
Launch Filmora on your Windows or Mac computer, make sure that the Media icon is selected from the standard toolbar at the top, click the + icon in the Media (also referred to as Library here) window (on Mac) or anywhere in the Media window itself (on Windows) from the upper-left corner of the interface, and import the audio file that you want to manage the playback speed of. Next, drag the media file from the Library to the timeline.
Step 2: Increase or Decrease Audio Speed
Ensure that the audio track is selected in the timeline. Click the Speedometer icon from the timeline toolbar at the upper section, hover mouse to the Slow option from the menu, and click your preferred value form the submenu to reduce the sound speed. Likewise, hover the mouse to the Fast option, and choose a value from the submenu to increase it.
Note: Usually, the audio pitch wouldn’t change as long as you pick the values anywhere between 0.5x and 5x. However, if you select any option beyond this range, you may experience variations in the pitch according the value you selected.
Step 3: Set Custom Speed or Reverse the Audio
Click the Speedometer icon from above the timeline, and click Custom Speed from the menu. Use the slider to slow down (move to the left) or speed up (move to the right) the audio on the Custom Speed box. Alternatively, you can manually enter your preferred value in the available field for granular control. In addition, you can also check the Reverse Speed box to reverse the audio if need be.
Step 4: Export the Output
Click EXPORT from the top-center area of the interface, go to the Local tab on the Export box that opens next, select your preferred audio format from the Format list in the left, make necessary customizations from the right pane, and click EXPORT from the bottom-right corner of the box to export the audio with the modified speed.
How to Change the Speed of Audio with Video in Filmora
The process to change audio speed that also has a video is identical to what is explained in the previous section. The only additional step required in this case is separating the audio track from that of video.
You can learn how to get this done by following the instructions given below:
Step 1: Import File to Media Window and then Add to Timeline
Use the method explained in Step 1 of the previous section to import a file to Filmora, drag the media to the timeline, and click MATCH TO MEDIA when the Project Setting box appears and prompts for confirmation. Note: Except for the Project Setting box, the rest of the process for adding audio and video files to the timeline is the same.
Step 2: Separate Audio from Video
Select and then right-click the video track with audio in the timeline, and click Detach Audio from the context menu.
Step 3: Adjust the Audio Speed
After the audio is detached, you can select the audio track and follow the method explained in the previous section to adjust its speed as needed. As for the video, you can use the trimming and cropping options to adjust its duration and size and export the entire project as explained in Step 4 of the previous section. Note: To export the project as video, all you need to do is, choose a video format like MP4 or something similar to that when on the Export box.
How to Change Audio Speed without Changing Pitch in Audacity for Free
One of the most downloaded, used, and admired applications, Audacity, is an open-source and free audio editing software available for Windows, Mac, and Linux computers in both x32 and x64 variants. The software has all the professionals’ tools for basic to advanced sound editing to produce industry-standard outputs.
You can follow the steps given below to learn how to change audio speed with Audacity without changing the pitch of the sound:
- Launch Audacity
- Click File
- Go to Import > Audio
- Import the audio you want to speed up or slow down
- Press Ctrl + A on the keyboard to select the whole audio track
- Go to the Effect menu
- Click Change Tempo
- In the Percent Change field, enter a value with or without minus (-) to reduce or increase the tempo of the audio respectively.
- Click OK
- Go to file> Export
- Select your preferred option from the submenu to export the modified audio as needed
Note: Changing the tempo usually doesn’t change the pitch of the audio up to some extent. However, you can expect some variations in the pitch if the new tempo value is too high or too low.
Conclusion
You may want to slow down or speed up audio if the existing one is not up to the mark, and you wish to manage the ambiance with the help of the music track either while playing a video or when merely a soundtrack is to be played during some event. In either case, the best tool for all your needs is Wondershare Filmora, and if you are looking for a program dedicated to audio only, Audacity is something worth trying.
Versatile Video Editor - Wondershare Filmora
An easy yet powerful editor
Numerous effects to choose from
Detailed tutorials provided by the official channel
A New Dawn for Music Creation: A Compilation of the Most Promising AI Composers
Top Best 10 AI Music Composers in 2024

Benjamin Arango
Mar 27, 2024• Proven solutions
Robots can’t be creative, right? A number of startups that focus on the development of artificial intelligence that is capable of composing music have proved this statement wrong. AI music composers generate original, copyright-free music you can use in your latest YouTube video or social media video ad. You don’t even have to be a sound designer or a musician to produce soundtracks for your videos with AI Music Composers, because you can upload the music that has already been recorded and create variations of it. So, let’s take a look at what AI music composers have to offer in 2024.
| 1 - Amper Music | 2 - AIVA |
|---|---|
| 3 - Jukedeck | 4 - Ecrett Music |
| 5 - Melodrive | 6 - ORB Composer |
| 7 - Amadeus Code | 8 - Humtap |
| 9 - Muzeek | 10 - Brain.fm |
Ten Best AI Music Composers You Should Know About
The AI technologies that can compose music are still relatively novel, and as time passes, they can only develop and grow further. Consequently, each of the AI music composers we featured in this article offers a different range of possibilities. Here are the ten best AI music composers you shouldn’t miss out on in 2024.
Filmora AI Music Editor
Edit Audio with AI Music Editor
Experience the power of Filmora’s AI tools and make your audio or music stand out like never before! Audio Denoise, Audio Ducking, Audio Synchronization, Audio Stretch, etc…
Try It Free Try It Free Try It Free Learn More >
1. Amper Music
Price: Available upon request
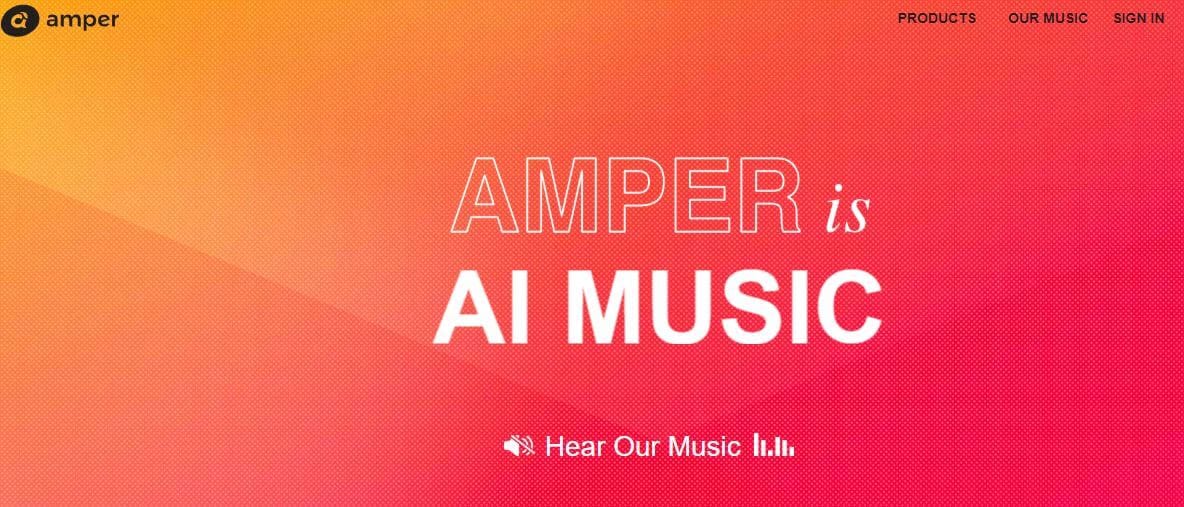
Industry professionals know just how frustrating the music licensing process can be. Amper Music is a cloud-based platform designed to simplify the process of creating soundtracks for movies and video games, as it produces AI generated algorithms that help users create music in a variety of music genres. You must first create an account on this platform, in order to be able to use the free version of Amper Music that provides only a limited amount of features. Upgrading to the pro version of Amper Music will enable you to enjoy the full potential of this rapidly growing AI Music Composer.
2. AIVA
Price: Free version available, subscription plans start from €14 p/month
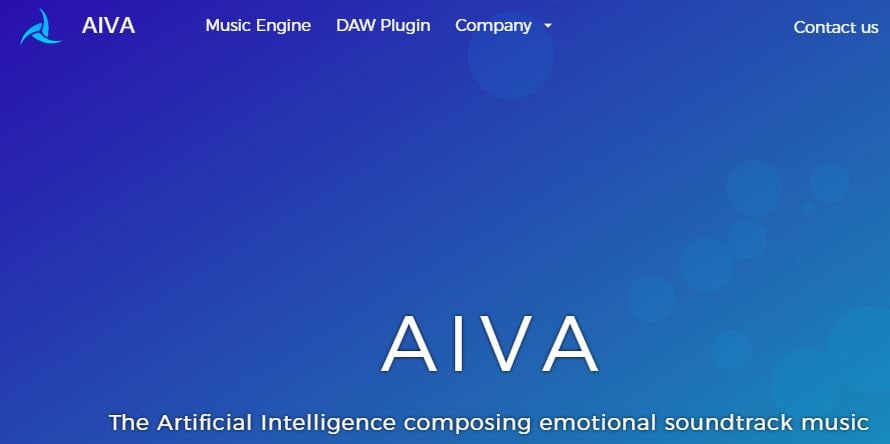
Since 2016, when AIVA Technologies was founded, its team has worked on developing an AI script that can compose emotional soundtracks for ads, video games, or movies. Soon after, the AI published its first oeuvre titled ‘Opus 1 for Piano Solo and in the subsequent years, AIVA released an album and composed music for a video game. Besides enabling its users to create music from scratch, AIVA can also be used to produce variations of existing songs. The music engine that powers this AI music composer makes the production of corporate or social media videos much easier, as it eliminates the need to go through the music licensing process.
3. Jukedeck
Price: Free version available, Pricing plans start from $0.99 per download

The AI music composer developed by the Jukedeck startup resembles the Amper’s music composer because they both rely on neural networks to analyze music data, that is then used by the AI to learn how to compose original music. Each track that is available through this AI music composer can be edited, so you can change its length or its tempo. You can create music with Jukedeck for free if you decide to give all the rights to the AI composer, while both individuals and small businesses can purchase the license to use the song created with Jukedeck for just $0.99.
Note: Jukedeck has been acquired by TikTok, and we are waiting for a new Jukedeck.
![]()
A cross-platform for making videos anywhere for all creators

Why your video editing isn’t good enough? How about some creative inspo?
- 100 Million+ Users
- 150+ Countries and Regions
- 4 Million+ Social Media Followers
- 5 Million+ Stock Media for Use
* Secure Download

4. Ecrett Music
Price: Subscription plans start at $5
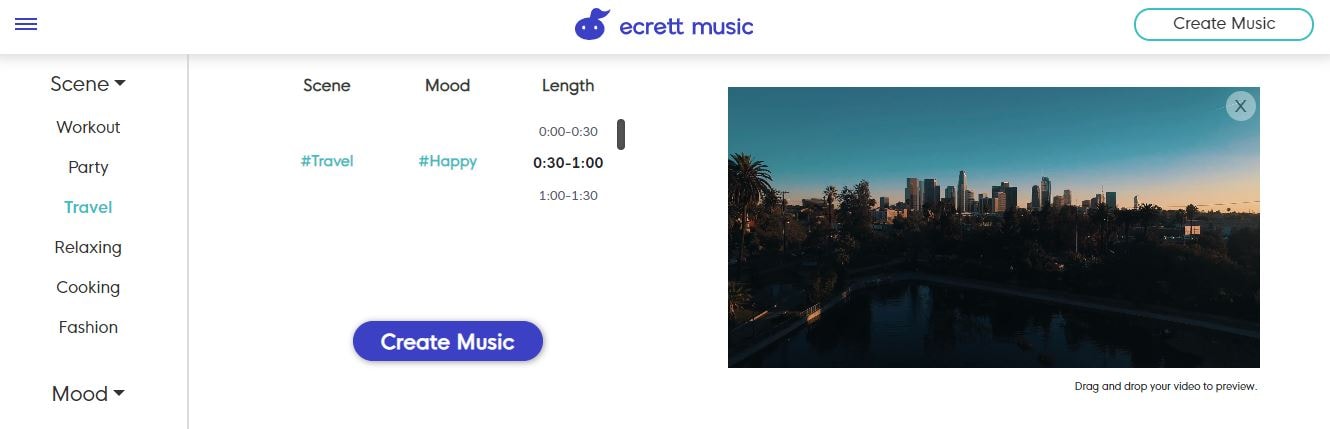
This online AI music composer makes creating stunning soundtracks for videos look easy. You just have to upload a video for which you want to generate music and select the type of scene and the mood of that scene. Party, Travel or Fashion are among the types of scenes you can choose from, while moods range from happy to serious. When done, simply click on the Create Music button, and the platform will automatically generate the soundtrack for your video. In case you are producing videos on a constant basis, you should consider purchasing one of the available subscription plans.
5. Melodrive
Price: Free
Compatibility: iOS, Windows
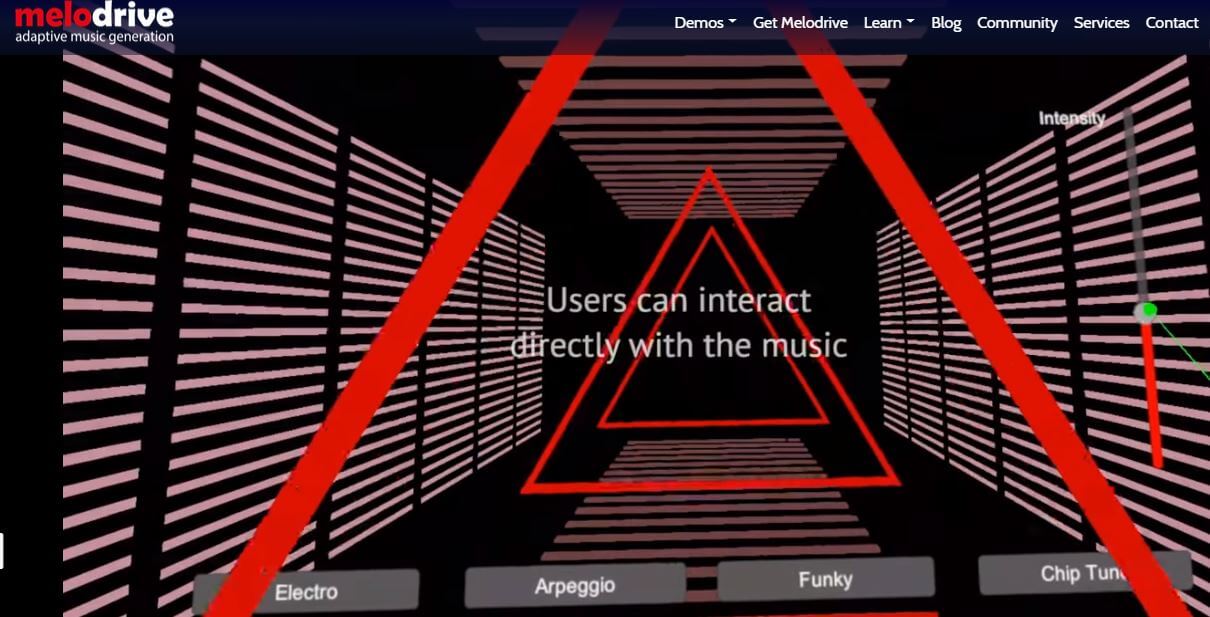
At the moment, the Lite and Indie versions of Melodrive are available for download free of charge, but the Indie version of this AI music composer still offers more options. Melodrive is one of the first AI systems that can compose emotional and unique music in real time. The AI generates music by adapting to the media environment and aims to match the mood and the style of the video. It is worth noting that Melodrive is still under development and that through time its capabilities to compose music are going to become even more refined than they already are.
6. ORB Composer
Price: Pricing plans start at $149,00
Compatibility: macOS, Windows

You can’t generate music automatically with ORB Composer, because the AI creates music based on your choices. That’s why you need to know at least the basic rules of music composition in order to be able to use the ORB Composer properly. The AI music composer comes bundled with a rich collection of chord progressions, that contains almost all chords used in popular music. This tool is aimed at artists who are interested in experimenting with the possibilities of creating music with artificial intelligence and discovering new styles of music. There are six music templates you can choose from, and you can create compositions by simply organizing different blocks of music.

Filmora AI Audio Stretcher
Wondershare Filmora - AI Audio Stretcher
• Retime any audio track to fit the duration of your video almost instantly.
• Rearrange songs without quality loss.
• Cross-platform supported - (Windows, Mac, iOS, Android)
Start Audio Stretch Start Audio Stretch Start Audio Stretch Learn More >
7. Amadeus Code
Price: Free, but the app offers in-app purchases
Compatibility: iOS
Both skilled musicians and music enthusiast can use this iOS-based app to create new melodies in just a few minutes. The AI engine that the Amadeus Code uses contains chord progressions of some of the most famous songs ever created and it let you use them to create new and innovative structures of music compositions. Moreover, you can use gestures to create new songs or recreate specific segments of songs you composed earlier. Even though Amadeus Code lets its users export audio and MIDI files to audio editing software, you still have to purchase all songs you want to keep.
8. Humtap
Price: Free
Compatibility: iOS
Musicians who have a tough time remembering their own ideas are going to love using Humtap because they can just hum a melody and the app will automatically generate an entire song using different instruments. What’s more, beats can be added with a single tap, and after the music is generated you can proceed to add the vocals as well. Humptap also has video making capabilities, so you can create videos for all songs you compose with this app. All tracks and videos generated with the Humtap AI music composer can be saved to your phone, but you can’t share your new creations to social media directly from the app.
9. Muzeek
Price: Free trial available, pricing plans start from $19 per month
Compatibility: macOS
If you are in need of licensed music for the video you’re planning on sharing to social media networks, then Muzeek is one of the best choices you can make. The AI algorithm Muzeek uses analyzes the videos for which you are generating music and it creates soundtracks that perfectly fit the rhythm of the video. All content creators, including online marketing agencies or video game developers, can rely on Muzeek AI music composer to create authentic music in high quality. Moreover, Muzeek can also analyze the video’s original audio and create subtitles from it or adjust its volume automatically.
10. Brain.fm
Price: Subscription plans start from $6,95 per month
Compatibility: Android, online
The idea that music can make our brains more productive is at the very core of what Brain.fm platform is all about. A team of scientists, musicians and engineers uses artificial intelligence to generate music designed to make your brain more productive and focused. They claim that the music created with their AI music composer achieve its effects in just ten to fifteen minutes. However, you can’t use Brain.fm to create your own music, as this platform is better suited for people who spend a lot of time at work and have a tough time maintaining their focus while performing important tasks.
Conclusion
The opportunities AI music composers offer are still not properly explored, because most of these technologies are still under development. The results AI music composers we included in this article have managed to achieve so far are impressive because each of them can produce high-quality audio files for all sorts of video content. Which AI music composer do you like to use the most? Leave a comment, and let us know.
Benjamin Arango
Benjamin Arango is a writer and a lover of all things video.
Follow @Benjamin Arango
Benjamin Arango
Mar 27, 2024• Proven solutions
Robots can’t be creative, right? A number of startups that focus on the development of artificial intelligence that is capable of composing music have proved this statement wrong. AI music composers generate original, copyright-free music you can use in your latest YouTube video or social media video ad. You don’t even have to be a sound designer or a musician to produce soundtracks for your videos with AI Music Composers, because you can upload the music that has already been recorded and create variations of it. So, let’s take a look at what AI music composers have to offer in 2024.
| 1 - Amper Music | 2 - AIVA |
|---|---|
| 3 - Jukedeck | 4 - Ecrett Music |
| 5 - Melodrive | 6 - ORB Composer |
| 7 - Amadeus Code | 8 - Humtap |
| 9 - Muzeek | 10 - Brain.fm |
Ten Best AI Music Composers You Should Know About
The AI technologies that can compose music are still relatively novel, and as time passes, they can only develop and grow further. Consequently, each of the AI music composers we featured in this article offers a different range of possibilities. Here are the ten best AI music composers you shouldn’t miss out on in 2024.
Filmora AI Music Editor
Edit Audio with AI Music Editor
Experience the power of Filmora’s AI tools and make your audio or music stand out like never before! Audio Denoise, Audio Ducking, Audio Synchronization, Audio Stretch, etc…
Try It Free Try It Free Try It Free Learn More >
1. Amper Music
Price: Available upon request
Industry professionals know just how frustrating the music licensing process can be. Amper Music is a cloud-based platform designed to simplify the process of creating soundtracks for movies and video games, as it produces AI generated algorithms that help users create music in a variety of music genres. You must first create an account on this platform, in order to be able to use the free version of Amper Music that provides only a limited amount of features. Upgrading to the pro version of Amper Music will enable you to enjoy the full potential of this rapidly growing AI Music Composer.
2. AIVA
Price: Free version available, subscription plans start from €14 p/month
Since 2016, when AIVA Technologies was founded, its team has worked on developing an AI script that can compose emotional soundtracks for ads, video games, or movies. Soon after, the AI published its first oeuvre titled ‘Opus 1 for Piano Solo and in the subsequent years, AIVA released an album and composed music for a video game. Besides enabling its users to create music from scratch, AIVA can also be used to produce variations of existing songs. The music engine that powers this AI music composer makes the production of corporate or social media videos much easier, as it eliminates the need to go through the music licensing process.
3. Jukedeck
Price: Free version available, Pricing plans start from $0.99 per download
The AI music composer developed by the Jukedeck startup resembles the Amper’s music composer because they both rely on neural networks to analyze music data, that is then used by the AI to learn how to compose original music. Each track that is available through this AI music composer can be edited, so you can change its length or its tempo. You can create music with Jukedeck for free if you decide to give all the rights to the AI composer, while both individuals and small businesses can purchase the license to use the song created with Jukedeck for just $0.99.
Note: Jukedeck has been acquired by TikTok, and we are waiting for a new Jukedeck.
![]()
A cross-platform for making videos anywhere for all creators
Why your video editing isn’t good enough? How about some creative inspo?
- 100 Million+ Users
- 150+ Countries and Regions
- 4 Million+ Social Media Followers
- 5 Million+ Stock Media for Use
* Secure Download
4. Ecrett Music
Price: Subscription plans start at $5

This online AI music composer makes creating stunning soundtracks for videos look easy. You just have to upload a video for which you want to generate music and select the type of scene and the mood of that scene. Party, Travel or Fashion are among the types of scenes you can choose from, while moods range from happy to serious. When done, simply click on the Create Music button, and the platform will automatically generate the soundtrack for your video. In case you are producing videos on a constant basis, you should consider purchasing one of the available subscription plans.
5. Melodrive
Price: Free
Compatibility: iOS, Windows
At the moment, the Lite and Indie versions of Melodrive are available for download free of charge, but the Indie version of this AI music composer still offers more options. Melodrive is one of the first AI systems that can compose emotional and unique music in real time. The AI generates music by adapting to the media environment and aims to match the mood and the style of the video. It is worth noting that Melodrive is still under development and that through time its capabilities to compose music are going to become even more refined than they already are.
6. ORB Composer
Price: Pricing plans start at $149,00
Compatibility: macOS, Windows

You can’t generate music automatically with ORB Composer, because the AI creates music based on your choices. That’s why you need to know at least the basic rules of music composition in order to be able to use the ORB Composer properly. The AI music composer comes bundled with a rich collection of chord progressions, that contains almost all chords used in popular music. This tool is aimed at artists who are interested in experimenting with the possibilities of creating music with artificial intelligence and discovering new styles of music. There are six music templates you can choose from, and you can create compositions by simply organizing different blocks of music.
Filmora AI Audio Stretcher
Wondershare Filmora - AI Audio Stretcher
• Retime any audio track to fit the duration of your video almost instantly.
• Rearrange songs without quality loss.
• Cross-platform supported - (Windows, Mac, iOS, Android)
Start Audio Stretch Start Audio Stretch Start Audio Stretch Learn More >
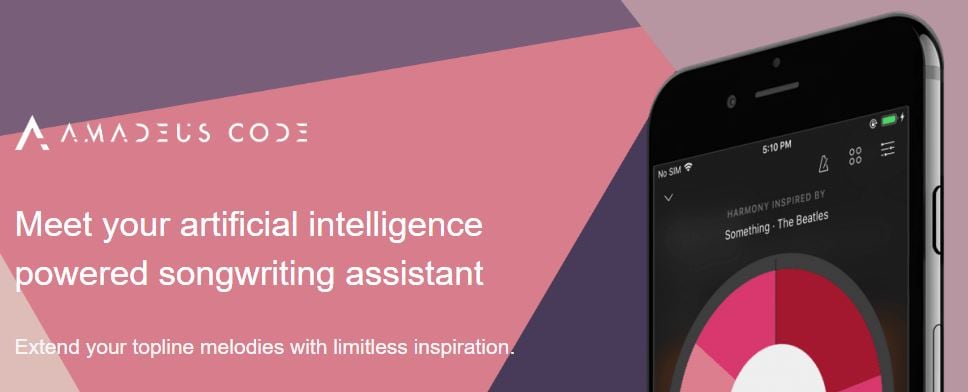
7. Amadeus Code
Price: Free, but the app offers in-app purchases
Compatibility: iOS
Both skilled musicians and music enthusiast can use this iOS-based app to create new melodies in just a few minutes. The AI engine that the Amadeus Code uses contains chord progressions of some of the most famous songs ever created and it let you use them to create new and innovative structures of music compositions. Moreover, you can use gestures to create new songs or recreate specific segments of songs you composed earlier. Even though Amadeus Code lets its users export audio and MIDI files to audio editing software, you still have to purchase all songs you want to keep.
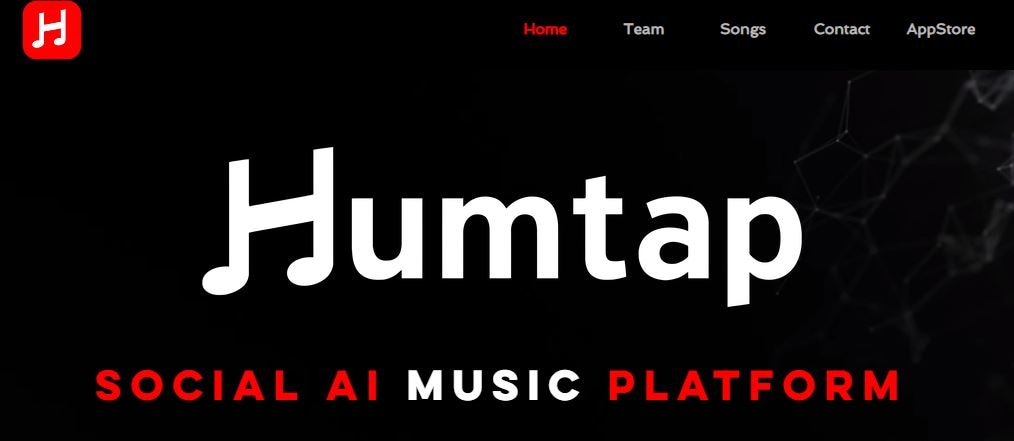
8. Humtap
Price: Free
Compatibility: iOS
Musicians who have a tough time remembering their own ideas are going to love using Humtap because they can just hum a melody and the app will automatically generate an entire song using different instruments. What’s more, beats can be added with a single tap, and after the music is generated you can proceed to add the vocals as well. Humptap also has video making capabilities, so you can create videos for all songs you compose with this app. All tracks and videos generated with the Humtap AI music composer can be saved to your phone, but you can’t share your new creations to social media directly from the app.
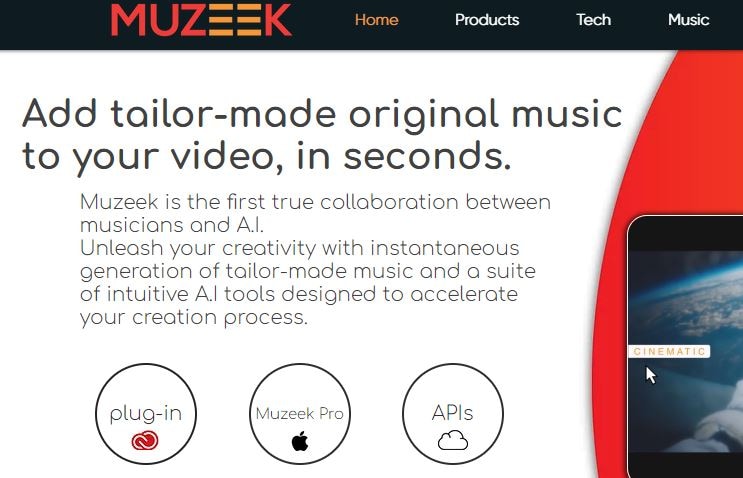
9. Muzeek
Price: Free trial available, pricing plans start from $19 per month
Compatibility: macOS
If you are in need of licensed music for the video you’re planning on sharing to social media networks, then Muzeek is one of the best choices you can make. The AI algorithm Muzeek uses analyzes the videos for which you are generating music and it creates soundtracks that perfectly fit the rhythm of the video. All content creators, including online marketing agencies or video game developers, can rely on Muzeek AI music composer to create authentic music in high quality. Moreover, Muzeek can also analyze the video’s original audio and create subtitles from it or adjust its volume automatically.
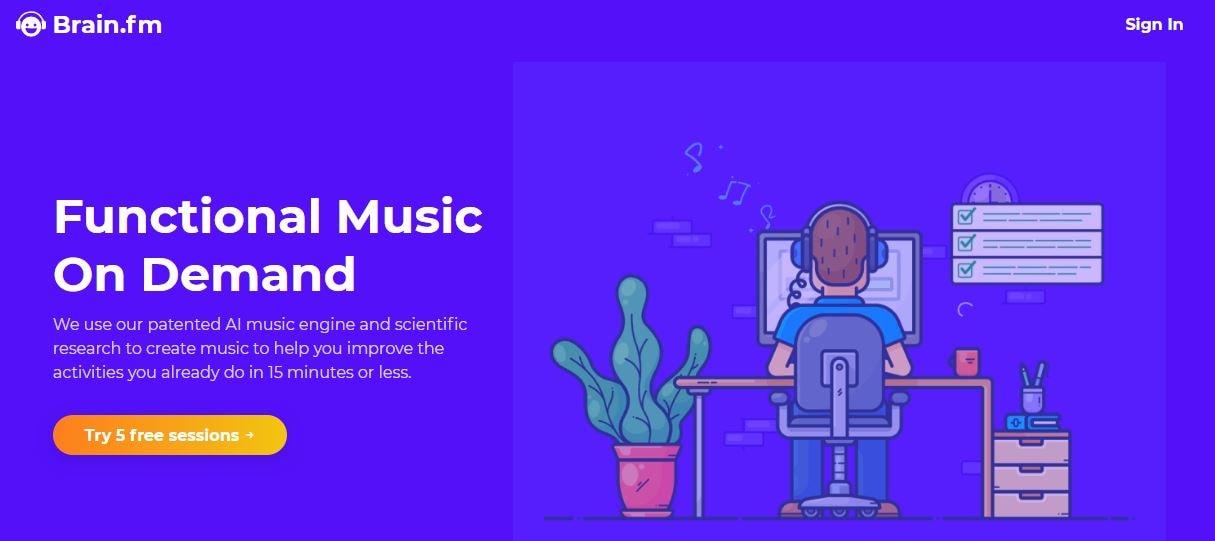
10. Brain.fm
Price: Subscription plans start from $6,95 per month
Compatibility: Android, online
The idea that music can make our brains more productive is at the very core of what Brain.fm platform is all about. A team of scientists, musicians and engineers uses artificial intelligence to generate music designed to make your brain more productive and focused. They claim that the music created with their AI music composer achieve its effects in just ten to fifteen minutes. However, you can’t use Brain.fm to create your own music, as this platform is better suited for people who spend a lot of time at work and have a tough time maintaining their focus while performing important tasks.
Conclusion
The opportunities AI music composers offer are still not properly explored, because most of these technologies are still under development. The results AI music composers we included in this article have managed to achieve so far are impressive because each of them can produce high-quality audio files for all sorts of video content. Which AI music composer do you like to use the most? Leave a comment, and let us know.
Benjamin Arango
Benjamin Arango is a writer and a lover of all things video.
Follow @Benjamin Arango
Benjamin Arango
Mar 27, 2024• Proven solutions
Robots can’t be creative, right? A number of startups that focus on the development of artificial intelligence that is capable of composing music have proved this statement wrong. AI music composers generate original, copyright-free music you can use in your latest YouTube video or social media video ad. You don’t even have to be a sound designer or a musician to produce soundtracks for your videos with AI Music Composers, because you can upload the music that has already been recorded and create variations of it. So, let’s take a look at what AI music composers have to offer in 2024.
| 1 - Amper Music | 2 - AIVA |
|---|---|
| 3 - Jukedeck | 4 - Ecrett Music |
| 5 - Melodrive | 6 - ORB Composer |
| 7 - Amadeus Code | 8 - Humtap |
| 9 - Muzeek | 10 - Brain.fm |
Ten Best AI Music Composers You Should Know About
The AI technologies that can compose music are still relatively novel, and as time passes, they can only develop and grow further. Consequently, each of the AI music composers we featured in this article offers a different range of possibilities. Here are the ten best AI music composers you shouldn’t miss out on in 2024.
Filmora AI Music Editor
Edit Audio with AI Music Editor
Experience the power of Filmora’s AI tools and make your audio or music stand out like never before! Audio Denoise, Audio Ducking, Audio Synchronization, Audio Stretch, etc…
Try It Free Try It Free Try It Free Learn More >
1. Amper Music
Price: Available upon request
Industry professionals know just how frustrating the music licensing process can be. Amper Music is a cloud-based platform designed to simplify the process of creating soundtracks for movies and video games, as it produces AI generated algorithms that help users create music in a variety of music genres. You must first create an account on this platform, in order to be able to use the free version of Amper Music that provides only a limited amount of features. Upgrading to the pro version of Amper Music will enable you to enjoy the full potential of this rapidly growing AI Music Composer.
2. AIVA
Price: Free version available, subscription plans start from €14 p/month
Since 2016, when AIVA Technologies was founded, its team has worked on developing an AI script that can compose emotional soundtracks for ads, video games, or movies. Soon after, the AI published its first oeuvre titled ‘Opus 1 for Piano Solo and in the subsequent years, AIVA released an album and composed music for a video game. Besides enabling its users to create music from scratch, AIVA can also be used to produce variations of existing songs. The music engine that powers this AI music composer makes the production of corporate or social media videos much easier, as it eliminates the need to go through the music licensing process.
3. Jukedeck
Price: Free version available, Pricing plans start from $0.99 per download
The AI music composer developed by the Jukedeck startup resembles the Amper’s music composer because they both rely on neural networks to analyze music data, that is then used by the AI to learn how to compose original music. Each track that is available through this AI music composer can be edited, so you can change its length or its tempo. You can create music with Jukedeck for free if you decide to give all the rights to the AI composer, while both individuals and small businesses can purchase the license to use the song created with Jukedeck for just $0.99.
Note: Jukedeck has been acquired by TikTok, and we are waiting for a new Jukedeck.
![]()
A cross-platform for making videos anywhere for all creators
Why your video editing isn’t good enough? How about some creative inspo?
- 100 Million+ Users
- 150+ Countries and Regions
- 4 Million+ Social Media Followers
- 5 Million+ Stock Media for Use
* Secure Download
4. Ecrett Music
Price: Subscription plans start at $5

This online AI music composer makes creating stunning soundtracks for videos look easy. You just have to upload a video for which you want to generate music and select the type of scene and the mood of that scene. Party, Travel or Fashion are among the types of scenes you can choose from, while moods range from happy to serious. When done, simply click on the Create Music button, and the platform will automatically generate the soundtrack for your video. In case you are producing videos on a constant basis, you should consider purchasing one of the available subscription plans.
5. Melodrive
Price: Free
Compatibility: iOS, Windows
At the moment, the Lite and Indie versions of Melodrive are available for download free of charge, but the Indie version of this AI music composer still offers more options. Melodrive is one of the first AI systems that can compose emotional and unique music in real time. The AI generates music by adapting to the media environment and aims to match the mood and the style of the video. It is worth noting that Melodrive is still under development and that through time its capabilities to compose music are going to become even more refined than they already are.
6. ORB Composer
Price: Pricing plans start at $149,00
Compatibility: macOS, Windows

You can’t generate music automatically with ORB Composer, because the AI creates music based on your choices. That’s why you need to know at least the basic rules of music composition in order to be able to use the ORB Composer properly. The AI music composer comes bundled with a rich collection of chord progressions, that contains almost all chords used in popular music. This tool is aimed at artists who are interested in experimenting with the possibilities of creating music with artificial intelligence and discovering new styles of music. There are six music templates you can choose from, and you can create compositions by simply organizing different blocks of music.
Filmora AI Audio Stretcher
Wondershare Filmora - AI Audio Stretcher
• Retime any audio track to fit the duration of your video almost instantly.
• Rearrange songs without quality loss.
• Cross-platform supported - (Windows, Mac, iOS, Android)
Start Audio Stretch Start Audio Stretch Start Audio Stretch Learn More >
7. Amadeus Code
Price: Free, but the app offers in-app purchases
Compatibility: iOS
Both skilled musicians and music enthusiast can use this iOS-based app to create new melodies in just a few minutes. The AI engine that the Amadeus Code uses contains chord progressions of some of the most famous songs ever created and it let you use them to create new and innovative structures of music compositions. Moreover, you can use gestures to create new songs or recreate specific segments of songs you composed earlier. Even though Amadeus Code lets its users export audio and MIDI files to audio editing software, you still have to purchase all songs you want to keep.
8. Humtap
Price: Free
Compatibility: iOS
Musicians who have a tough time remembering their own ideas are going to love using Humtap because they can just hum a melody and the app will automatically generate an entire song using different instruments. What’s more, beats can be added with a single tap, and after the music is generated you can proceed to add the vocals as well. Humptap also has video making capabilities, so you can create videos for all songs you compose with this app. All tracks and videos generated with the Humtap AI music composer can be saved to your phone, but you can’t share your new creations to social media directly from the app.
9. Muzeek
Price: Free trial available, pricing plans start from $19 per month
Compatibility: macOS
If you are in need of licensed music for the video you’re planning on sharing to social media networks, then Muzeek is one of the best choices you can make. The AI algorithm Muzeek uses analyzes the videos for which you are generating music and it creates soundtracks that perfectly fit the rhythm of the video. All content creators, including online marketing agencies or video game developers, can rely on Muzeek AI music composer to create authentic music in high quality. Moreover, Muzeek can also analyze the video’s original audio and create subtitles from it or adjust its volume automatically.
10. Brain.fm
Price: Subscription plans start from $6,95 per month
Compatibility: Android, online
The idea that music can make our brains more productive is at the very core of what Brain.fm platform is all about. A team of scientists, musicians and engineers uses artificial intelligence to generate music designed to make your brain more productive and focused. They claim that the music created with their AI music composer achieve its effects in just ten to fifteen minutes. However, you can’t use Brain.fm to create your own music, as this platform is better suited for people who spend a lot of time at work and have a tough time maintaining their focus while performing important tasks.
Conclusion
The opportunities AI music composers offer are still not properly explored, because most of these technologies are still under development. The results AI music composers we included in this article have managed to achieve so far are impressive because each of them can produce high-quality audio files for all sorts of video content. Which AI music composer do you like to use the most? Leave a comment, and let us know.
Benjamin Arango
Benjamin Arango is a writer and a lover of all things video.
Follow @Benjamin Arango
Also read:
- 2024 Approved Chromebook Sound Capture Unlocked 7 User-Friendly Steps
- In 2024, Best Auto Music Mixer for Mac
- In 2024, Effortless Audiobook Production The Ultimate Instruction Manual for Aspiring Authors
- Updated Seamless Synergy Merging Soundtracks with Visual Narratives in Modern Cinema for 2024
- New Echoes of Purity Advanced Techniques and Tools to Maintain Clear Audio Amidst Background Noise, Online & Offline
- New In 2024, YouTube Audible Treasure Trove
- New 2024 Approved Strategies for Silencing Acoustic Reflections A Guide to Clearer Recordings
- New In 2024, The Art of Synchronized Streams Implementing Smooth Volume Level Changes Using OBS
- Updated The Ultimate MP3 Editors Handbook Key Edits and Tips for 2024
- New Deciphering Agitated Dog Communication Through Vocalization Patterns for 2024
- New Evaluation Report on Sound Forges Audio Editing Tools
- Updated Elevating Calmness Low-Impact Noise Reduction Techniques in Premiere Pro
- New Complete Vimeo Media File Data with Aspect Ratio Highlighted
- In 2024, How to Clone Voice in 2 Ways-Create AI Voices
- New Soloing Videos Discarding Unwanted Audio in MP4 Formats
- Updated 2024 Approved The Contemporary Guide to Achieving Perfect Audio Gradual Decline
- New In 2024, Applications for Adding Audio to Video in Android
- 2024 Approved Cutting Out Chatter A Step-by-Step Method to Mute Unwanted Sound During Live Recordings
- Sound Silence Strategies How to Get Cleaner Videos without Lossy Audio Removal for 2024
- New In 2024, Understanding the Mechanics Behind Googles Podcast Application
- In 2024, Unraveling the Process of Stripping Beat Tracks From Online Compositions
- Updated 2024 Approved Top Linux Audio Workstation Tools Comparative Analysis of Bests
- In 2024, Essential Methods Reprogramming Soundtracks Within Film and Video Material
- Updated In 2024, The Art of Soundless Storytelling Removing Audio From Videos with iMovie
- New In 2024, Audio Recording Made Easy Exploring Options and Tutorials Outside of Apowersofts Offerings
- Amplify Your Music The Best 8 Android DAWs to Master the Art of Producing
- Melodious Background Elements for Creatives Digital Broadcasts
- 2024 Approved Shifting Gears Methods for Redefining Your Vocal Range
- New The Ultimate Guide to Recording Sounds in PowerPoint Operating Windows and macOS Systems
- New Expertise in Anime Vocal Alteration Hottest Voice-Change Tools on PCs and Smartphones
- Updated 2024 Approved Exploring Options for Authentic Gaseous Sounds in Audio Production
- New In 2024, Celebrity Soprano Shifters An All-Inclusive Guide to Pitch Modification Gadgets and Contingency Plans
- In-Depth Tutorial Removing Vocals In Adobe Audition - 6 Proven Steps
- New In 2024, Adding Free Soundtracks to Your Pictures Tips for Computers & Smartphones
- Updated In 2024, Online Auditory Hygiene Methods to Purify Sound Recordings of Digital Transmission
- Updated Expert Tips on Leveraging Morphvox in Games – The Comprehensive Guide to Voice Modification for 2024
- Free Audio Magic at Your Fingertips The Essential Top 10 Sound Blending Software
- Mastering Sound Integration Enhancing Videos with Adobe Premiere Pro
- New 2024 Approved MP3 to Karaoke Comparative Analysis of Premium Online & Traditional Offline Converters
- 2024 Approved Elevate Your Gameplay A Guide to Embedding Songs Into KineMaster
- Updated In 2024, Comprehensive Instructions for Incorporating Music Into iMovie Projects
- New 2024 Approved KineMaster Soundscape Techniques for Music Insertion
- How to Display Apple iPhone 14 Pro Max Screen on PC Easily? | Dr.fone
- Can you play MP4 on Huawei Nova Y71?
- 5 Ways to Track Sony Xperia 1 V without App | Dr.fone
- Play Store Not Working On Motorola G24 Power? 8 Solutions Inside | Dr.fone
- In 2024, How to Unlock Vivo Y78+ Phone without Any Data Loss
- Spoofing Life360 How to Do it on ZTE Nubia Flip 5G? | Dr.fone
- How to Choose A Nice GoPro for Vlogging?
- In 2024, The Updated Method to Bypass HTC U23 FRP
- Dual-View Video Editing The Best Apps for iOS and Android
- In 2024, How to use Pokemon Go Joystick on Vivo S17t? | Dr.fone
- New 2024 Approved 4 Solutions to Crop a Video on Android Easily
- How to play MP4 files on Galaxy A05s?
- ZTE Blade A73 5G Stuck on Screen – Finding Solutions For Stuck on Boot | Dr.fone
- Are You Struggling to Get Images for Commercial Use of Your Creations? The Following Is a Review of Different Methods You Can Use to Get Stock Images for Your Productions. Keep Reading to Find Out More
- Planning to Use a Pokemon Go Joystick on Honor 80 Pro Straight Screen Edition? | Dr.fone
- Different Methods for Resetting Samsung Galaxy M14 4G Phones with Screen Locked and Not | Dr.fone
- Title: New Mastering Silence Techniques for Eliminating Sibilance in Recordings
- Author: Paul
- Created at : 2024-05-20 01:48:28
- Updated at : 2024-05-21 01:48:28
- Link: https://voice-adjusting.techidaily.com/new-mastering-silence-techniques-for-eliminating-sibilance-in-recordings/
- License: This work is licensed under CC BY-NC-SA 4.0.
