
:max_bytes(150000):strip_icc():format(webp)/GettyImages-184415451-9f59b82b64ac421cad0f28540a515b5f.jpg)
New In 2024, FREE Top 10 Best Websites to Download Sound Clips for Videos
FREE Top 10 Best Websites to Download Sound Clips for Videos
FREE Top 10 Best Websites to Download Sound Clips for Videos

Liza Brown
Mar 27, 2024• Proven solutions


Are you working on animation , video, game, music, or maybe some other media file? Sound is a vital factor for all. It is the effect of the sound that can make or break a project.
But it can be difficult to find perfect and quality free sound clips. There are thousands of software for creating excellent videos, adding sounds , titles, overlays, tracks, and more. But what if you don’t wish to create a piece for just jazzing up your already existing video?
Free sound clips are great resources to download for videos if you don’t want to create sound effects.
Many people want to know the source of high-quality free audio for videos. These free sound samples are easy to find on the Internet.
In this article, you will get to know the 10 best websites to download free sound clips.
10 Best Free Sound Samples to Use
1. Freesound
Licensed under the Creative Commons License , the Freesound comprises of a large sound database. You can choose from the huge collection of sounds and decide which one is free and which sound needs attribution.
You can ensure if the sound can be used in commercial products or not. If you are not a professional and just need free sound samples for personal use, you may use free sound download from any site. The features of Freesound include-
- You can search for sounds or browse by tags or geotags
- The pack feature helps you to find a bunch of similar sounds very easily
- Preview the sound without logging in
- For downloading the sound, you need to log in
- Add your audio samples to contribute to the database
- You get 5 free sound clips download
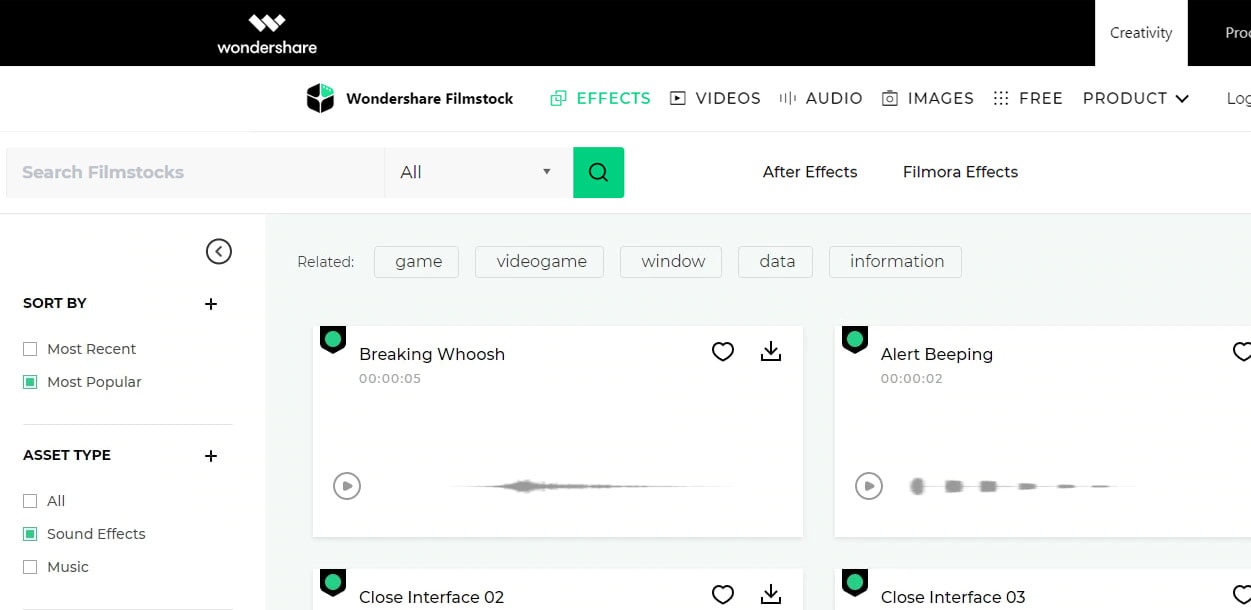
2. Filmstock
Filmstock from the house of Wondershare is one of the greatest libraries for free sound clips.
Any budget filmmaker would love to have this invaluable resource not just for free audio clips for videos but also for royalty-free sound clips.
You can bring your cinematic video to life from the Filmstock free-stuff one-stop-shop. The features of Filmstock include-
- Royalty-free video effects, audio, and stock media
- There are genres like science fiction, sci-fi, ufo, technology games
- Huge selection of curated quality stock images
- Filmstock library is continuously updated
- No attribution required for any project on Filmstock
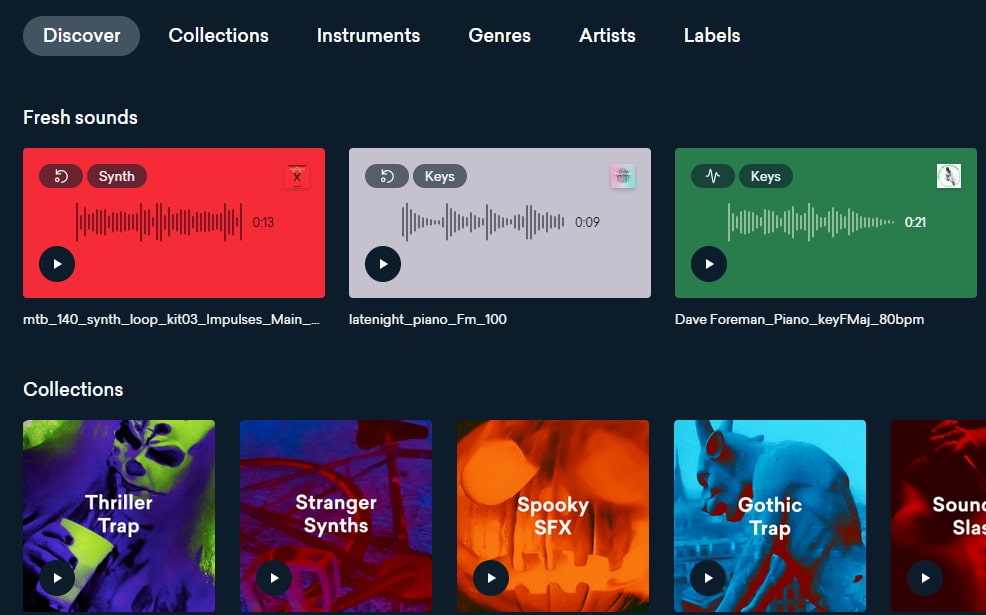
3. Landr
With a simple interface, Landr offers the best loops, packs, and samples to you. Make use of powerful Artificial Intelligence (AI) and you can spend lesser time searching and browsing. The features of Landr includes-
- You can browse free sound clips from the various collection of instruments
- Quickly find the right sound from the millions of free sound samples
- Get access to Selector tool powered by AI to make your browsing session faster
- Nourish your ideas with the curated collection and smart browsing
- The filter sounds by instrument, mood, BPM or key
- Go pro with your sampling
- Royalty-free sounds from today’s best artists, producers, and labels
4. Audio Micro
Audio Micro is one of the best tools for downloading horror-based free sound clips. Once you register with Audio Micro, you can easily download free audio clips for videos.
For downloading sound for commercial uses like TV or mass reproduction, you must be a paid subscriber. The features of Audio Micro are-
- Get access to the collection of royalty-free music and 2000 free good quality sound effects
- High-quality audio content for commercial use, available at competitive prices without any hidden cost
- Research, locate, purchase, and download stock audio
- Easy and fast search option with free sound collection visible from the navigation bar on the homepage
5. Audio Blocks
It is an intuitive platform to download loops, sound effects, and music. It has a low-cost subscription model and the content is constantly updated based on the search results. The features of Audio Blocks are-
- Unlimited royalty-free audio
- Loop, sound effects, and music download
- Low-cost subscription offers more content at a nominal price
- There are flexible plans for every budget
- Use content multiple times for commercial and personal projects
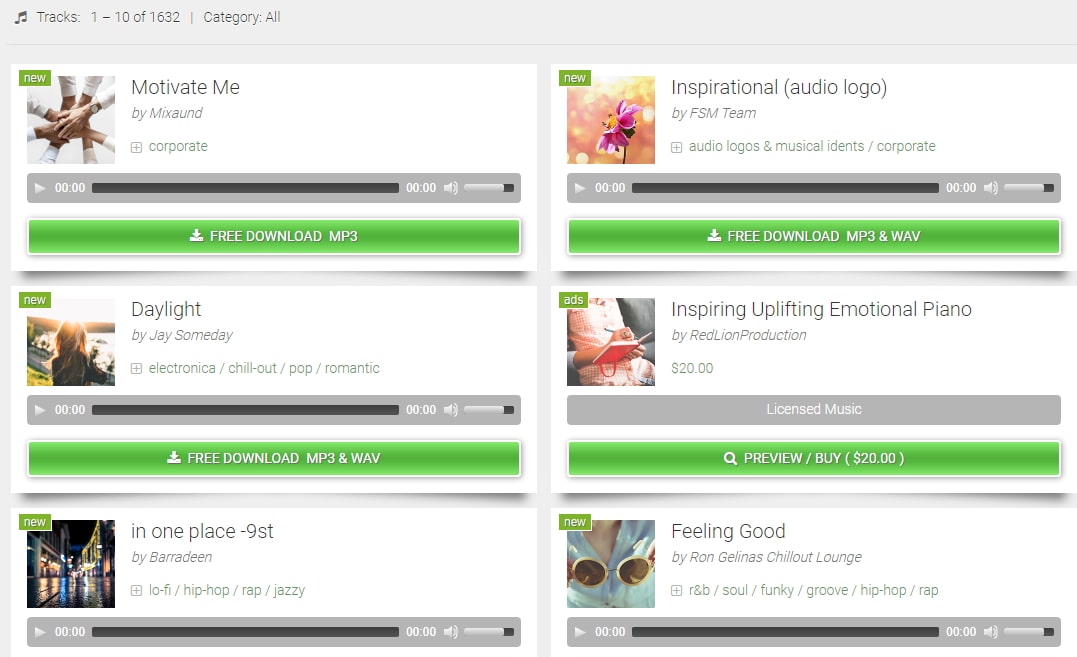
6. Free Stock Music
Whether YouTube project or your personal Vlog, Free Stock Music offers royalty-free music for a range of media platforms.
For any non-copyrighted sound clips free download, always feel free to reach Free Stock Music. The features are-
- Free access to non-copyrighted music
- Just put the attribution in credits to use the sound clips
- Unlimited royalty-free music in all moods, lengths, tempos, and categories
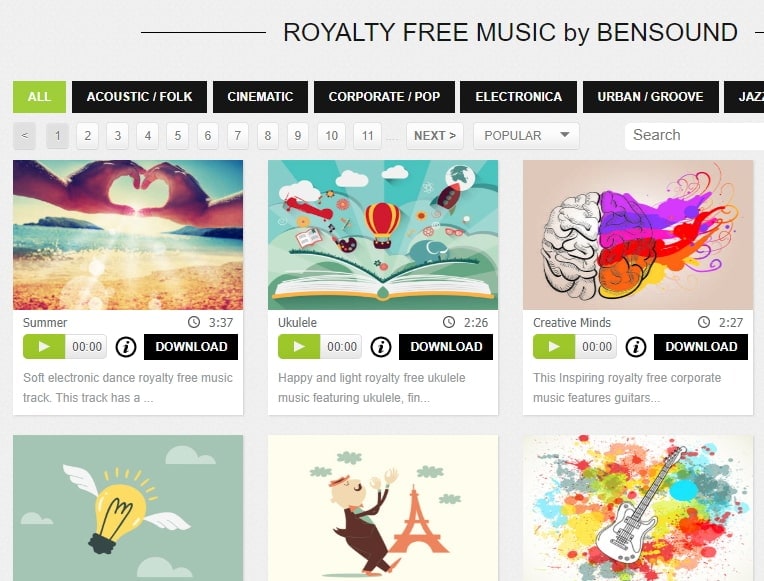
7. Bensound
Available under the Creative Common License, Bensound is used for multimedia projects like web applications or videos.
You can use the free tracks available with Bensound stock music in the various website background score, animations, web adverts, slideshows, etc. The features of Bensound include-
- Royalty-free stock music in various genres like electronica, urban, cinematic, jazz, rock, etc.
- Download free sound clips from the huge collection and add attributions in credits
- If you don’t wish to give credits and use the high-quality premium tracks, get the Bensound Pro License
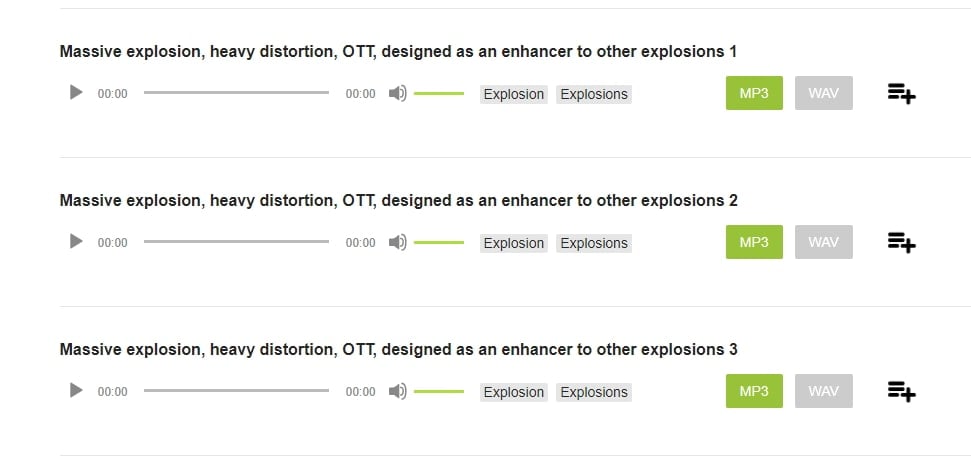
8. Sounds Crate
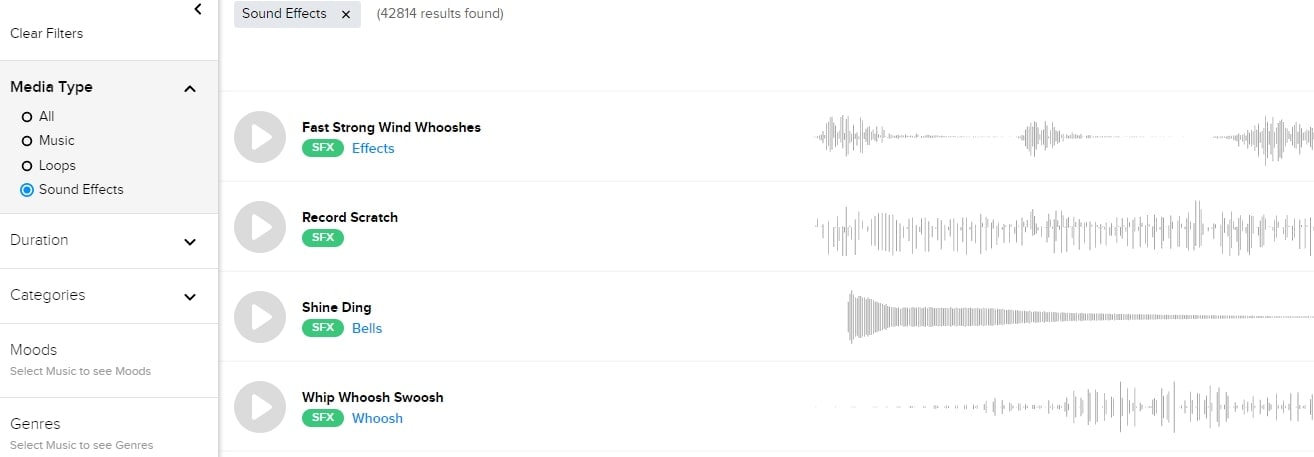
Are you looking for the best soundtrack for your video? Sounds Crate offers some of the best royalty-free music and sound FX.
With the tracks completely mastered for your production, Sound Crate offers 100% quality content created by industry professionals from Hollywood. The Sound Crate features include-
- Sound FX for electricity, gun, explosion, weapons, sci-fi, vehicles, movements, etc.
- Royalty-free music in diverse genres
- You can also use idents for corporate, news jingles, holiday idents, etc.
- Download and use the royalty-free sound clips easily
- Over 10000 plus HD assets
- No attribution required
- Browse from unlimited music, sound effects, etc.

9. ZapSlat
Do your audio and video editing projects need some cool soundtracks to jazz it up? Look no further. ZapSlat is one of the best free sound download sites to make your project successful. The features of ZapSlat are-
- Comprises over 54,000 professional free sound effects and royalty-free music files
- Variety of free sound effect packs
- Download royalty-free music from a variety of genres
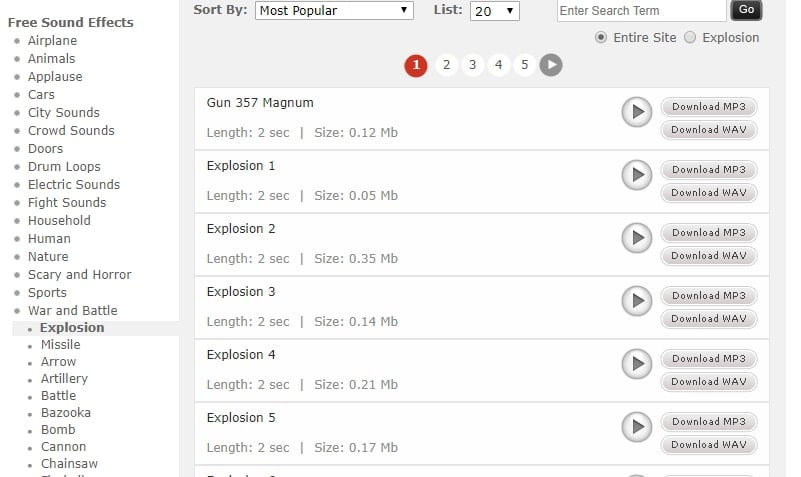
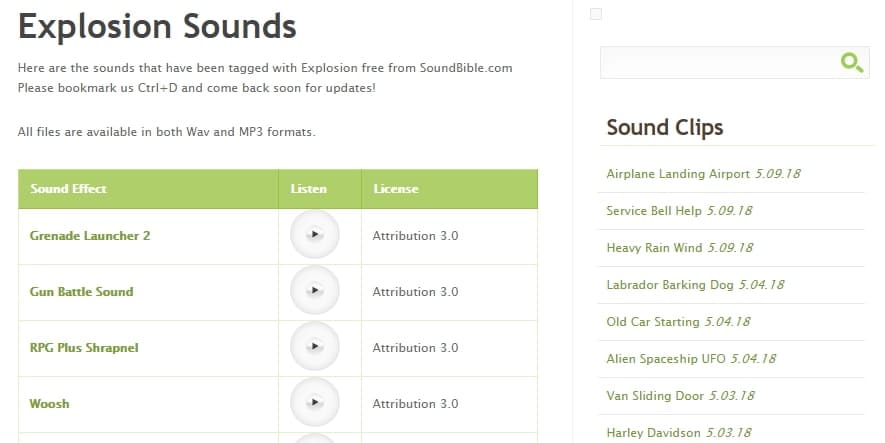
10. Sound Bible
Choose the best from 2000 free sound clips licensed under Creative Commons. To use the sound effect for commercial video, you can select from the royalty-free sounds. The features of SoundBible are-
- Download free sound clips without logging in or creating an account
- 2000 free sounds
- Copyright-free sound resources are weekly updated
Conclusion
Now that you know the best 10 free sound clip download sites, make use of it in your videos. Without worrying about the expense, you can use these sites to download free sound clips.
Liza Brown
Liza Brown is a writer and a lover of all things video.
Follow @Liza Brown
Liza Brown
Mar 27, 2024• Proven solutions
Are you working on animation , video, game, music, or maybe some other media file? Sound is a vital factor for all. It is the effect of the sound that can make or break a project.
But it can be difficult to find perfect and quality free sound clips. There are thousands of software for creating excellent videos, adding sounds , titles, overlays, tracks, and more. But what if you don’t wish to create a piece for just jazzing up your already existing video?
Free sound clips are great resources to download for videos if you don’t want to create sound effects.
Many people want to know the source of high-quality free audio for videos. These free sound samples are easy to find on the Internet.
In this article, you will get to know the 10 best websites to download free sound clips.
10 Best Free Sound Samples to Use
1. Freesound
Licensed under the Creative Commons License , the Freesound comprises of a large sound database. You can choose from the huge collection of sounds and decide which one is free and which sound needs attribution.
You can ensure if the sound can be used in commercial products or not. If you are not a professional and just need free sound samples for personal use, you may use free sound download from any site. The features of Freesound include-
- You can search for sounds or browse by tags or geotags
- The pack feature helps you to find a bunch of similar sounds very easily
- Preview the sound without logging in
- For downloading the sound, you need to log in
- Add your audio samples to contribute to the database
- You get 5 free sound clips download
2. Filmstock
Filmstock from the house of Wondershare is one of the greatest libraries for free sound clips.
Any budget filmmaker would love to have this invaluable resource not just for free audio clips for videos but also for royalty-free sound clips.
You can bring your cinematic video to life from the Filmstock free-stuff one-stop-shop. The features of Filmstock include-
- Royalty-free video effects, audio, and stock media
- There are genres like science fiction, sci-fi, ufo, technology games
- Huge selection of curated quality stock images
- Filmstock library is continuously updated
- No attribution required for any project on Filmstock
3. Landr
With a simple interface, Landr offers the best loops, packs, and samples to you. Make use of powerful Artificial Intelligence (AI) and you can spend lesser time searching and browsing. The features of Landr includes-
- You can browse free sound clips from the various collection of instruments
- Quickly find the right sound from the millions of free sound samples
- Get access to Selector tool powered by AI to make your browsing session faster
- Nourish your ideas with the curated collection and smart browsing
- The filter sounds by instrument, mood, BPM or key
- Go pro with your sampling
- Royalty-free sounds from today’s best artists, producers, and labels
4. Audio Micro
Audio Micro is one of the best tools for downloading horror-based free sound clips. Once you register with Audio Micro, you can easily download free audio clips for videos.
For downloading sound for commercial uses like TV or mass reproduction, you must be a paid subscriber. The features of Audio Micro are-
- Get access to the collection of royalty-free music and 2000 free good quality sound effects
- High-quality audio content for commercial use, available at competitive prices without any hidden cost
- Research, locate, purchase, and download stock audio
- Easy and fast search option with free sound collection visible from the navigation bar on the homepage
5. Audio Blocks
It is an intuitive platform to download loops, sound effects, and music. It has a low-cost subscription model and the content is constantly updated based on the search results. The features of Audio Blocks are-
- Unlimited royalty-free audio
- Loop, sound effects, and music download
- Low-cost subscription offers more content at a nominal price
- There are flexible plans for every budget
- Use content multiple times for commercial and personal projects
6. Free Stock Music
Whether YouTube project or your personal Vlog, Free Stock Music offers royalty-free music for a range of media platforms.
For any non-copyrighted sound clips free download, always feel free to reach Free Stock Music. The features are-
- Free access to non-copyrighted music
- Just put the attribution in credits to use the sound clips
- Unlimited royalty-free music in all moods, lengths, tempos, and categories
7. Bensound
Available under the Creative Common License, Bensound is used for multimedia projects like web applications or videos.
You can use the free tracks available with Bensound stock music in the various website background score, animations, web adverts, slideshows, etc. The features of Bensound include-
- Royalty-free stock music in various genres like electronica, urban, cinematic, jazz, rock, etc.
- Download free sound clips from the huge collection and add attributions in credits
- If you don’t wish to give credits and use the high-quality premium tracks, get the Bensound Pro License
8. Sounds Crate
Are you looking for the best soundtrack for your video? Sounds Crate offers some of the best royalty-free music and sound FX.
With the tracks completely mastered for your production, Sound Crate offers 100% quality content created by industry professionals from Hollywood. The Sound Crate features include-
- Sound FX for electricity, gun, explosion, weapons, sci-fi, vehicles, movements, etc.
- Royalty-free music in diverse genres
- You can also use idents for corporate, news jingles, holiday idents, etc.
- Download and use the royalty-free sound clips easily
- Over 10000 plus HD assets
- No attribution required
- Browse from unlimited music, sound effects, etc.
9. ZapSlat
Do your audio and video editing projects need some cool soundtracks to jazz it up? Look no further. ZapSlat is one of the best free sound download sites to make your project successful. The features of ZapSlat are-
- Comprises over 54,000 professional free sound effects and royalty-free music files
- Variety of free sound effect packs
- Download royalty-free music from a variety of genres
10. Sound Bible
Choose the best from 2000 free sound clips licensed under Creative Commons. To use the sound effect for commercial video, you can select from the royalty-free sounds. The features of SoundBible are-
- Download free sound clips without logging in or creating an account
- 2000 free sounds
- Copyright-free sound resources are weekly updated
Conclusion
Now that you know the best 10 free sound clip download sites, make use of it in your videos. Without worrying about the expense, you can use these sites to download free sound clips.
Liza Brown
Liza Brown is a writer and a lover of all things video.
Follow @Liza Brown
All You Need to Know About iMovie Audio Editing
All You Need to Know About iMovie Audio Editing

Marion Dubois
Oct 26, 2023• Proven solutions
iMovie offers a fantastic platform for video editing where you can merge multiple video clips to create something very phenomenal. Plus, it’s simply here to navigate between different scenes, edit video clips and save results directly to the digital format without making any videotape transformations.
It provides lots of things to beginners and professionals with its easy-to-use interface without any quality loss for your results even after adding lots of transitions, changes, and effects.
However, it is not accessible to master software, precisely when you’re not familiar with it, or you’re not its professional user. So today, we’d like to explore or pay attention to iMovie’s audio editing steps, tips, and tricks to help you become an iMovie master quickly.
What’s more, a practical yet professional iMovie alternative software is also advisable in this guide. So when the iMovie cannot fulfil your editing requirements, why don’t you hop on an iMovie alternative software?
Now, let’s get started!
Part 1: How to Edit Audio Clips in iMovie?
To learn how to edit audio clips in iMovie, you can use actions in the menu along with the quick shortcuts to make adjustments to your audio clips in iMovie on Mac. It’s a tip for your convenience!
Trim Audio Clips
There are a couple of options to trim an audio clip in iMovie.
#1. Trim to Playhead
You can place the playhead in your timeline. Now, trim an audio clip to that exact spot. Next, start moving the playhead and do one from the following.
- Select Modify > Trim to Playhead option in the menu bar.
- Right-click the audio clip and select the option of Trim to Playhead in the shortcut menu.
#2. Use the Clip Trimmer
You can use the Clip Trimmer to trim an exact section of the clip.
Step 1. Right-click the audio clip and select Show Clip Trimmer in the shortcut menu.
Step 2. After the Clip Trimmer shows, select a section you wish to trim by dragging the arrows right and left while holding the white lines. The area within those lines is what will get entirely deleted.
Move the entire clip but keep the trim area in place if arrows turn to a film strip icon.
Step 3. Click Close Clip Trimmer after you finish this section.
Shorten or Lengthen Audio Clips
You can easily shorten or lengthen an audio clip in iMovie. Just choose the pin in the timeline and drag one of its edges. The duration of the clip change will change as you carry. And a new course will be displayed after you finish in the upper left menu.
You can also set the clip’s duration to an exact time. Select the clip in the timeline and hit the Clip Information (small letter “i”) tab located above the Viewer. Put the value of the time you want in seconds in the Duration box on the right.
Change the Speed of an Audio Clip
You may want to speed up or slow down an audio clip while editing music in iMovie. So, here’s what you need to do!
Method 1. Click the Speed button above the Viewer. Next, select Custom in the Speed drop-down box and enter a percentage next to it. You can also set a different speed in that box if you prefer.
Method 2. Right-click the clip and select Show Speed Editor from the shortcut menu. A slider will then display at the top of the clip that you can move to change the speed.
Adjust the Volume of an Audio Clip
You can set the audio clip’s volume at higher or lower, or even mute it. Just select the clip and then do one of the following.
- Select the Volume tab above the Viewer option and move the slider to the percentage of volume. Hit the Mute button to mute the audio clip.
- Tap inside the clip, and when the two-sided arrow appears, drag up or down to adjust the volume.
Fade an Audio Clip
While editing audio in iMovie, you can also fade in or out the clip. Choose a clip in the timeline and then drag the fade handle (small circle) at either the ending or the beginning of the clip to make a fade-out or a fade-in effect.
As you drag, you will see the arcs displaying the shadow for the clips fade in or fade out.
How to Edit Audio Clips in iMovie on iOS?
The iMovie timeline is where you sort or organize all your audio clips, such as the special effects and background music. Audio clips are always present below the video clips in the timeline. To edit audio clips in iMovie on your iPhones or iPads, you can follow the guide belo
Move an Audio Clip
You can transfer the whole audio clip, except the background music, to another location.
- Touch and hold the purple or blue audio clip with your project open in the timeline until it comes over the timeline bar.
- Drag the clip to another place and release.
Adjust the Audio Clip’s Duration
Step 1. While the project is launched in the timeline, tap the audio clip (in blue or purple) or the background music clip you wish to adjust.
Step 2. Now, you can see the display of yellow trim handles. Drag them either at the end of the clip to the points where you wish the audio to start and end. If a trim handle won’t move left or right, it simply indicates there is no additional audio to work with on that clip’s end.
Step 3. Tap outside the audio clip and let the trim handles disappear.
Split an Audio Clip
There are around two options to split audio clips in iMovie. You can remove unwanted parts or adjust each section’s duration, volume, or speed while you split a clip.
Step 1. With your launched project in the timeline, scroll the timeline to the playhead’s position where you want to split the audio.
Step 2. Click the audio clip to display the inspector at the screen’s bottom.
Step 3. Now, click the Actions button, and select the Split tab.
Or, you can tap the clip (it becomes outlined in yellow), then swipe above the playhead as if you were placing your finger to slide over it.
Detach the Audio Part from a Video
You can detach the video clip’s audio to remove or edit it as a separate video clip.
Step 1. When the project is open in the timeline, select a video clip and display the inspector at the screen’s bottom.
Step 2. Tap the Actions button, then tap Detach.
Step 3. A new blue-colored audio clip will then appear below the video project. You can now move, edit, or delete the audio clip separately from its parent video clip.
Move Audio to the Foreground or Background
To ensure the sound in your video clips can listen above the background music, iMovie implies audio “ducking”. Ducking lowers the background music clips’ volume whenever there’s a video clip whose sound is playing simultaneously.
You can select which audio clips are in the foreground or the background.
Step 1. Select the timeline’s audio clip to display the inspector at the screen’s bottom.
Step 2. Hit the Actions tab and proceed with selecting the Foreground or Background.
The clip color changes to indicate whether it’s the background music (green) or foreground audio (blue or purple).
Part 2: An Easier Way to Edit Audio Clips
Windows users might be wandering for an alternative to iMovie as this software tool is only compatible with Mac and iOS devices. You will be thrilled to know that Wondershare Filmora can serve you with all synonymous and extra features more than the iMovie, and it works significantly in the Windows environment.
This latest software tool also assists users with easy video editing tricks and the intuitive interface that best serves quality editing to beginners and professionals.
Despite the basic video editing features, such as trimming, splitting, merging, cutting, and cropping, Filmora also offers various advanced editing elements that are far better than iMovie. And, with its video editing features, you can make a green screen effect, stabilize your video footage, reverse your video clip, and more.
Moreover, you can enjoy royalty-free music tracks for different themes, such as Young and Bright, Tender and Sentimental, Rock, Folk, Electronic Rock, and Hipster Folk, for selection.
All this will be available with a single program called Wondershare Filmora to take advantage of them for free. You do not have to search the background music files like a needle in a haystack. The program has nicely organized the music themes into six different folders. You can apply it for your video and make advanced editing, such as split/trim the clip, adjust the playback speed, pitch, volume, etc.
How to Edit Audio with Wondershare Filmora?
In Wondershare Filmora, you can insert background music and other files from the audio library or your computer. You can even record your voiceover using it.
Add Background Music
Filmora provides a royalty-free music library you can access or import your music within the program. You can select a song from the royalty-free audio library and use it for free.
The audio library has categorized into: YOUNG & BRIGHT, TENDER & SENTIMENTAL, ROCK, FOLK, and ELECTRONIC. The different kinds of sound effects are also available under the Sound Effects tab.
Once you find a sound effect or a song, either right-click on it and go with the Apply or drag and drop it into an audio track in the timeline.
Or, you can click the Import button above the Media Library panel to browse for audio files in your PC system. Then, select and import it into the Media Library when you find the song or other audio files you wish to add.
Once you place the song in the timeline, double-click to edit it in the Audio editing panel. You can apply fade-in or fade-out effects or adjust the pitch and volume. Filmora lets you add up to 100 audio tracks.
Split Audio Clips
Choose your audio clip and place the playhead where you want to split it, then right-click on the clip and choose the Split tab or click the Split icon right above on the toolbar.
Adjust Audio Settings
Double click on the audio clip to make adjustments to your audio. Open a panel with adjustment sliders in the timeline for pitch and volume.
Another element that you’ll find in this panel is Denoise, which is a feature that can remove background noise from your audio clips.
For a more professional audio editing experience, you can also access the Audio Equalizer from this panel. Select from presets or make manual adjustments by hitting the Customize tab.
Play it when you are done and, if you’re not happy with the results, tap the Reset button to start over.
Audio Equalizer (EQ)
All videos have plenty of sounds like speech, music, or sound effects. Changing the strength of sound waves will help you to mix these sounds within a coherent soundtrack.
Locate your audio clip in an audio track and double-click on it to open the Audio settings menu window. A drop-down menu next to the Equalizer feature will display presets such as Classic, Default, Rock’n’Roll, Techno, Sparkle, Bass, Hard Rock, Pop, Ska, Blues, Folk, Acoustic, Custom, or Country. Choose the preset that best fits your current needs and hit the OK tab to apply it.
Now, hit the Customize tab next to the drop-down bar to adjust the Audio Equalizer manually. Drag the sliders up or down and make the adjustments until you find their ideal value. Finally, hit OK and save your settings.
Besides the included music tracks and sound effects in Filmora initially, you can also find more audio files from Filmora’s effects store – Filmstock, and even get some free music and sound.
Part 3: iMovie Audio Editing Tips & Tricks
iMovie is a great video editor for Mac computers. After understanding the best alternative of iMovie sound editin g, let’s check out some tips on editing audio in iMovie best.
The explanations and screenshots below are for iMovie 10 only. However, the steps are a bit similar to older versions.
So, here we go!
1. Use Waveforms to See What You Hear
To properly edit the audio track in iMovie, you need a good pair of headphones and speakers to hear the sound, but you also need to check the sound.
You can check the sound in iMovie by considering the waveforms on each clip. If the waveforms can’t be seen, go to the View drop-down menu and choose the Show Waveforms option. The clip size for your project can also adjust to get an even better appearance for each video clip.
The waveforms will display the volume level of a clip and give you a good idea of what sections will require to turn up or down. You can also check how the levels of different clips compare to one another.
2. Audio Adjustments
With the help of Adjust tab in the top right, you can access some basic audio editing tools for changing your selected clip’s volume or changing the volume of other relative clips in the project.
The adjustment window of audio also provides basic audio equalization and noise reduction tools, along with a range of effects - from echo to robot - that will change the way people in your video sound.
3. Edit Audio with the Timeline
iMovie assists you in adjusting the audio within the clips themselves. Each pin has a volume bar, moving up and down to decrease or increase the audio level. The clips also contain Fade In and Fade Out tabs at the beginning and end, dragging to adjust the fade’s length.
By adding a short fade effect, whether in or out, the sound becomes relatively smoother and less conflicting to the ear when a new clip begins.
4. Detach the Audio
By default, iMovie keeps the video and audio sections of clips together for convenience. Yet, you want to use the video and audio sections of a clip separately sometimes.
For this purpose, choose your clip in the timeline, visit the Modify drop-down menu, and hit the Detach Audio button. You’ll now have two clips - one with the images and another with the sound.
A lot you can do with the detached audio. For instance, you could extend the audio clip to begin before the video plays, or so that it plays for a few seconds even after the video fades out. You could also cut out pieces from the audio’s middle portion while leaving the video intact.
Conclusion
Coming towards the end of the discussion, after understanding iMovie audio editingand going through an elaborated alternative of iMovie application, we decided that Wondershare Filmora sounds the best out of it. It allows you to flawlessly edit video and audio files on your desktop, with various inbuilt royalty-free music tracks to select from that can further improve your project’s presence.
Marion Dubois
Marion Dubois is a writer and a lover of all things video.
Follow @Marion Dubois
Marion Dubois
Oct 26, 2023• Proven solutions
iMovie offers a fantastic platform for video editing where you can merge multiple video clips to create something very phenomenal. Plus, it’s simply here to navigate between different scenes, edit video clips and save results directly to the digital format without making any videotape transformations.
It provides lots of things to beginners and professionals with its easy-to-use interface without any quality loss for your results even after adding lots of transitions, changes, and effects.
However, it is not accessible to master software, precisely when you’re not familiar with it, or you’re not its professional user. So today, we’d like to explore or pay attention to iMovie’s audio editing steps, tips, and tricks to help you become an iMovie master quickly.
What’s more, a practical yet professional iMovie alternative software is also advisable in this guide. So when the iMovie cannot fulfil your editing requirements, why don’t you hop on an iMovie alternative software?
Now, let’s get started!
Part 1: How to Edit Audio Clips in iMovie?
To learn how to edit audio clips in iMovie, you can use actions in the menu along with the quick shortcuts to make adjustments to your audio clips in iMovie on Mac. It’s a tip for your convenience!
Trim Audio Clips
There are a couple of options to trim an audio clip in iMovie.
#1. Trim to Playhead
You can place the playhead in your timeline. Now, trim an audio clip to that exact spot. Next, start moving the playhead and do one from the following.
- Select Modify > Trim to Playhead option in the menu bar.
- Right-click the audio clip and select the option of Trim to Playhead in the shortcut menu.
#2. Use the Clip Trimmer
You can use the Clip Trimmer to trim an exact section of the clip.
Step 1. Right-click the audio clip and select Show Clip Trimmer in the shortcut menu.
Step 2. After the Clip Trimmer shows, select a section you wish to trim by dragging the arrows right and left while holding the white lines. The area within those lines is what will get entirely deleted.
Move the entire clip but keep the trim area in place if arrows turn to a film strip icon.
Step 3. Click Close Clip Trimmer after you finish this section.
Shorten or Lengthen Audio Clips
You can easily shorten or lengthen an audio clip in iMovie. Just choose the pin in the timeline and drag one of its edges. The duration of the clip change will change as you carry. And a new course will be displayed after you finish in the upper left menu.
You can also set the clip’s duration to an exact time. Select the clip in the timeline and hit the Clip Information (small letter “i”) tab located above the Viewer. Put the value of the time you want in seconds in the Duration box on the right.
Change the Speed of an Audio Clip
You may want to speed up or slow down an audio clip while editing music in iMovie. So, here’s what you need to do!
Method 1. Click the Speed button above the Viewer. Next, select Custom in the Speed drop-down box and enter a percentage next to it. You can also set a different speed in that box if you prefer.
Method 2. Right-click the clip and select Show Speed Editor from the shortcut menu. A slider will then display at the top of the clip that you can move to change the speed.
Adjust the Volume of an Audio Clip
You can set the audio clip’s volume at higher or lower, or even mute it. Just select the clip and then do one of the following.
- Select the Volume tab above the Viewer option and move the slider to the percentage of volume. Hit the Mute button to mute the audio clip.
- Tap inside the clip, and when the two-sided arrow appears, drag up or down to adjust the volume.
Fade an Audio Clip
While editing audio in iMovie, you can also fade in or out the clip. Choose a clip in the timeline and then drag the fade handle (small circle) at either the ending or the beginning of the clip to make a fade-out or a fade-in effect.
As you drag, you will see the arcs displaying the shadow for the clips fade in or fade out.
How to Edit Audio Clips in iMovie on iOS?
The iMovie timeline is where you sort or organize all your audio clips, such as the special effects and background music. Audio clips are always present below the video clips in the timeline. To edit audio clips in iMovie on your iPhones or iPads, you can follow the guide belo
Move an Audio Clip
You can transfer the whole audio clip, except the background music, to another location.
- Touch and hold the purple or blue audio clip with your project open in the timeline until it comes over the timeline bar.
- Drag the clip to another place and release.
Adjust the Audio Clip’s Duration
Step 1. While the project is launched in the timeline, tap the audio clip (in blue or purple) or the background music clip you wish to adjust.
Step 2. Now, you can see the display of yellow trim handles. Drag them either at the end of the clip to the points where you wish the audio to start and end. If a trim handle won’t move left or right, it simply indicates there is no additional audio to work with on that clip’s end.
Step 3. Tap outside the audio clip and let the trim handles disappear.
Split an Audio Clip
There are around two options to split audio clips in iMovie. You can remove unwanted parts or adjust each section’s duration, volume, or speed while you split a clip.
Step 1. With your launched project in the timeline, scroll the timeline to the playhead’s position where you want to split the audio.
Step 2. Click the audio clip to display the inspector at the screen’s bottom.
Step 3. Now, click the Actions button, and select the Split tab.
Or, you can tap the clip (it becomes outlined in yellow), then swipe above the playhead as if you were placing your finger to slide over it.
Detach the Audio Part from a Video
You can detach the video clip’s audio to remove or edit it as a separate video clip.
Step 1. When the project is open in the timeline, select a video clip and display the inspector at the screen’s bottom.
Step 2. Tap the Actions button, then tap Detach.
Step 3. A new blue-colored audio clip will then appear below the video project. You can now move, edit, or delete the audio clip separately from its parent video clip.
Move Audio to the Foreground or Background
To ensure the sound in your video clips can listen above the background music, iMovie implies audio “ducking”. Ducking lowers the background music clips’ volume whenever there’s a video clip whose sound is playing simultaneously.
You can select which audio clips are in the foreground or the background.
Step 1. Select the timeline’s audio clip to display the inspector at the screen’s bottom.
Step 2. Hit the Actions tab and proceed with selecting the Foreground or Background.
The clip color changes to indicate whether it’s the background music (green) or foreground audio (blue or purple).
Part 2: An Easier Way to Edit Audio Clips
Windows users might be wandering for an alternative to iMovie as this software tool is only compatible with Mac and iOS devices. You will be thrilled to know that Wondershare Filmora can serve you with all synonymous and extra features more than the iMovie, and it works significantly in the Windows environment.
This latest software tool also assists users with easy video editing tricks and the intuitive interface that best serves quality editing to beginners and professionals.
Despite the basic video editing features, such as trimming, splitting, merging, cutting, and cropping, Filmora also offers various advanced editing elements that are far better than iMovie. And, with its video editing features, you can make a green screen effect, stabilize your video footage, reverse your video clip, and more.
Moreover, you can enjoy royalty-free music tracks for different themes, such as Young and Bright, Tender and Sentimental, Rock, Folk, Electronic Rock, and Hipster Folk, for selection.
All this will be available with a single program called Wondershare Filmora to take advantage of them for free. You do not have to search the background music files like a needle in a haystack. The program has nicely organized the music themes into six different folders. You can apply it for your video and make advanced editing, such as split/trim the clip, adjust the playback speed, pitch, volume, etc.
How to Edit Audio with Wondershare Filmora?
In Wondershare Filmora, you can insert background music and other files from the audio library or your computer. You can even record your voiceover using it.
Add Background Music
Filmora provides a royalty-free music library you can access or import your music within the program. You can select a song from the royalty-free audio library and use it for free.
The audio library has categorized into: YOUNG & BRIGHT, TENDER & SENTIMENTAL, ROCK, FOLK, and ELECTRONIC. The different kinds of sound effects are also available under the Sound Effects tab.
Once you find a sound effect or a song, either right-click on it and go with the Apply or drag and drop it into an audio track in the timeline.
Or, you can click the Import button above the Media Library panel to browse for audio files in your PC system. Then, select and import it into the Media Library when you find the song or other audio files you wish to add.
Once you place the song in the timeline, double-click to edit it in the Audio editing panel. You can apply fade-in or fade-out effects or adjust the pitch and volume. Filmora lets you add up to 100 audio tracks.
Split Audio Clips
Choose your audio clip and place the playhead where you want to split it, then right-click on the clip and choose the Split tab or click the Split icon right above on the toolbar.
Adjust Audio Settings
Double click on the audio clip to make adjustments to your audio. Open a panel with adjustment sliders in the timeline for pitch and volume.
Another element that you’ll find in this panel is Denoise, which is a feature that can remove background noise from your audio clips.
For a more professional audio editing experience, you can also access the Audio Equalizer from this panel. Select from presets or make manual adjustments by hitting the Customize tab.
Play it when you are done and, if you’re not happy with the results, tap the Reset button to start over.
Audio Equalizer (EQ)
All videos have plenty of sounds like speech, music, or sound effects. Changing the strength of sound waves will help you to mix these sounds within a coherent soundtrack.
Locate your audio clip in an audio track and double-click on it to open the Audio settings menu window. A drop-down menu next to the Equalizer feature will display presets such as Classic, Default, Rock’n’Roll, Techno, Sparkle, Bass, Hard Rock, Pop, Ska, Blues, Folk, Acoustic, Custom, or Country. Choose the preset that best fits your current needs and hit the OK tab to apply it.
Now, hit the Customize tab next to the drop-down bar to adjust the Audio Equalizer manually. Drag the sliders up or down and make the adjustments until you find their ideal value. Finally, hit OK and save your settings.
Besides the included music tracks and sound effects in Filmora initially, you can also find more audio files from Filmora’s effects store – Filmstock, and even get some free music and sound.
Part 3: iMovie Audio Editing Tips & Tricks
iMovie is a great video editor for Mac computers. After understanding the best alternative of iMovie sound editin g, let’s check out some tips on editing audio in iMovie best.
The explanations and screenshots below are for iMovie 10 only. However, the steps are a bit similar to older versions.
So, here we go!
1. Use Waveforms to See What You Hear
To properly edit the audio track in iMovie, you need a good pair of headphones and speakers to hear the sound, but you also need to check the sound.
You can check the sound in iMovie by considering the waveforms on each clip. If the waveforms can’t be seen, go to the View drop-down menu and choose the Show Waveforms option. The clip size for your project can also adjust to get an even better appearance for each video clip.
The waveforms will display the volume level of a clip and give you a good idea of what sections will require to turn up or down. You can also check how the levels of different clips compare to one another.
2. Audio Adjustments
With the help of Adjust tab in the top right, you can access some basic audio editing tools for changing your selected clip’s volume or changing the volume of other relative clips in the project.
The adjustment window of audio also provides basic audio equalization and noise reduction tools, along with a range of effects - from echo to robot - that will change the way people in your video sound.
3. Edit Audio with the Timeline
iMovie assists you in adjusting the audio within the clips themselves. Each pin has a volume bar, moving up and down to decrease or increase the audio level. The clips also contain Fade In and Fade Out tabs at the beginning and end, dragging to adjust the fade’s length.
By adding a short fade effect, whether in or out, the sound becomes relatively smoother and less conflicting to the ear when a new clip begins.
4. Detach the Audio
By default, iMovie keeps the video and audio sections of clips together for convenience. Yet, you want to use the video and audio sections of a clip separately sometimes.
For this purpose, choose your clip in the timeline, visit the Modify drop-down menu, and hit the Detach Audio button. You’ll now have two clips - one with the images and another with the sound.
A lot you can do with the detached audio. For instance, you could extend the audio clip to begin before the video plays, or so that it plays for a few seconds even after the video fades out. You could also cut out pieces from the audio’s middle portion while leaving the video intact.
Conclusion
Coming towards the end of the discussion, after understanding iMovie audio editingand going through an elaborated alternative of iMovie application, we decided that Wondershare Filmora sounds the best out of it. It allows you to flawlessly edit video and audio files on your desktop, with various inbuilt royalty-free music tracks to select from that can further improve your project’s presence.
Marion Dubois
Marion Dubois is a writer and a lover of all things video.
Follow @Marion Dubois
The Free Guide to Silencing Movie Trailers in Windows 10 Videos
You might need to remove sound from video windows 10. However, you may be confused about which tools you should you. Indeed, plenty of video editing tools have complicated user interfaces, which is not good if you are a beginner. Fortunately, in this article, we will recommend some of the reliable tools you can use to remove audio from video windows 10—additionally, a simple guide on how to do it.
Method 1: Use online and free solutions to mute audio in videos (500 words)
1. Kapwing
Kapwing is an easy-to-use but powerful online tool for remove sound from video windows 10. Furthermore, Kapwing has many different features you can use for all sorts of things. Such as making videos, adding subtitles to videos, filtering videos, adding watermarks to videos, and many more.

How to mute audio in videos with Kapwing
Step1 To begin, launch your web browser and search the website Kapwing.com. After that, select “Tool” from the menu.

Step2 in the search bar, type “Mute video” and click on it when the mute video feature pops up.

Step3 Click “upload video” in the next window to add the video you want to mute.

Step4 Once you upload your video, click your video, and you will see the volume feature. You just need to drag the volume to the most left to mute the audio.

Step5 Once you mute the movie audio, click “Export project.”

Step6 When the exporting project is done, you can save your video on your computer by clicking “download file.”

2. Veed.io
VEED is a windows video editor remove audio that makes it easy to remove the sound from a video. You can mute the whole video or just a part of it. There’s no software to install. You can do it right in your browser. VEED, on the other hand, is free and very simple to use.
How to remove mute audio from video with VEED.io
Step1 Open your browser and type “Remove audio mute VEED” into the search bar. After that, click “Choose video” to import the video you want to mute.

Step2 When you’re on the editing page, you’ll see a sound icon. Click that, and then drag the sound bar down to remove the sound. Once you remove the sound, click “Export” in the top right of your screen.

Step3 When the video exporting process is done, you can save the video you edited on your computer by clicking “Download.”

3. Adobe Express
Adobe Express is another tool for remove audio from video windows. You can use to remove sound from your videos. has an easy-to-use interface that makes removing sound in a video only a few steps.

How to remove audio from the video with Adobe Express
Step1 Open your browser and search for “Remove audio with Adobe Express”. In the next window, click “Upload your video” to import your video.

Step2 On the next page, you will see your video, and you will see the option “Mute” press that button to remove the sound on your video. Once you remove the audio from your video, click “download” to save your video.

Method 2: Use Filmora to remove audio from video
Step1 Before going any further, you need to download Filmora and open it on your computer. When you’re done, click “new project.”

Free Download For Win 7 or later(64-bit)
Free Download For macOS 10.14 or later
Step2 In this step, you need to find the video you want to mute on your computer and import it to Filmora. Then, drag your video onto Filmora’s timeline.

Step3 Once you’ve dragged your video onto Filmora’s timeline, click on your video in the timeline and then right-click. Afterwards, choose “detach audio.”

Step4 Now, you will see the audio track below the video track. Simply, click on the audio track and click the “delete” icon. Finally, you are successful in muting the audio from your video.

Step5 Click “Export” to save your video on your computer.

Beside Filmora allow you to mute audio from entire of the video, Filmora also has another audio modify feature called “Silence detection”. Silence Detection is a special add-on for Filmora users, making it easier to cut out silent parts of a video. Silence Detection is a unique Filmora add-on that makes it easier for users to remove silent pauses from a film. The add-on examines the full video to detect all the silent pauses and eliminates them instantly, saving you time and simplifying the editing process.
How to use silence detection?
Step1 Right-click on the clip in the resource, select the video clip on the timeline, and choose the silence detection option to open up the silence detection window.

Step2 The silent detection tool will automatically detect the silent and low sound points.
Furthermore, you can adjust the parameters to recalculate the silence detection or manually fine-tune what the feature has already detected

once everything sounds good, export the video into the Filmora timeline so you can continue editing your video.

Moreover, Filmora also has another feature called “Audio ducking”. Audio ducking is a way to turn down the volume of the background when one voiceover comes on.
How to use audio ducking with Filmora
Step1 Let’s say you already have your voiceover and the audio in your video. If you want you to use duking voice feature, firstly, you need to decide which part of the audio you want to lower. After that, double-click the selected part until the ducking voice feature comes out.

Step2 Next, you just need to drag the audio ducking bar to the left or right. Indeed, if you drag to the right, it will lower the audio. Once you are done adjusting the audio, click “Ok”, and you can preview the result.

Last but not least, Filmora has other features called TTS and STT. Speech to Text (STT) allows you to transcript voice to subtitles in one click. Using speech-to-text will save you a lot of time on subtitling and speed up the editing process. Meanwhile, Text to Speech (TTS) is a feature in Filmora that lets you turn text files into voiceover and add more elements to your video.
How to use STT with Filmora
Step1 Firstly, right-click on the audio track and choose “Speech-to-Text”.

Step2 In the STT parameter setting bar, you can choose the language of the audio to be transcribed and the files to be converted. You can also choose to match automatically to the timeline.

How to use TTS with Filmore
Step1 Go to the “Tittle” and add you default Title. After that, write anything you want.

Step2 Select the title box in the timeline, then right-click. After that, click on “Text-to-Speech”.

Step3 In the TTS parameter setting bar, choose the language this title is in and the voice’s name.

Method 3: Use Windows 10 officially recommend video editor
1. Climpchamp
Clipchamp is an online video editor that makes it easy for anyone to make videos, even if they have never edited before. It lets you combine your videos, images, and audio files, remove audio from the video and then save the finished video to your computer. On the Climpchamp homepage, you can sign up for a free account and start editing your videos right away.

How to mute audio from the video with Climpchamp
Step1 First, open up your browser and search for Climpchamp.com. You must sign up and make an account on the next page first. Please note that creating an account doesn’t cost anything. Once you have an account, you just need to click “Create your first video”.

Step2 In this part, you just need to drag the video file you want to mute into the Clipchamp.

Step3 Once you import your video into Clipchamp. Then, go to “Audio” and simply drag the bar to the most left to remove the audio. When you are done, click “Export” on your top screen.

Step4 When exporting the video is done, click “Save to your computer” to save the video.

Part4: FAQ
Why do we need to mute audio from the video?
Getting rid of the audio from some clips might be necessary for a variety of reasons: perhaps the background noise is too loud, maybe you want to censor something from it, or maybe you simply don’t need it because you plan to use the video as B-roll or play music over it.
Conclusion
Basically, it’s easy to remove sound from video windows 10. You can use the tools mentioned above and follow the step-by-step instructions on how to do it. Out of all the tools listed above, Filmora is the best one to use. Filmora can not only take the sound out of your video but also has many ways to change the sound. Like ducking video or detaching audio
Free Download For macOS 10.14 or later
Step2 In this step, you need to find the video you want to mute on your computer and import it to Filmora. Then, drag your video onto Filmora’s timeline.
Step3 Once you’ve dragged your video onto Filmora’s timeline, click on your video in the timeline and then right-click. Afterwards, choose “detach audio.”
Step4 Now, you will see the audio track below the video track. Simply, click on the audio track and click the “delete” icon. Finally, you are successful in muting the audio from your video.
Step5 Click “Export” to save your video on your computer.
Beside Filmora allow you to mute audio from entire of the video, Filmora also has another audio modify feature called “Silence detection”. Silence Detection is a special add-on for Filmora users, making it easier to cut out silent parts of a video. Silence Detection is a unique Filmora add-on that makes it easier for users to remove silent pauses from a film. The add-on examines the full video to detect all the silent pauses and eliminates them instantly, saving you time and simplifying the editing process.
How to use silence detection?
Step1 Right-click on the clip in the resource, select the video clip on the timeline, and choose the silence detection option to open up the silence detection window.
Step2 The silent detection tool will automatically detect the silent and low sound points.
Furthermore, you can adjust the parameters to recalculate the silence detection or manually fine-tune what the feature has already detected
once everything sounds good, export the video into the Filmora timeline so you can continue editing your video.
Moreover, Filmora also has another feature called “Audio ducking”. Audio ducking is a way to turn down the volume of the background when one voiceover comes on.
How to use audio ducking with Filmora
Step1 Let’s say you already have your voiceover and the audio in your video. If you want you to use duking voice feature, firstly, you need to decide which part of the audio you want to lower. After that, double-click the selected part until the ducking voice feature comes out.
Step2 Next, you just need to drag the audio ducking bar to the left or right. Indeed, if you drag to the right, it will lower the audio. Once you are done adjusting the audio, click “Ok”, and you can preview the result.
Last but not least, Filmora has other features called TTS and STT. Speech to Text (STT) allows you to transcript voice to subtitles in one click. Using speech-to-text will save you a lot of time on subtitling and speed up the editing process. Meanwhile, Text to Speech (TTS) is a feature in Filmora that lets you turn text files into voiceover and add more elements to your video.
How to use STT with Filmora
Step1 Firstly, right-click on the audio track and choose “Speech-to-Text”.
Step2 In the STT parameter setting bar, you can choose the language of the audio to be transcribed and the files to be converted. You can also choose to match automatically to the timeline.
How to use TTS with Filmore
Step1 Go to the “Tittle” and add you default Title. After that, write anything you want.
Step2 Select the title box in the timeline, then right-click. After that, click on “Text-to-Speech”.
Step3 In the TTS parameter setting bar, choose the language this title is in and the voice’s name.
Method 3: Use Windows 10 officially recommend video editor
1. Climpchamp
Clipchamp is an online video editor that makes it easy for anyone to make videos, even if they have never edited before. It lets you combine your videos, images, and audio files, remove audio from the video and then save the finished video to your computer. On the Climpchamp homepage, you can sign up for a free account and start editing your videos right away.
How to mute audio from the video with Climpchamp
Step1 First, open up your browser and search for Climpchamp.com. You must sign up and make an account on the next page first. Please note that creating an account doesn’t cost anything. Once you have an account, you just need to click “Create your first video”.
Step2 In this part, you just need to drag the video file you want to mute into the Clipchamp.
Step3 Once you import your video into Clipchamp. Then, go to “Audio” and simply drag the bar to the most left to remove the audio. When you are done, click “Export” on your top screen.
Step4 When exporting the video is done, click “Save to your computer” to save the video.
Part4: FAQ
Why do we need to mute audio from the video?
Getting rid of the audio from some clips might be necessary for a variety of reasons: perhaps the background noise is too loud, maybe you want to censor something from it, or maybe you simply don’t need it because you plan to use the video as B-roll or play music over it.
Conclusion
Basically, it’s easy to remove sound from video windows 10. You can use the tools mentioned above and follow the step-by-step instructions on how to do it. Out of all the tools listed above, Filmora is the best one to use. Filmora can not only take the sound out of your video but also has many ways to change the sound. Like ducking video or detaching audio
Also read:
- 2024 Approved Unveiling the Top 9 Revolutionary AI-Driven Audio Simulators Set
- Delving Into Crickets Vocalizations and Echoes for 2024
- New Sonic Exploration A Deep Dive Into Sound Forges Functionality
- New 2024 Approved How to Locate Horrific Noise Profiles for Filmmaking
- New Instant Solutions to Banish Background Noise Swiftly From Audio Files for 2024
- 2024 Approved Comprehensive Guide to Attaching Audios in Magix Movie Editor 2023
- In 2024, MP4 to Audiophile Revolutionary Audio Extraction Techniques of 2 Written by a Software Engineer
- New The Free Guide to Silencing Movie Trailers in Windows 10 Videos
- New 2024 Approved The Ultimate Arsenal of Audio Manipulation Software for Professional Use
- New Boosting Online Communication Efficiency The Role of the Clownfish Vocal Change Feature in Discord/Fortnite/Skype Chat Rooms for 2024
- 2024 Approved Freeware Harmonies to Accentuate Photo Stories
- Harmonizing Visuals and Beats The Editors Roadmap to Stellar MVs for 2024
- 2024 Approved Techniques for Maintaining Audio Fidelity During Pitch Alteration with Audacity
- In 2024, Beat Blend Benders A Curated List of Highest-Rated Audio-Synchronization Editors, 2023
- New In 2024, Mastering Silence A Comprehensive Walkthrough for Eliminating Tracks in Audacity
- Updated Unveiling the Ultimate Selection of Background Noise Reduction Software
- 2024 Approved Uplifting 15-Track News Jingles Playlist
- 10 Best FREE Music Visualization APPs for iPhone and Android
- No Cost, All Vibes Download Spotifys Free Playlist
- Sonic Sanctuary A Comprehensive Guide to Reducing Reverberation Effects on Audio Fidelity for 2024
- New 2024 Approved The Windows Waveform Guide A Step-by-Step on Incorporating Echo Effects Into Your Music Productions
- Pushing Boundaries Incorporating Photography Into Audio Experiences Audiovisual Trends 2023
- 2024 Approved Probe for Silly Sonic Impressions
- Updated Useful Tips How to Use Voxal Voice Changer on Discord, In 2024
- 2024 Approved The Best Tools and Websites for Video Audio Enhancement Ranking the Top 15 that Make Your Projects Sound Better, with a Balanced Perspective
- Updated Discover Virtual Reality Environment Noises
- Rapid Rhythm Adjustment Simplified Audio Pace Tweaking Strategies
- New Reclaiming Fidelity Navigating the Maze of Deformed Audio Repair Techniques
- In 2024, How does the stardust trade cost In pokemon go On Realme V30? | Dr.fone
- In 2024, Is Fake GPS Location Spoofer a Good Choice On Vivo V29 Pro? | Dr.fone
- Updated Convert YouTube Videos Like a Pro Top MP3 Converter Tools and Techniques
- How To Restore Missing Music Files from Oppo Find N3
- How to Rescue Lost Pictures from Huawei Nova Y91?
- How to Change/Add Location Filters on Snapchat For your Nokia XR21 | Dr.fone
- The Ultimate Guide to Bypassing iCloud Activation Lock on iPhone 13 Pro Max
- Can I recover my data if my iPhone SE (2022) screen turns black? | Stellar
- Create Engaging Audio Waveform Videos with These Web Apps
- In 2024, How to Check Distance and Radius on Google Maps For your Apple iPhone 13 mini | Dr.fone
- New Create Stunning Videos Like a Pro with Filmora. Learn About Its Benefits and some Amazing Video and Audio Editing Features Such as Split Screens, Keyframing, Etc
- How To Unbrick a Dead OnePlus Nord CE 3 5G | Dr.fone
- How to Transfer Data from Xiaomi Redmi Note 12 5G to BlackBerry | Dr.fone
- Title: New In 2024, FREE Top 10 Best Websites to Download Sound Clips for Videos
- Author: Paul
- Created at : 2024-05-05 05:52:37
- Updated at : 2024-05-06 05:52:37
- Link: https://voice-adjusting.techidaily.com/new-in-2024-free-top-10-best-websites-to-download-sound-clips-for-videos/
- License: This work is licensed under CC BY-NC-SA 4.0.
