
:max_bytes(150000):strip_icc():format(webp)/GettyImages-1558254975-0a8ae81a4cd04f3eba064dd56ba8b030.jpg)
New 2024 Approved The Essential Handbook to Audio Timeline Control Mastering Keyframe Creation and Editing in Adobe Premiere Pro (Mac)
The Essential Handbook to Audio Timeline Control: Mastering Keyframe Creation and Editing in Adobe Premiere Pro (Mac)
How to Create Audio Keyframes in Adobe Premiere Pro on Mac

Benjamin Arango
Aug 18, 2022• Proven solutions
Keyframing is one of the most vital components in post-production that can be applied to video and audio tracks. For instance, by adding keyframes in Premiere Pro, you can easily apply properties and values to a specific segment. To do this, you can set up an audio keyframe at the start and another one at the ending of the selected part.
Therefore, with the Premiere Pro keyframe options, you can achieve a gradual flow in your tracks. Without much ado, I’m going to help you set up audio keyframes in Premiere Pro with their vital operations in this post.
Part 1: How to Add Audio Keyframes in Adobe Premiere Pro on Mac?
As I have mentioned, to apply adjustments or properties to a specific point in the audio track, we can use Adobe Premiere keyframes. As of now, there are two kinds of keyframes in Adobe Premiere – Clip Keyframe and Track Keyframe. Before you start adding keyframes in Premiere Pro, you should know their difference.
- Clip Keyframes: This would apply audio effects for the selected clip (like adjusting the volume level). The audio keyframe will only apply to the clip that you have selected and not the entire track.
- Track Keyframes: These audio keyframes in Premiere are applied to the entire audio track (they have values like Volume and Mute).
Now when we have covered the basics, let’s learn how to set up audio keyframes in Premiere on your Mac.
Step 1: Add the Audio Track on Adobe Premiere Pro
To start with, you can launch Adobe Premiere Pro, go to your Project > Import, and simply load any audio track. You can also drag and drop any audio file to the project as well.

Once the audio track is added to the project, you can further drag and drop it to the sequence section (timelines) at the bottom.

Step 2: Show Keyframes for the Track
The application would automatically render different keyframes already present in the track. For this, you need to first select the ribbon of your audio track from the timeline. Now, just right-click on the working area and click on the “Show Audio Keyframes” button from the context menu.

If you want, you can also click on the “Show Keyframes” button that is depicted by a radio/circle icon on the timeline.

Step 3: Work on Audio Keyframes in Premiere Pro
Now, you can view either clip or track keyframes for the track. For this, you can just right-click the keyframe button on the timeline to get different options. Here, you can choose to get Clip or Track keyframes in Premiere Pro. There are options to mute the entire audio or set up its volume under the track option.

Once you have enabled the audio keyframe options in Premiere Pro, you can view keyframes in a highlighted color. You can now take the assistance of the Pen tool or press the CMD key on your Mac to select keyframes. This will let you select the starting and ending keyframes in Premiere Pro so that you can easily apply the desired effect to the selected segment.

Part 2: How to Fade Audio In/Out with Keyframes in Adobe Premiere Pro on Mac?
Once you have learned how to use the Adobe Premiere keyframe feature, you can apply all kinds of transitions and effects to a segment. Let’s suppose you wish to implement fade-in or out features for any segment. In this case, we will use the Clip Keyframing option in Premiere Pro to achieve these transitions the way we like.
Step 1: Get Clip Keyframes in Premiere Pro
Firstly, you can just add any audio track to your Premiere Pro project and drag it to the timeline. You can just click on the show keyframes button to start adding keyframes in Premiere Pro.
If you want, you can just right-click the track, go to the Show Clip Keyframes > Volume > Level option. This will show the level of the volume for different keyframes, letting you pick the right segments to fade in and out.

Step 2: Apply Fade-in or Out options
Once you have clip keyframes in your track, you can easily do whatever you like. You can use the Pen tool or press the CMD key on your Mac to select the starting and the ending of the clip.
Now, go to the audio segment from the timeline and simply place the audio level up (to fade-in) or down (to fade-out). You can set the audio levels for different segments the way you like to customize these operations in your audio track.

Pro Tip: Use Inbuilt Fade In/Out Transitions
With keyframes in Premiere Pro, you can certainly customize the fade in/out options. Though, if you are running short on time, then you can use its inbuilt features for audio adjustments.
For this, you can just go to its Effects > Audio Transitions option. To fade-out any clip, select the Crossfade > Exponential Fade and simply drag and drop to the location of your choice.

In the same way, you can also go to Effects > Audio Transitions > Crossfade and choose the “Constant Gain” feature. You can drag and drop the Contact Gain effect on any segment to implement the fade-in effect.
That’s a wrap, everyone! I’m sure that after reading this post, you would be able to set up audio keyframes in Adobe Premiere Pro. Since adding keyframes in Premiere can be done automatically, it would save your time in audio editing and post-production. Mostly, the clip audio keyframing is used in Adobe to customize the sound at any desired segment. Apart from fade-in or out, there are tons of other effects that you can apply to your audio tracks with the help of keyframes. Go ahead and try the Adobe Premiere Pro keyframing feature and let us know about your experience in the comments.
Benjamin Arango
Benjamin Arango is a writer and a lover of all things video.
Follow @Benjamin Arango
Benjamin Arango
Aug 18, 2022• Proven solutions
Keyframing is one of the most vital components in post-production that can be applied to video and audio tracks. For instance, by adding keyframes in Premiere Pro, you can easily apply properties and values to a specific segment. To do this, you can set up an audio keyframe at the start and another one at the ending of the selected part.
Therefore, with the Premiere Pro keyframe options, you can achieve a gradual flow in your tracks. Without much ado, I’m going to help you set up audio keyframes in Premiere Pro with their vital operations in this post.
Part 1: How to Add Audio Keyframes in Adobe Premiere Pro on Mac?
As I have mentioned, to apply adjustments or properties to a specific point in the audio track, we can use Adobe Premiere keyframes. As of now, there are two kinds of keyframes in Adobe Premiere – Clip Keyframe and Track Keyframe. Before you start adding keyframes in Premiere Pro, you should know their difference.
- Clip Keyframes: This would apply audio effects for the selected clip (like adjusting the volume level). The audio keyframe will only apply to the clip that you have selected and not the entire track.
- Track Keyframes: These audio keyframes in Premiere are applied to the entire audio track (they have values like Volume and Mute).
Now when we have covered the basics, let’s learn how to set up audio keyframes in Premiere on your Mac.
Step 1: Add the Audio Track on Adobe Premiere Pro
To start with, you can launch Adobe Premiere Pro, go to your Project > Import, and simply load any audio track. You can also drag and drop any audio file to the project as well.
Once the audio track is added to the project, you can further drag and drop it to the sequence section (timelines) at the bottom.
Step 2: Show Keyframes for the Track
The application would automatically render different keyframes already present in the track. For this, you need to first select the ribbon of your audio track from the timeline. Now, just right-click on the working area and click on the “Show Audio Keyframes” button from the context menu.
If you want, you can also click on the “Show Keyframes” button that is depicted by a radio/circle icon on the timeline.
Step 3: Work on Audio Keyframes in Premiere Pro
Now, you can view either clip or track keyframes for the track. For this, you can just right-click the keyframe button on the timeline to get different options. Here, you can choose to get Clip or Track keyframes in Premiere Pro. There are options to mute the entire audio or set up its volume under the track option.
Once you have enabled the audio keyframe options in Premiere Pro, you can view keyframes in a highlighted color. You can now take the assistance of the Pen tool or press the CMD key on your Mac to select keyframes. This will let you select the starting and ending keyframes in Premiere Pro so that you can easily apply the desired effect to the selected segment.
Part 2: How to Fade Audio In/Out with Keyframes in Adobe Premiere Pro on Mac?
Once you have learned how to use the Adobe Premiere keyframe feature, you can apply all kinds of transitions and effects to a segment. Let’s suppose you wish to implement fade-in or out features for any segment. In this case, we will use the Clip Keyframing option in Premiere Pro to achieve these transitions the way we like.
Step 1: Get Clip Keyframes in Premiere Pro
Firstly, you can just add any audio track to your Premiere Pro project and drag it to the timeline. You can just click on the show keyframes button to start adding keyframes in Premiere Pro.
If you want, you can just right-click the track, go to the Show Clip Keyframes > Volume > Level option. This will show the level of the volume for different keyframes, letting you pick the right segments to fade in and out.
Step 2: Apply Fade-in or Out options
Once you have clip keyframes in your track, you can easily do whatever you like. You can use the Pen tool or press the CMD key on your Mac to select the starting and the ending of the clip.
Now, go to the audio segment from the timeline and simply place the audio level up (to fade-in) or down (to fade-out). You can set the audio levels for different segments the way you like to customize these operations in your audio track.
Pro Tip: Use Inbuilt Fade In/Out Transitions
With keyframes in Premiere Pro, you can certainly customize the fade in/out options. Though, if you are running short on time, then you can use its inbuilt features for audio adjustments.
For this, you can just go to its Effects > Audio Transitions option. To fade-out any clip, select the Crossfade > Exponential Fade and simply drag and drop to the location of your choice.
In the same way, you can also go to Effects > Audio Transitions > Crossfade and choose the “Constant Gain” feature. You can drag and drop the Contact Gain effect on any segment to implement the fade-in effect.
That’s a wrap, everyone! I’m sure that after reading this post, you would be able to set up audio keyframes in Adobe Premiere Pro. Since adding keyframes in Premiere can be done automatically, it would save your time in audio editing and post-production. Mostly, the clip audio keyframing is used in Adobe to customize the sound at any desired segment. Apart from fade-in or out, there are tons of other effects that you can apply to your audio tracks with the help of keyframes. Go ahead and try the Adobe Premiere Pro keyframing feature and let us know about your experience in the comments.
Benjamin Arango
Benjamin Arango is a writer and a lover of all things video.
Follow @Benjamin Arango
Mastering Music Creation at Home: Ranking the Top 10 Digital Audio Environments
FREE 10 Best Online Music Makers
Benjamin Arango
Apr 26, 2024• Proven solutions


Expressing ideas through music was never easy, and even today in the age of powerful digital audio stations like Ableton Live or FruityLoops , producing original music requires a certain set of skills. However, online content producers often need music for their videos, but they neither have the time or the budget to hire a professional musician to create a soundtrack for their project in studio conditions. If you are looking for a quick way to make your own music online, then you should keep reading, because in this article we are going to take you through the ten best online music makers you should check out in 2021.
10 Best Online Music Makers in 2021
The music-making platforms that are currently available online are still not as nearly as powerful as professional software products for music producers. Nonetheless, this doesn’t mean that you can’t use them to create the music you like or just have fun with them. Here are the ten best online music makers in 2019.
1. Typeatone
Price: Free
Image from Internet
Have you ever wondered what your words would sound like if they were turned into music? Head over to the Typeatone platform if you want to find out since all you have to do in order to start creating your own music is type in the text. As you type, the platform will automatically start playing your words and once you’re done, you’ll be able to hear your new song. You can also choose between different instruments to make the process of creating music with Typeatone even more entertaining. You can share all of your creations with your friends on social media.
![]()
A cross-platform for making videos anywhere for all creators

Why your video editing isn’t good enough? How about some creative inspo?
- 100 Million+ Users
- 150+ Countries and Regions
- 4 Million+ Social Media Followers
- 5 Million+ Stock Media for Use
* Secure Download

2. Audiotool
Price: Free
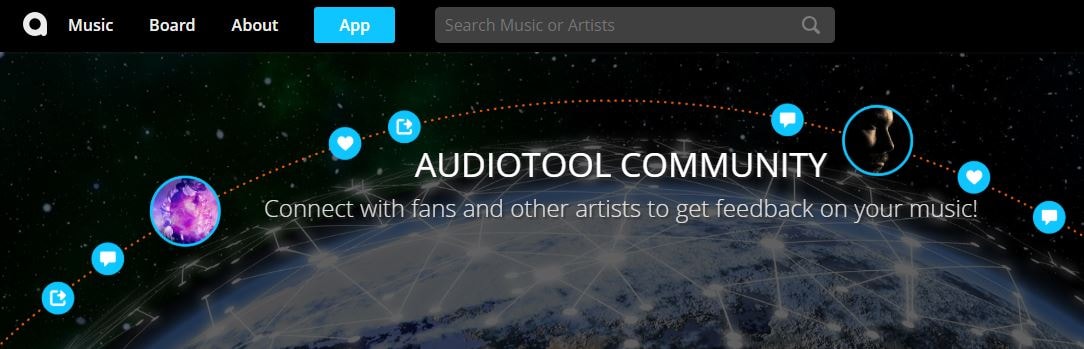
Image from Internet
Electronic music producers who often use synthesizers like Roland TB-303 or Roland TR-909 are going to love the features this online collaborative platform offers. Audiotool hosts a huge music library, you can explore even if you are not a registered user. In order to access the platform’s music studio, you first have to create an account and make sure that you are signed in. Audiotool is also a community of like-minded people where you can meet artists whose work you appreciate or hear what others think about your work. The only downside is that Audiotool’s abundance of features can be overwhelming for the newcomers to the world of electronic music production.
3. AudioSauna
Price: Free
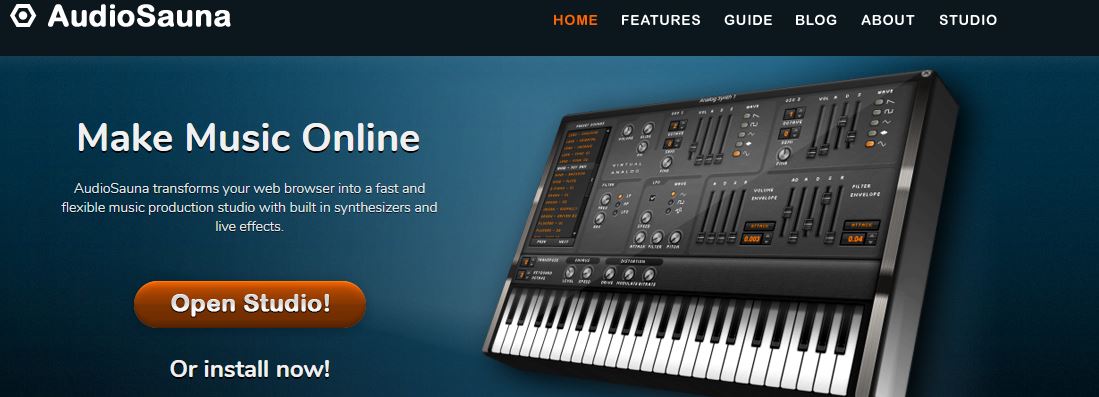
Image from Internet
AudioSauna seems to offer everything its users need to create inspiring music because it is equipped with frequency modulation synth, virtual analog synth and a sampler that provides layering features. Moreover, its intuitive interface makes the process of arranging the song structure or changing several note values simultaneously much easier. Creating an account on AudioSauna will enable to record all your projects and export them as audio files that can be uploaded to SoundCloud or any other audio distribution platform. AudioSauna is a perfect tool for skilled producers who want to create their music online.
4. Soundtrap
Price: Free trial available, subscription plans start at $3.99 per month

Image from Internet
Soundtrap offers a long list of features that enable professional musicians to create their music online. All you have to do is create an account and you will get access to the Sountrap’s studio that let you create new beat patterns, use a synthesizer or even invite friends to make music together. The platform also offers the possibility to connect your own instruments to the Soundtrap’s studio, so that you can record your music as you play it. This online platform also has an Education section where you can share your knowledge with others or learn valuable music lessons.
5. PatternSketch
Price: Free
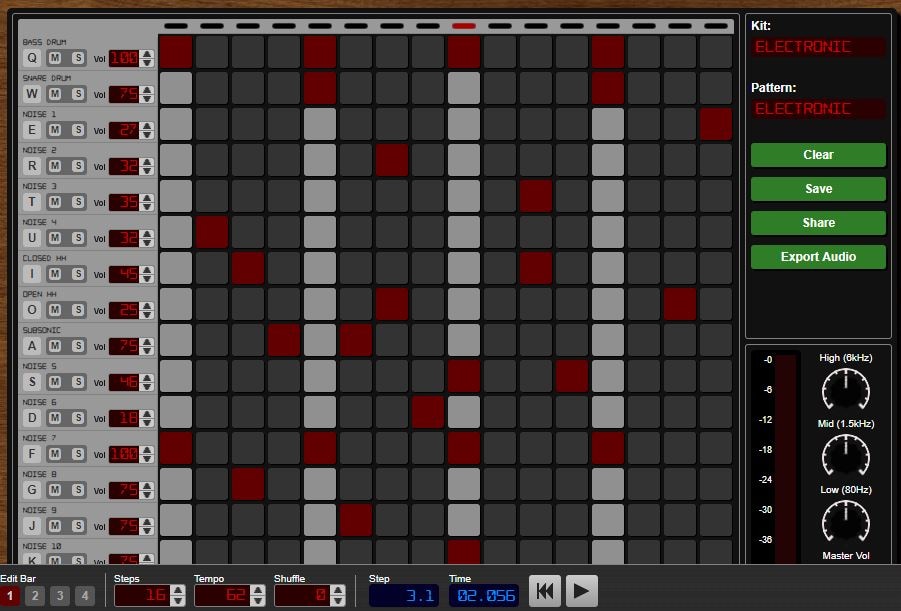
Image from Internet
This basic and yet effective drum machine can help you generate amazing beats for the songs you’re working on. Once you sign up, you will be able to choose from a number of different kits and patterns that are fully customizable or create your own original beats. After you create a pattern you like, you can save it with a single click or send it to your friends via email. Optionally, you can export all of your creations from PatternSketch and save them as wav, mp3 or ogg files, although in some cases mp3 audio files may not loop properly.
6. Soundation
Price: Free version available, pricing plans start at $1.99 per month

Image from Internet
If you choose to create music with the free version of Soundation, you’ll be able to work on up to ten projects, try out over 700 audio effects and loops, and export all your music in low quality. Purchasing the Intro pricing plan will enable you to work on an unlimited number of projects, make live audio recordings, import audio files smaller than 100MB or use an external midi controller. Moreover, opting for any of the annual or monthly subscription plans will allow you to export entire projects and audio files in high resolution from Soundation.
7. Text to Speech
Price: Free

online-music-maker-Text to Speech.jpg
Vocals are often overlooked in contemporary electronic music, but there are so many ways they can be used creatively. The platform lets you turn up to 50000 characters into speech at once, and it also offers several different voices you can choose from. Before you create an audio file you can determine how fast the text is going to be vocalized, so you should try different options and see which one fits your project the best. Text to Speech platform can be used during the process of creating a new song, but the tools it offers are not enough to make an entire song.
8. Looplabs
Price: Free
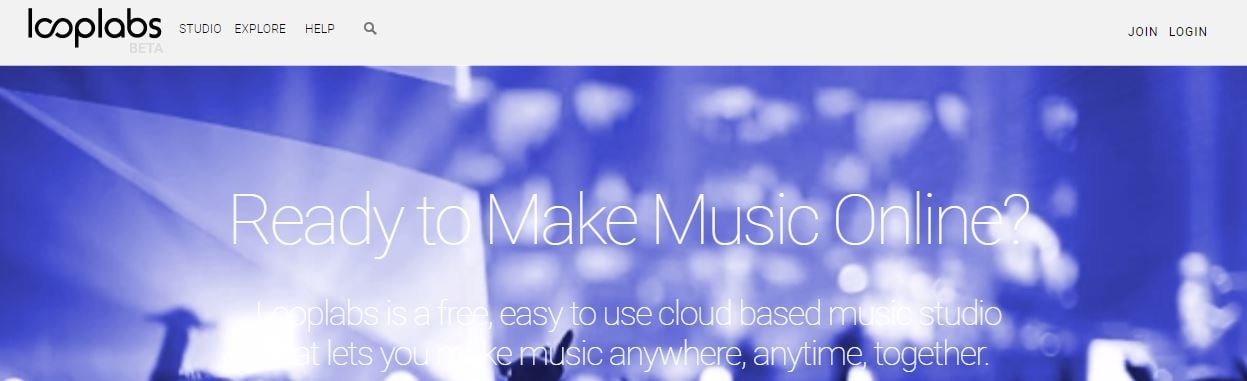
Music enthusiasts who would like to produce different genres of music online should definitely get familiar with Looplabs, as this online music maker lets its users remix songs or make music from scratch. Besides being one of the best places on the Internet to record music, Looplabs is also a community where you can meet people who like your music or discover artists whose work you admire. The Looplab’s studio features samples for a broad range of music genres and musical instruments, and you can use it to make Electro or Funk music equally effectively.
9. Online Sequencer
Price: Free
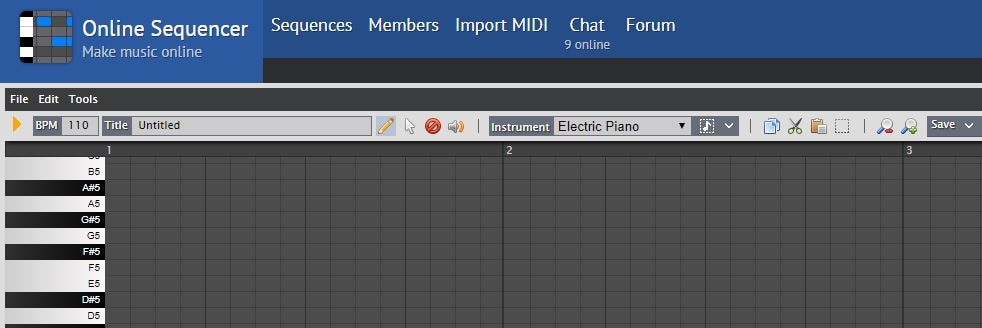
This is a perfect tool for developing an idea for a song, as you can create a sequence in just a few minutes. You can choose from Piano, Drums and Guitar categories of instruments or browse through a huge collection of fully customizable preset sequences that is updated on a daily basis. The platform also lets you import MIDI files and work on projects you’ve already started developing or you can export your sequences as MIDI files from the Online Sequencer and edit them with your DAW. Even though Online Sequencer is a useful tool for making music, the features it offers can’t really be compared with those on Soundation or AudioSauna.
10. Autochords
Price: Free
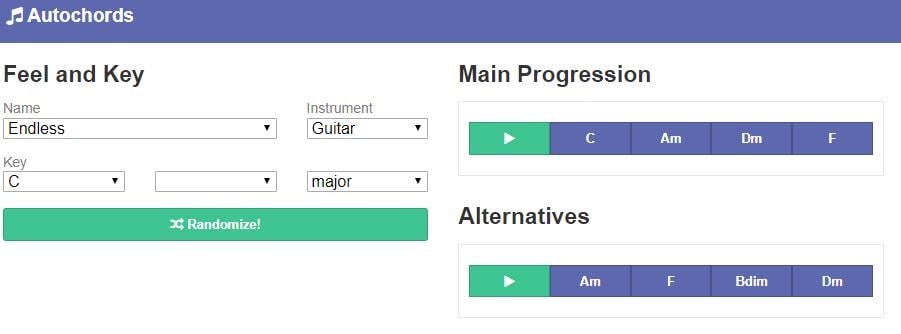
Finding new ideas for songs is often more difficult than it sounds, and if you ever face a creative block you should simply head over to Autochords. This platform suggests chord progressions based on the parameters you set, so you just have to select an instrument and the name of the song to set the feel, and the platform will show you the main progression and its alternatives. Rather than being an online music maker, Autochords is more a tool that helps piano and guitar players understand chord progressions better. iPhone and iPad users can download the Autochords app from the App Store for free.
Read More to Get : Best Free DAW for Windows and Mac for Beginners >>
Conclusion
You don’t have to be a professional musician in order to start making music online, you just have to love music, and an online music maker of your choice will take care of the rest. Do you use online music makers for entertainment or to express your creativity? Leave a comment below and share your opinions with us.
Benjamin Arango
Benjamin Arango is a writer and a lover of all things video.
Follow @Benjamin Arango
Benjamin Arango
Apr 26, 2024• Proven solutions
Expressing ideas through music was never easy, and even today in the age of powerful digital audio stations like Ableton Live or FruityLoops , producing original music requires a certain set of skills. However, online content producers often need music for their videos, but they neither have the time or the budget to hire a professional musician to create a soundtrack for their project in studio conditions. If you are looking for a quick way to make your own music online, then you should keep reading, because in this article we are going to take you through the ten best online music makers you should check out in 2021.
10 Best Online Music Makers in 2021
The music-making platforms that are currently available online are still not as nearly as powerful as professional software products for music producers. Nonetheless, this doesn’t mean that you can’t use them to create the music you like or just have fun with them. Here are the ten best online music makers in 2019.
1. Typeatone
Price: Free
Image from Internet
Have you ever wondered what your words would sound like if they were turned into music? Head over to the Typeatone platform if you want to find out since all you have to do in order to start creating your own music is type in the text. As you type, the platform will automatically start playing your words and once you’re done, you’ll be able to hear your new song. You can also choose between different instruments to make the process of creating music with Typeatone even more entertaining. You can share all of your creations with your friends on social media.
![]()
A cross-platform for making videos anywhere for all creators
Why your video editing isn’t good enough? How about some creative inspo?
- 100 Million+ Users
- 150+ Countries and Regions
- 4 Million+ Social Media Followers
- 5 Million+ Stock Media for Use
* Secure Download
2. Audiotool
Price: Free
Image from Internet
Electronic music producers who often use synthesizers like Roland TB-303 or Roland TR-909 are going to love the features this online collaborative platform offers. Audiotool hosts a huge music library, you can explore even if you are not a registered user. In order to access the platform’s music studio, you first have to create an account and make sure that you are signed in. Audiotool is also a community of like-minded people where you can meet artists whose work you appreciate or hear what others think about your work. The only downside is that Audiotool’s abundance of features can be overwhelming for the newcomers to the world of electronic music production.
3. AudioSauna
Price: Free
Image from Internet
AudioSauna seems to offer everything its users need to create inspiring music because it is equipped with frequency modulation synth, virtual analog synth and a sampler that provides layering features. Moreover, its intuitive interface makes the process of arranging the song structure or changing several note values simultaneously much easier. Creating an account on AudioSauna will enable to record all your projects and export them as audio files that can be uploaded to SoundCloud or any other audio distribution platform. AudioSauna is a perfect tool for skilled producers who want to create their music online.
4. Soundtrap
Price: Free trial available, subscription plans start at $3.99 per month
Image from Internet
Soundtrap offers a long list of features that enable professional musicians to create their music online. All you have to do is create an account and you will get access to the Sountrap’s studio that let you create new beat patterns, use a synthesizer or even invite friends to make music together. The platform also offers the possibility to connect your own instruments to the Soundtrap’s studio, so that you can record your music as you play it. This online platform also has an Education section where you can share your knowledge with others or learn valuable music lessons.
5. PatternSketch
Price: Free
Image from Internet
This basic and yet effective drum machine can help you generate amazing beats for the songs you’re working on. Once you sign up, you will be able to choose from a number of different kits and patterns that are fully customizable or create your own original beats. After you create a pattern you like, you can save it with a single click or send it to your friends via email. Optionally, you can export all of your creations from PatternSketch and save them as wav, mp3 or ogg files, although in some cases mp3 audio files may not loop properly.
6. Soundation
Price: Free version available, pricing plans start at $1.99 per month
Image from Internet
If you choose to create music with the free version of Soundation, you’ll be able to work on up to ten projects, try out over 700 audio effects and loops, and export all your music in low quality. Purchasing the Intro pricing plan will enable you to work on an unlimited number of projects, make live audio recordings, import audio files smaller than 100MB or use an external midi controller. Moreover, opting for any of the annual or monthly subscription plans will allow you to export entire projects and audio files in high resolution from Soundation.
7. Text to Speech
Price: Free

online-music-maker-Text to Speech.jpg
Vocals are often overlooked in contemporary electronic music, but there are so many ways they can be used creatively. The platform lets you turn up to 50000 characters into speech at once, and it also offers several different voices you can choose from. Before you create an audio file you can determine how fast the text is going to be vocalized, so you should try different options and see which one fits your project the best. Text to Speech platform can be used during the process of creating a new song, but the tools it offers are not enough to make an entire song.
8. Looplabs
Price: Free
Music enthusiasts who would like to produce different genres of music online should definitely get familiar with Looplabs, as this online music maker lets its users remix songs or make music from scratch. Besides being one of the best places on the Internet to record music, Looplabs is also a community where you can meet people who like your music or discover artists whose work you admire. The Looplab’s studio features samples for a broad range of music genres and musical instruments, and you can use it to make Electro or Funk music equally effectively.
9. Online Sequencer
Price: Free
This is a perfect tool for developing an idea for a song, as you can create a sequence in just a few minutes. You can choose from Piano, Drums and Guitar categories of instruments or browse through a huge collection of fully customizable preset sequences that is updated on a daily basis. The platform also lets you import MIDI files and work on projects you’ve already started developing or you can export your sequences as MIDI files from the Online Sequencer and edit them with your DAW. Even though Online Sequencer is a useful tool for making music, the features it offers can’t really be compared with those on Soundation or AudioSauna.
10. Autochords
Price: Free
Finding new ideas for songs is often more difficult than it sounds, and if you ever face a creative block you should simply head over to Autochords. This platform suggests chord progressions based on the parameters you set, so you just have to select an instrument and the name of the song to set the feel, and the platform will show you the main progression and its alternatives. Rather than being an online music maker, Autochords is more a tool that helps piano and guitar players understand chord progressions better. iPhone and iPad users can download the Autochords app from the App Store for free.
Read More to Get : Best Free DAW for Windows and Mac for Beginners >>
Conclusion
You don’t have to be a professional musician in order to start making music online, you just have to love music, and an online music maker of your choice will take care of the rest. Do you use online music makers for entertainment or to express your creativity? Leave a comment below and share your opinions with us.
Benjamin Arango
Benjamin Arango is a writer and a lover of all things video.
Follow @Benjamin Arango
Acoustical Alchemy Insights: A Comparative Study of Premier Audio Editing Tools, Their Strengths, Weaknesses, and Alternatives
Audio editors are generally referred to as Digital Audio Workstation, DAW. They provide you with digital tools to edit, record, and also produce audio files. Most audio editors are used to create podcasts and mix different audio files.
Internet is full of different audio editors, but the case in the study is about Beautiful Audio Editor. To know more about this editor and to learn about its steps, read the article below.
In this article
01 What Is Beautiful Audio Editor?
02 Beautiful Audio Editor: Key Features, Pros & Cons
03 How to Use Beautiful Audio Editor?
04 Best Alternatives for Beautiful Audio Editor
Part 1. What Is Beautiful Audio Editor?
For an online editor, Beautiful Audio Editor is the best choice, and this is because the editor is feature-rich. This editor works well on both Chrome and Firefox browsers. Beautiful Audio Editor is great for the fact that it offers excellent options of frequency effects. Importantly, the audio editor allows you to save the files on Google Drive.

Do you know the best part of Beautiful Audio Editor? The editor supports multi-track editing and allows you to adjust and manage every track level. With this editor, try and move from complete silence to 6 decibels higher than the actual level. Do you know what wonders this can do? For smooth fade-ins and fade-outs, this is very helpful.
Part 2. Beautiful Audio Editor: Key Features, Pros & Cons
With Beautiful Audio Editor, you can edit amazing audio files, make stunning mixes and crazy podcasts. This online, easy-to-use editor has a lot of features to offer. Do you know what they are? Let’s increase your knowledge and share some key features of Beautiful Audio Editor:
· Editing Features
This is a multi-track audio editor that supports adjusting every level of each track. With Beautiful Audio Editor, try to alter volume and pan. Along with this, options like Move, Split, Duplicate and Delete sections of the audio file are also offered.
· Recording
Do you think Beautiful Audio Editor is just an editor? You are wrong if you think so. This is because the editor is not only great for editing but try and record with this fantastic tool. You can record through your microphone and get high-quality recordings.
· Effects
Beautiful Audio Editor provides a wide range of effects that can modify and transform your audio file. For instance, you get effects like Gain, Dynamic Compression, Reverb, Low/High pass filters. Along with all this, you can also speed up or slow down the audio.
· Customized Effects
Which audio editor offers customized effects? Beautiful Audio Editor does! With Volume Envelopes, you can create custom Fade Ins and Fade Outs. Moreover, the editor also provides features like dragging the effects, zooming, etc.
2.1. Pros & Cons of Beautiful Audio Editor
Do you have any idea about the benefits that you get from Beautiful Audio Editor? If you don’t, let’s enlighten you with this editor’s pros and cons.
Benefits
- You can export files both in 16-bit WAV and also in 128-bit MP3 format from Beautiful AudioEditor.
- This audio editor is free to use. You don’t even have to register for editing audio, just open Chrome or Firefox and start the work.
- Your edited audio files are saved both online and offline. You can either save files on Google Drive or else save local files.
- Beautiful Audio Editorenables you to create audio envelopes. Moreover, you can apply dozens of audio effects while editing.
Drawback
- A significant drawback of this editor is that it crashes if the project is over 300MB or 45mins. This is not reliable for high stake projects.
Part 3. How to Use Beautiful Audio Editor?
Have you ever used this editor before? As we mentioned in the introduction, we would introduce the steps to use Beautiful Audio Editor, so here we are. Are you ready to learn about its step-by-step guidelines? Let’s get started!
Step 1: To start the editing, open the online editor. A timeline screen will appear in front of you; head to the ‘File’ tab and click on it from the top menu bar. From the sub-menu, select the ‘Import local sound file’ option to import the file from your device.

Step 2: For splitting the audio, drag the play head to the point from where you want to split. Next to the toolbar, click on the ‘Split’ icon. This will split the audio into 2 parts, and you can split as much as you want to. By using the ‘Remove’ icon from the toolbar, you can also remove the extra audio part.

Step 3: For adding Fade to your audio, move to the line under the timeline. Now, select a start and an endpoint on the line and drag it downwards for Fade Out. In comparison, push it upwards for Fade In.

Step 4: For adjusting the Volume or the Gain, move to the bottom left corner. You will see a ‘Gain’ option, hit on it to open its tab on the right side of the screen, and then adjust the ‘Gain’ by moving the slider.

Step 5: You can also rename your file by double-clicking on it. Lastly, to save the file, tap on the ‘File’ tab and select the ‘Save project to a local file for later load’ option. After this, download the file to your preferred location.

Part 4. Best Alternatives for Beautiful Audio Editor
We have something for you if Beautiful Audio Editor has failed to impress you. The following section of this article will share the best alternatives with its readers. Let’s begin!
1. TwistedWave
Do you know how amazing this alternative is? TwistedWave is an online, easy-to-use audio editor. The interface of this editor is very clean and simple to understand. Moreover, you get a long list of effects from TwistedWave, for instance, Reverse, Graphic EQ, Fade in and Fade out, Amplify, Normalize, and others.
The best part about this audio editor is that you can easily send files to SoundCloud and also Google Drive. Likewise, you can upload files from both Google Drive and SoundCloud.

2. Bear Audio Editor
Moving on to discuss Bear Audio Editor, which can trim, cut, and also convert music files. Interestingly, you can avail all these amazing features online and free, without even downloading any software. This editor offers you options like Fade In and Out, Mute, Pitch and Volume Adjustment, etc.
You can also combine different music files, ringtones, etc., to make your perfect mix. Bear Audio Editor supports MP3, OGG, and WAV input formats. Whereas OGG, WMA, WAV, MP3, and M4R are output-supported formats.

3. Sodaphonic
Do you want to edit a file from Dropbox? Try Sodaphonic audio editor. You can not only open files from Dropbox but also import them from Google Drive. This online editor offers diverse options that include Louder, Quieter, Silence, Normalize, Bleep it, Reverse, and much more than this.
Other than this, you get different editing options, including Delete, Trim, Cut, Copy, etc. This editor also allows access to a microphone for recording.

Last Words
Beautiful Audio Editor, like its name, is beautiful and equally amazing to use. The online editor offers a lot of features, and interestingly, it’s free. The article discussed great details about Beautiful Audio Editor along with its guideline. What if we share another audio editor? Try Wondershare Filmora Audio Editor, the easy-to-use, drag-and-drop software.
You can modify your audio files to the next level with Filmora . Its advanced audio editing features are unmatched, like Audio Equalizer, Audio Denoise, Detach Audio from Video, and so much more. You can also add Voiceovers, replace original audio from video, add background music, etc.
Wondershare Filmora
Get started easily with Filmora’s powerful performance, intuitive interface, and countless effects!
Try It Free Try It Free Try It Free Learn More >

02 Beautiful Audio Editor: Key Features, Pros & Cons
03 How to Use Beautiful Audio Editor?
04 Best Alternatives for Beautiful Audio Editor
Part 1. What Is Beautiful Audio Editor?
For an online editor, Beautiful Audio Editor is the best choice, and this is because the editor is feature-rich. This editor works well on both Chrome and Firefox browsers. Beautiful Audio Editor is great for the fact that it offers excellent options of frequency effects. Importantly, the audio editor allows you to save the files on Google Drive.
Do you know the best part of Beautiful Audio Editor? The editor supports multi-track editing and allows you to adjust and manage every track level. With this editor, try and move from complete silence to 6 decibels higher than the actual level. Do you know what wonders this can do? For smooth fade-ins and fade-outs, this is very helpful.
Part 2. Beautiful Audio Editor: Key Features, Pros & Cons
With Beautiful Audio Editor, you can edit amazing audio files, make stunning mixes and crazy podcasts. This online, easy-to-use editor has a lot of features to offer. Do you know what they are? Let’s increase your knowledge and share some key features of Beautiful Audio Editor:
· Editing Features
This is a multi-track audio editor that supports adjusting every level of each track. With Beautiful Audio Editor, try to alter volume and pan. Along with this, options like Move, Split, Duplicate and Delete sections of the audio file are also offered.
· Recording
Do you think Beautiful Audio Editor is just an editor? You are wrong if you think so. This is because the editor is not only great for editing but try and record with this fantastic tool. You can record through your microphone and get high-quality recordings.
· Effects
Beautiful Audio Editor provides a wide range of effects that can modify and transform your audio file. For instance, you get effects like Gain, Dynamic Compression, Reverb, Low/High pass filters. Along with all this, you can also speed up or slow down the audio.
· Customized Effects
Which audio editor offers customized effects? Beautiful Audio Editor does! With Volume Envelopes, you can create custom Fade Ins and Fade Outs. Moreover, the editor also provides features like dragging the effects, zooming, etc.
2.1. Pros & Cons of Beautiful Audio Editor
Do you have any idea about the benefits that you get from Beautiful Audio Editor? If you don’t, let’s enlighten you with this editor’s pros and cons.
Benefits
- You can export files both in 16-bit WAV and also in 128-bit MP3 format from Beautiful AudioEditor.
- This audio editor is free to use. You don’t even have to register for editing audio, just open Chrome or Firefox and start the work.
- Your edited audio files are saved both online and offline. You can either save files on Google Drive or else save local files.
- Beautiful Audio Editorenables you to create audio envelopes. Moreover, you can apply dozens of audio effects while editing.
Drawback
- A significant drawback of this editor is that it crashes if the project is over 300MB or 45mins. This is not reliable for high stake projects.
Part 3. How to Use Beautiful Audio Editor?
Have you ever used this editor before? As we mentioned in the introduction, we would introduce the steps to use Beautiful Audio Editor, so here we are. Are you ready to learn about its step-by-step guidelines? Let’s get started!
Step 1: To start the editing, open the online editor. A timeline screen will appear in front of you; head to the ‘File’ tab and click on it from the top menu bar. From the sub-menu, select the ‘Import local sound file’ option to import the file from your device.
Step 2: For splitting the audio, drag the play head to the point from where you want to split. Next to the toolbar, click on the ‘Split’ icon. This will split the audio into 2 parts, and you can split as much as you want to. By using the ‘Remove’ icon from the toolbar, you can also remove the extra audio part.
Step 3: For adding Fade to your audio, move to the line under the timeline. Now, select a start and an endpoint on the line and drag it downwards for Fade Out. In comparison, push it upwards for Fade In.
Step 4: For adjusting the Volume or the Gain, move to the bottom left corner. You will see a ‘Gain’ option, hit on it to open its tab on the right side of the screen, and then adjust the ‘Gain’ by moving the slider.
Step 5: You can also rename your file by double-clicking on it. Lastly, to save the file, tap on the ‘File’ tab and select the ‘Save project to a local file for later load’ option. After this, download the file to your preferred location.
Part 4. Best Alternatives for Beautiful Audio Editor
We have something for you if Beautiful Audio Editor has failed to impress you. The following section of this article will share the best alternatives with its readers. Let’s begin!
1. TwistedWave
Do you know how amazing this alternative is? TwistedWave is an online, easy-to-use audio editor. The interface of this editor is very clean and simple to understand. Moreover, you get a long list of effects from TwistedWave, for instance, Reverse, Graphic EQ, Fade in and Fade out, Amplify, Normalize, and others.
The best part about this audio editor is that you can easily send files to SoundCloud and also Google Drive. Likewise, you can upload files from both Google Drive and SoundCloud.
2. Bear Audio Editor
Moving on to discuss Bear Audio Editor, which can trim, cut, and also convert music files. Interestingly, you can avail all these amazing features online and free, without even downloading any software. This editor offers you options like Fade In and Out, Mute, Pitch and Volume Adjustment, etc.
You can also combine different music files, ringtones, etc., to make your perfect mix. Bear Audio Editor supports MP3, OGG, and WAV input formats. Whereas OGG, WMA, WAV, MP3, and M4R are output-supported formats.
3. Sodaphonic
Do you want to edit a file from Dropbox? Try Sodaphonic audio editor. You can not only open files from Dropbox but also import them from Google Drive. This online editor offers diverse options that include Louder, Quieter, Silence, Normalize, Bleep it, Reverse, and much more than this.
Other than this, you get different editing options, including Delete, Trim, Cut, Copy, etc. This editor also allows access to a microphone for recording.
Last Words
Beautiful Audio Editor, like its name, is beautiful and equally amazing to use. The online editor offers a lot of features, and interestingly, it’s free. The article discussed great details about Beautiful Audio Editor along with its guideline. What if we share another audio editor? Try Wondershare Filmora Audio Editor, the easy-to-use, drag-and-drop software.
You can modify your audio files to the next level with Filmora . Its advanced audio editing features are unmatched, like Audio Equalizer, Audio Denoise, Detach Audio from Video, and so much more. You can also add Voiceovers, replace original audio from video, add background music, etc.
Wondershare Filmora
Get started easily with Filmora’s powerful performance, intuitive interface, and countless effects!
Try It Free Try It Free Try It Free Learn More >
Also read:
- New Redefining Auditory Experience Discover the Best 5 Distortion Tools Available for 2024
- 2024 Approved Explore the Best Selection of 7 Internet-Based Audio Trimming Utilities
- Updated In 2024, Clearer Soundscapes Strategies to Eradicate Unwanted Whistling Noises
- Improve Auditory Experience Through Crossfade Adjustments for 2024
- New 2024 Approved Discover the Highest-Rated MP3 Recorders for Both PC and Mac Environments
- Updated Transformations in Anime How Localization Brings Characters Home
- New 2024 Approved Compilation of the Best 8 Rain Styled Sounds for Digital Acquisition - Updated
- Updated Eliminating Soundtracks in Contemporary MKV Video Files (MKV-2023)
- New Setting Up and Disabling Audacity for Enhanced Sound Editing on Your Chromebook for 2024
- 2024 Approved In-Depth Tutorial Removing Vocals In Adobe Audition - 6 Proven Steps
- Updated The Ultimate List of Speech-Friendly Audio Recorders
- New 2024 Approved Discovering 8 Premium, Cost-Free Videogame Soundscape Highlights
- Updated Spotlight on Emerging Emotive Acoustic Selections for 2024
- New Audio Adaptation Techniques From MP3 Files to Compatible MP4s in Modern Times
- Updated In 2024, How to Locate the Sound of an Enraged Canines Yell
- New 2024 Approved The Hush Technique Audio Removal Expertise for MP4, MKV, AVI, MOV, WMV Video Files
- In 2024, Ultimate Guide to the 9 Most Reliable Podcast Microphones
- Most Trending Free Digital Repositories for Guitar Mood Melodies and Images for 2024
- New Innovations in Android Call Technology The Best Replacements for FaceTime Outside of iOS
- Updated Leveraging Machine Learning for Clean Audio Transmission for 2024
- Updated In 2024, Silencing Audio in MP4 Format A Step-by-Step Guide
- In 2024, The Ultimate Guide to Adding Auto-Tuned Magic in Audacity
- Updated Turning the Tables on Sound Innovations in Audio Reversal Technology
- New 2024 Approved 5 Popular Linux Audio Recorder and Linux Audio Recording Tips
- 2024 Approved Exploring the Leading Free Audio Editors A Comprehensive Guide to Windows-Based Software
- Updated In 2024, Tips and Tricks to Listen or Download Soft Background Music
- New 2024 Approved Cheapest Mac Music Format Editor with Unlimited Trials
- Best 6 Apps for Real-Time Voice Changing
- New In 2024, How to Install and Uninstall Audacity for Chromebook
- New Best Vocal Silencing Software and Platforms Reviewed
- Updated Pinnacle Advice for Creating Stellar Music Videos
- Updated Master Your Sound on Mac The Top 5 Audio Mixer Selections
- Updated 2024 Approved The Ultimate Guide to Audio-Based Text Extraction Techniques
- Elevating Visuals with Vocal Synchrony A Curated List of Pivotal Song Choices for 2024
- Prime Concertor of MP3 Beats for Mac Devices
- Updated 2024 Approved Audio Chop & Split in a Flash Speeding up MP3 Separation Processes
- Updated How to Make 3D Cartoon of Yourself for 2024
- In 2024, The Complete Guide to Vivo Y27 4G FRP Bypass Everything You Need to Know
- In 2024, Top 11 Free Apps to Check IMEI on Meizu Phones
- 2024 Approved Design and Send Video Invites with These Top iOS and Android Apps
- New Save Big on Filmora The Most Comprehensive List of Coupon Codes 2024
- Stop Time in Its Tracks How to Freeze Frames in Your Favorite Video Editor for 2024
- How to Change Location on TikTok to See More Content On your Tecno Spark 10 4G | Dr.fone
- The Updated Method to Bypass Nokia C12 FRP
- In 2024, Disabling Apple iPhone XS Parental Restrictions With/Without Password | Dr.fone
- How to Soft Reset Motorola Moto G34 5G phone? | Dr.fone
- Here Are Some Reliable Ways to Get Pokemon Go Friend Codes For Honor X50i+ | Dr.fone
- Title: New 2024 Approved The Essential Handbook to Audio Timeline Control Mastering Keyframe Creation and Editing in Adobe Premiere Pro (Mac)
- Author: Paul
- Created at : 2024-05-05 06:05:40
- Updated at : 2024-05-06 06:05:40
- Link: https://voice-adjusting.techidaily.com/new-2024-approved-the-essential-handbook-to-audio-timeline-control-mastering-keyframe-creation-and-editing-in-adobe-premiere-pro-mac/
- License: This work is licensed under CC BY-NC-SA 4.0.
