
:max_bytes(150000):strip_icc():format(webp)/E-reader-57b936e05f9b58cdfd3e07e1.jpg)
New 2024 Approved Enhancing Sound Quality in Film Production Implementing Effective Automatic Volume Reduction in Final Cut Pro X
Enhancing Sound Quality in Film Production: Implementing Effective Automatic Volume Reduction in Final Cut Pro X
How to Do Automatic Audio Ducking in Final Cut Pro X

Benjamin Arango
Oct 26, 2023• Proven solutions
If you are working in post-production, then you might be familiar with the concept of audio ducking. In nutshell, it is a process in which the background sound of a clip is reduced and the voiceover is amplified. Therefore, with the help of sound ducking, we can focus on the dialogues without a noisy background track.
Lately, a lot of people have asked us about the process to do automatic audio ducking in Final Cut Pro X. Since it is a clip-based editing tool, it lacks a dedicated mixer to help us do FCPX audio ducking. Thankfully, there are third-party plugins and tools (like the FCPX AutoDuck) that can help us do the same. In this post, I will let you know how to do audio ducking in Final Cut Pro and its best alternative.
If you don’t want to use any plugins, see this article: How to sync in FCPX.
Part 1: How to Perform Audio Ducking in Final Cut Pro X?
If you have a video in which you have background music and a voiceover, then you can perform sound ducking in it. This will automatically enhance the quality of the voiceover and would mellow down the background music selectively. Sadly, the feature of audio ducking in Final Cut Pro has to be done manually as there are no instant automatic options in the tool presently.

Therefore, you can use any reliable third-party FCPX tool like Audified or AutoDuck to meet your requirements. For instance, let’s consider the example of FCPX AutoDuck, which is a paid macOS application. To perform FCPX audio ducking, you first have to export the music and voiceover as two dedicated files. Later, you can import them to FCPX AutoDuck to perform auto-ducking of the music.
Step 1: Export the Music Files
To perform audio ducking in Final Cut Pro, you can first launch the application on Mac and open your project. Since there is no FCPX audio ducking option, you first have to export the music files.
For this, you can just go to the main menu on Final Cut Pro and select File > Share > Master File. This will help you explore and save all the media files from Final Cut Pro.

Now, once the Master File window would be opened, you can go to the “Role” tab and select “Audio Only” as the output role. This will display a list of the background music and the voiceover file.

You can now select the files of your choice and click on the “Next” button to save them to any desired location on your Mac.
Step 2: Use FCPX AutoDuck to Do Automatic Sound Ducking
Great! Now, you can just open the FCPX AutoDuck application on your Mac via its Application or Spotlight. You can just give it a project name and drag-and-drop the speaker (voiceover) and the music files here. If you want, you can also import a filler file of your choice.

FCPX will also let you select the level of music ducking from its dedication option. There are also different options to set up things like setting up the window or pre-roll for the audio.

In the end, you can click on the “Duck” button and let FCPX AutoDuck perform automatic audio ducking on the files.
Step 3: Insert the Modified File to your Project
Once the FCPX audio ducking process is completed, it will generate an XML file. You can now just drag the XML file and drop it to your project in Final Cut Pro. Here, you can choose to select the XML file in the same project.

You can now copy the modified music clip, go to the timeline, and paste it at the starting of the video. Here, you can just mute the previous music clip and let the auto-duck audio play instead.

Part 2: The Best FCPX Alternative for Mac to Perform Automatic Audio Ducking
As you can see, it is pretty tough to do audio ducking in Final Cut Pro as there is no automatic feature in the tool. Therefore, you can consider using Wondershare Filmora for Mac to perform automatic sound ducking and save your time. It is an inbuilt feature in Filmora that would perform auto-ducking instantly, and you can also mark the level of ducking in the video.


Ideally, you can perform audio ducking on voiceover or another soundtrack in Wondershare Filmora. To perform music ducking via Wondershare Filmora on Mac, you can follow these steps:
Step 1: Import the Video Clip or Record Your Audio
To begin with, just launch Wondershare Filmora on your Mac and just drag-and-drop your media files to the application. You can also go to its menu and choose to import media files.

Once your video is imported, you can drag it to the timeline at the bottom to work on it. If you want, you can click on the voiceover icon (adjacent to the preview section) to record dialogues right away.

Apart from that, you can also import music files to your video or use the extensive range of royalty-free audio files that are available in Filmora.

Step 2: Perform Automatic Audio Ducking
Great! Now, on the timeline of Filmora, you can see your video and the music track. From here, you need to select the track that you want to amplify (like the voiceover).

Afterward, right-click the audio track and select the “Adjust Audio” option from the context menu.

This will open a dedicated Audio Mixer window on the screen. Just go to the Audio tab and enable the “Ducking” option to lower the volume of other audio tracks. You can also select the desired level for music ducking to implement.

Step 3: Export the Edited Video
That’s it! After performing audio ducking on Filmora, you can preview the results and further make the needed changes. In the end, you can click on the “Export” button and save the file in the format and resolution of your choice.

There you go! After following this guide, you can easily learn how to do audio ducking in Final Cut Pro X easily. Since there is no inbuilt FCPX audio ducking option, you can use a third-party tool like FCPX AutoDuck. Apart from that, if you are looking for a better alternative to do sound ducking, then simply use Wondershare Filmora. It is a user-friendly and resourceful application that would let you perform automatic music ducking like a pro.
Benjamin Arango
Benjamin Arango is a writer and a lover of all things video.
Follow @Benjamin Arango
Benjamin Arango
Oct 26, 2023• Proven solutions
If you are working in post-production, then you might be familiar with the concept of audio ducking. In nutshell, it is a process in which the background sound of a clip is reduced and the voiceover is amplified. Therefore, with the help of sound ducking, we can focus on the dialogues without a noisy background track.
Lately, a lot of people have asked us about the process to do automatic audio ducking in Final Cut Pro X. Since it is a clip-based editing tool, it lacks a dedicated mixer to help us do FCPX audio ducking. Thankfully, there are third-party plugins and tools (like the FCPX AutoDuck) that can help us do the same. In this post, I will let you know how to do audio ducking in Final Cut Pro and its best alternative.
If you don’t want to use any plugins, see this article: How to sync in FCPX.
Part 1: How to Perform Audio Ducking in Final Cut Pro X?
If you have a video in which you have background music and a voiceover, then you can perform sound ducking in it. This will automatically enhance the quality of the voiceover and would mellow down the background music selectively. Sadly, the feature of audio ducking in Final Cut Pro has to be done manually as there are no instant automatic options in the tool presently.
Therefore, you can use any reliable third-party FCPX tool like Audified or AutoDuck to meet your requirements. For instance, let’s consider the example of FCPX AutoDuck, which is a paid macOS application. To perform FCPX audio ducking, you first have to export the music and voiceover as two dedicated files. Later, you can import them to FCPX AutoDuck to perform auto-ducking of the music.
Step 1: Export the Music Files
To perform audio ducking in Final Cut Pro, you can first launch the application on Mac and open your project. Since there is no FCPX audio ducking option, you first have to export the music files.
For this, you can just go to the main menu on Final Cut Pro and select File > Share > Master File. This will help you explore and save all the media files from Final Cut Pro.
Now, once the Master File window would be opened, you can go to the “Role” tab and select “Audio Only” as the output role. This will display a list of the background music and the voiceover file.
You can now select the files of your choice and click on the “Next” button to save them to any desired location on your Mac.
Step 2: Use FCPX AutoDuck to Do Automatic Sound Ducking
Great! Now, you can just open the FCPX AutoDuck application on your Mac via its Application or Spotlight. You can just give it a project name and drag-and-drop the speaker (voiceover) and the music files here. If you want, you can also import a filler file of your choice.
FCPX will also let you select the level of music ducking from its dedication option. There are also different options to set up things like setting up the window or pre-roll for the audio.
In the end, you can click on the “Duck” button and let FCPX AutoDuck perform automatic audio ducking on the files.
Step 3: Insert the Modified File to your Project
Once the FCPX audio ducking process is completed, it will generate an XML file. You can now just drag the XML file and drop it to your project in Final Cut Pro. Here, you can choose to select the XML file in the same project.
You can now copy the modified music clip, go to the timeline, and paste it at the starting of the video. Here, you can just mute the previous music clip and let the auto-duck audio play instead.
Part 2: The Best FCPX Alternative for Mac to Perform Automatic Audio Ducking
As you can see, it is pretty tough to do audio ducking in Final Cut Pro as there is no automatic feature in the tool. Therefore, you can consider using Wondershare Filmora for Mac to perform automatic sound ducking and save your time. It is an inbuilt feature in Filmora that would perform auto-ducking instantly, and you can also mark the level of ducking in the video.
Ideally, you can perform audio ducking on voiceover or another soundtrack in Wondershare Filmora. To perform music ducking via Wondershare Filmora on Mac, you can follow these steps:
Step 1: Import the Video Clip or Record Your Audio
To begin with, just launch Wondershare Filmora on your Mac and just drag-and-drop your media files to the application. You can also go to its menu and choose to import media files.
Once your video is imported, you can drag it to the timeline at the bottom to work on it. If you want, you can click on the voiceover icon (adjacent to the preview section) to record dialogues right away.
Apart from that, you can also import music files to your video or use the extensive range of royalty-free audio files that are available in Filmora.
Step 2: Perform Automatic Audio Ducking
Great! Now, on the timeline of Filmora, you can see your video and the music track. From here, you need to select the track that you want to amplify (like the voiceover).
Afterward, right-click the audio track and select the “Adjust Audio” option from the context menu.
This will open a dedicated Audio Mixer window on the screen. Just go to the Audio tab and enable the “Ducking” option to lower the volume of other audio tracks. You can also select the desired level for music ducking to implement.
Step 3: Export the Edited Video
That’s it! After performing audio ducking on Filmora, you can preview the results and further make the needed changes. In the end, you can click on the “Export” button and save the file in the format and resolution of your choice.
There you go! After following this guide, you can easily learn how to do audio ducking in Final Cut Pro X easily. Since there is no inbuilt FCPX audio ducking option, you can use a third-party tool like FCPX AutoDuck. Apart from that, if you are looking for a better alternative to do sound ducking, then simply use Wondershare Filmora. It is a user-friendly and resourceful application that would let you perform automatic music ducking like a pro.
Benjamin Arango
Benjamin Arango is a writer and a lover of all things video.
Follow @Benjamin Arango
Installing Lame Encoder on Audacity: A Step-by-Step Guide
Lame for Audacity, one of the greatest mp3 encoders available for free download, since it’s a bummer. Music & sound processing may be used with it. The editing and recording features are also a lot of fun to play with. Let us now begin our investigation into how lame for audacity may be downloaded and installed. Check out the Audacity website for additional tutorials on how to use Audacity.
Two files are included with the lame for audacity download. An mp3 encoding program for CD playback, Lame.exe, is the other one. Lame-enc.dll is the second (ICL 11,1). The “.regedit” Windows database has a copy of this file.
MPEG 1, 2, & 2.5 are now included in Lame’s most recent release. a free encoding engine with additional layers of VBR ABR & CBR encodings If your computer has at least a Pentium 4 CPU, encoding will be much quicker. Noise interference may be minimized using the advanced audio settings.
Download Lame for Audacity

Chrome OS does not support the most recent version of Audacity. It is possible to use Audacity on a Chromebook, even though it is not officially supported, by using the Chrome version for Linux Ubuntu. We wanted to be as helpful as possible in helping you get the most out of Audacity.
How to install?

Installing Lame for Audacity is a simple process with no extra tools required. Right-click and choose “Install,” then restart your computer. Continue to press the “Next” button until you’ve completed the task. A lame mp3 encoder may now be installed. However, here are the procedures to follow in order to utilize and begin the mp3 encoding process:
- Open Audacity and choose “Edit” from the drop-down menu.
- Select “Preferences” from the drop-down menu.
- Look for the “File Formats” tab, & then click on the “Find Library” button to locate the appropriate library.
- Look for the file “lame enc.dll,” which may be found in “C: program file same for audacity,” select it, and then click the “Open” button to go further.
- The “Preferences” menu in Audacity has a number of optional options. There is an option to modify the bit rate. Once you have finished adjusting the bit rate, you may return to the main Audacity page by clicking on the “OK” button.
- Select “File” and then “Export to mp3” from the drop-down menu.
- Save the file on your computer. You will be required to input the ID3 tags for the artist’s name and the title of the music into the Audacity program. By clicking “Ok,” the encoding procedure for the file into the mp3 format will begin.
Lame for Audacity Windows

You may either download or develop a suitable version of the Lame mp3 encoder, after which you can install it. Following installation, look for lame for audacity in the library choices. The majority of Linux distributions have a form of package manager that detects, downloads, and installs software packages from the internet for you. Once you’ve opened the package manager, look for Lame and then install it if it hasn’t already been done so.
Preferences for Library Resources

Some distributions, such as the Ubuntu(Current) distribution, provide packages for Audacity, which includes mp3 encoding, and Libav, which is connected to the appropriate system libraries. It is not necessary to identify LAME or FFmpeg in the Audacity builds that have previously been packaged since there are no library choices for Audacity.
If you construct Audacity from source code, you may disable libraries’ preferences by setting Audacity as follows: Disable > Dynamic > Encoding > Disable > Dynamic > Encoding > Disable > Dynamic > Encoding. Finally, create an instance of Audacity that is connected to the LAME system. Additionally, you may build FFmpeg or Libav on your own computer if you so wish.
Can’t find MP3 Lame Library?
Most of the time, Audacity will automatically find the Lame Library. The actions outlined below are beneficial if the Lame option is available in Library preferences, & you also have a suitable version of Lame installed in a place other than the default one.
- Launch audacity and choose Edit > Preferences > Libraries from the drop-down menu on the left side of the screen.
- A Lame version number appears to the right of mp3 when it is exported from the mp3 Export Library. If LAME has been identified, you should export an mp3 and disregard the rest of the instructions. If, on the other hand, the mp3 Library displays “Not Found,” go to the procedures below.
- To the right of the mp3 Library, click on the locating tab to open a search bar.
- When the “Locate Linux” dialogue box displays, pick Browse from the drop-down menu.
- A dialogue window with the text “Where is Limp3lame?” appears.
- I can’t find Limp3lame. Please help. so. To exit Preferences, press 0 and hit Open, then OK and OK again.
Are you looking for an alternative to Audacity? It’s also available to us! You may also want to investigate the Audacity VST enabler, which will allow you to utilize Audacity much more effectively.
Conclusions
As an open-source audio editor, Audacity is extensively used, and mp3 is an audio codec. Many mp3 encoders are available online, even if they don’t operate together. Using Lame with Audacity requires some effort, but it’s worth it.
We also discuss Filmora’s voice effects and how users may utilize the software to alter and enhance their voices. It is possible to re-voice video/audio and previously recorded voiceovers using Filmora. It’s possible to use the Pitch option on the Timeline for video/audio and voiceover files. Make a video or recording sound different by altering its tone. Using Filmora, you can easily change the voices in your videos. Your viral should have a narration or a video accompanying it Allows you to modify your voice using the Changing Pitch option. In order to alter your voice, you may change the speed of the video (Optional). Make a copy of the edited video or audio.
For Win 7 or later (64-bit)
For macOS 10.12 or later
Chrome OS does not support the most recent version of Audacity. It is possible to use Audacity on a Chromebook, even though it is not officially supported, by using the Chrome version for Linux Ubuntu. We wanted to be as helpful as possible in helping you get the most out of Audacity.
How to install?
Installing Lame for Audacity is a simple process with no extra tools required. Right-click and choose “Install,” then restart your computer. Continue to press the “Next” button until you’ve completed the task. A lame mp3 encoder may now be installed. However, here are the procedures to follow in order to utilize and begin the mp3 encoding process:
- Open Audacity and choose “Edit” from the drop-down menu.
- Select “Preferences” from the drop-down menu.
- Look for the “File Formats” tab, & then click on the “Find Library” button to locate the appropriate library.
- Look for the file “lame enc.dll,” which may be found in “C: program file same for audacity,” select it, and then click the “Open” button to go further.
- The “Preferences” menu in Audacity has a number of optional options. There is an option to modify the bit rate. Once you have finished adjusting the bit rate, you may return to the main Audacity page by clicking on the “OK” button.
- Select “File” and then “Export to mp3” from the drop-down menu.
- Save the file on your computer. You will be required to input the ID3 tags for the artist’s name and the title of the music into the Audacity program. By clicking “Ok,” the encoding procedure for the file into the mp3 format will begin.
Lame for Audacity Windows
You may either download or develop a suitable version of the Lame mp3 encoder, after which you can install it. Following installation, look for lame for audacity in the library choices. The majority of Linux distributions have a form of package manager that detects, downloads, and installs software packages from the internet for you. Once you’ve opened the package manager, look for Lame and then install it if it hasn’t already been done so.
Preferences for Library Resources
Some distributions, such as the Ubuntu(Current) distribution, provide packages for Audacity, which includes mp3 encoding, and Libav, which is connected to the appropriate system libraries. It is not necessary to identify LAME or FFmpeg in the Audacity builds that have previously been packaged since there are no library choices for Audacity.
If you construct Audacity from source code, you may disable libraries’ preferences by setting Audacity as follows: Disable > Dynamic > Encoding > Disable > Dynamic > Encoding > Disable > Dynamic > Encoding. Finally, create an instance of Audacity that is connected to the LAME system. Additionally, you may build FFmpeg or Libav on your own computer if you so wish.
Can’t find MP3 Lame Library?
Most of the time, Audacity will automatically find the Lame Library. The actions outlined below are beneficial if the Lame option is available in Library preferences, & you also have a suitable version of Lame installed in a place other than the default one.
- Launch audacity and choose Edit > Preferences > Libraries from the drop-down menu on the left side of the screen.
- A Lame version number appears to the right of mp3 when it is exported from the mp3 Export Library. If LAME has been identified, you should export an mp3 and disregard the rest of the instructions. If, on the other hand, the mp3 Library displays “Not Found,” go to the procedures below.
- To the right of the mp3 Library, click on the locating tab to open a search bar.
- When the “Locate Linux” dialogue box displays, pick Browse from the drop-down menu.
- A dialogue window with the text “Where is Limp3lame?” appears.
- I can’t find Limp3lame. Please help. so. To exit Preferences, press 0 and hit Open, then OK and OK again.
Are you looking for an alternative to Audacity? It’s also available to us! You may also want to investigate the Audacity VST enabler, which will allow you to utilize Audacity much more effectively.
Conclusions
As an open-source audio editor, Audacity is extensively used, and mp3 is an audio codec. Many mp3 encoders are available online, even if they don’t operate together. Using Lame with Audacity requires some effort, but it’s worth it.
We also discuss Filmora’s voice effects and how users may utilize the software to alter and enhance their voices. It is possible to re-voice video/audio and previously recorded voiceovers using Filmora. It’s possible to use the Pitch option on the Timeline for video/audio and voiceover files. Make a video or recording sound different by altering its tone. Using Filmora, you can easily change the voices in your videos. Your viral should have a narration or a video accompanying it Allows you to modify your voice using the Changing Pitch option. In order to alter your voice, you may change the speed of the video (Optional). Make a copy of the edited video or audio.
For Win 7 or later (64-bit)
For macOS 10.12 or later
“Soundtrack Sanctuary: The Finest Websites Offering Free Audio Selections for Filmmakers “
FREE Top 10 Best Websites to Download Sound Clips for Videos

Liza Brown
Mar 27, 2024• Proven solutions
Are you working on animation , video, game, music, or maybe some other media file? Sound is a vital factor for all. It is the effect of the sound that can make or break a project.
But it can be difficult to find perfect and quality free sound clips. There are thousands of software for creating excellent videos, adding sounds , titles, overlays, tracks, and more. But what if you don’t wish to create a piece for just jazzing up your already existing video?
Free sound clips are great resources to download for videos if you don’t want to create sound effects.
Many people want to know the source of high-quality free audio for videos. These free sound samples are easy to find on the Internet.
In this article, you will get to know the 10 best websites to download free sound clips.
10 Best Free Sound Samples to Use
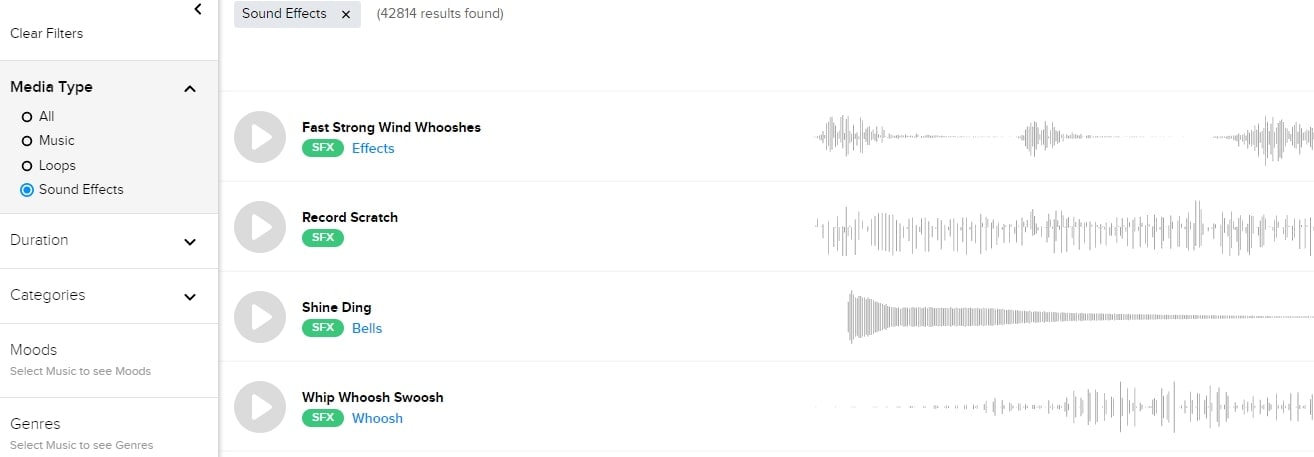
1. Freesound
Licensed under the Creative Commons License , the Freesound comprises of a large sound database. You can choose from the huge collection of sounds and decide which one is free and which sound needs attribution.
You can ensure if the sound can be used in commercial products or not. If you are not a professional and just need free sound samples for personal use, you may use free sound download from any site. The features of Freesound include-
- You can search for sounds or browse by tags or geotags
- The pack feature helps you to find a bunch of similar sounds very easily
- Preview the sound without logging in
- For downloading the sound, you need to log in
- Add your audio samples to contribute to the database
- You get 5 free sound clips download
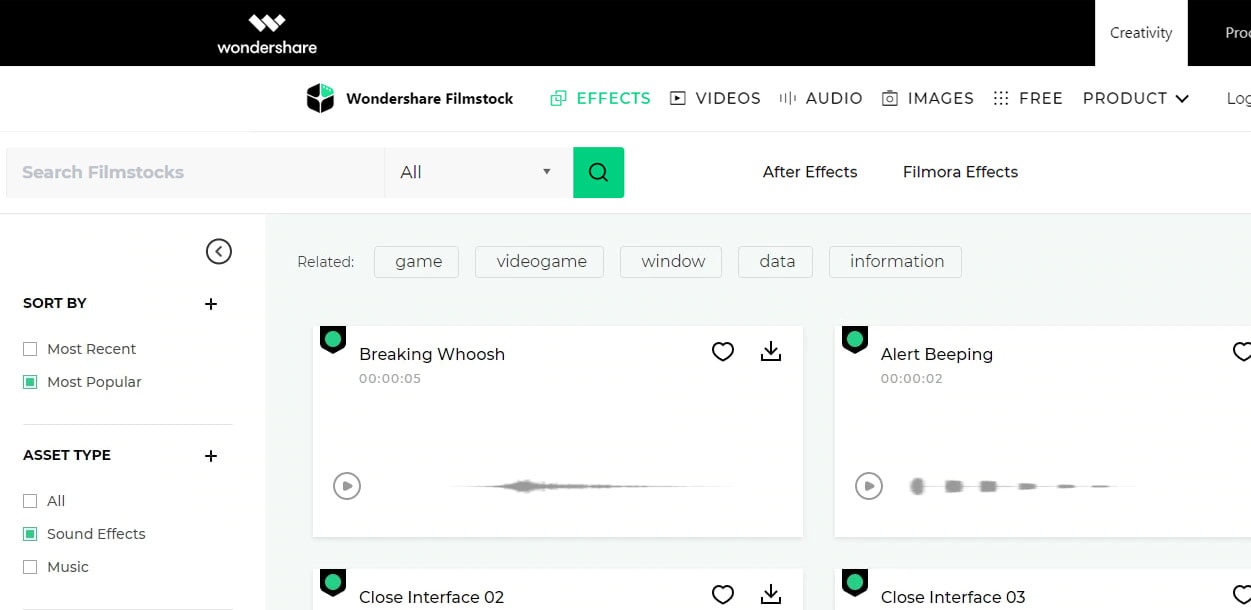
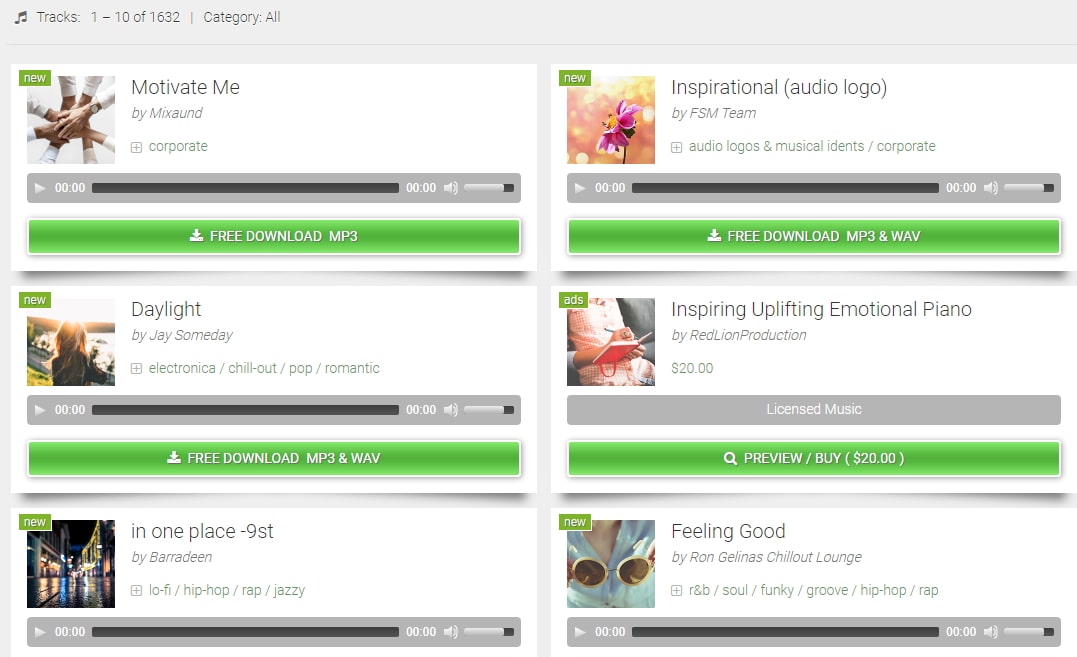
2. Filmstock
Filmstock from the house of Wondershare is one of the greatest libraries for free sound clips.
Any budget filmmaker would love to have this invaluable resource not just for free audio clips for videos but also for royalty-free sound clips.
You can bring your cinematic video to life from the Filmstock free-stuff one-stop-shop. The features of Filmstock include-
- Royalty-free video effects, audio, and stock media
- There are genres like science fiction, sci-fi, ufo, technology games
- Huge selection of curated quality stock images
- Filmstock library is continuously updated
- No attribution required for any project on Filmstock
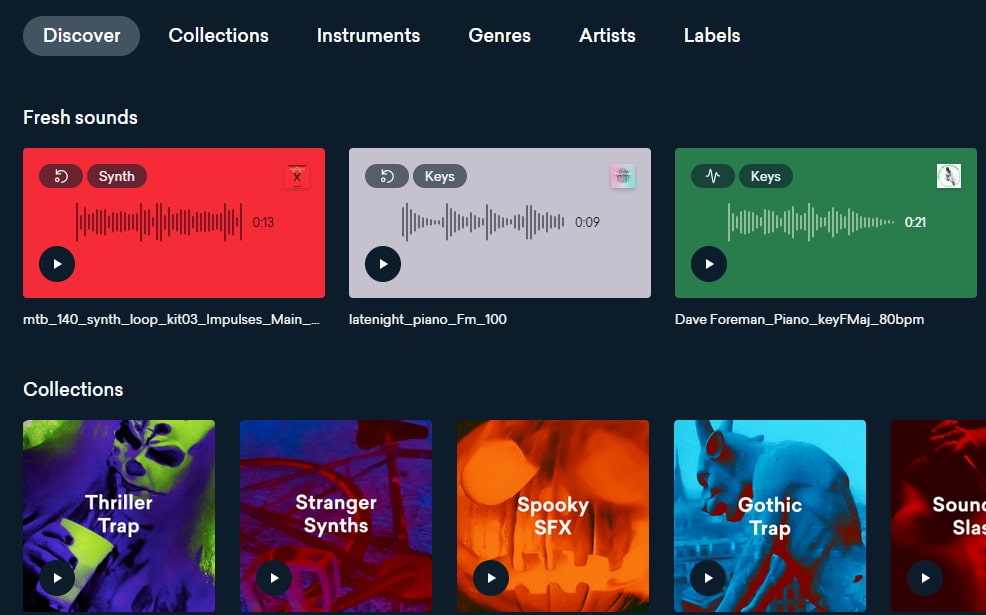
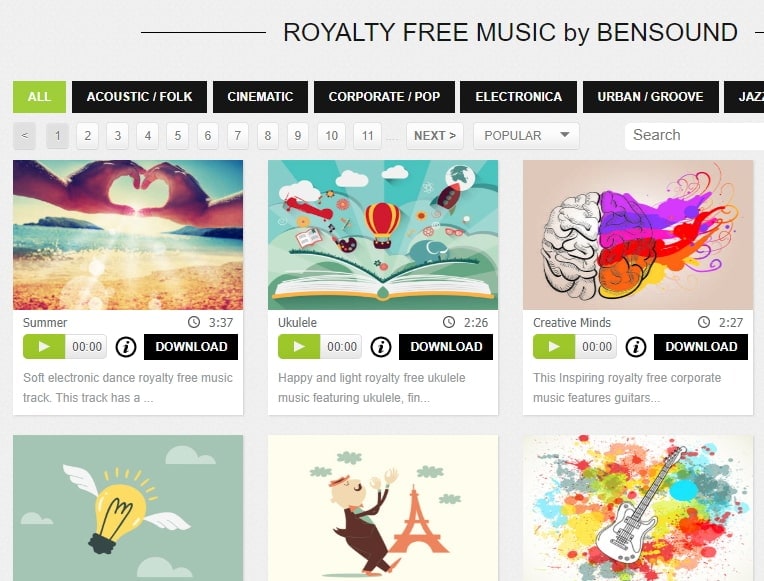
3. Landr
With a simple interface, Landr offers the best loops, packs, and samples to you. Make use of powerful Artificial Intelligence (AI) and you can spend lesser time searching and browsing. The features of Landr includes-
- You can browse free sound clips from the various collection of instruments
- Quickly find the right sound from the millions of free sound samples
- Get access to Selector tool powered by AI to make your browsing session faster
- Nourish your ideas with the curated collection and smart browsing
- The filter sounds by instrument, mood, BPM or key
- Go pro with your sampling
- Royalty-free sounds from today’s best artists, producers, and labels
4. Audio Micro
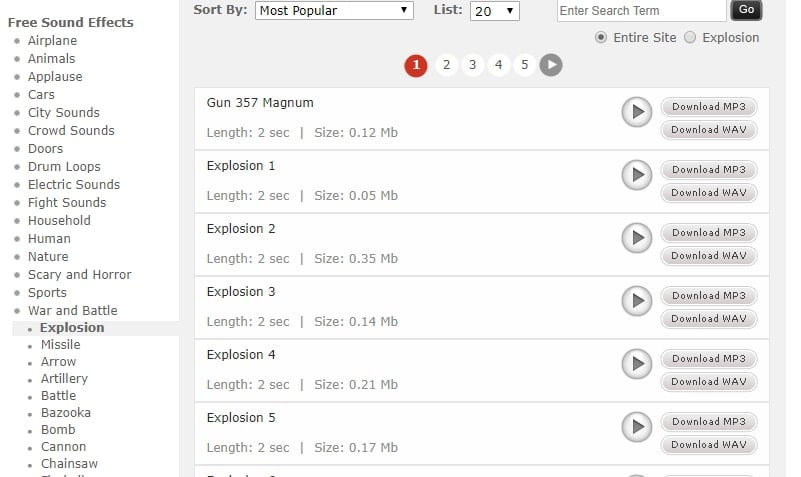
Audio Micro is one of the best tools for downloading horror-based free sound clips. Once you register with Audio Micro, you can easily download free audio clips for videos.
For downloading sound for commercial uses like TV or mass reproduction, you must be a paid subscriber. The features of Audio Micro are-
- Get access to the collection of royalty-free music and 2000 free good quality sound effects
- High-quality audio content for commercial use, available at competitive prices without any hidden cost
- Research, locate, purchase, and download stock audio
- Easy and fast search option with free sound collection visible from the navigation bar on the homepage
5. Audio Blocks
It is an intuitive platform to download loops, sound effects, and music. It has a low-cost subscription model and the content is constantly updated based on the search results. The features of Audio Blocks are-
- Unlimited royalty-free audio
- Loop, sound effects, and music download
- Low-cost subscription offers more content at a nominal price
- There are flexible plans for every budget
- Use content multiple times for commercial and personal projects
6. Free Stock Music
Whether YouTube project or your personal Vlog, Free Stock Music offers royalty-free music for a range of media platforms.
For any non-copyrighted sound clips free download, always feel free to reach Free Stock Music. The features are-
- Free access to non-copyrighted music
- Just put the attribution in credits to use the sound clips
- Unlimited royalty-free music in all moods, lengths, tempos, and categories
7. Bensound
Available under the Creative Common License, Bensound is used for multimedia projects like web applications or videos.
You can use the free tracks available with Bensound stock music in the various website background score, animations, web adverts, slideshows, etc. The features of Bensound include-
- Royalty-free stock music in various genres like electronica, urban, cinematic, jazz, rock, etc.
- Download free sound clips from the huge collection and add attributions in credits
- If you don’t wish to give credits and use the high-quality premium tracks, get the Bensound Pro License
8. Sounds Crate
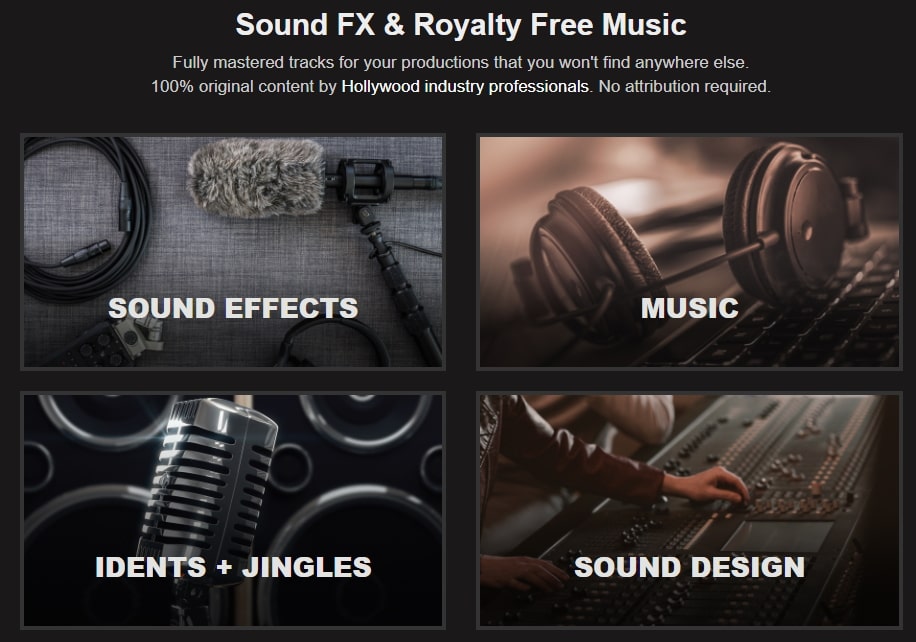
Are you looking for the best soundtrack for your video? Sounds Crate offers some of the best royalty-free music and sound FX.
With the tracks completely mastered for your production, Sound Crate offers 100% quality content created by industry professionals from Hollywood. The Sound Crate features include-
- Sound FX for electricity, gun, explosion, weapons, sci-fi, vehicles, movements, etc.
- Royalty-free music in diverse genres
- You can also use idents for corporate, news jingles, holiday idents, etc.
- Download and use the royalty-free sound clips easily
- Over 10000 plus HD assets
- No attribution required
- Browse from unlimited music, sound effects, etc.
9. ZapSlat
Do your audio and video editing projects need some cool soundtracks to jazz it up? Look no further. ZapSlat is one of the best free sound download sites to make your project successful. The features of ZapSlat are-
- Comprises over 54,000 professional free sound effects and royalty-free music files
- Variety of free sound effect packs
- Download royalty-free music from a variety of genres
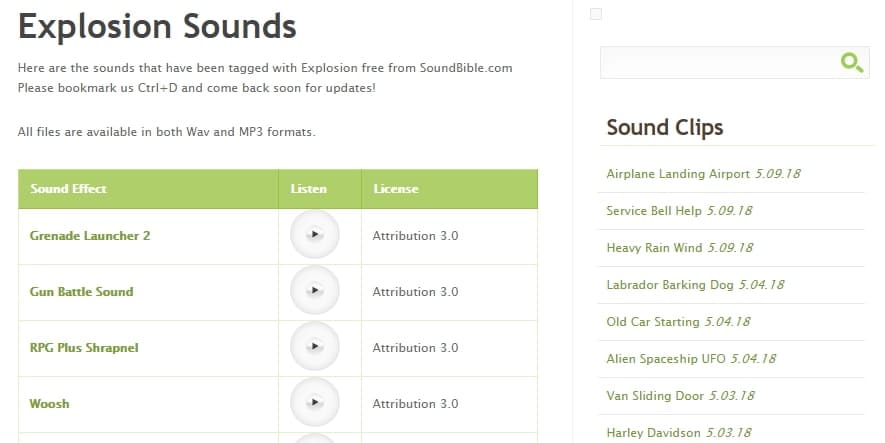
10. Sound Bible
Choose the best from 2000 free sound clips licensed under Creative Commons. To use the sound effect for commercial video, you can select from the royalty-free sounds. The features of SoundBible are-
- Download free sound clips without logging in or creating an account
- 2000 free sounds
- Copyright-free sound resources are weekly updated
Conclusion
Now that you know the best 10 free sound clip download sites, make use of it in your videos. Without worrying about the expense, you can use these sites to download free sound clips.
Liza Brown
Liza Brown is a writer and a lover of all things video.
Follow @Liza Brown
Liza Brown
Mar 27, 2024• Proven solutions
Are you working on animation , video, game, music, or maybe some other media file? Sound is a vital factor for all. It is the effect of the sound that can make or break a project.
But it can be difficult to find perfect and quality free sound clips. There are thousands of software for creating excellent videos, adding sounds , titles, overlays, tracks, and more. But what if you don’t wish to create a piece for just jazzing up your already existing video?
Free sound clips are great resources to download for videos if you don’t want to create sound effects.
Many people want to know the source of high-quality free audio for videos. These free sound samples are easy to find on the Internet.
In this article, you will get to know the 10 best websites to download free sound clips.
10 Best Free Sound Samples to Use
1. Freesound
Licensed under the Creative Commons License , the Freesound comprises of a large sound database. You can choose from the huge collection of sounds and decide which one is free and which sound needs attribution.
You can ensure if the sound can be used in commercial products or not. If you are not a professional and just need free sound samples for personal use, you may use free sound download from any site. The features of Freesound include-
- You can search for sounds or browse by tags or geotags
- The pack feature helps you to find a bunch of similar sounds very easily
- Preview the sound without logging in
- For downloading the sound, you need to log in
- Add your audio samples to contribute to the database
- You get 5 free sound clips download
2. Filmstock
Filmstock from the house of Wondershare is one of the greatest libraries for free sound clips.
Any budget filmmaker would love to have this invaluable resource not just for free audio clips for videos but also for royalty-free sound clips.
You can bring your cinematic video to life from the Filmstock free-stuff one-stop-shop. The features of Filmstock include-
- Royalty-free video effects, audio, and stock media
- There are genres like science fiction, sci-fi, ufo, technology games
- Huge selection of curated quality stock images
- Filmstock library is continuously updated
- No attribution required for any project on Filmstock
3. Landr
With a simple interface, Landr offers the best loops, packs, and samples to you. Make use of powerful Artificial Intelligence (AI) and you can spend lesser time searching and browsing. The features of Landr includes-
- You can browse free sound clips from the various collection of instruments
- Quickly find the right sound from the millions of free sound samples
- Get access to Selector tool powered by AI to make your browsing session faster
- Nourish your ideas with the curated collection and smart browsing
- The filter sounds by instrument, mood, BPM or key
- Go pro with your sampling
- Royalty-free sounds from today’s best artists, producers, and labels
4. Audio Micro
Audio Micro is one of the best tools for downloading horror-based free sound clips. Once you register with Audio Micro, you can easily download free audio clips for videos.
For downloading sound for commercial uses like TV or mass reproduction, you must be a paid subscriber. The features of Audio Micro are-
- Get access to the collection of royalty-free music and 2000 free good quality sound effects
- High-quality audio content for commercial use, available at competitive prices without any hidden cost
- Research, locate, purchase, and download stock audio
- Easy and fast search option with free sound collection visible from the navigation bar on the homepage
5. Audio Blocks
It is an intuitive platform to download loops, sound effects, and music. It has a low-cost subscription model and the content is constantly updated based on the search results. The features of Audio Blocks are-
- Unlimited royalty-free audio
- Loop, sound effects, and music download
- Low-cost subscription offers more content at a nominal price
- There are flexible plans for every budget
- Use content multiple times for commercial and personal projects
6. Free Stock Music
Whether YouTube project or your personal Vlog, Free Stock Music offers royalty-free music for a range of media platforms.
For any non-copyrighted sound clips free download, always feel free to reach Free Stock Music. The features are-
- Free access to non-copyrighted music
- Just put the attribution in credits to use the sound clips
- Unlimited royalty-free music in all moods, lengths, tempos, and categories
7. Bensound
Available under the Creative Common License, Bensound is used for multimedia projects like web applications or videos.
You can use the free tracks available with Bensound stock music in the various website background score, animations, web adverts, slideshows, etc. The features of Bensound include-
- Royalty-free stock music in various genres like electronica, urban, cinematic, jazz, rock, etc.
- Download free sound clips from the huge collection and add attributions in credits
- If you don’t wish to give credits and use the high-quality premium tracks, get the Bensound Pro License
8. Sounds Crate
Are you looking for the best soundtrack for your video? Sounds Crate offers some of the best royalty-free music and sound FX.
With the tracks completely mastered for your production, Sound Crate offers 100% quality content created by industry professionals from Hollywood. The Sound Crate features include-
- Sound FX for electricity, gun, explosion, weapons, sci-fi, vehicles, movements, etc.
- Royalty-free music in diverse genres
- You can also use idents for corporate, news jingles, holiday idents, etc.
- Download and use the royalty-free sound clips easily
- Over 10000 plus HD assets
- No attribution required
- Browse from unlimited music, sound effects, etc.
9. ZapSlat
Do your audio and video editing projects need some cool soundtracks to jazz it up? Look no further. ZapSlat is one of the best free sound download sites to make your project successful. The features of ZapSlat are-
- Comprises over 54,000 professional free sound effects and royalty-free music files
- Variety of free sound effect packs
- Download royalty-free music from a variety of genres
10. Sound Bible
Choose the best from 2000 free sound clips licensed under Creative Commons. To use the sound effect for commercial video, you can select from the royalty-free sounds. The features of SoundBible are-
- Download free sound clips without logging in or creating an account
- 2000 free sounds
- Copyright-free sound resources are weekly updated
Conclusion
Now that you know the best 10 free sound clip download sites, make use of it in your videos. Without worrying about the expense, you can use these sites to download free sound clips.
Liza Brown
Liza Brown is a writer and a lover of all things video.
Follow @Liza Brown
Also read:
- Best Online Sanctuaries for Serene Minds and Stress Reduction for 2024
- Updated Strategies for Creating Fluid Movement Between Video Segments
- Updated 2024 Approved Audio File Division Streamlined Strategies for Independent Sections of Sound
- Updated Basic Knowledge About Jazz Music That You Need Know for 2024
- Updated Cutting Edge 6 Internet Audio Divide and Conquer Software
- Updated Elite Web-Based Audio Precision Tuning Tools for 2024
- 2024 Approved Mastering Clear Sound Techniques for Eliminating Audio Distortion in Videos
- Updated 2024 Approved 5 Essential No-Cost Music Amplitude Scaler Tools
- In 2024, Strategies for Detaching Soundtracks From Footage
- Searching for High-Quality Game Noise FX
- Updated Silencing Audio in MP4 Format A Step-by-Step Guide
- New 2024 Approved Indispensable Techniques for Assembling a Remarkable Array of YouTube Soundtracks
- 2024 Approved Unearth the Sound Artifact Signifying a Bells Ring
- Updated 2024 Approved Ahead of Time Tomorrows Melancholic Masterpieces and Their Origins
- Updated In 2024, The Ultimate Guide to Tweaking Siris Sound Palette on iPhone, iPad, and Mac
- New Vocal Variety Made Easy Implementing Voice Changer Plus on Your iPhone Device for 2024
- Updated 2024 Approved Elevate Your Listening Experience Digital Methods for Audio Speed & Pitch Alteration
- Updated In 2024, The Fins of Conversation Mastering the Technique of Clownfish-Inspired Sound Effects on Online Platforms
- Updated Sound Off with Flair Enhancing High-Pitched Vocalization in Video Content Creation for 2024
- In 2024, Streamlining Your Chromebook for Effective Audio Capture
- Updated In 2024, Lamentations and Lullabies Best Sad Music Choices for a Touching Experience
- New How to Use Suspense Music to Master Film Score
- Discover the Impact of Bristle Movement Noise
- New In 2024, Harmonizing Hues The 10 Best Free Mobile Apps That Transform Songs Into Vibrant Graphics for iPhone/Android
- 2024 Approved Directory of Free, Non-Copyrighted Background Song Sources
- New 2024 Approved Mastering Multisensory Imagery Including Music with Your Photographs
- Find Whistle Sounds Effect for 2024
- 2024 Approved The Premier Free Online Confluence of MP3 Files 2023 Reviewed
- New How to Remove Audio From MOV Files on Windows/Mac for 2024
- New Chorus Cutter Suite Construct Individualized Musical Backdrops for 2024
- New Best Websites to Download Nature Sounds for 2024
- New Unleash Your Creative Potential with These 5 In-Demand Android Audio Editors for 2024
- New How to Create Audio Keyframes in Adobe Premiere Pro on Mac for 2024
- REAPER Essentials & Extras A Complete Rundown with Expert Commentary for 2024
- New Fine-Tuning Frequency Flux Innovative Approaches to Minimize Noise in Audacity
- New Proven Strategies for Selecting Elite Sound Engineers in Modern Filmmaking for 2024
- Updated 2024 Approved Clubhouse Decoded Delving Into Its Mission, Community Dynamics, and Evolving Landscape
- New In 2024, Finding Repository of Explosive Roar Samples
- 2024 Approved How to Change Volume in Media Files with Filmora
- New SonicSilence Eliminator Achieve Pristine Sound Quality
- New VoiceTransformation Plus A Comprehensive Introduction for iPhone Users
- In 2024, Non-Licensed Music Choices Excelling in Video Montages
- Updated Virtualdub Is It the Best Video Editor? Exploring Top Alternatives
- Change Location on Yik Yak For your Motorola Edge 40 to Enjoy More Fun | Dr.fone
- New A Comprehensive Guide for Free Video Translator Downloading for 2024
- New 2024 Approved 8 Best Motion Graphics Online Tools for Your Inspiration
- Updated Videopad 2023 Review A Top-Notch Video Editing Solution or Not?
- Full Guide to Unlock Your Honor X7b
- 2024 Approved Best AI Rap Voice Generators You Should Try
- In 2024, How to Cast Honor Magic Vs 2 to Computer for iPhone and Android? | Dr.fone
- How To Get Out of Recovery or DFU Mode on Apple iPhone SE (2022)? | Dr.fone
- 4 solution to get rid of pokemon fail to detect location On Itel A05s | Dr.fone
- How to recover deleted photos from Oppo Reno 11 Pro 5G.
- Top 10 AirPlay Apps in Infinix Note 30 VIP for Streaming | Dr.fone
- Updated Linux Premiere Pro Alternatives Top Picks for Video Editors for 2024
- Updated In 2024, Easy Video Aspect Ratio Conversion No Expertise Needed
- How do I reset my Samsung Galaxy M14 5G Phone without technical knowledge? | Dr.fone
- In 2024, Unlock Your Device iCloud DNS Bypass Explained and Tested, Plus Easy Alternatives On Apple iPhone 13 mini
- How to Unlock Apple iPhone 6 Plus With an Apple Watch & What to Do if It Doesnt Work
- Can I use iTools gpx file to catch the rare Pokemon On Motorola Moto G14 | Dr.fone
- In 2024, Unova Stone Pokémon Go Evolution List and How Catch Them For Samsung Galaxy A15 5G | Dr.fone
- In 2024, Tutorial | How to Make a Smooth Speed Ramping in Premiere Pro?
- In 2024, How to Transfer Contacts from Asus ROG Phone 7 Ultimate to Outlook | Dr.fone
- In 2024, How Can I Unlock My Apple iPhone 8 After Forgetting my PIN Code? | Dr.fone
- Updated In 2024, From Fast to Slow How to Convert Your Videos to Slow Motion on Kapwing
- Title: New 2024 Approved Enhancing Sound Quality in Film Production Implementing Effective Automatic Volume Reduction in Final Cut Pro X
- Author: Paul
- Created at : 2024-05-05 05:50:12
- Updated at : 2024-05-06 05:50:12
- Link: https://voice-adjusting.techidaily.com/new-2024-approved-enhancing-sound-quality-in-film-production-implementing-effective-automatic-volume-reduction-in-final-cut-pro-x/
- License: This work is licensed under CC BY-NC-SA 4.0.
