
:max_bytes(150000):strip_icc():format(webp)/preaknessstakes-5c804f1b46e0fb00019b8ee0.jpg)
New 2024 Approved Best Nature Sounds Apps for iOS and Android
10 Best Nature Sounds Apps for iOS and Android
Best Nature Sounds Apps for iOS and Android

Benjamin Arango
Apr 26, 2024• Proven solutions
In today’s challenging times, when stress and anxiety has become inevitable for a majority of population, there is a constant search for solutions that will enable people to live a peaceful and pleasant life. Here, the technology comes to their rescue with nature sound effects app.
These applications provide multiple sounds related to the Nature. The users just need to download any of these programs, and select the desired tone according to their choice. Such mobile software also offer numerous relaxing audios that assist in achieving a deeper level of concentration during the meditation.
10 Best Nature Sounds Apps
1. YouTube
YouTube is also one of the important apps for nature sounds where one can get almost any kind of relaxing sounds related to the Nature.
Binaural beats videos, where two different frequencies of sounds are combined to create a new frequency tone are getting highly popular among people. These are believed to help in lowering stress, anxiety and depression and increase concentration, attention, and efficiency of an individual.
It can also be helpful in attaining mental peace and serenity. The app even contains peaceful meditation sounds that ease the ability to focus and remain relaxed during the whole process. It is highly a user-friendly app and is absolutely free to download on the Android Smartphones.
2. Atmosphere: Relaxing Sounds
Compatible with Android 5.0 or up , and iOS 10.0 or later

Atmosphere is one of the best apps for nature sounds. It is custom-made to help people relieve stress and relax their mind.
The key feature of this application is that it allows users to import their personalized audios and mix them with various default acoustics available within the app itself.
The soothing sounds available here are divided into 8 different environments such as Beach, City, Park, Countryside, Home, Underwater, Forest and Oriental. Users can also mix and match the sounds between environments to produce a tailored theme.
3. Rainy Mood
Compatible with both iOS and Android OS 5.0 and up

Rainy Mood provides the most genuine rain, thunderstorm, and lightening sounds available online.
It not only relieves tension and anxiety but also helps users suffering from insomnia.
This app even contains natural white noise facility that helps in getting rid of any unwanted sounds around us.
The various rain sounds are available here in different environments such as heavy rain, tropical rain, umbrella, rain on tent, rain on porch etc. The best thing about this app is that it can work in offline mode, i.e. without any Internet connection. This eventually results in less power consumption.
4. Animal Sounds
Compatible with Android 4.1 and up
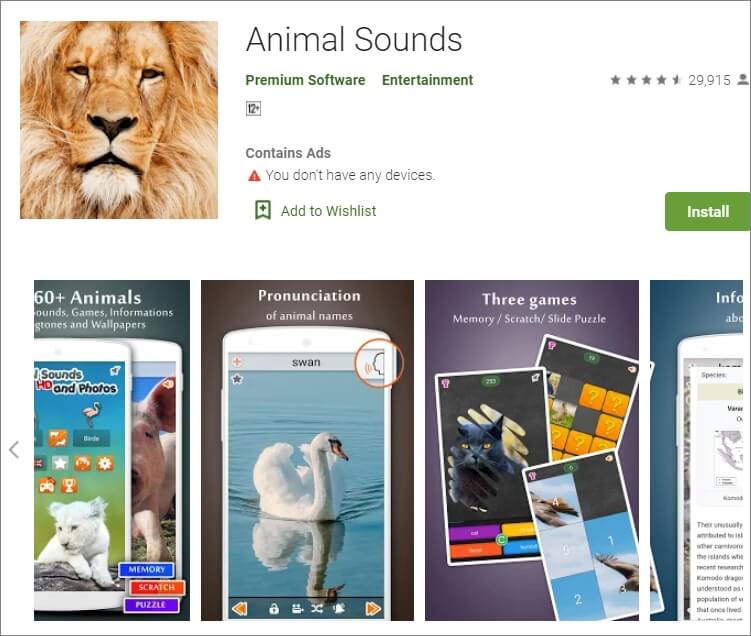
Animal Sounds is a one-stop destination for all animal lovers. The program provides the most detailed information about animals, and also contains hundreds of animal sounds and photographs from all over the globe.
The quality of audios and pictures is remarkably high and clear. The sounds here are categorized under pet animals, mammals, farm animals, bird sounds, wild animals, reptiles and amphibians.
The application also provides the facility of customized ringtones and wallpapers to its users.
5. Sleep Sounds
Compatible with Android 4.4 or later
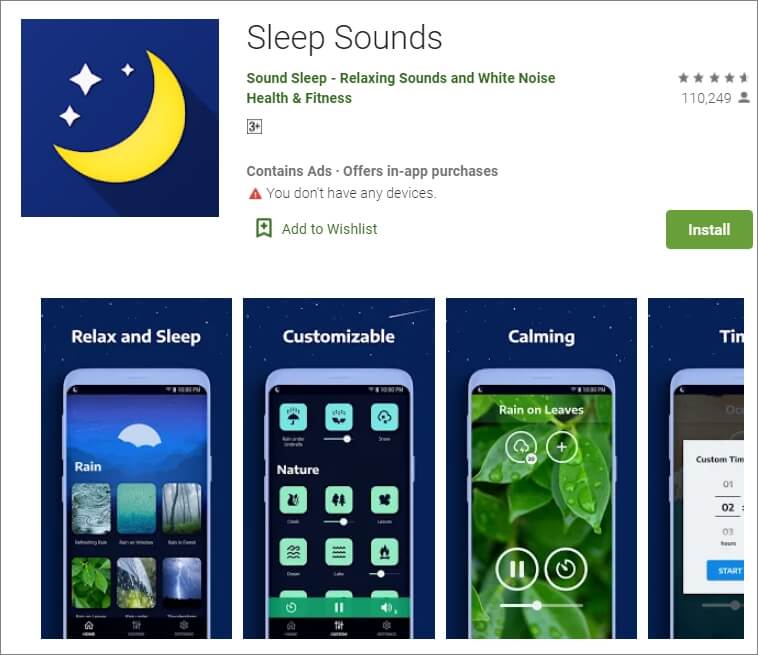
Sleep Sounds is one of the top trending apps nowadays owing to the increasing problems of insomnia and irregular sleep patterns among people. It is very helpful for an uninterrupted quality sleep.
The calm and soft music gradually tranquilizes the mind and the user eases into a good sleep. Its interface is user-friendly with beautiful images in the background.
The sounds here are categorized under rain, nature, relax, transport, noise, and white noise classes. This app also works without an Internet connection.
6.Calm
Compatible with Android and iOS 10.0 and watchOS 6.0 or later
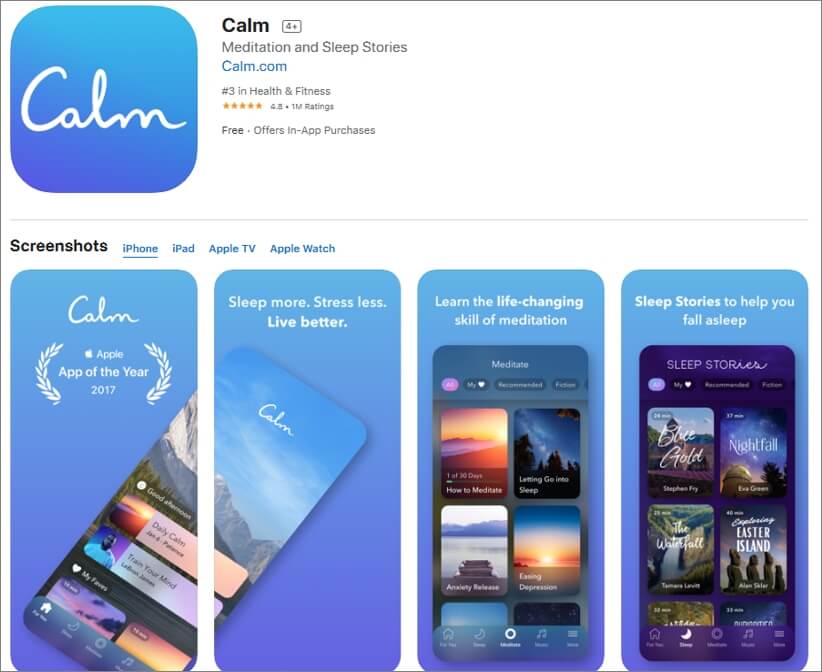
Calm is best suitable for the people who practice meditation on a daily basis. It is available for free and can be used by the beginners as well as experienced users.
The main features include guided meditation programs, breathing sessions, adult bed-time stories, masterclasses by the international coaches, etc.
Here, one can choose a personalized guide for meditation from several topics such as relationships, self-esteem, breaking habits, forgiveness, mindfulness, etc. Users can even track their daily progress on the basis of time spent by them on the app.
7. Ambience – Nature sounds: sleep and meditation
Compatible with Android 4.2 and up .
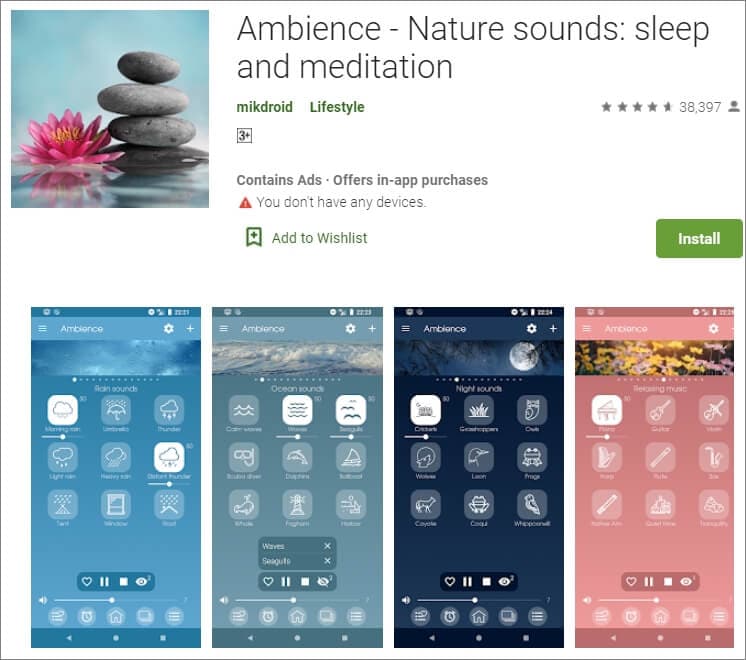
Ambience is another one of the most popular apps for nature sounds providing peace and serenity to its users through relaxing and soothing tones.
It has a very simple and clean user interface which makes it a highly demanding program. The main features include the facility of mixing maximum 10 sounds at the same time. Along with various preset mixtures of audios that are available here, users can also save their customized combinations for future use.
8. Naturespace: Sleep Relax Focus
Compatible with Android 4.0 or up and iOS 9.0 or later
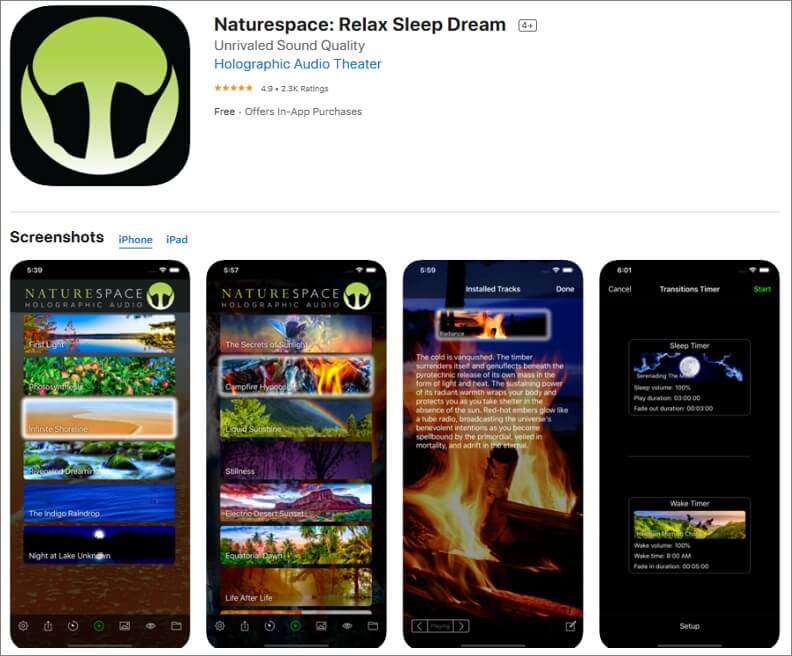
Naturespace is a unique app containing real time 3D recordings of natural places such as forests, deserts, mountains, etc. The equipment used in the program for recording the sounds are of extremely high quality, and as a result, the listening experience is out of this world.
The clarity of the sound surpasses almost every other application available in this genre of nature sound apps. It also provides the facility of sleep and wake timer to its users. The simple user interface along with earbud optimisation facility makes the software highly efficient and popular among people.
9. SimplyNoise – Free White Noise
Compatible with iOS 8.0 or later and Android
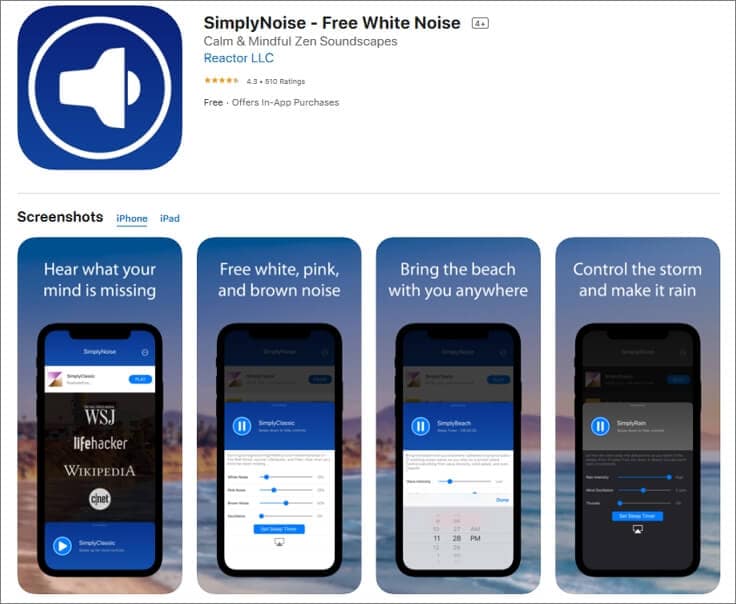
Simply Noise is one of the most basic apps for nature sounds as it provides only one acoustic without any background noises. As there are no such complexities involved, it can also be used by people who are not tech-savvy.
The categorization of sounds is done here as white noise, pink noise, and brown noise. Users can select any of these according to their requirement.
This app is best suitable for people who are unable to concentrate on a particular thing, or suffer from sleeping disorder. Sleep-timer option is also available here.
10. aSleep
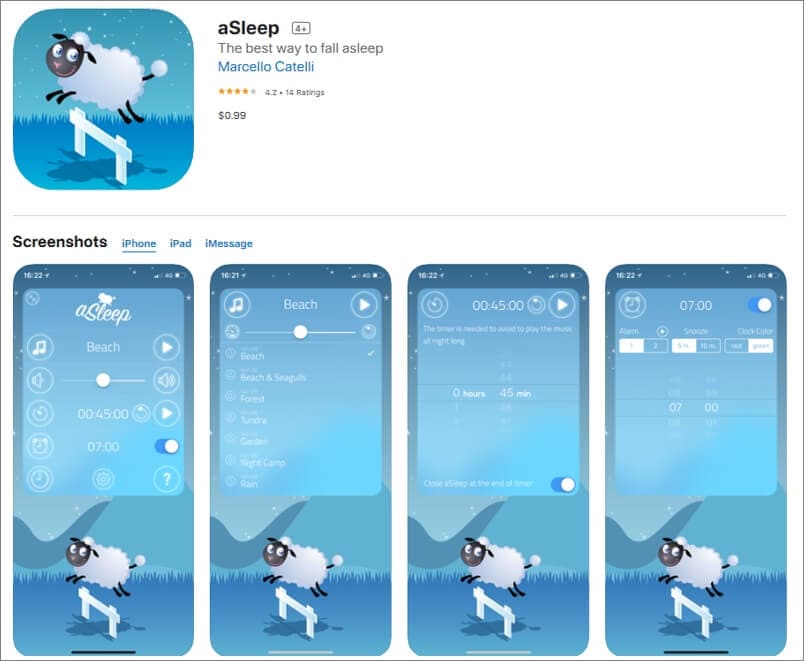
Available for iOS devices like iPhone and iPad, aSleep offers around 64 realistic stereo nature sounds to help you relax your mind and fall asleep almost instantaneously. With the built-in Timer feature, the music can be programmed to stop automatically after a certain amount of time to save your device’s battery.
Furthermore, the also works as an alarm clock that wakes you up with nature sounds at your predefined hour. The application is also good for kids as it can be used to play lullabies to help them get a tight sleep at night. And the program does all this without collecting any data from your iDevice.
What Is the Best Rain Sound App?
Among various rain sound applications available online, Rainy Mood is the most popular one that enjoys high star rating. When it comes to rain sounds, there is no match to it. It mainly includes 4 rain scenes namely Classic, Ocean, Countryside and Cafe. These genres can be customized according to different tastes and preferences.
What Are the Different Sounds of Nature?
The nature is made up of 5 basic elements which include Air, Water, Fire, Earth and Space. These components constitute various natural acoustics. Some examples are music of the rain, thunderstorm or a waterfall, wind blows, sounds of leaves and water streams, chirping of birds or grasshoppers, stridulation of insects like crickets, etc. All these sounds are beautifully incorporated in nature sound effects app.
In case that you want to add some nature sound to your video clip, you can try Wondershare Filmora, which features an audio library containing different nature sound effects as well. Download the free trial version of Filmora and have a try.


Besides adding sound to video, you can also add some elemental 2D visual effects to videos to make it cooler.
Benjamin Arango
Benjamin Arango is a writer and a lover of all things video.
Follow @Benjamin Arango
Benjamin Arango
Apr 26, 2024• Proven solutions
In today’s challenging times, when stress and anxiety has become inevitable for a majority of population, there is a constant search for solutions that will enable people to live a peaceful and pleasant life. Here, the technology comes to their rescue with nature sound effects app.
These applications provide multiple sounds related to the Nature. The users just need to download any of these programs, and select the desired tone according to their choice. Such mobile software also offer numerous relaxing audios that assist in achieving a deeper level of concentration during the meditation.
10 Best Nature Sounds Apps
1. YouTube
YouTube is also one of the important apps for nature sounds where one can get almost any kind of relaxing sounds related to the Nature.
Binaural beats videos, where two different frequencies of sounds are combined to create a new frequency tone are getting highly popular among people. These are believed to help in lowering stress, anxiety and depression and increase concentration, attention, and efficiency of an individual.
It can also be helpful in attaining mental peace and serenity. The app even contains peaceful meditation sounds that ease the ability to focus and remain relaxed during the whole process. It is highly a user-friendly app and is absolutely free to download on the Android Smartphones.
2. Atmosphere: Relaxing Sounds
Compatible with Android 5.0 or up , and iOS 10.0 or later
Atmosphere is one of the best apps for nature sounds. It is custom-made to help people relieve stress and relax their mind.
The key feature of this application is that it allows users to import their personalized audios and mix them with various default acoustics available within the app itself.
The soothing sounds available here are divided into 8 different environments such as Beach, City, Park, Countryside, Home, Underwater, Forest and Oriental. Users can also mix and match the sounds between environments to produce a tailored theme.
3. Rainy Mood
Compatible with both iOS and Android OS 5.0 and up
Rainy Mood provides the most genuine rain, thunderstorm, and lightening sounds available online.
It not only relieves tension and anxiety but also helps users suffering from insomnia.
This app even contains natural white noise facility that helps in getting rid of any unwanted sounds around us.
The various rain sounds are available here in different environments such as heavy rain, tropical rain, umbrella, rain on tent, rain on porch etc. The best thing about this app is that it can work in offline mode, i.e. without any Internet connection. This eventually results in less power consumption.
4. Animal Sounds
Compatible with Android 4.1 and up
Animal Sounds is a one-stop destination for all animal lovers. The program provides the most detailed information about animals, and also contains hundreds of animal sounds and photographs from all over the globe.
The quality of audios and pictures is remarkably high and clear. The sounds here are categorized under pet animals, mammals, farm animals, bird sounds, wild animals, reptiles and amphibians.
The application also provides the facility of customized ringtones and wallpapers to its users.
5. Sleep Sounds
Compatible with Android 4.4 or later
Sleep Sounds is one of the top trending apps nowadays owing to the increasing problems of insomnia and irregular sleep patterns among people. It is very helpful for an uninterrupted quality sleep.
The calm and soft music gradually tranquilizes the mind and the user eases into a good sleep. Its interface is user-friendly with beautiful images in the background.
The sounds here are categorized under rain, nature, relax, transport, noise, and white noise classes. This app also works without an Internet connection.
6.Calm
Compatible with Android and iOS 10.0 and watchOS 6.0 or later
Calm is best suitable for the people who practice meditation on a daily basis. It is available for free and can be used by the beginners as well as experienced users.
The main features include guided meditation programs, breathing sessions, adult bed-time stories, masterclasses by the international coaches, etc.
Here, one can choose a personalized guide for meditation from several topics such as relationships, self-esteem, breaking habits, forgiveness, mindfulness, etc. Users can even track their daily progress on the basis of time spent by them on the app.
7. Ambience – Nature sounds: sleep and meditation
Compatible with Android 4.2 and up .
Ambience is another one of the most popular apps for nature sounds providing peace and serenity to its users through relaxing and soothing tones.
It has a very simple and clean user interface which makes it a highly demanding program. The main features include the facility of mixing maximum 10 sounds at the same time. Along with various preset mixtures of audios that are available here, users can also save their customized combinations for future use.
8. Naturespace: Sleep Relax Focus
Compatible with Android 4.0 or up and iOS 9.0 or later
Naturespace is a unique app containing real time 3D recordings of natural places such as forests, deserts, mountains, etc. The equipment used in the program for recording the sounds are of extremely high quality, and as a result, the listening experience is out of this world.
The clarity of the sound surpasses almost every other application available in this genre of nature sound apps. It also provides the facility of sleep and wake timer to its users. The simple user interface along with earbud optimisation facility makes the software highly efficient and popular among people.
9. SimplyNoise – Free White Noise
Compatible with iOS 8.0 or later and Android
Simply Noise is one of the most basic apps for nature sounds as it provides only one acoustic without any background noises. As there are no such complexities involved, it can also be used by people who are not tech-savvy.
The categorization of sounds is done here as white noise, pink noise, and brown noise. Users can select any of these according to their requirement.
This app is best suitable for people who are unable to concentrate on a particular thing, or suffer from sleeping disorder. Sleep-timer option is also available here.
10. aSleep
Available for iOS devices like iPhone and iPad, aSleep offers around 64 realistic stereo nature sounds to help you relax your mind and fall asleep almost instantaneously. With the built-in Timer feature, the music can be programmed to stop automatically after a certain amount of time to save your device’s battery.
Furthermore, the also works as an alarm clock that wakes you up with nature sounds at your predefined hour. The application is also good for kids as it can be used to play lullabies to help them get a tight sleep at night. And the program does all this without collecting any data from your iDevice.
What Is the Best Rain Sound App?
Among various rain sound applications available online, Rainy Mood is the most popular one that enjoys high star rating. When it comes to rain sounds, there is no match to it. It mainly includes 4 rain scenes namely Classic, Ocean, Countryside and Cafe. These genres can be customized according to different tastes and preferences.
What Are the Different Sounds of Nature?
The nature is made up of 5 basic elements which include Air, Water, Fire, Earth and Space. These components constitute various natural acoustics. Some examples are music of the rain, thunderstorm or a waterfall, wind blows, sounds of leaves and water streams, chirping of birds or grasshoppers, stridulation of insects like crickets, etc. All these sounds are beautifully incorporated in nature sound effects app.
In case that you want to add some nature sound to your video clip, you can try Wondershare Filmora, which features an audio library containing different nature sound effects as well. Download the free trial version of Filmora and have a try.
Besides adding sound to video, you can also add some elemental 2D visual effects to videos to make it cooler.
Benjamin Arango
Benjamin Arango is a writer and a lover of all things video.
Follow @Benjamin Arango
Windows Audio Level Automation Using Adobe Premiere
The audio ducking technology aids the editors in creating a precise video as per their needs. In this article, you will discuss audio ducking Premiere Pro of Adobe to enhance the video’s audio quality optimally. Audio ducking is a feature that helps the audience to listen to every detail on the video flawlessly.

Here, you will be using Adobe Premiere Pro to establish this audio ducking feature precisely. This functionality is applicable on the Windows platform. To try on the Mac system, you can use the Filmora application to acquire precise results. In this article, you will learn how to use audio ducking concepts on Windows and Mac systems with the help of incredible tools in the digital space.
In this article
02 Use Audio Ducking in Adobe Premiere Pro on Win
03 Alternative ways to use Audio Ducking with Filmora
Part 1: What is audio ducking?
The concept of audio ducking is simple. In a soundtrack, you can find a wide range of music playing in the background. Audio ducking is the process of suppressing one type of audio signal and increasing the other movement simultaneously without causing any issues. Mostly audio ducking is processed for movies or any live sessions that reduce the background music when the characters or person speaks on the screen and increases the speaker’s volume. The scenario happens vice versa when the speaker completes its conversation. Here, the background music increases, and the speaker’s audio is reduced drastically. This type of audio ducking occurs to enhance the audio quality and reach the target audience without any issues.

The automatic changes with the audio volume are triggered by a common control using the audio ducking settings. When you enable this option in your device, this module is programmed to balance the volume settings as per the requirements. The audio ducking process allows the audio files to sound better by improving the quality of the audio signals. The audio parameters are adjusted at the specific track in the audio clippings to enhance the overall quality of the audio file.
You will be able to feel the difference when the audio tracks are played. Use the audio ducking feature optimally to strengthen the crucial audio signals when required. Identify the perfect sound spots at the audio file that requires this ducking feature. Implement this feature at particular spots to enjoy the benefits of this audio ducking functionality. It serves as a boon for sound editors and creates a positive impact on the audio files.
Part 2: Use Audio Ducking in Adobe Premiere Pro on Win
The Adobe Premiere Pro app helps to edit your media files professionally, and you can explore a wide range of settings to enhance the overall performance of the files. In the following content, you will study how to perform audio ducking in Adobe Premiere Pro at Windows space.
Step 1: Import the audio file and assign the audio type to the Essential Sound Panel. Next, auto-match the loudness level at the Essential Sound panel section.

Step 2: Choose the audio clip that requires audio ducking settings and adjusts values for sensitivity, amount of volume reduction, and the duration of fades along with the audio levels. These parameters determine the quality of audio ducking on the selected audio clips. Assign the perfect values as per your needs.

**Step 3: Finally, click Generate Keyframes to save the audio ducking settings on the chosen audio clips.

To modify the audio ducking settings, it is enough if you tap the Generate Keyframes option to create new audio ducking attributes. When you click Generate Keyframe, the older settings are erased and prompt for the new settings to be assigned for the audio ducking feature.
You can use the above instructions to perform the desired audio ducking feature at the selected audio clips.
Part 3: Alternative ways to use Audio Ducking with Filmora
If you are working with the Mac systems, worry not here is an incredible application that assists in performing the audio ducking at audio files in the Mac platform. The Filmora app from Wondershare is a sophisticated tool that carries out professional edits on media files based on your needs. The quality factors of the audio and video signals are retained, and the desired changes are implemented on the files precisely.
Versatile Video Editor - Wondershare Filmora
An easy yet powerful editor
Numerous effects to choose from
Detailed tutorials provided by the official channel
The Filmora application offers powerful features while editing audio files. You can apply audio ducking to enhance the vocals and use 100 audio effects to add flavors to the existing audio files. This app allows you to make any constructive changes to the file without disturbing the original elements set at the time of recording.
The remarkable features of the Filmora
- An exclusive audio file editor and improves the vocals using Audio Ducking strategy
- You can access the 100 audio effects built-in at its working ambiance to enhance your imported media files.
- The simple user interface helps you to discover awesome editing features effortlessly.
- All the changes in the audio signals are embedded without affecting the quality factors.
- The easy export option helps you to move the edited audio files to any storage space flawlessly.
These are the stunning functionalities of the Filmora app concerning audio files. You can perform a wide range of miraculous edits on the media tracks precisely in a professional way.
Here, you will be surfing the discussion about the effective usage of Filmora in implementing audio ducking functionality on the audio files. The Filmora offers an Audio Adjust module to perform the ducking operation efficiently without affecting the audio quality. It helps the audio to sound better and improves the clarity of vocals. The auto-adjust function modifies the volume of the audio files precisely as per the programmed algorithm. You do not have to write any code or perform manual adjustments in embedding this setting to your audio file. Few clicks are enough to enable the ducking functionality at the audio files.

The stepwise procedure to enable the audio ducking feature at Filmora application.
Step 1: Install the app and import the file.
First, download the application from its official webpage based on your system OS. Then, install the app and import the audio files into the working space of Filmora.

Step 2: Set Ducking parameters
Drag it to the timeline and choose the audio track that requires the audio ducking feature. After selecting the audio clip, right-click on it and choose ‘Adjust Audio’ from the pop-up message. The Audio Editor window appears, go to the Ducking menu and turn on ‘Lower the Volume of other clips. You can repeat this step to other audio clippings effortlessly.

Step 3: Save and Export
Next, save the changes by tapping the ‘OK’ button and clicking the Export button to store the edited audio files at any storage space. Filmora will adjust the volume on other audio clips as per the settings and export the file precisely.

The above guidelines help you to establish the audio ducking feature on your audio clips using the Filmora. Perform the appropriate clicks and set the attributes according to your needs to refine the audio ducking feature.
Conclusion
Thus, this article had given valuable insights on **audio ducking Premiere Pro of Adobe. Use Adobe Premiere Pro to perform the desired audio adjustments to enhance the vocal signal on your Windows system. The Filmora application assists in editing the audio clips at the Mac system effortlessly. The above instructions aid you in performing the audio ducking feature successfully. Connect with this article to discover unique editing options on media files to enhance their overall performance. Stay tuned to explore the features of the Filmora application in detail.
02 Use Audio Ducking in Adobe Premiere Pro on Win
03 Alternative ways to use Audio Ducking with Filmora
Part 1: What is audio ducking?
The concept of audio ducking is simple. In a soundtrack, you can find a wide range of music playing in the background. Audio ducking is the process of suppressing one type of audio signal and increasing the other movement simultaneously without causing any issues. Mostly audio ducking is processed for movies or any live sessions that reduce the background music when the characters or person speaks on the screen and increases the speaker’s volume. The scenario happens vice versa when the speaker completes its conversation. Here, the background music increases, and the speaker’s audio is reduced drastically. This type of audio ducking occurs to enhance the audio quality and reach the target audience without any issues.
The automatic changes with the audio volume are triggered by a common control using the audio ducking settings. When you enable this option in your device, this module is programmed to balance the volume settings as per the requirements. The audio ducking process allows the audio files to sound better by improving the quality of the audio signals. The audio parameters are adjusted at the specific track in the audio clippings to enhance the overall quality of the audio file.
You will be able to feel the difference when the audio tracks are played. Use the audio ducking feature optimally to strengthen the crucial audio signals when required. Identify the perfect sound spots at the audio file that requires this ducking feature. Implement this feature at particular spots to enjoy the benefits of this audio ducking functionality. It serves as a boon for sound editors and creates a positive impact on the audio files.
Part 2: Use Audio Ducking in Adobe Premiere Pro on Win
The Adobe Premiere Pro app helps to edit your media files professionally, and you can explore a wide range of settings to enhance the overall performance of the files. In the following content, you will study how to perform audio ducking in Adobe Premiere Pro at Windows space.
Step 1: Import the audio file and assign the audio type to the Essential Sound Panel. Next, auto-match the loudness level at the Essential Sound panel section.
Step 2: Choose the audio clip that requires audio ducking settings and adjusts values for sensitivity, amount of volume reduction, and the duration of fades along with the audio levels. These parameters determine the quality of audio ducking on the selected audio clips. Assign the perfect values as per your needs.
**Step 3: Finally, click Generate Keyframes to save the audio ducking settings on the chosen audio clips.
To modify the audio ducking settings, it is enough if you tap the Generate Keyframes option to create new audio ducking attributes. When you click Generate Keyframe, the older settings are erased and prompt for the new settings to be assigned for the audio ducking feature.
You can use the above instructions to perform the desired audio ducking feature at the selected audio clips.
Part 3: Alternative ways to use Audio Ducking with Filmora
If you are working with the Mac systems, worry not here is an incredible application that assists in performing the audio ducking at audio files in the Mac platform. The Filmora app from Wondershare is a sophisticated tool that carries out professional edits on media files based on your needs. The quality factors of the audio and video signals are retained, and the desired changes are implemented on the files precisely.
Versatile Video Editor - Wondershare Filmora
An easy yet powerful editor
Numerous effects to choose from
Detailed tutorials provided by the official channel
The Filmora application offers powerful features while editing audio files. You can apply audio ducking to enhance the vocals and use 100 audio effects to add flavors to the existing audio files. This app allows you to make any constructive changes to the file without disturbing the original elements set at the time of recording.
The remarkable features of the Filmora
- An exclusive audio file editor and improves the vocals using Audio Ducking strategy
- You can access the 100 audio effects built-in at its working ambiance to enhance your imported media files.
- The simple user interface helps you to discover awesome editing features effortlessly.
- All the changes in the audio signals are embedded without affecting the quality factors.
- The easy export option helps you to move the edited audio files to any storage space flawlessly.
These are the stunning functionalities of the Filmora app concerning audio files. You can perform a wide range of miraculous edits on the media tracks precisely in a professional way.
Here, you will be surfing the discussion about the effective usage of Filmora in implementing audio ducking functionality on the audio files. The Filmora offers an Audio Adjust module to perform the ducking operation efficiently without affecting the audio quality. It helps the audio to sound better and improves the clarity of vocals. The auto-adjust function modifies the volume of the audio files precisely as per the programmed algorithm. You do not have to write any code or perform manual adjustments in embedding this setting to your audio file. Few clicks are enough to enable the ducking functionality at the audio files.
The stepwise procedure to enable the audio ducking feature at Filmora application.
Step 1: Install the app and import the file.
First, download the application from its official webpage based on your system OS. Then, install the app and import the audio files into the working space of Filmora.
Step 2: Set Ducking parameters
Drag it to the timeline and choose the audio track that requires the audio ducking feature. After selecting the audio clip, right-click on it and choose ‘Adjust Audio’ from the pop-up message. The Audio Editor window appears, go to the Ducking menu and turn on ‘Lower the Volume of other clips. You can repeat this step to other audio clippings effortlessly.
Step 3: Save and Export
Next, save the changes by tapping the ‘OK’ button and clicking the Export button to store the edited audio files at any storage space. Filmora will adjust the volume on other audio clips as per the settings and export the file precisely.
The above guidelines help you to establish the audio ducking feature on your audio clips using the Filmora. Perform the appropriate clicks and set the attributes according to your needs to refine the audio ducking feature.
Conclusion
Thus, this article had given valuable insights on **audio ducking Premiere Pro of Adobe. Use Adobe Premiere Pro to perform the desired audio adjustments to enhance the vocal signal on your Windows system. The Filmora application assists in editing the audio clips at the Mac system effortlessly. The above instructions aid you in performing the audio ducking feature successfully. Connect with this article to discover unique editing options on media files to enhance their overall performance. Stay tuned to explore the features of the Filmora application in detail.
Innovative Methodologies for Embedding Musicality Within Instagram TV Experiences
People are putting lots of effort into creating videos and sharing them on IGTV to get fame. Due to it, they also want to figure out how to add music to IGTV to create impressive videos. For all these things, the interested ones have to consider some video editors. In this blog, you will get complete information about these factors.
In this article
01 [3 Ways To Add Music To IGTV On Android & iOS](#Part 1)
02 [2 Ways To Add Music To IGTV On Windows & Mac](#Part 2)
03 [How To Add Music To IGTV Without Copyright?](#Part 3)
04 [How To Post Your Video To IGTV?](#Part 4)
Part 1 3 Ways To Add Music To IGTV On Android & iOS
Most individuals are using mobile devices for Instagram and IGTV purposes. Similarly, they are looking for the best video editors by which they can edit videos and prepare impressive content for IGTV uploads. If you are one of these, the following are some major apps for Android and iOS.
Filmora

Videoshop

Videoshop is considered by numerous individuals. Mainly, this video editor is beneficial in adding audio to the video’s background. It can be used for both Android and iOS mobile devices. It is available with some basic editing features.
Prequel

In case you want to add music to IGTV, Prequel can be a good option as well. It also available for both types of devices Android and iOS. By using this particular application, you can add effects, text, do editing, and alter videos.
Part 2 2 Ways To Add Music To IGTV On Windows & Mac
Filmora
Filmora is one of the best video editors for Windows & Mac. It is almost similar to the mobile version (Filmora). In case you want to use it, you should follow below mentioned procedure.
Wondershare Filmora
Get started easily with Filmora’s powerful performance, intuitive interface, and countless effects!
Try It Free Try It Free Try It Free Learn More about Filmora>

Step1
Firstly, you should import video and audio files to the Filmora. For importing files, it should be available on the device.
Step2
Now, you need to add audio to the video. Filmora also has a big music library with lots of free files. You can pick sound effects from here to create an impressive video. By using audio keyframing features, you can also make changes to the files.
Step3
After all these things, you can proceed by saving the changes and exporting the available file.
Final Cut Pro

Final Cut Pro is a video editor that is mainly considered by professionals only. The biggest thing about this particular editor is, the tool is available for Mac devices only. It has a good and easy-to-understand interface with lots of features. But, you cannot ignore the fact that it is too expensive so everyone cannot consider its services.
Part 3 How To Add Music To IGTV Without Copyright?
In the case of the online system, copyright problems are taking place several times. It is the main reason why some publishers cannot post their content or get their videos removed by force. Due to all these things, many individuals are interested in figuring out the best ways that can be useful in avoiding copyright issues by uploading a music file with video.
Here, you can find out some basic things. Firstly, you should be careful with the copyright rules. If you want to add music to IGTV video, you should check out the music file and its all types of copyrights first. This inspection will help you figure out lots of things, such as – the current legal condition of the file. There are numerous free music files also available on the internet.
You can use these files in your videos as you want. While using these ones, you will never face any kind of copyright problem. For getting such kinds of audio files, you can get help from third-party sources on the internet. These websites are offering royalty-free music files. Another major way is contacting the copyright holder and getting his or her permission to use the file.
Part 4 How To Post Your Video To IGTV?
Everyone does not have expertise in using the IGTV. It is the main reason why they are looking for a proper guide in some major steps, such as -the best way to post a video on IGTV. Before that, you should get clarity that the process will be a little bit different for mobile and desktop. You should follow the procedure according to the device you are using. In the upcoming details, you can get a step-by-step guide for both types of devices.
For Mobile – Step-By-Step Guide
Step1
Firstly, you should proceed by accessing the mobile application of Instagram. After opening the application, you should pay attention to the top-right section of feeds. Here, you can see the IGTV symbol. In case you want direct access, you can also download the IGTV application separately.
Step2
After accessing the IGTV, you will get a different interface. Here, you can see the “+” button. When you click the button, it will open your video gallery. You can pick the video, you want to upload on the IGTV feeds.
Step3
When you successfully choose a video, you should be focused on choosing an image that will be used as the cover. When choosing an image or video scene for cover, you need to be smart and careful. Try to keep it interesting and eye-catching, so people would like to watch it.
Step4
The addition of cover images will complete media-related options. Now, you should proceed with the ‘NEXT’ button. It will take you to the title and description page. You should put an interesting title and description to showcase the right data about the video.
Step5
Now, you have to finalize everything. Before posting the video, you will get an option with a notification. If you click the ‘yes’ button, it will help you preview the video and figure out everything is perfect or not. In case you consider the ‘no’ button, it will eliminate the preview and proceed to publish the video. Within a few minutes, your video will be posted on IGTV and visible to the audience.
For Desktop – Step-By-Step Guide
Step1
Firstly, you need to proceed by opening Instagram on a desktop, no matter Windows or Mac. Here, you should log in to Instagram Web by using credentials. You should log in account by using the official sources only. Don’t fall for fake websites or scammers.
Step2
Now, you should access your account profile. Here, you can see multiple buttons in the interface. You should proceed by choosing the ‘IGTV’ button. You can see this button between the ‘post’ and ‘saved’ buttons.
Step3
In the IGTV interface, you can see the ‘upload’ button as well. Clicking this particular button will allow you to access the video upload interface and procedure.
Step4
The video that you want to upload on IGTV should be available on your device. By using the interface, you can access device storage and upload the desired video.
Step5
You can also upload the video by using drag and drop features. After adding the video, you should proceed with the addition of the title and description. In case you also want to target the Facebook audience, you can make it visible there as well. For such a task, you can see a specific button that will allow you to do that as well.
These are basic procedures to upload videos on IGTV. After completing the procedure, you need to wait for a few minutes only. Here, the video uploading procedure will take time as per your internet speed and connection quality.
Final Words
After all these things, you can easily figure out how to add music to IGTV video and the best methods to use IGTV. Along with it, you can understand what methods can help you get audio files by avoiding copyright problems. The most important thing is content. In case you don’t upload creative content, it will not please your audience. You should be using the best tools to create video content for sharing on IGTV. The best content will entertain your audience and provide better recognition as well. In case you are using mobile platforms, it will be good to consider Filmora and for desktops, Filmora works great. You should be smart and careful while making a final decision.
02 [2 Ways To Add Music To IGTV On Windows & Mac](#Part 2)
03 [How To Add Music To IGTV Without Copyright?](#Part 3)
04 [How To Post Your Video To IGTV?](#Part 4)
Part 1 3 Ways To Add Music To IGTV On Android & iOS
Most individuals are using mobile devices for Instagram and IGTV purposes. Similarly, they are looking for the best video editors by which they can edit videos and prepare impressive content for IGTV uploads. If you are one of these, the following are some major apps for Android and iOS.
Filmora
Videoshop
Videoshop is considered by numerous individuals. Mainly, this video editor is beneficial in adding audio to the video’s background. It can be used for both Android and iOS mobile devices. It is available with some basic editing features.
Prequel
In case you want to add music to IGTV, Prequel can be a good option as well. It also available for both types of devices Android and iOS. By using this particular application, you can add effects, text, do editing, and alter videos.
Part 2 2 Ways To Add Music To IGTV On Windows & Mac
Filmora
Filmora is one of the best video editors for Windows & Mac. It is almost similar to the mobile version (Filmora). In case you want to use it, you should follow below mentioned procedure.
Wondershare Filmora
Get started easily with Filmora’s powerful performance, intuitive interface, and countless effects!
Try It Free Try It Free Try It Free Learn More about Filmora>
Step1
Firstly, you should import video and audio files to the Filmora. For importing files, it should be available on the device.
Step2
Now, you need to add audio to the video. Filmora also has a big music library with lots of free files. You can pick sound effects from here to create an impressive video. By using audio keyframing features, you can also make changes to the files.
Step3
After all these things, you can proceed by saving the changes and exporting the available file.
Final Cut Pro
Final Cut Pro is a video editor that is mainly considered by professionals only. The biggest thing about this particular editor is, the tool is available for Mac devices only. It has a good and easy-to-understand interface with lots of features. But, you cannot ignore the fact that it is too expensive so everyone cannot consider its services.
Part 3 How To Add Music To IGTV Without Copyright?
In the case of the online system, copyright problems are taking place several times. It is the main reason why some publishers cannot post their content or get their videos removed by force. Due to all these things, many individuals are interested in figuring out the best ways that can be useful in avoiding copyright issues by uploading a music file with video.
Here, you can find out some basic things. Firstly, you should be careful with the copyright rules. If you want to add music to IGTV video, you should check out the music file and its all types of copyrights first. This inspection will help you figure out lots of things, such as – the current legal condition of the file. There are numerous free music files also available on the internet.
You can use these files in your videos as you want. While using these ones, you will never face any kind of copyright problem. For getting such kinds of audio files, you can get help from third-party sources on the internet. These websites are offering royalty-free music files. Another major way is contacting the copyright holder and getting his or her permission to use the file.
Part 4 How To Post Your Video To IGTV?
Everyone does not have expertise in using the IGTV. It is the main reason why they are looking for a proper guide in some major steps, such as -the best way to post a video on IGTV. Before that, you should get clarity that the process will be a little bit different for mobile and desktop. You should follow the procedure according to the device you are using. In the upcoming details, you can get a step-by-step guide for both types of devices.
For Mobile – Step-By-Step Guide
Step1
Firstly, you should proceed by accessing the mobile application of Instagram. After opening the application, you should pay attention to the top-right section of feeds. Here, you can see the IGTV symbol. In case you want direct access, you can also download the IGTV application separately.
Step2
After accessing the IGTV, you will get a different interface. Here, you can see the “+” button. When you click the button, it will open your video gallery. You can pick the video, you want to upload on the IGTV feeds.
Step3
When you successfully choose a video, you should be focused on choosing an image that will be used as the cover. When choosing an image or video scene for cover, you need to be smart and careful. Try to keep it interesting and eye-catching, so people would like to watch it.
Step4
The addition of cover images will complete media-related options. Now, you should proceed with the ‘NEXT’ button. It will take you to the title and description page. You should put an interesting title and description to showcase the right data about the video.
Step5
Now, you have to finalize everything. Before posting the video, you will get an option with a notification. If you click the ‘yes’ button, it will help you preview the video and figure out everything is perfect or not. In case you consider the ‘no’ button, it will eliminate the preview and proceed to publish the video. Within a few minutes, your video will be posted on IGTV and visible to the audience.
For Desktop – Step-By-Step Guide
Step1
Firstly, you need to proceed by opening Instagram on a desktop, no matter Windows or Mac. Here, you should log in to Instagram Web by using credentials. You should log in account by using the official sources only. Don’t fall for fake websites or scammers.
Step2
Now, you should access your account profile. Here, you can see multiple buttons in the interface. You should proceed by choosing the ‘IGTV’ button. You can see this button between the ‘post’ and ‘saved’ buttons.
Step3
In the IGTV interface, you can see the ‘upload’ button as well. Clicking this particular button will allow you to access the video upload interface and procedure.
Step4
The video that you want to upload on IGTV should be available on your device. By using the interface, you can access device storage and upload the desired video.
Step5
You can also upload the video by using drag and drop features. After adding the video, you should proceed with the addition of the title and description. In case you also want to target the Facebook audience, you can make it visible there as well. For such a task, you can see a specific button that will allow you to do that as well.
These are basic procedures to upload videos on IGTV. After completing the procedure, you need to wait for a few minutes only. Here, the video uploading procedure will take time as per your internet speed and connection quality.
Final Words
After all these things, you can easily figure out how to add music to IGTV video and the best methods to use IGTV. Along with it, you can understand what methods can help you get audio files by avoiding copyright problems. The most important thing is content. In case you don’t upload creative content, it will not please your audience. You should be using the best tools to create video content for sharing on IGTV. The best content will entertain your audience and provide better recognition as well. In case you are using mobile platforms, it will be good to consider Filmora and for desktops, Filmora works great. You should be smart and careful while making a final decision.
Also read:
- Verse Vane Eliminator Fabricate Original Track Foundations
- Updated Silence Amplified Simple Steps to Enhance Quality by Minimizing Unwanted Sounds in Audacity and FilmoraPro for 2024
- Updated Advanced Techniques for Eliminating Noise in AI Algorithms
- New In 2024, Best MPA to MP3 Converter Convert MPA Audio Files to MP3 for Free
- Updated 2024 Approved Techniques to Lessen Song Tempo Without Compromising Pitch Recognition
- New Revamp Your Sound Engineering Installing and Configuring Lame MP3 Encoder for Audacity
- In 2024, Discover the 8 Most Compelling Soundscapes for YouTube Debut Videos
- Top Online Tools For Removing Background Noise From Audio
- Updated Exploring 2024S Hottest Spots to Stream BGM Soundtracks
- Mastering Audio Purification for Outdoor Visuals on iOS, Android & PC Environments for 2024
- In 2024, Leading 11 iOS and Android Tools for Professional Sound Engineering
- Mastering Sound Visualization Merging Waveforms for Audio Sight & Animated Display Using Premiere Pro for 2024
- New How to Fade In and Fade Out Audio in Adobe After Effects for 2024
- Updated In 2024, Audacity Mastery Enhancing Your Podcast Sound and Delivery
- 2024 Approved Tips for Lowering the Bit Rate of Multimedia Content
- Updated In 2024, Melody Eraser Pro Craft Personalized Instrumental Compositions
- Updated MP3 Kitty Acoustic Trick
- Updated 2024 Approved Forge Your Path with Music Top 6 Budget-Friendly DAW Tools Recommended for Beginners
- In 2024, Mastering Quietude A Comprehensive Manual to Eliminate Background Lulls
- Updated Best Spotify Ripper How to Rip Music From Spotify?
- 2024 Approved Master List of Male to Female Voice Change Programs for Windows and macOS Enthusiasts
- In 2024, Sounds of the Game Discovering Cricket Ambient Noises
- Updated Top 10 Website to Download Montage Music for 2024
- New Unlocking the Power of Pitch Alteration A Step-by-Step Voice Transformation Guide for 2024
- New Ranking Your Voice The Top 7 Editing Software for Android Users
- New In 2024, Methods of Decelerating a Melody Without Key Modification
- New Elite Windows Sound Weaver for 2024
- Top 8 Masterful Audio Designs in Film
- Updated Streamlining Music Addition to Online Videos Step-by-Step Techniques
- DaVinci Resolves Aural Alchemy Transforming Unprocessed Audio Through Normalization for 2024
- Updated In 2024, Add Green Screen Effects in Final Cut Pro
- How to Transfer Photos From Lava Yuva 2 to Samsung Galaxy S21 Ultra | Dr.fone
- In 2024, Top IMEI Unlokers for Your OnePlus 12R Phone
- In 2024, The Top 5 Android Apps That Use Fingerprint Sensor to Lock Your Apps On Samsung Galaxy A05s
- How to Bypass Android Lock Screen Using Emergency Call On Poco X6 Pro?
- In 2024, How to Make the Most of Your iPhone SE (2020) Lock Screen with Notifications?
- A Step-by-Step Guide on Using ADB and Fastboot to Remove FRP Lock from your Oppo F25 Pro 5G
- Latest Guide on iPad 2/3 and Apple iPhone 14 Plus iCloud Activation Lock Bypass
- How to Quickly Fix Bluetooth Not Working on Realme C67 5G | Dr.fone
- In 2024, Two Ways to Track My Boyfriends Nokia C210 without Him Knowing | Dr.fone
- How do I reset my Lava Blaze Curve 5G Phone without technical knowledge? | Dr.fone
- In 2024, Top 5 ZTE Bypass FRP Tools for PC That Actually Work
- Top IMEI Unlokers for Your Samsung Galaxy S21 FE 5G (2023) Phone
- New What to Use Instead of VirtualDub Best Video Editing Tools for 2024
- Ultimate Guide to Free PPTP VPN For Beginners On Samsung Galaxy A54 5G | Dr.fone
- In 2024, How to Cast Realme V30T Screen to PC Using WiFi | Dr.fone
- Detailed guide of ispoofer for pogo installation On Vivo V27 Pro | Dr.fone
- Title: New 2024 Approved Best Nature Sounds Apps for iOS and Android
- Author: Paul
- Created at : 2024-05-05 05:45:02
- Updated at : 2024-05-06 05:45:02
- Link: https://voice-adjusting.techidaily.com/new-2024-approved-best-nature-sounds-apps-for-ios-and-android/
- License: This work is licensed under CC BY-NC-SA 4.0.
