
:max_bytes(150000):strip_icc():format(webp)/how-to-fix-it-when-pngs-wont-open-in-windows-11-41107f6a55db4318b6c2b64437de5b75.jpg)
In 2024, Virtual Confidante A Handbook on Protecting Yourself and Others While Chatting Over the Internet
Virtual Confidante: A Handbook on Protecting Yourself and Others While Chatting Over the Internet
Top 10 Video Chat Sites to Meet Funny Strangers

Ollie Mattison
Mar 27, 2024• Proven solutions
Having a conversation with a stranger online can be surprisingly enjoyable. The last generation taught us how meaningful human connections are. There are many video chat sites where you can meet interesting people. Many of them have chat rooms for you to meet someone. The number of fascinating people you can meet at random is astounding, whether you’re seeking a special someone or just looking for friends.


The good news is that there are plenty of sites where you can video chat with random people and meet new strangers. There is a random chat room, video chat room, and text chat room to meet and talk to new people. Getting to know strangers online can be a bit intimidating, but these platforms make it easy. There is also often no charge for talking with others on these platforms. What type of site is the best for you depends on what features you want and what you hope to accomplish.
You don’t need to worry if you aren’t sure where, to begin with, video chatting. We can help you no matter your level of experience with random chat. We are here to pick and choose which offers the best features with so many websites out there. If you’re looking for simple, safe, and easy-to-use platforms to make new friends and maybe even find love, we’ve got some of the best options for you, such as Fruzo, Tinychat, ChatRandom, etc.
You might be interested in:
How To Keep Yourself Safe During Online Video Chats?
We should talk about how to use video chatting safely before going into a detailed discussion about each website. It’s one thing to chat with your family and friends. However, if you find yourself speaking with strangers at random, you should exercise a bit more caution. The following tips should be kept in mind.
- You shouldn’t give strangers your personal information.
- Your videos shouldn’t feature too much of your home.
- Keep sensitive information, such as house numbers and mail, off of the screen.
- Make sure to only use sites with reputable security and safety measures.
- Don’t hesitate to report anything suspicious or unbecoming.
Our Picks
- Omegle - World’s No 1 Video Chatting Website.
- Fruzo - Best For Online Video Chatting and Dating
- Tinychat - Best for Video Chat Rooms and Group Chats.
- ChatRandom - Best For Annonymous Video Chatting.
- ChatRad - Best site for meeting random people online.
- EmeraldChat - Best for both Text and Video Chats.
- Chat Hub - Best for meeting a unique stranger every time.
- Shagle - Best if you want to chat with strangers in different languages.
- FaceFlow - Best for video conferencing and Instant Messaging.
- iMeetzu - Best for making new friends and public relations.
![]()
A cross-platform for making videos anywhere for all creators

Why your video editing isn’t good enough? How about some creative inspo?
- 100 Million+ Users
- 150+ Countries and Regions
- 4 Million+ Social Media Followers
- 5 Million+ Stock Media for Use
* Secure Download

1.Omegle

The global video chat site Omegle is frequently used by people across the world to chat with random strangers. Chatting with strangers online is what this website is all about. In 2010, Omegle introduced its video chat feature a year after it was launched as a text-only chat platform. You are paired with another user randomly from another country on Omegle. The website does not have any age restrictions as it is open to anyone aged 18 and over. Video chatting is also closely monitored to keep the other users safe and to avoid any harmful material. Using a screen recorder, you can also record Omegle chat.
Features:
  * Free To Use
  * It only takes a few seconds to match you with a stranger
  * Strict video chatting monitoring to avoid unethical content
  * Allows you to record your video chat
2. Fruzo

Fruzo is more than a place for free online video calls. This is an online dating site that allows users to connect with people through Facebook. Users can either create new profiles or connect with existing profiles using Facebook. Besides finding matches, you may also connect with people, follow people, discuss topics, and make new friends through this platform. Users have the option of finding connections by location, gender, age, or keywords. It is also possible to upload photos or browse unlimited images. Because it can be downloaded on your smartphone, you can access it from just about anywhere.
Features:
  * Search filters to find a relevant match
  * Allows you to upload photos and browse photos of others
  * The mobile app is also available
3. Tinychat

With TinyChat, you can chat with anyone using voice or video over the internet. A quarter of a billion minutes of airtime are logged by users every day, the company claims. If you’re unable to find a chat room you want, you can create one. You’ll find thousands of them, including some started by people in your area. You can stream up to 12 video feeds at once from TinyChat, which uses an API for streaming live video of shows hosted on the service, without paying a dime. Using mics, videos, or instant messaging, people can communicate online.
Features:
  * Allows group video chats
  * Easy to start your own chat room or join a public room
  * Free to use and multiple chatting options are available
4. ChatRandom

People do all kinds of things at ChatRandom since it is chaotic, crowded, and people-filled. Irrespective of whether you wanted something fun or anything else, ChatRandom has it all. Despite it being much less popular than it once was, this stranger chat website continues to thrive in the eyes of many. The community is decent, with a wide range of different types of people. The UI has been improved over the years, the matchmaking algorithm is better, and it is designed to cater to both male and female users
Features:
  * Register for free
  * Talk to members around the world
  * No registration is required for chat rooms
  * Online chatter numbers in the thousands
  * A mobile application is available
  * Users with an anonymous identity
5. ChatRad
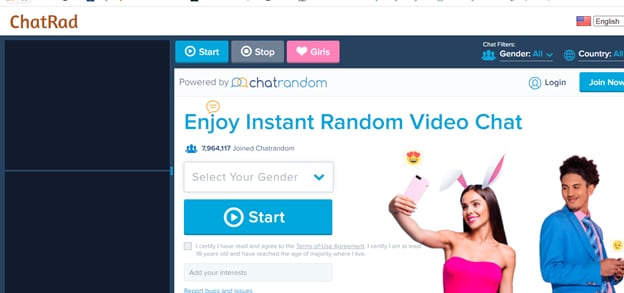
ChatRad is another video chat site that is free. You can chat with strangers from around the world on this random chat site. Before you can start video chatting, you only need to give the site access to your webcam. Furthermore, it allows you to restrict your conversation to only a specific partner you select. Unlike many other sites that are open for everyone, ChatRad has some terms, including that you have to be at least 18 years of age to use the service. Additionally, you can protect your privacy by remaining anonymous. Even if your webcam isn’t working, you can still start a video chat.
Features:
  * There is an option that allows users to stop the camera at any time
  * While viewing different cam chat users, every user has the option of setting a default message
  * If you are a free chat user, you have the ability to change the gender anytime
  * Even if you don't have a camera or microphone, you can still join a chat
6. EmeraldChat
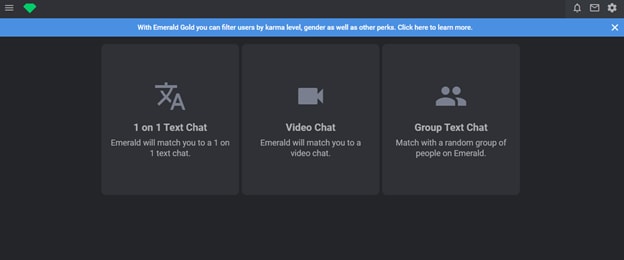
There is an elegant website for elegant people called EmeraldChat. Most people who use this site are trying to find some new friends, and there are surprisingly many women on the site, which is not the case with most other video chat services. The website boasts one of the most beautiful user interfaces on the market, which only adds to its appeal. Consider giving EmeraldChat a shot if you’re looking for a cool and clean chat room.
Features:
  * Allows both text and video chats
  * Group chatting options are available
  * No registration is required
  * Allows you to register an account and delete it at any time you want
  * Photo and media sharing options are available
7. Chat Hub
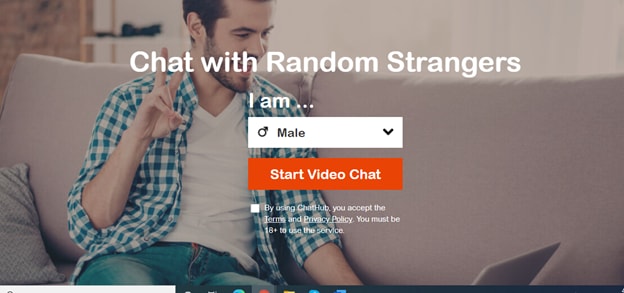
Starting a conversation with another user is simple. You can start online by just entering your gender, accepting the service terms, and following the steps! To prevent language barriers, you can also use a language filter. A user is never matched up with someone they’ve already met through a special filter, ensuring each match is different. The ChatHub interfaces are excellent for both video chats and text chats. Since you don’t need a profile, you can try without risk.
Additionally, ChatHub is concerned with the safety of its users. Conversations are kept private using peer-to-peer connections. You do not have to enter any personal information on this site.
Features:
  * No Registration Required
  * Language Filter To Prevent Language Barrier
  * You can choose to match with a unique stranger every time
  * The connection is private for additional security
8.Shagle

You need only a webcam to begin chatting with their more than 3 million members. It is now possible to talk with people from over 70 different countries thanks to translation tools so that you can converse with anyone. With Shagle, you can mask your identity while chatting, making it easier for shy people to communicate. Those who are hesitant or new to webcam chatting with strangers may find it easier to use that option.
Although you can use it for free to chat with people from 70 countries, you can upgrade to the premium version anytime and enjoy talking with people from over 200 countries with many other valuable features that come with the premium version only.
Features:
  * Best for first-timers
  * Translation tools are available to overcome the language barrier
  * The face masking option comes in very handy whether you want to hide your identity or have fun
  * You can chat with people from over 200 countries, but you will need to upgrade to the premium version
9.FaceFlow
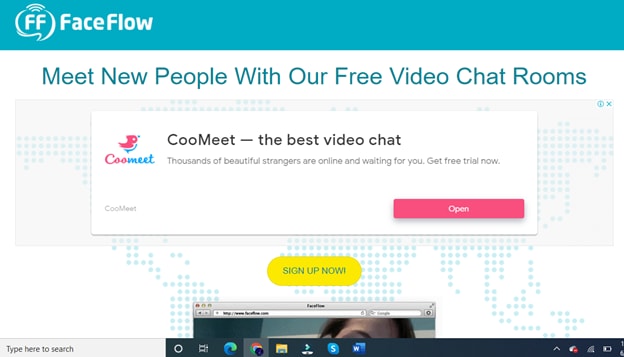
By allowing users to participate in three-way video chats simultaneously, these guys are taking social networking to a whole new level.
“FaceFlow” lets you communicate with your friends by video. However, you can also speak with strangers. It is now possible for users to create a searchable profile and upload YouTube videos and pictures. This site is more than just another webcam chat service - it is more comparable to Skype’s excellent communication service. One-on-one video chat is available, as well as text messaging. FaceFlow has also introduced a multiplayer game called Flappy that looks challenging.
Features:
  * Create video conferences or create your own
  * Participate in online chat rooms
  * Instant message sending and receiving
  * You can upload private photos and share them with others
  * Meet random strangers for private conversations
10.iMeetzu

iMeetzu lets you chat with random people live through video chats, and it has text chat rooms. This feature makes it similar to Omegle, but it goes a bit further. Once you pass the randomness, you are invited to join a free online dating or friend-finding service. Over a thousand new members join this social networking site every day, making it one of the fastest-growing sites of its kind. There is no better way to practice face-to-face communication before you get back into the dating pool. Whether you’re looking for a date or want to have fun with some random strangers, this site is one of the best choices for you.
Features:
- There is no charge for using this site’s features
- In addition to meeting new friends, you also build relationships with iMeetzu
- There is a global availability of this platform
- A new account can be created in fewer than five minutes
Conclusion
These are some of the best video chat sites you can find online. Some are new, and some have been in the market for over a decade. Every site has its unique features. Most of them are free, but some have premium versions to pay for a premium account and additional features.
Extra Info! Record & Edit Your Random Video Chat with Filmora
Ever thought of recording a funny random video chat and sharing it with your friends? Try Filmora! Filmora supports recording PC screens and allows you to edit your recorded videos. If you want to protect the privacy of the strangers you met on the above-listed video chat sites, you can easily add stickers or other elements to their faces. There is more you can do with Filmora. Check out the video below!
Ollie Mattison
Ollie Mattison is a writer and a lover of all things video.
Follow @Ollie Mattison
Ollie Mattison
Mar 27, 2024• Proven solutions
Having a conversation with a stranger online can be surprisingly enjoyable. The last generation taught us how meaningful human connections are. There are many video chat sites where you can meet interesting people. Many of them have chat rooms for you to meet someone. The number of fascinating people you can meet at random is astounding, whether you’re seeking a special someone or just looking for friends.
The good news is that there are plenty of sites where you can video chat with random people and meet new strangers. There is a random chat room, video chat room, and text chat room to meet and talk to new people. Getting to know strangers online can be a bit intimidating, but these platforms make it easy. There is also often no charge for talking with others on these platforms. What type of site is the best for you depends on what features you want and what you hope to accomplish.
You don’t need to worry if you aren’t sure where, to begin with, video chatting. We can help you no matter your level of experience with random chat. We are here to pick and choose which offers the best features with so many websites out there. If you’re looking for simple, safe, and easy-to-use platforms to make new friends and maybe even find love, we’ve got some of the best options for you, such as Fruzo, Tinychat, ChatRandom, etc.
You might be interested in:
How To Keep Yourself Safe During Online Video Chats?
We should talk about how to use video chatting safely before going into a detailed discussion about each website. It’s one thing to chat with your family and friends. However, if you find yourself speaking with strangers at random, you should exercise a bit more caution. The following tips should be kept in mind.
- You shouldn’t give strangers your personal information.
- Your videos shouldn’t feature too much of your home.
- Keep sensitive information, such as house numbers and mail, off of the screen.
- Make sure to only use sites with reputable security and safety measures.
- Don’t hesitate to report anything suspicious or unbecoming.
Our Picks
- Omegle - World’s No 1 Video Chatting Website.
- Fruzo - Best For Online Video Chatting and Dating
- Tinychat - Best for Video Chat Rooms and Group Chats.
- ChatRandom - Best For Annonymous Video Chatting.
- ChatRad - Best site for meeting random people online.
- EmeraldChat - Best for both Text and Video Chats.
- Chat Hub - Best for meeting a unique stranger every time.
- Shagle - Best if you want to chat with strangers in different languages.
- FaceFlow - Best for video conferencing and Instant Messaging.
- iMeetzu - Best for making new friends and public relations.
![]()
A cross-platform for making videos anywhere for all creators
Why your video editing isn’t good enough? How about some creative inspo?
- 100 Million+ Users
- 150+ Countries and Regions
- 4 Million+ Social Media Followers
- 5 Million+ Stock Media for Use
* Secure Download
1.Omegle
The global video chat site Omegle is frequently used by people across the world to chat with random strangers. Chatting with strangers online is what this website is all about. In 2010, Omegle introduced its video chat feature a year after it was launched as a text-only chat platform. You are paired with another user randomly from another country on Omegle. The website does not have any age restrictions as it is open to anyone aged 18 and over. Video chatting is also closely monitored to keep the other users safe and to avoid any harmful material. Using a screen recorder, you can also record Omegle chat.
Features:
  * Free To Use
  * It only takes a few seconds to match you with a stranger
  * Strict video chatting monitoring to avoid unethical content
  * Allows you to record your video chat
2. Fruzo
Fruzo is more than a place for free online video calls. This is an online dating site that allows users to connect with people through Facebook. Users can either create new profiles or connect with existing profiles using Facebook. Besides finding matches, you may also connect with people, follow people, discuss topics, and make new friends through this platform. Users have the option of finding connections by location, gender, age, or keywords. It is also possible to upload photos or browse unlimited images. Because it can be downloaded on your smartphone, you can access it from just about anywhere.
Features:
  * Search filters to find a relevant match
  * Allows you to upload photos and browse photos of others
  * The mobile app is also available
3. Tinychat
With TinyChat, you can chat with anyone using voice or video over the internet. A quarter of a billion minutes of airtime are logged by users every day, the company claims. If you’re unable to find a chat room you want, you can create one. You’ll find thousands of them, including some started by people in your area. You can stream up to 12 video feeds at once from TinyChat, which uses an API for streaming live video of shows hosted on the service, without paying a dime. Using mics, videos, or instant messaging, people can communicate online.
Features:
  * Allows group video chats
  * Easy to start your own chat room or join a public room
  * Free to use and multiple chatting options are available
4. ChatRandom
People do all kinds of things at ChatRandom since it is chaotic, crowded, and people-filled. Irrespective of whether you wanted something fun or anything else, ChatRandom has it all. Despite it being much less popular than it once was, this stranger chat website continues to thrive in the eyes of many. The community is decent, with a wide range of different types of people. The UI has been improved over the years, the matchmaking algorithm is better, and it is designed to cater to both male and female users
Features:
  * Register for free
  * Talk to members around the world
  * No registration is required for chat rooms
  * Online chatter numbers in the thousands
  * A mobile application is available
  * Users with an anonymous identity
5. ChatRad
ChatRad is another video chat site that is free. You can chat with strangers from around the world on this random chat site. Before you can start video chatting, you only need to give the site access to your webcam. Furthermore, it allows you to restrict your conversation to only a specific partner you select. Unlike many other sites that are open for everyone, ChatRad has some terms, including that you have to be at least 18 years of age to use the service. Additionally, you can protect your privacy by remaining anonymous. Even if your webcam isn’t working, you can still start a video chat.
Features:
  * There is an option that allows users to stop the camera at any time
  * While viewing different cam chat users, every user has the option of setting a default message
  * If you are a free chat user, you have the ability to change the gender anytime
  * Even if you don't have a camera or microphone, you can still join a chat
6. EmeraldChat
There is an elegant website for elegant people called EmeraldChat. Most people who use this site are trying to find some new friends, and there are surprisingly many women on the site, which is not the case with most other video chat services. The website boasts one of the most beautiful user interfaces on the market, which only adds to its appeal. Consider giving EmeraldChat a shot if you’re looking for a cool and clean chat room.
Features:
  * Allows both text and video chats
  * Group chatting options are available
  * No registration is required
  * Allows you to register an account and delete it at any time you want
  * Photo and media sharing options are available
7. Chat Hub
Starting a conversation with another user is simple. You can start online by just entering your gender, accepting the service terms, and following the steps! To prevent language barriers, you can also use a language filter. A user is never matched up with someone they’ve already met through a special filter, ensuring each match is different. The ChatHub interfaces are excellent for both video chats and text chats. Since you don’t need a profile, you can try without risk.
Additionally, ChatHub is concerned with the safety of its users. Conversations are kept private using peer-to-peer connections. You do not have to enter any personal information on this site.
Features:
  * No Registration Required
  * Language Filter To Prevent Language Barrier
  * You can choose to match with a unique stranger every time
  * The connection is private for additional security
8.Shagle
You need only a webcam to begin chatting with their more than 3 million members. It is now possible to talk with people from over 70 different countries thanks to translation tools so that you can converse with anyone. With Shagle, you can mask your identity while chatting, making it easier for shy people to communicate. Those who are hesitant or new to webcam chatting with strangers may find it easier to use that option.
Although you can use it for free to chat with people from 70 countries, you can upgrade to the premium version anytime and enjoy talking with people from over 200 countries with many other valuable features that come with the premium version only.
Features:
  * Best for first-timers
  * Translation tools are available to overcome the language barrier
  * The face masking option comes in very handy whether you want to hide your identity or have fun
  * You can chat with people from over 200 countries, but you will need to upgrade to the premium version
9.FaceFlow
By allowing users to participate in three-way video chats simultaneously, these guys are taking social networking to a whole new level.
“FaceFlow” lets you communicate with your friends by video. However, you can also speak with strangers. It is now possible for users to create a searchable profile and upload YouTube videos and pictures. This site is more than just another webcam chat service - it is more comparable to Skype’s excellent communication service. One-on-one video chat is available, as well as text messaging. FaceFlow has also introduced a multiplayer game called Flappy that looks challenging.
Features:
  * Create video conferences or create your own
  * Participate in online chat rooms
  * Instant message sending and receiving
  * You can upload private photos and share them with others
  * Meet random strangers for private conversations
10.iMeetzu
iMeetzu lets you chat with random people live through video chats, and it has text chat rooms. This feature makes it similar to Omegle, but it goes a bit further. Once you pass the randomness, you are invited to join a free online dating or friend-finding service. Over a thousand new members join this social networking site every day, making it one of the fastest-growing sites of its kind. There is no better way to practice face-to-face communication before you get back into the dating pool. Whether you’re looking for a date or want to have fun with some random strangers, this site is one of the best choices for you.
Features:
- There is no charge for using this site’s features
- In addition to meeting new friends, you also build relationships with iMeetzu
- There is a global availability of this platform
- A new account can be created in fewer than five minutes
Conclusion
These are some of the best video chat sites you can find online. Some are new, and some have been in the market for over a decade. Every site has its unique features. Most of them are free, but some have premium versions to pay for a premium account and additional features.
Extra Info! Record & Edit Your Random Video Chat with Filmora
Ever thought of recording a funny random video chat and sharing it with your friends? Try Filmora! Filmora supports recording PC screens and allows you to edit your recorded videos. If you want to protect the privacy of the strangers you met on the above-listed video chat sites, you can easily add stickers or other elements to their faces. There is more you can do with Filmora. Check out the video below!
Ollie Mattison
Ollie Mattison is a writer and a lover of all things video.
Follow @Ollie Mattison
Enhancing Visual Storytelling: Adding Audio Elements in Adobe Premiere Pro
Versatile Video Editor - Wondershare Filmora
An easy yet powerful editor
Numerous effects to choose from
Detailed tutorials provided by the official channel
Look at any of the spot commercials, wedding videos, or even some family candid videos. Adding audio makes them appealing and likable. To catch a potential customer or create an emotional connection with the viewer combination of audio and video is a must. This makes the footage attractive and exceptional.
Read on to know more about the step-by-step approach how to add audio to video in Adobe Premiere Pro.
In this article
01 [How to add audio to video in Premiere Pro](#Part 1)
02 [How to adjust audio in Premiere Pro](#Part 2)
03 [Adding Audio to Video files](#Part 3)
Part 1 How to add audio to video in Premiere Pro
Some essential pointers for all would-be videographers are:
● Before you add audio to video in Premiere Pro, be ready to see your file size increase to a large extent. If you add a background score of 15MB, your total video file size will increase by the same amount of 15MB. The best way to take care of such a problem is to use additional compression techniques to get a suitable file size.
● Most videographers use lots of software tools to add audio to video professionally. One such trending software tool is the Adobe Premiere Pro. Its simple to add audio to video in Premiere Pro, edit your audio and video, and fine-tune the audio volume of each video project.
Let’s learn how.

Step1 Find out the Audio option
Navigate to the Audio workspace, select Audio at the top on the tools bar
Step2 Choose the Workspace
Click Window select Workspace click on Audio
Step3 Check toolbar
Within Audio, click on Choose Window Media Browser to show the Media Browser toolbar.
Step4 Select audio files
Go to your audio file; for Windows OS, right-click or control-click the selected audio file for macOS.
Step5 Import and add
Please select the desired audio file, then click import to add it to your Project.
An important tip is to keep the Ingest box selected if you want to copy your audio file concurrently to your project folder.
Adding audio to your series

Step1 Go to the Project panel
Select Window, click on Project to open the Project panel.
Step2 Select audio file
Click on the audio file you imported to select it.
Step3 Check the waveform
Double click the file to open it in the Source panel to check the sound and waveform.
Step4 Check sounds
Play the audio file if you want to check the audio quality, volume, and overall sound.
Step5 Add audio to the video track
Hold the left click on your mouse to drag the audio file to the series in the Timeline panel. You can add any audio file to the video track listed in the panel window in this step.
Step6 Trim audio file
Select the Trim option to trim your audio file the same way you will edit the video file in the final step.
Part 2 How to adjust audio in Premiere Pro
Now that you have understood how to add audio to video in Adobe Premier Pro. Let’s know how to adjust audio in Premier Pro.

Step1 Activate the series
Press on the spacebar to activate your series in the Program panel (appears in the top right of the panel)
Step2 Stop playback
To stop the playback, press the space bar again.
Step3 Choose starting point of playback
Press down the left mouse button to hold and drag the Blue colored play head to wherever you desire the playback to start.
If you feel the audio track is mild or too harsh compared to the rest of the audio series, change each audio track’s volume separately.
Step1 Select Audio Track Mixer
Click Window selects Audio Track Mixer from the menu.
Step2 Click the series name to see the audio mixer
Click the series name of your audio file to show the audio mixer for your series.
Step3 Choose playback to play the audio
At the bottom of the panel is the Audio Track Mixer. Click on playback to star, pause or play your audio in-ring sequence.
Step4 Click on the slider
When your audio file plays or loops, click on the slider to move up or down. It will increase or reduce the volume of each separate audio track in your audio series.
Step5 Adjust the volume
Use the slider to adjust the overall audio volume
Tips
Always keep the audio projects within the -6 to 3 dB volume range to get the best quality of the audio effect. Any lower you won’t be able to hear the sound, or if it’s higher, the sound will hurt the listeners’ ears.
Professional advice to all beginner-level videographers is that as Premiere Pro is complex so you need more straightforward tools like Filmora for all your video editing work. Filmora is easy to use and much cheaper than Premiere Pro.
You may think now why or how Filmora can be the best as an alternative on how to add audio to video using Premiere Pro. Well! It will help you to transform your video into a piece of art incredibly by offering simple drag and drop options, including an easy-to-use interface and powerful editing tools. You can:
● Edit and create your videos with minimal effort
● Get a Music Library to add comedy, fear, tension, and love to every scene
● Get several royalty-free songs and sound effects
● Create videos with up to 800 stunning effects
● Unleash your creativity with its offered Hollywood effects
● Import and export in almost any type of video format
How to use Filmora to add audio to video
Adding sound to any video file enhances its viewability and the whole experience of watching any video. To do this, you need to add audio to video. The same can be done quickly in Filmora, a 3rd-party video editing software tool now the hot favorite of amateur and professional video editors. Below we describe how to add audio to video in Filmora.
Import Media
To start the process of adding audio to video follow these steps.
Step1 Select the audio, add using the Import option or drag and select
Import selected audio using the Filmora Media Panel and add it to your timeline. You can also choose and drag the audio file from the source folder to the Media Panel. Filmora supports multiple audio file formats to ease adding audio to video. The supported audio files are MP3, M4V, MPA, WAV, WMA.

Step2 Add and make the audio file
Adding the audio file to Filmora Media Panel makes it a media asset and can now be used multiple times in future projects. The original file remains as Filmora doesn’t change the original audio file.
Step3 Copying or deleting an audio file
In Filmora, using the feature of copying or deleting an audio file, you can work on the audio and video from any computer or remote PC.
Part 3 Adding Audio to Video files
Using Filmora, it is easy to sync or add audio to the video, which is separately recorded and stored on your device.
Using Filmora, it is easy to sync or add audio to the video, which is separately recorded and stored on your device.
Step1 Click on Import in the Media Panel
Select the audio and video files to import them into Filmora.
Step2 Click on the video file to add audio
Press the Ctrl key (Windows) or Cmd key (Mac OS) and click on the audio file.
Step3 Add audio to video
Right-click on the files selected and choose the Merge audio & video option to add audio to the video.
Filmora analyzes audio and video files and replaces the existing audio with the newly selected audio file. Once the synchronization process is over, the new merged file will be available in the Media Panel for future processing.
The synchronized file will have the same terminology as the original video file with a difference. It will get an extension Merged to its name.
The original file will not get affected in Filmora. This software tool only references the files to generate a new file. The new file created when you add audio to the video can now be added to the timeline and exported.
Wondershare Filmora
Get started easily with Filmora’s powerful performance, intuitive interface, and countless effects!
Try It Free Try It Free Try It Free Learn More about Filmora>

Conclusion
So, this article listed how to add audio to video in Premiere Pro via a step-by-step guide. The guide lets you know the easy method of adding audio to video in Adobe Premiere Pro to all potential videographers. Thus, you can now start your journey of video edition by putting your best click forward!
Look at any of the spot commercials, wedding videos, or even some family candid videos. Adding audio makes them appealing and likable. To catch a potential customer or create an emotional connection with the viewer combination of audio and video is a must. This makes the footage attractive and exceptional.
Read on to know more about the step-by-step approach how to add audio to video in Adobe Premiere Pro.
In this article
01 [How to add audio to video in Premiere Pro](#Part 1)
02 [How to adjust audio in Premiere Pro](#Part 2)
03 [Adding Audio to Video files](#Part 3)
Part 1 How to add audio to video in Premiere Pro
Some essential pointers for all would-be videographers are:
● Before you add audio to video in Premiere Pro, be ready to see your file size increase to a large extent. If you add a background score of 15MB, your total video file size will increase by the same amount of 15MB. The best way to take care of such a problem is to use additional compression techniques to get a suitable file size.
● Most videographers use lots of software tools to add audio to video professionally. One such trending software tool is the Adobe Premiere Pro. Its simple to add audio to video in Premiere Pro, edit your audio and video, and fine-tune the audio volume of each video project.
Let’s learn how.
Step1 Find out the Audio option
Navigate to the Audio workspace, select Audio at the top on the tools bar
Step2 Choose the Workspace
Click Window select Workspace click on Audio
Step3 Check toolbar
Within Audio, click on Choose Window Media Browser to show the Media Browser toolbar.
Step4 Select audio files
Go to your audio file; for Windows OS, right-click or control-click the selected audio file for macOS.
Step5 Import and add
Please select the desired audio file, then click import to add it to your Project.
An important tip is to keep the Ingest box selected if you want to copy your audio file concurrently to your project folder.
Adding audio to your series
Step1 Go to the Project panel
Select Window, click on Project to open the Project panel.
Step2 Select audio file
Click on the audio file you imported to select it.
Step3 Check the waveform
Double click the file to open it in the Source panel to check the sound and waveform.
Step4 Check sounds
Play the audio file if you want to check the audio quality, volume, and overall sound.
Step5 Add audio to the video track
Hold the left click on your mouse to drag the audio file to the series in the Timeline panel. You can add any audio file to the video track listed in the panel window in this step.
Step6 Trim audio file
Select the Trim option to trim your audio file the same way you will edit the video file in the final step.
Part 2 How to adjust audio in Premiere Pro
Now that you have understood how to add audio to video in Adobe Premier Pro. Let’s know how to adjust audio in Premier Pro.
Step1 Activate the series
Press on the spacebar to activate your series in the Program panel (appears in the top right of the panel)
Step2 Stop playback
To stop the playback, press the space bar again.
Step3 Choose starting point of playback
Press down the left mouse button to hold and drag the Blue colored play head to wherever you desire the playback to start.
If you feel the audio track is mild or too harsh compared to the rest of the audio series, change each audio track’s volume separately.
Step1 Select Audio Track Mixer
Click Window selects Audio Track Mixer from the menu.
Step2 Click the series name to see the audio mixer
Click the series name of your audio file to show the audio mixer for your series.
Step3 Choose playback to play the audio
At the bottom of the panel is the Audio Track Mixer. Click on playback to star, pause or play your audio in-ring sequence.
Step4 Click on the slider
When your audio file plays or loops, click on the slider to move up or down. It will increase or reduce the volume of each separate audio track in your audio series.
Step5 Adjust the volume
Use the slider to adjust the overall audio volume
Tips
Always keep the audio projects within the -6 to 3 dB volume range to get the best quality of the audio effect. Any lower you won’t be able to hear the sound, or if it’s higher, the sound will hurt the listeners’ ears.
Professional advice to all beginner-level videographers is that as Premiere Pro is complex so you need more straightforward tools like Filmora for all your video editing work. Filmora is easy to use and much cheaper than Premiere Pro.
You may think now why or how Filmora can be the best as an alternative on how to add audio to video using Premiere Pro. Well! It will help you to transform your video into a piece of art incredibly by offering simple drag and drop options, including an easy-to-use interface and powerful editing tools. You can:
● Edit and create your videos with minimal effort
● Get a Music Library to add comedy, fear, tension, and love to every scene
● Get several royalty-free songs and sound effects
● Create videos with up to 800 stunning effects
● Unleash your creativity with its offered Hollywood effects
● Import and export in almost any type of video format
How to use Filmora to add audio to video
Adding sound to any video file enhances its viewability and the whole experience of watching any video. To do this, you need to add audio to video. The same can be done quickly in Filmora, a 3rd-party video editing software tool now the hot favorite of amateur and professional video editors. Below we describe how to add audio to video in Filmora.
Import Media
To start the process of adding audio to video follow these steps.
Step1 Select the audio, add using the Import option or drag and select
Import selected audio using the Filmora Media Panel and add it to your timeline. You can also choose and drag the audio file from the source folder to the Media Panel. Filmora supports multiple audio file formats to ease adding audio to video. The supported audio files are MP3, M4V, MPA, WAV, WMA.
Step2 Add and make the audio file
Adding the audio file to Filmora Media Panel makes it a media asset and can now be used multiple times in future projects. The original file remains as Filmora doesn’t change the original audio file.
Step3 Copying or deleting an audio file
In Filmora, using the feature of copying or deleting an audio file, you can work on the audio and video from any computer or remote PC.
Part 3 Adding Audio to Video files
Using Filmora, it is easy to sync or add audio to the video, which is separately recorded and stored on your device.
Using Filmora, it is easy to sync or add audio to the video, which is separately recorded and stored on your device.
Step1 Click on Import in the Media Panel
Select the audio and video files to import them into Filmora.
Step2 Click on the video file to add audio
Press the Ctrl key (Windows) or Cmd key (Mac OS) and click on the audio file.
Step3 Add audio to video
Right-click on the files selected and choose the Merge audio & video option to add audio to the video.
Filmora analyzes audio and video files and replaces the existing audio with the newly selected audio file. Once the synchronization process is over, the new merged file will be available in the Media Panel for future processing.
The synchronized file will have the same terminology as the original video file with a difference. It will get an extension Merged to its name.
The original file will not get affected in Filmora. This software tool only references the files to generate a new file. The new file created when you add audio to the video can now be added to the timeline and exported.
Wondershare Filmora
Get started easily with Filmora’s powerful performance, intuitive interface, and countless effects!
Try It Free Try It Free Try It Free Learn More about Filmora>
Conclusion
So, this article listed how to add audio to video in Premiere Pro via a step-by-step guide. The guide lets you know the easy method of adding audio to video in Adobe Premiere Pro to all potential videographers. Thus, you can now start your journey of video edition by putting your best click forward!
Harmonizing Sounds with Imagery: Professional Strategies to Boost Your Videography
How to Add Audio to Your Video (with Steps)

Shanoon Cox
Mar 27, 2024• Proven solutions
Videos are everywhere around us, to promote a brand, create an Ad, or for larger programs like movies. Only a voice-over or a clip fails to grab attention of the audience, so you got to add music to the video and make it spectacularly fascinating. By adding background music to a video, you kill its monotony and make it more appealing to touch people’s heart and evoke the response your video is intended to.
If you want to explore the numerous options to edit and add audio to videos with free audio editor , then you have come to the right spot.
Through this article, we are going to introduce you to various desktop, and phone based applications as well as free online methods to help you add audio to your videos and make them strikingly beautiful.
- Part1: How to add music to videos on Desktop
- Part2: How to add audio to video online
- Part3: How to add music to videos on Mobile Phone
- Part4: How to download royalty free music from website
- Part5: Audio editing - 5 tips for mixing audio
You may also like
15 Free Music Sites to Use (Royalty Free) >>
Part 1: How to add music to videos on Desktop
1. How to add audio to videos with for Windows 10, 8, 7
Filmora
When you need a video editing software application that comes with a brilliant built-in audio library, you can undoubtedly pick Filmora to save you.
This is a perfect application for Windows PC, which enables you to add music to video (.MP3, .WMA, or .OGG audio files to .AVI, .MP4, .MKV videos) files while allowing you to remove any existing background music from the videos as well. Its intuitive design with drag and drop features makes editing videos cake walk.
Isn’t it great when the software supports such wide varieties of audio and video formats and helps you create the most enthralling videos for you?
Explore the way it transforms your mundane videos to an exquisite piece of art, within no time. Here is the step-by-step guide for Filmora –
Step 1: Where to import audio
Install Wondershare Filmora from the official website on your computer and launch it. Once the software gets launched tap ‘MEDIA’ and then click the ‘IMPORT’ tab just below the menu bar. Now, from the drop down list click on ‘Import Media Files’ to choose the video file, and then repeat the process to pick a desired background music file.
Note: You can also use the in-built music tracks to add music to your video by selecting the ‘MUSIC’ tab.

Step 2: How to add music to timeline
Now, hover the mouse over the audio and video files you have just imported to Filmora and then tap the ‘+’ sign on it (displays ‘Add to Project’). You can also drag the media files down to the timeline.

Step 3: Edit music file
You can edit the music by double tapping the audio from the timeline. It will show you the audio panel at the top of the screen. You can the audio to fade in or fade out, manage the volume, pitch, speed, and set the desired equalizer as well.

Step 4: Export
Now that you have made the desired changes to your video, tap on the ‘EXPORT’ tab on the toolbar to export the video. The exported file can be saved in .MP4, and .WMV formats and rename, define the resolution as well.

2. How to add audio to videos on Mac
VLC
Most people have no idea that VLC is not only a media player but a video editor as well, which allows you to add music to video. This open source cross-platform multimedia player supports almost all multimedia files and various streaming protocols.
VLC step-by-step guide to add audio to video –
Step 1: Add audio file
First of all install VLC media player on your computer and launch it. Now, tap the click file tab from the menu bar at the top. After that, pick the ‘Advanced Open File’ option from the drop down menu.

Step 2: Import audio and video
You need to click the ‘Browse…’ button for importing video, and select the ‘Play another media synchronously’. Now, click the ‘Choose…’ button for importing an audio file for editing. After that, you need to click the ‘Open’ button. You also have the option for adding sub-titles to your video. Now that you have imported and merged both the audio and video files, you can also enhance the audio settings.

Step 3: Quick Tip
Tap the ‘Window’ from the top bar and click on ‘Audio Effects…’ for applying the various audio effects to your edited video.

QuickTime
QuickTime Player is the default media player for Mac computer that supports older medial formats including QTVR, MIDI files on Snow Leopard and OS X Lion, and interactive QuickTime movies.
Entering QuickTime 7 Pro registration codes, you can unlock the QuickTime Pro functions that will enable you to add music to video files. If you don’t have it on your computer, then install it and find under the ‘Utilities’ folder within the ‘Applications’ folder. Here is the step-by-step guide for QuickTime to add audio to video –
Step 1: Import the files
First of all, launch QuickTime Player and tap ‘File’ and then click ‘Open File’. Pick your desired audio file to be imported. On the subsequent window of QuickTime Player, select ‘Edit’ and then tap ‘Select All’ to import the complete audio file. Hit ‘Edit’ and tap on the ‘Copy’ option.

Step 2: Import video and add audio to QuickTime movie
Now, you need to open the desired video that you are going to add audio to. For that, you need to first open the video in QuickTime and the click ‘Edit’ and ‘Add Clip to End’.

Note: You can add a part of the audio to the video by tapping ‘Edit’ and then ‘Add to Selection and Scale’. ‘Add to Selection and Scale’ fastens or lowers down the pace of the audio track to fit with the video’s length (that you have selected to add audio to).
3. How to add audio to videos with on Linux
Mkvmerge
This software for the Linux system is broadly known for editing the Matroska Multimedia Container. The GUI of this tool is much appealing but is rather simple and basic.
The software helps you to merge the audio or video multimedia streams into one single Matroska file. Matroska acts exactly like AVI, ASF, or MP4 the common container files. The Matroska files have .MKV extension for videos which includes audio and subtitles as well, files with a .MK3D extension represent stereoscopic video, .MKS for only subtitles, and .MKA for audio-only files.
Step-by-step guide for merging audio into video: (MKV ONLY)
Step 1: Add audio to video files
Download the software and launch it on your Linux computer. From the mkvtoolnix-gui package, open the mkvmerge GUI. Click the ‘add’ button for importing the audio and video files to the software interface.
Step 2: Choose the audio track
After importing the audio and video files, select the new audio tracks by marking the check boxes against them, under the ‘Tracks, chapters and tags’ section. You can also set the language in the ‘General track options’ and delay under ‘Format specific options’ tab.
Step 3: Merge the files
Mention the output format under ‘Output filename’ section and then tap ‘Start muxing’. This process will save the video file. Using this program you can also remover tracks from a video and fix the default audio track as well.

Part 2: How to add music to videos online
Mp3Care
MP3Care is an online video editing application that people mostly use to add audio to video files. This application wipes out the existing audio track from the video file and mixes the new audio file that you upload to create an interesting video.
The supported audio input format is MP3, whereas the supported video files include MKV, FLV, AVI, MOV, MP4, and WMV. You can record a video on your mobile phone or tablet and merge a desired audio background with this using MP3Care. All you need to do is select this recorded video and a preferred audio track in this website and get going.
Steps for adding audio track to video –
Step 1: Launch the web browser and open this application, then choose the audio and video file as per the online instruction.

Step 2: After you are done with the video selection, tap ‘ADD MUSIC TO VIDEO’ and then download your edited video file.

AddAudioToVideo
AddAudioToVideo is an online application for adding music/audio to a video. MP3 audio and AVI, WMV, MOV, and MP4 video formats are only supported with this program. It replaces the MP3 audio from any video and the uploaded files get removed after a while from the web.
Step-by-step guide –
Step 1: Choose a video file
You need to first select the video file from your local drive after browsing to this site.
Step 2: Choose audio files
Select the MP3 audio file after the video file. Tap ‘Upload’ to get the files uploaded to the program and wait for some time to get them merged together.
Tip: The video file size limit is up to 500 MB.

Check out more ways of adding music to video online >>
Part 3: How to add music to videos on Mobile Phone
1. How to add audio to video on Android
Filmora
The best method to add music to video files on Android devices is none other than Filmora. A video editing app that has no time limit to edit a video and leaves no watermark on videos either is always the talk of the show.
Using the music and effects, you can indeed make hilarious funny-videos to entertain yourself and your friends. You can create videos simply by selecting pictures and videos from your phone, Instagram, or Facebook and select a theme, template, mix some music, transitions, subtitles, filters etc. and then get the video saved on your phone or shared over popular social media platforms like Facebook, Instagram, WhatsApp, Vimeo, Email, Tumblr, or YouTube.
The best part about this app is it supports multiple international languages, fits the popular ratios of Instagram and YouTube during exporting of video, allows real-time preview of clips, exports HD videos, and provides overlay elements for the best video editing experience.
Let’s go through the step-by-step guide –
Step 1: Select video and audio
Install Filmora on your Android device and launch it. Click the ‘CREATE NEW VIDEO’ over there and select the desired video. After that, tap on the ‘Add’ button found on the right side of the screen and click ‘NEXT’ on the top right part of the mobile screen.

Step 2: Add audio to video
You will be navigated to the editing interface. Click on ‘MUSIC’ from the right toolbar and then choose the desired audio after pressing plus icon. Play and confirm the audio by clicking ‘OKAY’ on the top right corner.

Step 3: Export
You can swap the music by clicking the thumbnail icon at the bottom of the screen. Save the edited video by tapping ‘Save’

KineMaster
It is a fully-featured app in Android Play store that supports numerous images, video, and text layers along with multi-track audio, precise trimming and cutting, volume envelope control, 3D transition, color LUT features and the likes.
It allows a great amount of control for an app that does editing over a mobile. Artists and educators will make use of the handwriting layers for drawing directly over the video. It supports most of the video, audio, and image formats.
Tutorial Guide for KineMaster –
Step 1: Launch KineMaster
Install and launch the app on your Android phone. Click the ‘+’ icon found in the middle of the app screen and then tap ‘Empty Project’ for a new project or ‘Project Assistant’ otherwise.

Step 2: Select media
Under the media tab, choose the desired video file and then tap ‘Background Audio’ tab. From the left panel you can choose almost 8 categories for audio.
Tips: Without tapping the plus ‘+’ icon on the music, the audio will be added to the desired video.

Step 3: Edit and export
Now, select the preferred audio track and click the share icon from the left panel. Confirm your actions by tapping ‘Export’.
Note: Voice change, looping music, or setting up the fade in/out effect is a cake walk with this app. You can also set resolution, frame rate, and bitrate using this video editing app.

2. How to add audio to video on iPhone/iPad
iMovie
If you want to add music to video in your iPhone, then the in-built iMovie option helps you import music from Theme, iTunes and your own music. Your videos will be turned into exhilarating master pieces.
You can effortlessly browse through the music files and create awesome 4K-resolution movie and Hollywood-style trailers to amaze your friends. iMovie is built to work in sync with your iOS and Mac devices.
It doesn’t matter where you are working, we mean from your iPhone to your iPad or Mac system, the project can be synced automatically as you move ahead. Once you are done editing, the movie will show up on iMovie Theatre across your iOS and Mac devices.
The step-by-step guide to add music to video using iMovie –
Step 1: On your iPhone launch the iMovie app and click ‘Project’ from the top of the screen, and tap ‘Create Project’ represented by a ‘+’ icon.

Step 2: Now, click ‘Create’ and then ‘Movie’ to open the project interface on screen. Browse the ‘Media’ option from the top left corner of the timeline and explore the video gallery on screen and pick the desired video for editing then hit ‘Add’ and then ‘Use’.

Step 3: The source video gets added to the timeline. You need to reach to the starting point of the video, so that you can add audio from there. Add audio by following similar process to that of adding video from the gallery, but tap ‘Audio’ after clicking the ‘Add Media’ button. Ensure that music has been placed at background, by tapping the ‘Background’ button from the bottom of the screen. By clicking the ‘Theme Music’ option you can find the synced media on your device.

Step 4: Click ‘Play’ for previewing the audio visual, and click ‘Done’ if satisfied with your new creation.
Tip: iMovie will loop the background audio automatically, in case the video runs longer than the audio. It is recommended to adjust their lengths while merging them.
Part 4: How to download royalty free music from website
Few of the video editing software comes up with in-built library for music but not all of them. When there is no music with the software, you might import music from an external source to add audio to your video.
The biggest problem while using the audio tracks is copyright issues, they are not always copyright free. But, there is nothing to worry about. There are sites that offer free of cost stock music/audio tracks across genres that you can use and make a breath-taking audio visual. Let’s go through the most popular royalty free music sites.
Free Stock Music
Free Stock Music contains a library full of audio tracks across genres that you can avail for free. MP3, AIFF, and WAV audio formats are available within this site and asks you for free sign-up. You don’t have to provide any attribution to download the music.

Machinima Sound
Though this site doesn’t offer free music for you, few tracks might be there to suit your needs. You can find them under ‘LEGACY TRACKS’ at the bottom of the page. This site has a huge collection of tracks divided into genres, moods, and stingers. The audio is available in MP3 format and for attributions you might need specific license.

Free Soundtrack Music
Free Soundtrack Music enables you to access numerous royalty-free music tracks that you can make use of in your audio-visuals. Brilliant audio tracks are available with this audio library that you can download and add to your videos. When they say add credit, it usually means the music is paid and you need to buy the credits.

Part 5: Audio editing - 5 tips for mixing audio
Keyframe audio Levels
After fixing the primary audio, you shift your task to the new audio that you are adding to the video. Preview your track and make adjustments, then add the music to timeline and start balancing everything that seems out of place by managing the keyframes. Either work with the clip keyframes, or with the entire track, do whatever seems more pleasing with the composition.
Use filters and effects
You can apply filters/effects as you require, and keep in mind that an audio should only be added for enhanced effects, when you have a clear source for that effect. They shouldn’t make the composition weird. Use appropriate filters that separate a voice-over and a telephonic voice from usual dialogue in a video/audio.
Volume is important
Editing video or audio clip is just like attending a live concert. If not paid attention, the surrounding music will overpower the vocalist, or the guitar might be too low to be audible due to the dominant bass effect. The volume should be properly tuned to match with the rest of the audio visuals while adding audio to video. You can pick portions of the audio and balance audio level accordingly to allow a drop in volume during vocals and rise when there are no vocals.
Change tempo
The change in tempo enhances the composition. You can get creative and experiment. Let’s say there is a portion in your video that is slow and has music at a regular pace. Then why not stretch the tempo and slow it down to blend properly with your video? Altering the tempo brings more creative aspects to create better audio visuals.
Use fade in and fade out
While adding audio to video, if the new one music is instrumental whereas the existing one in the video is a quiet background track, the sudden change in volume might sound weird. Effective use of fades can lower the aural unexpectedness of the instruments.
Final Verdict
Coming towards the end of the discussion and after going through an elaborated list of video editing applications, we came to a final verdict that Filmora sound to be the best out of them. It allows you to flawlessly edit audio and video files on your desktop, with multiple in-built royalty free music tracks to choose from that can enhance your video’s beauty.
Shanoon Cox
Shanoon Cox is a writer and a lover of all things video.
Follow @Shanoon Cox
Shanoon Cox
Mar 27, 2024• Proven solutions
Videos are everywhere around us, to promote a brand, create an Ad, or for larger programs like movies. Only a voice-over or a clip fails to grab attention of the audience, so you got to add music to the video and make it spectacularly fascinating. By adding background music to a video, you kill its monotony and make it more appealing to touch people’s heart and evoke the response your video is intended to.
If you want to explore the numerous options to edit and add audio to videos with free audio editor , then you have come to the right spot.
Through this article, we are going to introduce you to various desktop, and phone based applications as well as free online methods to help you add audio to your videos and make them strikingly beautiful.
- Part1: How to add music to videos on Desktop
- Part2: How to add audio to video online
- Part3: How to add music to videos on Mobile Phone
- Part4: How to download royalty free music from website
- Part5: Audio editing - 5 tips for mixing audio
You may also like
15 Free Music Sites to Use (Royalty Free) >>
Part 1: How to add music to videos on Desktop
1. How to add audio to videos with for Windows 10, 8, 7
Filmora
When you need a video editing software application that comes with a brilliant built-in audio library, you can undoubtedly pick Filmora to save you.
This is a perfect application for Windows PC, which enables you to add music to video (.MP3, .WMA, or .OGG audio files to .AVI, .MP4, .MKV videos) files while allowing you to remove any existing background music from the videos as well. Its intuitive design with drag and drop features makes editing videos cake walk.
Isn’t it great when the software supports such wide varieties of audio and video formats and helps you create the most enthralling videos for you?
Explore the way it transforms your mundane videos to an exquisite piece of art, within no time. Here is the step-by-step guide for Filmora –
Step 1: Where to import audio
Install Wondershare Filmora from the official website on your computer and launch it. Once the software gets launched tap ‘MEDIA’ and then click the ‘IMPORT’ tab just below the menu bar. Now, from the drop down list click on ‘Import Media Files’ to choose the video file, and then repeat the process to pick a desired background music file.
Note: You can also use the in-built music tracks to add music to your video by selecting the ‘MUSIC’ tab.
Step 2: How to add music to timeline
Now, hover the mouse over the audio and video files you have just imported to Filmora and then tap the ‘+’ sign on it (displays ‘Add to Project’). You can also drag the media files down to the timeline.
Step 3: Edit music file
You can edit the music by double tapping the audio from the timeline. It will show you the audio panel at the top of the screen. You can the audio to fade in or fade out, manage the volume, pitch, speed, and set the desired equalizer as well.
Step 4: Export
Now that you have made the desired changes to your video, tap on the ‘EXPORT’ tab on the toolbar to export the video. The exported file can be saved in .MP4, and .WMV formats and rename, define the resolution as well.
2. How to add audio to videos on Mac
VLC
Most people have no idea that VLC is not only a media player but a video editor as well, which allows you to add music to video. This open source cross-platform multimedia player supports almost all multimedia files and various streaming protocols.
VLC step-by-step guide to add audio to video –
Step 1: Add audio file
First of all install VLC media player on your computer and launch it. Now, tap the click file tab from the menu bar at the top. After that, pick the ‘Advanced Open File’ option from the drop down menu.
Step 2: Import audio and video
You need to click the ‘Browse…’ button for importing video, and select the ‘Play another media synchronously’. Now, click the ‘Choose…’ button for importing an audio file for editing. After that, you need to click the ‘Open’ button. You also have the option for adding sub-titles to your video. Now that you have imported and merged both the audio and video files, you can also enhance the audio settings.
Step 3: Quick Tip
Tap the ‘Window’ from the top bar and click on ‘Audio Effects…’ for applying the various audio effects to your edited video.
QuickTime
QuickTime Player is the default media player for Mac computer that supports older medial formats including QTVR, MIDI files on Snow Leopard and OS X Lion, and interactive QuickTime movies.
Entering QuickTime 7 Pro registration codes, you can unlock the QuickTime Pro functions that will enable you to add music to video files. If you don’t have it on your computer, then install it and find under the ‘Utilities’ folder within the ‘Applications’ folder. Here is the step-by-step guide for QuickTime to add audio to video –
Step 1: Import the files
First of all, launch QuickTime Player and tap ‘File’ and then click ‘Open File’. Pick your desired audio file to be imported. On the subsequent window of QuickTime Player, select ‘Edit’ and then tap ‘Select All’ to import the complete audio file. Hit ‘Edit’ and tap on the ‘Copy’ option.
Step 2: Import video and add audio to QuickTime movie
Now, you need to open the desired video that you are going to add audio to. For that, you need to first open the video in QuickTime and the click ‘Edit’ and ‘Add Clip to End’.
Note: You can add a part of the audio to the video by tapping ‘Edit’ and then ‘Add to Selection and Scale’. ‘Add to Selection and Scale’ fastens or lowers down the pace of the audio track to fit with the video’s length (that you have selected to add audio to).
3. How to add audio to videos with on Linux
Mkvmerge
This software for the Linux system is broadly known for editing the Matroska Multimedia Container. The GUI of this tool is much appealing but is rather simple and basic.
The software helps you to merge the audio or video multimedia streams into one single Matroska file. Matroska acts exactly like AVI, ASF, or MP4 the common container files. The Matroska files have .MKV extension for videos which includes audio and subtitles as well, files with a .MK3D extension represent stereoscopic video, .MKS for only subtitles, and .MKA for audio-only files.
Step-by-step guide for merging audio into video: (MKV ONLY)
Step 1: Add audio to video files
Download the software and launch it on your Linux computer. From the mkvtoolnix-gui package, open the mkvmerge GUI. Click the ‘add’ button for importing the audio and video files to the software interface.
Step 2: Choose the audio track
After importing the audio and video files, select the new audio tracks by marking the check boxes against them, under the ‘Tracks, chapters and tags’ section. You can also set the language in the ‘General track options’ and delay under ‘Format specific options’ tab.
Step 3: Merge the files
Mention the output format under ‘Output filename’ section and then tap ‘Start muxing’. This process will save the video file. Using this program you can also remover tracks from a video and fix the default audio track as well.
Part 2: How to add music to videos online
Mp3Care
MP3Care is an online video editing application that people mostly use to add audio to video files. This application wipes out the existing audio track from the video file and mixes the new audio file that you upload to create an interesting video.
The supported audio input format is MP3, whereas the supported video files include MKV, FLV, AVI, MOV, MP4, and WMV. You can record a video on your mobile phone or tablet and merge a desired audio background with this using MP3Care. All you need to do is select this recorded video and a preferred audio track in this website and get going.
Steps for adding audio track to video –
Step 1: Launch the web browser and open this application, then choose the audio and video file as per the online instruction.
Step 2: After you are done with the video selection, tap ‘ADD MUSIC TO VIDEO’ and then download your edited video file.
AddAudioToVideo
AddAudioToVideo is an online application for adding music/audio to a video. MP3 audio and AVI, WMV, MOV, and MP4 video formats are only supported with this program. It replaces the MP3 audio from any video and the uploaded files get removed after a while from the web.
Step-by-step guide –
Step 1: Choose a video file
You need to first select the video file from your local drive after browsing to this site.
Step 2: Choose audio files
Select the MP3 audio file after the video file. Tap ‘Upload’ to get the files uploaded to the program and wait for some time to get them merged together.
Tip: The video file size limit is up to 500 MB.
Check out more ways of adding music to video online >>
Part 3: How to add music to videos on Mobile Phone
1. How to add audio to video on Android
Filmora
The best method to add music to video files on Android devices is none other than Filmora. A video editing app that has no time limit to edit a video and leaves no watermark on videos either is always the talk of the show.
Using the music and effects, you can indeed make hilarious funny-videos to entertain yourself and your friends. You can create videos simply by selecting pictures and videos from your phone, Instagram, or Facebook and select a theme, template, mix some music, transitions, subtitles, filters etc. and then get the video saved on your phone or shared over popular social media platforms like Facebook, Instagram, WhatsApp, Vimeo, Email, Tumblr, or YouTube.
The best part about this app is it supports multiple international languages, fits the popular ratios of Instagram and YouTube during exporting of video, allows real-time preview of clips, exports HD videos, and provides overlay elements for the best video editing experience.
Let’s go through the step-by-step guide –
Step 1: Select video and audio
Install Filmora on your Android device and launch it. Click the ‘CREATE NEW VIDEO’ over there and select the desired video. After that, tap on the ‘Add’ button found on the right side of the screen and click ‘NEXT’ on the top right part of the mobile screen.
Step 2: Add audio to video
You will be navigated to the editing interface. Click on ‘MUSIC’ from the right toolbar and then choose the desired audio after pressing plus icon. Play and confirm the audio by clicking ‘OKAY’ on the top right corner.
Step 3: Export
You can swap the music by clicking the thumbnail icon at the bottom of the screen. Save the edited video by tapping ‘Save’
KineMaster
It is a fully-featured app in Android Play store that supports numerous images, video, and text layers along with multi-track audio, precise trimming and cutting, volume envelope control, 3D transition, color LUT features and the likes.
It allows a great amount of control for an app that does editing over a mobile. Artists and educators will make use of the handwriting layers for drawing directly over the video. It supports most of the video, audio, and image formats.
Tutorial Guide for KineMaster –
Step 1: Launch KineMaster
Install and launch the app on your Android phone. Click the ‘+’ icon found in the middle of the app screen and then tap ‘Empty Project’ for a new project or ‘Project Assistant’ otherwise.
Step 2: Select media
Under the media tab, choose the desired video file and then tap ‘Background Audio’ tab. From the left panel you can choose almost 8 categories for audio.
Tips: Without tapping the plus ‘+’ icon on the music, the audio will be added to the desired video.
Step 3: Edit and export
Now, select the preferred audio track and click the share icon from the left panel. Confirm your actions by tapping ‘Export’.
Note: Voice change, looping music, or setting up the fade in/out effect is a cake walk with this app. You can also set resolution, frame rate, and bitrate using this video editing app.
2. How to add audio to video on iPhone/iPad
iMovie
If you want to add music to video in your iPhone, then the in-built iMovie option helps you import music from Theme, iTunes and your own music. Your videos will be turned into exhilarating master pieces.
You can effortlessly browse through the music files and create awesome 4K-resolution movie and Hollywood-style trailers to amaze your friends. iMovie is built to work in sync with your iOS and Mac devices.
It doesn’t matter where you are working, we mean from your iPhone to your iPad or Mac system, the project can be synced automatically as you move ahead. Once you are done editing, the movie will show up on iMovie Theatre across your iOS and Mac devices.
The step-by-step guide to add music to video using iMovie –
Step 1: On your iPhone launch the iMovie app and click ‘Project’ from the top of the screen, and tap ‘Create Project’ represented by a ‘+’ icon.
Step 2: Now, click ‘Create’ and then ‘Movie’ to open the project interface on screen. Browse the ‘Media’ option from the top left corner of the timeline and explore the video gallery on screen and pick the desired video for editing then hit ‘Add’ and then ‘Use’.
Step 3: The source video gets added to the timeline. You need to reach to the starting point of the video, so that you can add audio from there. Add audio by following similar process to that of adding video from the gallery, but tap ‘Audio’ after clicking the ‘Add Media’ button. Ensure that music has been placed at background, by tapping the ‘Background’ button from the bottom of the screen. By clicking the ‘Theme Music’ option you can find the synced media on your device.
Step 4: Click ‘Play’ for previewing the audio visual, and click ‘Done’ if satisfied with your new creation.
Tip: iMovie will loop the background audio automatically, in case the video runs longer than the audio. It is recommended to adjust their lengths while merging them.
Part 4: How to download royalty free music from website
Few of the video editing software comes up with in-built library for music but not all of them. When there is no music with the software, you might import music from an external source to add audio to your video.
The biggest problem while using the audio tracks is copyright issues, they are not always copyright free. But, there is nothing to worry about. There are sites that offer free of cost stock music/audio tracks across genres that you can use and make a breath-taking audio visual. Let’s go through the most popular royalty free music sites.
Free Stock Music
Free Stock Music contains a library full of audio tracks across genres that you can avail for free. MP3, AIFF, and WAV audio formats are available within this site and asks you for free sign-up. You don’t have to provide any attribution to download the music.
Machinima Sound
Though this site doesn’t offer free music for you, few tracks might be there to suit your needs. You can find them under ‘LEGACY TRACKS’ at the bottom of the page. This site has a huge collection of tracks divided into genres, moods, and stingers. The audio is available in MP3 format and for attributions you might need specific license.
Free Soundtrack Music
Free Soundtrack Music enables you to access numerous royalty-free music tracks that you can make use of in your audio-visuals. Brilliant audio tracks are available with this audio library that you can download and add to your videos. When they say add credit, it usually means the music is paid and you need to buy the credits.
Part 5: Audio editing - 5 tips for mixing audio
Keyframe audio Levels
After fixing the primary audio, you shift your task to the new audio that you are adding to the video. Preview your track and make adjustments, then add the music to timeline and start balancing everything that seems out of place by managing the keyframes. Either work with the clip keyframes, or with the entire track, do whatever seems more pleasing with the composition.
Use filters and effects
You can apply filters/effects as you require, and keep in mind that an audio should only be added for enhanced effects, when you have a clear source for that effect. They shouldn’t make the composition weird. Use appropriate filters that separate a voice-over and a telephonic voice from usual dialogue in a video/audio.
Volume is important
Editing video or audio clip is just like attending a live concert. If not paid attention, the surrounding music will overpower the vocalist, or the guitar might be too low to be audible due to the dominant bass effect. The volume should be properly tuned to match with the rest of the audio visuals while adding audio to video. You can pick portions of the audio and balance audio level accordingly to allow a drop in volume during vocals and rise when there are no vocals.
Change tempo
The change in tempo enhances the composition. You can get creative and experiment. Let’s say there is a portion in your video that is slow and has music at a regular pace. Then why not stretch the tempo and slow it down to blend properly with your video? Altering the tempo brings more creative aspects to create better audio visuals.
Use fade in and fade out
While adding audio to video, if the new one music is instrumental whereas the existing one in the video is a quiet background track, the sudden change in volume might sound weird. Effective use of fades can lower the aural unexpectedness of the instruments.
Final Verdict
Coming towards the end of the discussion and after going through an elaborated list of video editing applications, we came to a final verdict that Filmora sound to be the best out of them. It allows you to flawlessly edit audio and video files on your desktop, with multiple in-built royalty free music tracks to choose from that can enhance your video’s beauty.
Shanoon Cox
Shanoon Cox is a writer and a lover of all things video.
Follow @Shanoon Cox
Also read:
- New Audio Liberation in Visual Media Innovative Approaches to Extracting Sound From Films and Videos for 2024
- New Mastering the Use of Atmospheric Audio to Enhance Narrative in Films for 2024
- Updated Beginners Guide to Separating Chorus Pieces with Advanced Tools for 2024
- 2024 Approved Zoom Meets Fun 6 Must-Try Voice Change Tools to Brighten Up Online Interactions
- New 2024 Approved Eliminating Soundtracks in Contemporary MKV Video Files (MKV-2023)
- Construct an Audio-Enhanced, Gratis Video Art Piece for 2024
- New In 2024, Top 4 Ringtone Cuuter to Use
- In 2024, Mastering Audio Purification for Outdoor Visuals on iOS, Android & PC Environments
- 2024 Approved Perfect Pacing Strategies for Cutting Extra Audio in Your iMovie Projects Across Apple Ecosystems
- New In 2024, Step-by-Step Instructional Guide Recording High-Quality Audio on iPhone Devices
- In 2024, Innovative Linux Auditory Recording The Top 5 Tools & Tips to Elevate Your Capture Skills
- 2024 Approved Essential Tips for Capturing Sound with Your Samsung S10/S9
- 2024 Approved The Ultimate List of Free-to-Download Montage Music Sites
- New In 2024, Unveiling Song Strings Top 10 Approaches to Eradicating Melodic Voices in Recordings
- Updated In 2024, Echo-Free Soundscape Guide for Windows Discovering Best Practices in Auditory Purification
- 2024 Approved Unleash Your Creative Potential with These 5 In-Demand Android Audio Editors
- 2024 Approved Methods to Embed Audios in MKV Files New Edition Update Guide
- Enrich Video Narratives by Adding Audible Elements in Olive Studio
- Updated 2024 Approved How to Remove Drums From Songs Online
- Updated In 2024, Strategies for Slowing Music Beats While Preserving Harmonic Quality
- In 2024, How to Fade In/Out Audio with Keyframes in Filmora for Mac
- Updated 2024 Approved Echoes of Innovation Uncovering the Top 8 Digital Hubs for Comprehensive Free Sound Effect Collections (For Todays Creators)
- New The Ultimate Compilation Top 10 Audio Processing Mobile Apps (iOS and Android)
- New The Audio-Visual Connection Top Music Picks That Elevate Your Diverse Video Projects for 2024
- Updated Optimize Your Streaming Quality with These Top 4 Video Boosters
- Updated Explore the Best-Kept Secret 7 Premium Transition Sounds Available for Download
- Updated 2024 Approved A Step-by-Step Guide to Using Googles Audio Streaming Platform for Podcasts
- New 10 High-Ranking Video Volume Enhancers to Elevate Your Viewing Experience for 2024
- Updated In 2024, Streamlining Your Projects Techniques for Trimming Video Audio on iOS Devices
- New In 2024, Enhancing Your Discord Experience A Guide to Voxal Voice Modification
- Sonic Image Gallery Embed Free Music on Your Pictures Desktop/Smartphone
- Updated 2024 Approved Exploring Online Vaults for Chuckling Audio Effects
- New Eliminating Background Noise on TikTok Videos A Comprehensive Guide
- New The Critical Selection Top 5 Most Cutting-Edge Voice Transformation Services Online
- Elevate Your MP3 Experience Practical Tips for Everyday Listening
- New In 2024, The Speedy Route to Flawless Sound Import in Premiere Pro (Updated )
- Updated Systematic Review of Sound Forges Audio Enhancement Techniques
- New In 2024, The Essentials of Silent Segment Creation Leveraging Audio Duck in PowerDirector to Quiet Music During Transitions
- New Advanced Techniques in Online Auditory Enhancement Services
- New In 2024, Final Cut Pro Sound Visualization Step-by-Step on Rendering Audio Waveforms and Their Animation Integration
- New Unveiling the Secrets A Guide to 7 Exceptional Transition Audio Files (Complimentary) for 2024
- In 2024, How Many Attempts To Unlock Apple iPhone 12 Pro Max
- In 2024, Ultimate guide to get the meltan box pokemon go For Vivo V27e | Dr.fone
- Free and Fabulous The Best FCPX Plugins You Cant Miss
- In 2024, 3 Effective Ways to Bypass Activation Lock on Apple iPhone 13
- In 2024, PassFab iPhone 15 Pro Max Backup Unlocker Top 4 Alternatives | Dr.fone
- Updated In 2024, 10 Best Cartoon Video Makers (Online and Desktop Solution)
- Updated Detailed Review & Alternatives of VOCALOID6 Voice Generator
- New 2024 Approved The Best VLC Trimmer for Mac Zero Quality Loss, Every Time
- In 2024, 4 Ways to Transfer Music from Vivo Y27 5G to iPhone | Dr.fone
- Guide to Mirror Your Honor 100 to Other Android devices | Dr.fone
- 3 Things You Must Know about Fake Snapchat Location On Infinix GT 10 Pro | Dr.fone
- For People Wanting to Mock GPS on Poco X6 Pro Devices | Dr.fone
- Mix Fold 3 Video Recovery - Recover Deleted Videos from Mix Fold 3
- In 2024, 6 Methods to Share Apple iPhone 14 Pro Max Screen with PC | Dr.fone
- In 2024, Top 7 Skype Hacker to Hack Any Skype Account On your OnePlus Ace 3 | Dr.fone
- Thinking About Changing Your Netflix Region Without a VPN On Tecno Spark 20 Pro? | Dr.fone
- A Complete Guide To OEM Unlocking on Oppo A2
- In 2024, 5 Foolproof Amazing Anime Text to Speech Tips for Makers
- How To Teleport Your GPS Location On Oppo K11 5G? | Dr.fone
- Title: In 2024, Virtual Confidante A Handbook on Protecting Yourself and Others While Chatting Over the Internet
- Author: Paul
- Created at : 2024-05-05 05:40:01
- Updated at : 2024-05-06 05:40:01
- Link: https://voice-adjusting.techidaily.com/in-2024-virtual-confidante-a-handbook-on-protecting-yourself-and-others-while-chatting-over-the-internet/
- License: This work is licensed under CC BY-NC-SA 4.0.
