
:max_bytes(150000):strip_icc():format(webp)/twittermute-5bc42bbd46e0fb002679ac08.jpg)
In 2024, Digital Venues for Encountering and Bonding with Unknown Individuals Responsibly
Digital Venues for Encountering and Bonding with Unknown Individuals Responsibly
Top 10 Best Websites Like Omegle

Liza Brown
Mar 27, 2024• Proven solutions
One of the main reasons we use the Internet is to be social. Interaction brings comfort and satisfaction to most normal people, and most people need to interact. It is for this reason that Facebook is so popular. Nevertheless, there are other websites where people can meet. People usually post comments on these sites and return later to see if someone else has responded. However, many sites facilitate real-time online conversations that are as close as you can get to face-to-face communications.
Omegle’s website allows members to converse via video, audio, or plain text. You can talk to a stranger and meet random people there. Unfortunately, Omegle has become overpopulated like most big sites. Also, on Omegle, many people prey upon others and make illicit conversations due to which using Omegle is getting difficult day by day. This article brings you a list of 10 websites like Omegle that serve the same purpose as Omegle. You can say them as Omegle alternatives, but they are more secure and more fun to use.
![]()
A cross-platform for making videos anywhere for all creators

Why your video editing isn’t good enough? How about some creative inspo?
- 100 Million+ Users
- 150+ Countries and Regions
- 4 Million+ Social Media Followers
- 5 Million+ Stock Media for Use
* Secure Download

Best Websites Like Omegle (Omegle Alternatives)
1. Chatroulette

The webcam-based Chatroulette service is notable for pairing users with random strangers using a random pairing algorithm. Instead of using guns, you parry verbally with typewritten messages and/or a digital camera, and the person who does not agree with you leaves the chat (“kills the conversation”).
A 17-year-old child who created it in 2009 ran it out of a chamber in his parents’ house. Despite not running any advertisements, this website grew to a massive size through word of mouth. In recent years, after much trial and error, it has finally reached the stage where it can distinguish between appropriate and inappropriate behavior.
Moderators screen violators who have not adhered to the site’s terms of service. Users who do not do so will not be able to access the site. Approximately half of the users of this website are under thirty, and there are more men than women. There’s no doubt that it’s R-rated. Like Omegle, this site is a great alternative.
Features:
  * Anonymously Chat With Strangers.
  * Millions of Users Across Different Countries
  * Android and iOS apps are also available.
  * Fewer Scammers and Bots.
  * One of the best monitoring and moderating systems.
2. ChatRandom
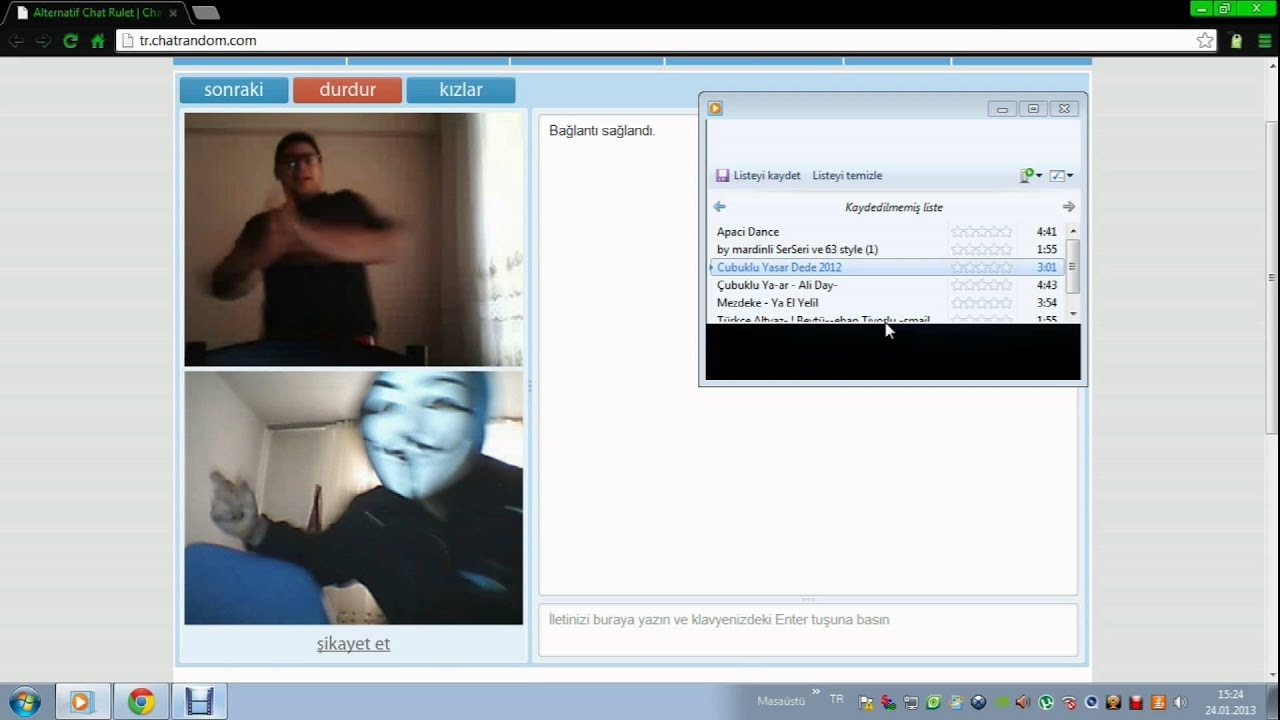
The ChatRandom service is a wonderful, chaotic, and people-packed place where users share all kinds of information. There is no shortage of fun stuff on ChatRandom, no matter what you want. Even though this stranger chat website has declined in popularity, it remains popular in the minds of many. The community is moderate, and there are a variety of people in it.
There have been a couple of changes to the site over the years, and what makes it one of the best websites like Omegle is its polished UI, better matchmaking algorithm, and general trend of catering to both genders.
Features:
  * You do not need to register to chat on Chatrandom; it is free to use.
  * Users of the site can access most of its features free of charge.
  * A total of 20 languages are available for users to use.
  * Chat rooms are available for members to connect.
  * Members are matched by their unique code.
  * On the site, you can video chat with others.
  * You can easily use the site's features.
3. YouNow
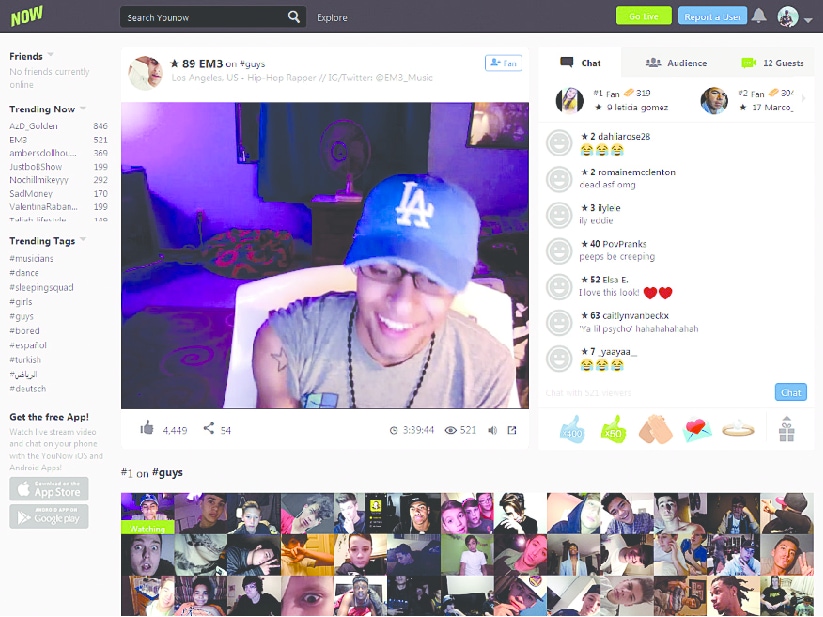
Is YouNow an app for broadcasting, chatting, streaming, or watching live videos? In contrast to Omegle, YouNow’s goal is to create a large audience, and trend, and build a loyal following.
Users can comment or buy gold bars to share with others during the viewing process. A user must be 13 years of age or older to use the chat app. Users of YouNow must register to begin chatting, unlike Omegle, which doesn’t require them to create a Facebook or Twitter account before chatting.
Though both platforms still have privacy concerns, YouNow lets you customize your usernames so that they don’t match anything about your Facebook or Twitter identities. Additionally, YouNow has stricter guidelines that prohibit sexual content, nudity, and bullying. However, there is no guarantee that such content will be monitored or removed.
The community guidelines can be broken, and you can report violators, but there’s no way to guarantee you won’t be exposed to objectionable live content. As long as you retain ownership of your content, posting content to the app gives the app permission to use it how it likes.
Features:
  * Allows you to integrate social media platforms.
  * Web, Android, and iOS versions are available.
  * Allows you to start a broadcast.
  * You can join the broadcast of other streams also to interact with them.
  * You can also make friends and send and receive gifts from them
,.
4. TinyChat

An alternative chat platform, TinyChat, offers chat rooms with video feeds of 12 each. With this chat site, you do not have to pay because you can invite people you know and set up topics for your chat. The platform offers the most extensive video and voice chat service online for five million minutes of airtime each day.
Numerous chat rooms are available, including those set up by residents of your area. TinyChat hosts live video streaming of TV shows that will let you watch them as they happen. If you can’t find a topic that interests you, create one. With TinyChat, you can connect with others through your webcam through audio, video, or text communication, just like with Omegle.
TinyChat is also a browser-based IM client and can be accessed from a PC, mobile device, or browser. While Omegle does not offer coins or points for unlocking special achievements or increasing your chances of landing in the live directory, it does provide you with a chance to interact with other users. A 500-coin token will also be awarded to you if you promote your room via TinyChat.
Features:
  * The process of starting a video call is very simple.
  * There are no issues with the webcam.
  * In your chat, you can control how many people participate.
  * It's possible to block someone if you don't want to communicate with them.
  * You can improve your experience with a variety of features.
5. FaceFlow
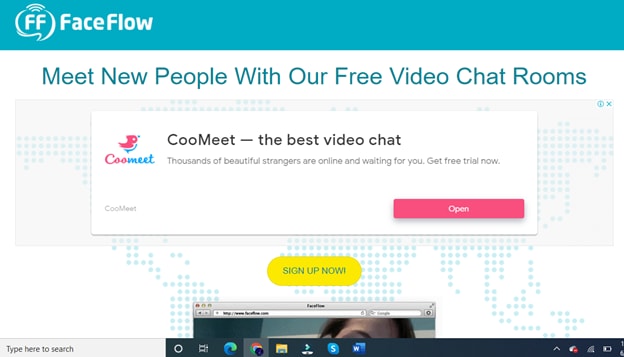
Users can have up to three video chats at the same time with these guys, taking social networking to a whole new level. In addition to offering free video chat and video conferencing with your friends, you can also communicate with strangers via FaceFlow. The new feature allows users to create a searchable profile and share their favorite online videos and pictures.
Aside from being simply another webcam chat service, this site is more like the amazing services offered by Skype. There is a one-to-one video chat feature as well as text chat. Furthermore, FaceFlow has released a multiplayer game called Flappy in which you have to team up against someone in order to complete the game.
Features
  * Signing up takes no time at all;
  * The service supports five languages;
  * It has a modern interface;
  * It offers a lot of free features;
  * FaceFlow can connect with your friends and family while still using a dating website.
6. CamSurf
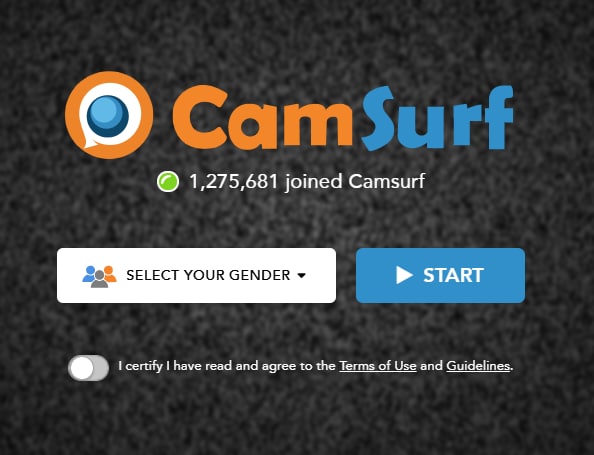
There are many websites similar to Omegle, but Camsurf has a unique twist - it is wild. If you’re trying to have fun, then you should visit this website. CamSurf has consistently delivered the most bizarre video chats we’ve ever experienced. The CamSurf website itself is straightforward and almost identical to the OmeTV website.
These two have a major difference in the types of people they attract. CamSurf has a vastly wider audience than OmeTV. While some individuals on OmeTV are looking for genuine conversation, on CamSurf, you’ll find people looking for genuine chat. It is our top choice for next time.
Features:
  * Feature-rich website.
  * A huge range of topics is available to discuss.
  * You Mostly find genuine people here.
7. ChatRad
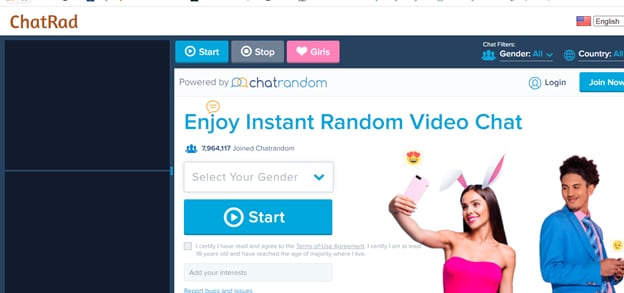
This site claims to be a G-rated alternative to chat sites like Chatroulette, and it is quite harsh toward behavior that is not appropriate. People need to act the same in the real world, where they don’t run around naked or try to expose themselves all of the time… at least not in my world. Despite being a random video chat site, ChatRad is managed by a team of 24x7 moderators, so anything 18 and older can take advantage of the service in a safe environment regardless of their sexual orientation.
Features:
  * Very Strict Policies For Disrespectful People
  * The chat is moderated 24/7 by an active team of moderators.
  * It offers a very safe environment for people.
8.Bazoocam
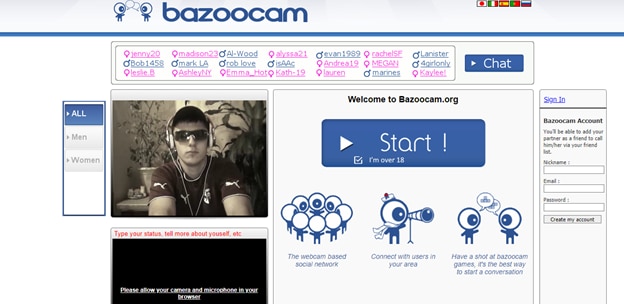
The Bazoocam webcam chat environment is another random digital camera chat site that maintains a high level of cleanliness. Like most of the other websites mentioned, you’re paired up with an interloper haphazardly. Press “skip” and move on to the next person if you are unsatisfied with what you see.
As icebreakers or when you are bored of talking about yourself, you can join one of the multiplayer games on Boomcam. You are advised to do something unusual if you’re bored, but you are urged to wear your clothes. Put your best foot forward when playing golf in fancy dress or taking part in your favorite music. Try playing a string or wind instrument, and you’ll find many people to talk to.
Features
  * The site offers a very high level of cleanliness.
  * You can chat with the person of your choice.
  * If you don't like a person you can skip to check the next candidate.
  * It also offers a lot of multiplayer games to play with strangers.
  * It will never let you get bored.
9. CamGo

Getting to know new people and making new connections is fun with Camgo. Start a conversation with strangers, develop relationships without worrying about running into Covid, and explore webcam dating! Camgo’s Safe Search feature uses artificial intelligence to discover potential matchmaking partners. Your webcam chat loop will be kept out of the reach of people you don’t want to see! By chatting online with new people from your home, you can meet new people in a much easier and safe manner.
Features:
  * Easy To Meet New Strangers.
  * The site is completely safe to use.
  * It offers a great video chatting experience.
10. iMeetzu

It is similar to Omegle in that there are random live video chats and text chat rooms available, but iMeetzu goes over and above that. Once you get past the randomness, you are given the option of joining a free online dating service or friend finder.
Over a thousand new members are joining every day on this one of the fastest-growing social networking sites. If you’re looking to find a date or if you practice your lines, this is the closest you can get to practice face-to-face before you dive back into the dating pool.
Features:
  * It is identical to Omegle.
  * As it is a new platform so there are mostly genuine users.
  * You can do both text and video chats with strangers.
  * You can also join group chats.
Conclusion
These are some of the best Omegle alternative sites. Every site has its own unique features, but if you compare them in functionality, they are quite similar. It’s just the working of every site is different. You can try these sites one by one and stick to those that you find the most suitable and according to your taste.


Liza Brown
Liza Brown is a writer and a lover of all things video.
Follow @Liza Brown
Liza Brown
Mar 27, 2024• Proven solutions
One of the main reasons we use the Internet is to be social. Interaction brings comfort and satisfaction to most normal people, and most people need to interact. It is for this reason that Facebook is so popular. Nevertheless, there are other websites where people can meet. People usually post comments on these sites and return later to see if someone else has responded. However, many sites facilitate real-time online conversations that are as close as you can get to face-to-face communications.
Omegle’s website allows members to converse via video, audio, or plain text. You can talk to a stranger and meet random people there. Unfortunately, Omegle has become overpopulated like most big sites. Also, on Omegle, many people prey upon others and make illicit conversations due to which using Omegle is getting difficult day by day. This article brings you a list of 10 websites like Omegle that serve the same purpose as Omegle. You can say them as Omegle alternatives, but they are more secure and more fun to use.
![]()
A cross-platform for making videos anywhere for all creators
Why your video editing isn’t good enough? How about some creative inspo?
- 100 Million+ Users
- 150+ Countries and Regions
- 4 Million+ Social Media Followers
- 5 Million+ Stock Media for Use
* Secure Download
Best Websites Like Omegle (Omegle Alternatives)
1. Chatroulette
The webcam-based Chatroulette service is notable for pairing users with random strangers using a random pairing algorithm. Instead of using guns, you parry verbally with typewritten messages and/or a digital camera, and the person who does not agree with you leaves the chat (“kills the conversation”).
A 17-year-old child who created it in 2009 ran it out of a chamber in his parents’ house. Despite not running any advertisements, this website grew to a massive size through word of mouth. In recent years, after much trial and error, it has finally reached the stage where it can distinguish between appropriate and inappropriate behavior.
Moderators screen violators who have not adhered to the site’s terms of service. Users who do not do so will not be able to access the site. Approximately half of the users of this website are under thirty, and there are more men than women. There’s no doubt that it’s R-rated. Like Omegle, this site is a great alternative.
Features:
  * Anonymously Chat With Strangers.
  * Millions of Users Across Different Countries
  * Android and iOS apps are also available.
  * Fewer Scammers and Bots.
  * One of the best monitoring and moderating systems.
2. ChatRandom
The ChatRandom service is a wonderful, chaotic, and people-packed place where users share all kinds of information. There is no shortage of fun stuff on ChatRandom, no matter what you want. Even though this stranger chat website has declined in popularity, it remains popular in the minds of many. The community is moderate, and there are a variety of people in it.
There have been a couple of changes to the site over the years, and what makes it one of the best websites like Omegle is its polished UI, better matchmaking algorithm, and general trend of catering to both genders.
Features:
  * You do not need to register to chat on Chatrandom; it is free to use.
  * Users of the site can access most of its features free of charge.
  * A total of 20 languages are available for users to use.
  * Chat rooms are available for members to connect.
  * Members are matched by their unique code.
  * On the site, you can video chat with others.
  * You can easily use the site's features.
3. YouNow
Is YouNow an app for broadcasting, chatting, streaming, or watching live videos? In contrast to Omegle, YouNow’s goal is to create a large audience, and trend, and build a loyal following.
Users can comment or buy gold bars to share with others during the viewing process. A user must be 13 years of age or older to use the chat app. Users of YouNow must register to begin chatting, unlike Omegle, which doesn’t require them to create a Facebook or Twitter account before chatting.
Though both platforms still have privacy concerns, YouNow lets you customize your usernames so that they don’t match anything about your Facebook or Twitter identities. Additionally, YouNow has stricter guidelines that prohibit sexual content, nudity, and bullying. However, there is no guarantee that such content will be monitored or removed.
The community guidelines can be broken, and you can report violators, but there’s no way to guarantee you won’t be exposed to objectionable live content. As long as you retain ownership of your content, posting content to the app gives the app permission to use it how it likes.
Features:
  * Allows you to integrate social media platforms.
  * Web, Android, and iOS versions are available.
  * Allows you to start a broadcast.
  * You can join the broadcast of other streams also to interact with them.
  * You can also make friends and send and receive gifts from them
,.
4. TinyChat
An alternative chat platform, TinyChat, offers chat rooms with video feeds of 12 each. With this chat site, you do not have to pay because you can invite people you know and set up topics for your chat. The platform offers the most extensive video and voice chat service online for five million minutes of airtime each day.
Numerous chat rooms are available, including those set up by residents of your area. TinyChat hosts live video streaming of TV shows that will let you watch them as they happen. If you can’t find a topic that interests you, create one. With TinyChat, you can connect with others through your webcam through audio, video, or text communication, just like with Omegle.
TinyChat is also a browser-based IM client and can be accessed from a PC, mobile device, or browser. While Omegle does not offer coins or points for unlocking special achievements or increasing your chances of landing in the live directory, it does provide you with a chance to interact with other users. A 500-coin token will also be awarded to you if you promote your room via TinyChat.
Features:
  * The process of starting a video call is very simple.
  * There are no issues with the webcam.
  * In your chat, you can control how many people participate.
  * It's possible to block someone if you don't want to communicate with them.
  * You can improve your experience with a variety of features.
5. FaceFlow
Users can have up to three video chats at the same time with these guys, taking social networking to a whole new level. In addition to offering free video chat and video conferencing with your friends, you can also communicate with strangers via FaceFlow. The new feature allows users to create a searchable profile and share their favorite online videos and pictures.
Aside from being simply another webcam chat service, this site is more like the amazing services offered by Skype. There is a one-to-one video chat feature as well as text chat. Furthermore, FaceFlow has released a multiplayer game called Flappy in which you have to team up against someone in order to complete the game.
Features
  * Signing up takes no time at all;
  * The service supports five languages;
  * It has a modern interface;
  * It offers a lot of free features;
  * FaceFlow can connect with your friends and family while still using a dating website.
6. CamSurf
There are many websites similar to Omegle, but Camsurf has a unique twist - it is wild. If you’re trying to have fun, then you should visit this website. CamSurf has consistently delivered the most bizarre video chats we’ve ever experienced. The CamSurf website itself is straightforward and almost identical to the OmeTV website.
These two have a major difference in the types of people they attract. CamSurf has a vastly wider audience than OmeTV. While some individuals on OmeTV are looking for genuine conversation, on CamSurf, you’ll find people looking for genuine chat. It is our top choice for next time.
Features:
  * Feature-rich website.
  * A huge range of topics is available to discuss.
  * You Mostly find genuine people here.
7. ChatRad
This site claims to be a G-rated alternative to chat sites like Chatroulette, and it is quite harsh toward behavior that is not appropriate. People need to act the same in the real world, where they don’t run around naked or try to expose themselves all of the time… at least not in my world. Despite being a random video chat site, ChatRad is managed by a team of 24x7 moderators, so anything 18 and older can take advantage of the service in a safe environment regardless of their sexual orientation.
Features:
  * Very Strict Policies For Disrespectful People
  * The chat is moderated 24/7 by an active team of moderators.
  * It offers a very safe environment for people.
8.Bazoocam
The Bazoocam webcam chat environment is another random digital camera chat site that maintains a high level of cleanliness. Like most of the other websites mentioned, you’re paired up with an interloper haphazardly. Press “skip” and move on to the next person if you are unsatisfied with what you see.
As icebreakers or when you are bored of talking about yourself, you can join one of the multiplayer games on Boomcam. You are advised to do something unusual if you’re bored, but you are urged to wear your clothes. Put your best foot forward when playing golf in fancy dress or taking part in your favorite music. Try playing a string or wind instrument, and you’ll find many people to talk to.
Features
  * The site offers a very high level of cleanliness.
  * You can chat with the person of your choice.
  * If you don't like a person you can skip to check the next candidate.
  * It also offers a lot of multiplayer games to play with strangers.
  * It will never let you get bored.
9. CamGo
Getting to know new people and making new connections is fun with Camgo. Start a conversation with strangers, develop relationships without worrying about running into Covid, and explore webcam dating! Camgo’s Safe Search feature uses artificial intelligence to discover potential matchmaking partners. Your webcam chat loop will be kept out of the reach of people you don’t want to see! By chatting online with new people from your home, you can meet new people in a much easier and safe manner.
Features:
  * Easy To Meet New Strangers.
  * The site is completely safe to use.
  * It offers a great video chatting experience.
10. iMeetzu
It is similar to Omegle in that there are random live video chats and text chat rooms available, but iMeetzu goes over and above that. Once you get past the randomness, you are given the option of joining a free online dating service or friend finder.
Over a thousand new members are joining every day on this one of the fastest-growing social networking sites. If you’re looking to find a date or if you practice your lines, this is the closest you can get to practice face-to-face before you dive back into the dating pool.
Features:
  * It is identical to Omegle.
  * As it is a new platform so there are mostly genuine users.
  * You can do both text and video chats with strangers.
  * You can also join group chats.
Conclusion
These are some of the best Omegle alternative sites. Every site has its own unique features, but if you compare them in functionality, they are quite similar. It’s just the working of every site is different. You can try these sites one by one and stick to those that you find the most suitable and according to your taste.
Liza Brown
Liza Brown is a writer and a lover of all things video.
Follow @Liza Brown
How to Add Audio to Your Video (with Steps)
How to Add Audio to Your Video (with Steps)

Shanoon Cox
Mar 27, 2024• Proven solutions
Videos are everywhere around us, to promote a brand, create an Ad, or for larger programs like movies. Only a voice-over or a clip fails to grab attention of the audience, so you got to add music to the video and make it spectacularly fascinating. By adding background music to a video, you kill its monotony and make it more appealing to touch people’s heart and evoke the response your video is intended to.
If you want to explore the numerous options to edit and add audio to videos with free audio editor , then you have come to the right spot.
Through this article, we are going to introduce you to various desktop, and phone based applications as well as free online methods to help you add audio to your videos and make them strikingly beautiful.
- Part1: How to add music to videos on Desktop
- Part2: How to add audio to video online
- Part3: How to add music to videos on Mobile Phone
- Part4: How to download royalty free music from website
- Part5: Audio editing - 5 tips for mixing audio
You may also like
15 Free Music Sites to Use (Royalty Free) >>
Part 1: How to add music to videos on Desktop
1. How to add audio to videos with for Windows 10, 8, 7
Filmora
When you need a video editing software application that comes with a brilliant built-in audio library, you can undoubtedly pick Filmora to save you.
This is a perfect application for Windows PC, which enables you to add music to video (.MP3, .WMA, or .OGG audio files to .AVI, .MP4, .MKV videos) files while allowing you to remove any existing background music from the videos as well. Its intuitive design with drag and drop features makes editing videos cake walk.
Isn’t it great when the software supports such wide varieties of audio and video formats and helps you create the most enthralling videos for you?
Explore the way it transforms your mundane videos to an exquisite piece of art, within no time. Here is the step-by-step guide for Filmora –
Step 1: Where to import audio
Install Wondershare Filmora from the official website on your computer and launch it. Once the software gets launched tap ‘MEDIA’ and then click the ‘IMPORT’ tab just below the menu bar. Now, from the drop down list click on ‘Import Media Files’ to choose the video file, and then repeat the process to pick a desired background music file.
Note: You can also use the in-built music tracks to add music to your video by selecting the ‘MUSIC’ tab.

Step 2: How to add music to timeline
Now, hover the mouse over the audio and video files you have just imported to Filmora and then tap the ‘+’ sign on it (displays ‘Add to Project’). You can also drag the media files down to the timeline.

Step 3: Edit music file
You can edit the music by double tapping the audio from the timeline. It will show you the audio panel at the top of the screen. You can the audio to fade in or fade out, manage the volume, pitch, speed, and set the desired equalizer as well.

Step 4: Export
Now that you have made the desired changes to your video, tap on the ‘EXPORT’ tab on the toolbar to export the video. The exported file can be saved in .MP4, and .WMV formats and rename, define the resolution as well.

2. How to add audio to videos on Mac
VLC
Most people have no idea that VLC is not only a media player but a video editor as well, which allows you to add music to video. This open source cross-platform multimedia player supports almost all multimedia files and various streaming protocols.
VLC step-by-step guide to add audio to video –
Step 1: Add audio file
First of all install VLC media player on your computer and launch it. Now, tap the click file tab from the menu bar at the top. After that, pick the ‘Advanced Open File’ option from the drop down menu.

Step 2: Import audio and video
You need to click the ‘Browse…’ button for importing video, and select the ‘Play another media synchronously’. Now, click the ‘Choose…’ button for importing an audio file for editing. After that, you need to click the ‘Open’ button. You also have the option for adding sub-titles to your video. Now that you have imported and merged both the audio and video files, you can also enhance the audio settings.

Step 3: Quick Tip
Tap the ‘Window’ from the top bar and click on ‘Audio Effects…’ for applying the various audio effects to your edited video.

QuickTime
QuickTime Player is the default media player for Mac computer that supports older medial formats including QTVR, MIDI files on Snow Leopard and OS X Lion, and interactive QuickTime movies.
Entering QuickTime 7 Pro registration codes, you can unlock the QuickTime Pro functions that will enable you to add music to video files. If you don’t have it on your computer, then install it and find under the ‘Utilities’ folder within the ‘Applications’ folder. Here is the step-by-step guide for QuickTime to add audio to video –
Step 1: Import the files
First of all, launch QuickTime Player and tap ‘File’ and then click ‘Open File’. Pick your desired audio file to be imported. On the subsequent window of QuickTime Player, select ‘Edit’ and then tap ‘Select All’ to import the complete audio file. Hit ‘Edit’ and tap on the ‘Copy’ option.

Step 2: Import video and add audio to QuickTime movie
Now, you need to open the desired video that you are going to add audio to. For that, you need to first open the video in QuickTime and the click ‘Edit’ and ‘Add Clip to End’.

Note: You can add a part of the audio to the video by tapping ‘Edit’ and then ‘Add to Selection and Scale’. ‘Add to Selection and Scale’ fastens or lowers down the pace of the audio track to fit with the video’s length (that you have selected to add audio to).
3. How to add audio to videos with on Linux
Mkvmerge
This software for the Linux system is broadly known for editing the Matroska Multimedia Container. The GUI of this tool is much appealing but is rather simple and basic.
The software helps you to merge the audio or video multimedia streams into one single Matroska file. Matroska acts exactly like AVI, ASF, or MP4 the common container files. The Matroska files have .MKV extension for videos which includes audio and subtitles as well, files with a .MK3D extension represent stereoscopic video, .MKS for only subtitles, and .MKA for audio-only files.
Step-by-step guide for merging audio into video: (MKV ONLY)
Step 1: Add audio to video files
Download the software and launch it on your Linux computer. From the mkvtoolnix-gui package, open the mkvmerge GUI. Click the ‘add’ button for importing the audio and video files to the software interface.
Step 2: Choose the audio track
After importing the audio and video files, select the new audio tracks by marking the check boxes against them, under the ‘Tracks, chapters and tags’ section. You can also set the language in the ‘General track options’ and delay under ‘Format specific options’ tab.
Step 3: Merge the files
Mention the output format under ‘Output filename’ section and then tap ‘Start muxing’. This process will save the video file. Using this program you can also remover tracks from a video and fix the default audio track as well.

Part 2: How to add music to videos online
Mp3Care
MP3Care is an online video editing application that people mostly use to add audio to video files. This application wipes out the existing audio track from the video file and mixes the new audio file that you upload to create an interesting video.
The supported audio input format is MP3, whereas the supported video files include MKV, FLV, AVI, MOV, MP4, and WMV. You can record a video on your mobile phone or tablet and merge a desired audio background with this using MP3Care. All you need to do is select this recorded video and a preferred audio track in this website and get going.
Steps for adding audio track to video –
Step 1: Launch the web browser and open this application, then choose the audio and video file as per the online instruction.

Step 2: After you are done with the video selection, tap ‘ADD MUSIC TO VIDEO’ and then download your edited video file.

AddAudioToVideo
AddAudioToVideo is an online application for adding music/audio to a video. MP3 audio and AVI, WMV, MOV, and MP4 video formats are only supported with this program. It replaces the MP3 audio from any video and the uploaded files get removed after a while from the web.
Step-by-step guide –
Step 1: Choose a video file
You need to first select the video file from your local drive after browsing to this site.
Step 2: Choose audio files
Select the MP3 audio file after the video file. Tap ‘Upload’ to get the files uploaded to the program and wait for some time to get them merged together.
Tip: The video file size limit is up to 500 MB.

Check out more ways of adding music to video online >>
Part 3: How to add music to videos on Mobile Phone
1. How to add audio to video on Android
Filmora
The best method to add music to video files on Android devices is none other than Filmora. A video editing app that has no time limit to edit a video and leaves no watermark on videos either is always the talk of the show.
Using the music and effects, you can indeed make hilarious funny-videos to entertain yourself and your friends. You can create videos simply by selecting pictures and videos from your phone, Instagram, or Facebook and select a theme, template, mix some music, transitions, subtitles, filters etc. and then get the video saved on your phone or shared over popular social media platforms like Facebook, Instagram, WhatsApp, Vimeo, Email, Tumblr, or YouTube.
The best part about this app is it supports multiple international languages, fits the popular ratios of Instagram and YouTube during exporting of video, allows real-time preview of clips, exports HD videos, and provides overlay elements for the best video editing experience.
Let’s go through the step-by-step guide –
Step 1: Select video and audio
Install Filmora on your Android device and launch it. Click the ‘CREATE NEW VIDEO’ over there and select the desired video. After that, tap on the ‘Add’ button found on the right side of the screen and click ‘NEXT’ on the top right part of the mobile screen.

Step 2: Add audio to video
You will be navigated to the editing interface. Click on ‘MUSIC’ from the right toolbar and then choose the desired audio after pressing plus icon. Play and confirm the audio by clicking ‘OKAY’ on the top right corner.

Step 3: Export
You can swap the music by clicking the thumbnail icon at the bottom of the screen. Save the edited video by tapping ‘Save’

KineMaster
It is a fully-featured app in Android Play store that supports numerous images, video, and text layers along with multi-track audio, precise trimming and cutting, volume envelope control, 3D transition, color LUT features and the likes.
It allows a great amount of control for an app that does editing over a mobile. Artists and educators will make use of the handwriting layers for drawing directly over the video. It supports most of the video, audio, and image formats.
Tutorial Guide for KineMaster –
Step 1: Launch KineMaster
Install and launch the app on your Android phone. Click the ‘+’ icon found in the middle of the app screen and then tap ‘Empty Project’ for a new project or ‘Project Assistant’ otherwise.

Step 2: Select media
Under the media tab, choose the desired video file and then tap ‘Background Audio’ tab. From the left panel you can choose almost 8 categories for audio.
Tips: Without tapping the plus ‘+’ icon on the music, the audio will be added to the desired video.

Step 3: Edit and export
Now, select the preferred audio track and click the share icon from the left panel. Confirm your actions by tapping ‘Export’.
Note: Voice change, looping music, or setting up the fade in/out effect is a cake walk with this app. You can also set resolution, frame rate, and bitrate using this video editing app.

2. How to add audio to video on iPhone/iPad
iMovie
If you want to add music to video in your iPhone, then the in-built iMovie option helps you import music from Theme, iTunes and your own music. Your videos will be turned into exhilarating master pieces.
You can effortlessly browse through the music files and create awesome 4K-resolution movie and Hollywood-style trailers to amaze your friends. iMovie is built to work in sync with your iOS and Mac devices.
It doesn’t matter where you are working, we mean from your iPhone to your iPad or Mac system, the project can be synced automatically as you move ahead. Once you are done editing, the movie will show up on iMovie Theatre across your iOS and Mac devices.
The step-by-step guide to add music to video using iMovie –
Step 1: On your iPhone launch the iMovie app and click ‘Project’ from the top of the screen, and tap ‘Create Project’ represented by a ‘+’ icon.

Step 2: Now, click ‘Create’ and then ‘Movie’ to open the project interface on screen. Browse the ‘Media’ option from the top left corner of the timeline and explore the video gallery on screen and pick the desired video for editing then hit ‘Add’ and then ‘Use’.

Step 3: The source video gets added to the timeline. You need to reach to the starting point of the video, so that you can add audio from there. Add audio by following similar process to that of adding video from the gallery, but tap ‘Audio’ after clicking the ‘Add Media’ button. Ensure that music has been placed at background, by tapping the ‘Background’ button from the bottom of the screen. By clicking the ‘Theme Music’ option you can find the synced media on your device.

Step 4: Click ‘Play’ for previewing the audio visual, and click ‘Done’ if satisfied with your new creation.
Tip: iMovie will loop the background audio automatically, in case the video runs longer than the audio. It is recommended to adjust their lengths while merging them.
Part 4: How to download royalty free music from website
Few of the video editing software comes up with in-built library for music but not all of them. When there is no music with the software, you might import music from an external source to add audio to your video.
The biggest problem while using the audio tracks is copyright issues, they are not always copyright free. But, there is nothing to worry about. There are sites that offer free of cost stock music/audio tracks across genres that you can use and make a breath-taking audio visual. Let’s go through the most popular royalty free music sites.
Free Stock Music
Free Stock Music contains a library full of audio tracks across genres that you can avail for free. MP3, AIFF, and WAV audio formats are available within this site and asks you for free sign-up. You don’t have to provide any attribution to download the music.

Machinima Sound
Though this site doesn’t offer free music for you, few tracks might be there to suit your needs. You can find them under ‘LEGACY TRACKS’ at the bottom of the page. This site has a huge collection of tracks divided into genres, moods, and stingers. The audio is available in MP3 format and for attributions you might need specific license.

Free Soundtrack Music
Free Soundtrack Music enables you to access numerous royalty-free music tracks that you can make use of in your audio-visuals. Brilliant audio tracks are available with this audio library that you can download and add to your videos. When they say add credit, it usually means the music is paid and you need to buy the credits.

Part 5: Audio editing - 5 tips for mixing audio
Keyframe audio Levels
After fixing the primary audio, you shift your task to the new audio that you are adding to the video. Preview your track and make adjustments, then add the music to timeline and start balancing everything that seems out of place by managing the keyframes. Either work with the clip keyframes, or with the entire track, do whatever seems more pleasing with the composition.
Use filters and effects
You can apply filters/effects as you require, and keep in mind that an audio should only be added for enhanced effects, when you have a clear source for that effect. They shouldn’t make the composition weird. Use appropriate filters that separate a voice-over and a telephonic voice from usual dialogue in a video/audio.
Volume is important
Editing video or audio clip is just like attending a live concert. If not paid attention, the surrounding music will overpower the vocalist, or the guitar might be too low to be audible due to the dominant bass effect. The volume should be properly tuned to match with the rest of the audio visuals while adding audio to video. You can pick portions of the audio and balance audio level accordingly to allow a drop in volume during vocals and rise when there are no vocals.
Change tempo
The change in tempo enhances the composition. You can get creative and experiment. Let’s say there is a portion in your video that is slow and has music at a regular pace. Then why not stretch the tempo and slow it down to blend properly with your video? Altering the tempo brings more creative aspects to create better audio visuals.
Use fade in and fade out
While adding audio to video, if the new one music is instrumental whereas the existing one in the video is a quiet background track, the sudden change in volume might sound weird. Effective use of fades can lower the aural unexpectedness of the instruments.
Final Verdict
Coming towards the end of the discussion and after going through an elaborated list of video editing applications, we came to a final verdict that Filmora sound to be the best out of them. It allows you to flawlessly edit audio and video files on your desktop, with multiple in-built royalty free music tracks to choose from that can enhance your video’s beauty.
Shanoon Cox
Shanoon Cox is a writer and a lover of all things video.
Follow @Shanoon Cox
Shanoon Cox
Mar 27, 2024• Proven solutions
Videos are everywhere around us, to promote a brand, create an Ad, or for larger programs like movies. Only a voice-over or a clip fails to grab attention of the audience, so you got to add music to the video and make it spectacularly fascinating. By adding background music to a video, you kill its monotony and make it more appealing to touch people’s heart and evoke the response your video is intended to.
If you want to explore the numerous options to edit and add audio to videos with free audio editor , then you have come to the right spot.
Through this article, we are going to introduce you to various desktop, and phone based applications as well as free online methods to help you add audio to your videos and make them strikingly beautiful.
- Part1: How to add music to videos on Desktop
- Part2: How to add audio to video online
- Part3: How to add music to videos on Mobile Phone
- Part4: How to download royalty free music from website
- Part5: Audio editing - 5 tips for mixing audio
You may also like
15 Free Music Sites to Use (Royalty Free) >>
Part 1: How to add music to videos on Desktop
1. How to add audio to videos with for Windows 10, 8, 7
Filmora
When you need a video editing software application that comes with a brilliant built-in audio library, you can undoubtedly pick Filmora to save you.
This is a perfect application for Windows PC, which enables you to add music to video (.MP3, .WMA, or .OGG audio files to .AVI, .MP4, .MKV videos) files while allowing you to remove any existing background music from the videos as well. Its intuitive design with drag and drop features makes editing videos cake walk.
Isn’t it great when the software supports such wide varieties of audio and video formats and helps you create the most enthralling videos for you?
Explore the way it transforms your mundane videos to an exquisite piece of art, within no time. Here is the step-by-step guide for Filmora –
Step 1: Where to import audio
Install Wondershare Filmora from the official website on your computer and launch it. Once the software gets launched tap ‘MEDIA’ and then click the ‘IMPORT’ tab just below the menu bar. Now, from the drop down list click on ‘Import Media Files’ to choose the video file, and then repeat the process to pick a desired background music file.
Note: You can also use the in-built music tracks to add music to your video by selecting the ‘MUSIC’ tab.
Step 2: How to add music to timeline
Now, hover the mouse over the audio and video files you have just imported to Filmora and then tap the ‘+’ sign on it (displays ‘Add to Project’). You can also drag the media files down to the timeline.
Step 3: Edit music file
You can edit the music by double tapping the audio from the timeline. It will show you the audio panel at the top of the screen. You can the audio to fade in or fade out, manage the volume, pitch, speed, and set the desired equalizer as well.
Step 4: Export
Now that you have made the desired changes to your video, tap on the ‘EXPORT’ tab on the toolbar to export the video. The exported file can be saved in .MP4, and .WMV formats and rename, define the resolution as well.
2. How to add audio to videos on Mac
VLC
Most people have no idea that VLC is not only a media player but a video editor as well, which allows you to add music to video. This open source cross-platform multimedia player supports almost all multimedia files and various streaming protocols.
VLC step-by-step guide to add audio to video –
Step 1: Add audio file
First of all install VLC media player on your computer and launch it. Now, tap the click file tab from the menu bar at the top. After that, pick the ‘Advanced Open File’ option from the drop down menu.
Step 2: Import audio and video
You need to click the ‘Browse…’ button for importing video, and select the ‘Play another media synchronously’. Now, click the ‘Choose…’ button for importing an audio file for editing. After that, you need to click the ‘Open’ button. You also have the option for adding sub-titles to your video. Now that you have imported and merged both the audio and video files, you can also enhance the audio settings.
Step 3: Quick Tip
Tap the ‘Window’ from the top bar and click on ‘Audio Effects…’ for applying the various audio effects to your edited video.
QuickTime
QuickTime Player is the default media player for Mac computer that supports older medial formats including QTVR, MIDI files on Snow Leopard and OS X Lion, and interactive QuickTime movies.
Entering QuickTime 7 Pro registration codes, you can unlock the QuickTime Pro functions that will enable you to add music to video files. If you don’t have it on your computer, then install it and find under the ‘Utilities’ folder within the ‘Applications’ folder. Here is the step-by-step guide for QuickTime to add audio to video –
Step 1: Import the files
First of all, launch QuickTime Player and tap ‘File’ and then click ‘Open File’. Pick your desired audio file to be imported. On the subsequent window of QuickTime Player, select ‘Edit’ and then tap ‘Select All’ to import the complete audio file. Hit ‘Edit’ and tap on the ‘Copy’ option.
Step 2: Import video and add audio to QuickTime movie
Now, you need to open the desired video that you are going to add audio to. For that, you need to first open the video in QuickTime and the click ‘Edit’ and ‘Add Clip to End’.
Note: You can add a part of the audio to the video by tapping ‘Edit’ and then ‘Add to Selection and Scale’. ‘Add to Selection and Scale’ fastens or lowers down the pace of the audio track to fit with the video’s length (that you have selected to add audio to).
3. How to add audio to videos with on Linux
Mkvmerge
This software for the Linux system is broadly known for editing the Matroska Multimedia Container. The GUI of this tool is much appealing but is rather simple and basic.
The software helps you to merge the audio or video multimedia streams into one single Matroska file. Matroska acts exactly like AVI, ASF, or MP4 the common container files. The Matroska files have .MKV extension for videos which includes audio and subtitles as well, files with a .MK3D extension represent stereoscopic video, .MKS for only subtitles, and .MKA for audio-only files.
Step-by-step guide for merging audio into video: (MKV ONLY)
Step 1: Add audio to video files
Download the software and launch it on your Linux computer. From the mkvtoolnix-gui package, open the mkvmerge GUI. Click the ‘add’ button for importing the audio and video files to the software interface.
Step 2: Choose the audio track
After importing the audio and video files, select the new audio tracks by marking the check boxes against them, under the ‘Tracks, chapters and tags’ section. You can also set the language in the ‘General track options’ and delay under ‘Format specific options’ tab.
Step 3: Merge the files
Mention the output format under ‘Output filename’ section and then tap ‘Start muxing’. This process will save the video file. Using this program you can also remover tracks from a video and fix the default audio track as well.
Part 2: How to add music to videos online
Mp3Care
MP3Care is an online video editing application that people mostly use to add audio to video files. This application wipes out the existing audio track from the video file and mixes the new audio file that you upload to create an interesting video.
The supported audio input format is MP3, whereas the supported video files include MKV, FLV, AVI, MOV, MP4, and WMV. You can record a video on your mobile phone or tablet and merge a desired audio background with this using MP3Care. All you need to do is select this recorded video and a preferred audio track in this website and get going.
Steps for adding audio track to video –
Step 1: Launch the web browser and open this application, then choose the audio and video file as per the online instruction.
Step 2: After you are done with the video selection, tap ‘ADD MUSIC TO VIDEO’ and then download your edited video file.
AddAudioToVideo
AddAudioToVideo is an online application for adding music/audio to a video. MP3 audio and AVI, WMV, MOV, and MP4 video formats are only supported with this program. It replaces the MP3 audio from any video and the uploaded files get removed after a while from the web.
Step-by-step guide –
Step 1: Choose a video file
You need to first select the video file from your local drive after browsing to this site.
Step 2: Choose audio files
Select the MP3 audio file after the video file. Tap ‘Upload’ to get the files uploaded to the program and wait for some time to get them merged together.
Tip: The video file size limit is up to 500 MB.
Check out more ways of adding music to video online >>
Part 3: How to add music to videos on Mobile Phone
1. How to add audio to video on Android
Filmora
The best method to add music to video files on Android devices is none other than Filmora. A video editing app that has no time limit to edit a video and leaves no watermark on videos either is always the talk of the show.
Using the music and effects, you can indeed make hilarious funny-videos to entertain yourself and your friends. You can create videos simply by selecting pictures and videos from your phone, Instagram, or Facebook and select a theme, template, mix some music, transitions, subtitles, filters etc. and then get the video saved on your phone or shared over popular social media platforms like Facebook, Instagram, WhatsApp, Vimeo, Email, Tumblr, or YouTube.
The best part about this app is it supports multiple international languages, fits the popular ratios of Instagram and YouTube during exporting of video, allows real-time preview of clips, exports HD videos, and provides overlay elements for the best video editing experience.
Let’s go through the step-by-step guide –
Step 1: Select video and audio
Install Filmora on your Android device and launch it. Click the ‘CREATE NEW VIDEO’ over there and select the desired video. After that, tap on the ‘Add’ button found on the right side of the screen and click ‘NEXT’ on the top right part of the mobile screen.
Step 2: Add audio to video
You will be navigated to the editing interface. Click on ‘MUSIC’ from the right toolbar and then choose the desired audio after pressing plus icon. Play and confirm the audio by clicking ‘OKAY’ on the top right corner.
Step 3: Export
You can swap the music by clicking the thumbnail icon at the bottom of the screen. Save the edited video by tapping ‘Save’
KineMaster
It is a fully-featured app in Android Play store that supports numerous images, video, and text layers along with multi-track audio, precise trimming and cutting, volume envelope control, 3D transition, color LUT features and the likes.
It allows a great amount of control for an app that does editing over a mobile. Artists and educators will make use of the handwriting layers for drawing directly over the video. It supports most of the video, audio, and image formats.
Tutorial Guide for KineMaster –
Step 1: Launch KineMaster
Install and launch the app on your Android phone. Click the ‘+’ icon found in the middle of the app screen and then tap ‘Empty Project’ for a new project or ‘Project Assistant’ otherwise.
Step 2: Select media
Under the media tab, choose the desired video file and then tap ‘Background Audio’ tab. From the left panel you can choose almost 8 categories for audio.
Tips: Without tapping the plus ‘+’ icon on the music, the audio will be added to the desired video.
Step 3: Edit and export
Now, select the preferred audio track and click the share icon from the left panel. Confirm your actions by tapping ‘Export’.
Note: Voice change, looping music, or setting up the fade in/out effect is a cake walk with this app. You can also set resolution, frame rate, and bitrate using this video editing app.
2. How to add audio to video on iPhone/iPad
iMovie
If you want to add music to video in your iPhone, then the in-built iMovie option helps you import music from Theme, iTunes and your own music. Your videos will be turned into exhilarating master pieces.
You can effortlessly browse through the music files and create awesome 4K-resolution movie and Hollywood-style trailers to amaze your friends. iMovie is built to work in sync with your iOS and Mac devices.
It doesn’t matter where you are working, we mean from your iPhone to your iPad or Mac system, the project can be synced automatically as you move ahead. Once you are done editing, the movie will show up on iMovie Theatre across your iOS and Mac devices.
The step-by-step guide to add music to video using iMovie –
Step 1: On your iPhone launch the iMovie app and click ‘Project’ from the top of the screen, and tap ‘Create Project’ represented by a ‘+’ icon.
Step 2: Now, click ‘Create’ and then ‘Movie’ to open the project interface on screen. Browse the ‘Media’ option from the top left corner of the timeline and explore the video gallery on screen and pick the desired video for editing then hit ‘Add’ and then ‘Use’.
Step 3: The source video gets added to the timeline. You need to reach to the starting point of the video, so that you can add audio from there. Add audio by following similar process to that of adding video from the gallery, but tap ‘Audio’ after clicking the ‘Add Media’ button. Ensure that music has been placed at background, by tapping the ‘Background’ button from the bottom of the screen. By clicking the ‘Theme Music’ option you can find the synced media on your device.
Step 4: Click ‘Play’ for previewing the audio visual, and click ‘Done’ if satisfied with your new creation.
Tip: iMovie will loop the background audio automatically, in case the video runs longer than the audio. It is recommended to adjust their lengths while merging them.
Part 4: How to download royalty free music from website
Few of the video editing software comes up with in-built library for music but not all of them. When there is no music with the software, you might import music from an external source to add audio to your video.
The biggest problem while using the audio tracks is copyright issues, they are not always copyright free. But, there is nothing to worry about. There are sites that offer free of cost stock music/audio tracks across genres that you can use and make a breath-taking audio visual. Let’s go through the most popular royalty free music sites.
Free Stock Music
Free Stock Music contains a library full of audio tracks across genres that you can avail for free. MP3, AIFF, and WAV audio formats are available within this site and asks you for free sign-up. You don’t have to provide any attribution to download the music.
Machinima Sound
Though this site doesn’t offer free music for you, few tracks might be there to suit your needs. You can find them under ‘LEGACY TRACKS’ at the bottom of the page. This site has a huge collection of tracks divided into genres, moods, and stingers. The audio is available in MP3 format and for attributions you might need specific license.
Free Soundtrack Music
Free Soundtrack Music enables you to access numerous royalty-free music tracks that you can make use of in your audio-visuals. Brilliant audio tracks are available with this audio library that you can download and add to your videos. When they say add credit, it usually means the music is paid and you need to buy the credits.
Part 5: Audio editing - 5 tips for mixing audio
Keyframe audio Levels
After fixing the primary audio, you shift your task to the new audio that you are adding to the video. Preview your track and make adjustments, then add the music to timeline and start balancing everything that seems out of place by managing the keyframes. Either work with the clip keyframes, or with the entire track, do whatever seems more pleasing with the composition.
Use filters and effects
You can apply filters/effects as you require, and keep in mind that an audio should only be added for enhanced effects, when you have a clear source for that effect. They shouldn’t make the composition weird. Use appropriate filters that separate a voice-over and a telephonic voice from usual dialogue in a video/audio.
Volume is important
Editing video or audio clip is just like attending a live concert. If not paid attention, the surrounding music will overpower the vocalist, or the guitar might be too low to be audible due to the dominant bass effect. The volume should be properly tuned to match with the rest of the audio visuals while adding audio to video. You can pick portions of the audio and balance audio level accordingly to allow a drop in volume during vocals and rise when there are no vocals.
Change tempo
The change in tempo enhances the composition. You can get creative and experiment. Let’s say there is a portion in your video that is slow and has music at a regular pace. Then why not stretch the tempo and slow it down to blend properly with your video? Altering the tempo brings more creative aspects to create better audio visuals.
Use fade in and fade out
While adding audio to video, if the new one music is instrumental whereas the existing one in the video is a quiet background track, the sudden change in volume might sound weird. Effective use of fades can lower the aural unexpectedness of the instruments.
Final Verdict
Coming towards the end of the discussion and after going through an elaborated list of video editing applications, we came to a final verdict that Filmora sound to be the best out of them. It allows you to flawlessly edit audio and video files on your desktop, with multiple in-built royalty free music tracks to choose from that can enhance your video’s beauty.
Shanoon Cox
Shanoon Cox is a writer and a lover of all things video.
Follow @Shanoon Cox
How to Record Computer Audio and Voice Audio with Audacity for Free?
Natural audio recording software, such as Voice Memos for Macs or Sound Recorder for Windows PCs, is included with every machine. These applications enable users to record audio using either the desktop’s internal or an external microphone, and they generally have basic audio editing features.
However, when you’re looking for a higher-quality recording program, Audacity is the way to go. Audacity is a free audio editor with a lot of cutting-edge features. More significantly, recording using Audacity is as simple as clicking a button.
In this Audacity Record Computer Audio guide, we will show you all the methods of recording internal audio on your computer and Mac.
In this article
01 Record Audio On Audacity with a Microphone
02 Record Sounds Playing on Your Computer Using Audacity on Win
03 Record Sounds Playing on Your Computer Using Audacity on Mac
04 Set up Audacity to Record as Schedule
Part 1: How to Record Audio On Audacity with a Microphone On Windows and Mac Computers?
For both Windows and Mac, the procedures for recording audio from a microphone are the same if you’re utilizing your desktop’s built-in mic or an external microphone. Here’s your step-by-step guide to audacity record using a microphone:
Step 1: Launch Audacity and get to know the Device Toolbar, situated underneath the playback controls. You may modify the Audio Host and the Recording and Playback Devices—all of which are required for Audacity recording.

Step 2: To begin, select Tracks under the Add New tab, Stereo Track, or Mono Track to create a new track.

Step 3: Select Recording Device from the options list. Select your microphone from the dropdown menu and hit the Record option.

Step 4: A soundwave emerges along the track as you talk into the speaker. The Recording Level may be found at the top of the display. To pause or stop the recording, click Stop or Pause until you select Record anew.

Step 5: With the mouse over any recording area, click the Delete button to cut out any portion of it quickly. Click Ctrl + A, then Delete to erase whatever you’ve just saved. Alternatively, press the X button to delete the track completely.

Part 2: How to Record Sounds Playing on Your Computer Using Audacity On Windows?
Unlike Mac, Windows makes it simple to capture audio from a movie or media file running on your desktop. There seem to be two primary methods for accomplishing audacity record desktop audio in this way:
1. Use MME as the Audio Host
Step 1: To use MME as your audio host, go to Tracks in the Add New tab in Stereo Track and create a new file.

Step 2: Change the Audio Host (to the left of Recording Device) to MME—this is the standard setting, so you might not have to change anything.

Step 3: Choose desired option from the Recording Device dropdown menu. Based on your configuration, this might be referred to as Wave Out or Loopback. When you’re uncertain, try it out.

Step 4: To record your audio source, click Record, then play it back.
2. Use WASAPI as the Audio Host
WASAPI provides higher-resolution digital recordings. If capturing audio from an external monitor, it’s also a good idea to utilize it.
Step 1: Convert the Audio Host from MME to Windows WASAPI after creating a fresh Stereo Track.

Step 2: Switch the Recording Device to Speaker (loopback). To display the entire label, you might have to slide the toolbar’s knobs outwards. Begin recording by pressing the red dot and then listen to the audio source. Audacity will capture the audio even if your PC is muted.
Part 3: How to Record Sounds Playing on Your Computer Using Audacity on Mac?
Unfortunately, there’s no ready-made method to record computer audio using Audacity on a Mac. Some alternative ways to use Audacity to record from Mac including using a loopback cable, or download and using a third-party software. You can try some Audacity alternatives to record the computer audio on Mac.
For Win 7 or later (64-bit)
For macOS 10.12 or later
If you have installed Filmora already, you can use it to record the sound playing on your Mac with some tricks.
Step 1: Luanch Filmora, and then click the Record button and select Record PC Screen.

Step 2: Set up the recording settings based on the need. Since we’re going to record the playing audio from the Mac computer, select Microphone and System Audio On and click the Red button to start.

Step 3: Now you have a screen captured video with sound included. Since we need th audio only, we can attache the audio from the video first and then do some editing such as adding fade in and fade out effect, or remove unwanted audio clip.

Part 4: How to Set up Audacity to Record as Schedule?
A streaming video recorder or cassette can be used to arrange a recording. All of those are identical to Time Recordings in that they are used to schedule recording. The Timer record configuration dialog box may be used to set the beginning and finish of the recording. This is how you do it:
Step 1: By definition, the recording’s Start Date and Time are set to the present time. It will begin recording on the present day and hour by default when you don’t alter it. There is no default setting for the End Date and Time. You must either choose a date and time to determine the end time.

Step 2: There is a Checkbox to Save the work immediately. By Ticking the option, you may choose the path or Folder where the file will be saved when the recording is finished.

Conclusion
Well, there you have it – your complete Audacity Record Computer Audio guide. One thing is for certain that Audacity allows some great ways of recording audio from internal and external components of your Windows and Mac. However, if your Audacity is having issues, we would highly recommend opting for another software, such as Wondershare Filmora.
Wondershare Filmora is the finest thing that has come out in recent years for recording audio from a desktop. It is intended not just for pros but also for any enthusiast videographer who desires to create a high-quality movie for their family and friends. Download it today to make your movie a delightful journey with high-quality audio recording.
02 Record Sounds Playing on Your Computer Using Audacity on Win
03 Record Sounds Playing on Your Computer Using Audacity on Mac
04 Set up Audacity to Record as Schedule
Part 1: How to Record Audio On Audacity with a Microphone On Windows and Mac Computers?
For both Windows and Mac, the procedures for recording audio from a microphone are the same if you’re utilizing your desktop’s built-in mic or an external microphone. Here’s your step-by-step guide to audacity record using a microphone:
Step 1: Launch Audacity and get to know the Device Toolbar, situated underneath the playback controls. You may modify the Audio Host and the Recording and Playback Devices—all of which are required for Audacity recording.
Step 2: To begin, select Tracks under the Add New tab, Stereo Track, or Mono Track to create a new track.
Step 3: Select Recording Device from the options list. Select your microphone from the dropdown menu and hit the Record option.
Step 4: A soundwave emerges along the track as you talk into the speaker. The Recording Level may be found at the top of the display. To pause or stop the recording, click Stop or Pause until you select Record anew.
Step 5: With the mouse over any recording area, click the Delete button to cut out any portion of it quickly. Click Ctrl + A, then Delete to erase whatever you’ve just saved. Alternatively, press the X button to delete the track completely.
Part 2: How to Record Sounds Playing on Your Computer Using Audacity On Windows?
Unlike Mac, Windows makes it simple to capture audio from a movie or media file running on your desktop. There seem to be two primary methods for accomplishing audacity record desktop audio in this way:
1. Use MME as the Audio Host
Step 1: To use MME as your audio host, go to Tracks in the Add New tab in Stereo Track and create a new file.
Step 2: Change the Audio Host (to the left of Recording Device) to MME—this is the standard setting, so you might not have to change anything.
Step 3: Choose desired option from the Recording Device dropdown menu. Based on your configuration, this might be referred to as Wave Out or Loopback. When you’re uncertain, try it out.
Step 4: To record your audio source, click Record, then play it back.
2. Use WASAPI as the Audio Host
WASAPI provides higher-resolution digital recordings. If capturing audio from an external monitor, it’s also a good idea to utilize it.
Step 1: Convert the Audio Host from MME to Windows WASAPI after creating a fresh Stereo Track.
Step 2: Switch the Recording Device to Speaker (loopback). To display the entire label, you might have to slide the toolbar’s knobs outwards. Begin recording by pressing the red dot and then listen to the audio source. Audacity will capture the audio even if your PC is muted.
Part 3: How to Record Sounds Playing on Your Computer Using Audacity on Mac?
Unfortunately, there’s no ready-made method to record computer audio using Audacity on a Mac. Some alternative ways to use Audacity to record from Mac including using a loopback cable, or download and using a third-party software. You can try some Audacity alternatives to record the computer audio on Mac.
For Win 7 or later (64-bit)
For macOS 10.12 or later
If you have installed Filmora already, you can use it to record the sound playing on your Mac with some tricks.
Step 1: Luanch Filmora, and then click the Record button and select Record PC Screen.
Step 2: Set up the recording settings based on the need. Since we’re going to record the playing audio from the Mac computer, select Microphone and System Audio On and click the Red button to start.
Step 3: Now you have a screen captured video with sound included. Since we need th audio only, we can attache the audio from the video first and then do some editing such as adding fade in and fade out effect, or remove unwanted audio clip.
Part 4: How to Set up Audacity to Record as Schedule?
A streaming video recorder or cassette can be used to arrange a recording. All of those are identical to Time Recordings in that they are used to schedule recording. The Timer record configuration dialog box may be used to set the beginning and finish of the recording. This is how you do it:
Step 1: By definition, the recording’s Start Date and Time are set to the present time. It will begin recording on the present day and hour by default when you don’t alter it. There is no default setting for the End Date and Time. You must either choose a date and time to determine the end time.
Step 2: There is a Checkbox to Save the work immediately. By Ticking the option, you may choose the path or Folder where the file will be saved when the recording is finished.
Conclusion
Well, there you have it – your complete Audacity Record Computer Audio guide. One thing is for certain that Audacity allows some great ways of recording audio from internal and external components of your Windows and Mac. However, if your Audacity is having issues, we would highly recommend opting for another software, such as Wondershare Filmora.
Wondershare Filmora is the finest thing that has come out in recent years for recording audio from a desktop. It is intended not just for pros but also for any enthusiast videographer who desires to create a high-quality movie for their family and friends. Download it today to make your movie a delightful journey with high-quality audio recording.
Also read:
- Updated Discover the Online Havens for High-Fidelity Recordings of Ornithological Sounds for 2024
- Updated Free Harmonies for Visuals Integrate Music Into Photos
- Updated Mastering Top Mac MP3 Labeling Software A Comprehensive Guide
- New Best 11 FREE Voice Changer Apps for iOS and Android for 2024
- Best Linux Audio Editor Free & Paid
- 2024 Approved Chromebook Sound Capture Unlocked 7 User-Friendly Steps
- Updated Voice Easy A Curated List of Software for Simplified Vocal Recordings
- New Comprehensive Guide to Vocal Isolation in Adobe Audition A Six-Step Process for 2024
- Updated 5 Premier Free Tools for Enhancing Your Vocal Range for 2024
- 2024 Approved 10 Prime Pages to Acquire Digital Ding Tone Files with Hassle-Free Downloads
- New 2024 Approved Where Can I Find Scream Sound Effect?
- Top 10 Iconic Song Selections for Inspiring Short Film Scenes
- New In 2024, Navigating the Nuances of Noise-Cancelling Sound Effects Using Final Cut Pro Xs AutoDuck Feature
- Updated 2024 Approved Mastering Free Audio Recording Using Audacitys Capabilities
- New Adobe Audition Reimagined The Essential Features for Audio Enthusiasts and Professionals for 2024
- New Find Monster Sounds Effect
- New Online Anomalies Sound Bank - Legal, Free Access
- Updated 2024 Approved Top 3 Audio Amplifiers Boost Your Videos and Streams to Perfection
- Updated In 2024, The Complete Guide to Professional Audio Editing with Sony Vegas
- Updated 2024 Approved A Comprehensive Guide to Choosing Best Zero-Cost Audio Modification Tools for Windows Enthusiasts
- 2024 Approved Ultimate Guided Audio Level Adjustment Software
- 2024 Approved The Mini Moviemaker A Fun Guide for Kids to Make Their Own Movies
- Easy steps to recover deleted data from Honor 90 Pro
- 3 Ways for Android Pokemon Go Spoofing On OnePlus Nord N30 SE | Dr.fone
- Microsoft Video Editor for Dummies A Step-by-Step Guide
- In 2024, Forgot Pattern Lock? Heres How You Can Unlock ZTE Blade A73 5G Pattern Lock Screen
- How To Deal With the OnePlus 12 Screen Black But Still Works? | Dr.fone
- Resize and Reframe How to Crop Videos in Avidemux for Better Storytelling for 2024
- 2 Ways to Monitor Samsung Galaxy S23 FE Activity | Dr.fone
- 8 Workable Fixes to the SIM not provisioned MM#2 Error on Oppo Reno 10 Pro 5G | Dr.fone
- iSpoofer is not working On Xiaomi Redmi K70 Pro? Fixed | Dr.fone
- In 2024, Ultimate Guide to Catch the Regional-Located Pokemon For Realme 11X 5G | Dr.fone
- In 2024, Full Guide to Catch 100 IV Pokémon Using a Map On Xiaomi Redmi Note 12 5G | Dr.fone
- New 2024 Approved The Best of the Best Top Animation Software for All Users
- Updated The Ultimate Guide to Learning All the Details About Voice Cloning
- 7 Fixes for Unfortunately, Phone Has Stopped on Vivo T2x 5G | Dr.fone
- In 2024, 5 Easy Ways to Transfer Contacts from Apple iPhone 6s Plus to Android | Dr.fone
- Title: In 2024, Digital Venues for Encountering and Bonding with Unknown Individuals Responsibly
- Author: Paul
- Created at : 2024-05-20 01:48:01
- Updated at : 2024-05-21 01:48:01
- Link: https://voice-adjusting.techidaily.com/in-2024-digital-venues-for-encountering-and-bonding-with-unknown-individuals-responsibly/
- License: This work is licensed under CC BY-NC-SA 4.0.
