:max_bytes(150000):strip_icc():format(webp)/how-to-fix-it-when-pngs-wont-open-in-windows-11-41107f6a55db4318b6c2b64437de5b75.jpg)
A Complete Guide to Help You Record Audio on iPhone

A Complete Guide to Help You Record Audio on iPhone
We use audio recording at all most every stage of life. Sometimes we are in class, and we record any lecture. Sometimes, something is explained in detail to you. Now are days, people share audio recordings even in an office and professional environment.
Things are always different for iPhone users. If you want to record audio on iPhone, then this article will discuss the built-in audio recorder as well as, 5 best audio recording apps for iPhone will also be shared with you.
In this article
01 How to Record Voice on iPhone?
02 5 Best Voice Recorder App for iPhone
Part 1. How to Record Voice on iPhone?
As mentioned earlier, things are a little different for iPhone users compared to Android phones. In the same way, the audio recording process is slightly different. iPhone has a built-in audio recorder, Voice Memo , that could be used to record sound on iPhone. Voice Memo is a great voice recorder. A few of its attractive features are.
- You can choose between compressed and uncompressed on Voice Memo for audio formats.
- With the search feature of this recorder, you can easily find your recordings.
- You can mark your recordings with the same name so that they can be accessed easily.
You might have a question in your mind about how to make a voice recording on iPhone? The answer to this question is shared below.
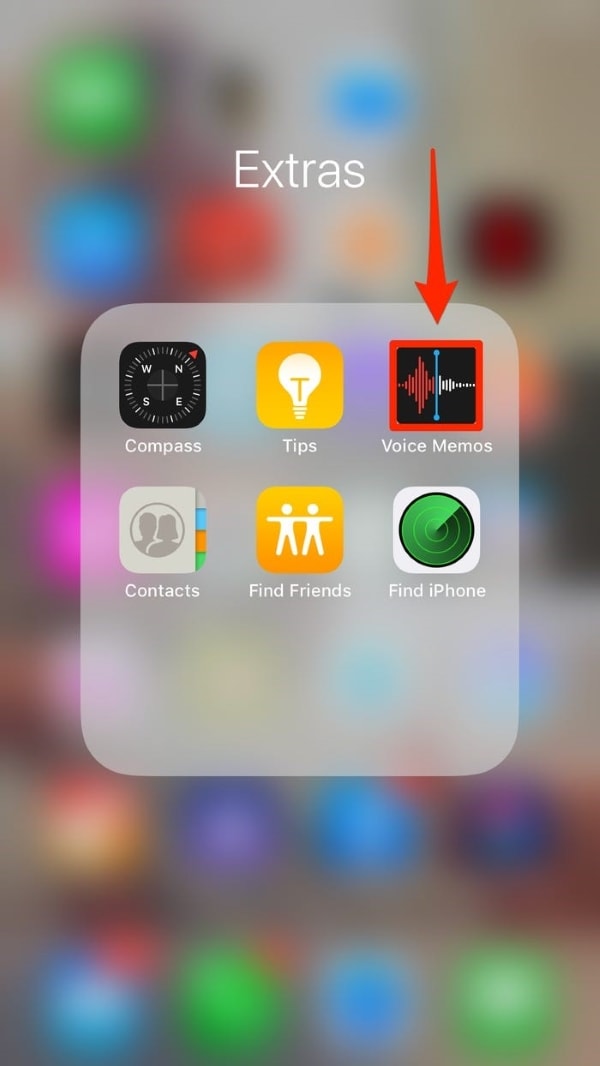
Step 1: First of all, you should locate the ‘Voice Memo’ application on your iPhone.
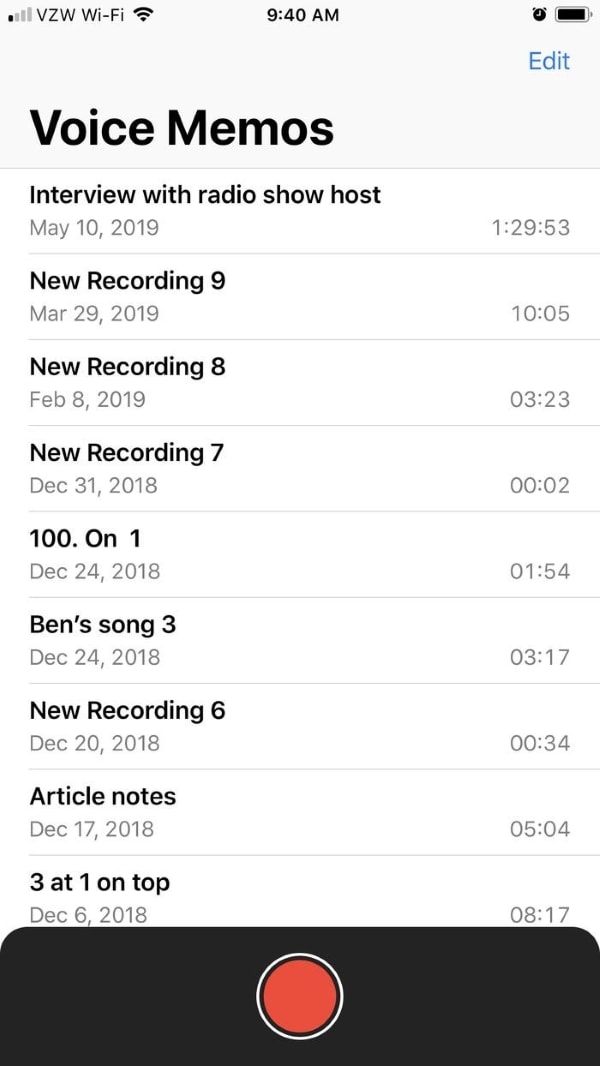
Step 2: Now, you should launch the application. You will see a big ‘Red’ button at the bottom of the screen. Simply hit that button to start the recording.
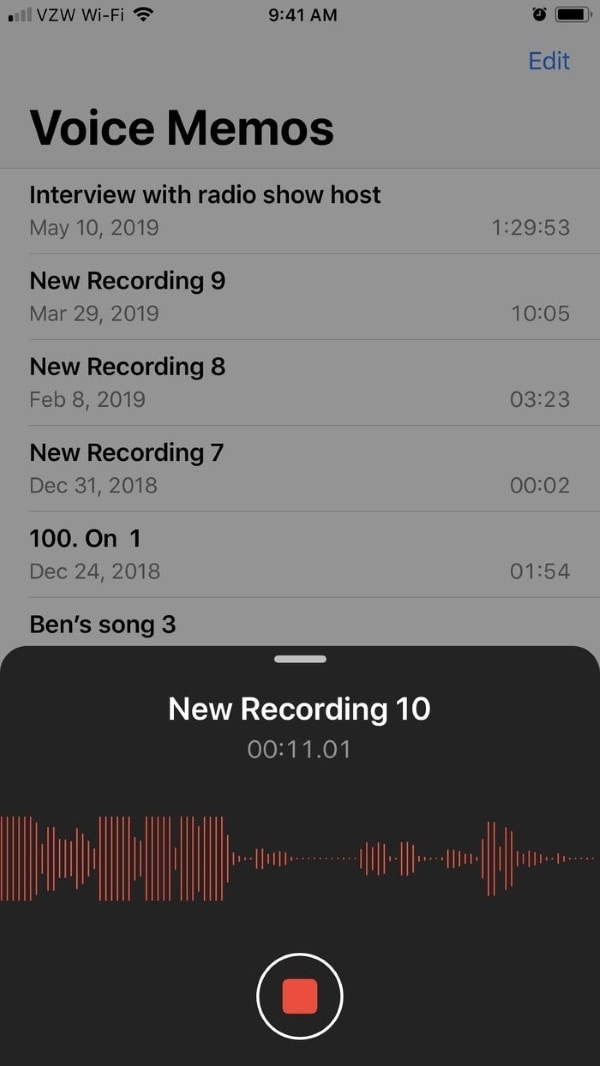
Step 3: After you are satisfied with the recording, you have to tap again on the big ‘Red’ square button to stop the audio recording.
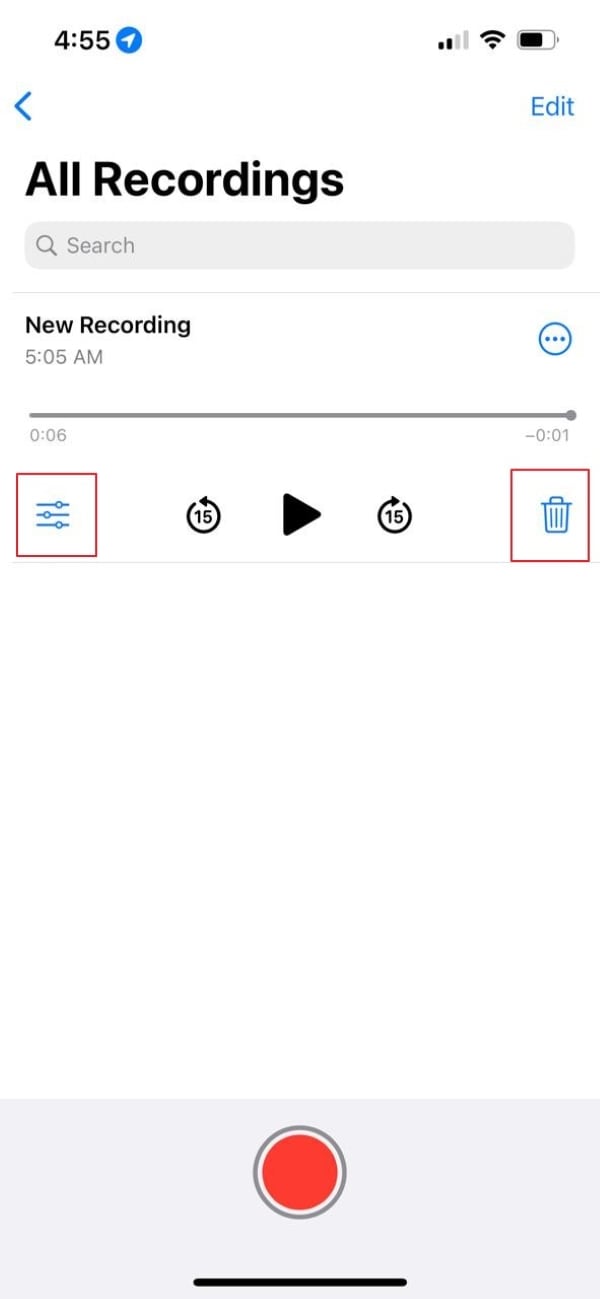
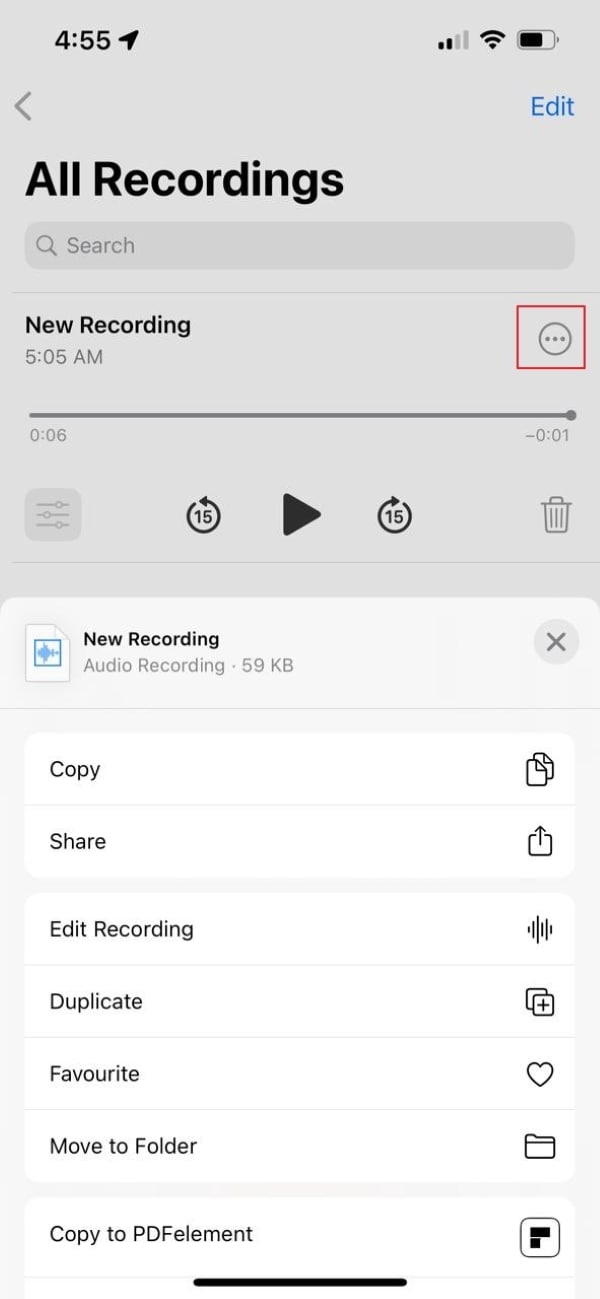
Step 4: Now, beneath the recording, you will see a ‘Delete’ option and the other option on the left side is to ‘Edit’ the recording. You can set the playback speed, skip silence and also Enhance Recording option.
Step 5: Lastly, by clicking on the 3 vertical dots, you can copy and share your recording. The dialog box also allows you to edit, duplicate, etc.
Part 2. 5 Best Voice Recorder App for iPhone
Although iPhone has a built-in voice recorder, that has been discussed in the above section. We use different voice recording applications now and then. Here, a question arises: What could be the best audio recording app for iPhone? What could be done if you don’don’tt to use it?
There are alternative options for almost everything. In the same way, there are alternative applications that could be used to record sound on iPhone. The following section will shed light on the 5 best voice recorder iPhone applications.
1. Rev Voice Recorder & Memos
The first application to record audio on iPhone is Rev Voice Recorder. The voice recorder is customer-oriented with a very easy-to-understand interface. Rev has a very strong customer service team that deals immediately with problems if any problem is reported. Rev Voice Recorder is a free voice recorder for iPhone.
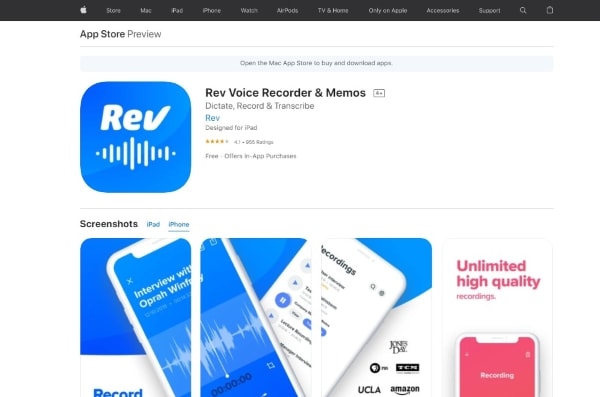
With Rev recorder, you don’don’te to struggle much as you can easily search for the recordings by name. It lets you view and then share your recordings. There are many more features of this voice recorder; let’let’sk about them.
- The most amazing thing about the Rev Voice Recorder is that it spontaneously pauses the recording for any incoming call or any other interruption.
- You can edit and trim the recording to remove any unwanted parts.
- The recorder is synced with Dropbox to backup your recordings.
- It offers high-quality voice recordings and playback.
2. Awesome Voice Recorder
The next recorder that comes in line that could be used as an alternative voice recorder iPhone is ‘Awe’ome Voice Recorder.’ Th’s recorder is great as it offers various voice recording tools. The interface is simple and basic. With Awesome Voice Recorder, you can pause your recording and then start again from where you left.
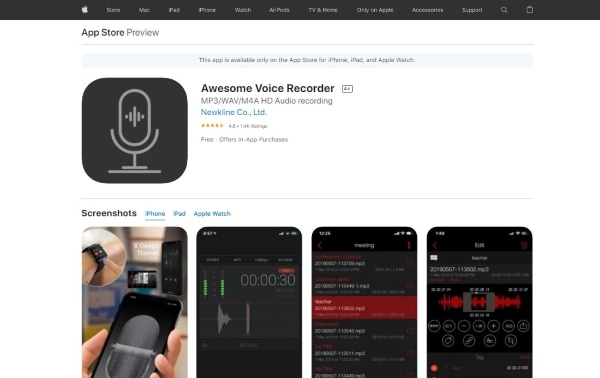
Like this, AVR has many crazy features that attract its users and facilitate them brilliantly at the same time. Let us share some of its features with you.
- The coolest thing about this recorder is that it stops in case there is any storage space problem or even a low battery.
- Awesome Voice Recorder supports Bluetooth.
- The fascinating factor of using AVR is its unlimited recording time.
- The recordings of this tool are playable in various media.
3. HT Professional Recorder
HT Professional Recorder is another awesome option to record audio on iPhone. The recorder is well known for its features and exceptional recording quality. HT Professional Recorder has this mind-blowing quality that it can record the audio even if the people talking are sitting several feet away from the iPhone.
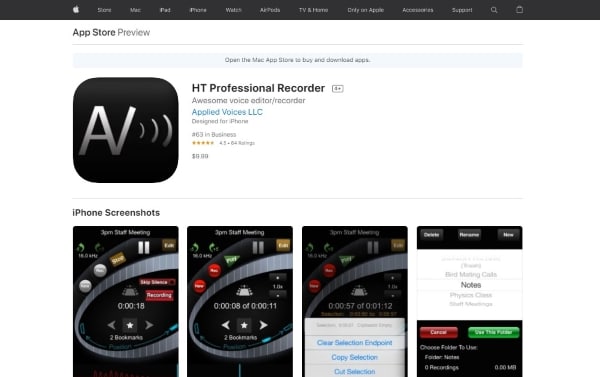
Like this, HT Professional Recorder is full of surprises. The recorder has a lot to offer. Allow us to highlight its features.
- An auto-record option automatically starts the recording as soon as the application is launched.
- This reorder offers a unique feature that you can bookmark important moments.
- The recorder spontaneously skips any silence between the recording.
- You can also transfer files to other computers via a Wi-Fi connection.
4. AudioNote 2 – Voice Recorder
Another alternate option for the audio recording app iPhone is AudioNote 2. The application is unmatchable as it uses Amplified audio recording, where the tool will adapt according to the volume level as well as the size of the room.
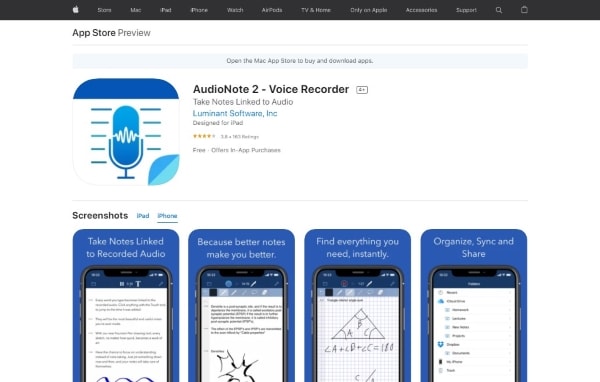
With AudioNote 2, you can pause or restart the recording any time you want to. You will learn more about this recorder after going through its features.
- The recorder lets you import any pre-recorded audio of yours, and then you can add notes to it.
- AudioNote 2 has a brilliant feature of ‘Noi’e Reduction Filter.’ Wi’h this filter, you can eliminate any extra and unwanted sound from the background.
- The recording application automatically syncs the devices with either Dropbox or iCloud.
- With this recorder, you can adjust the playback speed with pitch correction when it comes to playback.
5. Voice Recorder – Audio Record
Lastly, another best audio recording app for iPhone is Voice Recorder. The recording tool does auto-upload within seconds. You can also share your recordings on the cloud or Dropbox. Voice Recorder Audio Record has various features, few of its features are.
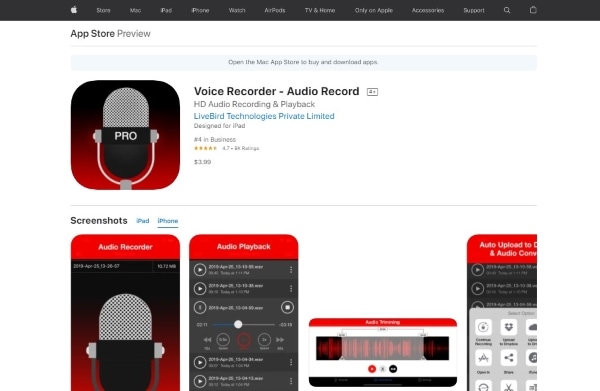
- You can easily edit and amend your recordings. It lets you trim the final version of your recording to remove any unwanted sound.
- The application is a quick audio player with multiple playback controls.
- You can easily share your recording via Dropbox or iCloud.
- The recording tool supports WAV, M4A, and CAF.
Ending Thoughts
The article is a detailed guide about the audio recording app iPhone. The audio recording for iPhone has been discussed from every possible aspect. The article also shared the steps to use the built-in voice recorder of the iPhone, and 5 amazing recording tools were also discussed.
After you have recorded the audio, there might be some problems with it. For such problems, we have Wondershare Filmora – Audio Editing. You can polish and edit your roughly recorded audio and make it smooth and flawless with Filmora.
For Win 7 or later (64-bit)
For macOS 10.12 or later
Filmora Audio Editor has multiple features. Among those, one feature is to Add Background Music to your recorded audio. Adding background music helps to maintain interest. Another feature of Audio Editing by Filmora is Split Audio. The feature is where you can split the original audio and use it like you want to. You can also Adjust Audio with Filmora Audio Editing.
Versatile Video Editor - Wondershare Filmora
An easy yet powerful editor
Numerous effects to choose from
Detailed tutorials provided by the official channel
02 5 Best Voice Recorder App for iPhone
Part 1. How to Record Voice on iPhone?
As mentioned earlier, things are a little different for iPhone users compared to Android phones. In the same way, the audio recording process is slightly different. iPhone has a built-in audio recorder, Voice Memo , that could be used to record sound on iPhone. Voice Memo is a great voice recorder. A few of its attractive features are.
- You can choose between compressed and uncompressed on Voice Memo for audio formats.
- With the search feature of this recorder, you can easily find your recordings.
- You can mark your recordings with the same name so that they can be accessed easily.
You might have a question in your mind about how to make a voice recording on iPhone? The answer to this question is shared below.
Step 1: First of all, you should locate the ‘Voice Memo’ application on your iPhone.

Step 2: Now, you should launch the application. You will see a big ‘Red’ button at the bottom of the screen. Simply hit that button to start the recording.

Step 3: After you are satisfied with the recording, you have to tap again on the big ‘Red’ square button to stop the audio recording.

Step 4: Now, beneath the recording, you will see a ‘Delete’ option and the other option on the left side is to ‘Edit’ the recording. You can set the playback speed, skip silence and also Enhance Recording option.

Step 5: Lastly, by clicking on the 3 vertical dots, you can copy and share your recording. The dialog box also allows you to edit, duplicate, etc.

Part 2. 5 Best Voice Recorder App for iPhone
Although iPhone has a built-in voice recorder, that has been discussed in the above section. We use different voice recording applications now and then. Here, a question arises: What could be the best audio recording app for iPhone? What could be done if you don’don’tt to use it?
There are alternative options for almost everything. In the same way, there are alternative applications that could be used to record sound on iPhone. The following section will shed light on the 5 best voice recorder iPhone applications.
1. Rev Voice Recorder & Memos
The first application to record audio on iPhone is Rev Voice Recorder. The voice recorder is customer-oriented with a very easy-to-understand interface. Rev has a very strong customer service team that deals immediately with problems if any problem is reported. Rev Voice Recorder is a free voice recorder for iPhone.

With Rev recorder, you don’don’te to struggle much as you can easily search for the recordings by name. It lets you view and then share your recordings. There are many more features of this voice recorder; let’let’sk about them.
- The most amazing thing about the Rev Voice Recorder is that it spontaneously pauses the recording for any incoming call or any other interruption.
- You can edit and trim the recording to remove any unwanted parts.
- The recorder is synced with Dropbox to backup your recordings.
- It offers high-quality voice recordings and playback.
2. Awesome Voice Recorder
The next recorder that comes in line that could be used as an alternative voice recorder iPhone is ‘Awe’ome Voice Recorder.’ Th’s recorder is great as it offers various voice recording tools. The interface is simple and basic. With Awesome Voice Recorder, you can pause your recording and then start again from where you left.

Like this, AVR has many crazy features that attract its users and facilitate them brilliantly at the same time. Let us share some of its features with you.
- The coolest thing about this recorder is that it stops in case there is any storage space problem or even a low battery.
- Awesome Voice Recorder supports Bluetooth.
- The fascinating factor of using AVR is its unlimited recording time.
- The recordings of this tool are playable in various media.
3. HT Professional Recorder
HT Professional Recorder is another awesome option to record audio on iPhone. The recorder is well known for its features and exceptional recording quality. HT Professional Recorder has this mind-blowing quality that it can record the audio even if the people talking are sitting several feet away from the iPhone.

Like this, HT Professional Recorder is full of surprises. The recorder has a lot to offer. Allow us to highlight its features.
- An auto-record option automatically starts the recording as soon as the application is launched.
- This reorder offers a unique feature that you can bookmark important moments.
- The recorder spontaneously skips any silence between the recording.
- You can also transfer files to other computers via a Wi-Fi connection.
4. AudioNote 2 – Voice Recorder
Another alternate option for the audio recording app iPhone is AudioNote 2. The application is unmatchable as it uses Amplified audio recording, where the tool will adapt according to the volume level as well as the size of the room.

With AudioNote 2, you can pause or restart the recording any time you want to. You will learn more about this recorder after going through its features.
- The recorder lets you import any pre-recorded audio of yours, and then you can add notes to it.
- AudioNote 2 has a brilliant feature of ‘Noi’e Reduction Filter.’ Wi’h this filter, you can eliminate any extra and unwanted sound from the background.
- The recording application automatically syncs the devices with either Dropbox or iCloud.
- With this recorder, you can adjust the playback speed with pitch correction when it comes to playback.
5. Voice Recorder – Audio Record
Lastly, another best audio recording app for iPhone is Voice Recorder. The recording tool does auto-upload within seconds. You can also share your recordings on the cloud or Dropbox. Voice Recorder Audio Record has various features, few of its features are.

- You can easily edit and amend your recordings. It lets you trim the final version of your recording to remove any unwanted sound.
- The application is a quick audio player with multiple playback controls.
- You can easily share your recording via Dropbox or iCloud.
- The recording tool supports WAV, M4A, and CAF.
Ending Thoughts
The article is a detailed guide about the audio recording app iPhone. The audio recording for iPhone has been discussed from every possible aspect. The article also shared the steps to use the built-in voice recorder of the iPhone, and 5 amazing recording tools were also discussed.
After you have recorded the audio, there might be some problems with it. For such problems, we have Wondershare Filmora – Audio Editing. You can polish and edit your roughly recorded audio and make it smooth and flawless with Filmora.
For Win 7 or later (64-bit)
For macOS 10.12 or later
Filmora Audio Editor has multiple features. Among those, one feature is to Add Background Music to your recorded audio. Adding background music helps to maintain interest. Another feature of Audio Editing by Filmora is Split Audio. The feature is where you can split the original audio and use it like you want to. You can also Adjust Audio with Filmora Audio Editing.
Versatile Video Editor - Wondershare Filmora
An easy yet powerful editor
Numerous effects to choose from
Detailed tutorials provided by the official channel
02 5 Best Voice Recorder App for iPhone
Part 1. How to Record Voice on iPhone?
As mentioned earlier, things are a little different for iPhone users compared to Android phones. In the same way, the audio recording process is slightly different. iPhone has a built-in audio recorder, Voice Memo , that could be used to record sound on iPhone. Voice Memo is a great voice recorder. A few of its attractive features are.
- You can choose between compressed and uncompressed on Voice Memo for audio formats.
- With the search feature of this recorder, you can easily find your recordings.
- You can mark your recordings with the same name so that they can be accessed easily.
You might have a question in your mind about how to make a voice recording on iPhone? The answer to this question is shared below.
Step 1: First of all, you should locate the ‘Voice Memo’ application on your iPhone.

Step 2: Now, you should launch the application. You will see a big ‘Red’ button at the bottom of the screen. Simply hit that button to start the recording.

Step 3: After you are satisfied with the recording, you have to tap again on the big ‘Red’ square button to stop the audio recording.

Step 4: Now, beneath the recording, you will see a ‘Delete’ option and the other option on the left side is to ‘Edit’ the recording. You can set the playback speed, skip silence and also Enhance Recording option.

Step 5: Lastly, by clicking on the 3 vertical dots, you can copy and share your recording. The dialog box also allows you to edit, duplicate, etc.

Part 2. 5 Best Voice Recorder App for iPhone
Although iPhone has a built-in voice recorder, that has been discussed in the above section. We use different voice recording applications now and then. Here, a question arises: What could be the best audio recording app for iPhone? What could be done if you don’don’tt to use it?
There are alternative options for almost everything. In the same way, there are alternative applications that could be used to record sound on iPhone. The following section will shed light on the 5 best voice recorder iPhone applications.
1. Rev Voice Recorder & Memos
The first application to record audio on iPhone is Rev Voice Recorder. The voice recorder is customer-oriented with a very easy-to-understand interface. Rev has a very strong customer service team that deals immediately with problems if any problem is reported. Rev Voice Recorder is a free voice recorder for iPhone.

With Rev recorder, you don’don’te to struggle much as you can easily search for the recordings by name. It lets you view and then share your recordings. There are many more features of this voice recorder; let’let’sk about them.
- The most amazing thing about the Rev Voice Recorder is that it spontaneously pauses the recording for any incoming call or any other interruption.
- You can edit and trim the recording to remove any unwanted parts.
- The recorder is synced with Dropbox to backup your recordings.
- It offers high-quality voice recordings and playback.
2. Awesome Voice Recorder
The next recorder that comes in line that could be used as an alternative voice recorder iPhone is ‘Awe’ome Voice Recorder.’ Th’s recorder is great as it offers various voice recording tools. The interface is simple and basic. With Awesome Voice Recorder, you can pause your recording and then start again from where you left.

Like this, AVR has many crazy features that attract its users and facilitate them brilliantly at the same time. Let us share some of its features with you.
- The coolest thing about this recorder is that it stops in case there is any storage space problem or even a low battery.
- Awesome Voice Recorder supports Bluetooth.
- The fascinating factor of using AVR is its unlimited recording time.
- The recordings of this tool are playable in various media.
3. HT Professional Recorder
HT Professional Recorder is another awesome option to record audio on iPhone. The recorder is well known for its features and exceptional recording quality. HT Professional Recorder has this mind-blowing quality that it can record the audio even if the people talking are sitting several feet away from the iPhone.

Like this, HT Professional Recorder is full of surprises. The recorder has a lot to offer. Allow us to highlight its features.
- An auto-record option automatically starts the recording as soon as the application is launched.
- This reorder offers a unique feature that you can bookmark important moments.
- The recorder spontaneously skips any silence between the recording.
- You can also transfer files to other computers via a Wi-Fi connection.
4. AudioNote 2 – Voice Recorder
Another alternate option for the audio recording app iPhone is AudioNote 2. The application is unmatchable as it uses Amplified audio recording, where the tool will adapt according to the volume level as well as the size of the room.

With AudioNote 2, you can pause or restart the recording any time you want to. You will learn more about this recorder after going through its features.
- The recorder lets you import any pre-recorded audio of yours, and then you can add notes to it.
- AudioNote 2 has a brilliant feature of ‘Noi’e Reduction Filter.’ Wi’h this filter, you can eliminate any extra and unwanted sound from the background.
- The recording application automatically syncs the devices with either Dropbox or iCloud.
- With this recorder, you can adjust the playback speed with pitch correction when it comes to playback.
5. Voice Recorder – Audio Record
Lastly, another best audio recording app for iPhone is Voice Recorder. The recording tool does auto-upload within seconds. You can also share your recordings on the cloud or Dropbox. Voice Recorder Audio Record has various features, few of its features are.

- You can easily edit and amend your recordings. It lets you trim the final version of your recording to remove any unwanted sound.
- The application is a quick audio player with multiple playback controls.
- You can easily share your recording via Dropbox or iCloud.
- The recording tool supports WAV, M4A, and CAF.
Ending Thoughts
The article is a detailed guide about the audio recording app iPhone. The audio recording for iPhone has been discussed from every possible aspect. The article also shared the steps to use the built-in voice recorder of the iPhone, and 5 amazing recording tools were also discussed.
After you have recorded the audio, there might be some problems with it. For such problems, we have Wondershare Filmora – Audio Editing. You can polish and edit your roughly recorded audio and make it smooth and flawless with Filmora.
For Win 7 or later (64-bit)
For macOS 10.12 or later
Filmora Audio Editor has multiple features. Among those, one feature is to Add Background Music to your recorded audio. Adding background music helps to maintain interest. Another feature of Audio Editing by Filmora is Split Audio. The feature is where you can split the original audio and use it like you want to. You can also Adjust Audio with Filmora Audio Editing.
Versatile Video Editor - Wondershare Filmora
An easy yet powerful editor
Numerous effects to choose from
Detailed tutorials provided by the official channel
02 5 Best Voice Recorder App for iPhone
Part 1. How to Record Voice on iPhone?
As mentioned earlier, things are a little different for iPhone users compared to Android phones. In the same way, the audio recording process is slightly different. iPhone has a built-in audio recorder, Voice Memo , that could be used to record sound on iPhone. Voice Memo is a great voice recorder. A few of its attractive features are.
- You can choose between compressed and uncompressed on Voice Memo for audio formats.
- With the search feature of this recorder, you can easily find your recordings.
- You can mark your recordings with the same name so that they can be accessed easily.
You might have a question in your mind about how to make a voice recording on iPhone? The answer to this question is shared below.
Step 1: First of all, you should locate the ‘Voice Memo’ application on your iPhone.

Step 2: Now, you should launch the application. You will see a big ‘Red’ button at the bottom of the screen. Simply hit that button to start the recording.

Step 3: After you are satisfied with the recording, you have to tap again on the big ‘Red’ square button to stop the audio recording.

Step 4: Now, beneath the recording, you will see a ‘Delete’ option and the other option on the left side is to ‘Edit’ the recording. You can set the playback speed, skip silence and also Enhance Recording option.

Step 5: Lastly, by clicking on the 3 vertical dots, you can copy and share your recording. The dialog box also allows you to edit, duplicate, etc.

Part 2. 5 Best Voice Recorder App for iPhone
Although iPhone has a built-in voice recorder, that has been discussed in the above section. We use different voice recording applications now and then. Here, a question arises: What could be the best audio recording app for iPhone? What could be done if you don’don’tt to use it?
There are alternative options for almost everything. In the same way, there are alternative applications that could be used to record sound on iPhone. The following section will shed light on the 5 best voice recorder iPhone applications.
1. Rev Voice Recorder & Memos
The first application to record audio on iPhone is Rev Voice Recorder. The voice recorder is customer-oriented with a very easy-to-understand interface. Rev has a very strong customer service team that deals immediately with problems if any problem is reported. Rev Voice Recorder is a free voice recorder for iPhone.

With Rev recorder, you don’don’te to struggle much as you can easily search for the recordings by name. It lets you view and then share your recordings. There are many more features of this voice recorder; let’let’sk about them.
- The most amazing thing about the Rev Voice Recorder is that it spontaneously pauses the recording for any incoming call or any other interruption.
- You can edit and trim the recording to remove any unwanted parts.
- The recorder is synced with Dropbox to backup your recordings.
- It offers high-quality voice recordings and playback.
2. Awesome Voice Recorder
The next recorder that comes in line that could be used as an alternative voice recorder iPhone is ‘Awe’ome Voice Recorder.’ Th’s recorder is great as it offers various voice recording tools. The interface is simple and basic. With Awesome Voice Recorder, you can pause your recording and then start again from where you left.

Like this, AVR has many crazy features that attract its users and facilitate them brilliantly at the same time. Let us share some of its features with you.
- The coolest thing about this recorder is that it stops in case there is any storage space problem or even a low battery.
- Awesome Voice Recorder supports Bluetooth.
- The fascinating factor of using AVR is its unlimited recording time.
- The recordings of this tool are playable in various media.
3. HT Professional Recorder
HT Professional Recorder is another awesome option to record audio on iPhone. The recorder is well known for its features and exceptional recording quality. HT Professional Recorder has this mind-blowing quality that it can record the audio even if the people talking are sitting several feet away from the iPhone.

Like this, HT Professional Recorder is full of surprises. The recorder has a lot to offer. Allow us to highlight its features.
- An auto-record option automatically starts the recording as soon as the application is launched.
- This reorder offers a unique feature that you can bookmark important moments.
- The recorder spontaneously skips any silence between the recording.
- You can also transfer files to other computers via a Wi-Fi connection.
4. AudioNote 2 – Voice Recorder
Another alternate option for the audio recording app iPhone is AudioNote 2. The application is unmatchable as it uses Amplified audio recording, where the tool will adapt according to the volume level as well as the size of the room.

With AudioNote 2, you can pause or restart the recording any time you want to. You will learn more about this recorder after going through its features.
- The recorder lets you import any pre-recorded audio of yours, and then you can add notes to it.
- AudioNote 2 has a brilliant feature of ‘Noi’e Reduction Filter.’ Wi’h this filter, you can eliminate any extra and unwanted sound from the background.
- The recording application automatically syncs the devices with either Dropbox or iCloud.
- With this recorder, you can adjust the playback speed with pitch correction when it comes to playback.
5. Voice Recorder – Audio Record
Lastly, another best audio recording app for iPhone is Voice Recorder. The recording tool does auto-upload within seconds. You can also share your recordings on the cloud or Dropbox. Voice Recorder Audio Record has various features, few of its features are.

- You can easily edit and amend your recordings. It lets you trim the final version of your recording to remove any unwanted sound.
- The application is a quick audio player with multiple playback controls.
- You can easily share your recording via Dropbox or iCloud.
- The recording tool supports WAV, M4A, and CAF.
Ending Thoughts
The article is a detailed guide about the audio recording app iPhone. The audio recording for iPhone has been discussed from every possible aspect. The article also shared the steps to use the built-in voice recorder of the iPhone, and 5 amazing recording tools were also discussed.
After you have recorded the audio, there might be some problems with it. For such problems, we have Wondershare Filmora – Audio Editing. You can polish and edit your roughly recorded audio and make it smooth and flawless with Filmora.
For Win 7 or later (64-bit)
For macOS 10.12 or later
Filmora Audio Editor has multiple features. Among those, one feature is to Add Background Music to your recorded audio. Adding background music helps to maintain interest. Another feature of Audio Editing by Filmora is Split Audio. The feature is where you can split the original audio and use it like you want to. You can also Adjust Audio with Filmora Audio Editing.
Versatile Video Editor - Wondershare Filmora
An easy yet powerful editor
Numerous effects to choose from
Detailed tutorials provided by the official channel
The Easy Path to Professional Audio Mixing in Adobe Premiere Pro
How to Easily Use Audio Track Mixer in Premiere Pro

Benjamin Arango
Mar 27, 2024• Proven solutions
If you are the type of person who loves mixing audio, then you’ll need to use this little-known function in Adobe Premiere Pro. While you might know about the Audio Clip Mixer, which lets you take on the audio between clips, the Audio Track Mixer allows you to control a whole track, which can be beneficial in its own way. Sometimes you need to make big sweeping changes that affect everything, and no one wants to change their all sounds clip by clip, which is where the track mixer comes in handy.
So how do you use the audio track mixer to manage your audio inside of a video? Well keep reading and we’ll show you!
- Part 1: How Does the Audio Track Mixer Work
- Part 2: How to Change the Audio Track Mixer Settings
- Part 3: Using Audio Track Mixer for Your next Project
Part 1: How Does the Audio Track Mixer Work
Mixing tracks is when audio is blended and mixed together in a sequence, and you have multiple sounds over one channel. For instance, when you watch a TV show and have music cut over two characters talking, that’s an example of mixed tracks. You can mix music, dialogue, sound effects, voiceovers, and other things to create a seamless finished product. You can even have different types of audio, or have different tracks play in different earphones of the headset if you want to.
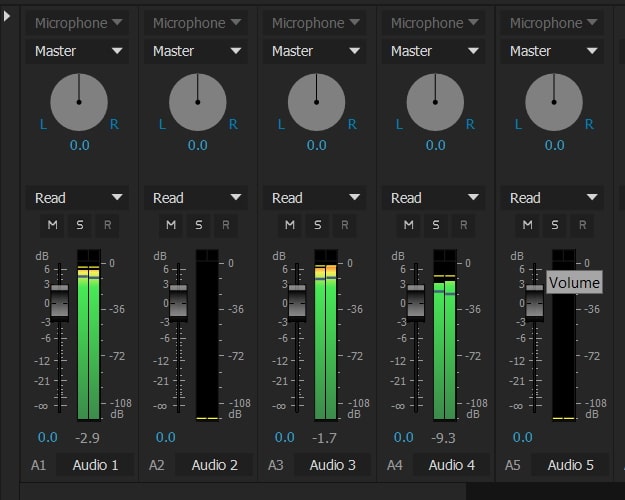
With audio track mixer, you can see each track being played in real time, not just on the timeline but also on its own screen. Then you can do a few things to each track such as:
- listen to tracks separately or together
- rename them
- control the volume and type of audio that each track is producing
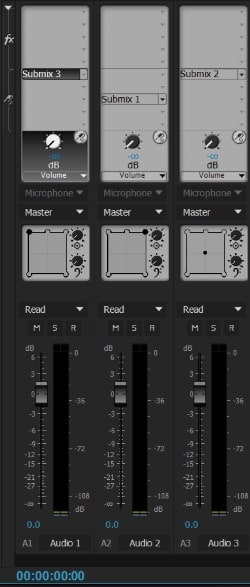
You can even look at meters while the main window is closed, which is helpful if you need to free up some space or organize your sounds while other data is shown.
You can see the sequence in real time as it is being played, see the peaks and valleys of the sound, and ensure that you can control the volume for every track. You’ll have total control over the sound, and the playback.
Part 2: How to Change the Audio Track Mixer Settings
If you are the type of person that likes to work with the sound as it happens, then you can. Recording and mixing on the fly is easy if you can avoid some mistakes .
Using mono tracks allows you to alter the sound for left and right settings, while stereo tracks produce two different signals for two different speakers. So, if you want to control where the sounds are coming from, then you can do so with a simple adjustment.
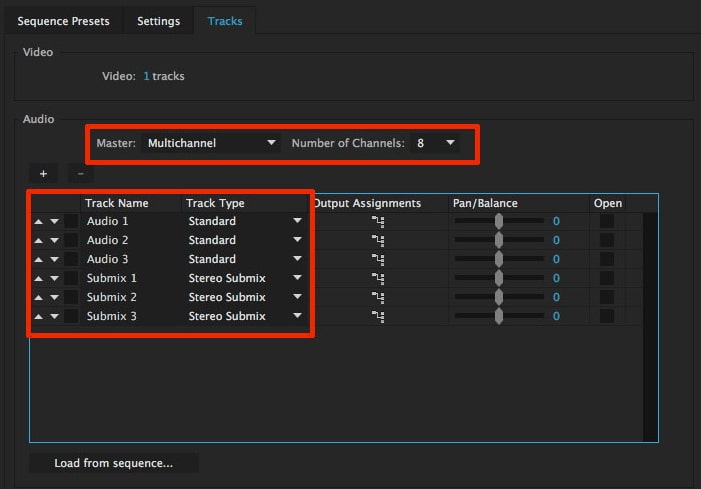
The audio files are edited both in the audio interface and in a timeline, where it is either imported or directly recorded. Then their waveforms can be viewed, the volume and sounds can be adjusted, and larger audio mixes can be divided into sub-mixes .
All your changes will happen on the timeline, and you’ll be able to listen to the new track instantly.
Part 3: Using Audio Track Mixer for Your next Project
If you are an aspiring filmmaker, working on a project, or just putting some clips and music together for fun, you need to use Audio Track Mixer to gain control over your sounds. Dealing with tracks, especially when you have several of them running on top of one another, can be a frustrating process of clicking and straining your ears to ensure that everything is just perfect.
Instead of wasting hours staring at the computer screen, using the Audio Track Mixer in Premiere Pro is a great way to cut down on the micromanagement and instead focus on what’s really important - getting a good quality sound out of your video and audio.
Use the track mixer to manage and customize your sounds, see the volume and base of each individual track in real time, and set when tracks come in and fade out. Using the mixer will allow you to have picture perfect sound quality, every single time.
Conclusion
If you want to edit audio in an easier way, here we recommend using Filmora . It is a video editor designed for people who want to enter a higher level of video editing. You can use FilmoraPro to do automatic audio sync. Equalize the highs and lows of your audio to normalize the volume of your clips and Reduce unwanted background sounds, like crowds or wind with this feature. It is a powerful audio editor for you. Download it now to have a try!

Benjamin Arango
Benjamin Arango is a writer and a lover of all things video.
Follow @Benjamin Arango
Benjamin Arango
Mar 27, 2024• Proven solutions
If you are the type of person who loves mixing audio, then you’ll need to use this little-known function in Adobe Premiere Pro. While you might know about the Audio Clip Mixer, which lets you take on the audio between clips, the Audio Track Mixer allows you to control a whole track, which can be beneficial in its own way. Sometimes you need to make big sweeping changes that affect everything, and no one wants to change their all sounds clip by clip, which is where the track mixer comes in handy.
So how do you use the audio track mixer to manage your audio inside of a video? Well keep reading and we’ll show you!
- Part 1: How Does the Audio Track Mixer Work
- Part 2: How to Change the Audio Track Mixer Settings
- Part 3: Using Audio Track Mixer for Your next Project
Part 1: How Does the Audio Track Mixer Work
Mixing tracks is when audio is blended and mixed together in a sequence, and you have multiple sounds over one channel. For instance, when you watch a TV show and have music cut over two characters talking, that’s an example of mixed tracks. You can mix music, dialogue, sound effects, voiceovers, and other things to create a seamless finished product. You can even have different types of audio, or have different tracks play in different earphones of the headset if you want to.

With audio track mixer, you can see each track being played in real time, not just on the timeline but also on its own screen. Then you can do a few things to each track such as:
- listen to tracks separately or together
- rename them
- control the volume and type of audio that each track is producing

You can even look at meters while the main window is closed, which is helpful if you need to free up some space or organize your sounds while other data is shown.
You can see the sequence in real time as it is being played, see the peaks and valleys of the sound, and ensure that you can control the volume for every track. You’ll have total control over the sound, and the playback.
Part 2: How to Change the Audio Track Mixer Settings
If you are the type of person that likes to work with the sound as it happens, then you can. Recording and mixing on the fly is easy if you can avoid some mistakes .
Using mono tracks allows you to alter the sound for left and right settings, while stereo tracks produce two different signals for two different speakers. So, if you want to control where the sounds are coming from, then you can do so with a simple adjustment.

The audio files are edited both in the audio interface and in a timeline, where it is either imported or directly recorded. Then their waveforms can be viewed, the volume and sounds can be adjusted, and larger audio mixes can be divided into sub-mixes .
All your changes will happen on the timeline, and you’ll be able to listen to the new track instantly.
Part 3: Using Audio Track Mixer for Your next Project
If you are an aspiring filmmaker, working on a project, or just putting some clips and music together for fun, you need to use Audio Track Mixer to gain control over your sounds. Dealing with tracks, especially when you have several of them running on top of one another, can be a frustrating process of clicking and straining your ears to ensure that everything is just perfect.
Instead of wasting hours staring at the computer screen, using the Audio Track Mixer in Premiere Pro is a great way to cut down on the micromanagement and instead focus on what’s really important - getting a good quality sound out of your video and audio.
Use the track mixer to manage and customize your sounds, see the volume and base of each individual track in real time, and set when tracks come in and fade out. Using the mixer will allow you to have picture perfect sound quality, every single time.
Conclusion
If you want to edit audio in an easier way, here we recommend using Filmora . It is a video editor designed for people who want to enter a higher level of video editing. You can use FilmoraPro to do automatic audio sync. Equalize the highs and lows of your audio to normalize the volume of your clips and Reduce unwanted background sounds, like crowds or wind with this feature. It is a powerful audio editor for you. Download it now to have a try!

Benjamin Arango
Benjamin Arango is a writer and a lover of all things video.
Follow @Benjamin Arango
Benjamin Arango
Mar 27, 2024• Proven solutions
If you are the type of person who loves mixing audio, then you’ll need to use this little-known function in Adobe Premiere Pro. While you might know about the Audio Clip Mixer, which lets you take on the audio between clips, the Audio Track Mixer allows you to control a whole track, which can be beneficial in its own way. Sometimes you need to make big sweeping changes that affect everything, and no one wants to change their all sounds clip by clip, which is where the track mixer comes in handy.
So how do you use the audio track mixer to manage your audio inside of a video? Well keep reading and we’ll show you!
- Part 1: How Does the Audio Track Mixer Work
- Part 2: How to Change the Audio Track Mixer Settings
- Part 3: Using Audio Track Mixer for Your next Project
Part 1: How Does the Audio Track Mixer Work
Mixing tracks is when audio is blended and mixed together in a sequence, and you have multiple sounds over one channel. For instance, when you watch a TV show and have music cut over two characters talking, that’s an example of mixed tracks. You can mix music, dialogue, sound effects, voiceovers, and other things to create a seamless finished product. You can even have different types of audio, or have different tracks play in different earphones of the headset if you want to.

With audio track mixer, you can see each track being played in real time, not just on the timeline but also on its own screen. Then you can do a few things to each track such as:
- listen to tracks separately or together
- rename them
- control the volume and type of audio that each track is producing

You can even look at meters while the main window is closed, which is helpful if you need to free up some space or organize your sounds while other data is shown.
You can see the sequence in real time as it is being played, see the peaks and valleys of the sound, and ensure that you can control the volume for every track. You’ll have total control over the sound, and the playback.
Part 2: How to Change the Audio Track Mixer Settings
If you are the type of person that likes to work with the sound as it happens, then you can. Recording and mixing on the fly is easy if you can avoid some mistakes .
Using mono tracks allows you to alter the sound for left and right settings, while stereo tracks produce two different signals for two different speakers. So, if you want to control where the sounds are coming from, then you can do so with a simple adjustment.

The audio files are edited both in the audio interface and in a timeline, where it is either imported or directly recorded. Then their waveforms can be viewed, the volume and sounds can be adjusted, and larger audio mixes can be divided into sub-mixes .
All your changes will happen on the timeline, and you’ll be able to listen to the new track instantly.
Part 3: Using Audio Track Mixer for Your next Project
If you are an aspiring filmmaker, working on a project, or just putting some clips and music together for fun, you need to use Audio Track Mixer to gain control over your sounds. Dealing with tracks, especially when you have several of them running on top of one another, can be a frustrating process of clicking and straining your ears to ensure that everything is just perfect.
Instead of wasting hours staring at the computer screen, using the Audio Track Mixer in Premiere Pro is a great way to cut down on the micromanagement and instead focus on what’s really important - getting a good quality sound out of your video and audio.
Use the track mixer to manage and customize your sounds, see the volume and base of each individual track in real time, and set when tracks come in and fade out. Using the mixer will allow you to have picture perfect sound quality, every single time.
Conclusion
If you want to edit audio in an easier way, here we recommend using Filmora . It is a video editor designed for people who want to enter a higher level of video editing. You can use FilmoraPro to do automatic audio sync. Equalize the highs and lows of your audio to normalize the volume of your clips and Reduce unwanted background sounds, like crowds or wind with this feature. It is a powerful audio editor for you. Download it now to have a try!

Benjamin Arango
Benjamin Arango is a writer and a lover of all things video.
Follow @Benjamin Arango
Benjamin Arango
Mar 27, 2024• Proven solutions
If you are the type of person who loves mixing audio, then you’ll need to use this little-known function in Adobe Premiere Pro. While you might know about the Audio Clip Mixer, which lets you take on the audio between clips, the Audio Track Mixer allows you to control a whole track, which can be beneficial in its own way. Sometimes you need to make big sweeping changes that affect everything, and no one wants to change their all sounds clip by clip, which is where the track mixer comes in handy.
So how do you use the audio track mixer to manage your audio inside of a video? Well keep reading and we’ll show you!
- Part 1: How Does the Audio Track Mixer Work
- Part 2: How to Change the Audio Track Mixer Settings
- Part 3: Using Audio Track Mixer for Your next Project
Part 1: How Does the Audio Track Mixer Work
Mixing tracks is when audio is blended and mixed together in a sequence, and you have multiple sounds over one channel. For instance, when you watch a TV show and have music cut over two characters talking, that’s an example of mixed tracks. You can mix music, dialogue, sound effects, voiceovers, and other things to create a seamless finished product. You can even have different types of audio, or have different tracks play in different earphones of the headset if you want to.

With audio track mixer, you can see each track being played in real time, not just on the timeline but also on its own screen. Then you can do a few things to each track such as:
- listen to tracks separately or together
- rename them
- control the volume and type of audio that each track is producing

You can even look at meters while the main window is closed, which is helpful if you need to free up some space or organize your sounds while other data is shown.
You can see the sequence in real time as it is being played, see the peaks and valleys of the sound, and ensure that you can control the volume for every track. You’ll have total control over the sound, and the playback.
Part 2: How to Change the Audio Track Mixer Settings
If you are the type of person that likes to work with the sound as it happens, then you can. Recording and mixing on the fly is easy if you can avoid some mistakes .
Using mono tracks allows you to alter the sound for left and right settings, while stereo tracks produce two different signals for two different speakers. So, if you want to control where the sounds are coming from, then you can do so with a simple adjustment.

The audio files are edited both in the audio interface and in a timeline, where it is either imported or directly recorded. Then their waveforms can be viewed, the volume and sounds can be adjusted, and larger audio mixes can be divided into sub-mixes .
All your changes will happen on the timeline, and you’ll be able to listen to the new track instantly.
Part 3: Using Audio Track Mixer for Your next Project
If you are an aspiring filmmaker, working on a project, or just putting some clips and music together for fun, you need to use Audio Track Mixer to gain control over your sounds. Dealing with tracks, especially when you have several of them running on top of one another, can be a frustrating process of clicking and straining your ears to ensure that everything is just perfect.
Instead of wasting hours staring at the computer screen, using the Audio Track Mixer in Premiere Pro is a great way to cut down on the micromanagement and instead focus on what’s really important - getting a good quality sound out of your video and audio.
Use the track mixer to manage and customize your sounds, see the volume and base of each individual track in real time, and set when tracks come in and fade out. Using the mixer will allow you to have picture perfect sound quality, every single time.
Conclusion
If you want to edit audio in an easier way, here we recommend using Filmora . It is a video editor designed for people who want to enter a higher level of video editing. You can use FilmoraPro to do automatic audio sync. Equalize the highs and lows of your audio to normalize the volume of your clips and Reduce unwanted background sounds, like crowds or wind with this feature. It is a powerful audio editor for you. Download it now to have a try!

Benjamin Arango
Benjamin Arango is a writer and a lover of all things video.
Follow @Benjamin Arango
The Ultimate Technique for Spotify Song Lifting: A Comprehensive Tutorial
When you rip music from a CD or an app, you’re copying songs from a source to your PC. During the ripping process, the ripping software compresses each song and stores it on your drive as a Windows Media Audio (WMA), WAV, or MP3 file. The era of CDs and cassettes is long gone today; we talk about music apps and how to extract mp3 sounds from them.
In this article
02 How to Rip Spotify Music on Windows and Mac?
03 How to Rip Music from Spotify Online?
Part 1. What Is Spotify Ripper?
We all know Spotify is a fantastic app to listen to music, but it only works online. So, if you wish to listen to songs while you aren’t connected to the internet, you have one option. You can rip audios using a full feature Spotify music ripper to get unlimited playback on all devices. Save the audio files in MP3, FLAC and other formats. Let’s see how you can go about ripping songs from Spotify.
Part 2. How to Rip Spotify Music on Windows and Mac?
If you like some playlists or songs on Spotify, you might want to listen, download and save them on a computer. But to do this, you have to subscribe to the app. However, premium users can play and download songs on the app itself. They can’t listen to them on other music players. So, you may ask if there is a way to rip and save Mp3 songs from Spotify to the computer for free?
Yes! If you find the right Spotify ripper, you can enjoy music anywhere offline without any limitations. Let’s have a look at these five powerful rippers that allows you to rip from Spotify.
Method 1. Try A Streaming Audio Recorder
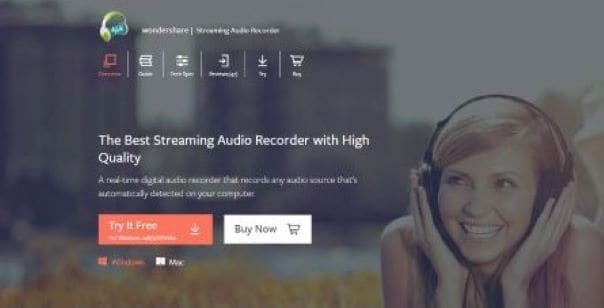
This is a perfect Spotify ripper for Windows and MAC. It can record any sound and save it in MP3, M4A, and other formats. You can adjust the output audio quality using this tool.
It streamlines downloading music from Spotify and many other various online sources. It has an intuitive interface, so it helps the users access it quickly. Every song you record gets saved with the details like song name, artist, and album title. This enables the users to track the recordings. If you are thinking of using this software for a long time, purchase the full version because the free tool only lets you record a few points.
Wondershare DemoCreator has a good set of features. It runs smoothly and does the work in the best way. Simply launch the software on your computer and stream the songs you like to save them to your device. Find the recorded audio files on the ‘newly recorded’ menu.
Method 2. Audacity
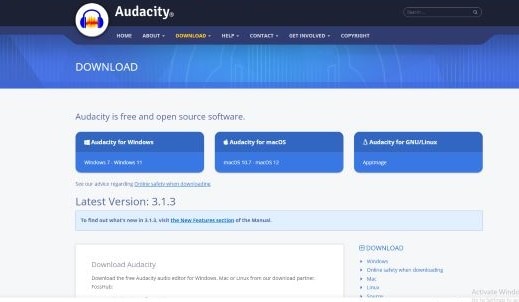
Audacity is one old and famous recorder that works as a music extractor. You can rip mp3 songs from Spotify on Mac, Windows, LINUX, and other operating systems. Audacity lets you save audio from many sources for free. It’s a flexible software that can even edit mp3 tracks and save them on your computer MP3, and so on. Do you know free, powerful streaming audio recorder and editor like Audacity? Let us know!!
Method 3. AllToMP3
AllToMP3 is another music ripping app that works well on Mac, Windows and Linux. It allows you to rip music from Spotify, YouTube, Deezer and SoundCloud. The process takes 3 simple steps to rip the mp3 songs. You do not have to keep the Spotify app running while converting the songs. Just copy and paste the song/album/playlist and click Enter key on your keyboard. This open-source app is free for Spotify users. However, you can only export the files in MP3.

Method 4. NoteBurner Spotify Music Converter
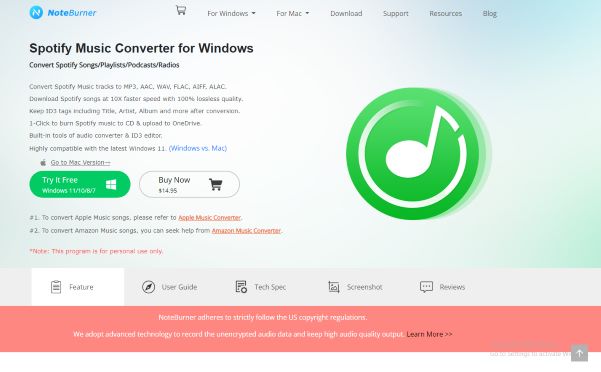
Convert any podcast, radio, or song on Spotify into any format- MP3, WAC, AIFF, and FLAC on NoteBurner without losing audio quality. You can listen to converted audio offline on any device.
This music extractor has a conversion speed that is 5 times faster than its previous versions. Simply select the song and the output format and click ‘Convert’. The conversion process is simple. You can use the free version with limited features or buy a license for $14.95
Method 5. Leawo Music Recorder
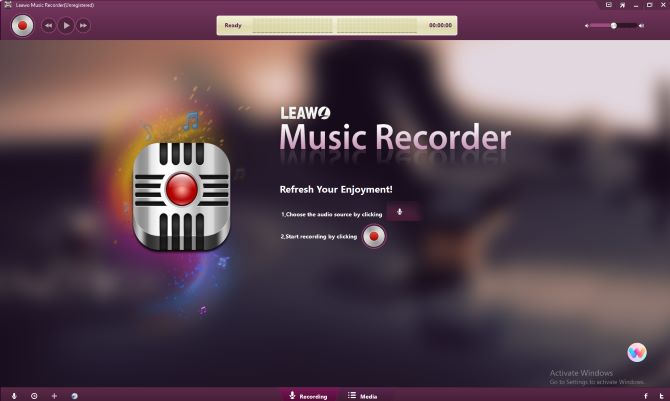
You can record high-quality songs, podcasts, and playlists on Leawo without losing the originality. Leawo also records audio from multiple sources apart from Spotify. You may save the audio file in MP3 or other output formats. It has additional features like scheduling the start and end time of recording and even editing the recordings. It allows you to customize downloaded playlists. There is a free trial available, and the paid version is $19.95.
What are you waiting for? Find a music extractor that is most suitable for you.
Part 3. How to Rip Music from Spotify Online?
The above tools are the third-party programs used to extract music from various sources. They are easy to install on your computer and other devices. However, if you do not wish to download a music extractor, you can use a Spotify ripper online. Let’s check out some of the possible options for you-
1. spotdl. com
You can download 500 songs a month on spotdl.com. You can upgrade spotdl so that you crip Spotify songs and playlists and save metadata such as album art, album, artist, etc. It does not support albums. However, it’s free and online.
2. TuneFab Spotify Music Converter
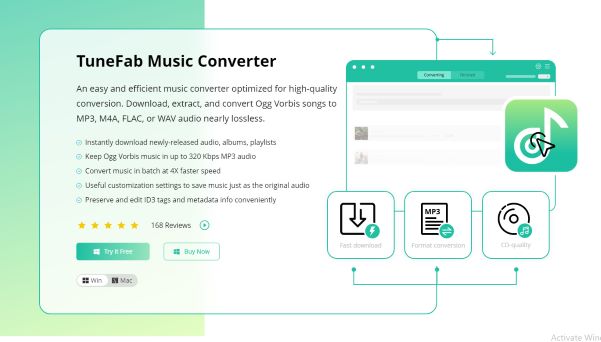
This is a powerful desktop program to convert Spotify music without compromising quality. It can convert songs into MP3, M4A, FLAC, or WAV formats.
The conversion speed is 5 times more than other music extractors. You’ll find a built-in Spotify web player in this program, so you can convert efficiently in batches without downloading the app. It also supports batch conversions with fast speed. TuneFab Spotify Music Converter offers a free trial with some limitations.
So, if you are looking for a user-friendly way to rip music, choose software that supports easy music conversions. This way, you can enjoy the latest playlists on any device. You can even customize the output files.
Closing Word
There are so many wonderful Spotify rippers for you to get MP3 files, online or offline, paid or free. Some of these rippers run in real-time, so it might take some time to rip tracks on Spotify. In this case, look for the ones with good conversion speed. So, what are you waiting for? Get searching!
02 How to Rip Spotify Music on Windows and Mac?
03 How to Rip Music from Spotify Online?
Part 1. What Is Spotify Ripper?
We all know Spotify is a fantastic app to listen to music, but it only works online. So, if you wish to listen to songs while you aren’t connected to the internet, you have one option. You can rip audios using a full feature Spotify music ripper to get unlimited playback on all devices. Save the audio files in MP3, FLAC and other formats. Let’s see how you can go about ripping songs from Spotify.
Part 2. How to Rip Spotify Music on Windows and Mac?
If you like some playlists or songs on Spotify, you might want to listen, download and save them on a computer. But to do this, you have to subscribe to the app. However, premium users can play and download songs on the app itself. They can’t listen to them on other music players. So, you may ask if there is a way to rip and save Mp3 songs from Spotify to the computer for free?
Yes! If you find the right Spotify ripper, you can enjoy music anywhere offline without any limitations. Let’s have a look at these five powerful rippers that allows you to rip from Spotify.
Method 1. Try A Streaming Audio Recorder
This is a perfect Spotify ripper for Windows and MAC. It can record any sound and save it in MP3, M4A, and other formats. You can adjust the output audio quality using this tool.
It streamlines downloading music from Spotify and many other various online sources. It has an intuitive interface, so it helps the users access it quickly. Every song you record gets saved with the details like song name, artist, and album title. This enables the users to track the recordings. If you are thinking of using this software for a long time, purchase the full version because the free tool only lets you record a few points.
Wondershare DemoCreator has a good set of features. It runs smoothly and does the work in the best way. Simply launch the software on your computer and stream the songs you like to save them to your device. Find the recorded audio files on the ‘newly recorded’ menu.

Method 2. Audacity
Audacity is one old and famous recorder that works as a music extractor. You can rip mp3 songs from Spotify on Mac, Windows, LINUX, and other operating systems. Audacity lets you save audio from many sources for free. It’s a flexible software that can even edit mp3 tracks and save them on your computer MP3, and so on. Do you know free, powerful streaming audio recorder and editor like Audacity? Let us know!!

Method 3. AllToMP3
AllToMP3 is another music ripping app that works well on Mac, Windows and Linux. It allows you to rip music from Spotify, YouTube, Deezer and SoundCloud. The process takes 3 simple steps to rip the mp3 songs. You do not have to keep the Spotify app running while converting the songs. Just copy and paste the song/album/playlist and click Enter key on your keyboard. This open-source app is free for Spotify users. However, you can only export the files in MP3.

Method 4. NoteBurner Spotify Music Converter
Convert any podcast, radio, or song on Spotify into any format- MP3, WAC, AIFF, and FLAC on NoteBurner without losing audio quality. You can listen to converted audio offline on any device.
This music extractor has a conversion speed that is 5 times faster than its previous versions. Simply select the song and the output format and click ‘Convert’. The conversion process is simple. You can use the free version with limited features or buy a license for $14.95

Method 5. Leawo Music Recorder
You can record high-quality songs, podcasts, and playlists on Leawo without losing the originality. Leawo also records audio from multiple sources apart from Spotify. You may save the audio file in MP3 or other output formats. It has additional features like scheduling the start and end time of recording and even editing the recordings. It allows you to customize downloaded playlists. There is a free trial available, and the paid version is $19.95.

What are you waiting for? Find a music extractor that is most suitable for you.
Part 3. How to Rip Music from Spotify Online?
The above tools are the third-party programs used to extract music from various sources. They are easy to install on your computer and other devices. However, if you do not wish to download a music extractor, you can use a Spotify ripper online. Let’s check out some of the possible options for you-
1. spotdl. com
You can download 500 songs a month on spotdl.com. You can upgrade spotdl so that you crip Spotify songs and playlists and save metadata such as album art, album, artist, etc. It does not support albums. However, it’s free and online.

2. TuneFab Spotify Music Converter
This is a powerful desktop program to convert Spotify music without compromising quality. It can convert songs into MP3, M4A, FLAC, or WAV formats.
The conversion speed is 5 times more than other music extractors. You’ll find a built-in Spotify web player in this program, so you can convert efficiently in batches without downloading the app. It also supports batch conversions with fast speed. TuneFab Spotify Music Converter offers a free trial with some limitations.
So, if you are looking for a user-friendly way to rip music, choose software that supports easy music conversions. This way, you can enjoy the latest playlists on any device. You can even customize the output files.

Closing Word
There are so many wonderful Spotify rippers for you to get MP3 files, online or offline, paid or free. Some of these rippers run in real-time, so it might take some time to rip tracks on Spotify. In this case, look for the ones with good conversion speed. So, what are you waiting for? Get searching!
02 How to Rip Spotify Music on Windows and Mac?
03 How to Rip Music from Spotify Online?
Part 1. What Is Spotify Ripper?
We all know Spotify is a fantastic app to listen to music, but it only works online. So, if you wish to listen to songs while you aren’t connected to the internet, you have one option. You can rip audios using a full feature Spotify music ripper to get unlimited playback on all devices. Save the audio files in MP3, FLAC and other formats. Let’s see how you can go about ripping songs from Spotify.
Part 2. How to Rip Spotify Music on Windows and Mac?
If you like some playlists or songs on Spotify, you might want to listen, download and save them on a computer. But to do this, you have to subscribe to the app. However, premium users can play and download songs on the app itself. They can’t listen to them on other music players. So, you may ask if there is a way to rip and save Mp3 songs from Spotify to the computer for free?
Yes! If you find the right Spotify ripper, you can enjoy music anywhere offline without any limitations. Let’s have a look at these five powerful rippers that allows you to rip from Spotify.
Method 1. Try A Streaming Audio Recorder
This is a perfect Spotify ripper for Windows and MAC. It can record any sound and save it in MP3, M4A, and other formats. You can adjust the output audio quality using this tool.
It streamlines downloading music from Spotify and many other various online sources. It has an intuitive interface, so it helps the users access it quickly. Every song you record gets saved with the details like song name, artist, and album title. This enables the users to track the recordings. If you are thinking of using this software for a long time, purchase the full version because the free tool only lets you record a few points.
Wondershare DemoCreator has a good set of features. It runs smoothly and does the work in the best way. Simply launch the software on your computer and stream the songs you like to save them to your device. Find the recorded audio files on the ‘newly recorded’ menu.

Method 2. Audacity
Audacity is one old and famous recorder that works as a music extractor. You can rip mp3 songs from Spotify on Mac, Windows, LINUX, and other operating systems. Audacity lets you save audio from many sources for free. It’s a flexible software that can even edit mp3 tracks and save them on your computer MP3, and so on. Do you know free, powerful streaming audio recorder and editor like Audacity? Let us know!!

Method 3. AllToMP3
AllToMP3 is another music ripping app that works well on Mac, Windows and Linux. It allows you to rip music from Spotify, YouTube, Deezer and SoundCloud. The process takes 3 simple steps to rip the mp3 songs. You do not have to keep the Spotify app running while converting the songs. Just copy and paste the song/album/playlist and click Enter key on your keyboard. This open-source app is free for Spotify users. However, you can only export the files in MP3.

Method 4. NoteBurner Spotify Music Converter
Convert any podcast, radio, or song on Spotify into any format- MP3, WAC, AIFF, and FLAC on NoteBurner without losing audio quality. You can listen to converted audio offline on any device.
This music extractor has a conversion speed that is 5 times faster than its previous versions. Simply select the song and the output format and click ‘Convert’. The conversion process is simple. You can use the free version with limited features or buy a license for $14.95

Method 5. Leawo Music Recorder
You can record high-quality songs, podcasts, and playlists on Leawo without losing the originality. Leawo also records audio from multiple sources apart from Spotify. You may save the audio file in MP3 or other output formats. It has additional features like scheduling the start and end time of recording and even editing the recordings. It allows you to customize downloaded playlists. There is a free trial available, and the paid version is $19.95.

What are you waiting for? Find a music extractor that is most suitable for you.
Part 3. How to Rip Music from Spotify Online?
The above tools are the third-party programs used to extract music from various sources. They are easy to install on your computer and other devices. However, if you do not wish to download a music extractor, you can use a Spotify ripper online. Let’s check out some of the possible options for you-
1. spotdl. com
You can download 500 songs a month on spotdl.com. You can upgrade spotdl so that you crip Spotify songs and playlists and save metadata such as album art, album, artist, etc. It does not support albums. However, it’s free and online.

2. TuneFab Spotify Music Converter
This is a powerful desktop program to convert Spotify music without compromising quality. It can convert songs into MP3, M4A, FLAC, or WAV formats.
The conversion speed is 5 times more than other music extractors. You’ll find a built-in Spotify web player in this program, so you can convert efficiently in batches without downloading the app. It also supports batch conversions with fast speed. TuneFab Spotify Music Converter offers a free trial with some limitations.
So, if you are looking for a user-friendly way to rip music, choose software that supports easy music conversions. This way, you can enjoy the latest playlists on any device. You can even customize the output files.

Closing Word
There are so many wonderful Spotify rippers for you to get MP3 files, online or offline, paid or free. Some of these rippers run in real-time, so it might take some time to rip tracks on Spotify. In this case, look for the ones with good conversion speed. So, what are you waiting for? Get searching!
02 How to Rip Spotify Music on Windows and Mac?
03 How to Rip Music from Spotify Online?
Part 1. What Is Spotify Ripper?
We all know Spotify is a fantastic app to listen to music, but it only works online. So, if you wish to listen to songs while you aren’t connected to the internet, you have one option. You can rip audios using a full feature Spotify music ripper to get unlimited playback on all devices. Save the audio files in MP3, FLAC and other formats. Let’s see how you can go about ripping songs from Spotify.
Part 2. How to Rip Spotify Music on Windows and Mac?
If you like some playlists or songs on Spotify, you might want to listen, download and save them on a computer. But to do this, you have to subscribe to the app. However, premium users can play and download songs on the app itself. They can’t listen to them on other music players. So, you may ask if there is a way to rip and save Mp3 songs from Spotify to the computer for free?
Yes! If you find the right Spotify ripper, you can enjoy music anywhere offline without any limitations. Let’s have a look at these five powerful rippers that allows you to rip from Spotify.
Method 1. Try A Streaming Audio Recorder
This is a perfect Spotify ripper for Windows and MAC. It can record any sound and save it in MP3, M4A, and other formats. You can adjust the output audio quality using this tool.
It streamlines downloading music from Spotify and many other various online sources. It has an intuitive interface, so it helps the users access it quickly. Every song you record gets saved with the details like song name, artist, and album title. This enables the users to track the recordings. If you are thinking of using this software for a long time, purchase the full version because the free tool only lets you record a few points.
Wondershare DemoCreator has a good set of features. It runs smoothly and does the work in the best way. Simply launch the software on your computer and stream the songs you like to save them to your device. Find the recorded audio files on the ‘newly recorded’ menu.

Method 2. Audacity
Audacity is one old and famous recorder that works as a music extractor. You can rip mp3 songs from Spotify on Mac, Windows, LINUX, and other operating systems. Audacity lets you save audio from many sources for free. It’s a flexible software that can even edit mp3 tracks and save them on your computer MP3, and so on. Do you know free, powerful streaming audio recorder and editor like Audacity? Let us know!!

Method 3. AllToMP3
AllToMP3 is another music ripping app that works well on Mac, Windows and Linux. It allows you to rip music from Spotify, YouTube, Deezer and SoundCloud. The process takes 3 simple steps to rip the mp3 songs. You do not have to keep the Spotify app running while converting the songs. Just copy and paste the song/album/playlist and click Enter key on your keyboard. This open-source app is free for Spotify users. However, you can only export the files in MP3.

Method 4. NoteBurner Spotify Music Converter
Convert any podcast, radio, or song on Spotify into any format- MP3, WAC, AIFF, and FLAC on NoteBurner without losing audio quality. You can listen to converted audio offline on any device.
This music extractor has a conversion speed that is 5 times faster than its previous versions. Simply select the song and the output format and click ‘Convert’. The conversion process is simple. You can use the free version with limited features or buy a license for $14.95

Method 5. Leawo Music Recorder
You can record high-quality songs, podcasts, and playlists on Leawo without losing the originality. Leawo also records audio from multiple sources apart from Spotify. You may save the audio file in MP3 or other output formats. It has additional features like scheduling the start and end time of recording and even editing the recordings. It allows you to customize downloaded playlists. There is a free trial available, and the paid version is $19.95.

What are you waiting for? Find a music extractor that is most suitable for you.
Part 3. How to Rip Music from Spotify Online?
The above tools are the third-party programs used to extract music from various sources. They are easy to install on your computer and other devices. However, if you do not wish to download a music extractor, you can use a Spotify ripper online. Let’s check out some of the possible options for you-
1. spotdl. com
You can download 500 songs a month on spotdl.com. You can upgrade spotdl so that you crip Spotify songs and playlists and save metadata such as album art, album, artist, etc. It does not support albums. However, it’s free and online.

2. TuneFab Spotify Music Converter
This is a powerful desktop program to convert Spotify music without compromising quality. It can convert songs into MP3, M4A, FLAC, or WAV formats.
The conversion speed is 5 times more than other music extractors. You’ll find a built-in Spotify web player in this program, so you can convert efficiently in batches without downloading the app. It also supports batch conversions with fast speed. TuneFab Spotify Music Converter offers a free trial with some limitations.
So, if you are looking for a user-friendly way to rip music, choose software that supports easy music conversions. This way, you can enjoy the latest playlists on any device. You can even customize the output files.

Closing Word
There are so many wonderful Spotify rippers for you to get MP3 files, online or offline, paid or free. Some of these rippers run in real-time, so it might take some time to rip tracks on Spotify. In this case, look for the ones with good conversion speed. So, what are you waiting for? Get searching!
Also read:
- New 2024 Approved Find Terror-Eliciting Shout Synths
- Discover the Best 8 Rain Sound Archives for Free Download - A Complete List
- Updated In 2024, Leading MP3-to-Text Conversion Tools Unveiled
- Updated 2024 Approved 10 FREE Online MP3 to Text Converters-Wondershare Filmora
- Updated Future-Proofing Your Productions Innovative Audio Editing Software Roundup for 2024
- Updated The Essential List Top 8 Android DAWs Revolutionizing Music
- New Stop Mobile Audio Dampening Feature in iOS Settings for 2024
- Updated Top Tips for Integrating Auditory Elements with Visual Images
- Beyond Default Modifying Siris Voice Across Apple Ecosystems for 2024
- New Elevating Video Clarity Methods for Eradicating Inaudible Roughness in Soundtracks
- Mastering the Use of Thrilling Soundscapes to Elevate Your Films Musical Composition
- Updated 2024 Approved The 5 Most Advanced Tools for Shaping and Sculpting Sound
- Updated Compile of High-Quality Sound Spectrum Templates to Elevate Video Production - 2023 Update for 2024
- Updated 2024 Approved The Ultimate Guide to the Top 5 Most Advanced Live Audio Modifiers
- 2024 Approved The Art of Harmonizing Moving Images and Sounds (A 2023 Approach)
- New 2024 Approved Vintage Vibes Curating Melodic Selections for Nuptial Video Making
- In 2024, Podcasting Made Simple Your Step-by-Step Guide to Effortless Production
- In 2024, The Leading Voice Alteration and Production Software for Aspiring Sopranos & Tenors
- Mastering Silence Effective Video Noise Reduction Techniques in Adobe Premiere Pro for 2024
- Updated Identify the Aural Representation of a Bell Clangor for 2024
- New Reverse Engineering Audioscape Unveiling Premium Sound Reversal Software
- New The Essential Guide to Mastering Your Auditory Projects Using TwistedWave
- Soundscape Seeking Outstanding Claps and Cheers
- New 2024 Approved Echoes of Celebration Finding the Perfect Applaud Tones
- Synchronized Sonic Space Techniques for Achieving Uniform Auditory Dynamics Across Video Content for 2024
- New The Comprehensive Guide to Adjusting Siris Voice in iOS Devices for 2024
- In 2024, The Essential List of Acoustic Amplifiers and Boosters for Android & iOS Users, 2023 Edition
- New Expert Tips on Pure Soundtrack Creation Eliminating Unwanted Noise with Wondershare Filmora
- New 2024 Approved A Step-by-Step Approach to Implementing Audio Volume Diminuation
- Updated 2024 Approved The Pinnacle of Sound in Film - Our Curated List of the Top 8 Sounds From 2023
- Updated How to Add Music to Final Cut Pro for 2024
- The Ultimate Mac User Manual Efficient Techniques for Storing Ambient Sounds
- New 6 Top Chrome Audio Recorder
- 2024 Approved A Comprehensive Selection of Free, Must-Hear Game Sounds
- Updated In 2024, The Art of Sound Alteration A Critical Review of Leading Instant Voice Transformation Software
- New Capturing Auditory Essence Waveform Visualization & Dynamic Animations in Avid Media Composer for 2024
- 2024 Approved Excellence in Audio Tweaking – Top 10 Song Editors for Windows/Mac Platforms
- Updated In 2024, Balancing Act Techniques for Achieving Even Loudness in DaVinci Resolve
- Updated How Does Gain Staging Impact the Overall Fidelity of Recorded Tracks, In 2024
- New Improve Auditory Experience Through Crossfade Adjustments for 2024
- New In 2024, Silent Interludes, Harmonious Sounds Expert Techniques for Audio Ducking in Adobe Premiere Pro on a Mac Computer
- Updated Finding the Place for an Agitated Dogs Vocal Display for 2024
- Audio Tranquility in Action Fading and Pulsating Sounds Made Easy in Adobe After Effects for 2024
- Updated In 2024, Text-to-Audio Conversion From Words to MP3 Across All Devices
- How To Restore a Bricked Infinix Note 30 VIP Racing Edition Back to Operation | Dr.fone
- 2024 Approved Top Tools To Create Blend Image Collage
- 11 Ways to Fix it When My Itel P55+ Wont Charge | Dr.fone
- Is Your Apple iPhone 11 Pro in Security Lockout? Proper Ways To Unlock
- Here are Some Pro Tips for Pokemon Go PvP Battles On Itel P40 | Dr.fone
- In 2024, About Vivo S18 Pro FRP Bypass
- What To Do When Oppo Reno 10 Pro+ 5G Has Black Screen of Death? | Dr.fone
- 11 Best Location Changers for Samsung Galaxy S23 Ultra | Dr.fone
- New 2024 Approved S Leading Lego Stop Motion Studios and Filmmakers
- How to Soft Reset Nubia Red Magic 8S Pro phone? | Dr.fone
- How to Use Phone Clone to Migrate Your Realme Narzo N55 Data? | Dr.fone
- How To Revive Your Bricked Vivo S17e in Minutes | Dr.fone
- How to Change Location on TikTok to See More Content On your Vivo S17e | Dr.fone
- Title: A Complete Guide to Help You Record Audio on iPhone
- Author: Paul
- Created at : 2024-05-20 01:47:40
- Updated at : 2024-05-21 01:47:40
- Link: https://voice-adjusting.techidaily.com/a-complete-guide-to-help-you-record-audio-on-iphone/
- License: This work is licensed under CC BY-NC-SA 4.0.

