
:max_bytes(150000):strip_icc():format(webp)/twittermute-5bc42bbd46e0fb002679ac08.jpg)
2024 Approved Taming Audio Chaos Advanced Tips and Tricks for Reducing Room Noise in Microphones
Taming Audio Chaos: Advanced Tips and Tricks for Reducing Room Noise in Microphones
The noise removal tool allows users to remove noise from voice recording to optimize live streaming. With the help of these noise removal tools, users can enjoy clearer and more focused audio. Some microphones can filter background noise to improve the audio experience. The better the experience, the better results you can get from your video content creation.
Seeing all the benefits of controlling noise in recordings and videos, you might seek a tool for this. In this article, we will talk about online and offline tools to let you remove noise from recordings.
AI Background Noise Remover A cross-platform for facilitating your video editing process by offering valuable benefits!
Free Download Free Download Learn More

Part 1. What Are Some Practical Applications for Using Microphone Background Noise Reducers?
Microphone filter background noise reducers help clear your voice when you’re speaking into a mic. There are many online and offline tools available that can help reduce the noise. You can make use of these noise-reducer tools for the following applications:
Voice and Video Calls
When you are video chatting for professional purposes, background noise can cause interruptions. In such situations, you can remove noise from the recording to make the call clearer. Without any disturbance from the background, you can communicate effectively.
Online Meetings
During online meetings, background noise reducers can help you sound better. When you’re in a noisy environment, the application of these tools becomes important. This helps you maintain the professional stature of your meeting.
Gaming Live Streaming
Gamers often reduce microphone background noise with the help of such tools. It can help them improve the audio of their in-game sound by eliminating distractions. If you consider monetizing your gaming channels, it is important to ensure there’s no noise.
Recording Music
Musicians and home studio enthusiasts use noise reducers to clean up their recordings. With the help of this voice recorder noise reduction, they create more polished music. This can inculcate a system of better music composition on a smaller scale.
Part 2. Looking Into Some Prominent Options To Reduce Microphone Background Noise
Many professionals search for tools to tackle microphone background noise. As clear audio is crucial in various fields, removing noise from recordings has become necessary. In this section, we will talk about offline and online solutions to this noise problem. After going through this section, you will be able to choose the best tool for audio content creation.
Section 1: Offline Methods for Reducing Microphone Background Noise
When it comes to reducing background noise using offline methods, there are several tools you can use. Here, we will introduce you to tools that will help you in this regard. These tools can remove background noise from voice recording in just a few clicks.
1. Wondershare UniConverter
Wondershare UniConverter removes noise from the microphone with its AI-powered technology. It detects and removes voices such as wind, traffic, rain, or fan noise. Additionally, you can remove static, echo, talking noise, and humming. This AI tool is compatible and supports over 1,000 formats of audio and video files. The support of batch processing allows you to denoise a video and audio in an effective manner.

Key Features
- You can improve the quality of your video blogs by removing unwanted talking noises.
- It denoises a recorded video from the voices of keyboard sounds, echo, and hissing sounds.
- This AI tool offers a powerful video toolbox to convert and edit your denoised videos.
2. Krisp
Krisp enhances the video quality of online meetings and additionally provides help from AI. With this tool, you can make your voice clear during your meeting and get a meeting assistant. It denoises a video and removes noise from the microphone, ensuring distraction-free calls. Users can remove different noise types on this tool, such as barking dogs and crying babies.

Key Features
- You can keep your voice only in the call with its noise cancellation feature.
- It removes the background voices of other people talking in the same place.
- Krisp can remove echoes caused by wall reflections and those originating from your own voice.
3. Audacity
Audacity reduces microphone background noise such as whistles, buzzes, hiss, and whines. This tool is suitable for irregular noise, such as from traffic or an audience. During noise reduction, you can filter out the noise in different DB values. Moreover, users can customize the sensitivity and frequency smoothing of noise bands. It calculates the statistics of the noise with an automation process.

Key Features
- The notch filter feature of this tool reduces the mains hum or a high-pitched whistle.
- In the residue section, it lets you hear the sound that the tool filters out.
- This AI tool supports cassette tapes and reduces sound from them in an efficient way.
4. SoliCall Pro
SoliCall Pro enhances call audio quality on Windows PCs. This tool works by performing bi-directional noise reduction and echo cancellation. You can remove non-human and even human voices while consuming minimal CPU resources. The software is easy to integrate with soft-phone and VoIP applications, like Zoom, Skype, and Teams. It supports call recording and works on almost all Windows versions.

Key Features
- It offers reference-based noise reduction to remove the voices of others during announcements.
- The profile-based noise reduction technology attenuates non-human sounds like a dog bark.
- A classical, powerful, and robust noise algorithm cancels noise.
5. Izotope RX10
Izotope RX10 offers audio repair and background noise reduction. It combines visual tools from DAWs with spectrogram displays for powerful audio editing. The goal of this tool is seamless repair without introducing distracting artifacts. Moreover, its focus is to find the balance between problem reduction and preserving the original audio quality.

Key Features
- It replaces damaged or missing audio sections with natural-sounding patches.
- The tool eradicates pops, clicks, and mouth noises without introducing artifacts.
- You can achieve precise repair of audible analog and digital clipping.
Section 2: Online Methods For Reducing Microphone Background Noise
When musicians record, their microphone is bound to pick up sounds like static or noises. While there is no clear option to get rid of the noise completely, there is still one solution to it. There are a series of software and tools that can help you reduce microphone background noise. So, let’s explore the top tools that can help you reduce background noise :
1. Flixier
Flixier is an online audio enhancement tool that removes background noise from voice recording. It removes any type of noise and makes your content sound professional. Additionally, all you have to do is upload your audio file. After that, you can access the enhanced audio menu and choose to remove background noise. This feature will let you aid out background noises and lets you create online videos.

Key Features
- Flixier offers a cloud server to let you reduce microphone background noise without leaving the browser.
- You can use the fade-in and fade-out effects to give visual transitions to your audio tracks.
- There is also a feature for removing and replacing audio from your videos.
2. LALAL.AI
LALAL.AI is an AI-based application that can remove noise from voice recording. This platform utilizes modern technology like “Phoenix” to deliver quality results. Moreover, users can upload their audio files ranging from 50 MB to 2GB. Furthermore, they can convert, change, and remove any instrumental noise from audio and video. These files can include formats like MP3, AVI, or MKV.

Key Features
- You can add up to 20 files at a time to remove noise from voice recording.
- It can detach any background and musical instruments from your video and audio.
- There are special tools that can extract instruments like drums, pianos, and electric guitars.
3. Cleanvoice AI
Cleanvoice is a powerful AI audio editing tool that can remove unwanted sounds. These sounds can include background noises, stuttering, or voices. Additionally, Cleanvoice also provides comprehensive support in creating podcasts. It also offers help in assisting with the pre-production of podcasts. Furthermore, this tool ensures that your podcast achieves professional professional-level excellence.

Key Features
- This tool ensures that your audio is free from any distractions like traffic noise.
- Cleanvoice reduces noise recording from your podcast for a clearer experience.
- You can now enjoy an engaging podcast as it removes long and boring pauses.
4. Media.io
Media.io is an excellent online platform that removes background noises with an AI-integrated system. Its features include various types of audio files like music, songs, and recordings. Moreover, its feature allows musicians to remove noise from voice recording. This tool can also remove noises with any type of audio file like MP3, WMA, or others. Furthermore, Media.io provides these features and services free of cost.

Key Features
- This tool removes background noise from voice recordings like hum or wind sounds.
- You can remove background noise from audio files, including songs, music, or recordings.
- It also offers a fine-tuning feature where you can optimize your audio according to your needs.
5. Podcastle
Podcastle is an outstanding AI background noise reduction tool. This tool can remove annoying noises like static, chatter, or voices in your audio. Moreover, its noise cancellation feature removes microphone background noise and delivers clean audio. Furthermore, it offers sound enhancement features that can generate clean audio.

Key Features
- This tool automatically removes silent segments and long pauses in your audio track.
- You can add various sound effects to your track with its long music collection.
- It has other editing features like text-to-speech, voice cloning, and others.
Bonus Part. Separating Vocals For Finer Editing Using Wondershare Filmora
When creating impactful videos, having effective audio content is vital. Hence, controlling vocals is a crucial part of conveying a desired message. That is why Wondershare Filmora offers an excellent solution where you can remove background noise from voice recording. The latest version of Filmora V13 introduces the AI vocal remover feature.
Free Download For Win 7 or later(64-bit)
Free Download For macOS 10.14 or later
This feature can analyze the audio and remove vocals from the background. Furthermore, it allows you to add effects, adjust, and even replace vocals. Thus, video creators can achieve a professional audio experience with its AI features. Moreover, having a tool that can remove noise from voice recording can enhance the final production.
Steps to Separate Vocals Using Wondershare Filmora
Now, as we have discussed, the new version of Filmora can remove any background noises. Let us delve into the steps on how to separate vocals from your audio or video:
Step 1Import your Audio or Video File
First, download Wondershare Filmora from its website and install its latest version. After that, click on “New Project’’ and import your file by clicking on the “Import” button. You can also drag and drop the file by clicking on the icon.

Step 2Add File and Proceed To Vocal Removal
Now, drag your file over to the timeline at the bottom of the Filmora interface. This is where you’ll remove background noise from voice recording. Right-click on the file on the timeline and click the “AI Vocal Remover” feature present on the menu.

Step 3Apply the AI Vocal Remover Effect
After clicking the vocal remover, it will remove all the background noises from your file. When it separates vocals from your audio or video, you can look into it across the “Preview” window.

Conclusion
Now that you are aware of the noise removal features of these tools choose the best one for your needs. All these tools will help you in several ways to remove noise from recordings. After choosing the appropriate tool, you will be able to streamline the audio content. No matter if you are a musician or podcaster, these tools will boost the quality of your sound.
Free Download For Win 7 or later(64-bit)
Free Download For macOS 10.14 or later
Free Download Free Download Learn More
Part 1. What Are Some Practical Applications for Using Microphone Background Noise Reducers?
Microphone filter background noise reducers help clear your voice when you’re speaking into a mic. There are many online and offline tools available that can help reduce the noise. You can make use of these noise-reducer tools for the following applications:
Voice and Video Calls
When you are video chatting for professional purposes, background noise can cause interruptions. In such situations, you can remove noise from the recording to make the call clearer. Without any disturbance from the background, you can communicate effectively.
Online Meetings
During online meetings, background noise reducers can help you sound better. When you’re in a noisy environment, the application of these tools becomes important. This helps you maintain the professional stature of your meeting.
Gaming Live Streaming
Gamers often reduce microphone background noise with the help of such tools. It can help them improve the audio of their in-game sound by eliminating distractions. If you consider monetizing your gaming channels, it is important to ensure there’s no noise.
Recording Music
Musicians and home studio enthusiasts use noise reducers to clean up their recordings. With the help of this voice recorder noise reduction, they create more polished music. This can inculcate a system of better music composition on a smaller scale.
Part 2. Looking Into Some Prominent Options To Reduce Microphone Background Noise
Many professionals search for tools to tackle microphone background noise. As clear audio is crucial in various fields, removing noise from recordings has become necessary. In this section, we will talk about offline and online solutions to this noise problem. After going through this section, you will be able to choose the best tool for audio content creation.
Section 1: Offline Methods for Reducing Microphone Background Noise
When it comes to reducing background noise using offline methods, there are several tools you can use. Here, we will introduce you to tools that will help you in this regard. These tools can remove background noise from voice recording in just a few clicks.
1. Wondershare UniConverter
Wondershare UniConverter removes noise from the microphone with its AI-powered technology. It detects and removes voices such as wind, traffic, rain, or fan noise. Additionally, you can remove static, echo, talking noise, and humming. This AI tool is compatible and supports over 1,000 formats of audio and video files. The support of batch processing allows you to denoise a video and audio in an effective manner.
Key Features
- You can improve the quality of your video blogs by removing unwanted talking noises.
- It denoises a recorded video from the voices of keyboard sounds, echo, and hissing sounds.
- This AI tool offers a powerful video toolbox to convert and edit your denoised videos.
2. Krisp
Krisp enhances the video quality of online meetings and additionally provides help from AI. With this tool, you can make your voice clear during your meeting and get a meeting assistant. It denoises a video and removes noise from the microphone, ensuring distraction-free calls. Users can remove different noise types on this tool, such as barking dogs and crying babies.
Key Features
- You can keep your voice only in the call with its noise cancellation feature.
- It removes the background voices of other people talking in the same place.
- Krisp can remove echoes caused by wall reflections and those originating from your own voice.
3. Audacity
Audacity reduces microphone background noise such as whistles, buzzes, hiss, and whines. This tool is suitable for irregular noise, such as from traffic or an audience. During noise reduction, you can filter out the noise in different DB values. Moreover, users can customize the sensitivity and frequency smoothing of noise bands. It calculates the statistics of the noise with an automation process.
Key Features
- The notch filter feature of this tool reduces the mains hum or a high-pitched whistle.
- In the residue section, it lets you hear the sound that the tool filters out.
- This AI tool supports cassette tapes and reduces sound from them in an efficient way.
4. SoliCall Pro
SoliCall Pro enhances call audio quality on Windows PCs. This tool works by performing bi-directional noise reduction and echo cancellation. You can remove non-human and even human voices while consuming minimal CPU resources. The software is easy to integrate with soft-phone and VoIP applications, like Zoom, Skype, and Teams. It supports call recording and works on almost all Windows versions.
Key Features
- It offers reference-based noise reduction to remove the voices of others during announcements.
- The profile-based noise reduction technology attenuates non-human sounds like a dog bark.
- A classical, powerful, and robust noise algorithm cancels noise.
5. Izotope RX10
Izotope RX10 offers audio repair and background noise reduction. It combines visual tools from DAWs with spectrogram displays for powerful audio editing. The goal of this tool is seamless repair without introducing distracting artifacts. Moreover, its focus is to find the balance between problem reduction and preserving the original audio quality.
Key Features
- It replaces damaged or missing audio sections with natural-sounding patches.
- The tool eradicates pops, clicks, and mouth noises without introducing artifacts.
- You can achieve precise repair of audible analog and digital clipping.
Section 2: Online Methods For Reducing Microphone Background Noise
When musicians record, their microphone is bound to pick up sounds like static or noises. While there is no clear option to get rid of the noise completely, there is still one solution to it. There are a series of software and tools that can help you reduce microphone background noise. So, let’s explore the top tools that can help you reduce background noise :
1. Flixier
Flixier is an online audio enhancement tool that removes background noise from voice recording. It removes any type of noise and makes your content sound professional. Additionally, all you have to do is upload your audio file. After that, you can access the enhanced audio menu and choose to remove background noise. This feature will let you aid out background noises and lets you create online videos.
Key Features
- Flixier offers a cloud server to let you reduce microphone background noise without leaving the browser.
- You can use the fade-in and fade-out effects to give visual transitions to your audio tracks.
- There is also a feature for removing and replacing audio from your videos.
2. LALAL.AI
LALAL.AI is an AI-based application that can remove noise from voice recording. This platform utilizes modern technology like “Phoenix” to deliver quality results. Moreover, users can upload their audio files ranging from 50 MB to 2GB. Furthermore, they can convert, change, and remove any instrumental noise from audio and video. These files can include formats like MP3, AVI, or MKV.
Key Features
- You can add up to 20 files at a time to remove noise from voice recording.
- It can detach any background and musical instruments from your video and audio.
- There are special tools that can extract instruments like drums, pianos, and electric guitars.
3. Cleanvoice AI
Cleanvoice is a powerful AI audio editing tool that can remove unwanted sounds. These sounds can include background noises, stuttering, or voices. Additionally, Cleanvoice also provides comprehensive support in creating podcasts. It also offers help in assisting with the pre-production of podcasts. Furthermore, this tool ensures that your podcast achieves professional professional-level excellence.
Key Features
- This tool ensures that your audio is free from any distractions like traffic noise.
- Cleanvoice reduces noise recording from your podcast for a clearer experience.
- You can now enjoy an engaging podcast as it removes long and boring pauses.
4. Media.io
Media.io is an excellent online platform that removes background noises with an AI-integrated system. Its features include various types of audio files like music, songs, and recordings. Moreover, its feature allows musicians to remove noise from voice recording. This tool can also remove noises with any type of audio file like MP3, WMA, or others. Furthermore, Media.io provides these features and services free of cost.
Key Features
- This tool removes background noise from voice recordings like hum or wind sounds.
- You can remove background noise from audio files, including songs, music, or recordings.
- It also offers a fine-tuning feature where you can optimize your audio according to your needs.
5. Podcastle
Podcastle is an outstanding AI background noise reduction tool. This tool can remove annoying noises like static, chatter, or voices in your audio. Moreover, its noise cancellation feature removes microphone background noise and delivers clean audio. Furthermore, it offers sound enhancement features that can generate clean audio.
Key Features
- This tool automatically removes silent segments and long pauses in your audio track.
- You can add various sound effects to your track with its long music collection.
- It has other editing features like text-to-speech, voice cloning, and others.
Bonus Part. Separating Vocals For Finer Editing Using Wondershare Filmora
When creating impactful videos, having effective audio content is vital. Hence, controlling vocals is a crucial part of conveying a desired message. That is why Wondershare Filmora offers an excellent solution where you can remove background noise from voice recording. The latest version of Filmora V13 introduces the AI vocal remover feature.
Free Download For Win 7 or later(64-bit)
Free Download For macOS 10.14 or later
This feature can analyze the audio and remove vocals from the background. Furthermore, it allows you to add effects, adjust, and even replace vocals. Thus, video creators can achieve a professional audio experience with its AI features. Moreover, having a tool that can remove noise from voice recording can enhance the final production.
Steps to Separate Vocals Using Wondershare Filmora
Now, as we have discussed, the new version of Filmora can remove any background noises. Let us delve into the steps on how to separate vocals from your audio or video:
Step 1Import your Audio or Video File
First, download Wondershare Filmora from its website and install its latest version. After that, click on “New Project’’ and import your file by clicking on the “Import” button. You can also drag and drop the file by clicking on the icon.
Step 2Add File and Proceed To Vocal Removal
Now, drag your file over to the timeline at the bottom of the Filmora interface. This is where you’ll remove background noise from voice recording. Right-click on the file on the timeline and click the “AI Vocal Remover” feature present on the menu.
Step 3Apply the AI Vocal Remover Effect
After clicking the vocal remover, it will remove all the background noises from your file. When it separates vocals from your audio or video, you can look into it across the “Preview” window.
Conclusion
Now that you are aware of the noise removal features of these tools choose the best one for your needs. All these tools will help you in several ways to remove noise from recordings. After choosing the appropriate tool, you will be able to streamline the audio content. No matter if you are a musician or podcaster, these tools will boost the quality of your sound.
Free Download For Win 7 or later(64-bit)
Free Download For macOS 10.14 or later
Echoes of the Earth: Unveiling the 10 Best iOS & Android Auditory Journeys in Nature
Best Nature Sounds Apps for iOS and Android

Benjamin Arango
Apr 26, 2024• Proven solutions
In today’s challenging times, when stress and anxiety has become inevitable for a majority of population, there is a constant search for solutions that will enable people to live a peaceful and pleasant life. Here, the technology comes to their rescue with nature sound effects app.
These applications provide multiple sounds related to the Nature. The users just need to download any of these programs, and select the desired tone according to their choice. Such mobile software also offer numerous relaxing audios that assist in achieving a deeper level of concentration during the meditation.
10 Best Nature Sounds Apps
1. YouTube
YouTube is also one of the important apps for nature sounds where one can get almost any kind of relaxing sounds related to the Nature.
Binaural beats videos, where two different frequencies of sounds are combined to create a new frequency tone are getting highly popular among people. These are believed to help in lowering stress, anxiety and depression and increase concentration, attention, and efficiency of an individual.
It can also be helpful in attaining mental peace and serenity. The app even contains peaceful meditation sounds that ease the ability to focus and remain relaxed during the whole process. It is highly a user-friendly app and is absolutely free to download on the Android Smartphones.
2. Atmosphere: Relaxing Sounds
Compatible with Android 5.0 or up , and iOS 10.0 or later

Atmosphere is one of the best apps for nature sounds. It is custom-made to help people relieve stress and relax their mind.
The key feature of this application is that it allows users to import their personalized audios and mix them with various default acoustics available within the app itself.
The soothing sounds available here are divided into 8 different environments such as Beach, City, Park, Countryside, Home, Underwater, Forest and Oriental. Users can also mix and match the sounds between environments to produce a tailored theme.
3. Rainy Mood
Compatible with both iOS and Android OS 5.0 and up

Rainy Mood provides the most genuine rain, thunderstorm, and lightening sounds available online.
It not only relieves tension and anxiety but also helps users suffering from insomnia.
This app even contains natural white noise facility that helps in getting rid of any unwanted sounds around us.
The various rain sounds are available here in different environments such as heavy rain, tropical rain, umbrella, rain on tent, rain on porch etc. The best thing about this app is that it can work in offline mode, i.e. without any Internet connection. This eventually results in less power consumption.
4. Animal Sounds
Compatible with Android 4.1 and up

Animal Sounds is a one-stop destination for all animal lovers. The program provides the most detailed information about animals, and also contains hundreds of animal sounds and photographs from all over the globe.
The quality of audios and pictures is remarkably high and clear. The sounds here are categorized under pet animals, mammals, farm animals, bird sounds, wild animals, reptiles and amphibians.
The application also provides the facility of customized ringtones and wallpapers to its users.
5. Sleep Sounds
Compatible with Android 4.4 or later
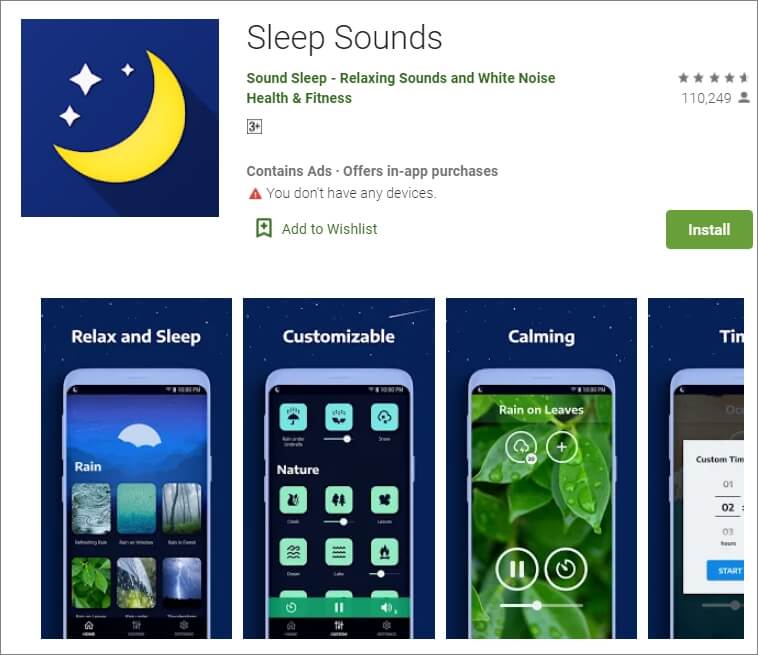
Sleep Sounds is one of the top trending apps nowadays owing to the increasing problems of insomnia and irregular sleep patterns among people. It is very helpful for an uninterrupted quality sleep.
The calm and soft music gradually tranquilizes the mind and the user eases into a good sleep. Its interface is user-friendly with beautiful images in the background.
The sounds here are categorized under rain, nature, relax, transport, noise, and white noise classes. This app also works without an Internet connection.
6.Calm
Compatible with Android and iOS 10.0 and watchOS 6.0 or later
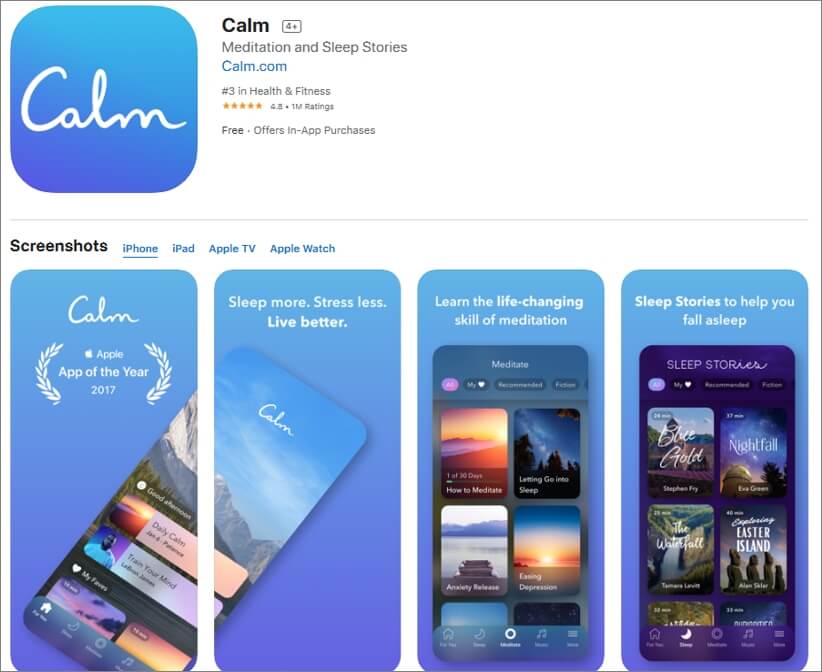
Calm is best suitable for the people who practice meditation on a daily basis. It is available for free and can be used by the beginners as well as experienced users.
The main features include guided meditation programs, breathing sessions, adult bed-time stories, masterclasses by the international coaches, etc.
Here, one can choose a personalized guide for meditation from several topics such as relationships, self-esteem, breaking habits, forgiveness, mindfulness, etc. Users can even track their daily progress on the basis of time spent by them on the app.
7. Ambience – Nature sounds: sleep and meditation
Compatible with Android 4.2 and up .
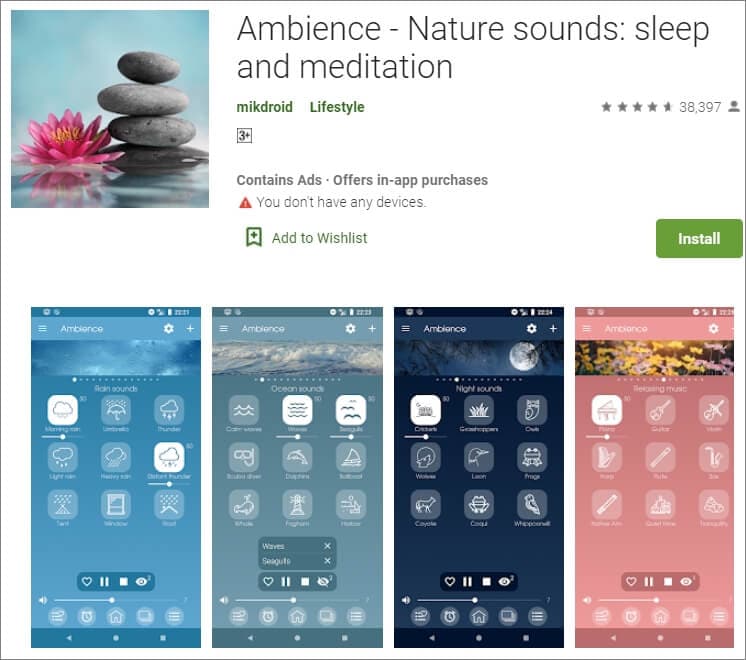
Ambience is another one of the most popular apps for nature sounds providing peace and serenity to its users through relaxing and soothing tones.
It has a very simple and clean user interface which makes it a highly demanding program. The main features include the facility of mixing maximum 10 sounds at the same time. Along with various preset mixtures of audios that are available here, users can also save their customized combinations for future use.
8. Naturespace: Sleep Relax Focus
Compatible with Android 4.0 or up and iOS 9.0 or later
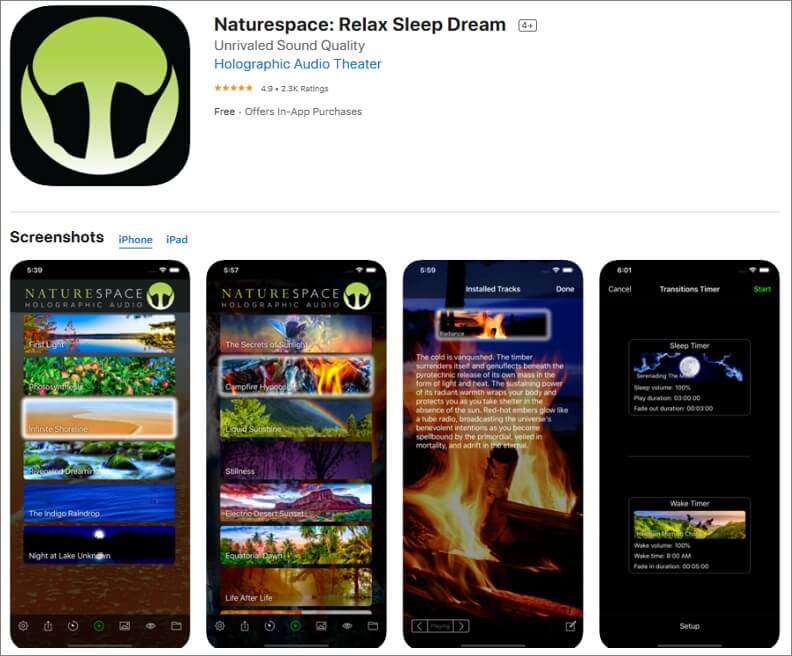
Naturespace is a unique app containing real time 3D recordings of natural places such as forests, deserts, mountains, etc. The equipment used in the program for recording the sounds are of extremely high quality, and as a result, the listening experience is out of this world.
The clarity of the sound surpasses almost every other application available in this genre of nature sound apps. It also provides the facility of sleep and wake timer to its users. The simple user interface along with earbud optimisation facility makes the software highly efficient and popular among people.
9. SimplyNoise – Free White Noise
Compatible with iOS 8.0 or later and Android
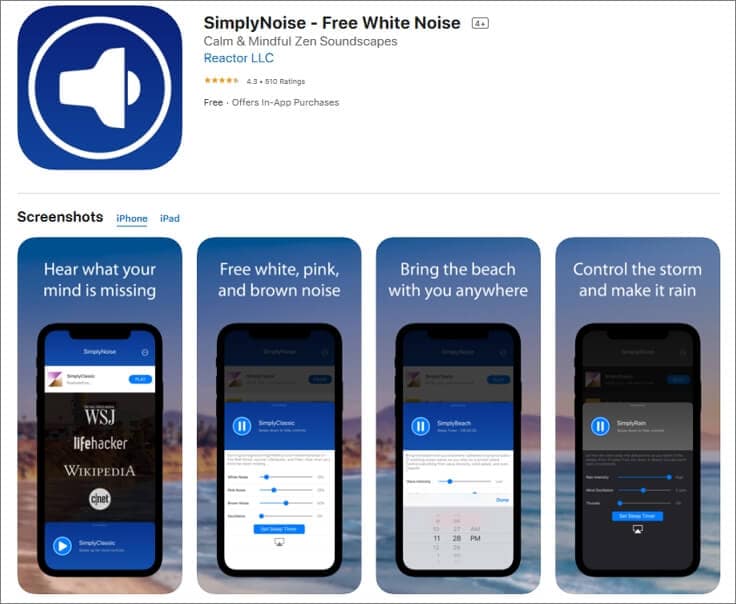
Simply Noise is one of the most basic apps for nature sounds as it provides only one acoustic without any background noises. As there are no such complexities involved, it can also be used by people who are not tech-savvy.
The categorization of sounds is done here as white noise, pink noise, and brown noise. Users can select any of these according to their requirement.
This app is best suitable for people who are unable to concentrate on a particular thing, or suffer from sleeping disorder. Sleep-timer option is also available here.
10. aSleep
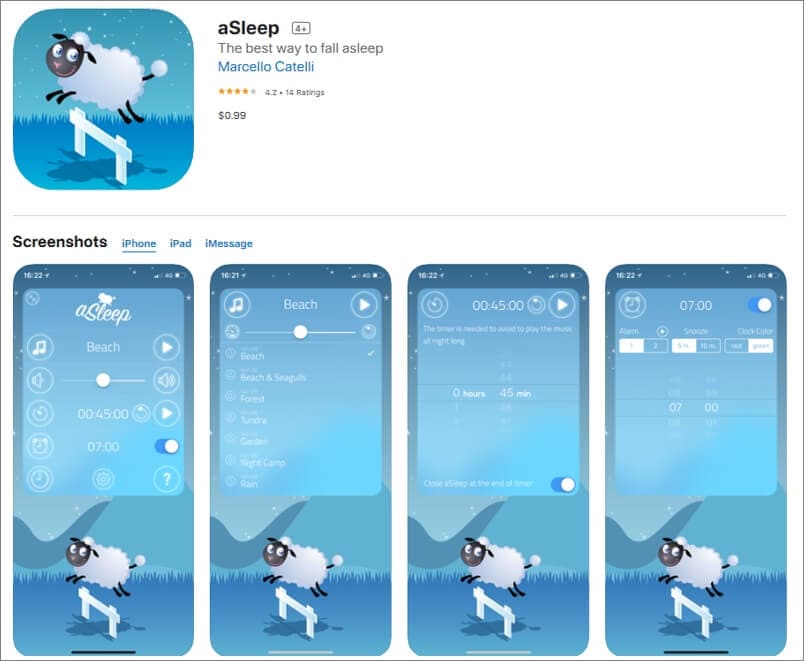
Available for iOS devices like iPhone and iPad, aSleep offers around 64 realistic stereo nature sounds to help you relax your mind and fall asleep almost instantaneously. With the built-in Timer feature, the music can be programmed to stop automatically after a certain amount of time to save your device’s battery.
Furthermore, the also works as an alarm clock that wakes you up with nature sounds at your predefined hour. The application is also good for kids as it can be used to play lullabies to help them get a tight sleep at night. And the program does all this without collecting any data from your iDevice.
What Is the Best Rain Sound App?
Among various rain sound applications available online, Rainy Mood is the most popular one that enjoys high star rating. When it comes to rain sounds, there is no match to it. It mainly includes 4 rain scenes namely Classic, Ocean, Countryside and Cafe. These genres can be customized according to different tastes and preferences.
What Are the Different Sounds of Nature?
The nature is made up of 5 basic elements which include Air, Water, Fire, Earth and Space. These components constitute various natural acoustics. Some examples are music of the rain, thunderstorm or a waterfall, wind blows, sounds of leaves and water streams, chirping of birds or grasshoppers, stridulation of insects like crickets, etc. All these sounds are beautifully incorporated in nature sound effects app.
In case that you want to add some nature sound to your video clip, you can try Wondershare Filmora, which features an audio library containing different nature sound effects as well. Download the free trial version of Filmora and have a try.


Besides adding sound to video, you can also add some elemental 2D visual effects to videos to make it cooler.
Benjamin Arango
Benjamin Arango is a writer and a lover of all things video.
Follow @Benjamin Arango
Benjamin Arango
Apr 26, 2024• Proven solutions
In today’s challenging times, when stress and anxiety has become inevitable for a majority of population, there is a constant search for solutions that will enable people to live a peaceful and pleasant life. Here, the technology comes to their rescue with nature sound effects app.
These applications provide multiple sounds related to the Nature. The users just need to download any of these programs, and select the desired tone according to their choice. Such mobile software also offer numerous relaxing audios that assist in achieving a deeper level of concentration during the meditation.
10 Best Nature Sounds Apps
1. YouTube
YouTube is also one of the important apps for nature sounds where one can get almost any kind of relaxing sounds related to the Nature.
Binaural beats videos, where two different frequencies of sounds are combined to create a new frequency tone are getting highly popular among people. These are believed to help in lowering stress, anxiety and depression and increase concentration, attention, and efficiency of an individual.
It can also be helpful in attaining mental peace and serenity. The app even contains peaceful meditation sounds that ease the ability to focus and remain relaxed during the whole process. It is highly a user-friendly app and is absolutely free to download on the Android Smartphones.
2. Atmosphere: Relaxing Sounds
Compatible with Android 5.0 or up , and iOS 10.0 or later
Atmosphere is one of the best apps for nature sounds. It is custom-made to help people relieve stress and relax their mind.
The key feature of this application is that it allows users to import their personalized audios and mix them with various default acoustics available within the app itself.
The soothing sounds available here are divided into 8 different environments such as Beach, City, Park, Countryside, Home, Underwater, Forest and Oriental. Users can also mix and match the sounds between environments to produce a tailored theme.
3. Rainy Mood
Compatible with both iOS and Android OS 5.0 and up
Rainy Mood provides the most genuine rain, thunderstorm, and lightening sounds available online.
It not only relieves tension and anxiety but also helps users suffering from insomnia.
This app even contains natural white noise facility that helps in getting rid of any unwanted sounds around us.
The various rain sounds are available here in different environments such as heavy rain, tropical rain, umbrella, rain on tent, rain on porch etc. The best thing about this app is that it can work in offline mode, i.e. without any Internet connection. This eventually results in less power consumption.
4. Animal Sounds
Compatible with Android 4.1 and up
Animal Sounds is a one-stop destination for all animal lovers. The program provides the most detailed information about animals, and also contains hundreds of animal sounds and photographs from all over the globe.
The quality of audios and pictures is remarkably high and clear. The sounds here are categorized under pet animals, mammals, farm animals, bird sounds, wild animals, reptiles and amphibians.
The application also provides the facility of customized ringtones and wallpapers to its users.
5. Sleep Sounds
Compatible with Android 4.4 or later
Sleep Sounds is one of the top trending apps nowadays owing to the increasing problems of insomnia and irregular sleep patterns among people. It is very helpful for an uninterrupted quality sleep.
The calm and soft music gradually tranquilizes the mind and the user eases into a good sleep. Its interface is user-friendly with beautiful images in the background.
The sounds here are categorized under rain, nature, relax, transport, noise, and white noise classes. This app also works without an Internet connection.
6.Calm
Compatible with Android and iOS 10.0 and watchOS 6.0 or later
Calm is best suitable for the people who practice meditation on a daily basis. It is available for free and can be used by the beginners as well as experienced users.
The main features include guided meditation programs, breathing sessions, adult bed-time stories, masterclasses by the international coaches, etc.
Here, one can choose a personalized guide for meditation from several topics such as relationships, self-esteem, breaking habits, forgiveness, mindfulness, etc. Users can even track their daily progress on the basis of time spent by them on the app.
7. Ambience – Nature sounds: sleep and meditation
Compatible with Android 4.2 and up .
Ambience is another one of the most popular apps for nature sounds providing peace and serenity to its users through relaxing and soothing tones.
It has a very simple and clean user interface which makes it a highly demanding program. The main features include the facility of mixing maximum 10 sounds at the same time. Along with various preset mixtures of audios that are available here, users can also save their customized combinations for future use.
8. Naturespace: Sleep Relax Focus
Compatible with Android 4.0 or up and iOS 9.0 or later
Naturespace is a unique app containing real time 3D recordings of natural places such as forests, deserts, mountains, etc. The equipment used in the program for recording the sounds are of extremely high quality, and as a result, the listening experience is out of this world.
The clarity of the sound surpasses almost every other application available in this genre of nature sound apps. It also provides the facility of sleep and wake timer to its users. The simple user interface along with earbud optimisation facility makes the software highly efficient and popular among people.
9. SimplyNoise – Free White Noise
Compatible with iOS 8.0 or later and Android
Simply Noise is one of the most basic apps for nature sounds as it provides only one acoustic without any background noises. As there are no such complexities involved, it can also be used by people who are not tech-savvy.
The categorization of sounds is done here as white noise, pink noise, and brown noise. Users can select any of these according to their requirement.
This app is best suitable for people who are unable to concentrate on a particular thing, or suffer from sleeping disorder. Sleep-timer option is also available here.
10. aSleep
Available for iOS devices like iPhone and iPad, aSleep offers around 64 realistic stereo nature sounds to help you relax your mind and fall asleep almost instantaneously. With the built-in Timer feature, the music can be programmed to stop automatically after a certain amount of time to save your device’s battery.
Furthermore, the also works as an alarm clock that wakes you up with nature sounds at your predefined hour. The application is also good for kids as it can be used to play lullabies to help them get a tight sleep at night. And the program does all this without collecting any data from your iDevice.
What Is the Best Rain Sound App?
Among various rain sound applications available online, Rainy Mood is the most popular one that enjoys high star rating. When it comes to rain sounds, there is no match to it. It mainly includes 4 rain scenes namely Classic, Ocean, Countryside and Cafe. These genres can be customized according to different tastes and preferences.
What Are the Different Sounds of Nature?
The nature is made up of 5 basic elements which include Air, Water, Fire, Earth and Space. These components constitute various natural acoustics. Some examples are music of the rain, thunderstorm or a waterfall, wind blows, sounds of leaves and water streams, chirping of birds or grasshoppers, stridulation of insects like crickets, etc. All these sounds are beautifully incorporated in nature sound effects app.
In case that you want to add some nature sound to your video clip, you can try Wondershare Filmora, which features an audio library containing different nature sound effects as well. Download the free trial version of Filmora and have a try.
Besides adding sound to video, you can also add some elemental 2D visual effects to videos to make it cooler.
Benjamin Arango
Benjamin Arango is a writer and a lover of all things video.
Follow @Benjamin Arango
Expert Strategies for Clearer Dialogue and Ambiance in iMovie Projects
All You Need to Know About iMovie Audio Editing

Marion Dubois
Oct 26, 2023• Proven solutions
iMovie offers a fantastic platform for video editing where you can merge multiple video clips to create something very phenomenal. Plus, it’s simply here to navigate between different scenes, edit video clips and save results directly to the digital format without making any videotape transformations.
It provides lots of things to beginners and professionals with its easy-to-use interface without any quality loss for your results even after adding lots of transitions, changes, and effects.
However, it is not accessible to master software, precisely when you’re not familiar with it, or you’re not its professional user. So today, we’d like to explore or pay attention to iMovie’s audio editing steps, tips, and tricks to help you become an iMovie master quickly.
What’s more, a practical yet professional iMovie alternative software is also advisable in this guide. So when the iMovie cannot fulfil your editing requirements, why don’t you hop on an iMovie alternative software?
Now, let’s get started!
Part 1: How to Edit Audio Clips in iMovie?
To learn how to edit audio clips in iMovie, you can use actions in the menu along with the quick shortcuts to make adjustments to your audio clips in iMovie on Mac. It’s a tip for your convenience!
Trim Audio Clips
There are a couple of options to trim an audio clip in iMovie.
#1. Trim to Playhead
You can place the playhead in your timeline. Now, trim an audio clip to that exact spot. Next, start moving the playhead and do one from the following.
- Select Modify > Trim to Playhead option in the menu bar.
- Right-click the audio clip and select the option of Trim to Playhead in the shortcut menu.
#2. Use the Clip Trimmer
You can use the Clip Trimmer to trim an exact section of the clip.
Step 1. Right-click the audio clip and select Show Clip Trimmer in the shortcut menu.
Step 2. After the Clip Trimmer shows, select a section you wish to trim by dragging the arrows right and left while holding the white lines. The area within those lines is what will get entirely deleted.
Move the entire clip but keep the trim area in place if arrows turn to a film strip icon.
Step 3. Click Close Clip Trimmer after you finish this section.
Shorten or Lengthen Audio Clips
You can easily shorten or lengthen an audio clip in iMovie. Just choose the pin in the timeline and drag one of its edges. The duration of the clip change will change as you carry. And a new course will be displayed after you finish in the upper left menu.
You can also set the clip’s duration to an exact time. Select the clip in the timeline and hit the Clip Information (small letter “i”) tab located above the Viewer. Put the value of the time you want in seconds in the Duration box on the right.
Change the Speed of an Audio Clip
You may want to speed up or slow down an audio clip while editing music in iMovie. So, here’s what you need to do!
Method 1. Click the Speed button above the Viewer. Next, select Custom in the Speed drop-down box and enter a percentage next to it. You can also set a different speed in that box if you prefer.
Method 2. Right-click the clip and select Show Speed Editor from the shortcut menu. A slider will then display at the top of the clip that you can move to change the speed.
Adjust the Volume of an Audio Clip
You can set the audio clip’s volume at higher or lower, or even mute it. Just select the clip and then do one of the following.
- Select the Volume tab above the Viewer option and move the slider to the percentage of volume. Hit the Mute button to mute the audio clip.
- Tap inside the clip, and when the two-sided arrow appears, drag up or down to adjust the volume.
Fade an Audio Clip
While editing audio in iMovie, you can also fade in or out the clip. Choose a clip in the timeline and then drag the fade handle (small circle) at either the ending or the beginning of the clip to make a fade-out or a fade-in effect.
As you drag, you will see the arcs displaying the shadow for the clips fade in or fade out.
How to Edit Audio Clips in iMovie on iOS?
The iMovie timeline is where you sort or organize all your audio clips, such as the special effects and background music. Audio clips are always present below the video clips in the timeline. To edit audio clips in iMovie on your iPhones or iPads, you can follow the guide belo
Move an Audio Clip
You can transfer the whole audio clip, except the background music, to another location.
- Touch and hold the purple or blue audio clip with your project open in the timeline until it comes over the timeline bar.
- Drag the clip to another place and release.
Adjust the Audio Clip’s Duration
Step 1. While the project is launched in the timeline, tap the audio clip (in blue or purple) or the background music clip you wish to adjust.
Step 2. Now, you can see the display of yellow trim handles. Drag them either at the end of the clip to the points where you wish the audio to start and end. If a trim handle won’t move left or right, it simply indicates there is no additional audio to work with on that clip’s end.
Step 3. Tap outside the audio clip and let the trim handles disappear.
Split an Audio Clip
There are around two options to split audio clips in iMovie. You can remove unwanted parts or adjust each section’s duration, volume, or speed while you split a clip.
Step 1. With your launched project in the timeline, scroll the timeline to the playhead’s position where you want to split the audio.
Step 2. Click the audio clip to display the inspector at the screen’s bottom.
Step 3. Now, click the Actions button, and select the Split tab.
Or, you can tap the clip (it becomes outlined in yellow), then swipe above the playhead as if you were placing your finger to slide over it.
Detach the Audio Part from a Video
You can detach the video clip’s audio to remove or edit it as a separate video clip.
Step 1. When the project is open in the timeline, select a video clip and display the inspector at the screen’s bottom.
Step 2. Tap the Actions button, then tap Detach.
Step 3. A new blue-colored audio clip will then appear below the video project. You can now move, edit, or delete the audio clip separately from its parent video clip.
Move Audio to the Foreground or Background
To ensure the sound in your video clips can listen above the background music, iMovie implies audio “ducking”. Ducking lowers the background music clips’ volume whenever there’s a video clip whose sound is playing simultaneously.
You can select which audio clips are in the foreground or the background.
Step 1. Select the timeline’s audio clip to display the inspector at the screen’s bottom.
Step 2. Hit the Actions tab and proceed with selecting the Foreground or Background.
The clip color changes to indicate whether it’s the background music (green) or foreground audio (blue or purple).
Part 2: An Easier Way to Edit Audio Clips
Windows users might be wandering for an alternative to iMovie as this software tool is only compatible with Mac and iOS devices. You will be thrilled to know that Wondershare Filmora can serve you with all synonymous and extra features more than the iMovie, and it works significantly in the Windows environment.
This latest software tool also assists users with easy video editing tricks and the intuitive interface that best serves quality editing to beginners and professionals.
Despite the basic video editing features, such as trimming, splitting, merging, cutting, and cropping, Filmora also offers various advanced editing elements that are far better than iMovie. And, with its video editing features, you can make a green screen effect, stabilize your video footage, reverse your video clip, and more.
Moreover, you can enjoy royalty-free music tracks for different themes, such as Young and Bright, Tender and Sentimental, Rock, Folk, Electronic Rock, and Hipster Folk, for selection.
All this will be available with a single program called Wondershare Filmora to take advantage of them for free. You do not have to search the background music files like a needle in a haystack. The program has nicely organized the music themes into six different folders. You can apply it for your video and make advanced editing, such as split/trim the clip, adjust the playback speed, pitch, volume, etc.
How to Edit Audio with Wondershare Filmora?
In Wondershare Filmora, you can insert background music and other files from the audio library or your computer. You can even record your voiceover using it.
Add Background Music
Filmora provides a royalty-free music library you can access or import your music within the program. You can select a song from the royalty-free audio library and use it for free.
The audio library has categorized into: YOUNG & BRIGHT, TENDER & SENTIMENTAL, ROCK, FOLK, and ELECTRONIC. The different kinds of sound effects are also available under the Sound Effects tab.
Once you find a sound effect or a song, either right-click on it and go with the Apply or drag and drop it into an audio track in the timeline.
Or, you can click the Import button above the Media Library panel to browse for audio files in your PC system. Then, select and import it into the Media Library when you find the song or other audio files you wish to add.
Once you place the song in the timeline, double-click to edit it in the Audio editing panel. You can apply fade-in or fade-out effects or adjust the pitch and volume. Filmora lets you add up to 100 audio tracks.
Split Audio Clips
Choose your audio clip and place the playhead where you want to split it, then right-click on the clip and choose the Split tab or click the Split icon right above on the toolbar.
Adjust Audio Settings
Double click on the audio clip to make adjustments to your audio. Open a panel with adjustment sliders in the timeline for pitch and volume.
Another element that you’ll find in this panel is Denoise, which is a feature that can remove background noise from your audio clips.
For a more professional audio editing experience, you can also access the Audio Equalizer from this panel. Select from presets or make manual adjustments by hitting the Customize tab.
Play it when you are done and, if you’re not happy with the results, tap the Reset button to start over.
Audio Equalizer (EQ)
All videos have plenty of sounds like speech, music, or sound effects. Changing the strength of sound waves will help you to mix these sounds within a coherent soundtrack.
Locate your audio clip in an audio track and double-click on it to open the Audio settings menu window. A drop-down menu next to the Equalizer feature will display presets such as Classic, Default, Rock’n’Roll, Techno, Sparkle, Bass, Hard Rock, Pop, Ska, Blues, Folk, Acoustic, Custom, or Country. Choose the preset that best fits your current needs and hit the OK tab to apply it.
Now, hit the Customize tab next to the drop-down bar to adjust the Audio Equalizer manually. Drag the sliders up or down and make the adjustments until you find their ideal value. Finally, hit OK and save your settings.
Besides the included music tracks and sound effects in Filmora initially, you can also find more audio files from Filmora’s effects store – Filmstock, and even get some free music and sound.
Part 3: iMovie Audio Editing Tips & Tricks
iMovie is a great video editor for Mac computers. After understanding the best alternative of iMovie sound editin g, let’s check out some tips on editing audio in iMovie best.
The explanations and screenshots below are for iMovie 10 only. However, the steps are a bit similar to older versions.
So, here we go!
1. Use Waveforms to See What You Hear
To properly edit the audio track in iMovie, you need a good pair of headphones and speakers to hear the sound, but you also need to check the sound.
You can check the sound in iMovie by considering the waveforms on each clip. If the waveforms can’t be seen, go to the View drop-down menu and choose the Show Waveforms option. The clip size for your project can also adjust to get an even better appearance for each video clip.
The waveforms will display the volume level of a clip and give you a good idea of what sections will require to turn up or down. You can also check how the levels of different clips compare to one another.
2. Audio Adjustments
With the help of Adjust tab in the top right, you can access some basic audio editing tools for changing your selected clip’s volume or changing the volume of other relative clips in the project.
The adjustment window of audio also provides basic audio equalization and noise reduction tools, along with a range of effects - from echo to robot - that will change the way people in your video sound.
3. Edit Audio with the Timeline
iMovie assists you in adjusting the audio within the clips themselves. Each pin has a volume bar, moving up and down to decrease or increase the audio level. The clips also contain Fade In and Fade Out tabs at the beginning and end, dragging to adjust the fade’s length.
By adding a short fade effect, whether in or out, the sound becomes relatively smoother and less conflicting to the ear when a new clip begins.
4. Detach the Audio
By default, iMovie keeps the video and audio sections of clips together for convenience. Yet, you want to use the video and audio sections of a clip separately sometimes.
For this purpose, choose your clip in the timeline, visit the Modify drop-down menu, and hit the Detach Audio button. You’ll now have two clips - one with the images and another with the sound.
A lot you can do with the detached audio. For instance, you could extend the audio clip to begin before the video plays, or so that it plays for a few seconds even after the video fades out. You could also cut out pieces from the audio’s middle portion while leaving the video intact.
Conclusion
Coming towards the end of the discussion, after understanding iMovie audio editingand going through an elaborated alternative of iMovie application, we decided that Wondershare Filmora sounds the best out of it. It allows you to flawlessly edit video and audio files on your desktop, with various inbuilt royalty-free music tracks to select from that can further improve your project’s presence.
Marion Dubois
Marion Dubois is a writer and a lover of all things video.
Follow @Marion Dubois
Marion Dubois
Oct 26, 2023• Proven solutions
iMovie offers a fantastic platform for video editing where you can merge multiple video clips to create something very phenomenal. Plus, it’s simply here to navigate between different scenes, edit video clips and save results directly to the digital format without making any videotape transformations.
It provides lots of things to beginners and professionals with its easy-to-use interface without any quality loss for your results even after adding lots of transitions, changes, and effects.
However, it is not accessible to master software, precisely when you’re not familiar with it, or you’re not its professional user. So today, we’d like to explore or pay attention to iMovie’s audio editing steps, tips, and tricks to help you become an iMovie master quickly.
What’s more, a practical yet professional iMovie alternative software is also advisable in this guide. So when the iMovie cannot fulfil your editing requirements, why don’t you hop on an iMovie alternative software?
Now, let’s get started!
Part 1: How to Edit Audio Clips in iMovie?
To learn how to edit audio clips in iMovie, you can use actions in the menu along with the quick shortcuts to make adjustments to your audio clips in iMovie on Mac. It’s a tip for your convenience!
Trim Audio Clips
There are a couple of options to trim an audio clip in iMovie.
#1. Trim to Playhead
You can place the playhead in your timeline. Now, trim an audio clip to that exact spot. Next, start moving the playhead and do one from the following.
- Select Modify > Trim to Playhead option in the menu bar.
- Right-click the audio clip and select the option of Trim to Playhead in the shortcut menu.
#2. Use the Clip Trimmer
You can use the Clip Trimmer to trim an exact section of the clip.
Step 1. Right-click the audio clip and select Show Clip Trimmer in the shortcut menu.
Step 2. After the Clip Trimmer shows, select a section you wish to trim by dragging the arrows right and left while holding the white lines. The area within those lines is what will get entirely deleted.
Move the entire clip but keep the trim area in place if arrows turn to a film strip icon.
Step 3. Click Close Clip Trimmer after you finish this section.
Shorten or Lengthen Audio Clips
You can easily shorten or lengthen an audio clip in iMovie. Just choose the pin in the timeline and drag one of its edges. The duration of the clip change will change as you carry. And a new course will be displayed after you finish in the upper left menu.
You can also set the clip’s duration to an exact time. Select the clip in the timeline and hit the Clip Information (small letter “i”) tab located above the Viewer. Put the value of the time you want in seconds in the Duration box on the right.
Change the Speed of an Audio Clip
You may want to speed up or slow down an audio clip while editing music in iMovie. So, here’s what you need to do!
Method 1. Click the Speed button above the Viewer. Next, select Custom in the Speed drop-down box and enter a percentage next to it. You can also set a different speed in that box if you prefer.
Method 2. Right-click the clip and select Show Speed Editor from the shortcut menu. A slider will then display at the top of the clip that you can move to change the speed.
Adjust the Volume of an Audio Clip
You can set the audio clip’s volume at higher or lower, or even mute it. Just select the clip and then do one of the following.
- Select the Volume tab above the Viewer option and move the slider to the percentage of volume. Hit the Mute button to mute the audio clip.
- Tap inside the clip, and when the two-sided arrow appears, drag up or down to adjust the volume.
Fade an Audio Clip
While editing audio in iMovie, you can also fade in or out the clip. Choose a clip in the timeline and then drag the fade handle (small circle) at either the ending or the beginning of the clip to make a fade-out or a fade-in effect.
As you drag, you will see the arcs displaying the shadow for the clips fade in or fade out.
How to Edit Audio Clips in iMovie on iOS?
The iMovie timeline is where you sort or organize all your audio clips, such as the special effects and background music. Audio clips are always present below the video clips in the timeline. To edit audio clips in iMovie on your iPhones or iPads, you can follow the guide belo
Move an Audio Clip
You can transfer the whole audio clip, except the background music, to another location.
- Touch and hold the purple or blue audio clip with your project open in the timeline until it comes over the timeline bar.
- Drag the clip to another place and release.
Adjust the Audio Clip’s Duration
Step 1. While the project is launched in the timeline, tap the audio clip (in blue or purple) or the background music clip you wish to adjust.
Step 2. Now, you can see the display of yellow trim handles. Drag them either at the end of the clip to the points where you wish the audio to start and end. If a trim handle won’t move left or right, it simply indicates there is no additional audio to work with on that clip’s end.
Step 3. Tap outside the audio clip and let the trim handles disappear.
Split an Audio Clip
There are around two options to split audio clips in iMovie. You can remove unwanted parts or adjust each section’s duration, volume, or speed while you split a clip.
Step 1. With your launched project in the timeline, scroll the timeline to the playhead’s position where you want to split the audio.
Step 2. Click the audio clip to display the inspector at the screen’s bottom.
Step 3. Now, click the Actions button, and select the Split tab.
Or, you can tap the clip (it becomes outlined in yellow), then swipe above the playhead as if you were placing your finger to slide over it.
Detach the Audio Part from a Video
You can detach the video clip’s audio to remove or edit it as a separate video clip.
Step 1. When the project is open in the timeline, select a video clip and display the inspector at the screen’s bottom.
Step 2. Tap the Actions button, then tap Detach.
Step 3. A new blue-colored audio clip will then appear below the video project. You can now move, edit, or delete the audio clip separately from its parent video clip.
Move Audio to the Foreground or Background
To ensure the sound in your video clips can listen above the background music, iMovie implies audio “ducking”. Ducking lowers the background music clips’ volume whenever there’s a video clip whose sound is playing simultaneously.
You can select which audio clips are in the foreground or the background.
Step 1. Select the timeline’s audio clip to display the inspector at the screen’s bottom.
Step 2. Hit the Actions tab and proceed with selecting the Foreground or Background.
The clip color changes to indicate whether it’s the background music (green) or foreground audio (blue or purple).
Part 2: An Easier Way to Edit Audio Clips
Windows users might be wandering for an alternative to iMovie as this software tool is only compatible with Mac and iOS devices. You will be thrilled to know that Wondershare Filmora can serve you with all synonymous and extra features more than the iMovie, and it works significantly in the Windows environment.
This latest software tool also assists users with easy video editing tricks and the intuitive interface that best serves quality editing to beginners and professionals.
Despite the basic video editing features, such as trimming, splitting, merging, cutting, and cropping, Filmora also offers various advanced editing elements that are far better than iMovie. And, with its video editing features, you can make a green screen effect, stabilize your video footage, reverse your video clip, and more.
Moreover, you can enjoy royalty-free music tracks for different themes, such as Young and Bright, Tender and Sentimental, Rock, Folk, Electronic Rock, and Hipster Folk, for selection.
All this will be available with a single program called Wondershare Filmora to take advantage of them for free. You do not have to search the background music files like a needle in a haystack. The program has nicely organized the music themes into six different folders. You can apply it for your video and make advanced editing, such as split/trim the clip, adjust the playback speed, pitch, volume, etc.
How to Edit Audio with Wondershare Filmora?
In Wondershare Filmora, you can insert background music and other files from the audio library or your computer. You can even record your voiceover using it.
Add Background Music
Filmora provides a royalty-free music library you can access or import your music within the program. You can select a song from the royalty-free audio library and use it for free.
The audio library has categorized into: YOUNG & BRIGHT, TENDER & SENTIMENTAL, ROCK, FOLK, and ELECTRONIC. The different kinds of sound effects are also available under the Sound Effects tab.
Once you find a sound effect or a song, either right-click on it and go with the Apply or drag and drop it into an audio track in the timeline.
Or, you can click the Import button above the Media Library panel to browse for audio files in your PC system. Then, select and import it into the Media Library when you find the song or other audio files you wish to add.
Once you place the song in the timeline, double-click to edit it in the Audio editing panel. You can apply fade-in or fade-out effects or adjust the pitch and volume. Filmora lets you add up to 100 audio tracks.
Split Audio Clips
Choose your audio clip and place the playhead where you want to split it, then right-click on the clip and choose the Split tab or click the Split icon right above on the toolbar.
Adjust Audio Settings
Double click on the audio clip to make adjustments to your audio. Open a panel with adjustment sliders in the timeline for pitch and volume.
Another element that you’ll find in this panel is Denoise, which is a feature that can remove background noise from your audio clips.
For a more professional audio editing experience, you can also access the Audio Equalizer from this panel. Select from presets or make manual adjustments by hitting the Customize tab.
Play it when you are done and, if you’re not happy with the results, tap the Reset button to start over.
Audio Equalizer (EQ)
All videos have plenty of sounds like speech, music, or sound effects. Changing the strength of sound waves will help you to mix these sounds within a coherent soundtrack.
Locate your audio clip in an audio track and double-click on it to open the Audio settings menu window. A drop-down menu next to the Equalizer feature will display presets such as Classic, Default, Rock’n’Roll, Techno, Sparkle, Bass, Hard Rock, Pop, Ska, Blues, Folk, Acoustic, Custom, or Country. Choose the preset that best fits your current needs and hit the OK tab to apply it.
Now, hit the Customize tab next to the drop-down bar to adjust the Audio Equalizer manually. Drag the sliders up or down and make the adjustments until you find their ideal value. Finally, hit OK and save your settings.
Besides the included music tracks and sound effects in Filmora initially, you can also find more audio files from Filmora’s effects store – Filmstock, and even get some free music and sound.
Part 3: iMovie Audio Editing Tips & Tricks
iMovie is a great video editor for Mac computers. After understanding the best alternative of iMovie sound editin g, let’s check out some tips on editing audio in iMovie best.
The explanations and screenshots below are for iMovie 10 only. However, the steps are a bit similar to older versions.
So, here we go!
1. Use Waveforms to See What You Hear
To properly edit the audio track in iMovie, you need a good pair of headphones and speakers to hear the sound, but you also need to check the sound.
You can check the sound in iMovie by considering the waveforms on each clip. If the waveforms can’t be seen, go to the View drop-down menu and choose the Show Waveforms option. The clip size for your project can also adjust to get an even better appearance for each video clip.
The waveforms will display the volume level of a clip and give you a good idea of what sections will require to turn up or down. You can also check how the levels of different clips compare to one another.
2. Audio Adjustments
With the help of Adjust tab in the top right, you can access some basic audio editing tools for changing your selected clip’s volume or changing the volume of other relative clips in the project.
The adjustment window of audio also provides basic audio equalization and noise reduction tools, along with a range of effects - from echo to robot - that will change the way people in your video sound.
3. Edit Audio with the Timeline
iMovie assists you in adjusting the audio within the clips themselves. Each pin has a volume bar, moving up and down to decrease or increase the audio level. The clips also contain Fade In and Fade Out tabs at the beginning and end, dragging to adjust the fade’s length.
By adding a short fade effect, whether in or out, the sound becomes relatively smoother and less conflicting to the ear when a new clip begins.
4. Detach the Audio
By default, iMovie keeps the video and audio sections of clips together for convenience. Yet, you want to use the video and audio sections of a clip separately sometimes.
For this purpose, choose your clip in the timeline, visit the Modify drop-down menu, and hit the Detach Audio button. You’ll now have two clips - one with the images and another with the sound.
A lot you can do with the detached audio. For instance, you could extend the audio clip to begin before the video plays, or so that it plays for a few seconds even after the video fades out. You could also cut out pieces from the audio’s middle portion while leaving the video intact.
Conclusion
Coming towards the end of the discussion, after understanding iMovie audio editingand going through an elaborated alternative of iMovie application, we decided that Wondershare Filmora sounds the best out of it. It allows you to flawlessly edit video and audio files on your desktop, with various inbuilt royalty-free music tracks to select from that can further improve your project’s presence.
Marion Dubois
Marion Dubois is a writer and a lover of all things video.
Follow @Marion Dubois
Also read:
- New Integrate Songs Seamlessly Into Videos Without Paying
- Updated The Art of Audio Conjunction Preparing Sounds for Video Production
- In 2024, The Ultimate Technique for Taming Room Rumbles in Recording Sessions
- In 2024, Leveraging Voiceovers in Microsoft PowerPoint A Detailed Walkthrough for Windows & Mac Operating Systems
- New Quick Guide to Disabling Zoom Microphones on PC/Mac and iOS Devices
- Updated In 2024, Beating Time A Guide to Adding Rhythms and Tempos Using Premiere Pro
- New In 2024, The Art of Sound Visualization Combining Waveform Graphics & Animation Techniques in Premiere Pro
- In 2024, Tranquility Tools Suite Comprehensive Noise Reduction App for Smooth Backgrounds on Android and iPhone
- Updated 2024 Approved The Ultimate Guide to Fine-Tuning Audio Volume for Optimal Listening Experience
- New In 2024, Top-Ranked Noise Reducer App Boost Visual Impact in Your Clips
- 2024 Approved Bridging Audio Realms to the Screen Designing Eye-Catching Audio Graphs & Animating Video Sequences with Premiere Pro Mastery
- The Premier List of Windows-Compatible Automatic Speech Recognition Systems
- Critical Lists of Soft Instrumental Sets for Ambient Acoustics for 2024
- New Elevate Your Speech Best Voice Alteration Apps for Beginners (No Cost - Top Picks )
- Updated In-Depth Exploration and Scrutiny of the 2023 Cambridge CXU Surround System for 2024
- Unleashing Your Audio Journey in Ubuntu Installation and Removal of Audacity for 2024
- 2024 Approved Echo the Quietude Expert Guide to Muting Audio in iPhone Videos
- New Unveiling the Essentials A Deep Dive Into Hip-Hop Culture for 2024
- In 2024, Unlocking Creative Power in Logic Pro X with These Top 8 Plugins
- New 2024 Approved Capturing Auditory Essence Waveform Visualization & Dynamic Animations in Avid Media Composer
- Strategies for Obtaining Gentle Music Without Disturbance for 2024
- New In 2024, Audio Alchemy Top Linux Editors - Free & Paid Options Explored
- Updated Auditory Elements in Podcasts Prime Venues for High-Quality Effects
- New Pro Video Editors Choice 10 Invaluable Plugins for Seamless Cutting and Trimming for 2024
- New 2024 Approved Audio-Free Video Formats Mastering the Art of Silence Removal in Popular File Types (MP4, MKV, AVI, MOV, WMV)
- Updated Audio Artistry Rendering and Animating Auditory Data in Roxio Media Creator for 2024
- Updated 2024 Approved Mastering Silence Effective Video Noise Reduction Techniques in Adobe Premiere Pro
- In 2024, How to Cut Audio in iMovie on Mac & iPhone?
- New Essential Tips for Picking the Ideal Mac-Compatible Music Catalog Tool for 2024
- New IPhones Auditory Features Demystified - The Top 10 Audio Recording Apps
- Updated Free & Value-Oriented Mac Audio Editing Suite for 2024
- Updated Streamlining Production Workflow Extracting Audio Separately on a Mac with iMovie
- New Advanced Techniques in Online Auditory Enhancement Services for 2024
- Crafting Seamless Sound Tracks with iMovies Volume Control for 2024
- Updated Harmonious Hacks Free Music Resources for Video Craftsmanship
- New Mastering Seamless Scene Shifts in Video Editing for 2024
- Updated In 2024, Top 15 Non Copyrighted Music for Montages
- Updated In 2024, Free, Web-Based DAWs That Are Changing Music Production The Top 10
- Updated 2024 Approved The Essential List 6 High-Performance Voice Alteration Apps
- 2024 Approved Voice Modification for Zoom Enhancing Communication with Personality Tweaks and Laughs
- Updated 2024 Approved Sounds of Success Unveiling the Top 8 Cinematic Audio Wonders
- New In 2024, Harmonic Pinnacle Identifying Exceptional Music for Visual Sequences
- Best Free-Flowing Tunes for Creative Slideshows for 2024
- 2024 Approved Revealed The 5 Superior Mac-Compatible Audio Mixers
- New MP4 to Mono Separating Sound From Video
- Updated In 2024, Silencing Audio in MP4 Format A Step-by-Step Guide
- New 2024 Approved Mac Video Editing Mastery Adobe Premiere Pro for Experts
- In 2024, Pokémon Go Cooldown Chart On Honor 100 Pro | Dr.fone
- In 2024, The Best Android Unlock Software For Vivo Y200 Device Top 5 Picks to Remove Android Locks
- Kapwing Video Trimming Tutorial Edit Videos in Minutes for 2024
- 10 Fake GPS Location Apps on Android Of your Tecno Camon 20 Premier 5G | Dr.fone
- In 2024, Unlock iPhone 15 With Forgotten Passcode Different Methods You Can Try
- A Perfect Guide To Remove or Disable Google Smart Lock On HTC
- 2024 Approved Cut, Trim, and Edit MOV Files for Free Top Picks
- In 2024, Android to Apple How To Transfer Photos From Motorola Moto G23 to iPad Easily | Dr.fone
- Updated 2024 Approved 5 Best Free Video Editors for AVI Files
- Prevent Cross-Site Tracking on Realme 12 Pro 5G and Browser | Dr.fone
- Updated Free WebM Video Editing Software Top Picks
- Updated In 2024, Change the Pace Best GIF Speed Changer Tools Reviewed
- In 2024, How To Bypass iCloud By Checkra1n Even On iPhone 14 Pro Max If Youve Tried Everything
- In 2024, How To Make Your Memoji Talk? Get Creative With Your Messaging
- How To Fix Apple ID Verification Code Not Working On Apple iPhone 14 Pro Max
- Updated 2024 Approved Top-Rated Cartoon Video Creators for Android, iPhone, and iPad
- Updated 2024 Approved Effortless Video Editing A Beginners Guide to Camtasia Speed Adjustment
- New 2024 Approved Easy Video Creation Best Apps for Photos and Music Lovers
- Title: 2024 Approved Taming Audio Chaos Advanced Tips and Tricks for Reducing Room Noise in Microphones
- Author: Paul
- Created at : 2024-05-05 06:14:21
- Updated at : 2024-05-06 06:14:21
- Link: https://voice-adjusting.techidaily.com/2024-approved-taming-audio-chaos-advanced-tips-and-tricks-for-reducing-room-noise-in-microphones/
- License: This work is licensed under CC BY-NC-SA 4.0.
