
:max_bytes(150000):strip_icc():format(webp)/santahatcomputer-5ba0332646e0fb0050e7ae93.jpg)
2024 Approved Mastering Music Creation at Home Ranking the Top 10 Digital Audio Environments
Mastering Music Creation at Home: Ranking the Top 10 Digital Audio Environments
FREE 10 Best Online Music Makers

Benjamin Arango
Apr 26, 2024• Proven solutions


Expressing ideas through music was never easy, and even today in the age of powerful digital audio stations like Ableton Live or FruityLoops , producing original music requires a certain set of skills. However, online content producers often need music for their videos, but they neither have the time or the budget to hire a professional musician to create a soundtrack for their project in studio conditions. If you are looking for a quick way to make your own music online, then you should keep reading, because in this article we are going to take you through the ten best online music makers you should check out in 2021.
10 Best Online Music Makers in 2021
The music-making platforms that are currently available online are still not as nearly as powerful as professional software products for music producers. Nonetheless, this doesn’t mean that you can’t use them to create the music you like or just have fun with them. Here are the ten best online music makers in 2019.
1. Typeatone
Price: Free
Image from Internet
Have you ever wondered what your words would sound like if they were turned into music? Head over to the Typeatone platform if you want to find out since all you have to do in order to start creating your own music is type in the text. As you type, the platform will automatically start playing your words and once you’re done, you’ll be able to hear your new song. You can also choose between different instruments to make the process of creating music with Typeatone even more entertaining. You can share all of your creations with your friends on social media.
![]()
A cross-platform for making videos anywhere for all creators

Why your video editing isn’t good enough? How about some creative inspo?
- 100 Million+ Users
- 150+ Countries and Regions
- 4 Million+ Social Media Followers
- 5 Million+ Stock Media for Use
* Secure Download

2. Audiotool
Price: Free
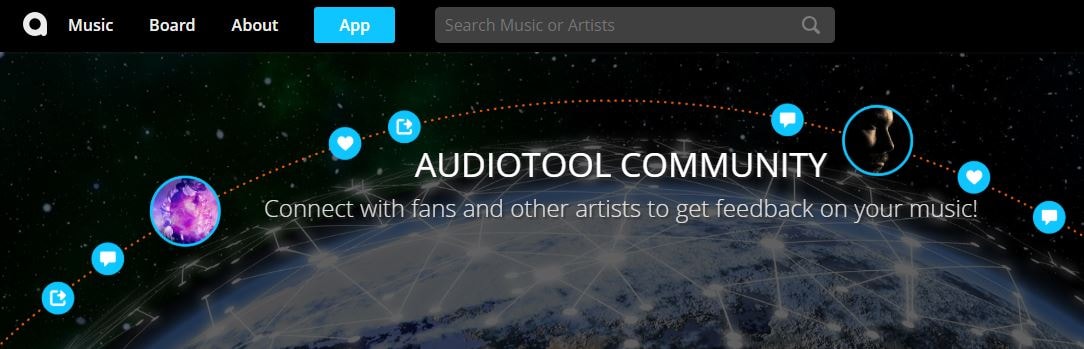
Image from Internet
Electronic music producers who often use synthesizers like Roland TB-303 or Roland TR-909 are going to love the features this online collaborative platform offers. Audiotool hosts a huge music library, you can explore even if you are not a registered user. In order to access the platform’s music studio, you first have to create an account and make sure that you are signed in. Audiotool is also a community of like-minded people where you can meet artists whose work you appreciate or hear what others think about your work. The only downside is that Audiotool’s abundance of features can be overwhelming for the newcomers to the world of electronic music production.
3. AudioSauna
Price: Free
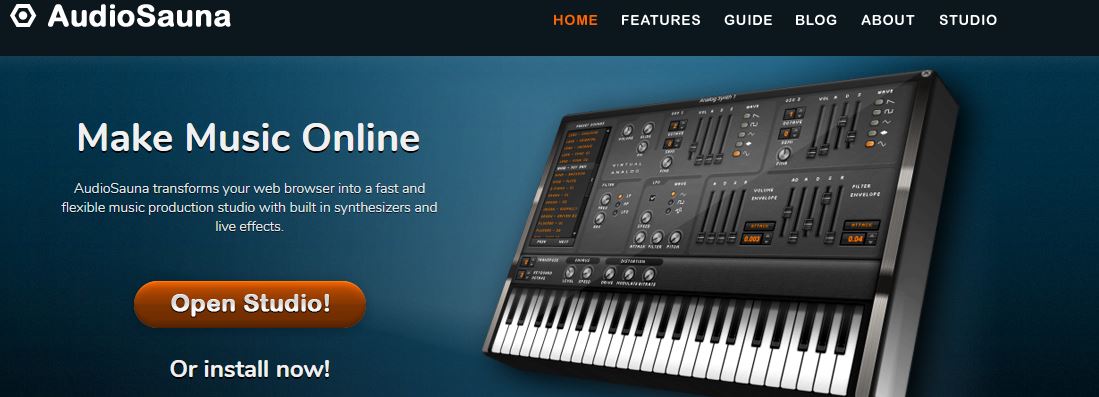
Image from Internet
AudioSauna seems to offer everything its users need to create inspiring music because it is equipped with frequency modulation synth, virtual analog synth and a sampler that provides layering features. Moreover, its intuitive interface makes the process of arranging the song structure or changing several note values simultaneously much easier. Creating an account on AudioSauna will enable to record all your projects and export them as audio files that can be uploaded to SoundCloud or any other audio distribution platform. AudioSauna is a perfect tool for skilled producers who want to create their music online.
4. Soundtrap
Price: Free trial available, subscription plans start at $3.99 per month

Image from Internet
Soundtrap offers a long list of features that enable professional musicians to create their music online. All you have to do is create an account and you will get access to the Sountrap’s studio that let you create new beat patterns, use a synthesizer or even invite friends to make music together. The platform also offers the possibility to connect your own instruments to the Soundtrap’s studio, so that you can record your music as you play it. This online platform also has an Education section where you can share your knowledge with others or learn valuable music lessons.
5. PatternSketch
Price: Free
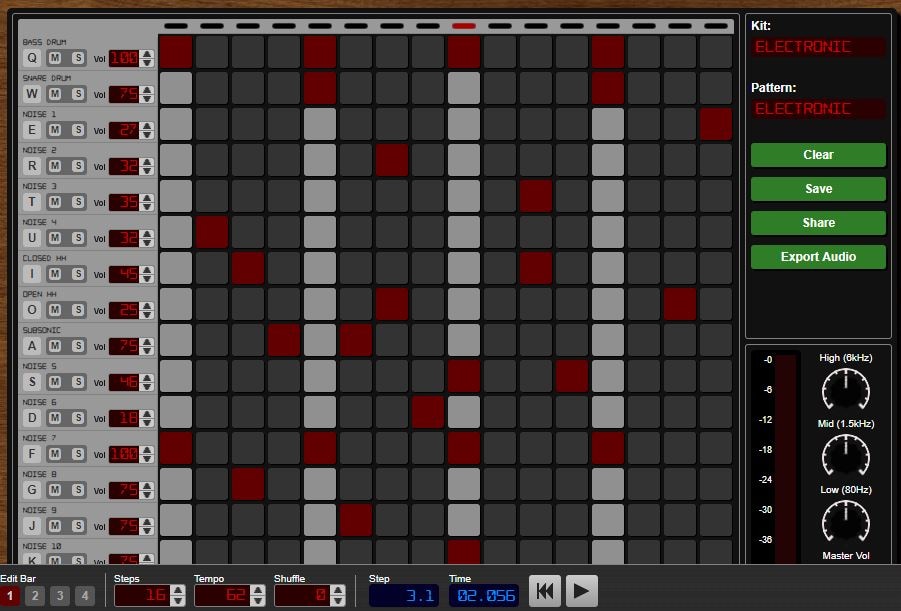
Image from Internet
This basic and yet effective drum machine can help you generate amazing beats for the songs you’re working on. Once you sign up, you will be able to choose from a number of different kits and patterns that are fully customizable or create your own original beats. After you create a pattern you like, you can save it with a single click or send it to your friends via email. Optionally, you can export all of your creations from PatternSketch and save them as wav, mp3 or ogg files, although in some cases mp3 audio files may not loop properly.
6. Soundation
Price: Free version available, pricing plans start at $1.99 per month

Image from Internet
If you choose to create music with the free version of Soundation, you’ll be able to work on up to ten projects, try out over 700 audio effects and loops, and export all your music in low quality. Purchasing the Intro pricing plan will enable you to work on an unlimited number of projects, make live audio recordings, import audio files smaller than 100MB or use an external midi controller. Moreover, opting for any of the annual or monthly subscription plans will allow you to export entire projects and audio files in high resolution from Soundation.
7. Text to Speech
Price: Free

online-music-maker-Text to Speech.jpg
Vocals are often overlooked in contemporary electronic music, but there are so many ways they can be used creatively. The platform lets you turn up to 50000 characters into speech at once, and it also offers several different voices you can choose from. Before you create an audio file you can determine how fast the text is going to be vocalized, so you should try different options and see which one fits your project the best. Text to Speech platform can be used during the process of creating a new song, but the tools it offers are not enough to make an entire song.
8. Looplabs
Price: Free
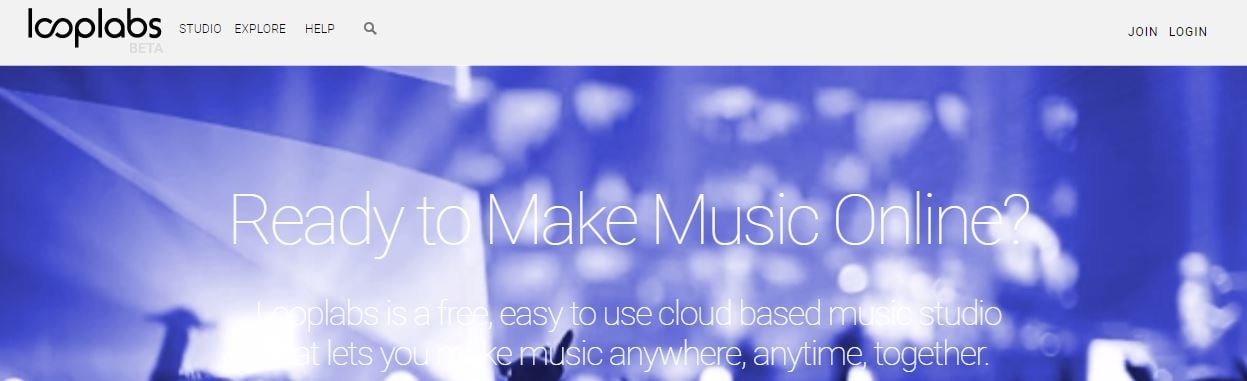
Music enthusiasts who would like to produce different genres of music online should definitely get familiar with Looplabs, as this online music maker lets its users remix songs or make music from scratch. Besides being one of the best places on the Internet to record music, Looplabs is also a community where you can meet people who like your music or discover artists whose work you admire. The Looplab’s studio features samples for a broad range of music genres and musical instruments, and you can use it to make Electro or Funk music equally effectively.
9. Online Sequencer
Price: Free
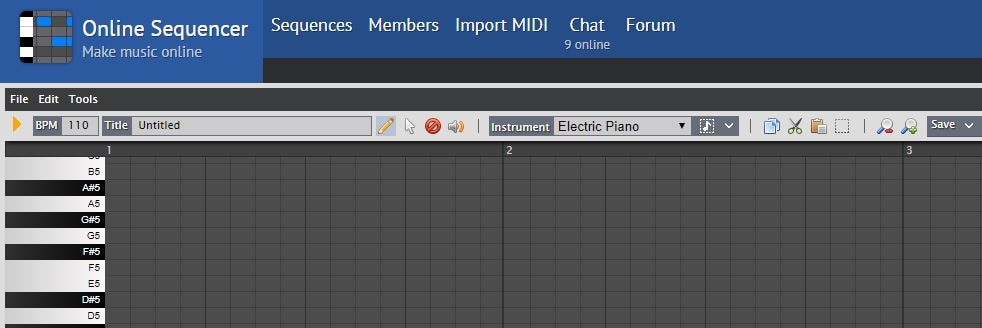
This is a perfect tool for developing an idea for a song, as you can create a sequence in just a few minutes. You can choose from Piano, Drums and Guitar categories of instruments or browse through a huge collection of fully customizable preset sequences that is updated on a daily basis. The platform also lets you import MIDI files and work on projects you’ve already started developing or you can export your sequences as MIDI files from the Online Sequencer and edit them with your DAW. Even though Online Sequencer is a useful tool for making music, the features it offers can’t really be compared with those on Soundation or AudioSauna.
10. Autochords
Price: Free
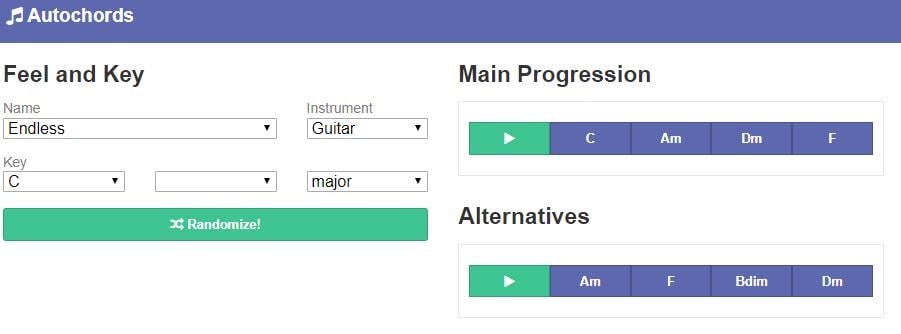
Finding new ideas for songs is often more difficult than it sounds, and if you ever face a creative block you should simply head over to Autochords. This platform suggests chord progressions based on the parameters you set, so you just have to select an instrument and the name of the song to set the feel, and the platform will show you the main progression and its alternatives. Rather than being an online music maker, Autochords is more a tool that helps piano and guitar players understand chord progressions better. iPhone and iPad users can download the Autochords app from the App Store for free.
Read More to Get : Best Free DAW for Windows and Mac for Beginners >>
Conclusion
You don’t have to be a professional musician in order to start making music online, you just have to love music, and an online music maker of your choice will take care of the rest. Do you use online music makers for entertainment or to express your creativity? Leave a comment below and share your opinions with us.
Benjamin Arango
Benjamin Arango is a writer and a lover of all things video.
Follow @Benjamin Arango
Benjamin Arango
Apr 26, 2024• Proven solutions
Expressing ideas through music was never easy, and even today in the age of powerful digital audio stations like Ableton Live or FruityLoops , producing original music requires a certain set of skills. However, online content producers often need music for their videos, but they neither have the time or the budget to hire a professional musician to create a soundtrack for their project in studio conditions. If you are looking for a quick way to make your own music online, then you should keep reading, because in this article we are going to take you through the ten best online music makers you should check out in 2021.
10 Best Online Music Makers in 2021
The music-making platforms that are currently available online are still not as nearly as powerful as professional software products for music producers. Nonetheless, this doesn’t mean that you can’t use them to create the music you like or just have fun with them. Here are the ten best online music makers in 2019.
1. Typeatone
Price: Free
Image from Internet
Have you ever wondered what your words would sound like if they were turned into music? Head over to the Typeatone platform if you want to find out since all you have to do in order to start creating your own music is type in the text. As you type, the platform will automatically start playing your words and once you’re done, you’ll be able to hear your new song. You can also choose between different instruments to make the process of creating music with Typeatone even more entertaining. You can share all of your creations with your friends on social media.
![]()
A cross-platform for making videos anywhere for all creators
Why your video editing isn’t good enough? How about some creative inspo?
- 100 Million+ Users
- 150+ Countries and Regions
- 4 Million+ Social Media Followers
- 5 Million+ Stock Media for Use
* Secure Download
2. Audiotool
Price: Free
Image from Internet
Electronic music producers who often use synthesizers like Roland TB-303 or Roland TR-909 are going to love the features this online collaborative platform offers. Audiotool hosts a huge music library, you can explore even if you are not a registered user. In order to access the platform’s music studio, you first have to create an account and make sure that you are signed in. Audiotool is also a community of like-minded people where you can meet artists whose work you appreciate or hear what others think about your work. The only downside is that Audiotool’s abundance of features can be overwhelming for the newcomers to the world of electronic music production.
3. AudioSauna
Price: Free
Image from Internet
AudioSauna seems to offer everything its users need to create inspiring music because it is equipped with frequency modulation synth, virtual analog synth and a sampler that provides layering features. Moreover, its intuitive interface makes the process of arranging the song structure or changing several note values simultaneously much easier. Creating an account on AudioSauna will enable to record all your projects and export them as audio files that can be uploaded to SoundCloud or any other audio distribution platform. AudioSauna is a perfect tool for skilled producers who want to create their music online.
4. Soundtrap
Price: Free trial available, subscription plans start at $3.99 per month
Image from Internet
Soundtrap offers a long list of features that enable professional musicians to create their music online. All you have to do is create an account and you will get access to the Sountrap’s studio that let you create new beat patterns, use a synthesizer or even invite friends to make music together. The platform also offers the possibility to connect your own instruments to the Soundtrap’s studio, so that you can record your music as you play it. This online platform also has an Education section where you can share your knowledge with others or learn valuable music lessons.
5. PatternSketch
Price: Free
Image from Internet
This basic and yet effective drum machine can help you generate amazing beats for the songs you’re working on. Once you sign up, you will be able to choose from a number of different kits and patterns that are fully customizable or create your own original beats. After you create a pattern you like, you can save it with a single click or send it to your friends via email. Optionally, you can export all of your creations from PatternSketch and save them as wav, mp3 or ogg files, although in some cases mp3 audio files may not loop properly.
6. Soundation
Price: Free version available, pricing plans start at $1.99 per month
Image from Internet
If you choose to create music with the free version of Soundation, you’ll be able to work on up to ten projects, try out over 700 audio effects and loops, and export all your music in low quality. Purchasing the Intro pricing plan will enable you to work on an unlimited number of projects, make live audio recordings, import audio files smaller than 100MB or use an external midi controller. Moreover, opting for any of the annual or monthly subscription plans will allow you to export entire projects and audio files in high resolution from Soundation.
7. Text to Speech
Price: Free

online-music-maker-Text to Speech.jpg
Vocals are often overlooked in contemporary electronic music, but there are so many ways they can be used creatively. The platform lets you turn up to 50000 characters into speech at once, and it also offers several different voices you can choose from. Before you create an audio file you can determine how fast the text is going to be vocalized, so you should try different options and see which one fits your project the best. Text to Speech platform can be used during the process of creating a new song, but the tools it offers are not enough to make an entire song.
8. Looplabs
Price: Free
Music enthusiasts who would like to produce different genres of music online should definitely get familiar with Looplabs, as this online music maker lets its users remix songs or make music from scratch. Besides being one of the best places on the Internet to record music, Looplabs is also a community where you can meet people who like your music or discover artists whose work you admire. The Looplab’s studio features samples for a broad range of music genres and musical instruments, and you can use it to make Electro or Funk music equally effectively.
9. Online Sequencer
Price: Free
This is a perfect tool for developing an idea for a song, as you can create a sequence in just a few minutes. You can choose from Piano, Drums and Guitar categories of instruments or browse through a huge collection of fully customizable preset sequences that is updated on a daily basis. The platform also lets you import MIDI files and work on projects you’ve already started developing or you can export your sequences as MIDI files from the Online Sequencer and edit them with your DAW. Even though Online Sequencer is a useful tool for making music, the features it offers can’t really be compared with those on Soundation or AudioSauna.
10. Autochords
Price: Free
Finding new ideas for songs is often more difficult than it sounds, and if you ever face a creative block you should simply head over to Autochords. This platform suggests chord progressions based on the parameters you set, so you just have to select an instrument and the name of the song to set the feel, and the platform will show you the main progression and its alternatives. Rather than being an online music maker, Autochords is more a tool that helps piano and guitar players understand chord progressions better. iPhone and iPad users can download the Autochords app from the App Store for free.
Read More to Get : Best Free DAW for Windows and Mac for Beginners >>
Conclusion
You don’t have to be a professional musician in order to start making music online, you just have to love music, and an online music maker of your choice will take care of the rest. Do you use online music makers for entertainment or to express your creativity? Leave a comment below and share your opinions with us.
Benjamin Arango
Benjamin Arango is a writer and a lover of all things video.
Follow @Benjamin Arango
Elevating Your Music Mix: Changing Volume in Audacity
Audacity is a free, open access, cross-platform sound editing and recording tool. It is compatible with Windows, Mac OS X, Linux, and various other operating systems. All of these aspects have contributed to Audacity’s worldwide popularity. Audacity features an amplified effect that alters the loudness of your chosen audio and other practical tools that can change the sound in different ways.
As a result, Audacity can not only assist you in modifying the level of an audio file, but it can also help you equalize, reduce, normalize, and so on.
Yes, you have heard it right, Audacity increase volume, but the primary question is how? But don’t worry, you will get the answer after reading the article. This article will explain how you can increase or decrease the volume of a whole and a specific segment of the audio file. Let’s get started.
In this article
01 How to Increase or Decrease Volume Without Distortion and Clipping in Audacity
02 How to Increase Volume of Multiple Files in Audacity?
03 How to Increase Volume in Certain Parts of Track?
04 What’s the Difference between Normalize and Amplify?
Part 1: How to Increase or Decrease Volume Without Distortion and Clipping in Audacity
Audio clipping occurs when the audio input becomes too loud for an amplifier to produce, and the surplus signal creates distortion. When editing, you cannot add additional volume to your audio clip forever because this would result in clipping. In this case, you can use the Audacity application to emphasize your material by turning the volume up or down without distortion and clipping on a track or recording.
Learn how Audacity increase volume without distortion by following the procedure described below:
Step 1: First, download and install the Audacity software on your computer.
Step 2: Select the File from the menu above and click Open to open the audio file.

Step 3: Choose the audio track, go to the Effect menu and pick the Amplify option from the drop-down menu.

Note: You can increase or decrease the volume by double-clicking the track and using the slider under the Gain title.
Step 4: Increase or decrease the volume by sliding the slider or typing the amplification value in the text box next to it in the Amplify window as needed.

Note: Ensure that the Allow Clipping checkbox remains unchecked to avoid clipping. Moreover, keep in mind that increasing the volume to a greater extent can result in distortion.
Related: How to Change Audio Volume in Filmora
Part 2: How to Increase Volume of Multiple Files in Audacity?
Audacity is an open-source audio editing tool. It is used for various purposes, like audio recording, music creation, and audio file editing. It also allows you to increase and decrease the volume of audio files.
You may also apply the modifications to multiple files at once, rather than one at a time. Check out the instructions below to learn how to change the volume of multiple audio files:
Step 1: Select the Import option from the File menu, and then pick the Audio option. Browse to your audio files, choose all of them, and then click the Open option.

Step 2: To select all the files, press Ctrl + A, click on the Effect option in the menu bar and pick Amplify.

Step 3: Now, either enter the value in the text box next to the Amplification Decibels tab or use the slider under it. To verify the operation of increasing the volume, check the allow clipping checkbox. When you’re through with the options, click the Ok button.

Step 4: Amplification will be applied to all the tracks. Go to the File option from the above menu to export the files and then select the Export option.

If you’re running Audacity on macOS computer, you can watch the video tutorial below to apply effects to multiple files.
Part 3: How to Increase Volume in Certain Parts of Track?
The audacity software also allows you to alter a specific section of an audio file. The selection tool can assist in locating a particular area of the track. After you’ve chosen a section of the audio file, you may utilize the amplification effect to increase its loudness. Check out the instructions below to learn how you can achieve it:
Step 1: Launch the Audacity software on the computer. To open the audio file, go to the File menu and select Open. You may also open the file by dragging it.
Step 2: Ensure that the Selection tool is active now. Click and hold the mouse left-click to move from one spot on the track to another.

Step 3: After picking the part, go to the Effect option from the menu and select Amplify.

Step 4: Now, for that specific region, modify the amplification and click OK. This will only change the volume for the area you have selected.

Part 4: What’s the Difference between Normalize and Amplify?
Amplify and Normalize are two essential features of the Audacity tool. Many people think they are the same thing, they are right up to some extent, but there exists a big difference between both the features. Before discussing the differences, you need to know what the terms Normalize and Amplify imply.
Amplify
It is the quickest approach to comprehend the effect’s name if you want to know precisely what impacts are. The frequency of the vibration is enhanced to increase the amplification effect. As previously said, it raises a tiny sound.
Furthermore, because this amplification is extended to all frequencies and amplitude, the noise increases. If you choose ten sources and magnify them by ten decibels, each source will be ten decibels louder than your present sound.

Normalize
The meaning of normalizing is standardized, which is also a feature of its name. Whenever you pick an audio input and use the normalize feature, the level is adjusted automatically according to the previously indicated average volume size in Oda City.
As a result, when one sound source is normalized, there is no discernible difference between it and the amplification mechanism. Still, the effect is evident when several sound sources are performed concurrently.
By pressing Ctrl + A and selecting all ten various audio sources, you may compute the required standard of every sound source, enhance the audio input that is smaller than the normal, and create the audio signal more significant than the standard. Shrink the size of each noise source, such as the name, and normalize the sound.

Related: Best Audio Normalizers for Windows
Differences
To differentiate the meaning and impact precisely, amplification means increasing or reducing the sound, whereas normalizing means equalizing the sound. Simply defined, if you magnify ten sources by ten decibels, each of the shorter and louder noises equals ten decibels in their actual loudness.
When the ten sources are normalized, the louder sounds grow louder, conforming to the standard sound source size. Because the amplifying is done regardless, the little noises are going insane during this procedure.
Conclusion
All in all, Audacity does an excellent job at audio editing. If you simply need to modify an audio file, Audacity is a great option. For increasing and decreasing the volume of single and multiple audio files, Audacity is still one of the best bets in the market. We hope that now know how Audacity increase volume of the audio files after reading this article.
02 How to Increase Volume of Multiple Files in Audacity?
03 How to Increase Volume in Certain Parts of Track?
04 What’s the Difference between Normalize and Amplify?
Part 1: How to Increase or Decrease Volume Without Distortion and Clipping in Audacity
Audio clipping occurs when the audio input becomes too loud for an amplifier to produce, and the surplus signal creates distortion. When editing, you cannot add additional volume to your audio clip forever because this would result in clipping. In this case, you can use the Audacity application to emphasize your material by turning the volume up or down without distortion and clipping on a track or recording.
Learn how Audacity increase volume without distortion by following the procedure described below:
Step 1: First, download and install the Audacity software on your computer.
Step 2: Select the File from the menu above and click Open to open the audio file.
Step 3: Choose the audio track, go to the Effect menu and pick the Amplify option from the drop-down menu.
Note: You can increase or decrease the volume by double-clicking the track and using the slider under the Gain title.
Step 4: Increase or decrease the volume by sliding the slider or typing the amplification value in the text box next to it in the Amplify window as needed.
Note: Ensure that the Allow Clipping checkbox remains unchecked to avoid clipping. Moreover, keep in mind that increasing the volume to a greater extent can result in distortion.
Related: How to Change Audio Volume in Filmora
Part 2: How to Increase Volume of Multiple Files in Audacity?
Audacity is an open-source audio editing tool. It is used for various purposes, like audio recording, music creation, and audio file editing. It also allows you to increase and decrease the volume of audio files.
You may also apply the modifications to multiple files at once, rather than one at a time. Check out the instructions below to learn how to change the volume of multiple audio files:
Step 1: Select the Import option from the File menu, and then pick the Audio option. Browse to your audio files, choose all of them, and then click the Open option.
Step 2: To select all the files, press Ctrl + A, click on the Effect option in the menu bar and pick Amplify.
Step 3: Now, either enter the value in the text box next to the Amplification Decibels tab or use the slider under it. To verify the operation of increasing the volume, check the allow clipping checkbox. When you’re through with the options, click the Ok button.
Step 4: Amplification will be applied to all the tracks. Go to the File option from the above menu to export the files and then select the Export option.
If you’re running Audacity on macOS computer, you can watch the video tutorial below to apply effects to multiple files.
Part 3: How to Increase Volume in Certain Parts of Track?
The audacity software also allows you to alter a specific section of an audio file. The selection tool can assist in locating a particular area of the track. After you’ve chosen a section of the audio file, you may utilize the amplification effect to increase its loudness. Check out the instructions below to learn how you can achieve it:
Step 1: Launch the Audacity software on the computer. To open the audio file, go to the File menu and select Open. You may also open the file by dragging it.
Step 2: Ensure that the Selection tool is active now. Click and hold the mouse left-click to move from one spot on the track to another.
Step 3: After picking the part, go to the Effect option from the menu and select Amplify.
Step 4: Now, for that specific region, modify the amplification and click OK. This will only change the volume for the area you have selected.
Part 4: What’s the Difference between Normalize and Amplify?
Amplify and Normalize are two essential features of the Audacity tool. Many people think they are the same thing, they are right up to some extent, but there exists a big difference between both the features. Before discussing the differences, you need to know what the terms Normalize and Amplify imply.
Amplify
It is the quickest approach to comprehend the effect’s name if you want to know precisely what impacts are. The frequency of the vibration is enhanced to increase the amplification effect. As previously said, it raises a tiny sound.
Furthermore, because this amplification is extended to all frequencies and amplitude, the noise increases. If you choose ten sources and magnify them by ten decibels, each source will be ten decibels louder than your present sound.
Normalize
The meaning of normalizing is standardized, which is also a feature of its name. Whenever you pick an audio input and use the normalize feature, the level is adjusted automatically according to the previously indicated average volume size in Oda City.
As a result, when one sound source is normalized, there is no discernible difference between it and the amplification mechanism. Still, the effect is evident when several sound sources are performed concurrently.
By pressing Ctrl + A and selecting all ten various audio sources, you may compute the required standard of every sound source, enhance the audio input that is smaller than the normal, and create the audio signal more significant than the standard. Shrink the size of each noise source, such as the name, and normalize the sound.
Related: Best Audio Normalizers for Windows
Differences
To differentiate the meaning and impact precisely, amplification means increasing or reducing the sound, whereas normalizing means equalizing the sound. Simply defined, if you magnify ten sources by ten decibels, each of the shorter and louder noises equals ten decibels in their actual loudness.
When the ten sources are normalized, the louder sounds grow louder, conforming to the standard sound source size. Because the amplifying is done regardless, the little noises are going insane during this procedure.
Conclusion
All in all, Audacity does an excellent job at audio editing. If you simply need to modify an audio file, Audacity is a great option. For increasing and decreasing the volume of single and multiple audio files, Audacity is still one of the best bets in the market. We hope that now know how Audacity increase volume of the audio files after reading this article.
Best AIF to MP3 Converter: Convert Audio Files Easily and Quickly
Best AIF to MP3 Converter: Convert audio files easily and quickly

Liza Brown
Mar 27, 2024• Proven solutions
Nowadays, people have started using various types of audio files because different players support only few file formats but MP3 is the only universal file format that is supported by all the players. That is the main reason why people are proactively seeking software that can convert their existing audio and video files into MP3 file format. If you are also seeking how to Convert AIF to MP3 then we have come up with detail information about the converters that will help you in possessing MP3 files without facing any troubles. These converters are apt for various devices and that makes them perfect software to use for possessing MP3 Audio files.
Here is a list of the Best AIF to MP3 converters that you can use very easily with your various devices
#1.Convert AIF to MP3 with Wondershare Filmora
Converting AIF music file to MP3 can be accomplished in three easy steps with Wondershare Filmora.
- 1.Import your AIF files to the media panel of Filmora.
- 2.Drag the AIF file to the audio track on the timeline below.(Filmora allows you to add up to 3 audio tracks at a time, so in this step you can also add some sound effects, background music or voice over to your original file. You can also trim, merge adjust order of the music file before converting to MP3)
- 3.Click “Export” to bring up an editing window, and choose MP3 as the output format. There you go!
Download a free trial version to get started now:
Download Mac Version ](https://tools.techidaily.com/wondershare/filmora/download/ )
#2. Convert AIF to MP3 with Faasoft AIFF to MP3 Converter
Audio Interchange File format or AIFF was introduced to the world in 1988 by the apple. This file format is not supported by the latest audio players because it is kind of older version. It consumes lots of space as compared with the other file formats and can create lots of space problem in your device. But that is not the case with the MP3 files because that is universal file format and it is accepted by various audio players, window players and Mac devices.
Faasoft AIFF to MP3 Converter is perfect software that can convert AIFF files into MP3 within few minutes. You can save lots of disk space, if you have converted your favorite files into MP3 file format. Here are steps that you need to take for converting AIFF into MP3
- 1. Add AIFF to Fassoft AIFF to MP3 converter –
There is no denying that it is the only software that can convert AIFF within very less time and you can start the procedure by clicking on ‘ADD File’ button. You can also drag and drop the file on the software surface for adding the file that you want to convert into MP3. - 2. Select the MP3 format among all the other options –
Once, you have added the file then this software will ask you the desirable file format that you want to convert. You have to avoid all the other file formats and select MP3 for starting the converting process. You need to click on the ‘profile Drop-Down’ button and select “MP3 MPEG Layer-3 Audio (MP3). - 3. Click on ‘Convert’ button for completing the AIFF to MP3 conversion –
Now You only have to click on the Convert button that is given on the software interface and it will convert the file. It might take few seconds before completing the process so be patient and wait until the process is completed.
Benefits that you can avail by choosing for Faasoft AIFF to MP3 converter –
- 1. You can easily convert AIFF to MP3 with three simple steps
- 2. You can also convert AIFF to other famous file formats such as WAV, M4R etc
- 3. You can also convert other file formats into AIFF and you can also convert other famous file formats into your desirable formats
- 4. You can also extract audio from videos such as AVI, MOV, WMV etc
#3. Use iTunes to convert AIF to MP3
This software is used with Mac devices and convert all types of audio and video files very easily. You can download this application from the App store and start converting your favorite AIFF into MP3. Here are step by step procedures that you should follow to complete the file conversion task.
- 1. Open the iTune that is given in the Multi-Media folder, and double click on the iTune icon.
- 2. You have to agree to the license software to use the iTune on your computer, in case, you are using it on your computer, first time. Now, click on agree and then next and ok, until the done is displayed and then open iTune. You can also seek the latest version on iTune by clicking on OK once more. When you have done with this process then you will see software interface.
- 3. Now drag and drop the file that you want to convert on the iTune. In case you are having problem then you can right click on the file and use drop down menu where you will find ‘Convert Selection to ACC’ option. You should change the preference first and then opt for the MP3 option because we want to convert file into MP3 file format. You can also find it into the topmost menu, located under the iTune heading.
- 4. Now import the file using ‘import using’ that is followed by the drag down menu. Now select MP3 Encoder from the box and select good quality for the dropdown box.
- 5. Now right click on the song again and select the Convert Selection to MP3, to verify that settings are changed with the preference.
- 6. Now you will have both the files (MP3 and AIFF) and you can check the info and delete the unwanted file.
- 7. You can also get the location of the file by right click and choosing ‘Show Song File’.
#4. Use iDealshare VideoGo to convert AIF to MP3
It is the most unique software because it can convert from AIFF to MP3 and MP3 to AIFF without any problem. This software is compatible with various platforms such as MAC, Windows and other platforms. It is very user friendly software that you can manage without facing any hassle. Here are key features that make this software ideal to use.
- 1. You can easily convert AIFF, AIF, AIFC file formats on your Mac and Windows computers into MP3 and other file formats.
- 2. You can also convert MP3, WMA, AC3, OGG into AIFF and other formats using this magnificent software.
- 3. It converts AIFF into various lossless audio formats such as ALAC, M4A etc.
- 4. You can also convert videos into audio files using this software.
- 5. You can also apply various editing functions such as increasing volume, adding bass or many other adjustments to convert high quality audio files.
Hence, all these software are best in the industry and you can choose any one of them for converting AIFF into MP3 or other file formats without wasting your time.
Liza Brown
Liza Brown is a writer and a lover of all things video.
Follow @Liza Brown
Liza Brown
Mar 27, 2024• Proven solutions
Nowadays, people have started using various types of audio files because different players support only few file formats but MP3 is the only universal file format that is supported by all the players. That is the main reason why people are proactively seeking software that can convert their existing audio and video files into MP3 file format. If you are also seeking how to Convert AIF to MP3 then we have come up with detail information about the converters that will help you in possessing MP3 files without facing any troubles. These converters are apt for various devices and that makes them perfect software to use for possessing MP3 Audio files.
Here is a list of the Best AIF to MP3 converters that you can use very easily with your various devices
#1.Convert AIF to MP3 with Wondershare Filmora
Converting AIF music file to MP3 can be accomplished in three easy steps with Wondershare Filmora.
- 1.Import your AIF files to the media panel of Filmora.
- 2.Drag the AIF file to the audio track on the timeline below.(Filmora allows you to add up to 3 audio tracks at a time, so in this step you can also add some sound effects, background music or voice over to your original file. You can also trim, merge adjust order of the music file before converting to MP3)
- 3.Click “Export” to bring up an editing window, and choose MP3 as the output format. There you go!
Download a free trial version to get started now:
Download Mac Version ](https://tools.techidaily.com/wondershare/filmora/download/ )
#2. Convert AIF to MP3 with Faasoft AIFF to MP3 Converter
Audio Interchange File format or AIFF was introduced to the world in 1988 by the apple. This file format is not supported by the latest audio players because it is kind of older version. It consumes lots of space as compared with the other file formats and can create lots of space problem in your device. But that is not the case with the MP3 files because that is universal file format and it is accepted by various audio players, window players and Mac devices.
Faasoft AIFF to MP3 Converter is perfect software that can convert AIFF files into MP3 within few minutes. You can save lots of disk space, if you have converted your favorite files into MP3 file format. Here are steps that you need to take for converting AIFF into MP3
- 1. Add AIFF to Fassoft AIFF to MP3 converter –
There is no denying that it is the only software that can convert AIFF within very less time and you can start the procedure by clicking on ‘ADD File’ button. You can also drag and drop the file on the software surface for adding the file that you want to convert into MP3. - 2. Select the MP3 format among all the other options –
Once, you have added the file then this software will ask you the desirable file format that you want to convert. You have to avoid all the other file formats and select MP3 for starting the converting process. You need to click on the ‘profile Drop-Down’ button and select “MP3 MPEG Layer-3 Audio (MP3). - 3. Click on ‘Convert’ button for completing the AIFF to MP3 conversion –
Now You only have to click on the Convert button that is given on the software interface and it will convert the file. It might take few seconds before completing the process so be patient and wait until the process is completed.
Benefits that you can avail by choosing for Faasoft AIFF to MP3 converter –
- 1. You can easily convert AIFF to MP3 with three simple steps
- 2. You can also convert AIFF to other famous file formats such as WAV, M4R etc
- 3. You can also convert other file formats into AIFF and you can also convert other famous file formats into your desirable formats
- 4. You can also extract audio from videos such as AVI, MOV, WMV etc
#3. Use iTunes to convert AIF to MP3
This software is used with Mac devices and convert all types of audio and video files very easily. You can download this application from the App store and start converting your favorite AIFF into MP3. Here are step by step procedures that you should follow to complete the file conversion task.
- 1. Open the iTune that is given in the Multi-Media folder, and double click on the iTune icon.
- 2. You have to agree to the license software to use the iTune on your computer, in case, you are using it on your computer, first time. Now, click on agree and then next and ok, until the done is displayed and then open iTune. You can also seek the latest version on iTune by clicking on OK once more. When you have done with this process then you will see software interface.
- 3. Now drag and drop the file that you want to convert on the iTune. In case you are having problem then you can right click on the file and use drop down menu where you will find ‘Convert Selection to ACC’ option. You should change the preference first and then opt for the MP3 option because we want to convert file into MP3 file format. You can also find it into the topmost menu, located under the iTune heading.
- 4. Now import the file using ‘import using’ that is followed by the drag down menu. Now select MP3 Encoder from the box and select good quality for the dropdown box.
- 5. Now right click on the song again and select the Convert Selection to MP3, to verify that settings are changed with the preference.
- 6. Now you will have both the files (MP3 and AIFF) and you can check the info and delete the unwanted file.
- 7. You can also get the location of the file by right click and choosing ‘Show Song File’.
#4. Use iDealshare VideoGo to convert AIF to MP3
It is the most unique software because it can convert from AIFF to MP3 and MP3 to AIFF without any problem. This software is compatible with various platforms such as MAC, Windows and other platforms. It is very user friendly software that you can manage without facing any hassle. Here are key features that make this software ideal to use.
- 1. You can easily convert AIFF, AIF, AIFC file formats on your Mac and Windows computers into MP3 and other file formats.
- 2. You can also convert MP3, WMA, AC3, OGG into AIFF and other formats using this magnificent software.
- 3. It converts AIFF into various lossless audio formats such as ALAC, M4A etc.
- 4. You can also convert videos into audio files using this software.
- 5. You can also apply various editing functions such as increasing volume, adding bass or many other adjustments to convert high quality audio files.
Hence, all these software are best in the industry and you can choose any one of them for converting AIFF into MP3 or other file formats without wasting your time.
Liza Brown
Liza Brown is a writer and a lover of all things video.
Follow @Liza Brown
Also read:
- New Unlock Your Phones Potential with These Top 10 Voice Recorder Apps (iOS) for 2024
- In 2024, Navigating Gaming Voice Changes Expert Advice on Best Practices
- Updated How to Convert MP3 to Text Online 4 Easy Ways
- 2024 Approved Enhancing PC Sound Quality with Audacity Modern Techniques and Setup
- New Stardust Vocal Tuning Essential Features, User Guides & Alternatives for Voice Change Devices
- New Locate the Wolf Whistle Ambiance for 2024
- New 2024 Approved How to Make Beats for Your Music Videos?
- Updated Advanced Techniques for Audio Detachment in Newly Updated MKV Files (MKV-2023)
- Updated In 2024, Expertly Curated List of Music to Text Transcription Tools
- New 2024 Approved Three Methods for Transforming Your Podcast Into MP3 Format
- In 2024, The Art of Syncing Sound Enhancing Video Quality Through Dynamic Audio Editing in Final Cut Pro X
- New 2024 Approved Expert Platforms for Silencing Background Noise in Audio Files
- 2024 Approved The Unveiling of Cambridges CXU Audio Performance - A 2023 Assessment
- Updated The Pinnacle of Sound Filtration Leading Apps for Eliminating Background Ruckus
- Updated Front-Runners in Browser Sound Capture Tech - Chrome Edition, Revealed for 2024
- 2024 Approved Leading Speech Transcription Tools for Smartphones - Android and iPhone Edition
- New 2024 Approved Exploring the Sonic Signature of an Aggravated Poochs Howl
- Updated In 2024, Expertly Curated List of Premier Audio Trimming Software Websites
- Searching for High-Quality Vocal Noise Sounds
- Updated The Triumvirate of Premium MP3 Sound Enhancement Services Online
- Low-Hassle Chromebook Sound Recording A Step-by-Step Approach for 2024
- Updated In 2024, Winning Windows & macOS DAW Software The Top 10 Choice
- Echoes of Purity Advanced Techniques and Tools to Maintain Clear Audio Amidst Background Noise, Online & Offline for 2024
- New 2024 Approved Mass Momentum Surge Phenomenon
- New Cutting-Edge Practices for Harmonizing Music with IGTV Broadcasts
- New Helpful Advice Mastering the Use of Voxal Sound Changer for Improved Discord Interaction
- Updated Reducing Noise With Audacity Working Through The Details for 2024
- New In 2024, Tidal Transformations Using Discords Clownfish Voice Filter for a Unique Skype Experience
- Updated In 2024, The Power of Projection Adjusting Your Voice Across Different Settings
- New Eliminating the Noise A Step-by-Step Approach to Clearer Sound Editing in Audacity for 2024
- Updated Expert Listing Top 8 Voice Command Systems Compatible with Windows/MacOS & Web-Based Applications for 2024
- Updated 2024 Approved The Ultimate Voice Memo Solution Comparing Vocaroo and Its Competitors
- Updated 2024 Approved Indispensable Auditory Treasures From YouTube
- New In 2024, Contemporary Voiceover Practices for Dynamic Video Creation - An Updated Guide
- New How to Make Beats for Your Music Videos, In 2024
- 2024 Approved Top 10 Windows & macOS Compatible DAWs The Ultimate Selection
- 2024 Approved Best Free Online Transcribers Convert Your Audio Files with Ease
- New In 2024, Efficient Methods for Audio Trimming in Apple Videos
- New Elevating Your Audio Game A Comprehensive List of the Best Tools to Modify and Transform Sound for 2024
- Auditory Precision in Filmmaking Employing Audio Ducking Strategies
- 2024 Approved The Ultimate Guide to Modifying Sound Intensity in Audacity
- New In 2024, Essential Guide to Combining Multi-Track Recordings Into a Single Clip
- 2024 Approved Efficient Ways to Extract and Save Audio Tracks From Video Files Across Multiple Devices
- Updated How to Record Voice on iPhone? Step by Step Guide
- New Seamless Song Editing on Mac Unveiling the Most Acclaimed MP3 Cutter Applications for 2024
- Updated Audio-to-Text Transformation Trends for 2024
- Updated From Cloud to Disk The Comprehensive Guide to Extracting Songs From Spotify Playlists
- 2024 Approved This Article Discusses What Is Adobe Premiere Pro, How to Download, Install and Use It, and Its Key Features. It Further Discusses Its Alternative for Editing Your Videos and More. Check Out Now
- How to Transfer from Apple iPhone 8 to iPhone 8/X/11 | Dr.fone
- In 2024, The Best Android Unlock Software For Vivo Y17s Device Top 5 Picks to Remove Android Locks
- New Get Ready to Amaze Top-Rated 3D Video Creation Tools for 2024
- Updated 2024 Approved Mac Users, Rejoice! Top VSDC Video Editor Alternatives You Need to Know
- In 2024, 8 Ways to Transfer Photos from Realme 10T 5G to iPhone Easily | Dr.fone
- The Best Android SIM Unlock Code Generators Unlock Your Vivo V29e Phone Hassle-Free
- New 2024 Approved Top 12 Best Meme Makers Online for FREE
- How To Unlock SIM Cards Of Vivo Y77t Without PUK Codes
- Best 10 Mock Location Apps Worth Trying On Infinix Hot 30i | Dr.fone
- 2024 Approved What Is an AI Text Generator?
- Fix Unfortunately Settings Has Stopped on Samsung Galaxy A05s Quickly | Dr.fone
- In 2024, Unlocking Made Easy The Best 10 Apps for Unlocking Your Itel A60s Device
- New How to Create Slideshow in LinkedIn
- 2024 Approved 6 Essential Tools for Creating Engaging Movie Introduction Videos
- Remove Google FRP lock on Realme Note 50
- Updated 2024 Approved This Is a Recommendation About Bandicut. If You Are Confused, Please Check It Out
- New Get Pro-Level Results Top 10 Free Green Screen Video Editing Apps for Mobile
- The Best 8 VPN Hardware Devices Reviewed On Huawei P60 | Dr.fone
- In 2024, Full Guide to Unlock iPhone 8 with iTunes | Dr.fone
- Updated 10 Free Online Tools to Create Stunning Invitation Videos for 2024
- In 2024, How to Mirror Motorola Edge 2023 to Mac? | Dr.fone
- How to Reset Xiaomi Redmi Note 12R Without the Home Button | Dr.fone
- In 2024, 3 Ways for Android Pokemon Go Spoofing On Vivo X Flip | Dr.fone
- How to Stop Life360 from Tracking You On Realme C33 2023? | Dr.fone
- All You Need To Know About Mega Greninja For Asus ROG Phone 7 Ultimate | Dr.fone
- Overview of the Best Samsung Galaxy A05s Screen Mirroring App | Dr.fone
- In 2024, 3 Solutions to Find Your Samsung Galaxy A24 Current Location of a Mobile Number | Dr.fone
- Best Android Data Recovery - Undelete Lost Messages from Lava Blaze Pro 5G
- 2024 Approved Vintage Video Filters Top Mobile Apps for Achieving a Retro VHS Look
- New The Top-Rated Educational Animation Software for Schools
- New Elevate Your Storytelling Best Photo Slideshow Video Makers for 2024
- Fix the Error of Unfortunately the Process.com.android.phone Has Stopped on Samsung Galaxy A05 | Dr.fone
- Updated The Art of Lower Thirds Design in Final Cut Pro X
- How to Mirror Your Xiaomi Redmi K70 Screen to PC with Chromecast | Dr.fone
- A Step-by-Step Guide on Using ADB and Fastboot to Remove FRP Lock from your Poco X6
- New How to Edit MP4 Video in Mac/Windows (Windows 8 Included)
- For People Wanting to Mock GPS on Itel P55+ Devices | Dr.fone
- The Best iSpoofer Alternative to Try On Xiaomi Redmi A2+ | Dr.fone
- 6 Proven Ways to Unlock Vivo S17e Phone When You Forget the Password
- New Unleash Your Creativity Top-Rated Stop Motion Apps for Mobile for 2024
- Proven Ways in How To Hide Location on Life360 For Lenovo ThinkPhone | Dr.fone
- In 2024, 3 Ways to Change Location on Facebook Marketplace for Realme C53 | Dr.fone
- 5 Quick Methods to Bypass Oppo A2 FRP
- Learn How To Lock Stolen Your iPhone 14 Properly
- In 2024, Why does the pokemon go battle league not available On Xiaomi Redmi Note 12 Pro+ 5G | Dr.fone
- In 2024, Preparation to Beat Giovani in Pokemon Go For Samsung Galaxy A54 5G | Dr.fone
- Title: 2024 Approved Mastering Music Creation at Home Ranking the Top 10 Digital Audio Environments
- Author: Paul
- Created at : 2024-05-20 01:48:27
- Updated at : 2024-05-21 01:48:27
- Link: https://voice-adjusting.techidaily.com/2024-approved-mastering-music-creation-at-home-ranking-the-top-10-digital-audio-environments/
- License: This work is licensed under CC BY-NC-SA 4.0.
