
:max_bytes(150000):strip_icc():format(webp)/samsungvoiceassistant-1c59910bc4614b2a8531fc5b7a754e7d.jpg)
2024 Approved Accessible Vocal Isolation Equipment for All Voice Levels
Accessible Vocal Isolation Equipment for All Voice Levels
Acapella extraction has grown in popularity and become a sought-after art online. Those interested in music production or people who just enjoy listening to vocals alone can extract acapella from their favorite music with ease. The best acapella extractors help to separate vocals from background music so you can enjoy each individually. This article briefly reviews acapella separator options that you may use for various purposes.
AI Vocal Remover A cross-platform for facilitating your video editing process by offering valuable benefits!
Free Download Free Download Learn More

Part 1. Online Acapella Extractors: Top 5 Options
The choice of an acapella extractor will mainly depend on what you want to achieve. For quick and small projects, online acapella extractors often work the best. Here is a list of the top tools that you may consider:
1. Media.io
The first one on this list is Media.io. This acapella online extractor tool is powered by AI, producing quality output in minutes.

Key features
- A user-friendly online platform that is specially designed for processing audio and viewer
- Powered by an artificial intelligence algorithm that automates acapella extraction
- Effortlessly separates music from vocals, downloading each respectively
- Audio formats: M4A, MOV, MP4, MP3, OGG, MKV, FLV, MOV, and more
- Tales about 1 minute and 45 seconds to process a 4-minute song
2. Lalal.ai
Lalal.ai is a powerful online acapella extractor. The AI-powered website allows you to extract vocals, drums, musical instruments, bass, and more from audio recordings.

Key Features
- Easy to create karaoke tracks by isolating vocals for remixes
- Based on cutting-edge machine learning techniques that allow it to learn to recognize and isolate vocals accurately
- Audio formats: OGG, MP3, AVI, WAV, FLAC, MP4, AIFF
- A free starter plan and karaoke maker tool
3. Acapella Extractor
The Acapella Extractor accurately removes instrumentals from songs. The website is an efficient acapella isolator that generates the vocal audio file for free download.

Key Features
- Easy to use as you only need to upload your audio file to start the extraction process
- Removes instruments from songs quickly
- Audio formats: MP3, WMA, WAV, AIFF, FLAC
- Drag and drop your music file and export the output as MP3
4. Vocali.se
When looking for a simple acapella online extractor, Vocali.se is a great choice. The website allows you to separate vocals from music easily and quickly. The service is available for free without the need for software installation or creating an account.

Key Features
- An easy-to-use and highly efficient service
- Processes audio in less than 2 minutes
- Offers an acapella maker tool
- Audio Formats: MP3, M4A, WAV, FLAC, OGG
5. Voice Separator
Voice Separator is a free acapella extractor website. It offers tools for extracting voice and instruments from music in a matter of minutes. The AI-powered tool uses machine learning to extract vocals, pianos, drums, bass, and other instruments from music into individual audio tracks.

Key Features
- Powered by Artificial Intelligence that produces accurate results
- Great for karaoke track creation
- 3 available processing methods
Part 2. Acapella Extractor Apps: On-the-Go Solutions
Acapella extractor apps are great for use on your phone and other devices. They are lightweight, allowing you to extract acapella from your soundtrack on the go. Here are the top five options you may choose from.
1. Vocal Remover and Isolation
This acapella extractor app uses AI algorithms to separate the vocals and instrumentals. Users can export the vocals and background instrumentals tracks individually, which makes it a great tool for making karaoke background tracks.

Key Features
- Quickly separates voice from music
- Uses and is powered by an AI algorithm
- Creates an acapella from a sing in only 10 seconds
- Audio formats: MP3, WAV, FLAV
2. Moises App
This AI acapella extractor removes and separates vocals and instruments with only one click. The audio separation feature will take your musical training to the next level.

Key Features
- Easy and quick acapella extraction in one click
- Powered by an AI algorithm that produces quick and accurate results
- Audio formats: MP3, WMA, WAV, AIFF, FLAC
- The vocal remover feature allows users to play and sing along to their favorite songs
3. Splitter.ai - AI Audio Processing
This is a great choice of tool for acapella extractor YouTube purposes. With millions of users, Splitter processes audio using AI for quick and accurate results. The app has a free plan and commercial services that include music stem separation.

Key Features
- Easy way to separate your soundtracks
- Audio formats: WAV, FLAC, OGG, MP3
- Access to an online instrumental maker
4. iZotope RX
This is an advanced audio editing software that works perfectly with acapella removal. The MP3 voice remover is a popular app among professionals in the audio industry. It is also used for noise reduction, audio cleaning, audio repair, and creative sound design.

Key Features
- A range of powerful algorithms and tools to address audio issues
- Audio formats: WAV, AIFF, Broadcast WAV, MP3, WMA, SD2, OGG, BWF, FLAC
- Creates quality acapella with internal music rebalance tools
- Powerful spectral editing tools that give precise adjustments
5. Melody.ml
This is another effective acapella extractor app that allows users to separate music tracks using AI and machine learning. The output is a zip file that contains 2 isolated files of the vocals and instrumentals.

Key Features
- Easy way to separate your favorite songs
- Supports up to 100MB file
- Access to an online instrumental maker
- Audio formats: WAV, FLAC, OGG, MP3
Part 3. Efficiently Extract Acapella from Audio with Filmora 13
When extracting acapella from your favorite music, you want the best outcomes. Wondershare Filmora is a popular video editing software with advanced audio editing capabilities. With a host of several AI features, the software produces quality and accurate results in every project.
Free Download For Win 7 or later(64-bit)
Free Download For macOS 10.14 or later
The audio editing features on Filmora allow you to extract acapella and do a lot more with your clips. Let’s explore this feature in more detail:
AI Vocal Remover
The AI Vocal Remover on Filmora allows you to separate vocals and music from any song. You can also extra acapella from music tracks and audio files while keeping high-quality audio. The feature also allows you to dub videos freely by simply removing all the vocals. The feature offers several benefits when editing:

- Removes Vocals from Audio in One Click – Easily dub any video without covering the current vocals, which allows you to keep great soundtracks after removing the vocals.
- Effective Vocal Separation – With the use of advanced AI algorithms, the AI Vocal Remover isolates vocals with exceptional quality to ensure that the vocals are effectively separated from background music. It does all this without losing audio fidelity.
- Instant Listening of Results – You won’t have to export or download the entire video or audio to listen to the results. Filmora allows you to view and listen to the results in the editor on the go.
- Removes other Audio Elements – Aside from extracting acapella and removing vocals, Filmora allows you to extract other elements from your audio. Point out the unwanted elements to remove from your soundtrack to achieve better results.
- Dub Exceptional Videos – No need to record vocals in different languages and stick them over the original ones. The AI Vocal Remover feature allows you to completely remove the originals so you can import new and fresh ones. This will give you highly professional and clear dubbed videos in a matter of clicks.
How To Use AI Vocal Remover?
Using AI Vocal Remover to extract acapella from your soundtrack is pretty easy. Here are the main three steps to follow:
Step 1: Launch Filmora and Create a New Project
Start the Filmora software on your desktop. Then click the “New Project” tab in the startup window to enter the editing window.

Step 2: Import Your Soundtrack or Files
Select the “Media” tab from the custom toolbar. Click on the “Files” icon and select the files you want to import to Filmora for editing. You can also drag and drop the files on your computer to the Filmora media section.

Step 3: Enable the AI Vocal Remover
Choose the clips you want to extract acapella from in the timeline. Then click on the “Audio” option and select “AI Vocal Remover.” From the AI Vocal Remover window that appears, make the appropriate edits that you want with your audio clip.

Conclusion
To wrap up, there is a wide choice of acapella extractors depending on what you want to achieve. You have the option of acapella extractor online tools or an acapella extractor app that you can use on your devices. Each will support different audio formats and will produce specific quality results. For the quickest and most user-friendly tool, we recommend Wondershare Filmora. The popular video editing software offers you excellent audio editing features and will help you achieve more in your editing projects.
Free Download Free Download Learn More
Part 1. Online Acapella Extractors: Top 5 Options
The choice of an acapella extractor will mainly depend on what you want to achieve. For quick and small projects, online acapella extractors often work the best. Here is a list of the top tools that you may consider:
1. Media.io
The first one on this list is Media.io. This acapella online extractor tool is powered by AI, producing quality output in minutes.
Key features
- A user-friendly online platform that is specially designed for processing audio and viewer
- Powered by an artificial intelligence algorithm that automates acapella extraction
- Effortlessly separates music from vocals, downloading each respectively
- Audio formats: M4A, MOV, MP4, MP3, OGG, MKV, FLV, MOV, and more
- Tales about 1 minute and 45 seconds to process a 4-minute song
2. Lalal.ai
Lalal.ai is a powerful online acapella extractor. The AI-powered website allows you to extract vocals, drums, musical instruments, bass, and more from audio recordings.
Key Features
- Easy to create karaoke tracks by isolating vocals for remixes
- Based on cutting-edge machine learning techniques that allow it to learn to recognize and isolate vocals accurately
- Audio formats: OGG, MP3, AVI, WAV, FLAC, MP4, AIFF
- A free starter plan and karaoke maker tool
3. Acapella Extractor
The Acapella Extractor accurately removes instrumentals from songs. The website is an efficient acapella isolator that generates the vocal audio file for free download.
Key Features
- Easy to use as you only need to upload your audio file to start the extraction process
- Removes instruments from songs quickly
- Audio formats: MP3, WMA, WAV, AIFF, FLAC
- Drag and drop your music file and export the output as MP3
4. Vocali.se
When looking for a simple acapella online extractor, Vocali.se is a great choice. The website allows you to separate vocals from music easily and quickly. The service is available for free without the need for software installation or creating an account.
Key Features
- An easy-to-use and highly efficient service
- Processes audio in less than 2 minutes
- Offers an acapella maker tool
- Audio Formats: MP3, M4A, WAV, FLAC, OGG
5. Voice Separator
Voice Separator is a free acapella extractor website. It offers tools for extracting voice and instruments from music in a matter of minutes. The AI-powered tool uses machine learning to extract vocals, pianos, drums, bass, and other instruments from music into individual audio tracks.
Key Features
- Powered by Artificial Intelligence that produces accurate results
- Great for karaoke track creation
- 3 available processing methods
Part 2. Acapella Extractor Apps: On-the-Go Solutions
Acapella extractor apps are great for use on your phone and other devices. They are lightweight, allowing you to extract acapella from your soundtrack on the go. Here are the top five options you may choose from.
1. Vocal Remover and Isolation
This acapella extractor app uses AI algorithms to separate the vocals and instrumentals. Users can export the vocals and background instrumentals tracks individually, which makes it a great tool for making karaoke background tracks.
Key Features
- Quickly separates voice from music
- Uses and is powered by an AI algorithm
- Creates an acapella from a sing in only 10 seconds
- Audio formats: MP3, WAV, FLAV
2. Moises App
This AI acapella extractor removes and separates vocals and instruments with only one click. The audio separation feature will take your musical training to the next level.
Key Features
- Easy and quick acapella extraction in one click
- Powered by an AI algorithm that produces quick and accurate results
- Audio formats: MP3, WMA, WAV, AIFF, FLAC
- The vocal remover feature allows users to play and sing along to their favorite songs
3. Splitter.ai - AI Audio Processing
This is a great choice of tool for acapella extractor YouTube purposes. With millions of users, Splitter processes audio using AI for quick and accurate results. The app has a free plan and commercial services that include music stem separation.
Key Features
- Easy way to separate your soundtracks
- Audio formats: WAV, FLAC, OGG, MP3
- Access to an online instrumental maker
4. iZotope RX
This is an advanced audio editing software that works perfectly with acapella removal. The MP3 voice remover is a popular app among professionals in the audio industry. It is also used for noise reduction, audio cleaning, audio repair, and creative sound design.
Key Features
- A range of powerful algorithms and tools to address audio issues
- Audio formats: WAV, AIFF, Broadcast WAV, MP3, WMA, SD2, OGG, BWF, FLAC
- Creates quality acapella with internal music rebalance tools
- Powerful spectral editing tools that give precise adjustments
5. Melody.ml
This is another effective acapella extractor app that allows users to separate music tracks using AI and machine learning. The output is a zip file that contains 2 isolated files of the vocals and instrumentals.
Key Features
- Easy way to separate your favorite songs
- Supports up to 100MB file
- Access to an online instrumental maker
- Audio formats: WAV, FLAC, OGG, MP3
Part 3. Efficiently Extract Acapella from Audio with Filmora 13
When extracting acapella from your favorite music, you want the best outcomes. Wondershare Filmora is a popular video editing software with advanced audio editing capabilities. With a host of several AI features, the software produces quality and accurate results in every project.
Free Download For Win 7 or later(64-bit)
Free Download For macOS 10.14 or later
The audio editing features on Filmora allow you to extract acapella and do a lot more with your clips. Let’s explore this feature in more detail:
AI Vocal Remover
The AI Vocal Remover on Filmora allows you to separate vocals and music from any song. You can also extra acapella from music tracks and audio files while keeping high-quality audio. The feature also allows you to dub videos freely by simply removing all the vocals. The feature offers several benefits when editing:
- Removes Vocals from Audio in One Click – Easily dub any video without covering the current vocals, which allows you to keep great soundtracks after removing the vocals.
- Effective Vocal Separation – With the use of advanced AI algorithms, the AI Vocal Remover isolates vocals with exceptional quality to ensure that the vocals are effectively separated from background music. It does all this without losing audio fidelity.
- Instant Listening of Results – You won’t have to export or download the entire video or audio to listen to the results. Filmora allows you to view and listen to the results in the editor on the go.
- Removes other Audio Elements – Aside from extracting acapella and removing vocals, Filmora allows you to extract other elements from your audio. Point out the unwanted elements to remove from your soundtrack to achieve better results.
- Dub Exceptional Videos – No need to record vocals in different languages and stick them over the original ones. The AI Vocal Remover feature allows you to completely remove the originals so you can import new and fresh ones. This will give you highly professional and clear dubbed videos in a matter of clicks.
How To Use AI Vocal Remover?
Using AI Vocal Remover to extract acapella from your soundtrack is pretty easy. Here are the main three steps to follow:
Step 1: Launch Filmora and Create a New Project
Start the Filmora software on your desktop. Then click the “New Project” tab in the startup window to enter the editing window.
Step 2: Import Your Soundtrack or Files
Select the “Media” tab from the custom toolbar. Click on the “Files” icon and select the files you want to import to Filmora for editing. You can also drag and drop the files on your computer to the Filmora media section.
Step 3: Enable the AI Vocal Remover
Choose the clips you want to extract acapella from in the timeline. Then click on the “Audio” option and select “AI Vocal Remover.” From the AI Vocal Remover window that appears, make the appropriate edits that you want with your audio clip.
Conclusion
To wrap up, there is a wide choice of acapella extractors depending on what you want to achieve. You have the option of acapella extractor online tools or an acapella extractor app that you can use on your devices. Each will support different audio formats and will produce specific quality results. For the quickest and most user-friendly tool, we recommend Wondershare Filmora. The popular video editing software offers you excellent audio editing features and will help you achieve more in your editing projects.
Synthetic Soundscape Pioneers: Unveiling the Top AI Composers
Top Best 10 AI Music Composers in 2024

Benjamin Arango
Mar 27, 2024• Proven solutions
Robots can’t be creative, right? A number of startups that focus on the development of artificial intelligence that is capable of composing music have proved this statement wrong. AI music composers generate original, copyright-free music you can use in your latest YouTube video or social media video ad. You don’t even have to be a sound designer or a musician to produce soundtracks for your videos with AI Music Composers, because you can upload the music that has already been recorded and create variations of it. So, let’s take a look at what AI music composers have to offer in 2024.
| 1 - Amper Music | 2 - AIVA |
|---|---|
| 3 - Jukedeck | 4 - Ecrett Music |
| 5 - Melodrive | 6 - ORB Composer |
| 7 - Amadeus Code | 8 - Humtap |
| 9 - Muzeek | 10 - Brain.fm |
Ten Best AI Music Composers You Should Know About
The AI technologies that can compose music are still relatively novel, and as time passes, they can only develop and grow further. Consequently, each of the AI music composers we featured in this article offers a different range of possibilities. Here are the ten best AI music composers you shouldn’t miss out on in 2024.
Filmora AI Music Editor
Edit Audio with AI Music Editor
Experience the power of Filmora’s AI tools and make your audio or music stand out like never before! Audio Denoise, Audio Ducking, Audio Synchronization, Audio Stretch, etc…
Try It Free Try It Free Try It Free Learn More >
1. Amper Music
Price: Available upon request
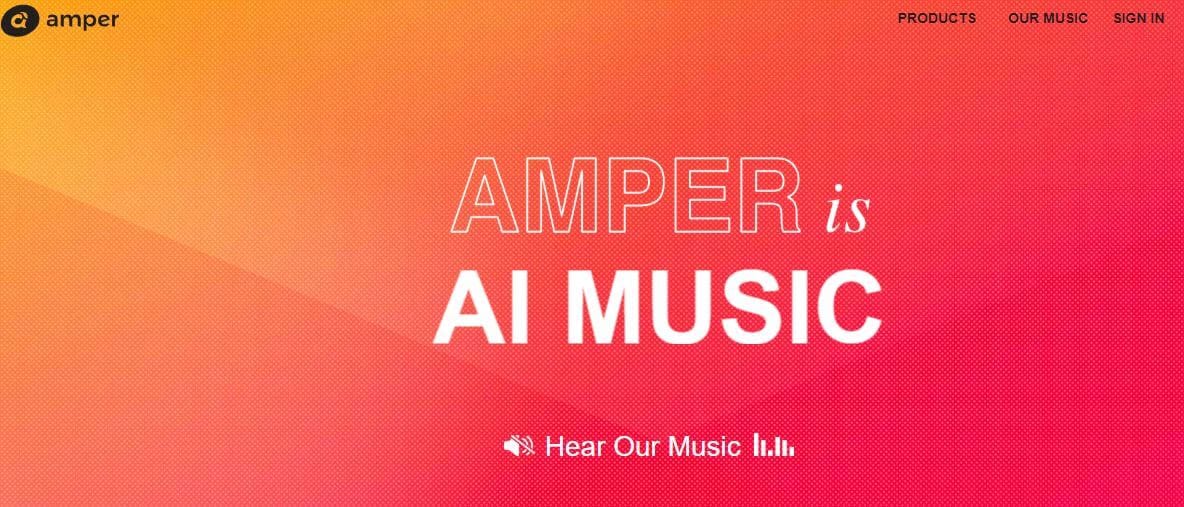
Industry professionals know just how frustrating the music licensing process can be. Amper Music is a cloud-based platform designed to simplify the process of creating soundtracks for movies and video games, as it produces AI generated algorithms that help users create music in a variety of music genres. You must first create an account on this platform, in order to be able to use the free version of Amper Music that provides only a limited amount of features. Upgrading to the pro version of Amper Music will enable you to enjoy the full potential of this rapidly growing AI Music Composer.
2. AIVA
Price: Free version available, subscription plans start from €14 p/month
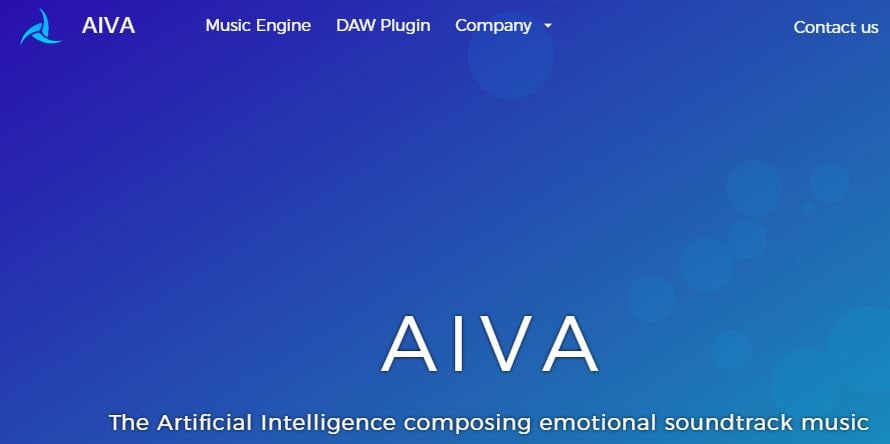
Since 2016, when AIVA Technologies was founded, its team has worked on developing an AI script that can compose emotional soundtracks for ads, video games, or movies. Soon after, the AI published its first oeuvre titled ‘Opus 1 for Piano Solo and in the subsequent years, AIVA released an album and composed music for a video game. Besides enabling its users to create music from scratch, AIVA can also be used to produce variations of existing songs. The music engine that powers this AI music composer makes the production of corporate or social media videos much easier, as it eliminates the need to go through the music licensing process.
3. Jukedeck
Price: Free version available, Pricing plans start from $0.99 per download
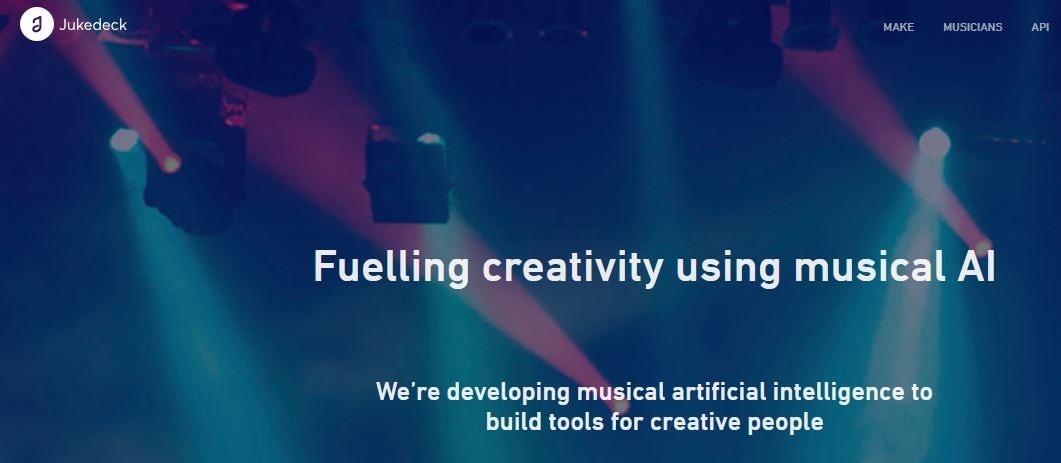
The AI music composer developed by the Jukedeck startup resembles the Amper’s music composer because they both rely on neural networks to analyze music data, that is then used by the AI to learn how to compose original music. Each track that is available through this AI music composer can be edited, so you can change its length or its tempo. You can create music with Jukedeck for free if you decide to give all the rights to the AI composer, while both individuals and small businesses can purchase the license to use the song created with Jukedeck for just $0.99.
Note: Jukedeck has been acquired by TikTok, and we are waiting for a new Jukedeck.
![]()
A cross-platform for making videos anywhere for all creators

Why your video editing isn’t good enough? How about some creative inspo?
- 100 Million+ Users
- 150+ Countries and Regions
- 4 Million+ Social Media Followers
- 5 Million+ Stock Media for Use
* Secure Download

4. Ecrett Music
Price: Subscription plans start at $5
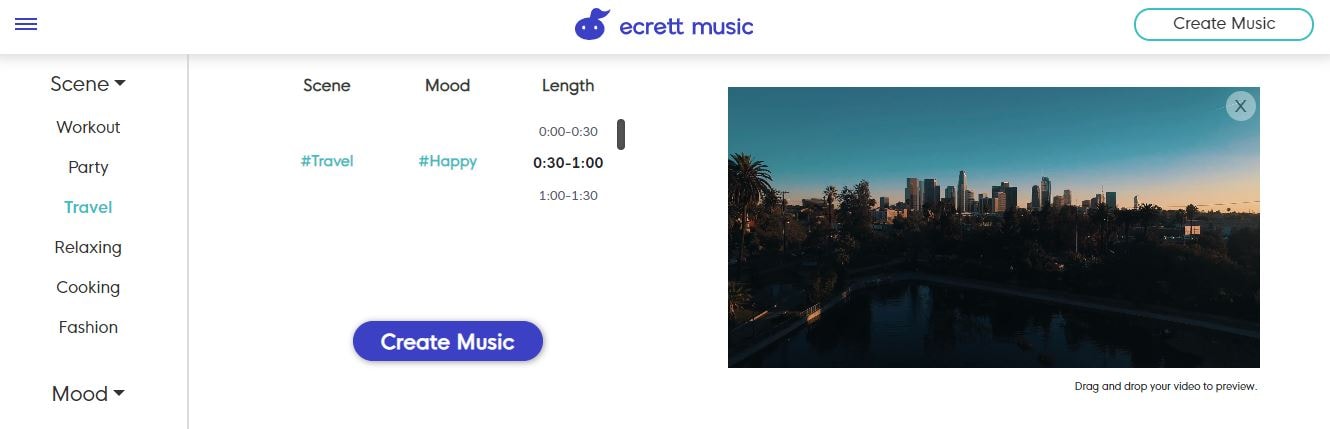
This online AI music composer makes creating stunning soundtracks for videos look easy. You just have to upload a video for which you want to generate music and select the type of scene and the mood of that scene. Party, Travel or Fashion are among the types of scenes you can choose from, while moods range from happy to serious. When done, simply click on the Create Music button, and the platform will automatically generate the soundtrack for your video. In case you are producing videos on a constant basis, you should consider purchasing one of the available subscription plans.
5. Melodrive
Price: Free
Compatibility: iOS, Windows
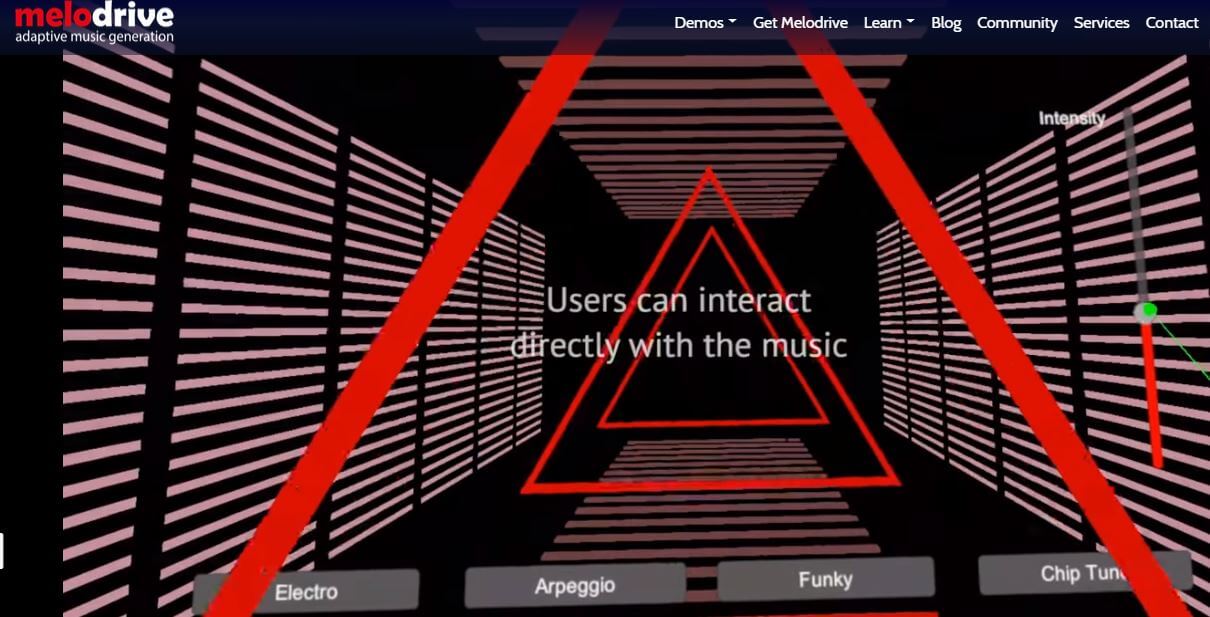
At the moment, the Lite and Indie versions of Melodrive are available for download free of charge, but the Indie version of this AI music composer still offers more options. Melodrive is one of the first AI systems that can compose emotional and unique music in real time. The AI generates music by adapting to the media environment and aims to match the mood and the style of the video. It is worth noting that Melodrive is still under development and that through time its capabilities to compose music are going to become even more refined than they already are.
6. ORB Composer
Price: Pricing plans start at $149,00
Compatibility: macOS, Windows

You can’t generate music automatically with ORB Composer, because the AI creates music based on your choices. That’s why you need to know at least the basic rules of music composition in order to be able to use the ORB Composer properly. The AI music composer comes bundled with a rich collection of chord progressions, that contains almost all chords used in popular music. This tool is aimed at artists who are interested in experimenting with the possibilities of creating music with artificial intelligence and discovering new styles of music. There are six music templates you can choose from, and you can create compositions by simply organizing different blocks of music.

Filmora AI Audio Stretcher
Wondershare Filmora - AI Audio Stretcher
• Retime any audio track to fit the duration of your video almost instantly.
• Rearrange songs without quality loss.
• Cross-platform supported - (Windows, Mac, iOS, Android)
Start Audio Stretch Start Audio Stretch Start Audio Stretch Learn More >
7. Amadeus Code
Price: Free, but the app offers in-app purchases
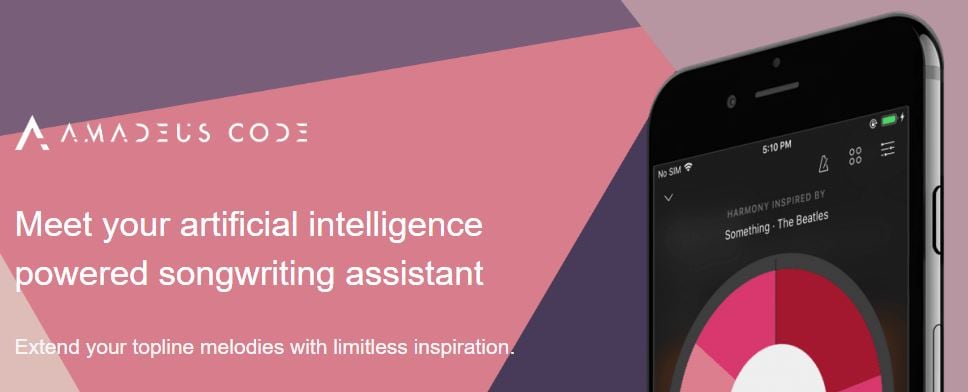
Compatibility: iOS
Both skilled musicians and music enthusiast can use this iOS-based app to create new melodies in just a few minutes. The AI engine that the Amadeus Code uses contains chord progressions of some of the most famous songs ever created and it let you use them to create new and innovative structures of music compositions. Moreover, you can use gestures to create new songs or recreate specific segments of songs you composed earlier. Even though Amadeus Code lets its users export audio and MIDI files to audio editing software, you still have to purchase all songs you want to keep.
8. Humtap
Price: Free
Compatibility: iOS
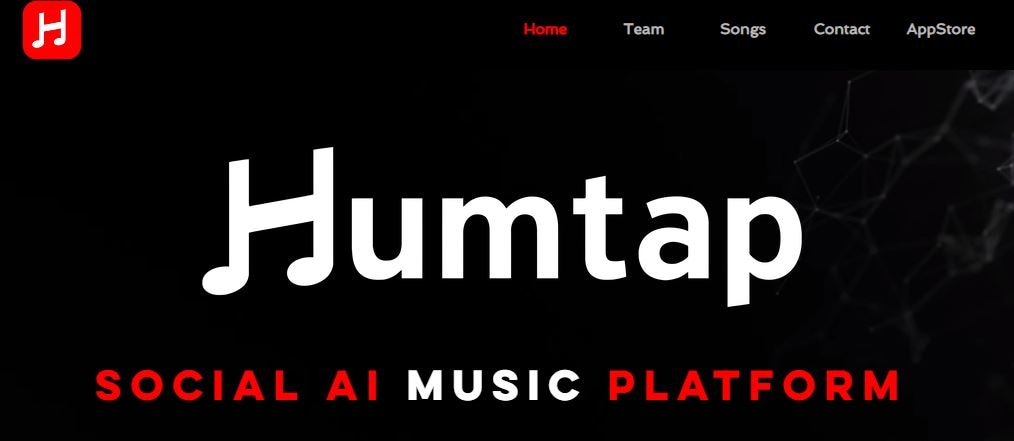
Musicians who have a tough time remembering their own ideas are going to love using Humtap because they can just hum a melody and the app will automatically generate an entire song using different instruments. What’s more, beats can be added with a single tap, and after the music is generated you can proceed to add the vocals as well. Humptap also has video making capabilities, so you can create videos for all songs you compose with this app. All tracks and videos generated with the Humtap AI music composer can be saved to your phone, but you can’t share your new creations to social media directly from the app.
9. Muzeek
Price: Free trial available, pricing plans start from $19 per month
Compatibility: macOS
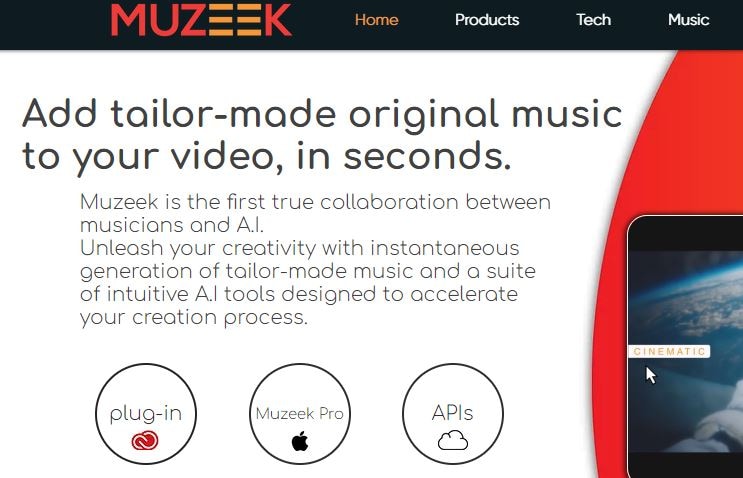
If you are in need of licensed music for the video you’re planning on sharing to social media networks, then Muzeek is one of the best choices you can make. The AI algorithm Muzeek uses analyzes the videos for which you are generating music and it creates soundtracks that perfectly fit the rhythm of the video. All content creators, including online marketing agencies or video game developers, can rely on Muzeek AI music composer to create authentic music in high quality. Moreover, Muzeek can also analyze the video’s original audio and create subtitles from it or adjust its volume automatically.
10. Brain.fm
Price: Subscription plans start from $6,95 per month
Compatibility: Android, online
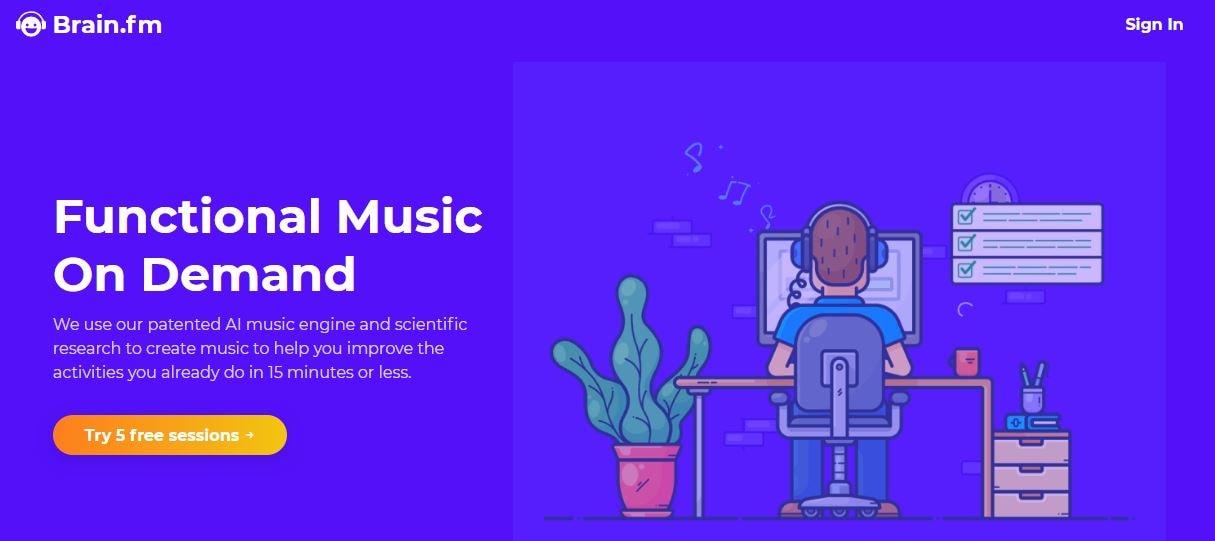
The idea that music can make our brains more productive is at the very core of what Brain.fm platform is all about. A team of scientists, musicians and engineers uses artificial intelligence to generate music designed to make your brain more productive and focused. They claim that the music created with their AI music composer achieve its effects in just ten to fifteen minutes. However, you can’t use Brain.fm to create your own music, as this platform is better suited for people who spend a lot of time at work and have a tough time maintaining their focus while performing important tasks.
Conclusion
The opportunities AI music composers offer are still not properly explored, because most of these technologies are still under development. The results AI music composers we included in this article have managed to achieve so far are impressive because each of them can produce high-quality audio files for all sorts of video content. Which AI music composer do you like to use the most? Leave a comment, and let us know.
Benjamin Arango
Benjamin Arango is a writer and a lover of all things video.
Follow @Benjamin Arango
Benjamin Arango
Mar 27, 2024• Proven solutions
Robots can’t be creative, right? A number of startups that focus on the development of artificial intelligence that is capable of composing music have proved this statement wrong. AI music composers generate original, copyright-free music you can use in your latest YouTube video or social media video ad. You don’t even have to be a sound designer or a musician to produce soundtracks for your videos with AI Music Composers, because you can upload the music that has already been recorded and create variations of it. So, let’s take a look at what AI music composers have to offer in 2024.
| 1 - Amper Music | 2 - AIVA |
|---|---|
| 3 - Jukedeck | 4 - Ecrett Music |
| 5 - Melodrive | 6 - ORB Composer |
| 7 - Amadeus Code | 8 - Humtap |
| 9 - Muzeek | 10 - Brain.fm |
Ten Best AI Music Composers You Should Know About
The AI technologies that can compose music are still relatively novel, and as time passes, they can only develop and grow further. Consequently, each of the AI music composers we featured in this article offers a different range of possibilities. Here are the ten best AI music composers you shouldn’t miss out on in 2024.
Filmora AI Music Editor
Edit Audio with AI Music Editor
Experience the power of Filmora’s AI tools and make your audio or music stand out like never before! Audio Denoise, Audio Ducking, Audio Synchronization, Audio Stretch, etc…
Try It Free Try It Free Try It Free Learn More >
1. Amper Music
Price: Available upon request
Industry professionals know just how frustrating the music licensing process can be. Amper Music is a cloud-based platform designed to simplify the process of creating soundtracks for movies and video games, as it produces AI generated algorithms that help users create music in a variety of music genres. You must first create an account on this platform, in order to be able to use the free version of Amper Music that provides only a limited amount of features. Upgrading to the pro version of Amper Music will enable you to enjoy the full potential of this rapidly growing AI Music Composer.
2. AIVA
Price: Free version available, subscription plans start from €14 p/month
Since 2016, when AIVA Technologies was founded, its team has worked on developing an AI script that can compose emotional soundtracks for ads, video games, or movies. Soon after, the AI published its first oeuvre titled ‘Opus 1 for Piano Solo and in the subsequent years, AIVA released an album and composed music for a video game. Besides enabling its users to create music from scratch, AIVA can also be used to produce variations of existing songs. The music engine that powers this AI music composer makes the production of corporate or social media videos much easier, as it eliminates the need to go through the music licensing process.
3. Jukedeck
Price: Free version available, Pricing plans start from $0.99 per download
The AI music composer developed by the Jukedeck startup resembles the Amper’s music composer because they both rely on neural networks to analyze music data, that is then used by the AI to learn how to compose original music. Each track that is available through this AI music composer can be edited, so you can change its length or its tempo. You can create music with Jukedeck for free if you decide to give all the rights to the AI composer, while both individuals and small businesses can purchase the license to use the song created with Jukedeck for just $0.99.
Note: Jukedeck has been acquired by TikTok, and we are waiting for a new Jukedeck.
![]()
A cross-platform for making videos anywhere for all creators
Why your video editing isn’t good enough? How about some creative inspo?
- 100 Million+ Users
- 150+ Countries and Regions
- 4 Million+ Social Media Followers
- 5 Million+ Stock Media for Use
* Secure Download
4. Ecrett Music
Price: Subscription plans start at $5

This online AI music composer makes creating stunning soundtracks for videos look easy. You just have to upload a video for which you want to generate music and select the type of scene and the mood of that scene. Party, Travel or Fashion are among the types of scenes you can choose from, while moods range from happy to serious. When done, simply click on the Create Music button, and the platform will automatically generate the soundtrack for your video. In case you are producing videos on a constant basis, you should consider purchasing one of the available subscription plans.
5. Melodrive
Price: Free
Compatibility: iOS, Windows
At the moment, the Lite and Indie versions of Melodrive are available for download free of charge, but the Indie version of this AI music composer still offers more options. Melodrive is one of the first AI systems that can compose emotional and unique music in real time. The AI generates music by adapting to the media environment and aims to match the mood and the style of the video. It is worth noting that Melodrive is still under development and that through time its capabilities to compose music are going to become even more refined than they already are.
6. ORB Composer
Price: Pricing plans start at $149,00
Compatibility: macOS, Windows

You can’t generate music automatically with ORB Composer, because the AI creates music based on your choices. That’s why you need to know at least the basic rules of music composition in order to be able to use the ORB Composer properly. The AI music composer comes bundled with a rich collection of chord progressions, that contains almost all chords used in popular music. This tool is aimed at artists who are interested in experimenting with the possibilities of creating music with artificial intelligence and discovering new styles of music. There are six music templates you can choose from, and you can create compositions by simply organizing different blocks of music.
Filmora AI Audio Stretcher
Wondershare Filmora - AI Audio Stretcher
• Retime any audio track to fit the duration of your video almost instantly.
• Rearrange songs without quality loss.
• Cross-platform supported - (Windows, Mac, iOS, Android)
Start Audio Stretch Start Audio Stretch Start Audio Stretch Learn More >
7. Amadeus Code
Price: Free, but the app offers in-app purchases
Compatibility: iOS
Both skilled musicians and music enthusiast can use this iOS-based app to create new melodies in just a few minutes. The AI engine that the Amadeus Code uses contains chord progressions of some of the most famous songs ever created and it let you use them to create new and innovative structures of music compositions. Moreover, you can use gestures to create new songs or recreate specific segments of songs you composed earlier. Even though Amadeus Code lets its users export audio and MIDI files to audio editing software, you still have to purchase all songs you want to keep.
8. Humtap
Price: Free
Compatibility: iOS
Musicians who have a tough time remembering their own ideas are going to love using Humtap because they can just hum a melody and the app will automatically generate an entire song using different instruments. What’s more, beats can be added with a single tap, and after the music is generated you can proceed to add the vocals as well. Humptap also has video making capabilities, so you can create videos for all songs you compose with this app. All tracks and videos generated with the Humtap AI music composer can be saved to your phone, but you can’t share your new creations to social media directly from the app.
9. Muzeek
Price: Free trial available, pricing plans start from $19 per month
Compatibility: macOS
If you are in need of licensed music for the video you’re planning on sharing to social media networks, then Muzeek is one of the best choices you can make. The AI algorithm Muzeek uses analyzes the videos for which you are generating music and it creates soundtracks that perfectly fit the rhythm of the video. All content creators, including online marketing agencies or video game developers, can rely on Muzeek AI music composer to create authentic music in high quality. Moreover, Muzeek can also analyze the video’s original audio and create subtitles from it or adjust its volume automatically.
10. Brain.fm
Price: Subscription plans start from $6,95 per month
Compatibility: Android, online
The idea that music can make our brains more productive is at the very core of what Brain.fm platform is all about. A team of scientists, musicians and engineers uses artificial intelligence to generate music designed to make your brain more productive and focused. They claim that the music created with their AI music composer achieve its effects in just ten to fifteen minutes. However, you can’t use Brain.fm to create your own music, as this platform is better suited for people who spend a lot of time at work and have a tough time maintaining their focus while performing important tasks.
Conclusion
The opportunities AI music composers offer are still not properly explored, because most of these technologies are still under development. The results AI music composers we included in this article have managed to achieve so far are impressive because each of them can produce high-quality audio files for all sorts of video content. Which AI music composer do you like to use the most? Leave a comment, and let us know.
Benjamin Arango
Benjamin Arango is a writer and a lover of all things video.
Follow @Benjamin Arango
Achieving Sonic Clarity: Managing Audio Volume in Audacity
Audacity is a free, open access, cross-platform sound editing and recording tool. It is compatible with Windows, Mac OS X, Linux, and various other operating systems. All of these aspects have contributed to Audacity’s worldwide popularity. Audacity features an amplified effect that alters the loudness of your chosen audio and other practical tools that can change the sound in different ways.
As a result, Audacity can not only assist you in modifying the level of an audio file, but it can also help you equalize, reduce, normalize, and so on.
Yes, you have heard it right, Audacity increase volume, but the primary question is how? But don’t worry, you will get the answer after reading the article. This article will explain how you can increase or decrease the volume of a whole and a specific segment of the audio file. Let’s get started.
In this article
01 How to Increase or Decrease Volume Without Distortion and Clipping in Audacity
02 How to Increase Volume of Multiple Files in Audacity?
03 How to Increase Volume in Certain Parts of Track?
04 What’s the Difference between Normalize and Amplify?
Part 1: How to Increase or Decrease Volume Without Distortion and Clipping in Audacity
Audio clipping occurs when the audio input becomes too loud for an amplifier to produce, and the surplus signal creates distortion. When editing, you cannot add additional volume to your audio clip forever because this would result in clipping. In this case, you can use the Audacity application to emphasize your material by turning the volume up or down without distortion and clipping on a track or recording.
Learn how Audacity increase volume without distortion by following the procedure described below:
Step 1: First, download and install the Audacity software on your computer.
Step 2: Select the File from the menu above and click Open to open the audio file.

Step 3: Choose the audio track, go to the Effect menu and pick the Amplify option from the drop-down menu.

Note: You can increase or decrease the volume by double-clicking the track and using the slider under the Gain title.
Step 4: Increase or decrease the volume by sliding the slider or typing the amplification value in the text box next to it in the Amplify window as needed.

Note: Ensure that the Allow Clipping checkbox remains unchecked to avoid clipping. Moreover, keep in mind that increasing the volume to a greater extent can result in distortion.
Related: How to Change Audio Volume in Filmora
Part 2: How to Increase Volume of Multiple Files in Audacity?
Audacity is an open-source audio editing tool. It is used for various purposes, like audio recording, music creation, and audio file editing. It also allows you to increase and decrease the volume of audio files.
You may also apply the modifications to multiple files at once, rather than one at a time. Check out the instructions below to learn how to change the volume of multiple audio files:
Step 1: Select the Import option from the File menu, and then pick the Audio option. Browse to your audio files, choose all of them, and then click the Open option.

Step 2: To select all the files, press Ctrl + A, click on the Effect option in the menu bar and pick Amplify.

Step 3: Now, either enter the value in the text box next to the Amplification Decibels tab or use the slider under it. To verify the operation of increasing the volume, check the allow clipping checkbox. When you’re through with the options, click the Ok button.

Step 4: Amplification will be applied to all the tracks. Go to the File option from the above menu to export the files and then select the Export option.

If you’re running Audacity on macOS computer, you can watch the video tutorial below to apply effects to multiple files.
Part 3: How to Increase Volume in Certain Parts of Track?
The audacity software also allows you to alter a specific section of an audio file. The selection tool can assist in locating a particular area of the track. After you’ve chosen a section of the audio file, you may utilize the amplification effect to increase its loudness. Check out the instructions below to learn how you can achieve it:
Step 1: Launch the Audacity software on the computer. To open the audio file, go to the File menu and select Open. You may also open the file by dragging it.
Step 2: Ensure that the Selection tool is active now. Click and hold the mouse left-click to move from one spot on the track to another.

Step 3: After picking the part, go to the Effect option from the menu and select Amplify.

Step 4: Now, for that specific region, modify the amplification and click OK. This will only change the volume for the area you have selected.

Part 4: What’s the Difference between Normalize and Amplify?
Amplify and Normalize are two essential features of the Audacity tool. Many people think they are the same thing, they are right up to some extent, but there exists a big difference between both the features. Before discussing the differences, you need to know what the terms Normalize and Amplify imply.
Amplify
It is the quickest approach to comprehend the effect’s name if you want to know precisely what impacts are. The frequency of the vibration is enhanced to increase the amplification effect. As previously said, it raises a tiny sound.
Furthermore, because this amplification is extended to all frequencies and amplitude, the noise increases. If you choose ten sources and magnify them by ten decibels, each source will be ten decibels louder than your present sound.

Normalize
The meaning of normalizing is standardized, which is also a feature of its name. Whenever you pick an audio input and use the normalize feature, the level is adjusted automatically according to the previously indicated average volume size in Oda City.
As a result, when one sound source is normalized, there is no discernible difference between it and the amplification mechanism. Still, the effect is evident when several sound sources are performed concurrently.
By pressing Ctrl + A and selecting all ten various audio sources, you may compute the required standard of every sound source, enhance the audio input that is smaller than the normal, and create the audio signal more significant than the standard. Shrink the size of each noise source, such as the name, and normalize the sound.

Related: Best Audio Normalizers for Windows
Differences
To differentiate the meaning and impact precisely, amplification means increasing or reducing the sound, whereas normalizing means equalizing the sound. Simply defined, if you magnify ten sources by ten decibels, each of the shorter and louder noises equals ten decibels in their actual loudness.
When the ten sources are normalized, the louder sounds grow louder, conforming to the standard sound source size. Because the amplifying is done regardless, the little noises are going insane during this procedure.
Conclusion
All in all, Audacity does an excellent job at audio editing. If you simply need to modify an audio file, Audacity is a great option. For increasing and decreasing the volume of single and multiple audio files, Audacity is still one of the best bets in the market. We hope that now know how Audacity increase volume of the audio files after reading this article.
02 How to Increase Volume of Multiple Files in Audacity?
03 How to Increase Volume in Certain Parts of Track?
04 What’s the Difference between Normalize and Amplify?
Part 1: How to Increase or Decrease Volume Without Distortion and Clipping in Audacity
Audio clipping occurs when the audio input becomes too loud for an amplifier to produce, and the surplus signal creates distortion. When editing, you cannot add additional volume to your audio clip forever because this would result in clipping. In this case, you can use the Audacity application to emphasize your material by turning the volume up or down without distortion and clipping on a track or recording.
Learn how Audacity increase volume without distortion by following the procedure described below:
Step 1: First, download and install the Audacity software on your computer.
Step 2: Select the File from the menu above and click Open to open the audio file.
Step 3: Choose the audio track, go to the Effect menu and pick the Amplify option from the drop-down menu.
Note: You can increase or decrease the volume by double-clicking the track and using the slider under the Gain title.
Step 4: Increase or decrease the volume by sliding the slider or typing the amplification value in the text box next to it in the Amplify window as needed.
Note: Ensure that the Allow Clipping checkbox remains unchecked to avoid clipping. Moreover, keep in mind that increasing the volume to a greater extent can result in distortion.
Related: How to Change Audio Volume in Filmora
Part 2: How to Increase Volume of Multiple Files in Audacity?
Audacity is an open-source audio editing tool. It is used for various purposes, like audio recording, music creation, and audio file editing. It also allows you to increase and decrease the volume of audio files.
You may also apply the modifications to multiple files at once, rather than one at a time. Check out the instructions below to learn how to change the volume of multiple audio files:
Step 1: Select the Import option from the File menu, and then pick the Audio option. Browse to your audio files, choose all of them, and then click the Open option.
Step 2: To select all the files, press Ctrl + A, click on the Effect option in the menu bar and pick Amplify.
Step 3: Now, either enter the value in the text box next to the Amplification Decibels tab or use the slider under it. To verify the operation of increasing the volume, check the allow clipping checkbox. When you’re through with the options, click the Ok button.
Step 4: Amplification will be applied to all the tracks. Go to the File option from the above menu to export the files and then select the Export option.
If you’re running Audacity on macOS computer, you can watch the video tutorial below to apply effects to multiple files.
Part 3: How to Increase Volume in Certain Parts of Track?
The audacity software also allows you to alter a specific section of an audio file. The selection tool can assist in locating a particular area of the track. After you’ve chosen a section of the audio file, you may utilize the amplification effect to increase its loudness. Check out the instructions below to learn how you can achieve it:
Step 1: Launch the Audacity software on the computer. To open the audio file, go to the File menu and select Open. You may also open the file by dragging it.
Step 2: Ensure that the Selection tool is active now. Click and hold the mouse left-click to move from one spot on the track to another.
Step 3: After picking the part, go to the Effect option from the menu and select Amplify.
Step 4: Now, for that specific region, modify the amplification and click OK. This will only change the volume for the area you have selected.
Part 4: What’s the Difference between Normalize and Amplify?
Amplify and Normalize are two essential features of the Audacity tool. Many people think they are the same thing, they are right up to some extent, but there exists a big difference between both the features. Before discussing the differences, you need to know what the terms Normalize and Amplify imply.
Amplify
It is the quickest approach to comprehend the effect’s name if you want to know precisely what impacts are. The frequency of the vibration is enhanced to increase the amplification effect. As previously said, it raises a tiny sound.
Furthermore, because this amplification is extended to all frequencies and amplitude, the noise increases. If you choose ten sources and magnify them by ten decibels, each source will be ten decibels louder than your present sound.
Normalize
The meaning of normalizing is standardized, which is also a feature of its name. Whenever you pick an audio input and use the normalize feature, the level is adjusted automatically according to the previously indicated average volume size in Oda City.
As a result, when one sound source is normalized, there is no discernible difference between it and the amplification mechanism. Still, the effect is evident when several sound sources are performed concurrently.
By pressing Ctrl + A and selecting all ten various audio sources, you may compute the required standard of every sound source, enhance the audio input that is smaller than the normal, and create the audio signal more significant than the standard. Shrink the size of each noise source, such as the name, and normalize the sound.
Related: Best Audio Normalizers for Windows
Differences
To differentiate the meaning and impact precisely, amplification means increasing or reducing the sound, whereas normalizing means equalizing the sound. Simply defined, if you magnify ten sources by ten decibels, each of the shorter and louder noises equals ten decibels in their actual loudness.
When the ten sources are normalized, the louder sounds grow louder, conforming to the standard sound source size. Because the amplifying is done regardless, the little noises are going insane during this procedure.
Conclusion
All in all, Audacity does an excellent job at audio editing. If you simply need to modify an audio file, Audacity is a great option. For increasing and decreasing the volume of single and multiple audio files, Audacity is still one of the best bets in the market. We hope that now know how Audacity increase volume of the audio files after reading this article.
Also read:
- Next-Gen Audio Data Organizer The Ultimate Tagging App for Windows & Mac Users,
- New In 2024, Creative Commons Chorus Compilation for Slideshow Synthesis
- New Soundscaping Cinema Three Original Ways to Augment Visual Storytelling with Audio
- New Chorus of Unified Enthusiasm Pattern for 2024
- The Pursuit of Pristine Sounds A Complete Guide to Utilizing Adobe Auditions Noise Reduction Features
- In 2024, The Ultimate List of 8 Powerful DAW Options Revolutionize Your Music Production Process
- 2024 Approved Discovering the Most Used Audio Recorders Within Googles Browser
- Updated Discerning Broken Optical Container Auditory Event
- New From Ideas to Masterpieces How to Record High-Quality Music in GarageBand
- In 2024, Amplifying the Listener Experience Where to Obtain Professional Podcast Sound Effects
- Updated Maximizing Communication Mastering the DiscoVoice on Discord for 2024
- Harmonizing Acoustics with Visuals for Enriched Photo Experiences
- Updated 2024 Approved The Best Batch MP3 Conversion Services with Text Output – Compatible with SmoothVideoPro
- Updated In 2024, Reveal the Vocalization of a Wolveshow
- Elevate Your Listening Experience Expert Strategies for Retrieving Spotify Content
- 2024 Approved The Power of Projection Adjusting Your Voice Across Different Settings
- New Mastering Sound on Your Mac The Top 8 DAWs Ranked for 2024
- 2024 Approved Step-by-Step Process for Expeditiously Converting WhatsApp Audio Recordings Into MP3
- New The Ultimate Guide to Audio Detachment in Videos - Discovering the Most Used Software
- New Professional Audio Enhancements Ranking the Top 6 Multitrack Mixers for Live Events
- New 2024 Approved Premier Selection of Inexpensive Audio Editing Utilities Available Worldwide
- New In 2024, Expert Suggestions for Enhancing Devices Audiovisual Experience
- New In 2024, Crafting the Perfect Sound Changing Your Voice in Audacity
- 2024 Approved Comprehensive Guide to the Wave Editor Highlights, Critiques, and Walkthroughs
- Updated Uncover Audible Patter of Hands in Collaboration
- In 2024, 5 Best Mobile Call Modification Apps Android & iOS Edition
- Updated In 2024, Premiere Voice Mimicry Programs - Compilation of the Best
- The Complete Audio Enhancement Manual From Raw Footage to Final Cut 2023S Methodology for 2024
- Top 8 Digital Audio Workstations (DAWs) Revolutionizing Contemporary Rap and R&B Creation
- 2024 Approved Easy Access to FREE Guitar-Centric Background Media and Sounds
- New Achieving Precise Audio Output Deactivating Adaptive Ducking in Apples Ecosystem for 2024
- New 2024 Approved Audio Artistry Rendering and Animating Auditory Data in Roxio Media Creator
- New Setting Up Lame MP3 Support in Audacity for 2024
- Updated Mastering the Art of Custom Ringtone Creation
- Essential 2023 Playlist The Most Influential Rock Hits So Far
- 2024 Approved Exploring the Future of Sound Alteration 10 Leading Apps for Changing Your Voice
- 2024 Approved Add Soundtrack Segment to iMovie Project Layout
- 15 Stunning GIF Splitter Examples You Need to Bookmark for 2024
- Updated As a Designer, Color Is the Most Powerful and the Most Diverse Tool at Your Disposal. Here Are Ten Matching Color Combinations to Get You Started on Your Next Project for 2024
- In 2024, Is pgsharp legal when you are playing pokemon On Asus ROG Phone 8 Pro? | Dr.fone
- Full Guide on Mirroring Your Nubia Red Magic 9 Pro to Your PC/Mac | Dr.fone
- New In 2024, Linux Video Editing Software Top 10 Alternatives to Adobe Premiere
- How to Successfully Bypass iCloud Activation Lock from iPhone 12
- 2024 Approved Unlock Maximum Engagement How to Resize Videos for Social Media Success
- New An Ultimate Guide to Edit a Music Video Aspect Ratio and First Cut for 2024
- New In 2024, Reviewing Minitool Movie Maker Features, Pros, and Cons, and Alternative Options
- Updated Craft Professional-Looking Video Invites with These iPhone and Android Apps for 2024
- The Best Methods to Unlock the iPhone Locked to Owner for iPhone 14 Pro
- In 2024, How can I get more stardust in pokemon go On Motorola Edge 40? | Dr.fone
- No-Cost Images for Your Business Commercial Use Permitted for 2024
- 9 Solutions to Fix Process System Isnt Responding Error on Xiaomi Civi 3 Disney 100th Anniversary Edition | Dr.fone
- 2024 Approved Discover the Best Animation Software for Education
- Detailed guide of ispoofer for pogo installation On Asus ROG Phone 8 | Dr.fone
- Lava Blaze Pro 5G Not Connecting to Wi-Fi? 12 Quick Ways to Fix | Dr.fone
- In 2024, How to Lock Apps on Vivo T2 5G to Protect Your Individual Information
- In 2024, Best Anti Tracker Software For Xiaomi Redmi Note 12 5G | Dr.fone
- 15 Best Strongest Pokémon To Use in Pokémon GO PvP Leagues For Motorola Moto G24 | Dr.fone
- In 2024, Protecting Your Privacy How To Remove Apple ID From iPhone 6
- In 2024, Forgotten The Voicemail Password Of Vivo T2 5G? Try These Fixes
- New In 2024, Maximize Your GoPro Footage Effortless Video Editing on MacBook with Quik
- New Learn to Make an Emotional Video with Photos and Music for 2024
- Why Is My Lava Yuva 3 Pro Offline? Troubleshooting Guide | Dr.fone
- Updated Realistic AI Avatars
- New In 2024, How To Edit Youtube Videos In Simple Steps
- New 2024 Approved No-Cost Video Blurring The Best Online Tools and Techniques
- The 6 Best SIM Unlock Services That Actually Work On Your Samsung Galaxy A25 5G Device
- In 2024, Maximizing Your Facebook Video Reach The Power of Aspect Ratios
- New 2024 Approved Whats Music Video GIF & How to Add Music to GIF Files
- In 2024, Forgotten The Voicemail Password Of Infinix Smart 8? Try These Fixes
- Title: 2024 Approved Accessible Vocal Isolation Equipment for All Voice Levels
- Author: Paul
- Created at : 2024-05-20 01:47:44
- Updated at : 2024-05-21 01:47:44
- Link: https://voice-adjusting.techidaily.com/2024-approved-accessible-vocal-isolation-equipment-for-all-voice-levels/
- License: This work is licensed under CC BY-NC-SA 4.0.
